Wow, I'm trying to be quick here to drop a brief update before having to start on dinner, but I want to say to Toshi, Mark, Mike, Andy, Dman, Chris, and Hammer and Tanker thank you very much and you guys are too kind. I am happy to share what's on my bench as I'm happy to get to see what each of you all are up to. Chris, if you have any other questions about something I'm fooling with that I didn't cover well enough, then don't hesitate to ask. That's what this forum is all about. =] I've learned plenty from the guys on Finescale and other places too, so I'm definitely about paying it forward. Hammer and Tanker I must be getting soft or something because I happen to catch your post in my email a few days ago and a simple thing like that actually did a lot to brighten a pretty difficult day. I think having a kid makes you more sentimental and emotional cause lately it seems it takes a lot less to stir my pot. =] So thanks guys. I'm glad this WIP is stirring in some of you out there as well.
Start your engines!
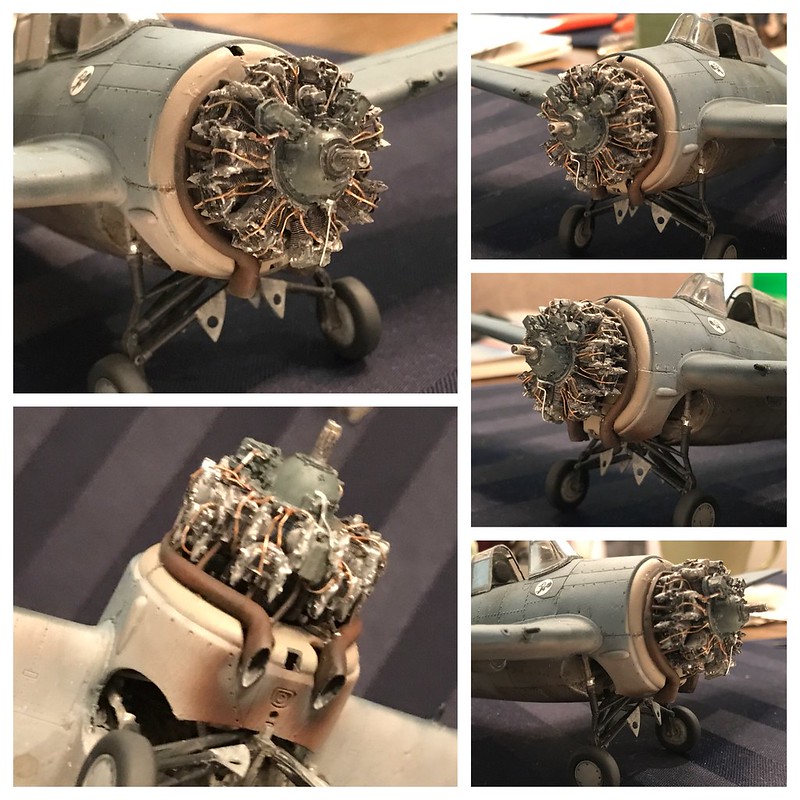
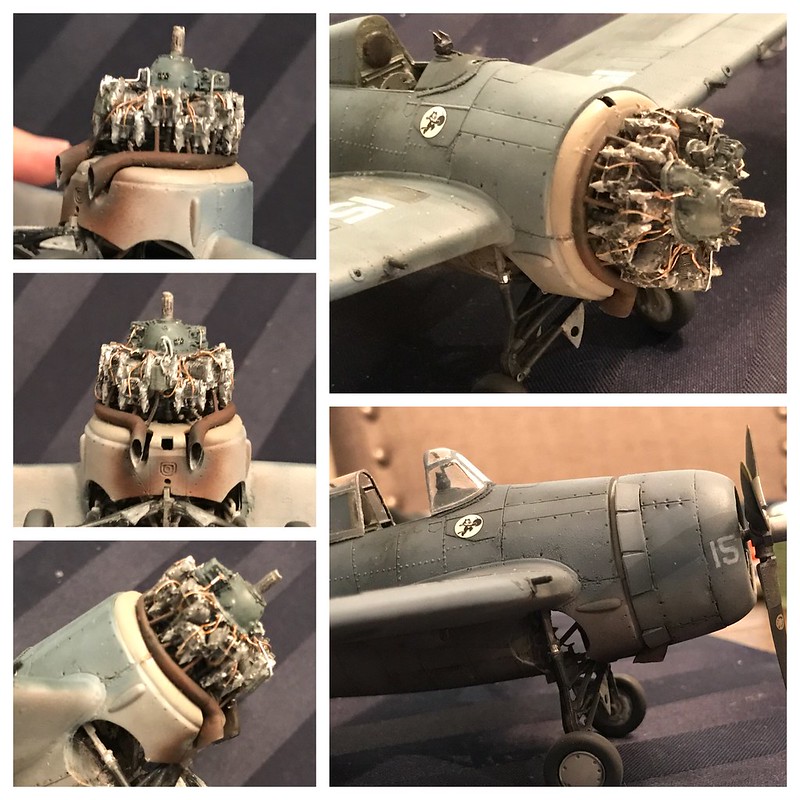
I finally got to a spot in the build where I felt confident about putting on the exhaust manifold. With parts that protrude or can catch and especially with the delicate stuff, I'm normally waiting as long as I can before attaching them. This didn't seem to be such a tough obstacle to tackle. Measuring and re-measuring paid off and this was a simple glue and drop in place. =] I'll take it!! My only small issue I'm chewing on right now is how far down the exhaust stacks protude downward out of the cowling. Every picture I've seen of aircraft from back in the day shows it to be fairly flushed. The forward part of my build dips down a little too much. I suppose I can deal with it. But for anyone else out there, it should be level to the fuselage and no lower than what you see at the tip of the exhaust.
 Untitled by Britt Vallot, on Flickr
You can see more of what I mean in the bottom, larger picture on the right.
 Untitled by Britt Vallot, on Flickr
Small potatoes I guess. I am very happy with how this came out. It was worth the time and effort. I hope more people out there go after rigging up there own exhaust mani. =]
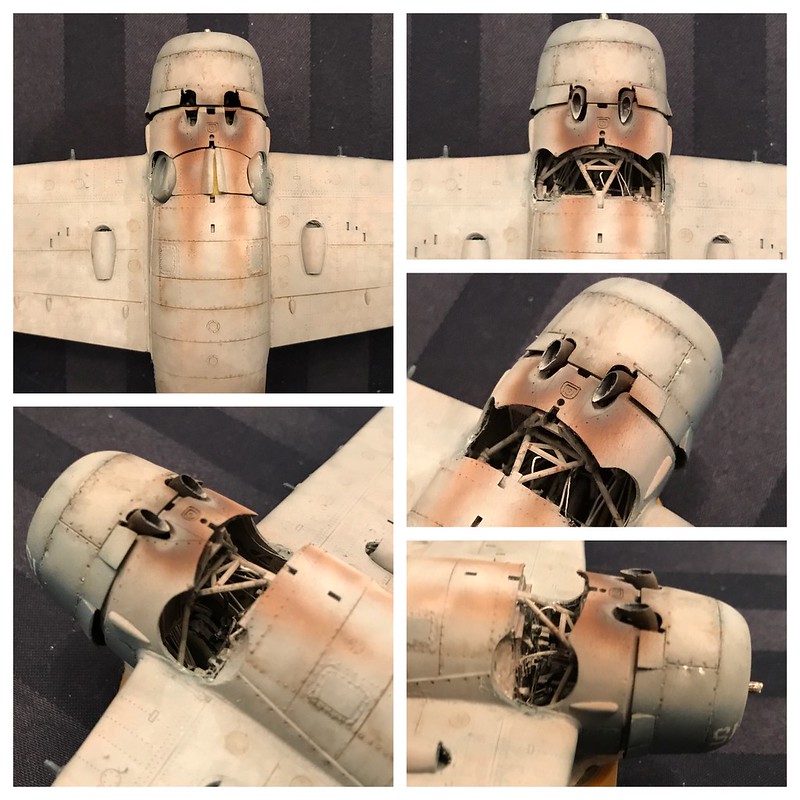
Here's a look at the exhaust staining. I had a hard time getting pictures of this feature on the wildcat. I don't know how lean fuel mixtures ever got on Navy wildcats or how much staining was ever made or left on, but I didn't want this cat to be too filthy. So, I settled for this.
 Untitled by Britt Vallot, on Flickr
This was done in light, thin layers starting with NATO Brown and Flat Black and capping it off with a Sky Grey from Tamiya. Editor's note: that whole get this done quickly thing didn't happen. lol Mommy came home early. It's now after 9:30p and everyone is in bed. =P
The Prop!
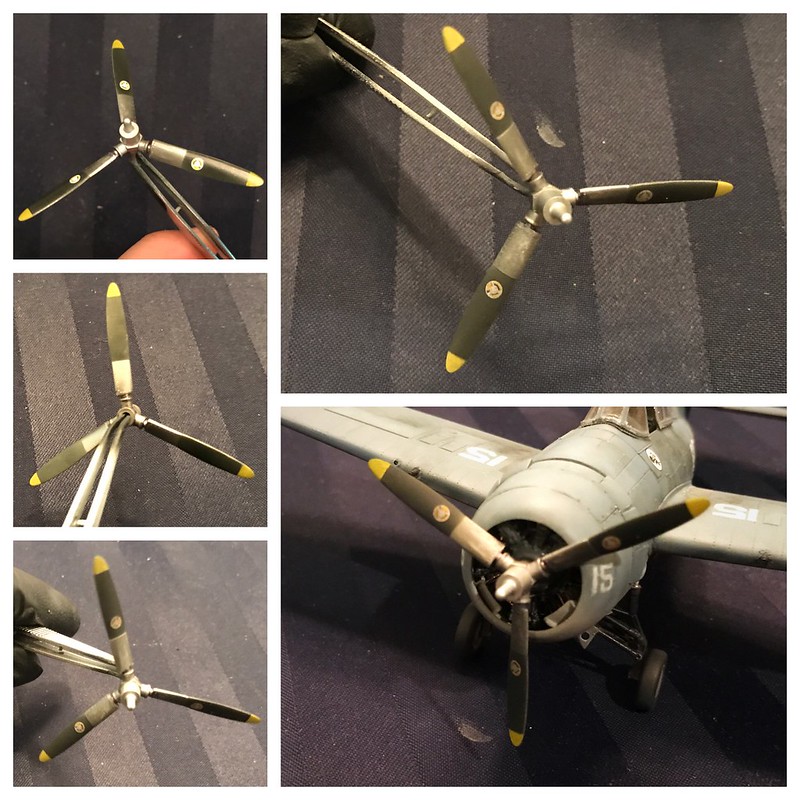
The Curtis three blade electric, variable pitch propeller. The prop was painted a base coat of Duraluminum from Alclad with the hub being painted in White Aluminum. I've always seen the hub of wildcats glow a bit brighter than other metal parts pictured with it. The cuffs saw the same Duraluminum coat but was dusted with Alclad's Magnesium afterwards. I wanted a bit of texture in the contrast from the White Aluminum prop hub. Later, I lightly buffed the cuffs to bring out the Duraluminum underneath. The Magnesium was lightly sprayed from about 9 to 10 inches out with the other parts masked. The cuffs were apparently added to the -3 in an effort to increase airflow over the engine to help with cooling.
For the black I use NATO Black for the most part. It's comes off as a lighter, faded looking black next to your standard Flat Black. I feel it represents what's seen in reality a bit better than some factory fresh paint job. If I want a considerably more faded look, I just add a bit of grey or white to the mix. If not, regular NATO Black works perfectly well. =] I put this on in thin coats. On the back side, I leave a little metal showing. I've noticed in many photos of the back side of props how the metal seems to peek through as if it's been buffed down almost. I'm not sure how long this process takes, but it is a feature to give my props that adds a bit of interest and since this is a USN wildcat I suppose I'll include it here. The yellow was masked and painted last in this instance. Once this was complete, a coat of clear goes down to place the decals on the prop blades. Afterwards, I put a flat coat down to allow for some dusting of my NATO Black again over the decals. I find this takes down that brand new sticker look and helps it blend with the rest of the painting. This all gets followed up with the flat coat after. =]
 Untitled by Britt Vallot, on Flickr
This part was a little difficult to film. I'm sorry these were some of the best pictures I could get of this at the moment. The top left pic shows the decals over clear and the rest show the progression. The Detailer in Black was pulled out to add a bit of pop here in there in the creases where necessary.
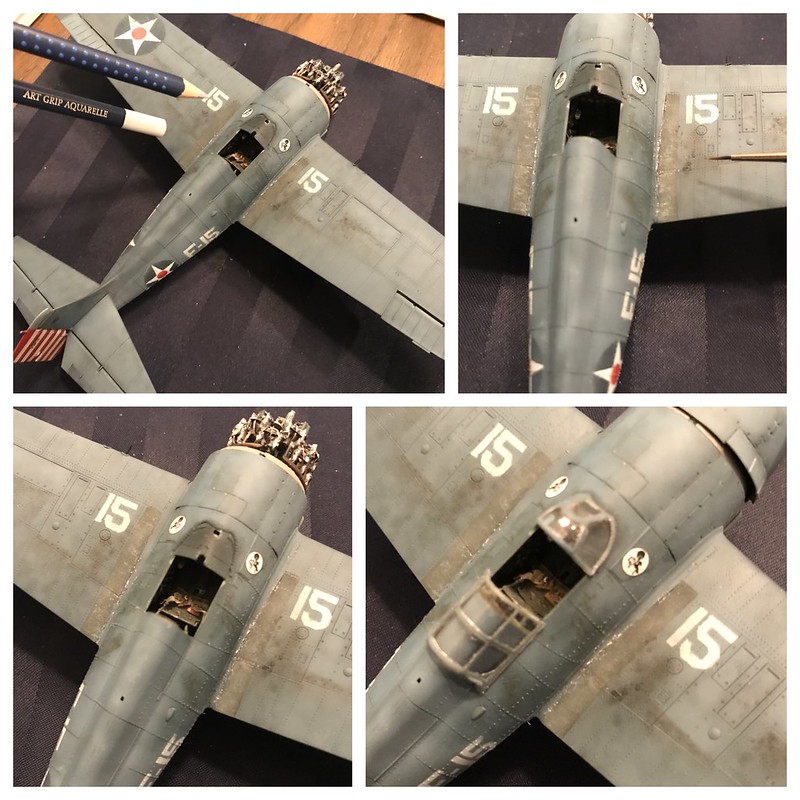
I came back to the skid strips again since some of my lighter colors disappeared with the clear and flat coats. This was brought back to life with some color pencils from Faber and Castelle (I may need to double check that). They have a water color quality to them as well which makes them very useful here for weathering both very tiny, specific details and lines as well as blending to whatever end. I have a silver and white out for this part. Honestly, best $3 you can spend.
 Untitled by Britt Vallot, on Flickr
I start out by dropping in some worn in rivet color over sections that would see high wear and lightly scribbling in with the side of the white pencil in broader areas. With a fine brush and a bit of spit straight from my mouth, I dampened my brush to slowly blend these marks in to my liking. Left to right and top to bottom shows the progression.
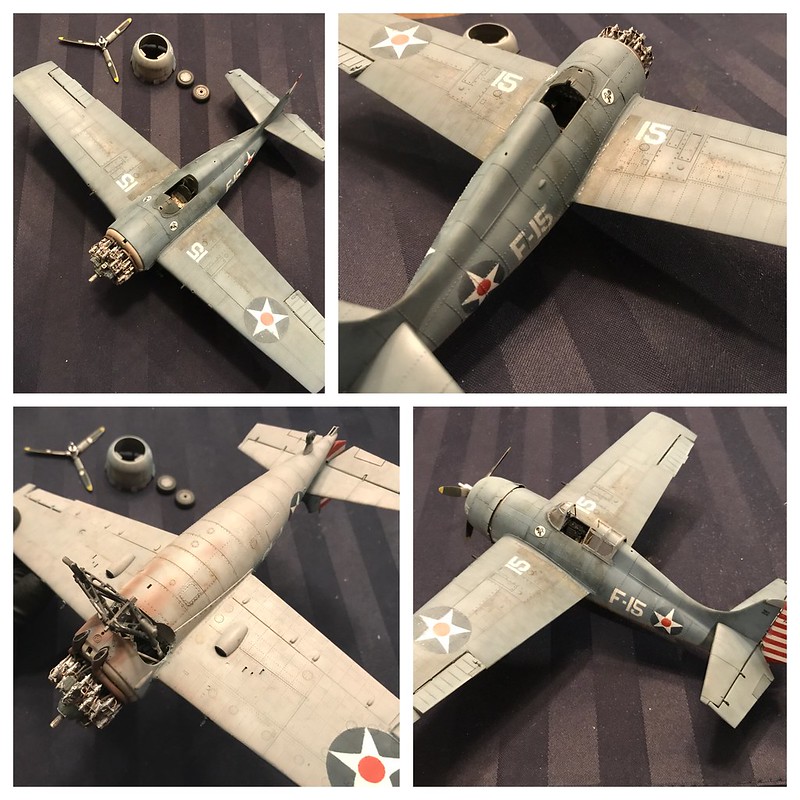
Once this was done I set this with light coats of Alclad's Light Sheen. I've only recently started adding this to my weathering and painting repertoire. Even amonst "flat" paints on aircraft there is still some amount of reflectivity present within the material(metal)/paint. As I've seen in WW2 aircraft, this seems to be more present due to the grease and grime that stains the surface of the aircraft. The undersurface is especially shiny what with all the oil that clings and runs down the aircraft. You can see this in radial engine planes still nowadays at the air shows that tour the country. All these aircraft have a greasy, shinier bottom underbelly than on top. So for this build, I've lightly coated the cowl and sides of the fuselage near the cockpit. I do this slowly so as not to over do it. The wings get a treatment with light sprays from front to back much in the same way Lawdog does his condensation streaks across his wings. I allow this to concentrate a bit along the forward most spar (where there's a panel line) as I've seen in many photos. I'll also show some attention to spots where hands go to push and pull the plane into place along the flight deck. Leading edges and sides of wings and the base of the vertical stab and leading edges of the horizontal stabs all get this treatment. Any place that I feel this has gotten a bit out of hand will get followed up with the Flat coat to correct it. I know this is very difficult to see in pictures, but to the eye this has really become that last little thing that helps make the plane pop to life. A little goes a long way. I mostly limit this to greasier, oil stained parts of the plane.
 Untitled by Britt Vallot, on Flickr
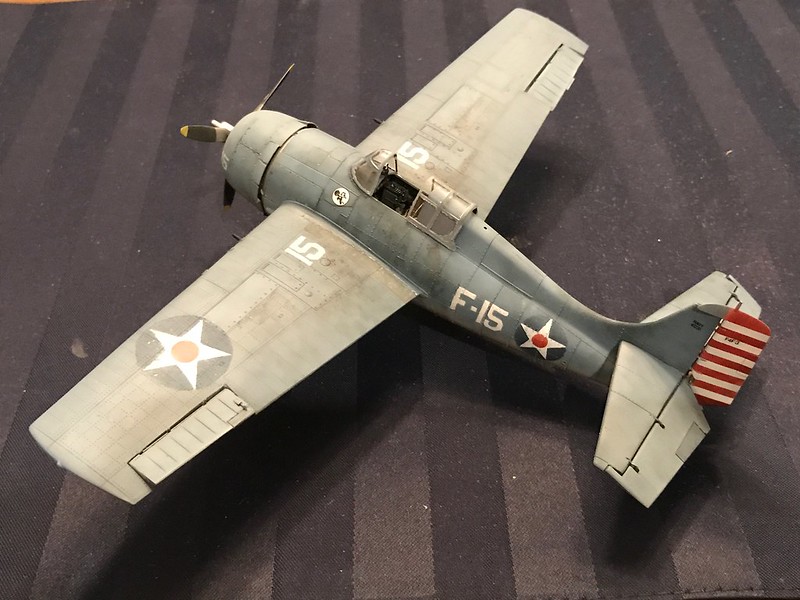
That's a wrap for tonight. I've got the tires done but pictures were not coming out well at all due to the contrast with my iPhone camera lens and the lighting in my kitchen. The gunsight is complete, the canopy and windscreen are complete and just need to be glued in. I'll do those next. Really all that's left pretty much just amounts to the bells and whistles.
 Untitled by Britt Vallot, on Flickr
Questions, comments, or critiques are all welcomed.
=]