SEARCH FINESCALE.COM

Enter keywords or a search phrase below:

Helldiver! 2/08/09 Post Script

171661 views
878 replies
1 rating 2 rating 3 rating 4 rating 5 rating
  • Member since
    December 2002
  • From: Whidbey Island, Washington
Posted by chukw on Sunday, November 4, 2007 5:14 PM
Well, Luftwoller- here's a shot of the root wearing some quick paint.  Interior green it is! I'm not going too crazy because it'll tough to protect it from overspray.

I've glued the subassembly to the fuselage- no turning back now!  

After relentless inspection of the photographic reference at hand, I finally realized what was missing from the bay.  It's the actual bomb racks!  Eduard referenced the surviving SB2C-5, which has had 'em removed.  I swiped some PE racks from Classic Airframes' Brewster Model 239 Buffalo (Finnish version)- they're a nice surplus on the etch fret.  I layered them with some strip of styrene to fit the Etched brackets.  Kinda kluged together, but they look good and busy.  

Here they are temporarily set in place- they're bare metal, so I'll fix them in after the Interior green is sprayed in.  


My photos show a centerline rack fitted along with the outers- for a heavy payload.  I'll be scratchbuilding this one- but now I've got to go wash the Spyder.  See you next week!  
  • Member since
    August 2006
  • From: The Great State of Wyoming
Posted by wyoroy on Sunday, November 4, 2007 6:11 PM

Your work is outstandingThumbs Up [tup]  I like the tip of getting bent wire flat, you are the masterBow [bow]

Roy

Roy (Capt. Wyoroy FAAGB/USNFAWGB)

John 3:16

  • Member since
    February 2003
Posted by Jim Barton on Wednesday, November 14, 2007 10:18 PM
Coming along beautifully!Thumbs Up [tup]

"Whaddya mean 'Who's flying the plane?!' Nobody's flying the plane!"

  • Member since
    February 2007
  • From: Bournemouth UK
Posted by Luftwoller on Thursday, November 15, 2007 8:33 AM

Awesome work fella Thumbs Up [tup]

...Guy

..'Your an embarrassment to the human genus, makes me ashamed to call myself Homo'.
  • Member since
    November 2005
Posted by Anonymous on Thursday, November 15, 2007 9:41 AM
Although I am no fan of the Helldiver (they were very unpopular w/ their crews), this is truly outstanding work... 
  • Member since
    January 2003
  • From: 40 klicks east of the Gateway
Posted by yardbird78 on Thursday, November 15, 2007 10:09 AM

Beautiful work on the details in the bomb bay.  This will obviously be a truly outstanding model when finished.

Darwin, O.F.  Alien [alien]

 ,,

The B-52 and me, we have grown old, gray and overweight together.

  • Member since
    April 2003
  • From: Hayward, CA
Posted by MikeV on Thursday, November 15, 2007 11:48 AM

Looks great!

I wish my dad was still here so I could show it to him and hear some more stories about him working on them. Wink [;)]

Wisdom is the right use of knowledge. To know is not to be wise. Many men know a great deal, and are all the greater fools for it. There is no fool so great a fool as a knowing fool. But to know how to use knowledge is to have wisdom. " Charles Spurgeon
  • Member since
    December 2002
  • From: Whidbey Island, Washington
Posted by chukw on Saturday, November 17, 2007 7:51 PM
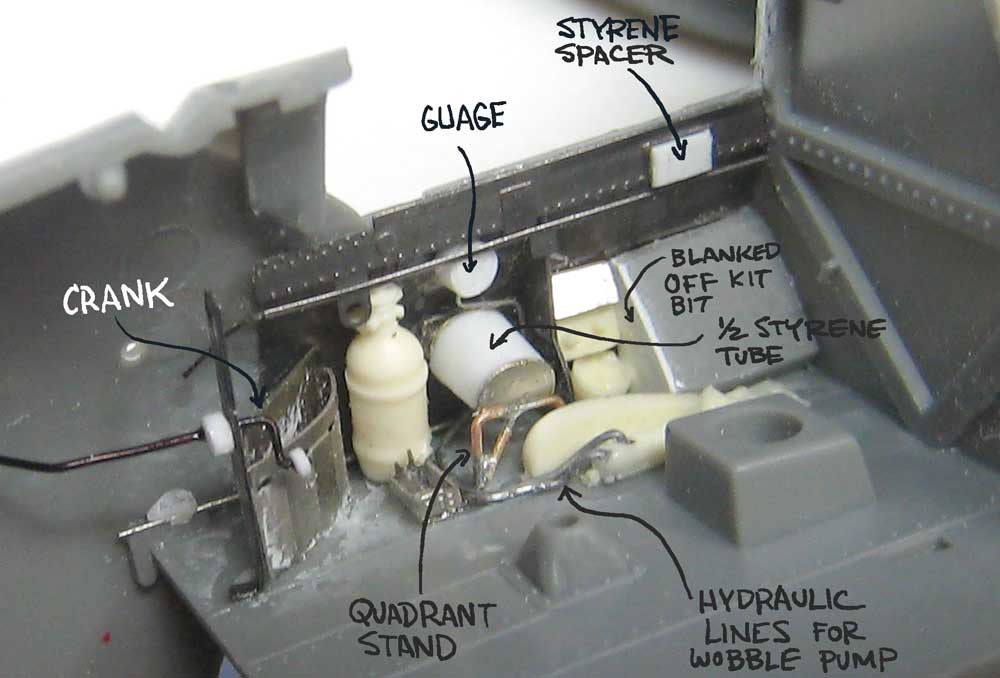
Thanks, fellas!   I really appreciate the support- this is a reall journey!   As for progress, last week was pretty sparse, but I spent this Saturday at the office- the pilot's office, that is! So far, just the cockpit floor, bulkhead and one little sidewall bit are left from the kit parts. I've used all the Eduard bits and some of the better parts from from the True Details set. Here's an early shot of the starboard sidewall. Note the soldered brass legs for the control quadrant, the solder hydraulic lines for the wobble pump ready for placement- and the repair to the goofed-up PE quadrant. Oh, well- ya mess up these little bits once] in a while... Black Eye [B)] 
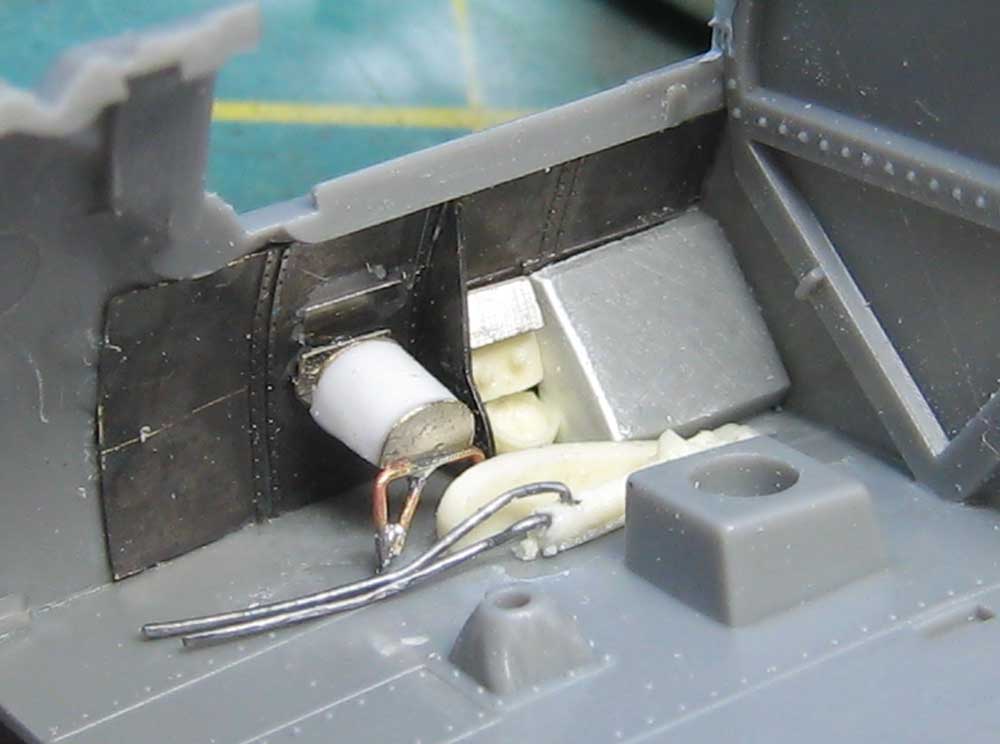
I added a guage seen in a photograph. The True Details version was kind of lumpy so I made my own. The wire is stripped from an old bit of electric cable. 
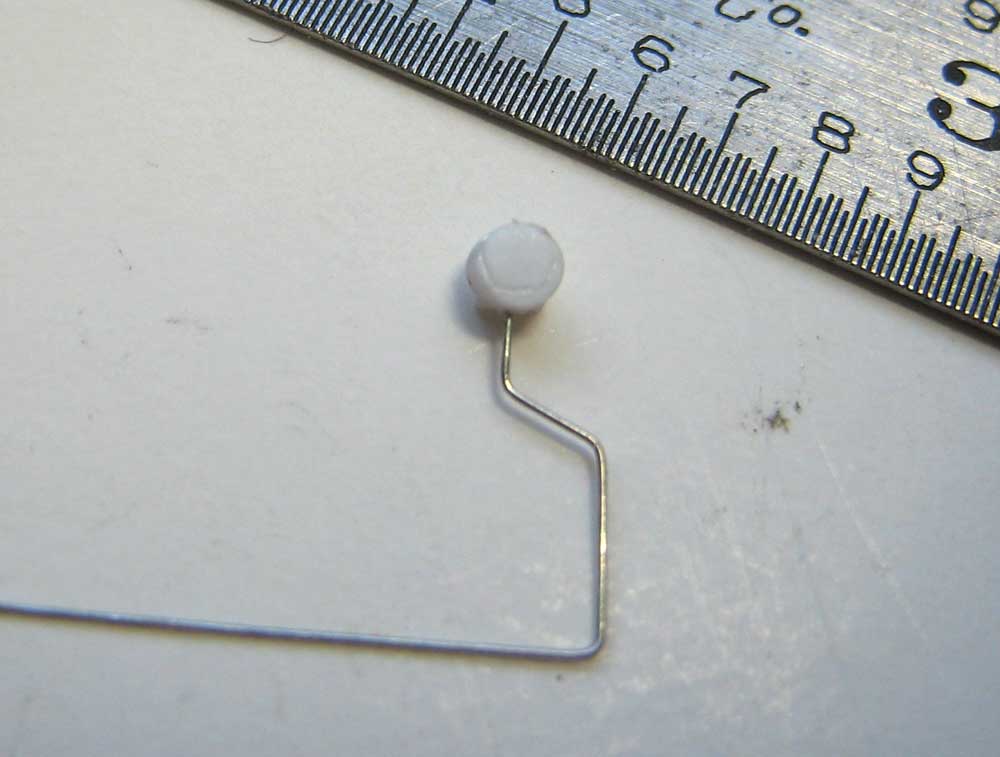
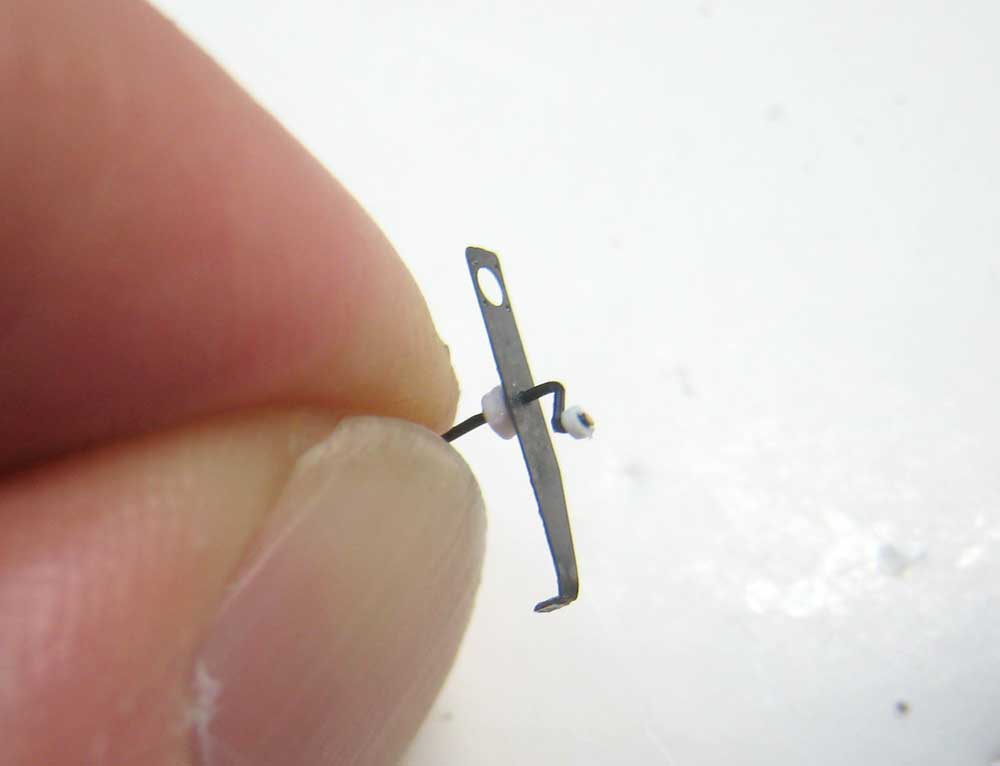
Eduard provided this bracket, but I made the crank that goes through it. I drilled tiny holes in styrene and then punch out the discs for the knob and support spacer. Here's an annotated view of the sidewall listing all the scratchbuilt (and repaired) pieces. 
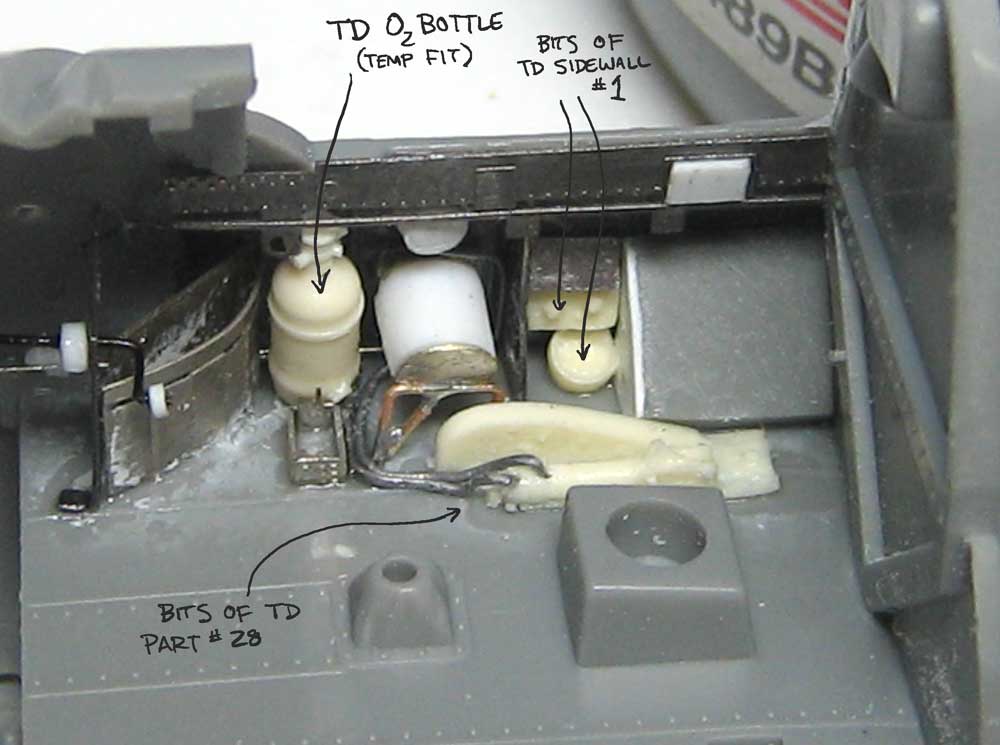
Likewise, a breakdown of the True Details elements. 
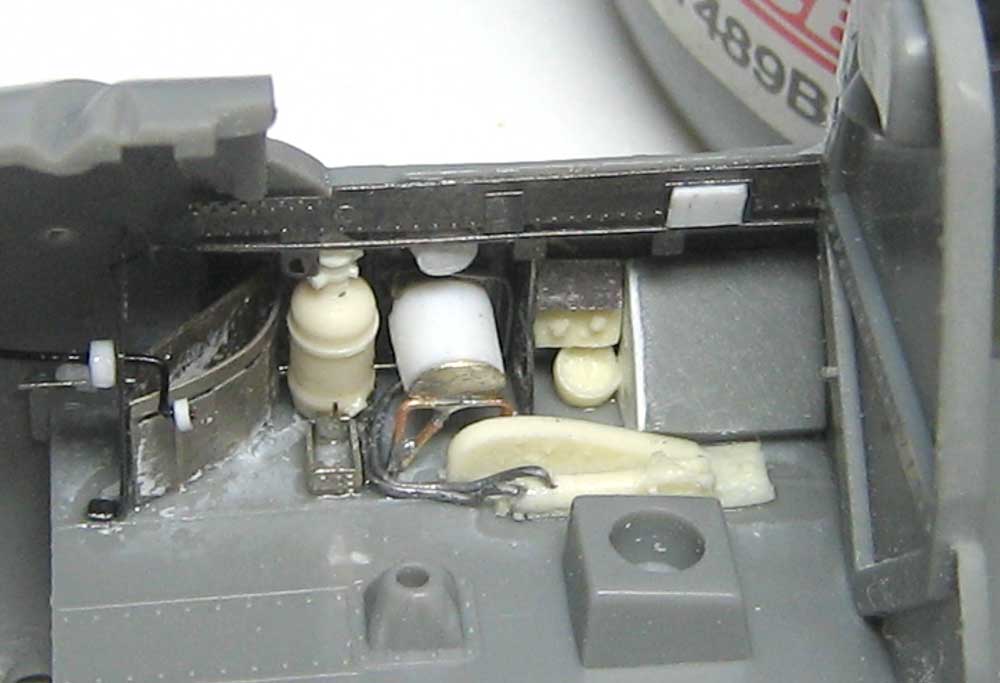
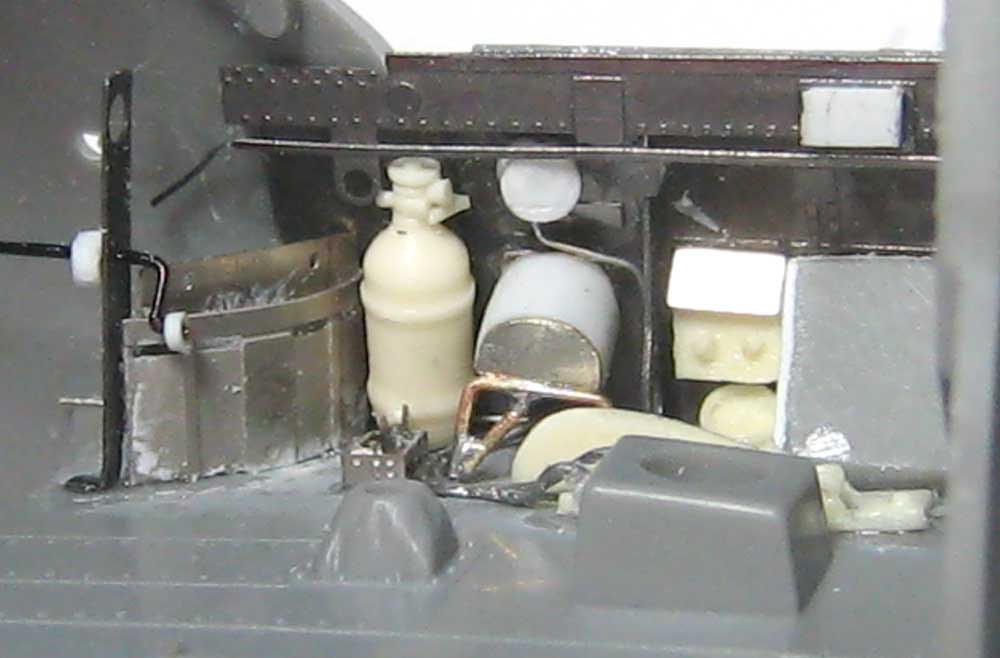
Let's see it without all that yammering: There's lots of pre-colored and printed PE to go in, but that will have to wait until after painting.... 
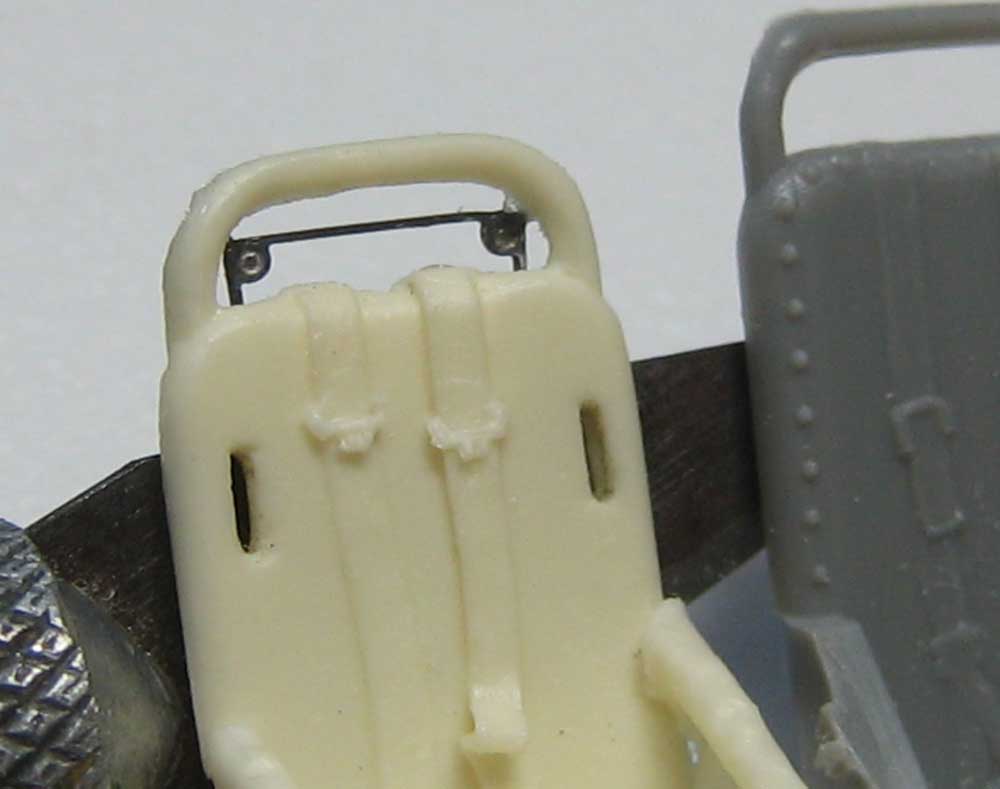
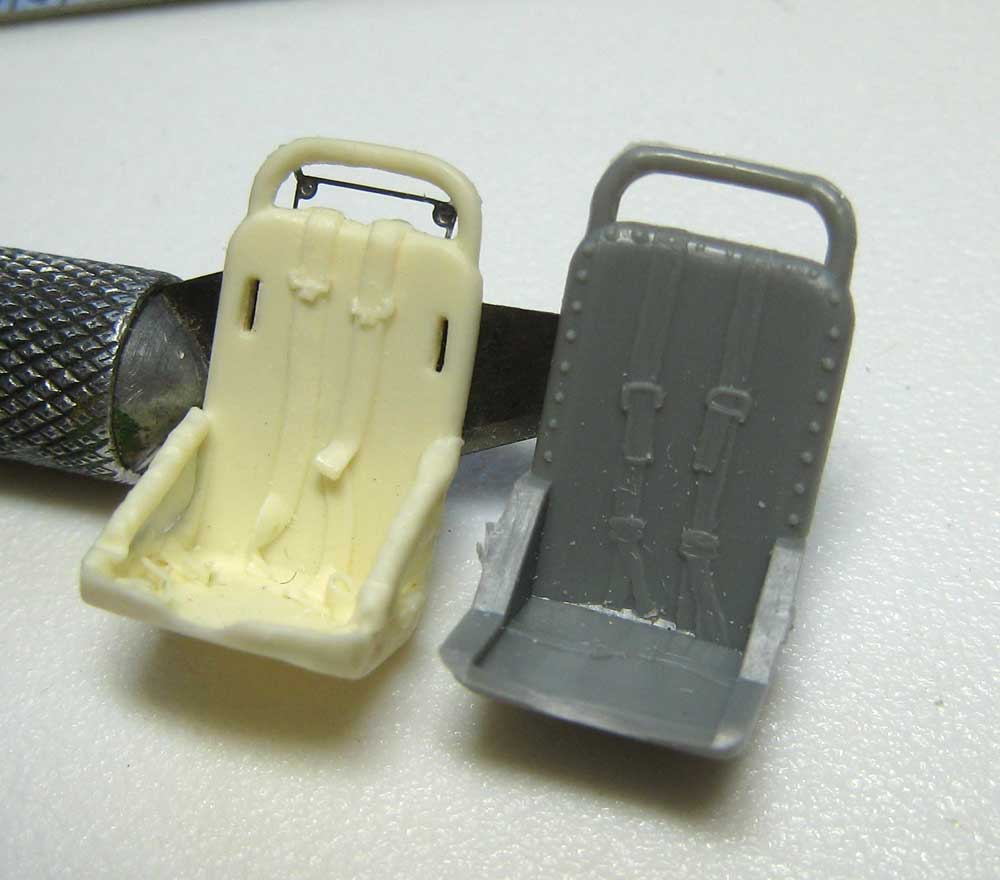
Every office needs a comfy chair, and True Details wins out here- check out the comparison with the kit chair. I like seat belts as they're molded here. Eduard adds this uber-nifty set of pulleys and bungees for the adjustment mechanism. I love this stuff! Propeller [8-]
  • Member since
    December 2005
  • From: Alabama USA
Posted by davew6003 on Saturday, November 17, 2007 8:23 PM
Man this is gonna be so cool when its done.Make a Toast [#toast]
  • Member since
    December 2002
  • From: Whidbey Island, Washington
Posted by chukw on Sunday, November 25, 2007 8:22 PM

Thanks, Dave-

I'm truly thankful- for four days off this week!  My Thanksgiving holiday gave me plenty of time to get down to work.  I always study my ref before tackling a sub-assembly and noticed that the kit rear canopy opening was just plain wrong.  Curses!   The rails need to be fixed and the opening re-shaped. I've already glued a bit of styrene into the gap to shorten it up.  

I cut a new opening, matching it to the PE inner rail and photographic ref.  That notch is abit deep and got a styrene bit to fix it.  Also note the block in place to level out the rail.  

The inner rail is supported by a shelf.  You can see a punch-disc pulley in the cut-out.

Here's the finished bit. Inner and outer rails have been added, the handgrip and circular port filled and rescribed.  

A much more accurate set of rails for a late-model Beast.  The compulsive nerd in me can now sleep at night...  :coolio:

While I'm railing on- how about the gunner's footrail?  The kit's is pretty basic, and that oxygen bottle has to make way for sweet, sweet resin....

Styrene rod to the rescue!  

Now I could finally move on to the rear sidewalls- I'm working on the starboard side first.  I mixed bits of the kit sidewall, the True Details O2 bottle, styrene, wire and solder. 

A broken guitar string serves as the oxygen hose.  I heated it red hot in a gas flame and let it cool slowly to anneal it and make it pliable.  That white circle is a styrene disc filling an ejector pin depression.

The True Details radio boxes are more square than the kit examples.  Each box and rail is a separate piece and need to be glued, drilled and pegged.  I used copper wire for that, clipping the excess off after the glue had set.

The TD parts have a lot of character- it's a shame I've got to scrape it off to make way for the Eduard printed faces- they can't be beat! 

I started to replace the upper rack with a simple shelf, but photo ref revealed a much more interesting rack.  As I'm building -4E model I'll have to scratchbuild the APNS radar set and it's components to mount here

The radio is seen temporarily in place- it's a busy little station!

The space behind the radios was wide open- I can't bring myself to hide it behind the kit "bulkhead".  There's a rollover pylon, fuel tank and lot's of cool piping. I could open up some inspection hatches... do you dare me?    :taunt:


  • Member since
    December 2005
  • From: Alabama USA
Posted by davew6003 on Sunday, November 25, 2007 8:33 PM
I say go for it....fuel tank, wiring, hatches open, do it all.  Although that's easy for me to say im not the one building it.Make a Toast [#toast]
  • Member since
    August 2006
  • From: The Great State of Wyoming
Posted by wyoroy on Sunday, November 25, 2007 9:09 PM

do itWhistling [:-^] plus I can only learn from youBow [bow]

Roy

Roy (Capt. Wyoroy FAAGB/USNFAWGB)

John 3:16

  • Member since
    November 2007
  • From: Columbus, OH
Posted by chef_ben on Monday, November 26, 2007 3:50 PM

I double dog dare you!!  Besides I'm drooling over this build and just want to see what kooky stuff you come up with.  This build is the stuff my dreams are made of!!

wait....I just started building again....now it makes sense


Ben

On the workbench: 1/48 Spitfire Mark II (Revell) - rethinking this situation! 1/48 Eduard Pfalz D.IIIa - 2%
  • Member since
    February 2007
  • From: Calgary, Alberta, Canada
Posted by T-rex on Monday, November 26, 2007 8:33 PM

My god! That is the best made helldiver I've ever seen, I admire oyur workBow [bow]

Keep us posted

Working on: Trumpeter SU-152 (1/35) Trumpeter E-10 (1/35) Heller Somua (1/35)

"The world is your enemy, prince of a thousand enemy. And when they'll find you, they will kill you... but they will have to catch you first ''

  • Member since
    November 2005
Posted by Anonymous on Monday, November 26, 2007 9:48 PM
That looks amazing, I wish I had those skills. I was looking through my pictures and found several from a airshow earlier this year do you still need ref. photos?
  • Member since
    December 2002
  • From: Whidbey Island, Washington
Posted by chukw on Wednesday, November 28, 2007 1:47 PM

Stop twisting my arm- I'll do it!  :D

 1/23Marine- Yes, please!  Any photo ref is solid gold for a crazy project like this...  Thanks!

  • Member since
    December 2002
  • From: Whidbey Island, Washington
Posted by chukw on Sunday, December 2, 2007 8:04 PM

Peer pressure!  Peer pressure!  


So, here goes- I cut away the bulkhead, thinned the sides (sooooooo boring!), filled the ejector pin marks, thinned the sides some more and cut away the access panels.  Not all -4's had the upper panel, but I figured screw it!  I want this work to be seen.  Next came the fun stuff- building up the inner ribbing.  Aaaah- modeling heaven!


I began building from the front of the compartment- here are the two front legs of the turnover pylon and the pilot's armor panel.  Details from bits of strip stock and sliced sprue, just like our armor-building brethren.  See the notes for various details- and pitfalls!


The ribbing on the other side was a bit more challenging with the various subcomponents already in place.  Not crushing things is always priority one!  I glued the front assembly in and added one of the rear braces.  Note that I've gotten those rivets installed correctly at last.  


The fourth leg was carefully added- I did some test-fitting with the other fuselage half in place before gluing.
The radio is set in place temporarily to assess the size of the pylons.  I'm doing this by the Mk I Eyeball method.


I did some caliper measurements on the space between the pylon legs, drew up some paper patterns and cut the endcaps of the tank from styrene.  These in turn were glues to a small block of balsa wood.  The tank is, lengthwise, flat along the top but sloped on the bottom, so these endcaps are differently-sized.  


With a sanding block I carved the tank to shape- it was pretty easy, as the endcaps set the shape.  I got the to and bottom angles right, but the tank was too long.  Well, it's easier to take material away than add it... ;)


Using my trusty calipers I scribed a line around the rear end of the tank, held my breath and cut it off.  Success!  From here it was a simple trick to glue it a scrap of styrene and trim that down to match the balsa profile.  Whew!


I wrapped a bit of paper around the tank to create a rough pattern, then used it to cut a piece from .010 styrene.  Wrapped, glued and trimmed to shape, it's starting to look like a fuel tank!  There's more shaping to be done- I'll break out the Miliput for that.  This photo shows how much more internal ribbing needs to be added- not much,  but that's for later!  ;D

  • Member since
    August 2006
  • From: The Great State of Wyoming
Posted by wyoroy on Sunday, December 2, 2007 8:20 PM

Looking good so farThumbs Up [tup]  Question on the saw, I read about that type awhile back in FSM but can not find the issue.  What is the name, I want to get myself one.  Do you use a Waldron Punch? 

Roy

Roy (Capt. Wyoroy FAAGB/USNFAWGB)

John 3:16

  • Member since
    April 2005
  • From: Piscataway, NJ!
Posted by wing_nut on Sunday, December 2, 2007 10:17 PM
Not just an impressive bit of woirk... t's entertaining too.

Marc  

  • Member since
    December 2005
  • From: Alabama USA
Posted by davew6003 on Monday, December 3, 2007 12:35 PM
Just as expected. excellent!Make a Toast [#toast]
  • Member since
    February 2007
  • From: Bournemouth UK
Posted by Luftwoller on Monday, December 3, 2007 3:17 PM

Simply awesome fella. Loving this build.

...Guy

..'Your an embarrassment to the human genus, makes me ashamed to call myself Homo'.
  • Member since
    February 2003
  • From: Panama City, Florida, Hurricane Alley
Posted by berny13 on Monday, December 3, 2007 4:24 PM
You are the master, even if you are all thumbs.  Big Smile [:D]   That is some of the best work I have ever seen.  Great job all around.  I'll keep looking at your progress.

Berny

 Phormer Phantom Phixer

On the bench

TF-102A Delta Dagger, 32nd FIS, 54-1370, 1/48 scale. Monogram Pro Modeler with C&H conversion.  

Revell F-4E Phantom II 33rd TFW, 58th TFS, 69-260, 1/32 scale. 

Tamiya F-4D Phantom II, 13th TFS, 66-8711, 1/32 scale.  F-4 Phantom Group Build. 


  • Member since
    December 2002
Posted by Bossman on Monday, December 3, 2007 8:33 PM

Chuck,

This is really nice work you're showing us.  Just wanted to let you know that I'm reading this with great interest and will definitely keep this thread as a reference for the helldiver and for modelling methodology in general.  Thanks for putting the effort and time into documenting all this.  Again - nice work !

Chris

  • Member since
    September 2012
Posted by namrednef on Monday, December 3, 2007 9:08 PM
Sign - Ditto [#ditto]Thumbs Up [tup].......and ditto that!
  • Member since
    January 2005
  • From: Ohio
Posted by mikepowers on Thursday, December 6, 2007 11:49 AM

Great stuff.

Eagerly awaiting the sequels. Whistling [:-^]Whistling [:-^]

  • Member since
    December 2002
  • From: Whidbey Island, Washington
Posted by chukw on Sunday, December 16, 2007 8:59 PM

wyoroy: It's a JLC razor saw- I got it from Billy Crisler of Aerospace Modeler at the NATS.  Yup- that's a Waldron Punch at work.  Cool [8D]

The rest of you guys:  Thanks a bunch!

Man, the Christmas season has been keeping me busy!   I got in only an hour or two last week, but was able to hit the bench some yesterday and today.   First order was to add the rounded ends of the fuel tank from Milliput, smoothed out with a wet, sloppy finger.  I usually hold the camera in my teeth for this kind of shot, but my wife helped out this time- thanks, Honey!   


While harding for the putty to harden I whipped up some sub-assemblies and such.  There's a big ring around the fuel filler cap, so that was first- here's how I did it:


Next came the filler neck itself.  I was guessing at the length- it was later cut to fit.  


The Helldiver's wing tanks were inked to the main tank by a series of beautifully bent, nesting lines.  A template is the only sane way to do this, so I broke out the calipers, took some measurements off the rear rollover bar and drew a guide onto some cardboard.  The various marks were used to bend the three differently-stepped lines.  I used copper wire for the lines, and bent them using my Mission Models Etchmate.   The template made it relatively easy.   


One week later I got back to the tank itself.  The Milliput sanded easily and to a beautiful surface.


All this from two old photos!  The notes explain a lot, but patience was the main ingredient.   I bent the three nesting lines first, then the feed lines from the tank itself.  The auxiliary lines that run under the tank were last.  The nested lines were glued first ( they run down into the wing roots and out of sight).  Next the tank was wiggled into place and its lines added.  lastly the auxiliary lines went in.  The fuel filler cap was the cerry on the cake.    :D


The radio got some love, too- but that's another story... ;)

  • Member since
    December 2005
  • From: Alabama USA
Posted by davew6003 on Sunday, December 16, 2007 10:06 PM
Holy Cow that is great. This is the coolest helldiver build I have ever seen. Man you sure are doing it right. Wonderfull.Make a Toast [#toast]
  • Member since
    December 2002
Posted by Bossman on Sunday, December 16, 2007 10:12 PM

Chuk,

Again - very impressive !  Are you gonna close all that up ?  Or are you gonna have some cut- aways to show it off after completion ?

And on a personal note, I've got this new water heater...  you wouldn't mind givin me a hand...  wouldja ?

Chris  

  • Member since
    April 2005
  • From: Piscataway, NJ!
Posted by wing_nut on Monday, December 17, 2007 7:39 AM
WOW chuk that is just insane stuff.  I have this trhead bookmarked. Last week I scored the 1/72 Acadmey kit with the bouns PE and will use this as a guide to copyxxx  err... ahh... help guide meWhistling [:-^] in some extra detailing.  And since the kit is nearly an exact copy of the Pro-Modeler kit, it will just take some resizing of the details.

Marc  

  • Member since
    September 2003
  • From: South Central Wisconsin
Posted by Daywalker on Monday, December 17, 2007 8:31 AM

Chuck,

Excellent article, both informative AND entertaining!  Are you gonna submit this to FSM for the mag?  This is front cover material!

Frank 


JOIN OUR COMMUNITY!

Our community is FREE to join. To participate you must either login or register for an account.

SEARCH FORUMS
FREE NEWSLETTER
By signing up you may also receive reader surveys and occasional special offers. We do not sell, rent or trade our email lists. View our Privacy Policy.