SEARCH FINESCALE.COM

Enter keywords or a search phrase below:

IMS IV : The Return of the Stash

150981 views
303 replies
1 rating 2 rating 3 rating 4 rating 5 rating
  • Member since
    February 2003
  • From: Montreal, Quebec, Canada
Posted by superbear on Saturday, January 9, 2010 10:39 AM

Wow Great progress guysYes There are some realy cool builds going on keep up the great work.

Well I started the P-61 This is a realy nice kit.  I like the premium edition kits as it saves me from ordering the pe set as it's included the only extra I'm going to order is the Eduard mask set for this kit as I suck at masking canopy's. 

Here are some progress pics:

The kit:


The flight deck:


Well that's it for now.


Cheers

Bear

Marc
  • Member since
    February 2004
  • From: Second City
Posted by arki30 on Saturday, January 9, 2010 10:05 AM

jmabx, while surfing various forums I stumbled across (2) progress threads for the Italeri Tornado in the Black Panther scheme.  For your use and reference sir.

http://www.britmodeller.com/forums/index.php?showtopic=16584&hl=

http://www.arcforums.com/forums/air/index.php?showtopic=182367&hl=tornado

Cheers

Building Now:

1/48 Academy Bf-109G6 - 100%

1/48 Tamiya F4U-1A - 5%

Upcoming:

1/48 Revell F-14D

  • Member since
    January 2006
  • From: Liverpool, NY
Posted by Upstate John on Saturday, January 9, 2010 8:51 AM

Hot-Pb

Thanks for the detailed explanation and taking time to write it. That is a lot work and steps on something so small.  It does make it much clearer how to get the real look I see on models.  I'm looking forward to seeing the build progress.

Best Regards,

John


“Having a positive mental attitude is asking how something can be done rather than saying it can't be done.”

On the Bench:  1/ 72 Hasagawa P2V-7 and 1/96 Lindberg HP Victor


  • Member since
    November 2008
  • From: Long Island, NY
Posted by Hot-Pb on Friday, January 8, 2010 7:23 PM

Upstate John

Hot-Pb

The rotor head is exquisite!  What techniques do use to get such a realistic look? 

John

Hey John,

let's see...the chrome bits are airbrushed with Alclad chrome over a gloss black (Tamiya). The steel bits I painted flat black but then drybrushed with citadel's boltgun metal. I find that gives a nice metallic sheen that simulates steel and gunmetal pretty well. I touched up nuts and bolts with just a dot of testors silver enamel paint. I added bits of silver solder painted gloss black going in to the rotor head to simulate tubing and wires, but I gave up on trying to be accurate with those...was getting way too complicated. I decided to make the rotor blades tamiya flat black but then I airbrushed the steel edges with alclad steel over the flat black.

  • Member since
    February 2004
  • From: Second City
Posted by arki30 on Friday, January 8, 2010 6:11 PM

Gamera, that lighting is going to be really cool once finished. Yes

Hot-pb, yep, that's a big kit.

Building Now:

1/48 Academy Bf-109G6 - 100%

1/48 Tamiya F4U-1A - 5%

Upcoming:

1/48 Revell F-14D

  • Member since
    January 2006
  • From: Liverpool, NY
Posted by Upstate John on Friday, January 8, 2010 11:20 AM

Hot-Pb

The rotor head is exquisite!  What techniques do use to get such a realistic look? 

John


“Having a positive mental attitude is asking how something can be done rather than saying it can't be done.”

On the Bench:  1/ 72 Hasagawa P2V-7 and 1/96 Lindberg HP Victor


  • Member since
    May 2003
  • From: Staten Island, New York
Posted by kenny_conklin on Wednesday, January 6, 2010 9:18 PM

excellent work fellas

"Rakkasans Lead the Way!"
  • Member since
    November 2008
  • From: Long Island, NY
Posted by Hot-Pb on Wednesday, January 6, 2010 6:27 AM

I have begun my penance, Academy's 1/48 CH-53E Super Stallion. I am building it in a three color camo scheme with folded rotors. Directions call for starting on the rotor assemblies:

Hot-Pb

  • Member since
    November 2009
  • From: SW Virginia
Posted by Gamera on Tuesday, January 5, 2010 7:20 PM

Wow, some impressive progress! Esp your B-1 Helo.

Sorry to hear about your warped hull Glamdring, not sure what you can do. Maybe write Zvesda or try to bend it with hot water? I'm sure other people can give you more useful advice.

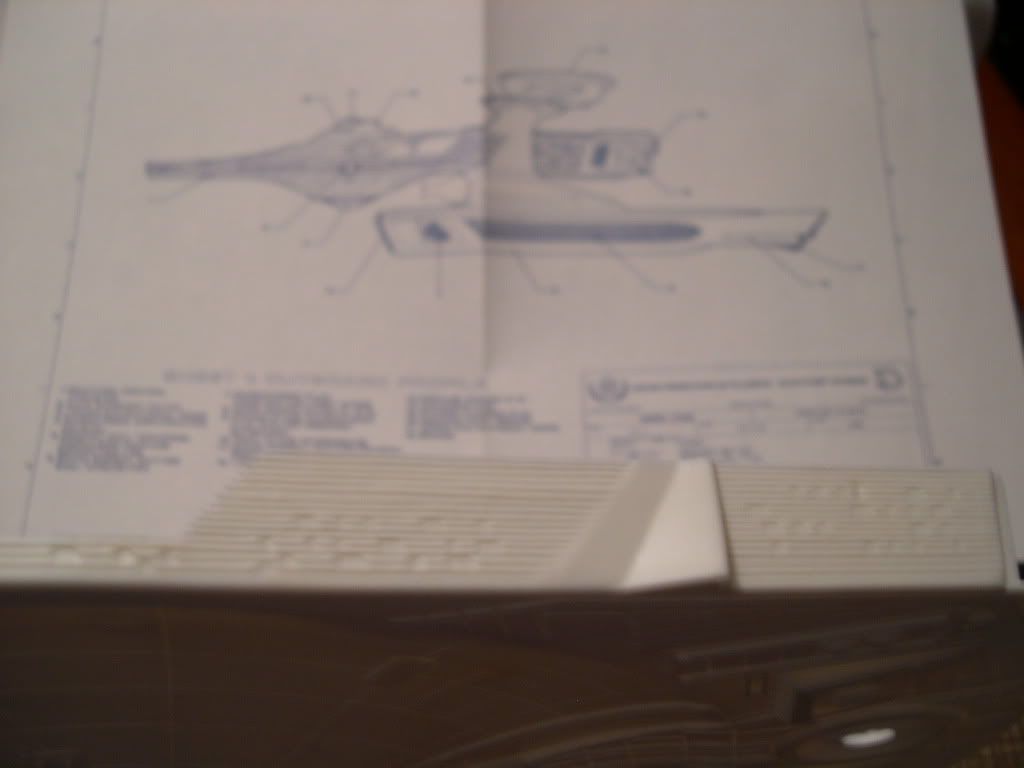
Sprayed the interior of the Reliant with black paint to make her light-proof. Puttied over the portholes on the flanks of the kit but have having trouble drilling them out in a straight line. Going to try making a jig that might keep me on the straight and narrow.

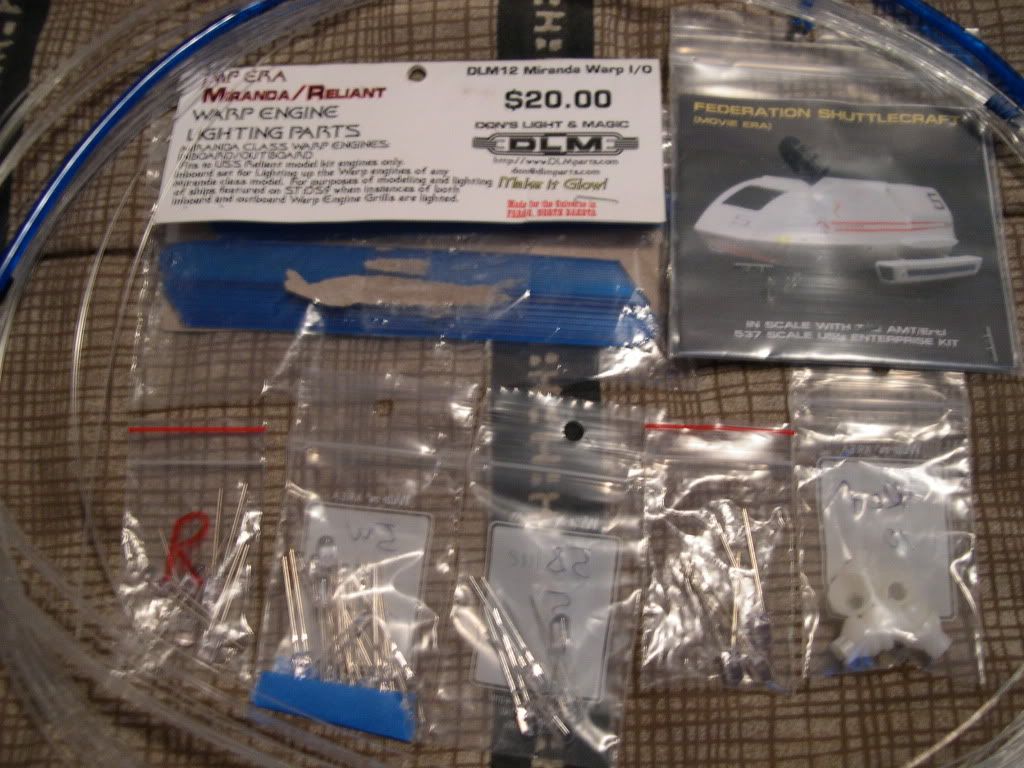
Cut out the inner section on one of the warp drive nacelles and tested out these light tubes I'd picked up a few years ago.

Meanwhile modified three LEDs for the bridge lighting. LEDs don't put out much heat so this should work. I just hope they don't short out and melt or set the model on fire!

BTW: Finger will be removed before ship leaves spacedock...

"I dream in fire but work in clay." -Arthur Machen


  • Member since
    October 2007
  • From: Rhode Island
Posted by jmabx on Monday, January 4, 2010 8:51 PM

Mark - I've got this kit also (SB2U-1) and when I opened it up a couple of years ago and saw those sink marks, it went right back in the closet. Surprise

I'll be watching closely to see how you manage to fix them. Yes 

Jeremy    Propeller


  • Member since
    August 2007
  • From: Southeast Wisconsin
Posted by MaxSheridan on Monday, January 4, 2010 1:25 PM

Normal 0

I unpacked the vindicator this morning and took some sprue shots.


The packaging on these AM kits is excellent! The wings( with their built-in dihedral), the clear parts, decals, and PE are all protected from damage under a little "shelf".


The reviews I've been reading on these kits all talk about this nasty sink mark that wraps around the fuselage just aft of the canopy. Let me tell you, they weren't kidding!  It looks as if it will be partially hidden by a white band, but will still need some careful fixing....whoopee!


On the bright side, it came with some PE seatbelts, and the decals are printed by Microscale.


Hopefully, I'll be able to get started on this today. If so, I'll try to get some pics up.


Note: I posted this at HLI also. I will most likely post updates over there for 2 reasons, 1) my brain starts hurting when I post the same things on two sites, and 2) The forums over there are alot closer to what they used to be here.(the ease-of-use factor)Big Smile

As time goes on (and I get more used to the changes), I'll probably post at both. You all know what they say about an old dog and new tricks!Bang Head

-Mark

  • Member since
    September 2003
  • From: Australia
Posted by Helo H-34 on Monday, January 4, 2010 1:09 PM

Hi arki30 , I also forgot about that jpsmodell site , while I was searching around the net , I stumbled across it again , this time I did add it to 'my favourites'

There has been a couple of issue's with the B-1cockpit and canopy ;

The cockpit itself fits snuggly into the top half of the fuselage , however I soon discovered that the left side pilots seat stops the canopy from finishing flush with the fuselage , the edge of the seat and headrest hit the inside of the canopy , so I had to remove the seat and file down the right side of the seat to get it to sit closer to the center consol .

The canopy sits in place okay but the back edges aren't flush , I can push with my fingers on both sides of the canopy to get it to finish flush with the fuselage but then the top two overhead panels tend to sit up above the fuselage roof .


I'm thinking it might be better if I glue the canopy in place now before adding the cockpit and glueing both top and bottom fuselage halves together , it's easier to handle the top fuselage section only and I may need to add a couple of drops of super glue from a toothpick in a couple of places to get the canopy to sit flush .

Any small gaps would be easier to fill from both inside and out , I will also dip the canopy in some 'future' and let it dry for a day and then install it , future should help prevent any fogging from the super glue , plus not having the fuselage completly closed up will let plenty of air around the canopy when I glue it in place  ; [I hope that makes sense]

I'm fairly confident this should work .

                                                                         John .


  • Member since
    February 2004
  • From: Second City
Posted by arki30 on Sunday, January 3, 2010 7:40 PM

John, I have the jpsmodell.de site in my favorites but completely forgot about it.  Otherwise I could have pointed you to it sooner. 

That site is very helpful.

Building Now:

1/48 Academy Bf-109G6 - 100%

1/48 Tamiya F4U-1A - 5%

Upcoming:

1/48 Revell F-14D

  • Member since
    September 2003
  • From: Australia
Posted by Helo H-34 on Sunday, January 3, 2010 6:46 PM

Thank's guy's ;

I did find this link to the FS color of the B-1B Lancer

http://www.jpsmodell.de/dc/draw/b1b_86.jpg

I'm just not sure which of Gunzes olive drab is the closest match .

I have also decided to leave out the two pilots and instead I ordered from Squadron , two of Hasegawa's U.S.Pilot/Ground Crew sets .

Airfix include a boarding ladder for the B-1 and I like the idea of one pilot going up the ladder and the others standing ready .

                                                      John .

  • Member since
    February 2004
  • From: Second City
Posted by arki30 on Sunday, January 3, 2010 5:43 PM

It's great to see progress right away.  John, you're flying!  Can't help with the colors, but I can say even in 1/72 that is a big frickin model.

Cheers

Building Now:

1/48 Academy Bf-109G6 - 100%

1/48 Tamiya F4U-1A - 5%

Upcoming:

1/48 Revell F-14D

  • Member since
    December 2002
  • From: Bury St Edmunds, Suffolk, England
Posted by Bish on Sunday, January 3, 2010 4:59 PM

Looking good so far, got a hell of a job ahead of you. Not sure if it will be of help, but back in camp i have the Revell B-1 and i am sur ethat has the FS colours. I won't be back in camp till next Sun, but if it will be of help i can get the colours from there and send them on.

I am a Norfolk man and i glory in being so


On the bench: Airfix 1/72nd Harrier GR.3/Fujimi 1/72nd Ju 87D-3

  • Member since
    January 2006
  • From: Liverpool, NY
Posted by Upstate John on Sunday, January 3, 2010 4:54 PM

Hi John,

You are making great progress and I would guess ahead of most.

I just stared doing some weathering and detailing on my current builds which are my third and fourth  models that I have built.  I did preshading on the F4D Skyray as well as washes after painting.  On my PBY, started about 15 years ago and left to sit until recently was already painted so I just did washes on it.  All in all not as bad as I thought and the result was fair which is OK for the learning curve.  So I would say try what ever you have been thinking about.  I think the preshading adds a lot.

Please keep the photos and progress info coming.

Best regards,

John McMakin


“Having a positive mental attitude is asking how something can be done rather than saying it can't be done.”

On the Bench:  1/ 72 Hasagawa P2V-7 and 1/96 Lindberg HP Victor


  • Member since
    September 2003
  • From: Australia
Posted by Helo H-34 on Sunday, January 3, 2010 4:32 PM

I've continued with a bit more work on the "Bone"

The wings went together okay , I then airbrushed the Landing gear wells , Struts and doors ; I've tried adding some black wash around the recesses , I haven't done much wash detail before , most of my builds have always been of the clean finish , so I'm trying some new tecniques ,


Airfix dont mention what color the insides of the engine intakes should be , so I airbrushed them white first and then some FS. 36118 just inside the front part of each intake . I'm not sure if this is correct ?


Thank's for the help with the FS colors , I printed out that paint reference charts , I will have to see how Gunze H-304 olive drab looks compared to olive drab 2 .

Anyway I have made a little more progress and it's good to see nearly everyone else is starting as well .

Thank's for looking....

                                                            John .

  • Member since
    February 2005
  • From: Nashotah, WI
Posted by Glamdring on Sunday, January 3, 2010 11:31 AM

I dug out the Borodino last night, my first Zvezda kit and my first build in 1/350.  Read the directions and it doesn't look to be all that complicated of a build.

That is until I test fitted  the hull halves together, and found major warpage.  So much for uncomplicated....  Bang Head

I'm starting this one plenty early so I don't have to rush it with a month to go, like IMS3.  I've also screenprinted my voting results so if I finish early, I'll know the order to build them.

Robert 

"I can't get ahead no matter how hard I try, I'm gettin' really good at barely gettin' by"

  • Member since
    February 2004
  • From: Second City
Posted by arki30 on Sunday, January 3, 2010 9:17 AM

Paul, I've always felt Lifecolor paints had a weird texture to them once sprayed.  It's likely the paint is old or on it's way to being old.

Can't help you on the heater.  I know next to squat about helicopters.  Nice to see you started, however. Yes

Cheers

Building Now:

1/48 Academy Bf-109G6 - 100%

1/48 Tamiya F4U-1A - 5%

Upcoming:

1/48 Revell F-14D

  • Member since
    October 2004
  • From: Nelson, BC, Canada
Posted by paul_toz on Saturday, January 2, 2010 8:12 PM

Here's the first update of my Chinook build...yay!

Some paint has been sprayed...

Weird things was that it is a Lifecolor paint and I added some of Hannants acrylic thinner to it and it congealed into a gloop. Then after cleaning everything and thinning with just water second time around it went better, after a bit of messing to get the mix right. I'm sure I've used Hannants acrylic thinner with other Lifecolor paints without an issue, so I am confused by this. Maybe it's old acrylic paint?? Anyone seen anything like this before.

First issue with the kit...the item arrowed in the image below is the heater. Both my reference books say this was removed from the ACH-47A as a weight saving measure. Also found a photo that seems to confirm this as well. Guess it will have to be removed for accuracy - and since it can maybe be seen through the door.

I'm thinking this is one part from Italeri's CH-47D kit that should not have made it into their ACH-47A kit without modification.

  • Member since
    May 2003
  • From: Staten Island, New York
Posted by kenny_conklin on Saturday, January 2, 2010 4:31 PM

page one builders list and kits are updated

"Rakkasans Lead the Way!"
  • Member since
    December 2007
  • From: Sudbury MA
Posted by Got Hinomaru? on Saturday, January 2, 2010 9:40 AM

I just voted for the ties. Looks like there is a Hokum in my future. I better get out my silver bullets and check the moon tables.  (SWG)


                                                                      Andrew

Respect all, fear none.
  • Member since
    February 2004
  • From: Second City
Posted by arki30 on Friday, January 1, 2010 8:10 PM

Swanny did a recent review of the Rommel's Rod re-release over on his sight.  Interesting kit. Yes

http://www.swannysmodels.com/Rommel.html

Building Now:

1/48 Academy Bf-109G6 - 100%

1/48 Tamiya F4U-1A - 5%

Upcoming:

1/48 Revell F-14D

  • Member since
    November 2008
  • From: Hatboro, PA
Posted by Justinryan215 on Friday, January 1, 2010 7:12 PM

I took a look at Rommel's Rod this afternoon, and It doesnt seem tobe too challenging of a kit, so I may get more than my number one choice finished...I inadvertantly left my camera at my in-laws house last night, so I will begin my build when I retrieve my camera...

"...failure to do anything because someone else can do better makes us rather dull and lazy..."

Mortal as I am,I know that I am born for a day.  But when I follow at my pleasure the serried multitude of the stars in their circular course, my feet no longer touch the Earth...


  • Member since
    November 2009
  • From: SW Virginia
Posted by Gamera on Friday, January 1, 2010 6:07 PM

Helo, I'm not that familar with the B-1 but if you need a colour conversion from Humbrol to Gunze you can't beat the IPMS Stockholm's site:

http://www.ipmsstockholm.org/colorcharts/colorcharts.asp

Jmabx- I suppose you could always go aftermarket but that scheme looks awesome. I've been looking at this site for some time but never got around to ordering their decals- still some cool Tornadoes:

http://www.syhartdecal.fr/references.php?lang=ENG&ref=48/72-001&page=description

http://www.syhartdecal.fr/references.php?lang=ENG&ref=48/72-002&page=description

http://www.syhartdecal.fr/references.php?lang=ENG&ref=48/72-003&page=description

http://www.syhartdecal.fr/references.php?lang=ENG&ref=48/72-033&page=description


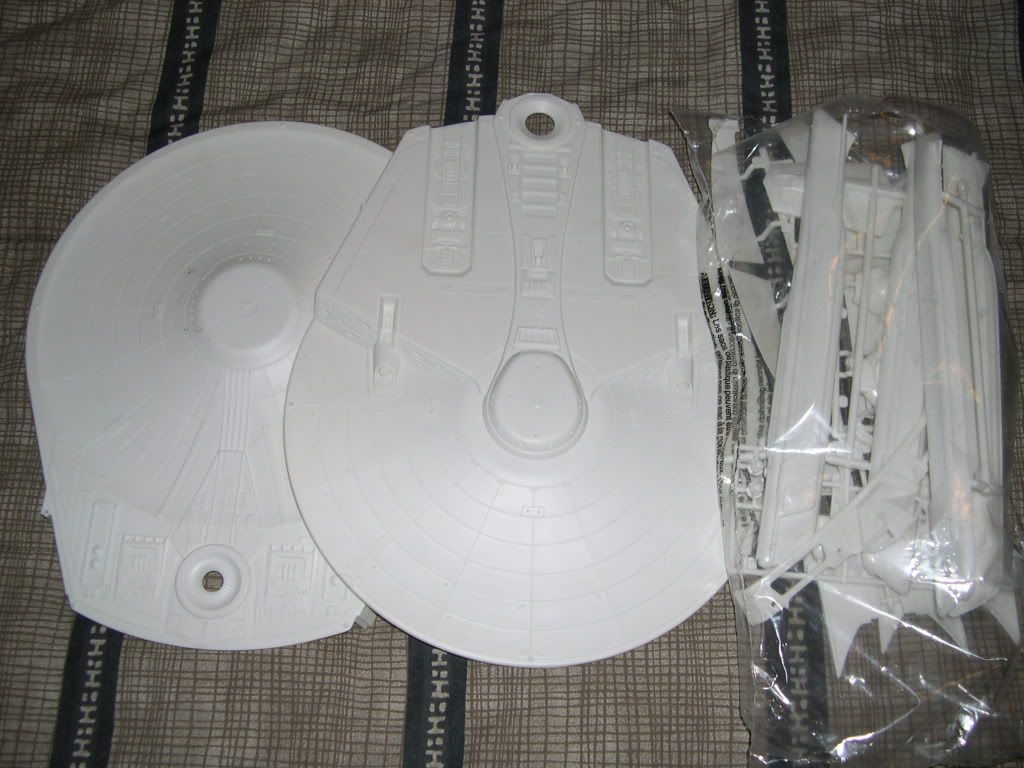
Did some work on the Reliant today but spent most of the time getting out all the stuff and organizing it.

The kit itself:
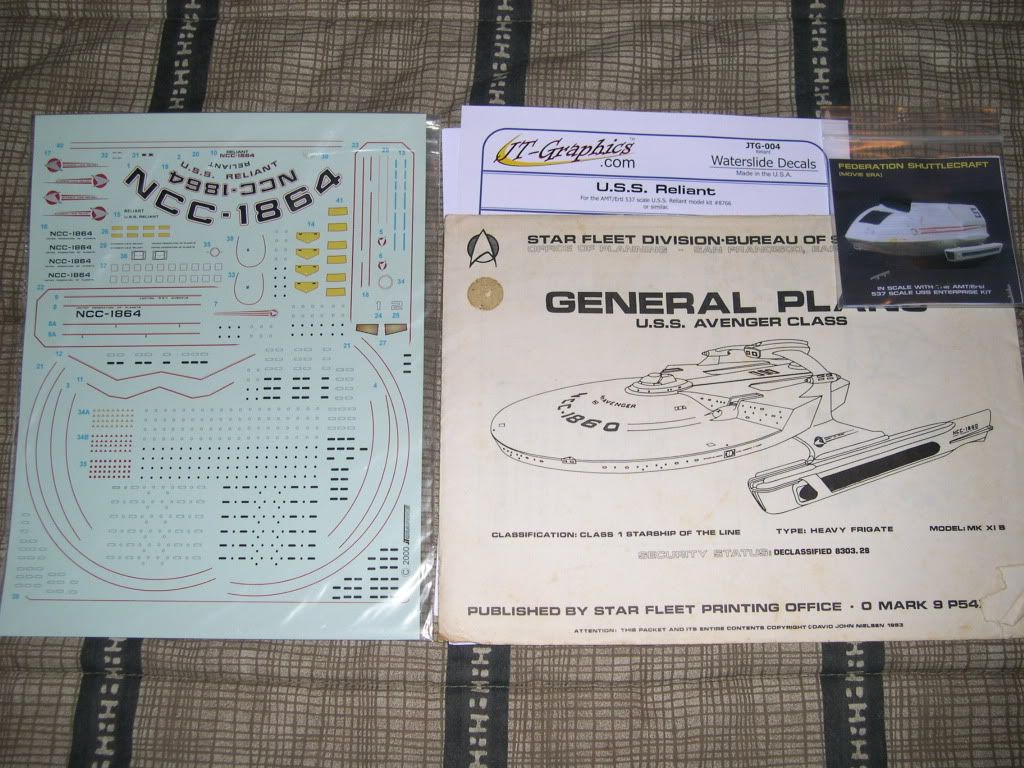
Aftermarket decals, blueprints, and aftermarket shuttlecraft. The blueprints are old enough they list the ship as an Avenger class heavy frigate, the unofficial fan designation, later the official Paramount designation renamed it as Miranda class light cruiser. I like the older name better- oh well...
Fiber optic strands, LEDs, expensive clear parts for the warp engines, and that darn shuttlecraft again:
The picture came out blurry, I guess the camera couldn't decide which object to focus on, but you can see that AMT/Ertl did some very soft molding of the portholes. I think I'm just going to putty the whole thing over and drill new ones using the plans.
 

"I dream in fire but work in clay." -Arthur Machen


  • Member since
    October 2007
  • From: Rhode Island
Posted by jmabx on Friday, January 1, 2010 2:58 PM

Thanks for the link arki... it will come in handy in the future. 

Looks like it is painted silver rather than NMF.  This may end up being more fun than I expected! 

Jeremy    Propeller


  • Member since
    February 2004
  • From: Second City
Posted by arki30 on Friday, January 1, 2010 1:35 PM

Here's a link to that particular finish.  Very cool! 

http://www.milavia.net/specials/50stormo_70yrs/index.htm

Building Now:

1/48 Academy Bf-109G6 - 100%

1/48 Tamiya F4U-1A - 5%

Upcoming:

1/48 Revell F-14D

  • Member since
    October 2007
  • From: Rhode Island
Posted by jmabx on Friday, January 1, 2010 1:29 PM

paul_toz
 I think you'll find that the panther decal option is the only one...if you're unsure maybe we should vote on it? Whistling

Hahaha!!!   Yeah, I'm sure that I bought that kit for one reason only.  It will be built in the Black Panther scheme.  It looks grey and black on the box but the instructions say it's a natural finish... that will make it even more interesting with those giant decals.

Jeremy    Propeller


  • Member since
    October 2004
  • From: Nelson, BC, Canada
Posted by paul_toz on Friday, January 1, 2010 12:37 PM

jmabx

I hope you folks realize that the box art is not the only painting option!  http://farm3.static.flickr.com/2668/4193851430_23f20ca80d_o.gif

jmabx - I have the same kit in my stash so I'm looking forward to your build of this one, I think you'll find that the panther decal option is the only one...if you're unsure maybe we should vote on it? Whistling

JOIN OUR COMMUNITY!

Our community is FREE to join. To participate you must either login or register for an account.

SEARCH FORUMS
FREE NEWSLETTER
By signing up you may also receive reader surveys and occasional special offers. We do not sell, rent or trade our email lists. View our Privacy Policy.