SEARCH FINESCALE.COM

Enter keywords or a search phrase below:

70th Anniversary Battle of Britain GB - 2010

181091 views
819 replies
1 rating 2 rating 3 rating 4 rating 5 rating
  • Member since
    March 2006
Posted by simpilot34 on Sunday, October 3, 2010 5:26 AM

Welcome Signback Andrew!!!! Looking forward to your build!!

Aaron what a lil gem!!!! Awesome finish mate!!!Toast

Cheers, Lt. Cmdr. Richie "To be prepared for war, is one of the most effectual means of preserving the peace."-George Washington
  • Member since
    July 2003
  • From: Bicester, England
Posted by KJ200 on Sunday, October 3, 2010 4:09 PM

Aaron, nice job on the little lizzie.Yes

Check, the Hurris look spot.

Always nice to resurrect old kits.

Steve, the big Dornier looks stunning.

I have actually started on the big Stuka, starting with the undercarriage which needs a few corrections.

As soon as I've got the camera uploading again, I'll post some pics.

Karl

Currently on the bench: AZ Models 1/72 Mig 17PF

  • Member since
    May 2009
  • From: Hobart, Tasmania
Posted by Konigwolf13 on Monday, October 4, 2010 3:35 AM

Well started the build last night got some more build time this afternoon.

The box and sprues. Not the only person on here do this kit

Eric. The pilot. Needs a little more cleaning up paint wise.

Cockpit ready to go together. doing this as a relaxed get back into modeling after a 3-4 month break build, so just OOB.

Fuselage together.

Should get some more bench time tonight I hope.

Andrew

  • Member since
    March 2009
  • From: Wirral. UK
Posted by Spike190 on Monday, October 4, 2010 5:31 AM

Andrew thanks so much for the kind comments about my Spitfire, nice start on your 109 Yes

Aaron well done on the Lysander, you've done a great job.

Checkmate I really like your Hurricanes and I like the pictures on the flags, nice touch.

Steve you've done a beautiful finish on a great looking aircraft, very nice indeed Yes

Cheers everyone...

Mike  Toast


  • Member since
    April 2005
Posted by Thunderbolt379 on Monday, October 4, 2010 9:05 AM

Hi KW13 -- that is a lovely kit that just builds itself! I did that one for BoB '08, in Galland's markings, I believe it was a plane that he flew for about five weeks, around August '40, the red griffon being the standard marking for III/JG26. He returned to a mount with his personalised markings in September, if I have my photos and dates correct.

I'm sure you'll really enjoy that one, I couldn't think of a better kit with which to return to the hobby after a lengthy break. I'm thinking of pulling out another for the Ostfront GB...

Cheers, MIke/TB379

http://worldinminiature.blogspot.com/

  • Member since
    July 2003
  • From: waynesboro va, via Ireland
Posted by sidure on Monday, October 4, 2010 1:56 PM

Aaron,  Really great work on the lysander. I remember that kit and its a little jem. You did a great job on it.

On my front the Do-24 is finished and I am getting ready to do final pics , so hope to have them up today

Steve

  • Member since
    July 2003
  • From: waynesboro va, via Ireland
Posted by sidure on Monday, October 4, 2010 3:01 PM

Well that didnt take long, so as promised here are some final pics. To review, this is a 1/72 ROG Do-24. The kit was actually a surprise to me in that the fit and details are quite nice. No major fir issues thank god as I was worried on how that big wing was going to fit on the supports with no major attachment points. You just drop it onto the fuselage and hope all the struts match which they did. Nice recess detail all over. There is no detail to speak of in the cockpit just seats,figures and the IP that has a decal for details. I used MM enamels throughout and a panel wash of grounded pastels and dishdetergent and pastels for weathering. I chipped it a lot and stained the exhausts etc heavely to try depect a well used machine. Testors Gloss and Flat from the rattle can for the decals and sealing. Finally 6lb fishing line for the aerial wires. Here it is.

The front turret does not have a gun in it as I broke it during painting but the only pics I have of the real thing shows none either so as of yet have not decided to replace it yet. Thanks for looking guys and as usuall I enjoyed the BOB GB. I like to drag up the more unusuall subjects for this one every year. It was a blast and enjoyed seeing all the tremendous work being done in this GB. All comments and critique are welcome

Steve

  • Member since
    July 2003
  • From: Bicester, England
Posted by KJ200 on Monday, October 4, 2010 3:45 PM

Steve, absolutely stunning mate.Yes

That is a great looking Dornier, and the paintwork came out wonderfully.

Here's a couple of pics of the Stuka's undercarriage...

The wheel fairing should be smooth, all the way along, not notched with a flap!

So out with the plastic card..

I've just laminated it up ready for filing to shape, and no doubts a lot of filler.

I'll post some pics of the progress tomorrow night, along with a shot of the changes to the fuselage to turn this kit into a proper B-1, rather than the B-1/2 hybrid that it is.

Karl


Currently on the bench: AZ Models 1/72 Mig 17PF

  • Member since
    April 2005
Posted by Thunderbolt379 on Monday, October 4, 2010 6:35 PM

Steve -- let me be among the first to congratulate you on a truly wonderful model! if I remember correctly, these molds began life in the 1970s with Matchbox -- or is this a ROG retool? Whichever, your painting and finshing skills have brought it to life, evoking a well-used workhorse seaplane of the period. It's a beauty and looks so good I have a good mind to add one to  my own collection in due course!

Big thumbs-up on a terrific build!

Mike/TB379

http://worldinminiature.blogspot.com/

  • Member since
    July 2003
  • From: waynesboro va, via Ireland
Posted by sidure on Monday, October 4, 2010 9:32 PM

Andrew, very nice and fast progress on the Tamy 109

Karl, thanks for the comments mate. Looks like a lot of surgery on the spats. Good luck with the corrections.

Mike, thanks very much for the comments. Not sure about the molds on this one but the interior and some detail do remind me of some Matchbox kits. I bought the kit in London back in 2005 and the instructions have the same year printed on it. Due to the fine panel lines I would say its a new tooling though.

Steve

  • Member since
    March 2009
  • From: Wirral. UK
Posted by Spike190 on Tuesday, October 5, 2010 2:22 AM

Steve well done on an absolute beauty, a fantastic looking aircraft and you've done it proud YesYesYes.

Karl I cant wait to see you work your magic on the Stuka Cool

Cheers...

Mike  Toast


  • Member since
    May 2009
  • From: Hobart, Tasmania
Posted by Konigwolf13 on Tuesday, October 5, 2010 4:33 AM

Steve/Sidure -   I had to go and out this fine machine on youtube, looks very elegent on take off and landing with those oversized wing stubs. Thank for opening my eyes to her  Yes

Andrew

  • Member since
    March 2010
  • From: Brisbane
Posted by Julez72 on Tuesday, October 5, 2010 4:56 AM

Spike190

Steve well done on an absolute beauty, a fantastic looking aircraft and you've done it proud YesYesYes.

Karl I cant wait to see you work your magic on the Stuka Cool

Cheers...

Ditto fantastic build SteveYes

Karl looking forward to seeing some more buddyToast

KW, good to see you posting againYes Nice work on the Emil, well doneYes


  • Member since
    September 2009
  • From: Frisco, TX
Posted by B17Pilot on Tuesday, October 5, 2010 8:32 AM

Spike190

Steve well done on an absolute beauty, a fantastic looking aircraft and you've done it proud YesYesYes.

Ditto love the weathering in her too!


  • Member since
    November 2009
  • From: SW Virginia
Posted by Gamera on Tuesday, October 5, 2010 1:39 PM

Checkmateking: Love the Hurricanes, and they look great displayed on the flag!

Aaron: Can't say enough about the Lysander.

Sidure: She looks even better together than she did as parts. I can see her zipping along the Channel in my mind.

Konigwolf and KJ200: Great work so far, looking forward to seeing the Bf-109 and Ju-87 come together.

Konigwolf: Thanks but after I finished the bloody thing then I find out the wheel wells shouldn't have been painted RAF interior green! Oh well, I'm not going back to repaint her Embarrassed

"I dream in fire but work in clay." -Arthur Machen


  • Member since
    April 2013
Posted by nomad68 on Tuesday, October 5, 2010 8:09 PM

Steve Wow! you did such a good job on the Do24. I enjoyed watching you put it together Yes

Damon

  • Member since
    June 2008
Posted by lewbud on Thursday, October 7, 2010 12:42 AM

Here's a couple of pics of my Me 109E-3. The kit is the 1/72 ICM Bf 109E-3.  A quick review of the kit.  The kit comes on a single tree, not all parts are used, as some are for the E-4 variant.  From what I've read, this kit scales out the fuselage length correctly where the Tamiya kit was a little on the short side.  From what I've read, the Tamiya parts will interchange almost perfectly with the ICM which leads me to believe that ICM based their tooling on the Tamiya (some friends say they outright copied it, I don't know).  On to the build.  Beware of flash, it's on every part and fairly heavy on some.  If you're not experienced with flash, you will be by the end of construction.  However, once the parts are CAREFULLY cleaned up, they fit like a dream.  I started with the wings first.  Normally I start with the leading edge and work my way back, but in test fitting I found the best results by working from the back to the front.  Do it right and there will only be some light cleanup on the leading edge.  The cockpit consists of a rear bulkhead,which glues to the floor and a firewall which does the same.  A basic seat bucket is provided along with a stick and instrument panel.  A word of warning, there are no locating pins, so I used the pit to locate the fuselage halves.  I did this by gluing it to the right fuselage half, then gluing the left half on after.  Doing it this way allowed me to get a more positive attachment, but the pit sits a little cockeyed.  A note about the pit, the rear bulkhead is a little on the narrow side while the firewall is a little wide and caused some problems getting the fuselage halves together.  Some careful sanding fixed this.  Perhaps the biggest bugaboo with aircraft kits is the wing to fuselage fit.  If you're careful, you'll end up with a perfect fit.  After I sanded the firewall and cockpit floor down and glued the fuselage together, I placed the fuselage on the wings and thought I had some major sanding to do but with a little squeeze the fuselage dropped in like it was supposed to, resulting in a Tamiya like fit.  I did some careful sanding of the cowling and some gentle pressure, was rewarded with a Tamiya like fit as well.  Outside of the cockpit, the only other problem I've encountered was aligning the horizontal stabilizers.  I took a little too much off the starboard strut and so it has a noticeable droop.  On to the pics-sorry I didn't take many at the beginning.

[View:/themes/fsm/utility/Photobucket:550:0]

 [View:/themes/fsm/utility/Photobucket:550:0]

 For inspiration.  These were taken at the Cavanaugh Flight Museum in Addison Tx.  Both were used in the filming of the The Battle of Britain.

Both are supposedly flightworthy, but I have yet to see them fly.

Buddy- Those who say there are no stupid questions have never worked in customer service.

gzt
  • Member since
    May 2007
  • From: Massachusetts
Posted by gzt on Thursday, October 7, 2010 10:53 AM

My RFoF is still in the box (working on the cockpit), however I am finishing this one in the meantime ...

1/48 Hasegawa


Flying is a thrill #2 known to mankind. Landing is #1.

http://www.rwd-6.org

  • Member since
    July 2003
  • From: Bicester, England
Posted by KJ200 on Thursday, October 7, 2010 4:09 PM

Lewbud, having built Tamiya's 1/72 Emil, I bet the ICM knock off goes together beautifully.

GZT, looking great.

What scale is that, 1/48?

Have made some headway on the big Stuka.

These shots show the mods to the engine and exhaust cowling necessary to back date this kit to a proper B-1.

The new exhaust ports were punched out of a thin sheet of plastic card, and then filed to shape, with the card added as an overlay to the existing cowling side then filled and sanded to reduce the step.

The shiny disc is a punched disc of foil added to represent the small access hatch in this position.

The two vents, one in front, and one to the rear of the exhaust stacks started out as the ends of the drop tanks from an old Monogram F-106.

I simply drew around them, then drilled out, and glued in, with a bit of filler.

Now I just need to do it all again on the starboard side!

Last time I posted pics of the undercarriage spats they were looking very rough, well they still look rough, but are at least the right shape.

Just some tidying up to do around the Jericho trumpet mount, and a few coats of Mr Surfacer.

As this kit was originally designed to be also sold as a pre-assembled model, it has screw together wings and fuselage, hence the discs in the pic below to plug the screw holes.

These really don't fit at all well, so a bit of filler was required.

You can also see the stubs of the mounts for the flaps & ailerons. I simply cut these lovely lumps of plastic off the flaps themselves and glued them in to plug the large mounting points.

When they are sorted I will drill out mounts and make new flap hangers from wire.

Karl

Currently on the bench: AZ Models 1/72 Mig 17PF

  • Member since
    November 2005
Posted by Dermo on Thursday, October 7, 2010 4:54 PM

Aaron – great work on the Lysander

Steve – that Dornier is super

Andrew – nice start to the 109

Karl – the big Stooka looking good

Check – like the Hurri pair

Lewbud - sharp stuff

GZT - off to a flyer

Slow progress on the Airfix Battle of Britain duo - the Spitfire just needs a flat coat and some odds and it's done. When I look at it, I think I went all "Hollywood" on the weathering - you learn with every build I guess..

[View:/themes/fsm/utility/Airfix Spitfire Mk1 L Front:550:0]


[View:/themes/fsm/utility/Airfix Spitfire Mk1 R close:550:0]

The 109 is almost there too. Weathering will be far more restrained on this one.

[View:/themes/fsm/utility/Airfix Bf 109 Right front:550:0]

 [View:/themes/fsm/utility/Airfix Bf109 Left front:550:0]

Thanks for looking and keep up the great work - I learn a lot from everyone here.

Dermot


  • Member since
    September 2003
  • From: AandF in the Badger State
Posted by checkmateking02 on Thursday, October 7, 2010 11:50 PM

Dermot:  your planes are looking great.  I especially like the Airfix Spitfire since that's the final item I'm doing for the build.  I think the weathering looks good; I don't have the skills, so I admire someone who does.  My weathering efforts in the past have nearly turned disastrous, so I don't attempt it any more.  Good show.

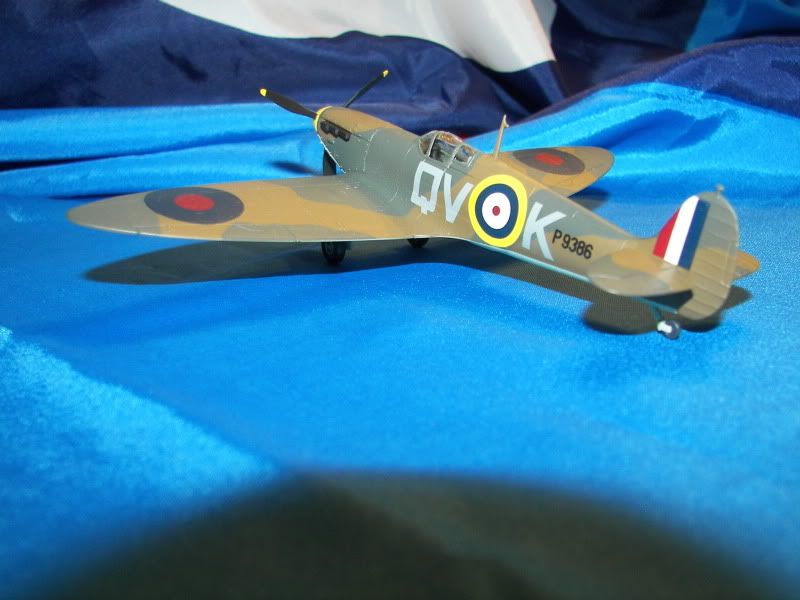
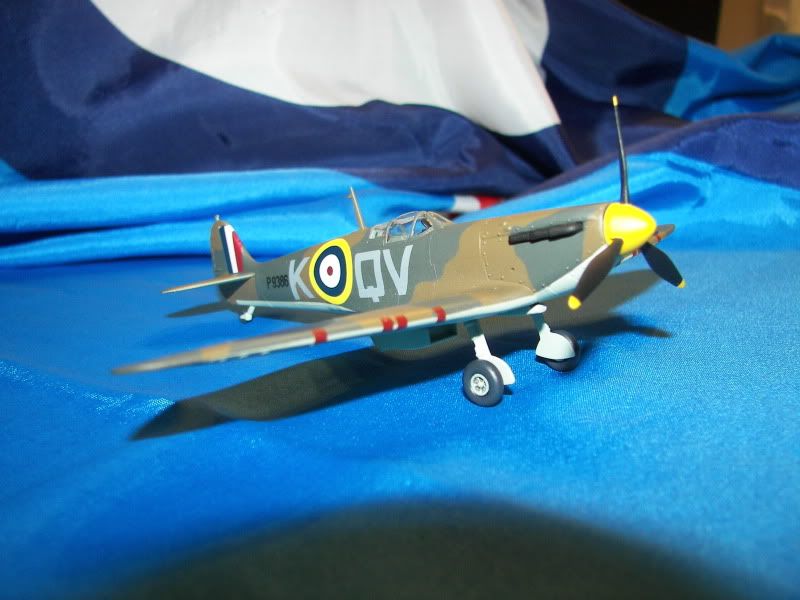
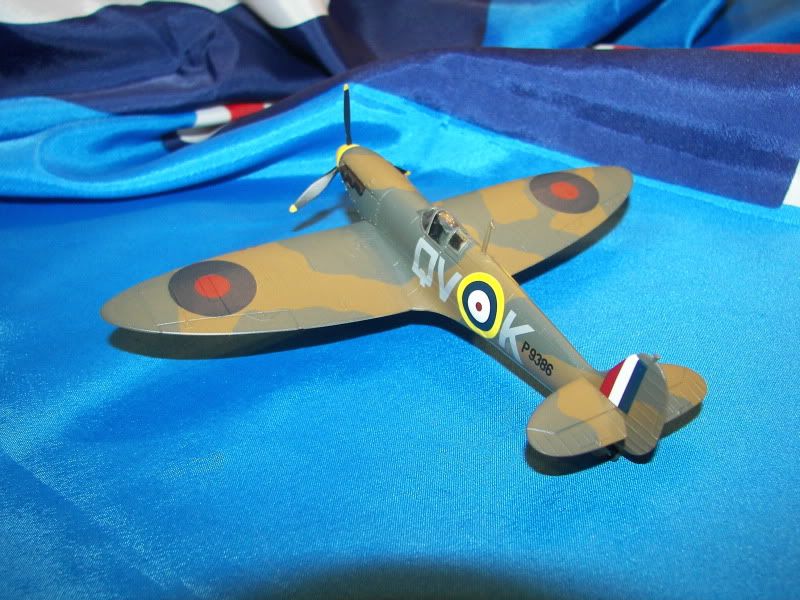
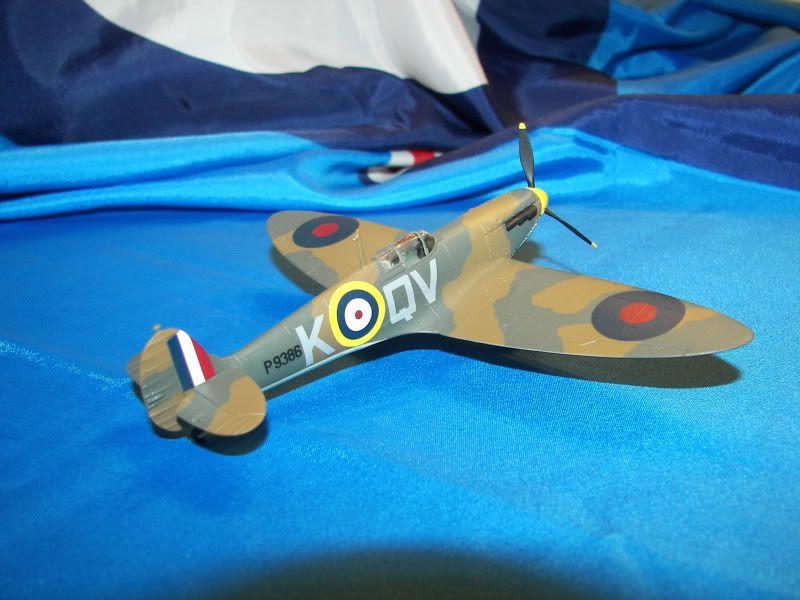
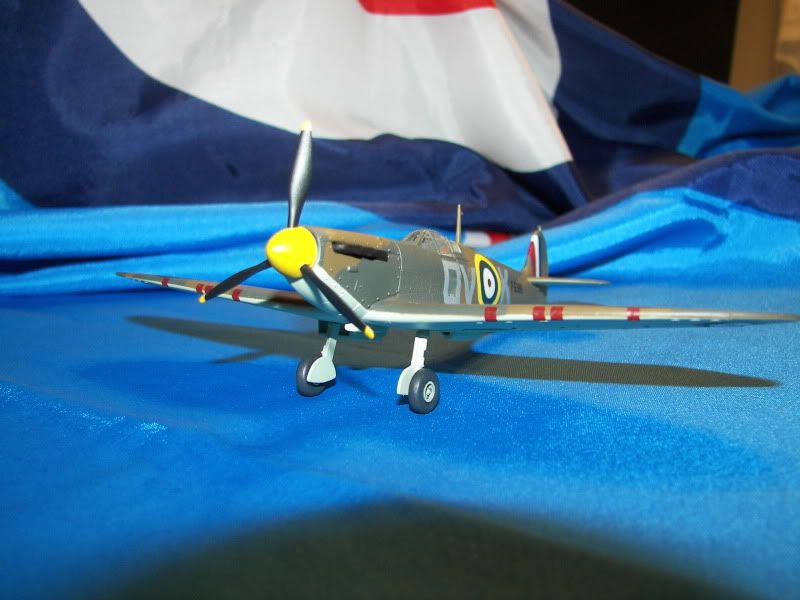
Here, then, also is my finished Spitfire, the Airfix 1/72 version.  The markings are taken from an older sheet by Mini Print Decal (MPD) in the Czech Republic.  They went on very well.  I used Floquil's RR Flat as an undercoat, which produces a very smooth waxy finish, and decals go on very well.

The pilot is listed as Sgt. Stanislav Plzak, dated "zari 1940," but I don't know what that means.  Plzak served with 19 Squadron from 27 August 1940 until 8 August 1941, when he was lost over the Channel.  He attained 7 victories.

[View:/themes/fsm/utility/:550:0]
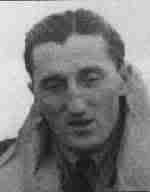
 

However, the same aircraft also seems to have been used by S/Ldr Brian John Edward "Sandy" Lane.  Under the pseudonym "B.J. Ellan," he wrote a memoir titled Spitfire!  Lane achieved 6 victories and was lost over the North Sea in December 1942.

[View:/themes/fsm/utility/:550:0]
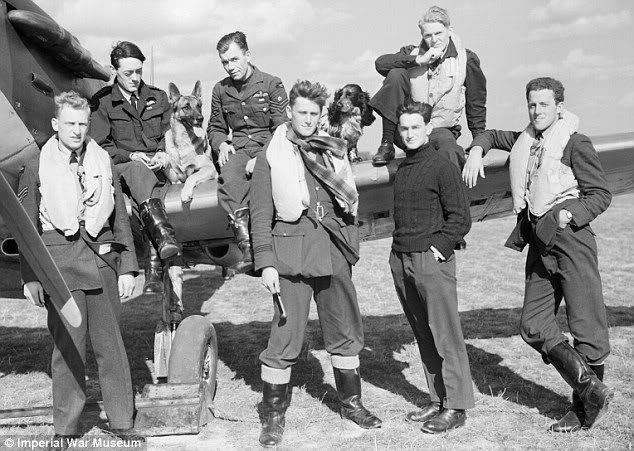
 

In the photo above, S/Ldr Lane is seated left; then Sgt. George "Grumpy" Unwin's dog, and next is Unwin himself.

I suppose both Lane and Plzak flew the plane at one time or another.  The interesting point is the yellow spinner.

[View:/themes/fsm/utility/:550:0]
[View:/themes/fsm/utility/:550:0]

[View:/themes/fsm/utility/:550:0]

  [View:/themes/fsm/utility/:550:0]

 [View:/themes/fsm/utility/:550:0]

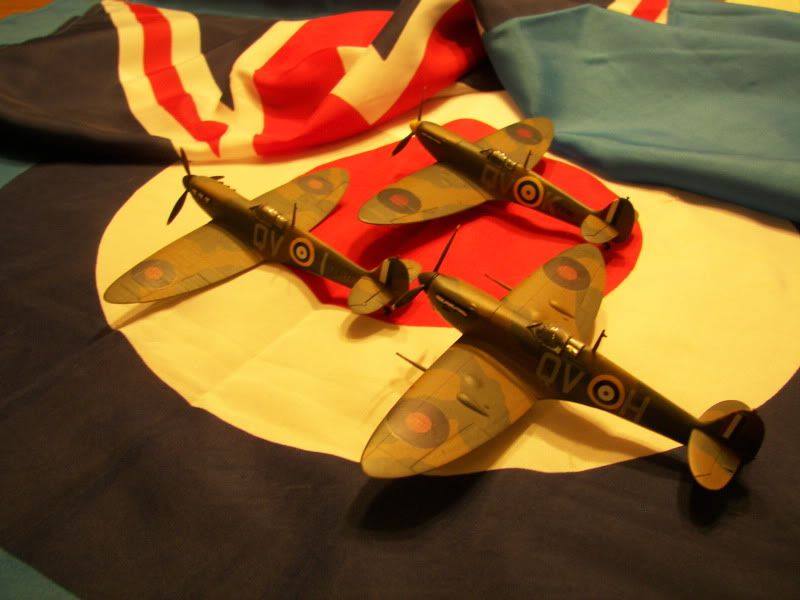
 Finally, I built a couple of 19 Squadron Spitfires about four years ago.  Below, QV-H is George Unwin's cannon-armed plane (cobbled together from an Airfix Mk I and Mk V), and QV-I (pilot unknown, from a photo; the kit is the old Heller production), along with QV-K.  Thanks to my daughter for letting me use her camera, which does better than the one I used for photographing the Hurricanes.  I appreciate it, Ashley!  Aloha nui loa!

[View:/themes/fsm/utility/:550:0]
This was the first group build I've participated it, and I've very much enjoyed looking at all the efforts of all the builders.  Everyone who's posted has accomplished some outstanding results--and it may even motivate me to try weathering again.  Thanks.


  • Member since
    May 2009
  • From: Hobart, Tasmania
Posted by Konigwolf13 on Friday, October 8, 2010 8:50 AM

Update time..

KJ200 - That thing looks like its gonna be HUGE

Dermo - To much weathering? Those planes were flying alot of hours, combat daily or more and only basic maintinance, they did age from use if nothing else.

checkmateking, some nice crisp spitfires and wonderful info/research Yes

As for myself? a bit of frustration, but otherwise fine if slow sailing

Wings on, canopy masked.

Now the frustration, got the main colours on but lost some paint on the un-masking gonna need some touch ups :(

All colours are right according to the IMPSStockholm Colour charts but I think the grey/green on the wings should of been a little greener. I dont really mind anyways as I'm gonna add field mods to this bird anyways paint wise of a yellow nose, so whose to say the RLM 02 paint mix wasnt off as well.

Andrew

gzt
  • Member since
    May 2007
  • From: Massachusetts
Posted by gzt on Friday, October 8, 2010 9:02 AM

Andrew,

What paint did you use?


Flying is a thrill #2 known to mankind. Landing is #1.

http://www.rwd-6.org

  • Member since
    May 2009
  • From: Hobart, Tasmania
Posted by Konigwolf13 on Friday, October 8, 2010 9:56 AM

Tamiya acrylics. I had same problem twice before (Academy 1/100 F-15 and Tamiya 1/48 Panther tank), both using either Tamiya and/or Gunze Sangyo acrylics. All three have VERY smooth surfaces, so that maybe the issue.

I might start undercoating now a standard thing. I stripped the F-15, undercoated (humbrol enamel undercoat) and that fixed the problem, the Panther hasnt been touched again yet.

As for this build, I might just patch it and give it a coat of future see if that helps. Not really interested in to much stress as I wanted this to be an easy build to get back into modeling after illness.

Andrew

gzt
  • Member since
    May 2007
  • From: Massachusetts
Posted by gzt on Friday, October 8, 2010 1:20 PM

Andrew,

I used MM enamels for this one. I think both colors are pretty close.I used a WB based on 18% gray (if this is what it is :) )to make sure colors are represented correctly.

Flying is a thrill #2 known to mankind. Landing is #1.

http://www.rwd-6.org

  • Member since
    May 2009
  • From: Hobart, Tasmania
Posted by Konigwolf13 on Saturday, October 9, 2010 7:13 PM

Well update...

I tried to touch up with brush but thing didn't meld very well (enough for me) so ...

back to here

I used methylated spirits and paint brush to paint of the paints then a baby wipe dipped in same to bring up a clean finish.

Next the primer

Andrew


gzt
  • Member since
    May 2007
  • From: Massachusetts
Posted by gzt on Saturday, October 9, 2010 7:39 PM

OUCH !! Indifferent

Flying is a thrill #2 known to mankind. Landing is #1.

http://www.rwd-6.org

  • Member since
    May 2009
  • From: Hobart, Tasmania
Posted by Konigwolf13 on Sunday, October 10, 2010 9:48 AM

Well productive day paint wise, I think it looks better (using the tamiya  colour codes/mix's instead of the IPMS Stockholm pages info.

oh well signing off today :) . Hope to get more done soon

Andrew

  • Member since
    July 2003
  • From: waynesboro va, via Ireland
Posted by sidure on Sunday, October 10, 2010 12:01 PM

Andrew, hate that that happened to you but it looks like you have it back on track, and fast too. Looks good.

gzt, thats a great looking 109 it came out terriffic, I have to build mine some day.

Great job by all im enjoying all these wonderful builds

Steve

  • Member since
    June 2008
Posted by lewbud on Monday, October 11, 2010 12:40 AM

Karl, thanks.  She goes together pretty good as long as you're careful.  Looking forward to seeing more of your conversion.

Dermot, thanks.  I remember reading in the IPMS rag an article on British camo schemes.  The author quoted a crewman that when asked if the model was correct, he said it was TOO clean.  Those planes got so dirty that sometimes all they had time to do was wipe off the roundels and aircraft number with a kerosene soaked rag.

Filled the seam on the top of the rear fuselage (got a little careless removing flash) and the underside where the wing and fuselage come together.  Other than that not much progress.  The Ju-88 has been started, will post pics later.


Buddy- Those who say there are no stupid questions have never worked in customer service.

JOIN OUR COMMUNITY!

Our community is FREE to join. To participate you must either login or register for an account.

SEARCH FORUMS
FREE NEWSLETTER
By signing up you may also receive reader surveys and occasional special offers. We do not sell, rent or trade our email lists. View our Privacy Policy.