SEARCH FINESCALE.COM

Enter keywords or a search phrase below:

The OFFICIAL Panzer III and Its Variants GB

298259 views
2308 replies
1 rating 2 rating 3 rating 4 rating 5 rating
  • Member since
    March 2006
  • From: Right Side of a Left State
Posted by Shellback on Monday, August 8, 2011 8:10 PM

Greg , looks great . This is going to be interesting when you add the rest of the details .

  • Member since
    March 2006
  • From: Right Side of a Left State
Posted by Shellback on Monday, August 8, 2011 8:12 PM

Rob , the detail and weathering on the radio and gun are sweet !

  • Member since
    March 2006
  • From: Right Side of a Left State
Posted by Shellback on Monday, August 8, 2011 9:26 PM

UPDATE ........................

The turret skirts were a bit tricky to get alligned . I got them mounted late one night but the next night they looked like heck so i took them off and re mounted them . So here are the results .

I left the center panels off for now . Might put a figure  in the side hatch openings .

Dang , the turret panels cover up my smoke grenade launchers wiring !

The panel brackets/frames had no location marks on the turret .

I put some weld marks in the seam .

  • Member since
    October 2009
Posted by PANZERWAFFE on Monday, August 8, 2011 10:17 PM

CARL - That looks pretty dang good. Yes  No alignment marks, you got the brackets on straight and look to be in the correct places, armor fits around the turret nicely!  One thing you could do if you had not already thought of it and you were up to it,  some had a screen mesh on the rear section, between the rear stowage bin - armor-turret, to make a floor in that area for stowage.

If you put a figure are you going to open the side turret hatch also?

Rob

  • Member since
    May 2011
  • From: Bedford, Indiana
Posted by AceHawkDriver on Monday, August 8, 2011 10:27 PM

guys:  everyone's builds are looking awesome!  the only problem I see so far is that it's making me want to spend more money on Panzer III's!

just a quick update here.  I spent the weekend working on cleaning up the tracks.  it was a chore, but they're done. 

i have also been working on the coupola from the voyager set.  it's almost completely done, minus masking the blocks and a few bolt heads to put into place.  Is there a cure for seeing photoetch everytime I close my eyes to go to sleep?

a couple pics of the coupola.  sorry for the out of focus shots but hopefully it's clear enough to see:

in all, there are 68 parts to the coupola itself.  i used a mixture of kit and voyager parts, due to ease of use and losing a couple piecesEmbarrassed

Comments and criticisms are always welcome!

Peace through superior firepower.

Brian


  • Member since
    October 2009
Posted by PANZERWAFFE on Monday, August 8, 2011 10:42 PM

How could anyone say anything but awesome.  The only thing I can think of for your sleeping problem is Beer and lots of it!

Rob

  • Member since
    October 2009
Posted by PANZERWAFFE on Monday, August 8, 2011 10:45 PM

This will be another interior part.  It will be the floor ammo rack that goes on the right side of the Sturm

Still some work to go on it but everyone should get the idea.

Rob

  • Member since
    April 2009
  • From: Carmel, IN
Posted by deafpanzer on Monday, August 8, 2011 11:18 PM

Rob- I am really digging your office. Yes  I think you would make a great interior decorator for any Panzers!  Hope you will be able to use the scratch built pipe because it really looks great.  Nice racks too!  Wait a minute... don't get the wrong idea! Wink

Not to worry about Bill... we have been communicating in most secretive way for a while that he will join us whenever he is ready.   Now I have the information and he has made a formal announcement that he is joining us officially.  Wait until he tells you what he will be building...

I will update the roster with pleasure when I have the chance.  Big Smile  Well, I am still drinking those Canadian Beer...

Doogs- I brought the same AM barrel for $7.  I think it was from Great Models.  I don't think I will ever be able to build kits without those aluminum barrels. Tongue Tied

Carl- Nice touch on handle bars and weld seams! Yes  Judges and serious modelers will be able to see the wirings behind the launchers.  Looking forward to your next update!

Brian- Holy cow... it is a great looking cupola!  More PE... 68 parts just for cupola?!?!?  Do you really want to know the cure for this?  Just drink a Canadian Beer or two.  It always worked for me...


Andy

  • Member since
    March 2003
  • From: Rain USA, Vancouver WA
Posted by tigerman on Monday, August 8, 2011 11:36 PM

Brian, you're a glutton for punishment on that cupola. Looks great.

Everyone is doing very inspiring building. Great thread, great subject.

   http://i7.photobucket.com/albums/y269/wing_nut_5o/PANZERJAGERGB.jpg

 Eric 

  • Member since
    March 2006
  • From: Right Side of a Left State
Posted by Shellback on Monday, August 8, 2011 11:51 PM

PANZERWAFFE

CARL - That looks pretty dang good. Yes  No alignment marks, you got the brackets on straight and look to be in the correct places, armor fits around the turret nicely!  One thing you could do if you had not already thought of it and you were up to it,  some had a screen mesh on the rear section, between the rear stowage bin - armor-turret, to make a floor in that area for stowage.

If you put a figure are you going to open the side turret hatch also?

Rob ,much appreciated . I hadnt thought about a wire mesh floor .....didnt know about it either .Sounds like a good idea . If you have a pic of it and post it i'll see what i can build . I had thought of having a crew member sitting in the open hatch but now that i just looked at the kit door it is a one piece part instead of two parts . Guess i could cut it into two parts .......................Hmm

Beautiful scratch building on the ammo rack ! Beer

  • Member since
    March 2006
  • From: Right Side of a Left State
Posted by Shellback on Monday, August 8, 2011 11:56 PM

Brian the coupola is a beaut ! Beer

  • Member since
    May 2011
  • From: Bedford, Indiana
Posted by AceHawkDriver on Tuesday, August 9, 2011 11:09 AM

Rob:  thanks!  am really enjoying watching your interior come together.  you just reminded me that i didn't wire anything on the radios!  now to figure out how to do that with the interior installed . . . . .

Carl:  thanks!  your attention to detail i.e. the weld seam and the smoke canisters is paying off. 

Andy:  thanks for the comments!  i'm in need of a Beer after having spent about six hours looking through my optivisors.  i may have to have an eye exam after this GB is over.

Tigerman:  i'm starting to believe that I am a glutton for punishment.  i think by the time i'm done with this thing it'll have twice the amount of parts as the actual kit. 

some cleanup will need to be done on the hatch.  i damaged one of the parts, hard to see in the pictures but it's there, and will have to try and work with it.  i'll probably finish it up tonight and find my next target.

Peace through superior firepower.

Brian


  • Member since
    February 2003
  • From: Allentown, PA
Posted by BaBill212 on Tuesday, August 9, 2011 1:16 PM

Gentlemen,,,  great great work. I would not know where to begin on praise,, excellence,, all the way round!


So I've been contemplating jumping into the GB...  with a bit of trepidation I figured what the heck.   I was going to build this as a quicky-decompress sort of project. I had just finished a, same scale, Schwimmwagen to go along with the Pz III.

(I'll post some pics of the Schwimmwagen when I get a chance....)


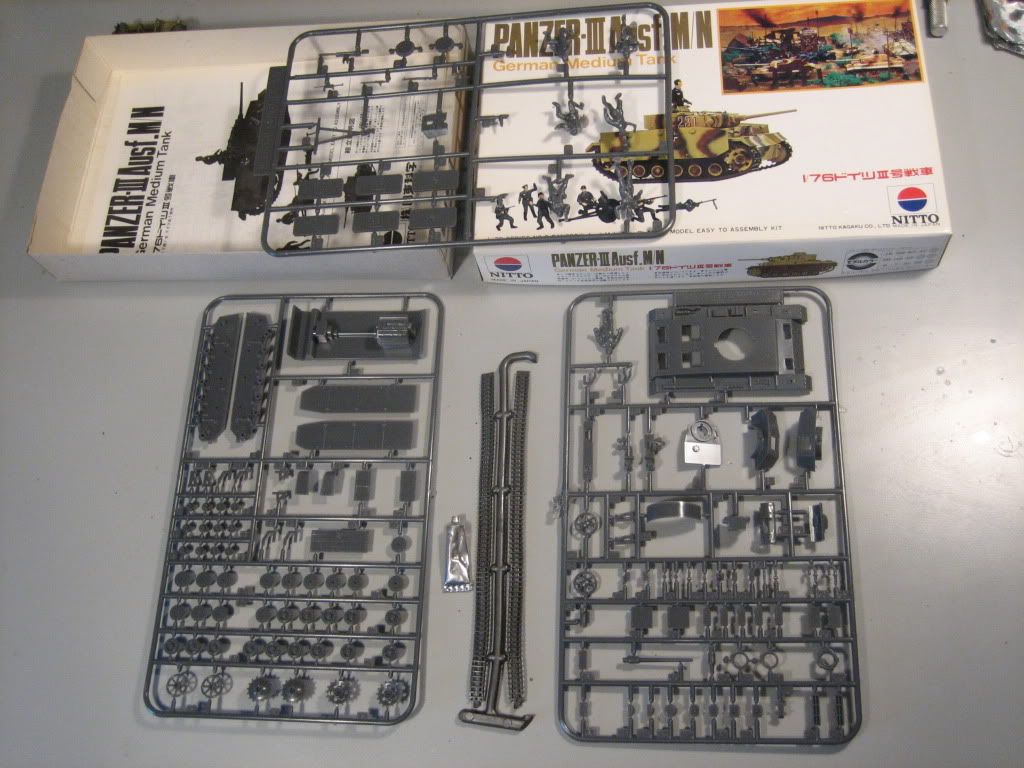
So, without further adieu,,,,    A Nitto 1/76 scale Pz III Ausf. M (kit option offered M or N)

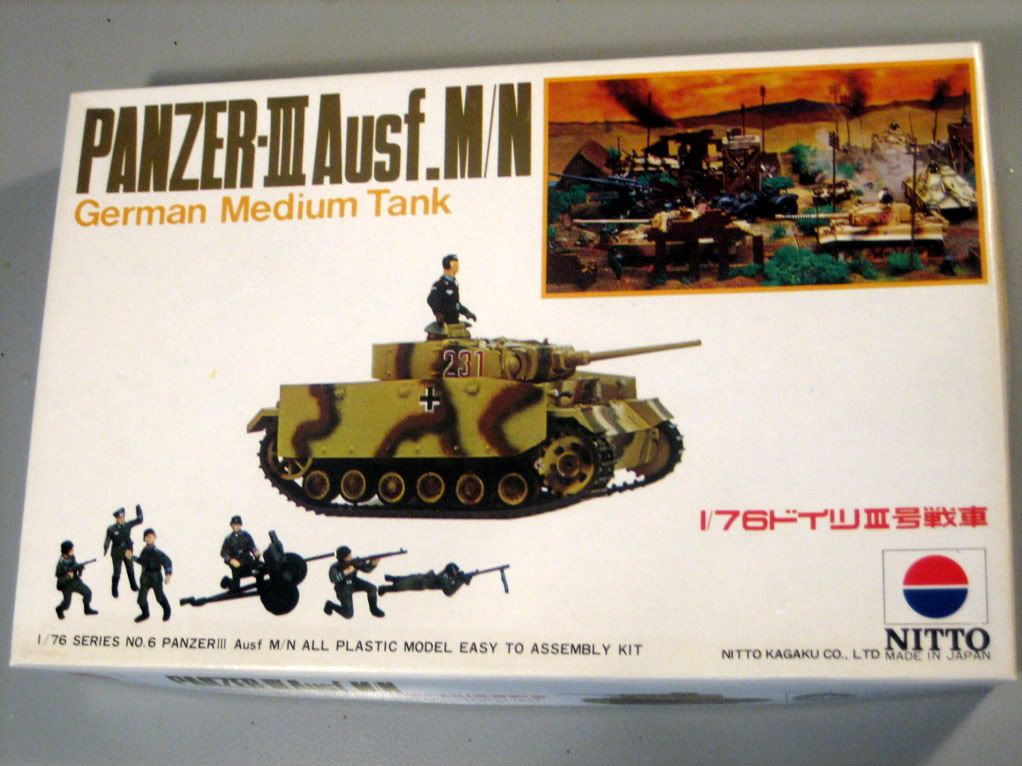
Some wonderful box art,,,  it just screams "Buy me,, Build me"   (oye ve)


Not only do you get the Pz III, but you get a few figures and a 37mm anti tank gun!     And GLUE too!


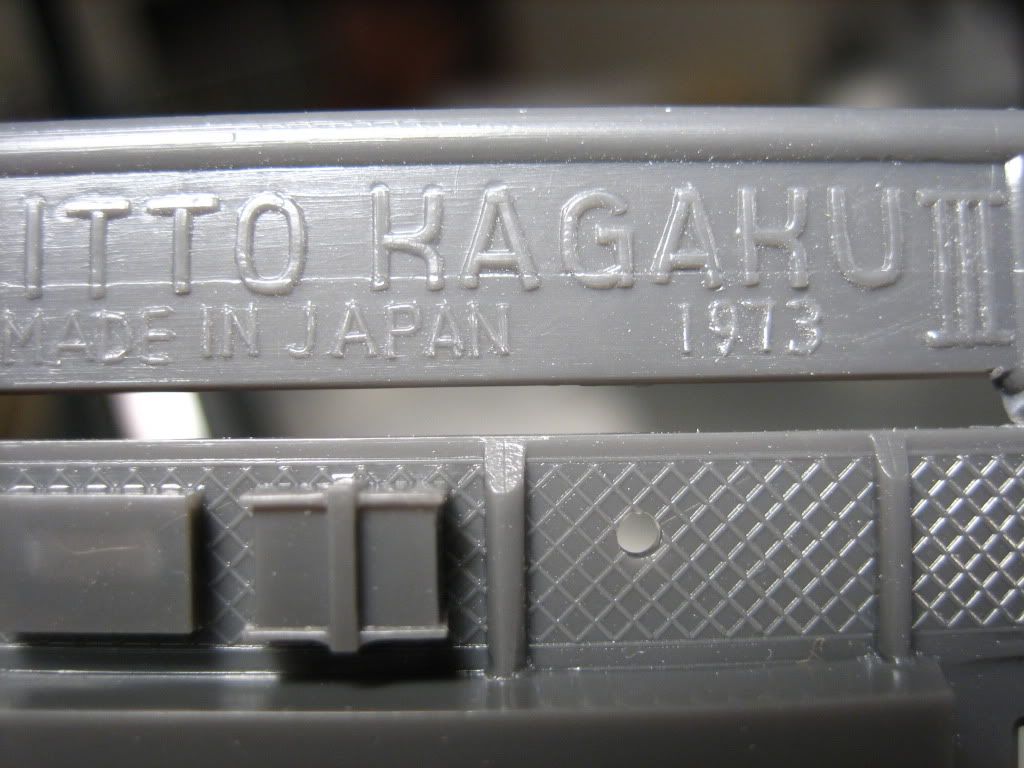
As you see in the next photo, this little,, umm,,  peach was produced in 1973.


All this for the low low price of -

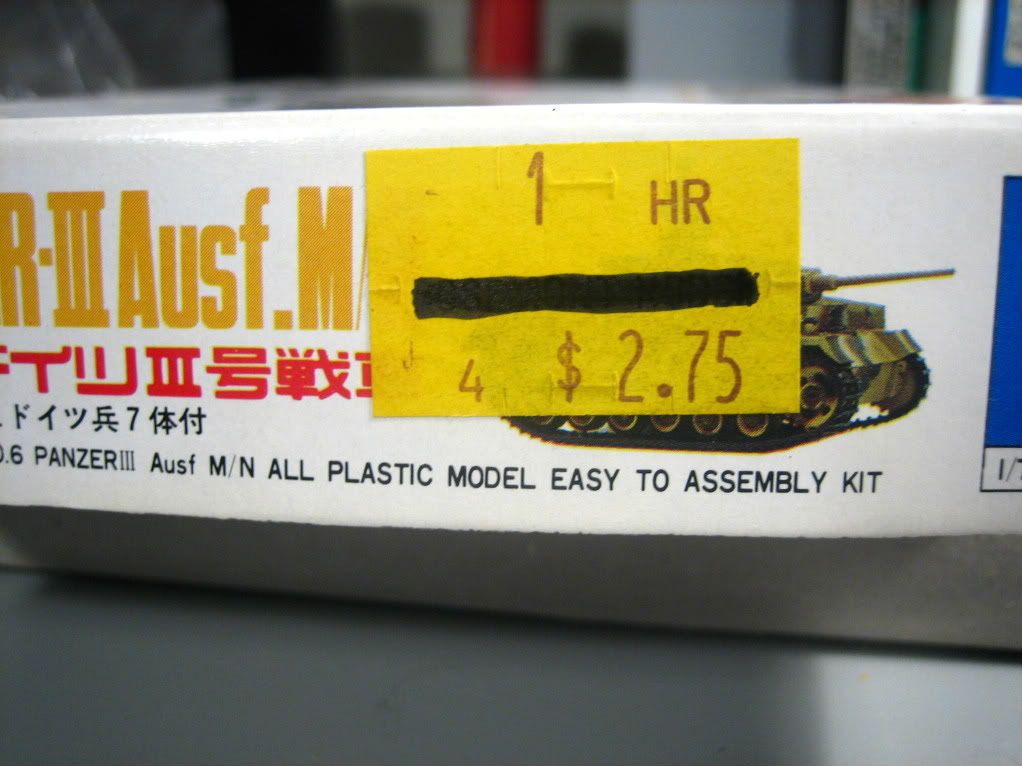
Whew,,, so there it is...     (giving time for the laughter to die down.....)


In all seriousness I will attempt to produce a Pz III M. Originally I was going to go straight OOB.... But, in joining the GB I'll add some extra, redeeming, parts here and there. Knowing there are zero after market accessories, any tidbit added will have to be scratchbuilt. My optometrist is going to be on-call until I finish the build.

While this kit will never stand any true accuracy test, I'm going to go for a nice build, paint job and a scene or diorama.


Thanks Guys........

Bill


PS - - Thanks Andy for giving me a kick in the butt to enter this into the GB


Enjoy the ride!


  • Member since
    March 2006
  • From: Right Side of a Left State
Posted by Shellback on Tuesday, August 9, 2011 4:42 PM

Bill , $2.75 !!!!! WOW ! Thatsan old kit alright !Yes

  • Member since
    March 2003
  • From: Rain USA, Vancouver WA
Posted by tigerman on Tuesday, August 9, 2011 5:11 PM

Wow, Bill going with the braille III. Indifferent

$2.75 back in 73. I think I bought my first Tamiya kit (Pak 40) in 1975 for $3.99. I remember complaining to the clerk about the price. She wasn't happy. Back then, Monogram 1/32 was very close in price, so I'm not sure why I got all bent out of shape. LOL

   http://i7.photobucket.com/albums/y269/wing_nut_5o/PANZERJAGERGB.jpg

 Eric 

  • Member since
    April 2009
  • From: Carmel, IN
Posted by deafpanzer on Tuesday, August 9, 2011 5:45 PM

BaBill212-  Oh no you have fallen into another GB trap.  Now you are going to be stuck with us for a long time. Kidding!  This is going to be fun to follow your work...

I was only three years old when it came out... scary!  I have added you to the roster few minutes ago by the way.

Andy

  • Member since
    August 2006
  • From: Cygnus X-1
Posted by ogrejohn on Tuesday, August 9, 2011 5:52 PM

There sure are a lot of really great looking builds going on here! I'll be getting started on my Sturm in a few weeks.

  • Member since
    January 2011
  • From: The Great North Woods, Maine
Posted by Chazzer on Tuesday, August 9, 2011 5:56 PM

Un-be-effin be-lievable!! I say that in the most positive way! The builds that are being put out are  some of the best that I have seen. I am truley humbeled to be a part of this group build.There are so many (if not all) names to be mentioned that I will just say to all my brothers in armor, that your building, attention to detail, and painting is absolutly inspiring!!! 

That being said, I haven't had much time in my man cave due to work and , it seems, endless Doctor visits. However, I have had time to start my Stug III B. I took some pictures and here they are.

Chapter six of one of my books is the name of our build:

The beginning and the santuary:

An overview of my progress:

The start of the hull with the tensioning springs. I still need to add lots of detail since I plan to try to detail as much as posible including drilling out the rest of the rack for the potatoe mashers, move the radios from the attatched areas under the top hull to the wall so they can be seen with the upper hull off etc. It will be very slow going but we have a whole year! Maybe enough time for another? Any way the lower hull:

I scuffed up the tires or rollers to show wear and also dug out and sliced up the rollers to show a bit more wear to the rubber. They still need paint and weathering:

Here is the kit supplied aluminium barrel and a somewhat blurred view of the rifleing:

The AM stuff:

Last is a shameless kiss ass plug for FSM:


Time for an office meeting

Comments are very welcome


ChazzerBlack Eye

  • Member since
    March 2006
  • From: Right Side of a Left State
Posted by Shellback on Tuesday, August 9, 2011 6:22 PM

Hey Chaz , i was just thinking i hadnt seen you around here in a few . Good to see your progress pics . That sure looks nice n cozy in your man cave what with the bed nice n handy !!!! What no glue and smears on your work matt ? Yes

  • Member since
    March 2003
  • From: Rain USA, Vancouver WA
Posted by tigerman on Tuesday, August 9, 2011 6:41 PM

What a great place for the bench: right next to the bed. Geez, all you need is a mini-fridge and you'd never leave. 

   http://i7.photobucket.com/albums/y269/wing_nut_5o/PANZERJAGERGB.jpg

 Eric 

  • Member since
    February 2003
  • From: Allentown, PA
Posted by BaBill212 on Tuesday, August 9, 2011 8:16 PM

Thanks for the welcome guys,,,     the kit comparison (mine and yours) is totally night and day!        I am absolutely going to absorb all you are doing and try to incorporate what I can into this Nitto kit. You are all putting out some fantastic work.

Carl,,,  indeed, this is an old old kit. I've built a few in the past and as I remember they have a decent fit.

Eric,,, yelling at the clerk, eh?,,,,   hope she didn't ban you from the shop.

Andy,,, the GB trap!?,,,       I sure hope I survive!


And good to see you Chaz, and everyone else that I have had the pleasure of "meeting" in the past...     and I'm very glad to meet all of you that I have not met before.


Enjoy the ride!


  • Member since
    February 2003
  • From: Allentown, PA
Posted by BaBill212 on Tuesday, August 9, 2011 9:05 PM

Chaz,,,  I also noticed the old Singer sewing machine. My Grandmother had one that looked very similar. Is that the pedal / pump type?

Enjoy the ride!


  • Member since
    April 2009
  • From: Carmel, IN
Posted by deafpanzer on Tuesday, August 9, 2011 9:25 PM

John- Looking forward to see your Sturm here when you are ready.  It is a good thing you are only an hour and half drive so I can personally inspect your build when it is completed. Big Smile

Chazzer- Welcome back Chaazzzzeeerrr!  It sounds like you are doing all right now after that nasty snake bites?  I dig your man cave!  Mine was just like that when I first returned to the hobby few years ago except it was in the family room.  Of course It drove my wife crazy for nearly a year before I finally relocated into the basement. 

Trust me you are going to enjoy this Tamiya kit.  I built it last year.  I am not sure if I ever sent you a link to my WIP.  Just let me know if you are interested.  Most important thing... don't attach the periscope until you are almost done because mine snapped off twice... to fragile.   Have fun!!!

Eric- Mini- fridge stocked with Canadian Beer of course!

Andy

  • Member since
    March 2006
  • From: Right Side of a Left State
Posted by Shellback on Tuesday, August 9, 2011 9:30 PM

Looks like a peddle type .

Question , would it be accurate to leave off one of the removeable turret panels like i did in the below pic on the left side ?


  • Member since
    October 2009
Posted by PANZERWAFFE on Tuesday, August 9, 2011 11:03 PM

CARL - Sorry have not found a picture yet will start looking when / if I find it will post.  Know I've seen it before for sure just dont remember where?  I would think you could leave the panels off but if you leave the one you have off, would guess there would still be the other half of the hinges on the remaining panels.

BILL - Nice to officially have you join us.  You do know Andy mails all new members of the GB beer after their first post!  Looking forward to see what you do with your build.  I find it to be very intresting and something new, kit wise, to what is normaly seen here.

JOHN - Looking forward to another great build.

CHAZZER - Nice start and work bench.  My only suggestion, you should pull the bed up to the workbench, get the frig already mentioned and you would be set.  Looks like you have a large amount of the parts cleaned-up and behind you.  Should be able to build nice and smooth now.  Do you plan on using all of the AM stowage?

Rob

  • Member since
    March 2006
  • From: Right Side of a Left State
Posted by Shellback on Tuesday, August 9, 2011 11:32 PM

Rob thanks for the help  . Not sure if there was a hinge or did it sit into a slot and bolt in ? I need to reasearch .

  • Member since
    August 2009
  • From: Milwaukee, Wisconsin
Posted by StreetFightingMan on Wednesday, August 10, 2011 11:43 AM
Well, I've been away for several weeks from this GB, so I had about fifteen pages to read (took a while....).  I may have missed some of the side discussions and inside jokes, but I saw every picture, and everything is looking greeeeaaaat!!!!!!

-Mike

On the Bench: 1/48 Eduard Avia B-534 Series IV, Cyber Hobby Messerschmidt Bf-109 E-4

  • Member since
    March 2006
  • From: Right Side of a Left State
Posted by Shellback on Wednesday, August 10, 2011 12:00 PM

Glad your back Mike !

  • Member since
    April 2009
  • From: Carmel, IN
Posted by deafpanzer on Wednesday, August 10, 2011 12:20 PM

Carl-  I can look into one of my Achtung Panzer books when I have the chance tonight about the hinges. 

Mike- Welcome Sign back!  You were right about the Dragon kit Panzer III Ausf E/F.  I reviewed the kit over the weekend and noticed its instruction to cut off the roller mount and move it.  Crazy, huh?  I am not sure if I want to do this.  Wondering if you have run into another issue other than this and tons of sinkholes? Stick out tongue


Andy

  • Member since
    February 2003
  • From: Allentown, PA
Posted by BaBill212 on Wednesday, August 10, 2011 1:44 PM

Starting at the bottom and moving up....


Beginning with the hull sides,,,  I am going to add a little bit of character to this area.

A few gouges in the "steel" sides.


The floor / hull bottom. Complete with a Maybach!....   I will pass on any engine detail.

Attach hull sides and rear plate....


The rear plate is in need of a little fill and file....    AND some detail....  I'll look into this a bit later however.


Well,,  it's a start. Where it will lead??  ,,, unknown.

I'll keep diligently posting.......


(Rob,,,, I will keep an eye on the mailbox)


Bill

Enjoy the ride!


JOIN OUR COMMUNITY!

Our community is FREE to join. To participate you must either login or register for an account.

SEARCH FORUMS
FREE NEWSLETTER
By signing up you may also receive reader surveys and occasional special offers. We do not sell, rent or trade our email lists. View our Privacy Policy.