SEARCH FINESCALE.COM

Enter keywords or a search phrase below:

The OFFICIAL Panzer III and Its Variants GB

298256 views
2308 replies
1 rating 2 rating 3 rating 4 rating 5 rating
  • Member since
    October 2009
Posted by PANZERWAFFE on Sunday, August 14, 2011 7:08 PM

Carl thanks, that sounds like a good idea, think that is the route going to try.  Have to check the size of rod I have on hand. 

Have started to prime the lower hull and road wheels, sprockets and idlers.  Will finish up the lower hull then move onto the tracks.  Once the tracks are on then will go back to the headsets.  Need a break from the interior but they will get done.

Rob

  • Member since
    February 2003
  • From: Allentown, PA
Posted by BaBill212 on Sunday, August 14, 2011 7:49 PM

Carl,,,  that's a better idea for sure, much more uniform.        Good luck with the headsets Rob.


Here are a couple of pics on the progress of the micro pz III - - -

Return rollers, road wheels and running gear.... one of the (few) pluses in working with this scale is there are not an overabundance of seam lines to repair.


2-part return rollers...     whatever you do, don't sneeze!


Road wheels,,,,  (not much cleanup... thank goodness)

But small   !!

I dinged up the road wheels a bit to try to add a little fluff to the build.

As you can see,, the detail is a little lacking,,,,  I'll add what I can as the build progresses.


Bill


Enjoy the ride!


  • Member since
    March 2006
  • From: Right Side of a Left State
Posted by Shellback on Sunday, August 14, 2011 8:26 PM

Bill , looks good .Beer

  • Member since
    February 2003
  • From: Allentown, PA
Posted by BaBill212 on Sunday, August 14, 2011 8:36 PM

Carl,,  you are a kind man                              thanks

Enjoy the ride!


  • Member since
    March 2006
  • From: Right Side of a Left State
Posted by Shellback on Sunday, August 14, 2011 8:39 PM

Bill ...............Yes and Beer

  • Member since
    April 2009
  • From: Carmel, IN
Posted by deafpanzer on Sunday, August 14, 2011 9:17 PM

Bill-  Way too tiny!!! Tongue Tied  I'd probably loose one or two.  I sneeze often because its allergy season now for me.   Looking forward to your next update...


Andy

  • Member since
    February 2003
  • From: Allentown, PA
Posted by BaBill212 on Monday, August 15, 2011 10:18 AM

Thanks guys,,,   indeed it is very small, for sure....   my wife even said the same thing (hope she was talking about the tank!)

Enjoy the ride!


  • Member since
    March 2003
  • From: Rain USA, Vancouver WA
Posted by tigerman on Monday, August 15, 2011 12:05 PM

BaBill212

Thanks guys,,,   indeed it is very small, for sure....   my wife even said the same thing (hope she was talking about the tank!)

Indifferent Thanks for the laugh of the day.

   http://i7.photobucket.com/albums/y269/wing_nut_5o/PANZERJAGERGB.jpg

 Eric 

  • Member since
    April 2009
  • From: Carmel, IN
Posted by deafpanzer on Monday, August 15, 2011 3:43 PM

tigerman

 BaBill212:

Thanks guys,,,   indeed it is very small, for sure....   my wife even said the same thing (hope she was talking about the tank!)


Indifferent Thanks for the laugh of the day.

LMAO!  Same here... way too funny you are Bill!

Andy

  • Member since
    December 2006
  • From: t.r.f. mn.
Posted by detailfreak on Monday, August 15, 2011 9:56 PM

                           Bill,definately an eyestraining build.although I do have some 1/72 nd armor in the stash also.Oh and as for the other subject I tell my wife its a MAUS.LOLTongue Tied


                                                          Greg"Detailfreak"RowleyYes

[View:http://s172.photobucket.com/albums/w1/g-earl828/]  http://i158.photobucket.com/albums/t104/cycledupes/1000Roadwheels4BuildBadge.jpg

  • Member since
    May 2011
  • From: Illinois
Posted by armor86 on Monday, August 15, 2011 11:44 PM

Updated photos - ongoing work with the early III Ausf. J build - upper hull assembled next will start on the turret ... 

close up rear fender / engine ... check references and corrected fender fasteners to antenna mount ... nice wood detail. 

Back end / rear engine deck 

Front hull before head light wiring and other details 

Side view 


Dan

  • Member since
    March 2003
  • From: Rain USA, Vancouver WA
Posted by tigerman on Tuesday, August 16, 2011 12:14 AM

Just got this kit armor86. I'll be watching your build with interest.

   http://i7.photobucket.com/albums/y269/wing_nut_5o/PANZERJAGERGB.jpg

 Eric 

  • Member since
    February 2003
  • From: Allentown, PA
Posted by BaBill212 on Tuesday, August 16, 2011 6:08 AM

I guess working in this scale you better have a good sense of humor...

Greg,,   if I told her MAUS she would no doubt be thinking MOUSE...  (best to leave well enough alone I suppose)

Armor86,,   looking very nice. [Looking at your pics]  gave me a good thought for a small alteration to my micro pz III

Enjoy the ride!


  • Member since
    April 2009
  • From: Carmel, IN
Posted by deafpanzer on Tuesday, August 16, 2011 10:56 AM

detailfreak

                           Bill,definately an eyestraining build.although I do have some 1/72 nd armor in the stash also.Oh and as for the other subject I tell my wife its a MAUS.LOLTongue Tied


                                                          Greg"Detailfreak"RowleyYes

Greg- That's good one!

Armor86- Looking real good!  I like the details on the wood rod where antenna is secured when not in use.  It will look great with dark washes.


Andy

  • Member since
    October 2009
Posted by PANZERWAFFE on Tuesday, August 16, 2011 1:23 PM

BILL - looks tedious.

ARMOR86 - Nice work on the hull and I agree, nice looking antenna stowage.

Rob

  • Member since
    February 2003
  • From: Allentown, PA
Posted by BaBill212 on Tuesday, August 16, 2011 1:30 PM

True Rob,,,     a test in patience     (serenity now,, serenity now,,)

Enjoy the ride!


  • Member since
    October 2009
Posted by PANZERWAFFE on Tuesday, August 16, 2011 7:06 PM

Been working on the lower hull to try to escape the interior for awhile.  Put on a base coat, a simple wash then some selected pin washing.  Also have the wheels in the same condition but still need to paint the rubber.  Hope to get the wheels on tonight and maybe start the tracks.

Almost forgot, added some extra PE chain on the rear tow bails.

Will use the above for my base color.  Upon completion will receive much more to it.

Rob

  • Member since
    March 2006
  • From: Right Side of a Left State
Posted by Shellback on Tuesday, August 16, 2011 8:36 PM

Armor 86 , good looking progress .

Rob , your weathering makes the detail "pop" .

  • Member since
    February 2003
  • From: Allentown, PA
Posted by BaBill212 on Wednesday, August 17, 2011 1:14 PM

Looking very nice Rob,,,,  !


Couple of quick update photos (micro pz III)

A little change of pace... figured I would do some work on the gun

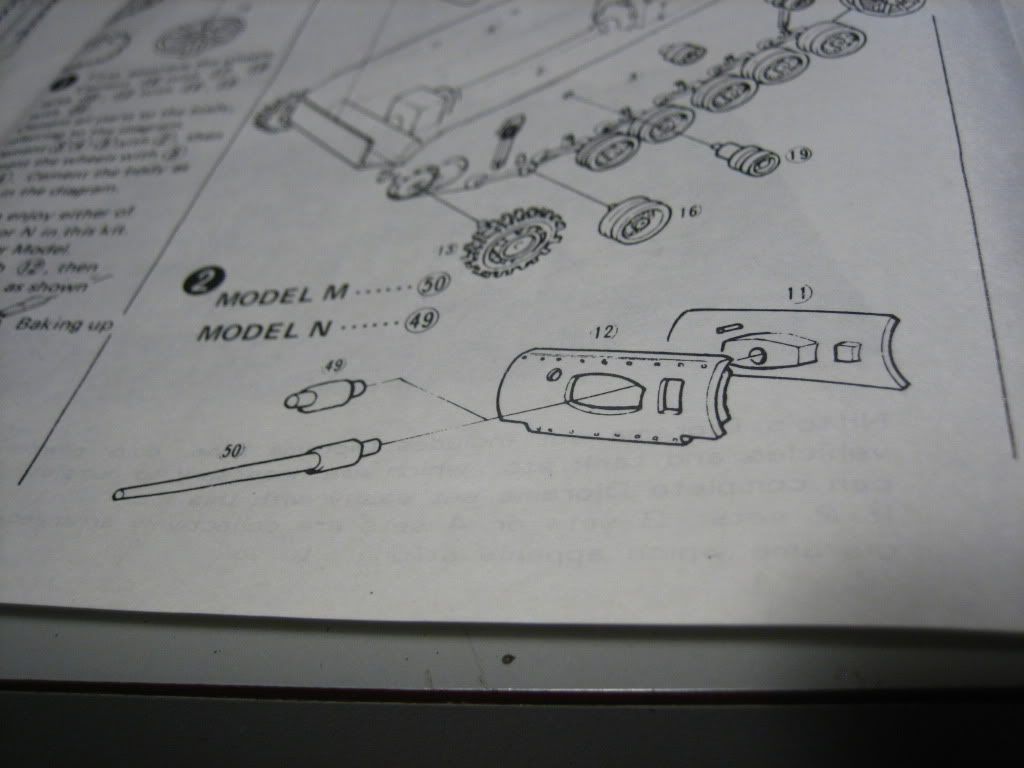
Both M and N barrels shown,,  Going with M version. As you can see it needs a little work.

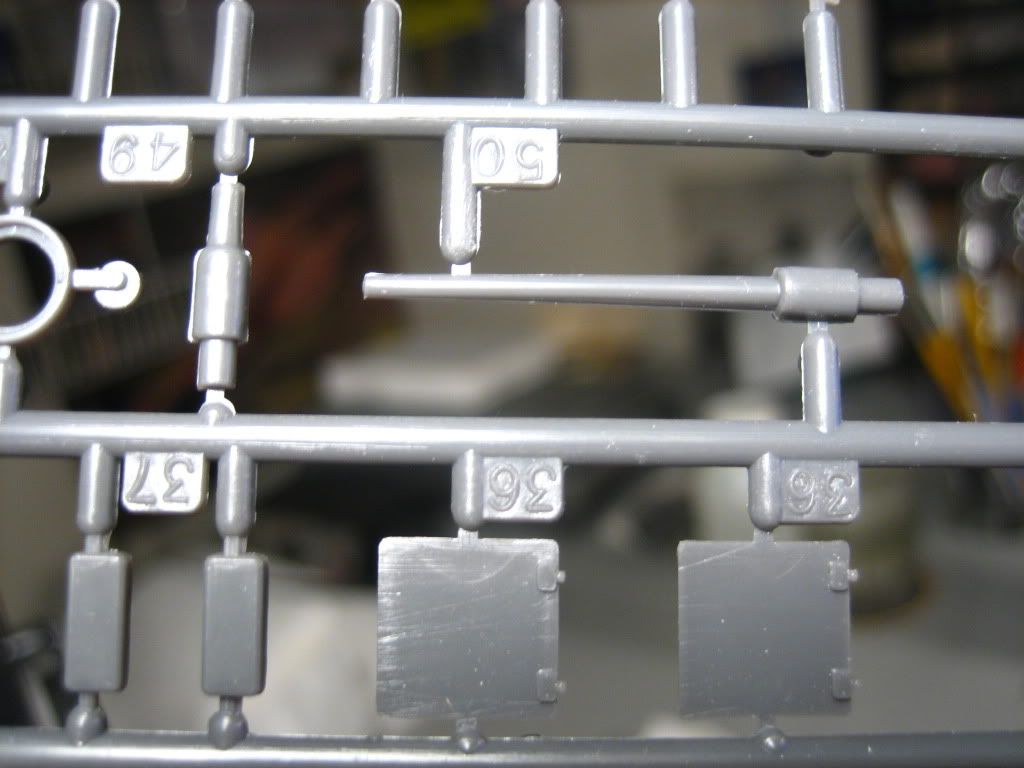
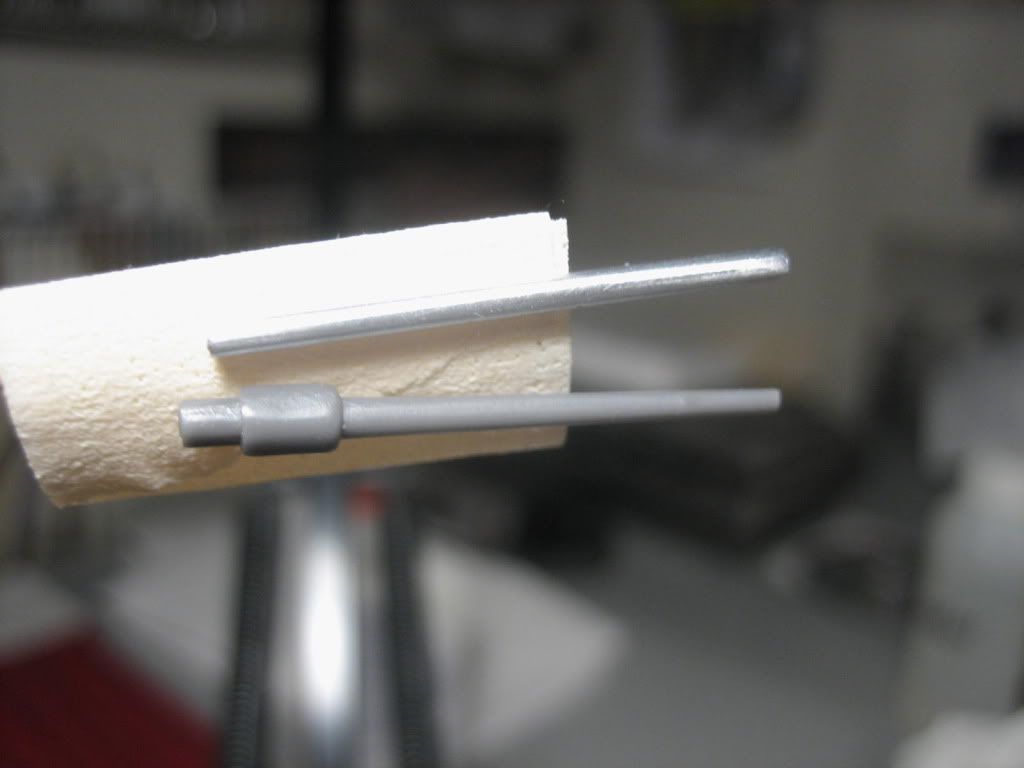
I found a close resemblence in aluminum but tapering it by hand wasn't thrilling me that much. I cleaned up the kit barrel and dubbed it suitable.

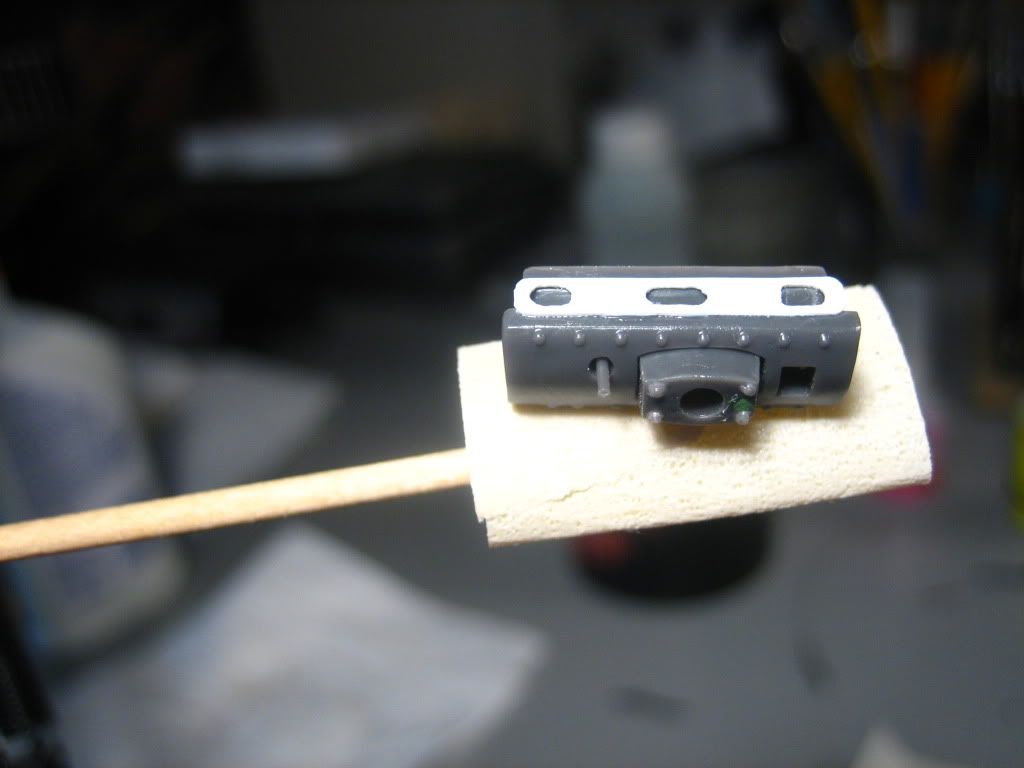
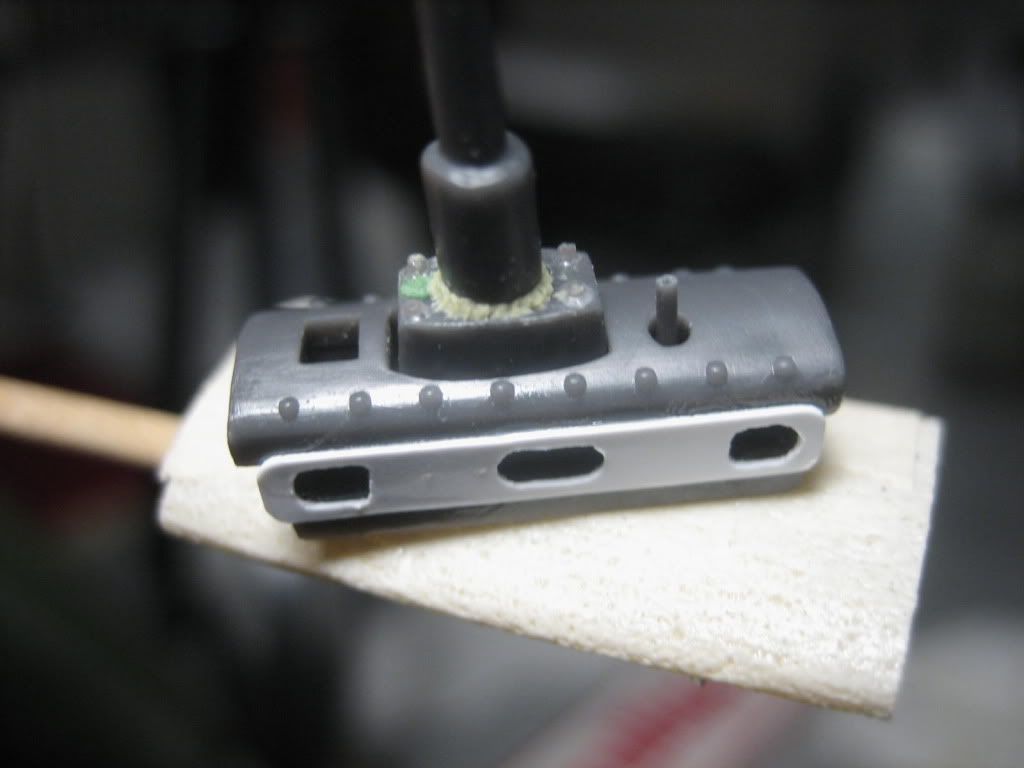
Next was the manlet. I puttied a small sink hole would have been noticable (well maybe not but it would have bugged me).  The coaxial was smashed so I drilled it out and made my own. I also added the 4 corner bolts using cut, stretched sprue.

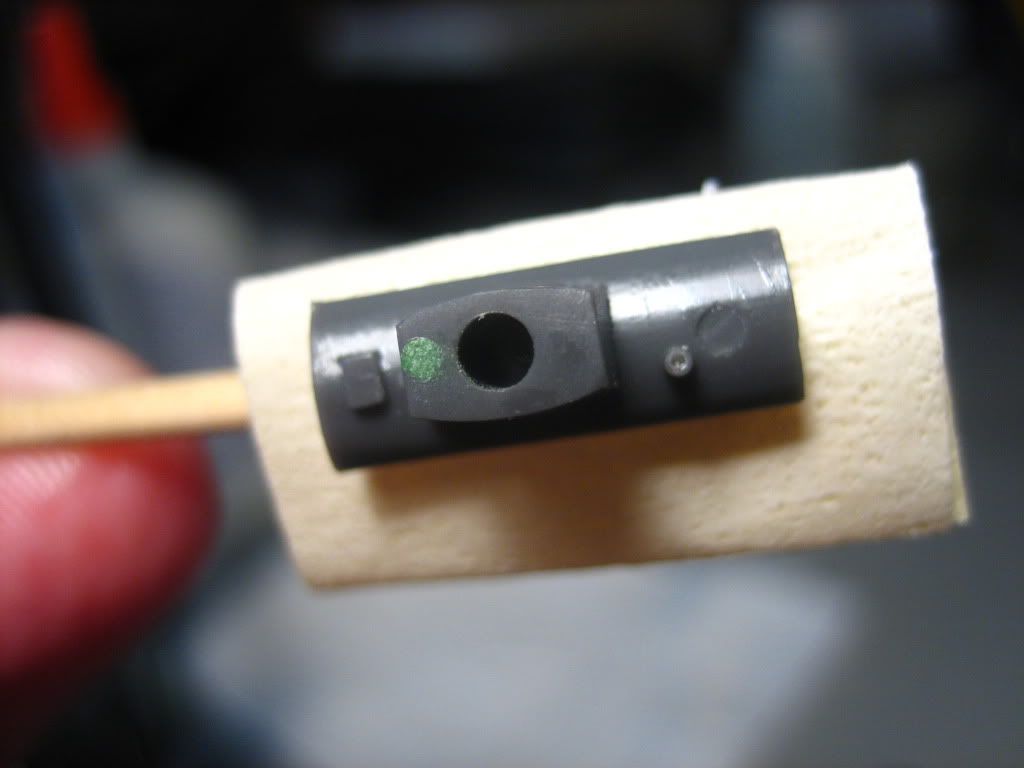
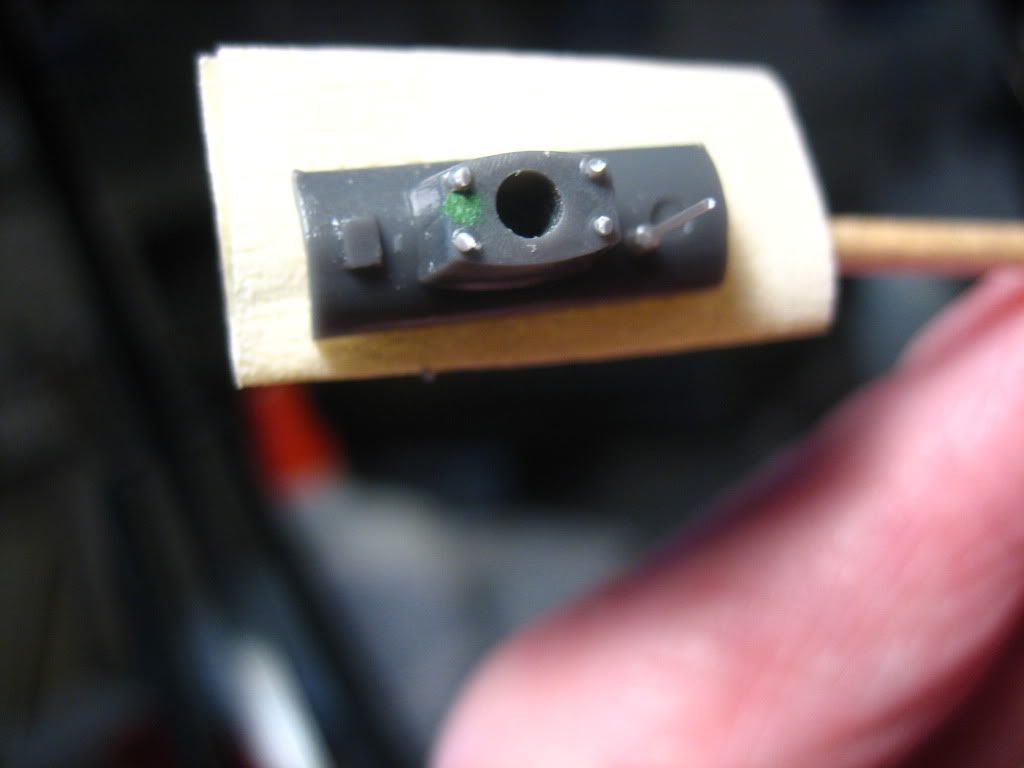
The bolts hunker down with a little liquid cement.  It was fun drilling out the coaxial (not really). Attach the front armor plate.


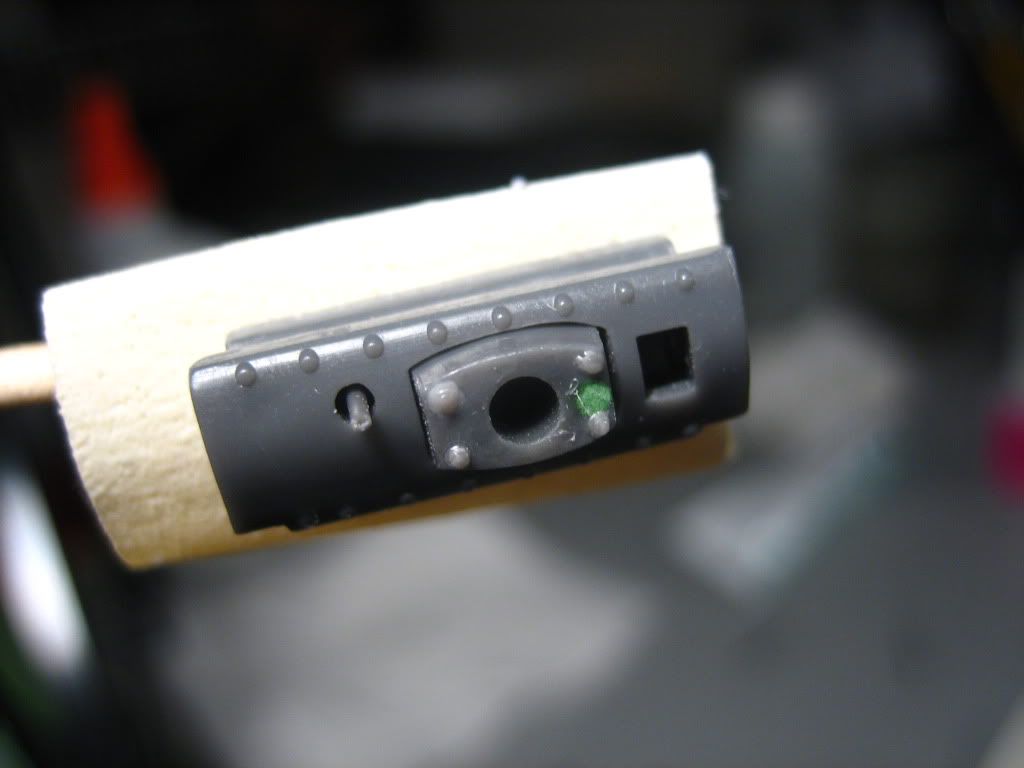
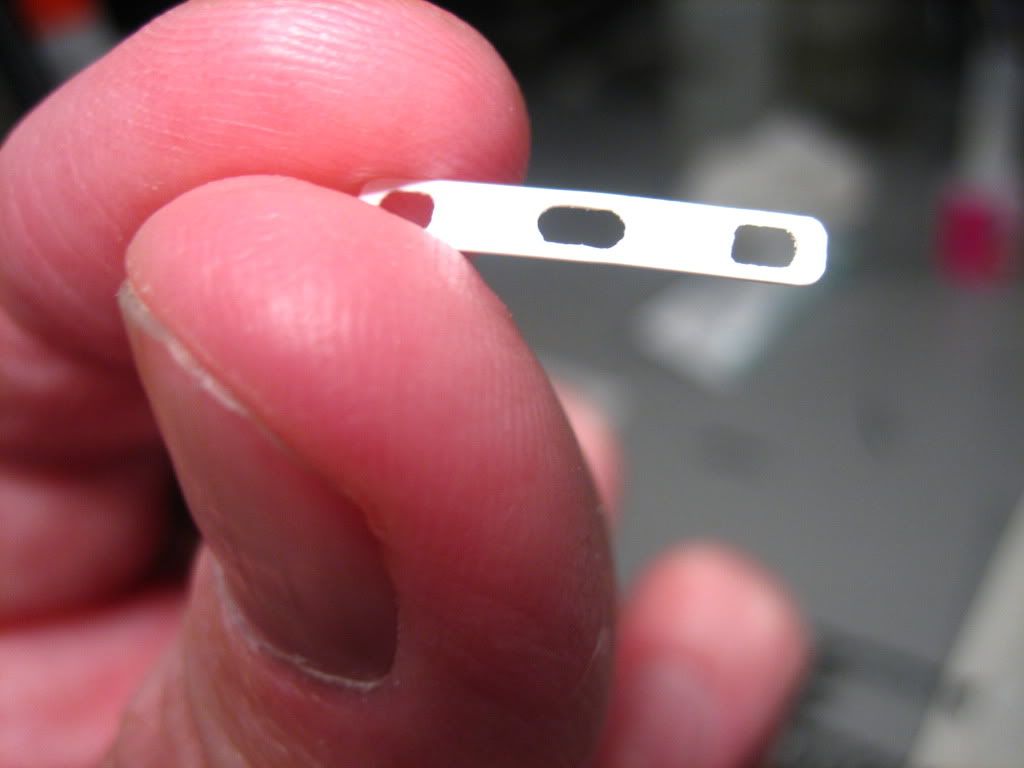
Needed to carve out a spacer using a flat plank plastic stock.

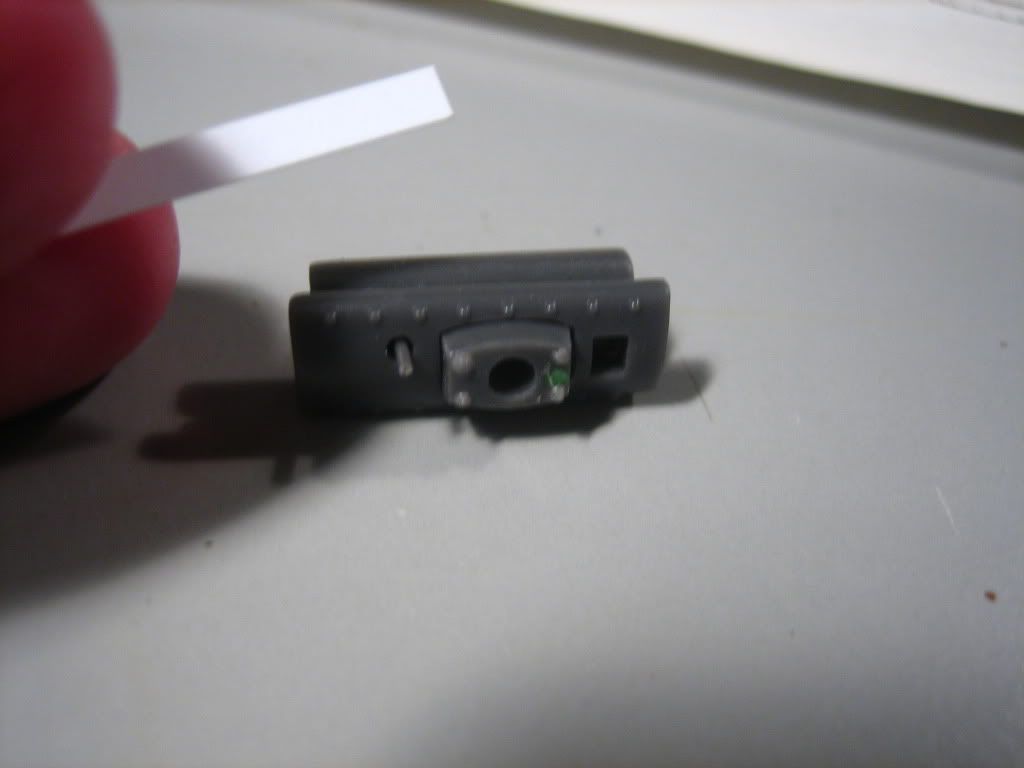
I cleaned it up before attaching.


Before I attached the barrel I ran a small ring of milliput around the base.

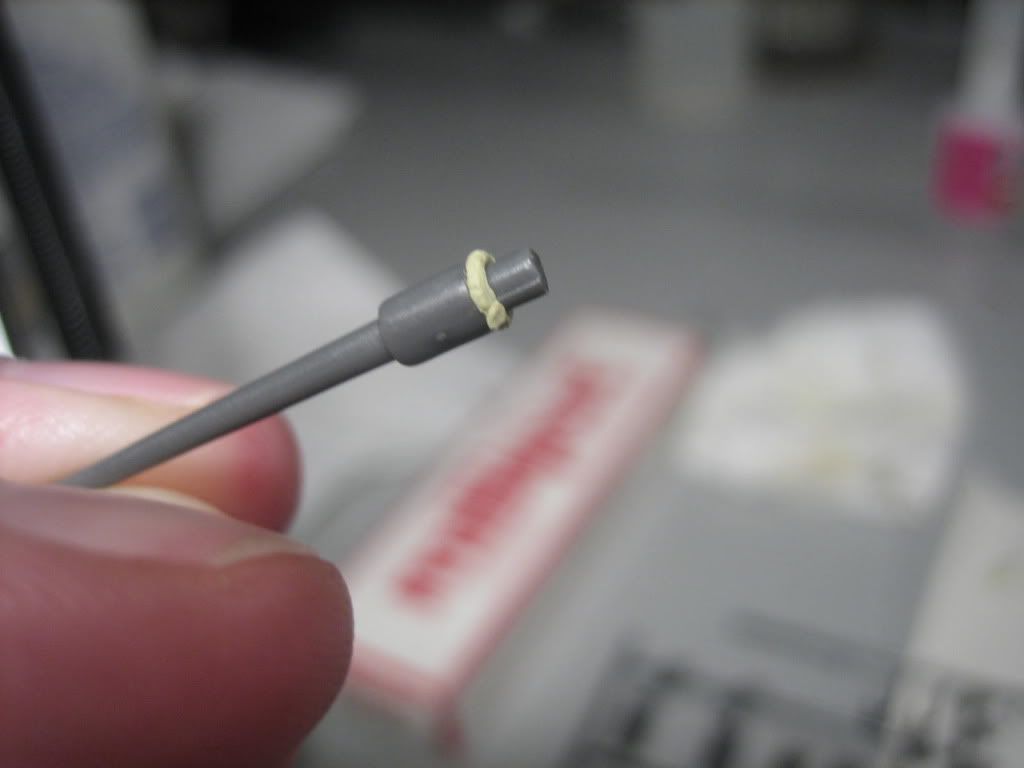
I pushed / glued in place and added a weld bead in the milliput. This will be cleaned up before painting.

So, that is where I am currently at with the micro pz.....  

Hope you like......


Bill


Enjoy the ride!


  • Member since
    October 2009
Posted by PANZERWAFFE on Wednesday, August 17, 2011 1:33 PM

Bill, impressive work specially at that scale.

Rob

  • Member since
    February 2003
  • From: Allentown, PA
Posted by BaBill212 on Wednesday, August 17, 2011 1:42 PM

Thanks kindly Rob........    (I'm giving the optivisor a workout!)

Enjoy the ride!


  • Member since
    April 2009
  • From: Carmel, IN
Posted by deafpanzer on Wednesday, August 17, 2011 3:03 PM

Bill- Jeez, I had to take my optivisor out just to look at your pictures.  Great details at that tiny... scary that you even drilled a hole into the machine gun barrel. 

Rob- Agree with Carl's comment... the washes made the zimm POP! 

Andy

  • Member since
    March 2006
  • From: Right Side of a Left State
Posted by Shellback on Wednesday, August 17, 2011 3:14 PM

Bill , super fine detail !  Yes

  • Member since
    March 2003
  • From: Rain USA, Vancouver WA
Posted by tigerman on Wednesday, August 17, 2011 3:28 PM

Bill- mighty fine detail work on something so small.

Rob- You have any syrup to go along with those tasty waffles? Stick out tongue

   http://i7.photobucket.com/albums/y269/wing_nut_5o/PANZERJAGERGB.jpg

 Eric 

  • Member since
    March 2006
  • From: Right Side of a Left State
Posted by Shellback on Wednesday, August 17, 2011 3:47 PM

tigerman

Bill- mighty fine detail work on something so small.

Rob- You have any syrup to go along with those tasty waffles? Stick out tongue

Lol ! kinda crunchy ?

  • Member since
    February 2003
  • From: Allentown, PA
Posted by BaBill212 on Wednesday, August 17, 2011 4:39 PM

Andy,   Carl,    Eric,           thank you gentlemen....   I have big hopes for this tiny addition.       A few dio / static scenes have been coming to mind. Hopefully I don't lose what little eyesight I have left before it is finished.

Enjoy the ride!


  • Member since
    October 2009
Posted by PANZERWAFFE on Thursday, August 18, 2011 7:10 PM

About to fall off the page, whats everyone up too?  Not much to report, wheels took a little longer than expected.

Now to the tracks.

Eric, the syrup comes last.  Good things come to those who wait. Big Smile

Rob

  • Member since
    March 2003
  • From: Rain USA, Vancouver WA
Posted by tigerman on Thursday, August 18, 2011 7:21 PM

What did you use for the tires Rob? 

Shaping up real nicely.

   http://i7.photobucket.com/albums/y269/wing_nut_5o/PANZERJAGERGB.jpg

 Eric 

  • Member since
    October 2009
Posted by PANZERWAFFE on Thursday, August 18, 2011 7:46 PM

Eric, do you mean the color?  I hand paint and use Testors "Rubber".  It's the little small square bottles.

Rob

  • Member since
    February 2003
  • From: Allentown, PA
Posted by BaBill212 on Thursday, August 18, 2011 8:17 PM

Rob,,,  that chassis is looking fine!

Enjoy the ride!


JOIN OUR COMMUNITY!

Our community is FREE to join. To participate you must either login or register for an account.

SEARCH FORUMS
FREE NEWSLETTER
By signing up you may also receive reader surveys and occasional special offers. We do not sell, rent or trade our email lists. View our Privacy Policy.