SEARCH FINESCALE.COM

Enter keywords or a search phrase below:

The OFFICIAL Panzer III and Its Variants GB

298256 views
2308 replies
1 rating 2 rating 3 rating 4 rating 5 rating
  • Member since
    April 2009
  • From: Carmel, IN
Posted by deafpanzer on Wednesday, August 10, 2011 4:09 PM

Bill-  Way too tiny... I can't tell which is bigger... your thumb or the kit. Wink  Nice details not too bad for a kit from the 70's.  Are you planning to do the figures too?  I see six or seven figures on the box artwork. 

Andy

  • Member since
    February 2003
  • From: Allentown, PA
Posted by BaBill212 on Wednesday, August 10, 2011 4:24 PM

Andy,,,   

TINY for sure,,,,,,,,  wait until you see the return rollers, headlights and the like. One of my biggest fears is the "boinged" / dropped piece. I'll need a microscope to find anything that hits the floor....    These little kits did offer some very interesting extras. Most of them give you some sort of interior,, as flawed as they may be. And typically some other additions as well (figures, a Kubel, AT guns, etc.).
I'm not sure if I am going to include figures yet.   More than likely I will, but undecided for now.

I'll try to get some pics of the Schwimmwagen up this evening. I'll also see if I can't get a pic or two of some of the other kits in the series.


Enjoy the ride!


  • Member since
    August 2009
  • From: Milwaukee, Wisconsin
Posted by StreetFightingMan on Wednesday, August 10, 2011 4:29 PM

Deafpanzer Yeah, the sinkholes...... I read a review about this kit before I got it, and I noticed the reviewer mentioned annoying sinkholes. Silly Me thought, "Hey, what kit DOESN'T have sinkholes, right?" At the stage I'm at right now, I'm just ignoring them.  There are a few I missed before painting and now stick out like a sore thumb.  I've found them on the wheels, the crappy fenders, and the hull sides.  It looks like this Panzer was hit by some serious anti-armor!  I guess this kit will not be my finest hour, but once I get a little farther, I'll post pics to showcase the little bit of it that I can be proud of.  Of course, now I want to get another one to proove to myself that I can do better, knowing the little problems that may occur here and there.

Other than the sinkholes and the stupid directions that want you to cut up half the kit (which I did with bad results) I can't remember much that was wrong with the kit.  A few pieces were rough around the edges, and some of the molding was a lot more simplified than expected, but overall it's an OK kit.  I guess it wouldn't be modeling if it all fit like a glove, right? Or is that just me trying to comfort myself?

-Mike

On the Bench: 1/48 Eduard Avia B-534 Series IV, Cyber Hobby Messerschmidt Bf-109 E-4

  • Member since
    December 2006
  • From: t.r.f. mn.
Posted by detailfreak on Wednesday, August 10, 2011 7:57 PM

                           Well as I mentioned before about the 230 some odd minutes it took for clean-up and the 60 mins. for assembly,the bare tracks are on.No ice cleats or paint as of yet.But they are on,soon to be off of course.


                               Maybe a bit more work later.

                                                    Greg"Detailfreak"RowleyYes

[View:http://s172.photobucket.com/albums/w1/g-earl828/]  http://i158.photobucket.com/albums/t104/cycledupes/1000Roadwheels4BuildBadge.jpg

  • Member since
    March 2003
  • From: Rain USA, Vancouver WA
Posted by tigerman on Wednesday, August 10, 2011 8:08 PM

Wow, 5 hrs on the tracks alone. Goodness.

   http://i7.photobucket.com/albums/y269/wing_nut_5o/PANZERJAGERGB.jpg

 Eric 

  • Member since
    February 2003
  • From: Allentown, PA
Posted by BaBill212 on Wednesday, August 10, 2011 8:13 PM

Mike,,  I am going to bet that your build turns out great, sinkholes or not.   

Greg,,   those tracks are awesome


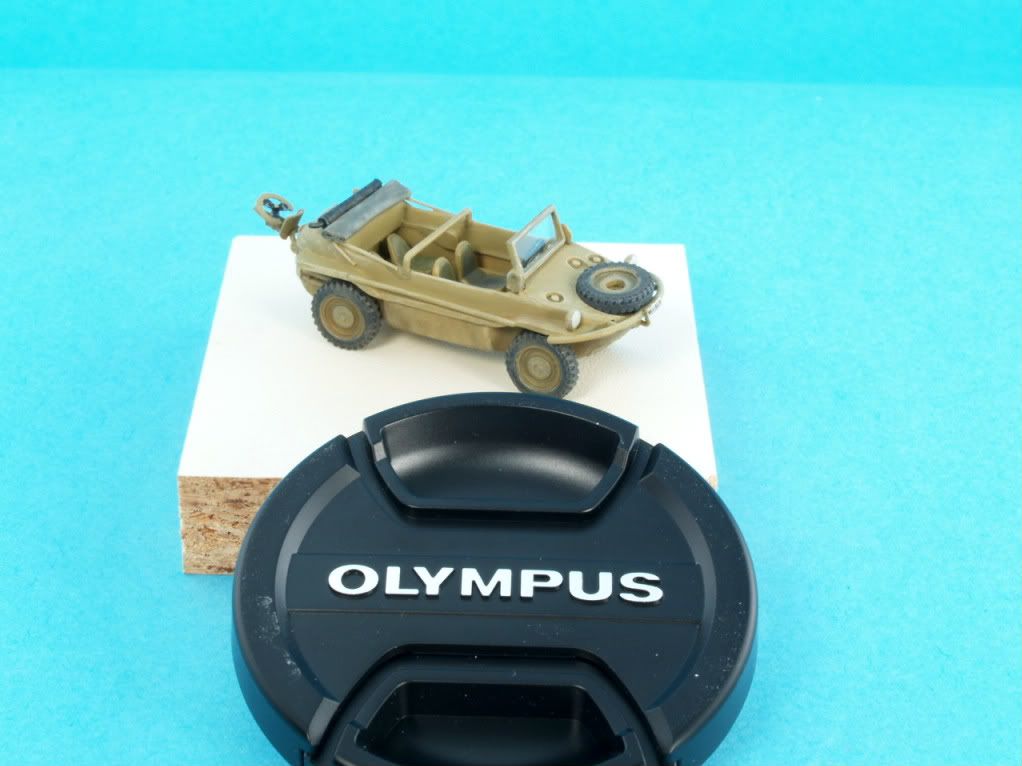
As I mentioned before, the Nitto Pz III was a previous idea to incorporate into a scene with the Schwimmwagen (Nitto,,, same scale). I finished the Schwim just before the GB.

Here are some pics of this lil guy......


I changed out the convertible top with folded lead foil and StripStyrene .025" rod for the brackets. The kit supplied top just looked way too chincy even for me...


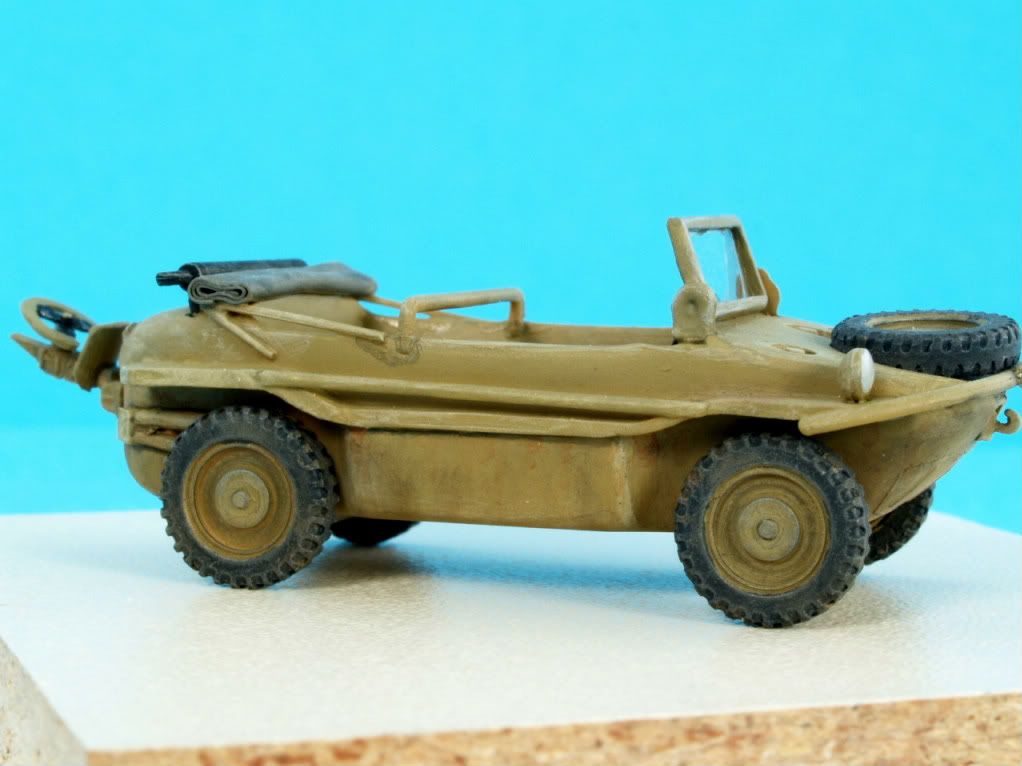
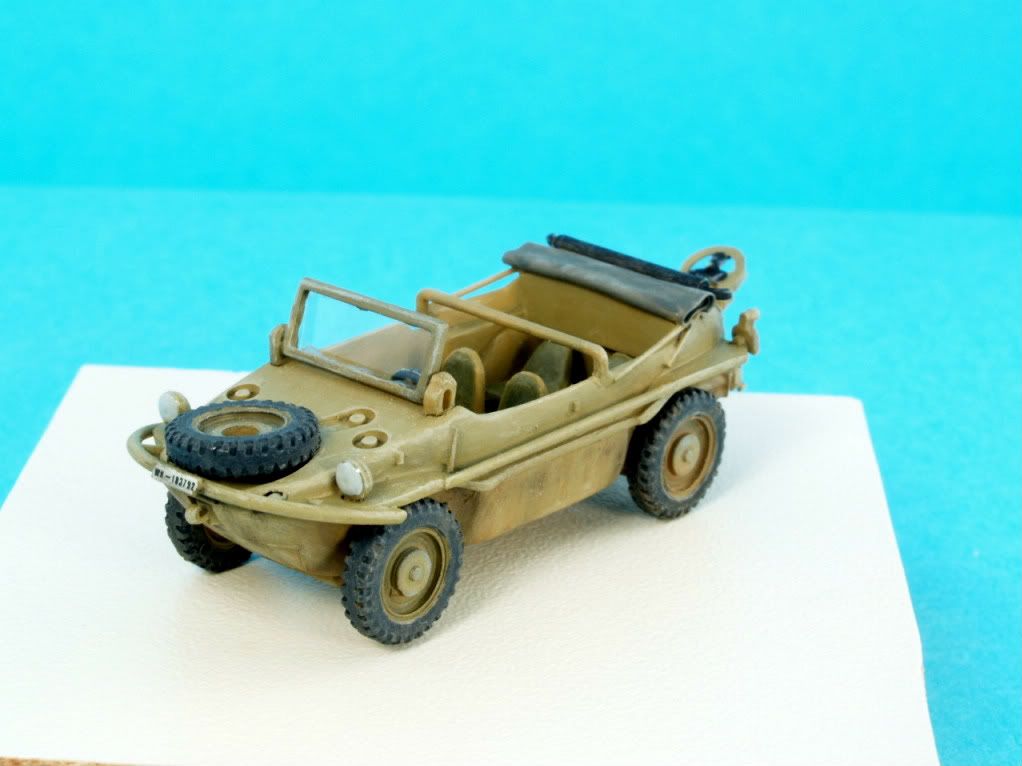
The shovel and oar were so crappy that I decided to just scratch build the brackets (for what they're worth in this scale). I also made my own side / grab rods which run between the front and back fenders. I also added a "firewall" / back behind the rear seats as this was wide open.


I hollowed out the exhaust pipes and measured and cut a piece of acetate as the kit did not include a windscreen. I didn't go so far as to add wipers though,,,,  they would have probably been invisible anyway.


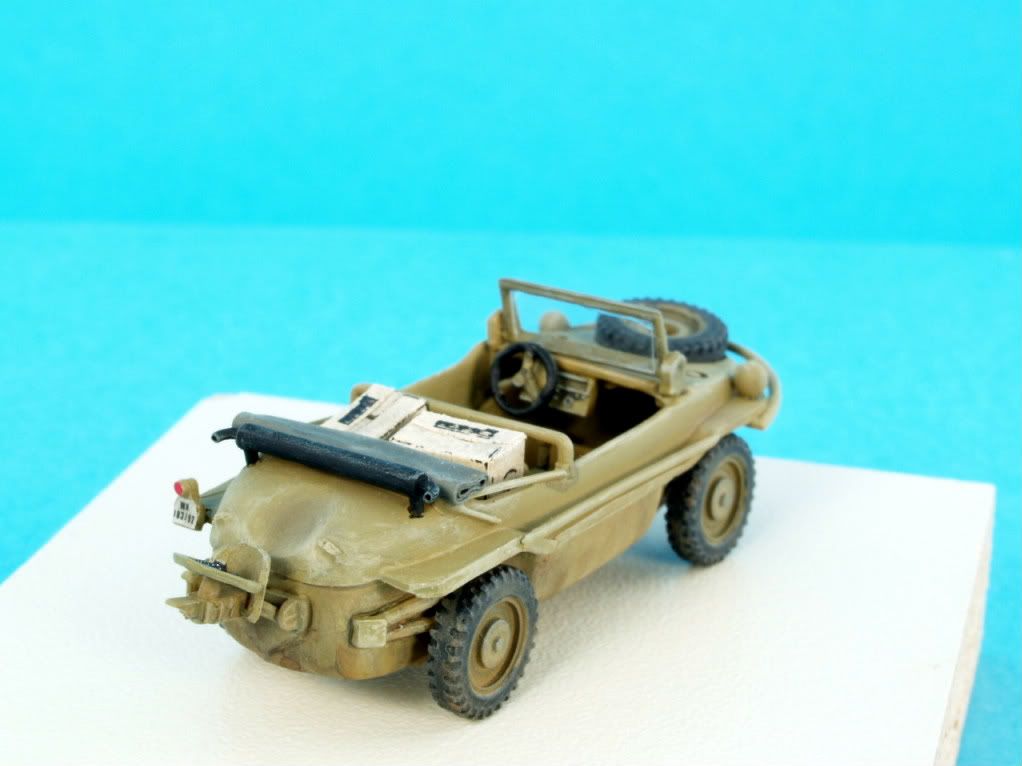
I also tossed in a few supply cartons that I made,,, not sure if they will be there in the end,,, at this time they are loose.     I used some standard 35th scale ration carton templates and reduced them to scale. Printed on some brownish paper, cut out and glued.


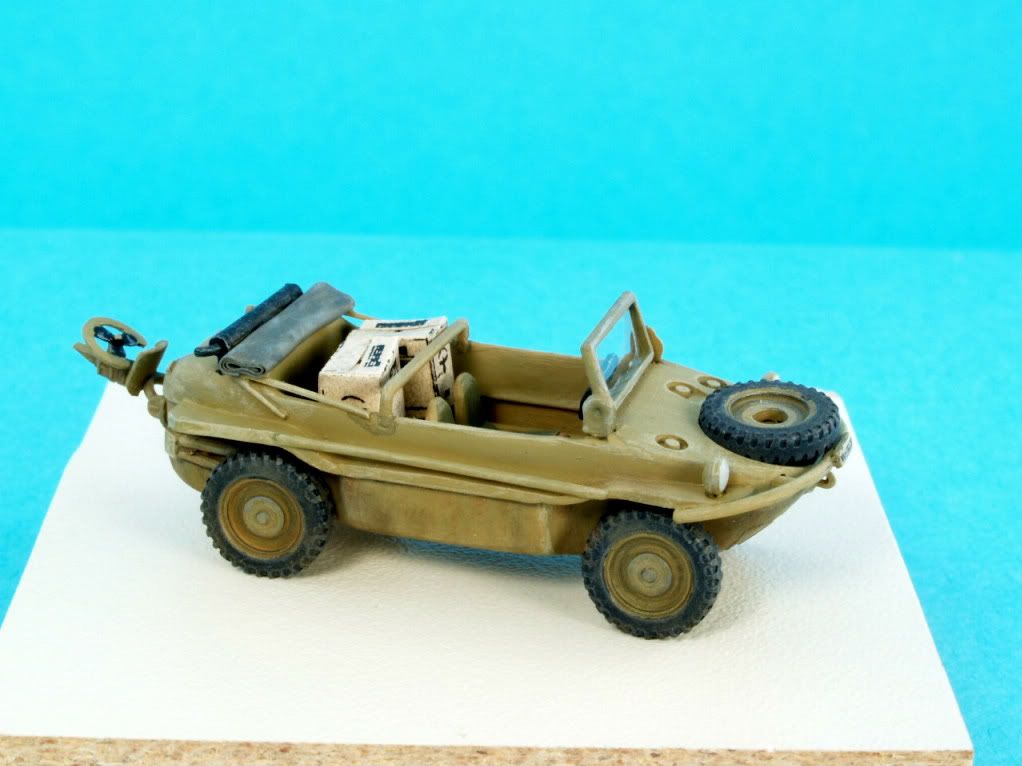
A little acrylic airbrushing, highlights, dirt and crud, and pastels to finish and there it is,,,,  1.25" from nose to tail.


I don't often delve in this scale, but when I worked part time in a hobby shop (ages ago), I thought they were pretty cool and so very inexpensive.....  I ended up buying a slew of them.....     I snapped a couple of pics of that part / portion of my inventory -

Mostly Nitto,,, with a few Fujimi's tossed in too


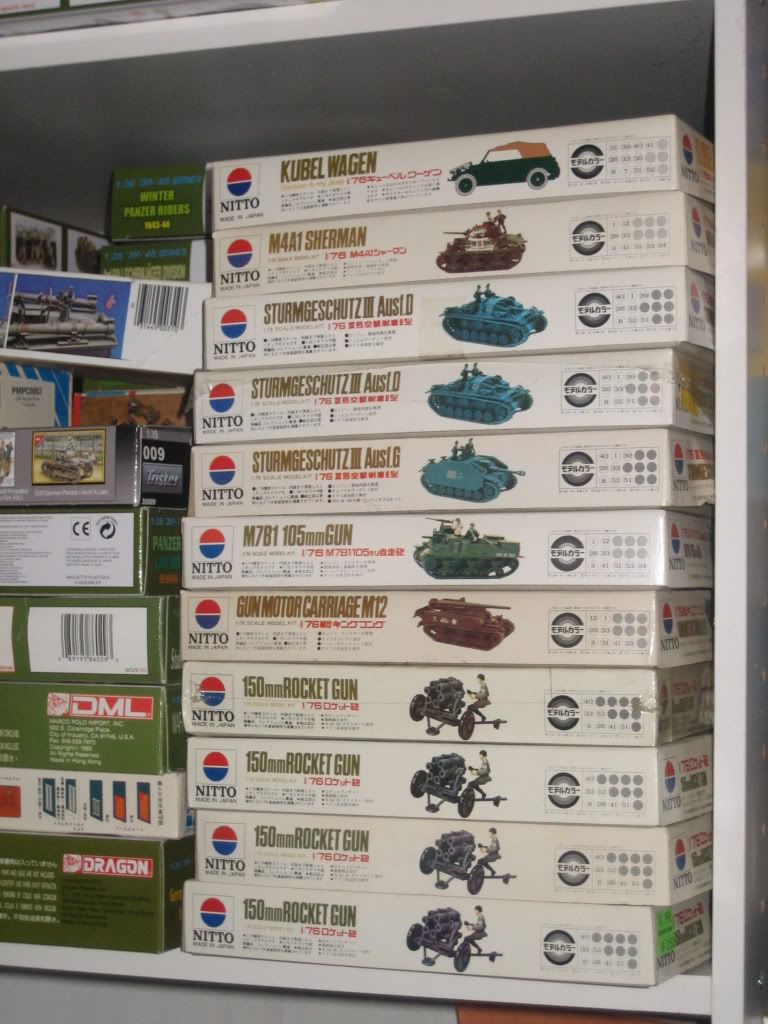
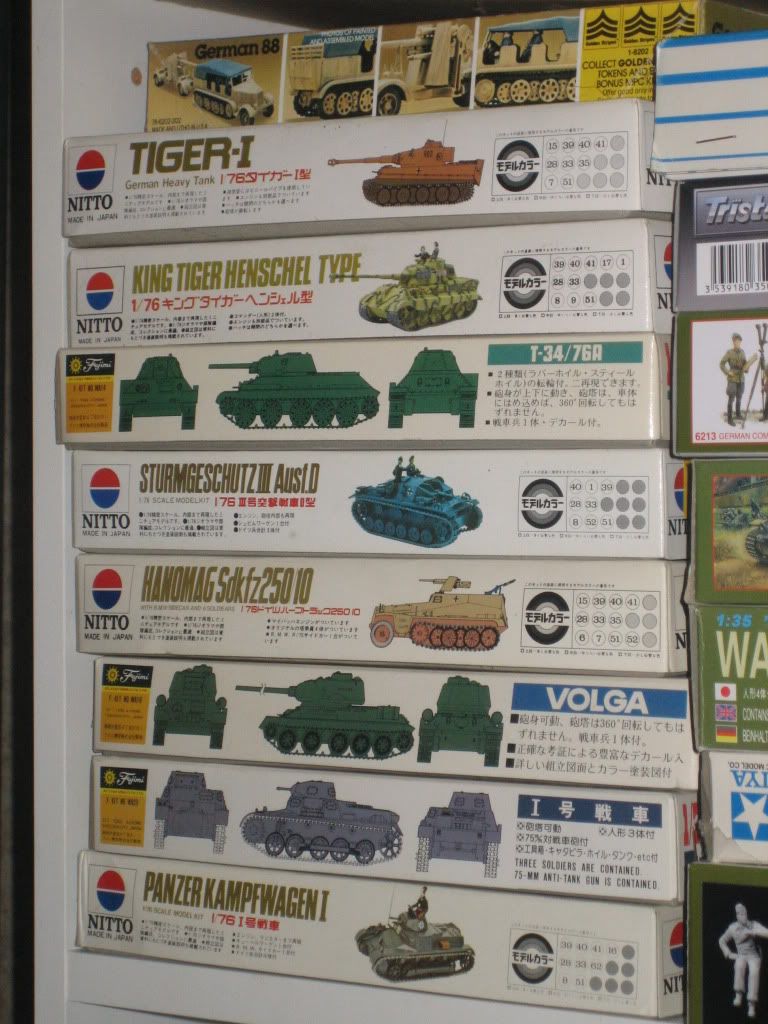
They always offered more than just the main subject -


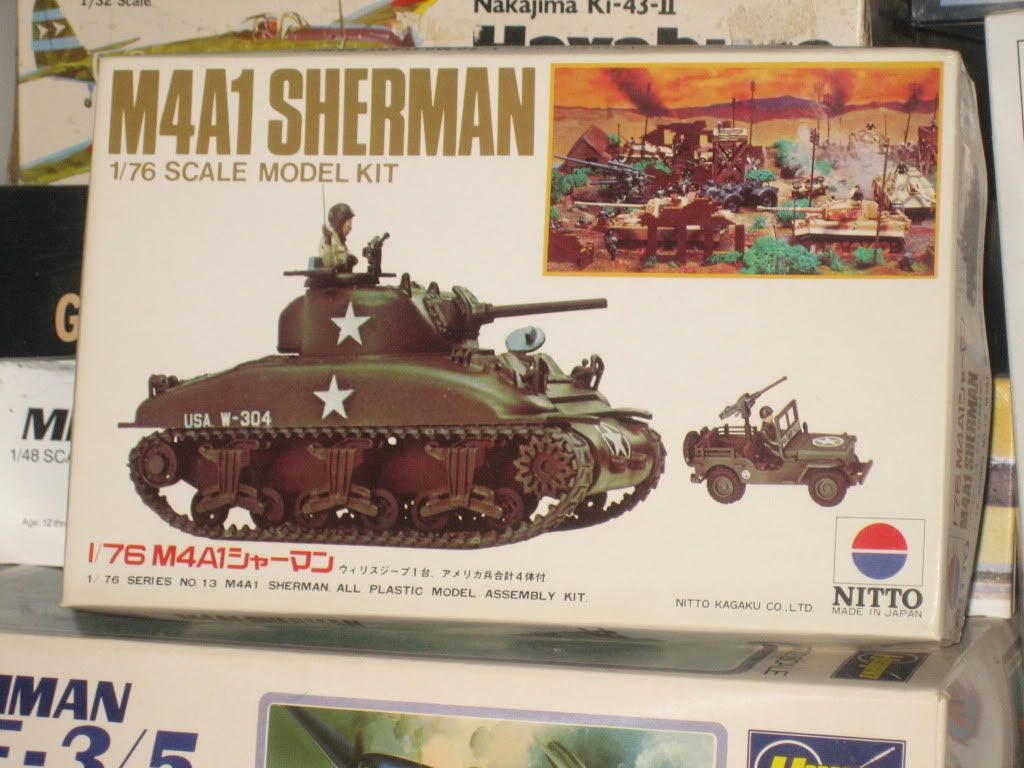
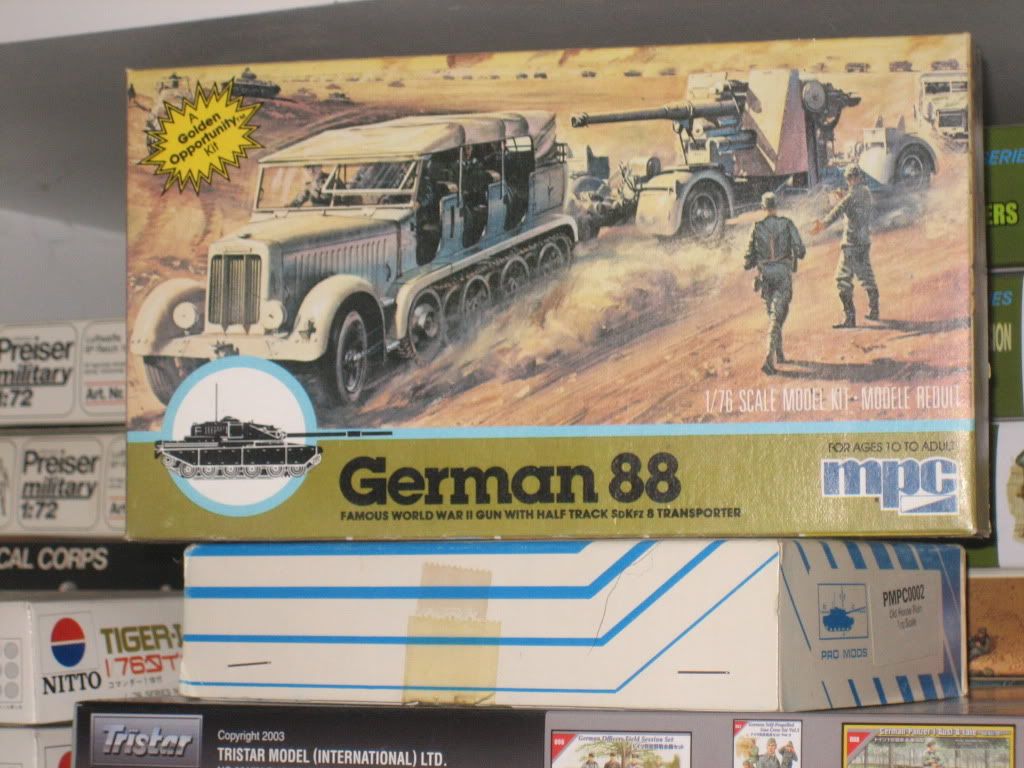
I also found one of these old MPC kits.....


So enough of this off-shoot nonsense,,,,,,, 

I hope you liked the little detour from the regular broadcast station. We now return you to real builds in real scale...    


Enjoy the ride!


  • Member since
    April 2009
  • From: Carmel, IN
Posted by deafpanzer on Wednesday, August 10, 2011 8:37 PM

Shellback

Rob thanks for the help  . Not sure if there was a hinge or did it sit into a slot and bolt in ? I need to research .

I checked my reference book Achtung Panzer to answer your question... the book stated it was detachable. 

Photos from book for discussion purpose only:

Clearly as shown in pictures, they were...

If you can do your best not to stare at the crew's butt, the panel sure was removed... 

Hope this helps...


Andy

  • Member since
    April 2009
  • From: Carmel, IN
Posted by deafpanzer on Wednesday, August 10, 2011 8:48 PM

Greg- WOW!  The tracks look freaking great! Yes  Five hours of work sure was worth it I bet... hope your wife was OK with this? 

Mike- Thanks for the tip about the kit.  I need to take another good look at it again.  It may be a good thing I am not planning to build it next after my Pz IV. Big Smile  Looking forward to see updated pictures... 

Bill- Loved your tiny Schwim!  I am not sure if I will ever have the courage to build one.  Thanks for the great detour.  I do see you have few StuG Ausf D kits... maybe we will need you to build in case nobody has built the Ausf D before the GB ends. 


Andy

  • Member since
    February 2003
  • From: Allentown, PA
Posted by BaBill212 on Wednesday, August 10, 2011 8:59 PM

Thanks Andy,,,,,,,,,       and yup, always liked the Stugs,,,       Hey,  instead of me building one, I'll offer you one!       After all you did offer me a few Canadian beverages.     Hell, one beer probably cost as much as two of those little kits,,     ha!                 

Enjoy the ride!


  • Member since
    March 2006
  • From: Right Side of a Left State
Posted by Shellback on Wednesday, August 10, 2011 9:15 PM

Greg , very tediouise ! The tracks have a great fit !

Bit , too small ! Nice collection of Nitto kits .

Andy , thanks for the help . I see hinges in the photo and none in the diagram ..............Crying

  • Member since
    March 2006
  • From: Right Side of a Left State
Posted by Shellback on Wednesday, August 10, 2011 9:27 PM

Ok , i got it !!!! The hing is on the rear of the panel and the latch is in the front !!!!!!!! Woo Hooo !!!!! Or is it DUHHHHHHHHHHHHHHHHHHHHHHHH ...............Stick out tongue

  • Member since
    October 2009
Posted by PANZERWAFFE on Wednesday, August 10, 2011 9:44 PM

CARL - May have opened my mouth without having anything to back it up, imagine that Dunce  Been looking through my books and online but have not been able to find a picture of that floor between the turret, armor and stowage bin?  Will keep looking but cant promise anything.

Have also been looking for your door / armor plate.  Looks as if Andy found the best picture.  Found a few pics online with the plate off or missing, were not great pics so did not post.  I say yes leave it off.  Looks like a pin that would just slide down into the receiving end from Andys picture.  Believe it may have been the Pz IV's that had a hinged like door?

Sorry could not be more helpfull

BILL - Nice little Schwim.  Way to small for me to try but nice to see some different scales.  Nice scratch work in that scale also.  Looking at all of those kits I,m now pretty sure I've had a few when I was a young modler.  You have enough of them to start your own small conflict!

Rob

  • Member since
    September 2009
  • From: Spring Branch, TX
Posted by satch_ip on Thursday, August 11, 2011 4:39 PM

Andy, go back several pages and you can see that cutting and moving of the return roller step on my F model.  It as pretty painless.  I used a cutting wheel on a Dremel than sanded the nubs smooth.  The instructions tell you where to put the new rollers, which they provide.  Just measure and use a straight edge to get the vertical alignment right.

I've got most of the hull done and am halfway through the superstructure and turret.  The cupola was a major PITA and mine looks like crap.  I'll have to do some fixing before it's done. 

No pics now, sorry.  I'm in NYC leaving for the west coast tomorrow.  I'll be back Monday evening and maybe shoot some.


Satch

  • Member since
    March 2006
  • From: Right Side of a Left State
Posted by Shellback on Thursday, August 11, 2011 8:41 PM

PANZERWAFFE

CARL - May have opened my mouth without having anything to back it up, imagine that Dunce  Been looking through my books and online but have not been able to find a picture of that floor between the turret, armor and stowage bin?  Will keep looking but cant promise anything.

Have also been looking for your door / armor plate.  Looks as if Andy found the best picture.  Found a few pics online with the plate off or missing, were not great pics so did not post.  I say yes leave it off.  Looks like a pin that would just slide down into the receiving end from Andys picture.  Believe it may have been the Pz IV's that had a hinged like door?

Sorry could not be more helpfull

BILL - Nice little Schwim.  Way to small for me to try but nice to see some different scales.  Nice scratch work in that scale also.  Looking at all of those kits I,m now pretty sure I've had a few when I was a young modler.  You have enough of them to start your own small conflict!

Rob , no prob , you tried and for that many thanks !Beer

I see the pin that you discribed in Andys pics so i'll go with that idea . I'm getting close to painting this so i will forego the the mesh bottomed storage .


Thanks again Beer

  • Member since
    April 2009
  • From: Carmel, IN
Posted by deafpanzer on Thursday, August 11, 2011 10:35 PM

Satch- Thank you so much for reminding me about your work earlier on the return roller. Beer   Now you have made it sounds alot easier and I got my Dremel for Christmas but I haven't really used it that much so this is a perfect opportunity.

Doogs- My kit comes with two storage bin so I was wondering if you want one if you are trying to replicate the Panzer III shown in the picture below with two bins. 

http://doogsmodelsdotcom.files.wordpress.com/2011/06/pziii-l-rusvillage.jpg?w=600&h=410

Andy

  • Member since
    October 2009
Posted by PANZERWAFFE on Friday, August 12, 2011 10:04 AM

Does anyone know if the "loader" had a seat of some sort for his position in the 10.5 Sturm 42?  Have been searching and have not seen thing.  Getting close with the interior but needed to know if I needed to add a seat before closing it up.

Rob

  • Member since
    December 2006
  • From: t.r.f. mn.
Posted by detailfreak on Friday, August 12, 2011 10:48 AM

                          PANZERWAFFE,from some of the pics i've seen the loaders seat resembles the commanders seat,and the commanders seat is actually adjustable for up and down.Not to say Dragon is wrong,its possible right,I will scrounge some more pics when I get home from work.

                                                Greg"Detailfreak"RowleyYes

[View:http://s172.photobucket.com/albums/w1/g-earl828/]  http://i158.photobucket.com/albums/t104/cycledupes/1000Roadwheels4BuildBadge.jpg

  • Member since
    October 2009
Posted by PANZERWAFFE on Friday, August 12, 2011 11:00 AM

Sweet!  My guess was he had one. Thanks!

Rob

  • Member since
    June 2010
  • From: Austin, TX
Posted by DoogsATX on Friday, August 12, 2011 11:43 AM

deafpanzer

Doogs- My kit comes with two storage bin so I was wondering if you want one if you are trying to replicate the Panzer III shown in the picture below with two bins. 

http://doogsmodelsdotcom.files.wordpress.com/2011/06/pziii-l-rusvillage.jpg?w=600&h=410

Think I'm planning build the 502nd vehicle depicted on the box, but thanks!

Also question for everyone. I've seen lots of love for Vallejo Dark Rubber for painting the rubber portions of the wheels. BUT...the Vallejo Dark Rubber seems substantially lighter than the Lifecolor Panzer Gray I'm planning to use (or Vallejo Black Grey, which is about the same). So...is this a case where Dark Rubber works very well on lighter vehicles (DAK, Dunky, whitewashed, etc), but something darker is required with PG?


On the Bench: 1/32 Trumpeter P-47 | 1/32 Hasegawa Bf 109G | 1/144 Eduard MiG-21MF x2

On Deck:  1/350 HMS Dreadnought

Blog/Completed Builds: doogsmodels.com


  • Member since
    February 2003
  • From: Allentown, PA
Posted by BaBill212 on Friday, August 12, 2011 3:57 PM

Rob,,,   I believe Greg is right,,,  the loader had a flip up / down seat if I remember correctly. I know I have seen some pics or schematics,,,  I'll try to find some and post.

Enjoy the ride!


  • Member since
    February 2003
  • From: Allentown, PA
Posted by BaBill212 on Friday, August 12, 2011 3:59 PM

Hi Matt,,,,  I have not tried the Vallejo DRubber yet...    wish I could offer some help, sorry

Enjoy the ride!


  • Member since
    March 2006
  • From: Right Side of a Left State
Posted by Shellback on Friday, August 12, 2011 7:55 PM

Here's what i came up with to represent the brackets that hold the removeable panel on either side of the turret .

  • Member since
    April 2009
  • From: Carmel, IN
Posted by deafpanzer on Friday, August 12, 2011 8:09 PM

Carl- WOW! Yes Great scratch building there...looks just like the one in the picture I posted earlier.  You are already in process of painting your Panzer!

Andy

  • Member since
    April 2011
  • From: imperial beach, ca
Posted by malone duke on Friday, August 12, 2011 8:09 PM
Man those look great! I do have a question and I hope its not a dumb one, but, do the skirt doors lay down and make a platform kinda. I know I've seen a pic of this but I have to dig deeper to find it.

  • Member since
    March 2006
  • From: Right Side of a Left State
Posted by Shellback on Friday, August 12, 2011 8:18 PM

OMG i hope not .....................Crying That means my theory that the panels lift up and off a couple of pins and brackets at the top is all wrong ! Crying

I'm ok , , snick , i think ......................

  • Member since
    April 2011
  • From: imperial beach, ca
Posted by malone duke on Friday, August 12, 2011 8:25 PM
I pretty sure its not hinged. Ill dig later tonight or manana. I know they had it resting on the ledge with the turret door open. I just can't remember how it was attached to the skirt. I'm fairly certain it just had an L frame welded across.

  • Member since
    March 2006
  • From: Right Side of a Left State
Posted by Shellback on Friday, August 12, 2011 8:32 PM

Seriousely , i'm not positive but i agree it probably was not hinged . Looks like it could be lifted up and laid aside for easier access into the side turret doors . Beer

  • Member since
    October 2009
Posted by PANZERWAFFE on Friday, August 12, 2011 8:43 PM

Not sure either but from the pictures would say it just lifts straight up and off, like you have it.

Great work!!!  It looks justlike the picture Yes

Rob

  • Member since
    October 2009
Posted by PANZERWAFFE on Friday, August 12, 2011 8:47 PM

BILL, GREG - Went ahead and made a seat and about to install it.  Just took a guess and made it similar to the commanders seat.  I,m going to attach it to the hull side bulkhead and it is hinged so that it will fold down against the bulkhead.  Hope it will be correct?


Rob

  • Member since
    March 2006
  • From: Right Side of a Left State
Posted by Shellback on Friday, August 12, 2011 9:14 PM

Some more paint . I'm thinking that not every nook n cranny ended up getting the final color of paint on it so i want some surfaces to show the primer color . Mainly behind the added on armor , side panels and lower turret surfaces . I'll see how it turns out but this is just a preliminary coat .

JOIN OUR COMMUNITY!

Our community is FREE to join. To participate you must either login or register for an account.

SEARCH FORUMS
FREE NEWSLETTER
By signing up you may also receive reader surveys and occasional special offers. We do not sell, rent or trade our email lists. View our Privacy Policy.