SEARCH FINESCALE.COM

Enter keywords or a search phrase below:

Still Too Many Props GB - 2013

40553 views
279 replies
1 rating 2 rating 3 rating 4 rating 5 rating
  • Member since
    September 2009
  • From: Frisco, TX
Posted by B17Pilot on Saturday, July 6, 2013 4:19 PM

Good Job y'all!

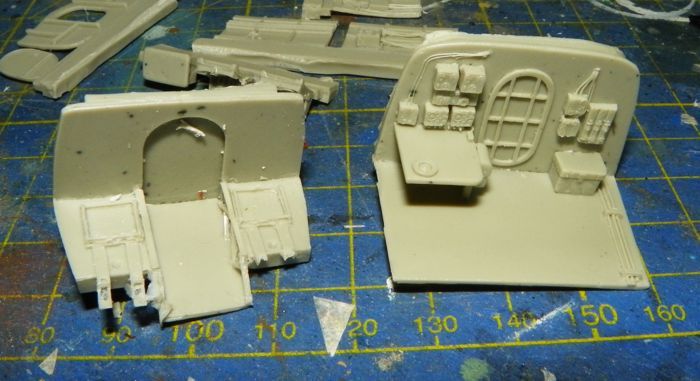
Well I'm waiting on a book to get here to continue my certification training, bonus=BENCH TIME! So I am about done with a repaint of a 727, so while waiting for decals to dry, I am able to catch up on progress of the B-26 I'm doing.

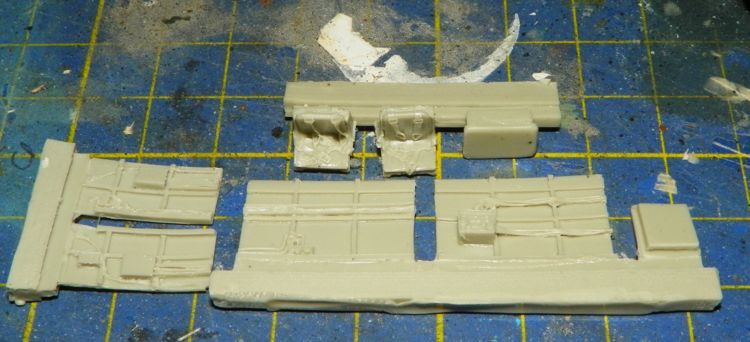
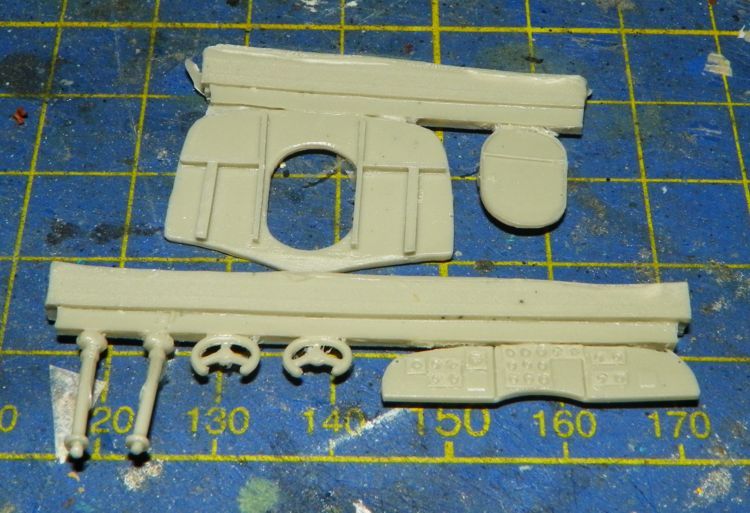
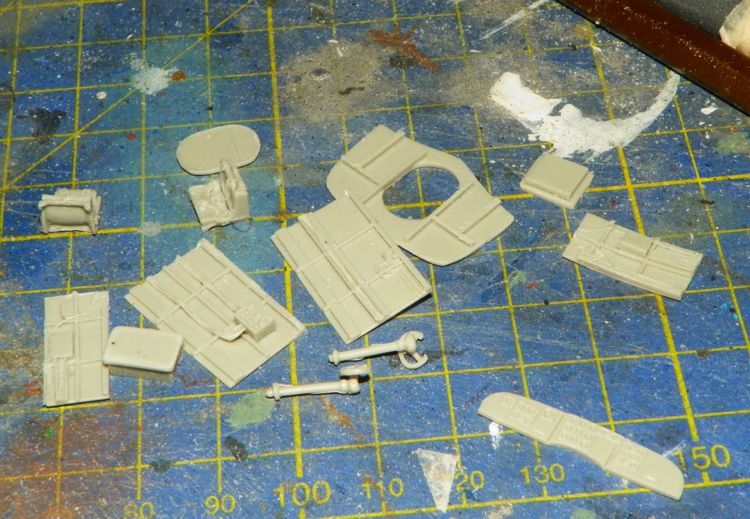
Cockpit:

One of the waist guns:

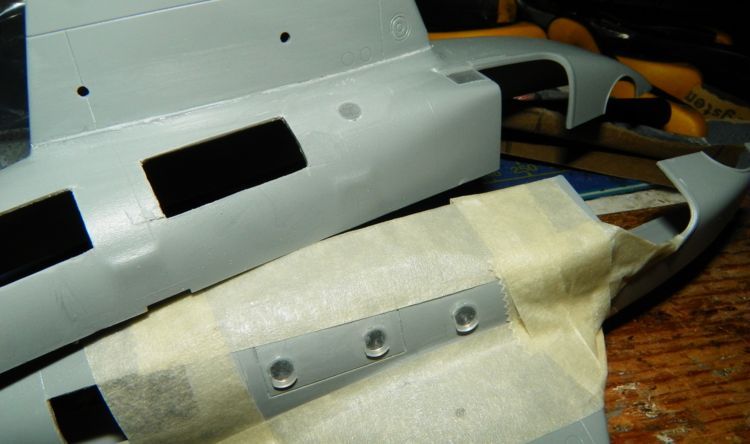
I think I lost the whole OOB idea I was going for, but opening up the ports on the gun pods just looks a whole lot better


And finally, I have the fuselage together. Only bad part is I had to put the top turret in it, which means I have got to be extremely careful not to break the guns off!

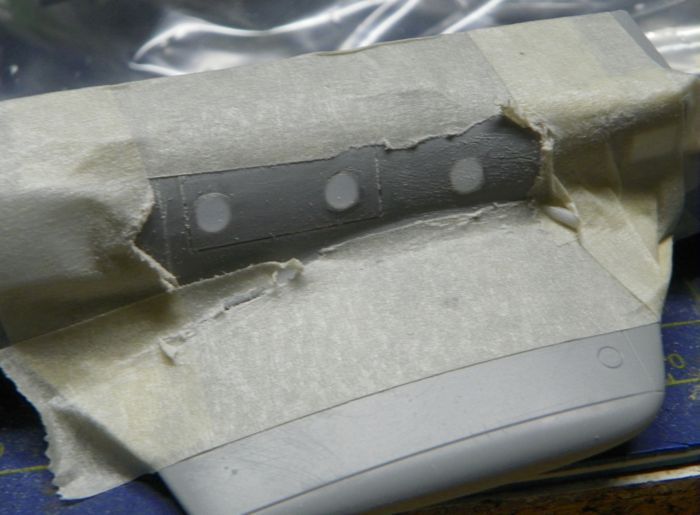
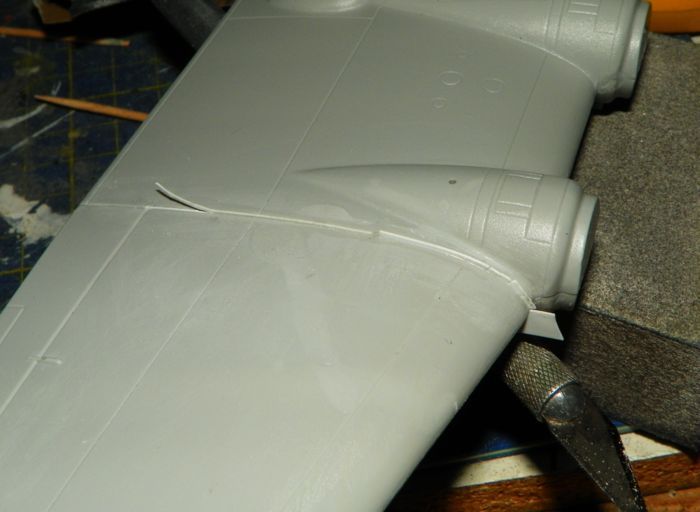
This is a re-pop of the kit from the 70s and the age of the mold is showing. Lots of flesh and mold marks, and this thing is going to need a lot of putty!


  • Member since
    December 2002
  • From: Bury St Edmunds, Suffolk, England
Posted by Bish on Tuesday, July 2, 2013 1:14 PM

Well, I can't take much of the credit, most of it is PE.

The 262 is now done so I can get going with this. The decals arrived last week. Less than a week to come from Canada, I'm impressed. Good old Royal mail must be trying to make things upto me.

So hopefully some pics soon.

I am a Norfolk man and i glory in being so


On the bench: Airfix 1/72nd Harrier GR.3/Fujimi 1/72nd Ju 87D-3

  • Member since
    October 2008
  • From: italy
Posted by bsyamato on Tuesday, July 2, 2013 12:36 PM

Bish

..no 72nd,..

IndifferentIndifferentIndifferent omg! outstanding!! i was sure a 48 kit with that level of detail Toast me too with 72!

  • Member since
    December 2002
  • From: Bury St Edmunds, Suffolk, England
Posted by Bish on Thursday, June 27, 2013 10:36 AM

Thanks guys. bsyamato, no 72nd, as is my scale of choice. Most of it is Eduard PE, the pre coloured set. I do like that stuff.

I am a Norfolk man and i glory in being so


On the bench: Airfix 1/72nd Harrier GR.3/Fujimi 1/72nd Ju 87D-3

  • Member since
    October 2008
  • From: italy
Posted by bsyamato on Thursday, June 27, 2013 10:28 AM

fantastic level of detail Bish!! i presume 48 scale

  • Member since
    April 2013
Posted by SchattenSpartan on Thursday, June 27, 2013 3:31 AM

TREYZX10R

Bish that office looks awesome,looking forward to seeing more!

Ditto

Trey: I hope you get some bench time soon. I'm looking forward to your next update!

Cheers, Clemens

  • Member since
    December 2002
  • From: Bury St Edmunds, Suffolk, England
Posted by Bish on Thursday, June 27, 2013 3:11 AM

Thanks TREY. They have been ordered, so should be here in time. I have the decals for my 262 now, so getting that wrapped up and should be back to the B-24 in a couple of days.

I am a Norfolk man and i glory in being so


On the bench: Airfix 1/72nd Harrier GR.3/Fujimi 1/72nd Ju 87D-3

  • Member since
    August 2009
  • From: Borlando Fla home of the rat
Posted by TREYZX10R on Tuesday, June 25, 2013 8:09 PM

Bish that office looks awesome,looking forward to seeing more! I'm sure you'll get the markings sorted!

Working lots of overtime so not much progress to report on the 17,hope to get started on the seat belts and the rest of the guns soon.

  • Member since
    December 2002
  • From: Bury St Edmunds, Suffolk, England
Posted by Bish on Friday, June 21, 2013 1:13 PM

As I was waiting for my decals for the Me 262 I am building, I started on my B-24 for the GB last week. I had made a little start on it for the first too many props GB when I thought my B-17 would be a no go. But thanks again to the guys of the forum, I was put onto some correct decals. So I only made a little progress on this before.

This is the kit I am building.

I am building the alternative aircraft, a lead ship of the 445th BG based at Tibenham in Norfolk. 

The colours are orange and black.

So far the pit is complete.

The fuselage is also together with the tail fitted. The kit instructions have you fitting the top turret for both options. I know the aircraft on the box had a top turret. But the colour plates I have seen of the one I am building show it absent. As you can see from the pic of the real thing, the only one I can find, the wing and engines obscure this area. Among the unused parts in the kit is one piece that perfectly fits the hole for the top turret. So I decided to tack the plunge and fit it. The colour plates show the blanked off turret to be flat, but who knows what they are based on, so this is a bit of guess work on my part.

Another possible issue with the kit is the markings.  There is a suggestion that it carried nose art on the left side, missing from the kit decals. Also, the tail and wing F are shown in red in some images, and the photo above seem to support this. Finally, the large F on the fuselage side has lights in it, again missing from the decals.

I found a set of Hussar decals which corrects all these, so have ordered these from Canada. They are pricey, but they also have other Norfolk based B-24 Lead ships which I can add to my collection. Hopefully the decals will be here in time so it doesn't cause a hold up.

I am a Norfolk man and i glory in being so


On the bench: Airfix 1/72nd Harrier GR.3/Fujimi 1/72nd Ju 87D-3

  • Member since
    October 2008
  • From: italy
Posted by bsyamato on Friday, June 21, 2013 6:07 AM

Trey, i have a fortress too in the stash, will take some reference from your , excellent detailing work Toast

I'm a little busy lately, hope to get back soon on the workbench!

  • Member since
    December 2002
  • From: Bury St Edmunds, Suffolk, England
Posted by Bish on Wednesday, June 19, 2013 4:50 PM

Great work Trey. I was just checking the pics of my 17F and the front looks empty compared to yours. I think I will have to put extra effort into my G.

I am a Norfolk man and i glory in being so


On the bench: Airfix 1/72nd Harrier GR.3/Fujimi 1/72nd Ju 87D-3

  • Member since
    July 2007
  • From: Southern New Jersey
Posted by troublemaker66 on Monday, June 17, 2013 4:52 AM

SchattenSpartan

I'd like to build this one instead:

with the addition of the following goodies:

  • Eduard masks
  • Eduard cockpit PE
  • Eduard "greenhouse" interior PE
  • HGW belts for the pilot seats
  • Eduard Brassin wheels
  • Profimodeller M2 gun barrels
  • Kits-World stencilling decals
  • Correct resin props (still have to find some; any ideas?)

I'll build "Meet Mrs Runyon" using this decal sheet:

I have to wait 3-6 weeks for all the AM stuff to arrive though...

Cheers, Clemens

That`ll be an awesome build Clemens! Hope "Nanny Bot" doesn`t see that nose art...lol

Len Pytlewski

  • Member since
    August 2009
  • From: Borlando Fla home of the rat
Posted by TREYZX10R on Sunday, June 16, 2013 8:25 PM

Thanks for all the kind words everyone it really helps keeping me motivated!

Bsyamato really looking forward to seeing more of the Do24 its one of my favs!

I've gotten the nav desk and seat in place,used the kit part for the desk top and cut it down to size.. Will start on the tail gun position next.


  • Member since
    October 2008
  • From: italy
Posted by bsyamato on Sunday, June 16, 2013 7:32 PM

Glad to join the group B17 Pilot Toast

Mhh Hmm it's too hard but i'll try .

I'm about finish my first four engine plane, the halifax from revell (the old matchbox not the new tool) for a friend and gain some experience to use on larger planes :)

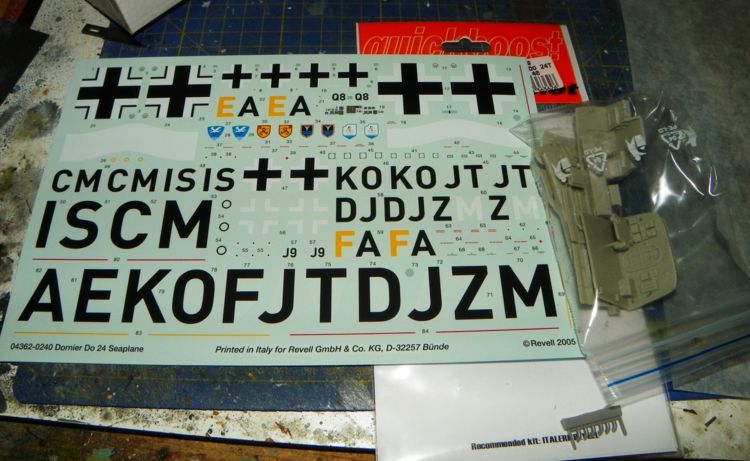
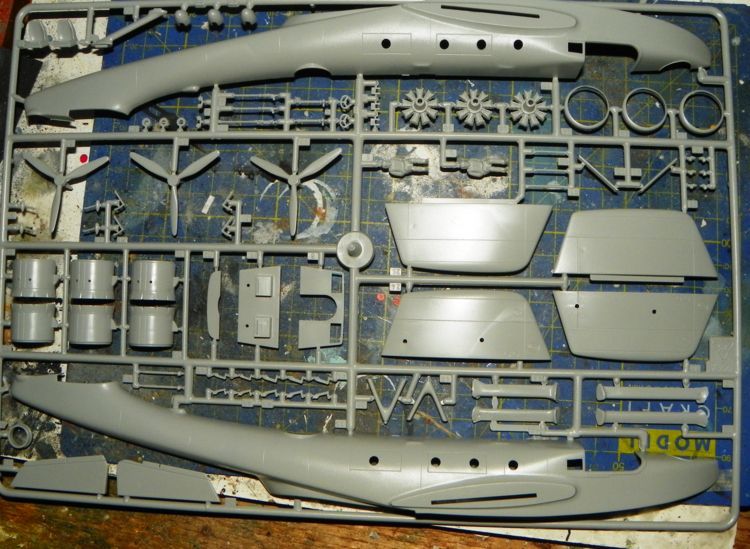
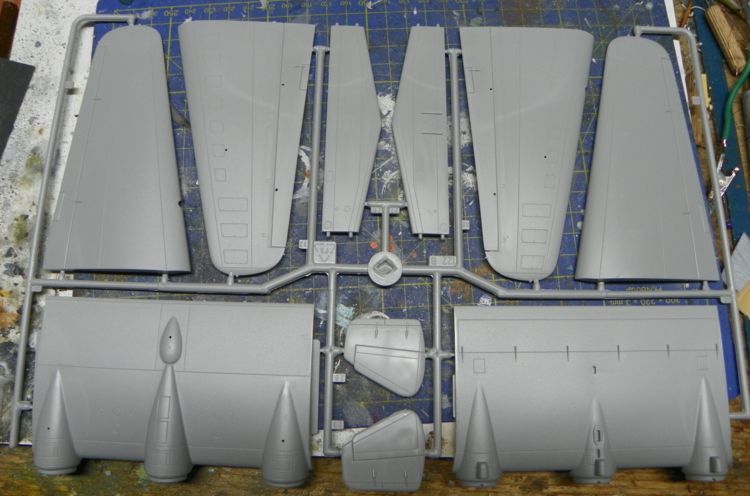
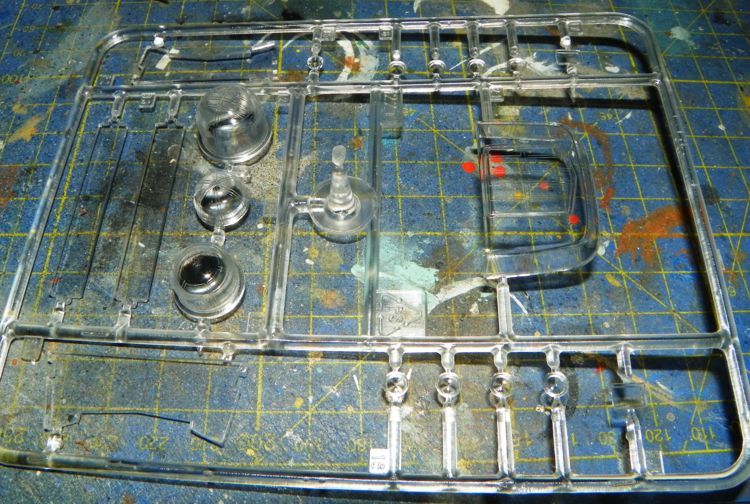
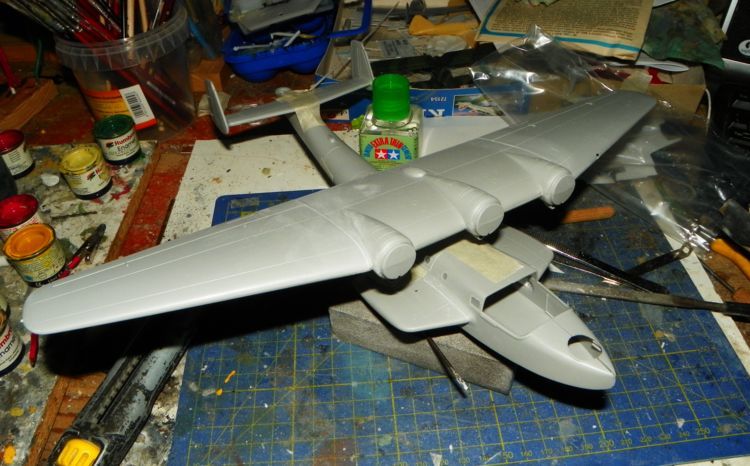
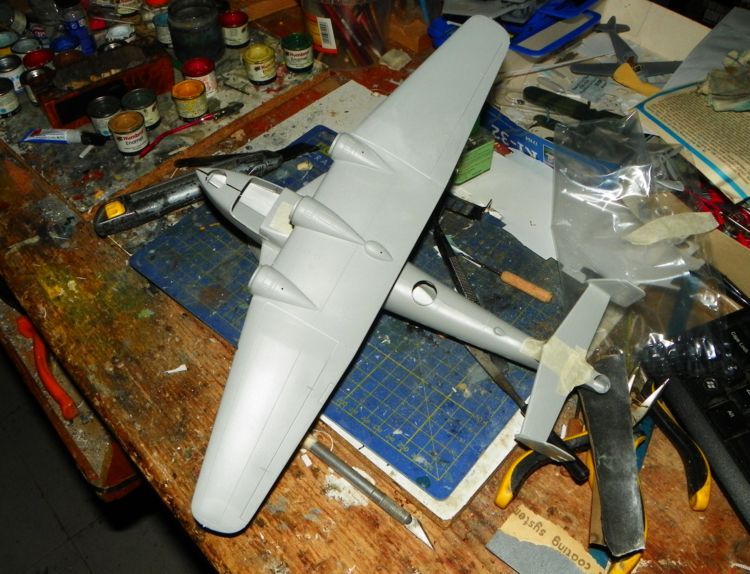
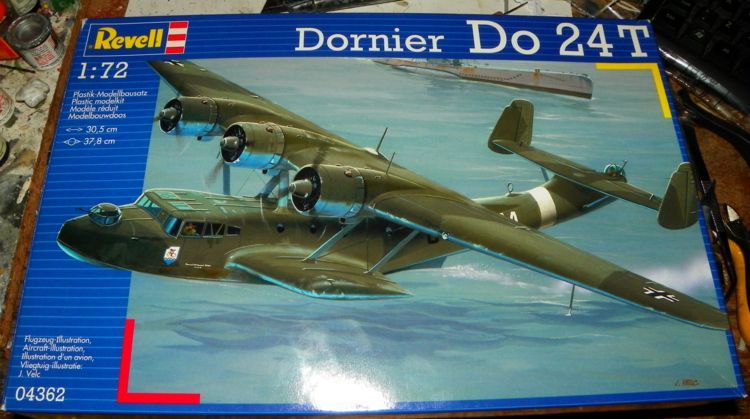
As i have time to write will introduce all three kits with done work, here the first, the Do-24 from revell, a rebox of old italeri kit (lately italeri ennanched the moulds and put sales a new box!) wit gofty model cockpit set

Box'n'sprues
I'm not used to manage after market sets, i prefere to scratchbuild it  and save money for more kits but all these three kits comes from a private sale at very low price Propeller

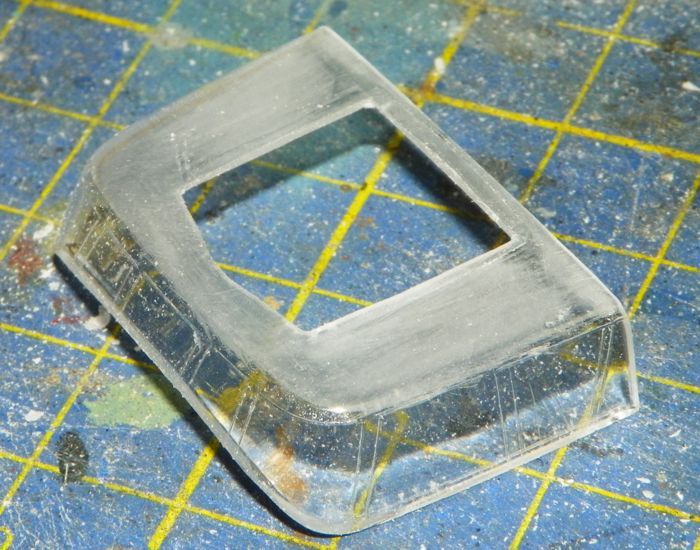
First mod was a cut on the upper fuselage doors and corrected their size, too narrow (the original door size is the one near the little windows.. to close!) , also glued all windows in reverse mode, windows turned and glued from the outside instead from inside (a trick recently learned)
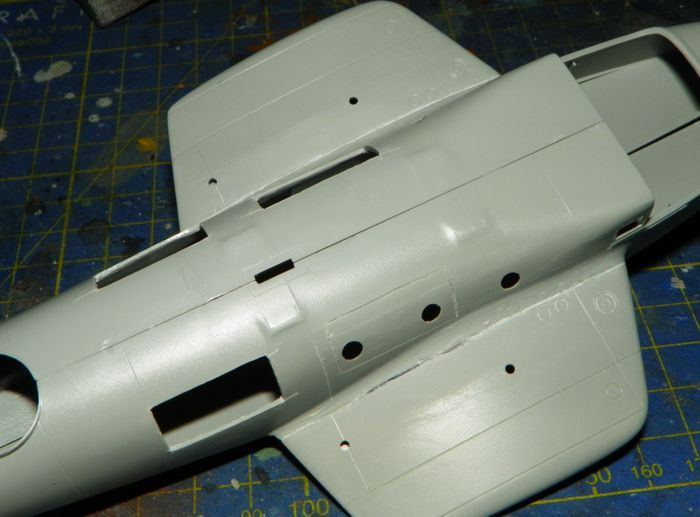
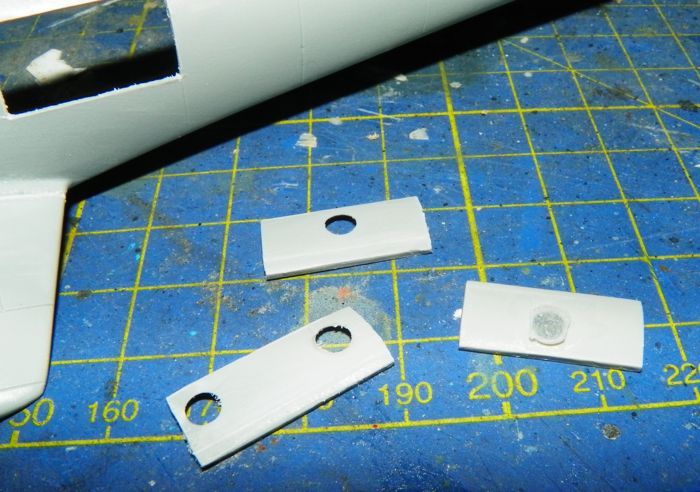
The inner will be detailed with structures so i prepared a smooth surface and filled the floating gaps with plastic sheets and putty
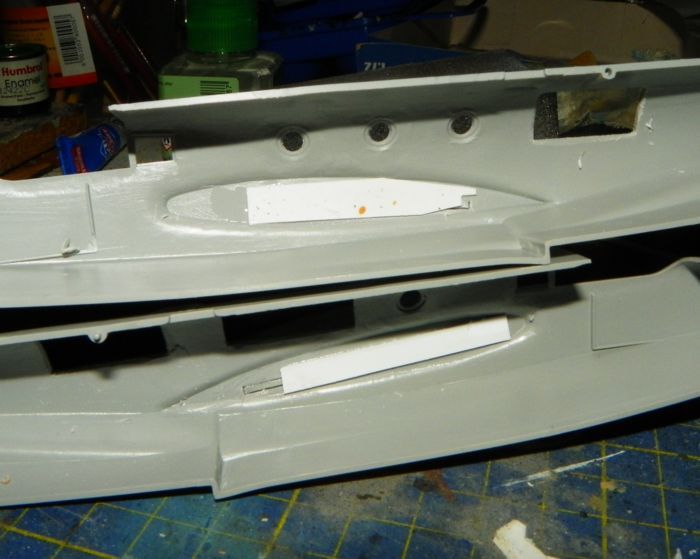
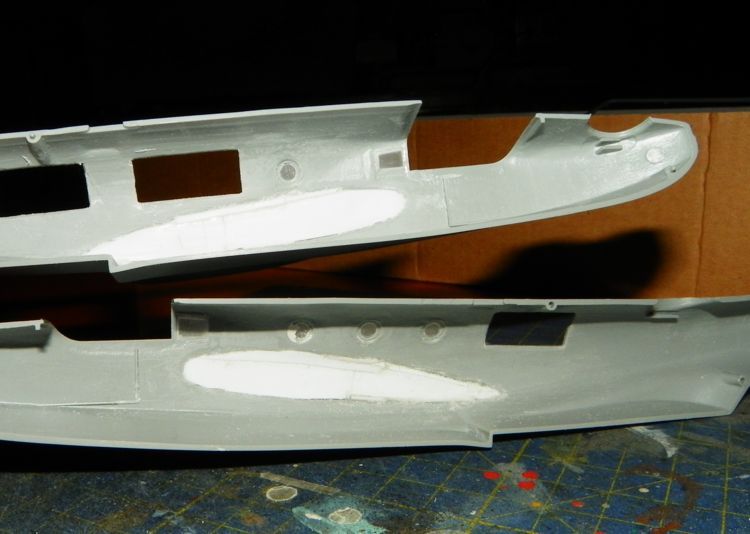
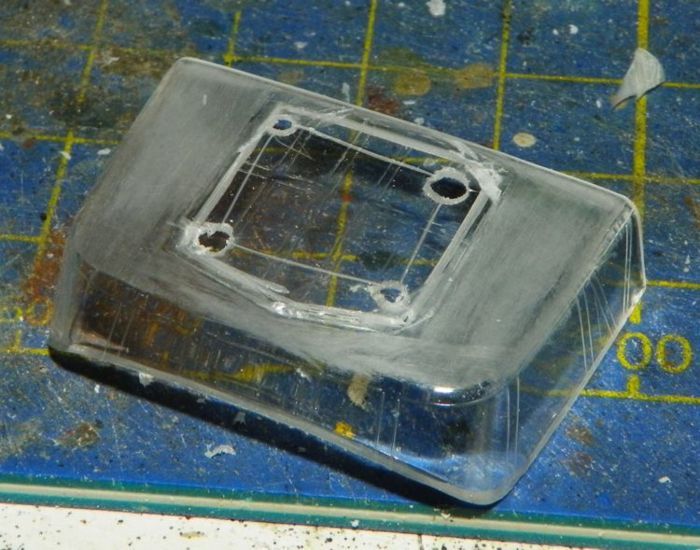
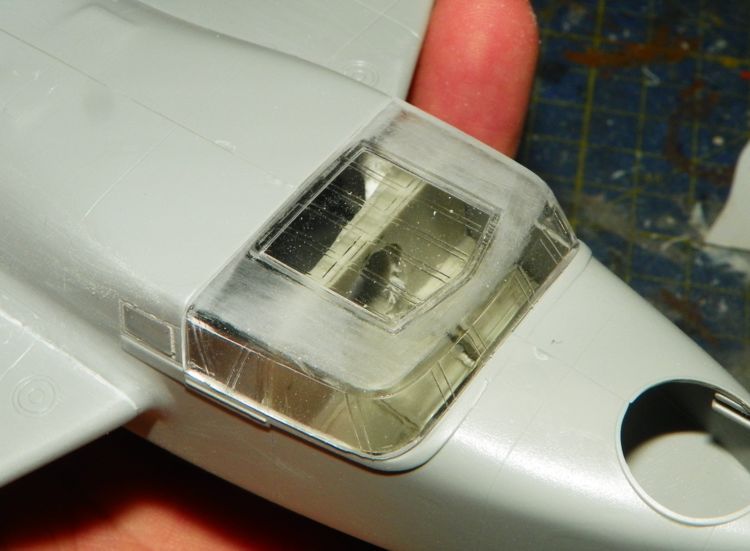
Canopy top opened, will try to open all possible acces door, also the original top was partially wrong
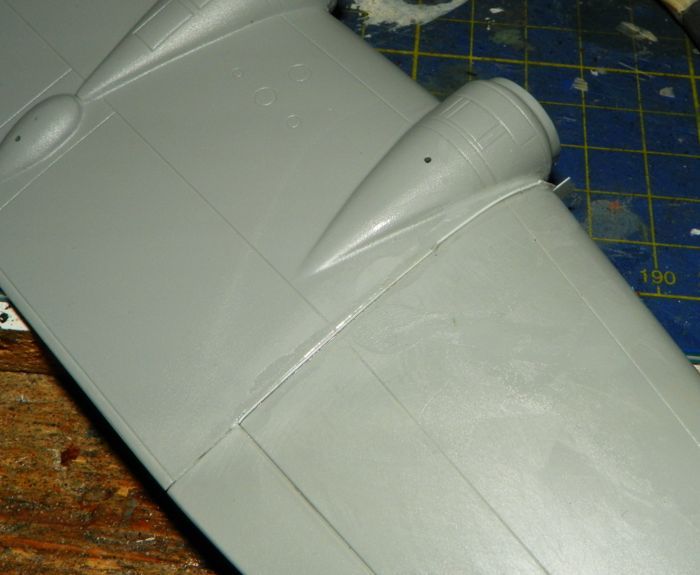
Wings junction gaps was filled in some way
free from base the resin pieces with some unappropriated tool Embarrassed ,some unwished break too

Some dry fittings
After these works just glued the engine cowling toghether but no pictures :) 

At the next!

  • Member since
    September 2009
  • From: Frisco, TX
Posted by B17Pilot on Sunday, June 16, 2013 4:35 PM

Bsyamato - I put you down for all three, since you're building all three at the same time! Plus you don't see those built very much, so all three are in!

SchattenSparten - I've changed your build to the 1/32 B-25, can't wait to see it! I've got one in the stash, so I am looking forward to your build.


  • Member since
    April 2013
Posted by SchattenSpartan on Saturday, June 15, 2013 2:02 PM

I'd like to build this one instead:

with the addition of the following goodies:

  • Eduard masks
  • Eduard cockpit PE
  • Eduard "greenhouse" interior PE
  • HGW belts for the pilot seats
  • Eduard Brassin wheels
  • Profimodeller M2 gun barrels
  • Kits-World stencilling decals
  • Correct resin props (still have to find some; any ideas?)

I'll build "Meet Mrs Runyon" using this decal sheet:

I have to wait 3-6 weeks for all the AM stuff to arrive though...

Cheers, Clemens

  • Member since
    April 2013
Posted by SchattenSpartan on Friday, June 14, 2013 5:37 PM

Uhm, B-17Pilot? Could you please change my entry for this GB? I'd like to build the B-25 with those custom decals when I gained more experience... I'll tell you tomorrow what I'm up to instead...

Cheers, Clemens

  • Member since
    April 2013
Posted by SchattenSpartan on Friday, June 14, 2013 5:35 PM

I'd like to see your progress on the 2nd one! It just looks so awesome! The 3rd one looks cool as well!

Cheers Clemens

  • Member since
    October 2008
  • From: italy
Posted by bsyamato on Friday, June 14, 2013 4:47 PM

Thanx B-17 Pilot :)

The three options are the following 1/72 kits:

Trmpeter tu-95ms bear H, main pieces glued togheter (wings and fliyng surfaces) but fuselage again opened and lots of works to do

the Revell Do-24T with cockpit resin set, here wings pieces glued toghether too and started some work on fuselage

And the hasegawa Shinmaywa Us-1a. Wings , flaps and engines glued toghrther and fuselage not glued with some started work

I'm good with one of these , no preference for the kit to submit , i'm working on all by rotation on the workbench 

Let the choice to you Embarrassed

  • Member since
    September 2009
  • From: Frisco, TX
Posted by B17Pilot on Friday, June 14, 2013 1:25 PM

Trey, I'm going OOB on the B-26, don't think a Sperry was installed in the actual aircraft, not sure though.

Bsyamato - Join anytime, end date is Dec 31, so you still have time. What are you going to build?


  • Member since
    October 2008
  • From: italy
Posted by bsyamato on Friday, June 14, 2013 11:29 AM

Hi guys! still in time to join?

I have actually 3 planes tha probably meets requirements :)

  • Member since
    April 2013
Posted by SchattenSpartan on Wednesday, June 12, 2013 12:27 PM

That's some really impressive stuff, Trey!

  • Member since
    April 2004
  • From: Sydney
Posted by cossack on Wednesday, June 12, 2013 4:53 AM

Trey,

Such a pity to see it all boxed away.  However, after such a wonderful job on the inside, I can't wait to see you weave your magic on the outside

Paul

  • Member since
    August 2009
  • From: Borlando Fla home of the rat
Posted by TREYZX10R on Tuesday, June 11, 2013 11:08 PM

To me it would make sense to offer up a set for each multiple gun application,if you're listening Master marketers ,hint ,hint. My life would have been so much easier to just order up a 'G' B-17 upgrade and been done with it.

This is a productive day in the build as the sub assemblies start to fall in place! The major components are installed and once the tail gunner area is squared away I can button this bad boy up!!!

  • Member since
    December 2002
  • From: Bury St Edmunds, Suffolk, England
Posted by Bish on Tuesday, June 11, 2013 11:30 AM

I have seen them in the Quickbost sets. That's the ones I am going for  my B-17 and B-24's as the cost of a full set of those is the same as two metal barrels. But I would have thought Master would have come up with the barrels with the flash guards.

I am a Norfolk man and i glory in being so


On the bench: Airfix 1/72nd Harrier GR.3/Fujimi 1/72nd Ju 87D-3

  • Member since
    July 2011
Posted by maharrin on Tuesday, June 11, 2013 10:37 AM

I haven't seen any that come with the metal barrels either, but they are included in the Eduard Nose Interior (x2) and Rear Interior (x2) PE sets, and some good resin ones (x4) in the Quickboost B-17 Gun Barrels set.

On the bench: 1/48 B-17 Diorama

  • Member since
    December 2002
  • From: Bury St Edmunds, Suffolk, England
Posted by Bish on Tuesday, June 11, 2013 3:29 AM

I did wonder about those nose barrels. I haven't found any metal barrels that come with those flash guards fitted.

I am a Norfolk man and i glory in being so


On the bench: Airfix 1/72nd Harrier GR.3/Fujimi 1/72nd Ju 87D-3

  • Member since
    August 2009
  • From: Borlando Fla home of the rat
Posted by TREYZX10R on Monday, June 10, 2013 8:51 PM

Bish appreciate the kind words. I agree the metal barrels are the way to go and worth the money too! I've just got the kit supplied gun barrels in the nose turret for now,after painting I'll be putting metal barrels in. I'm cutting the resin flash guards from the verlinden set and using them for the ends.

B17PILOT Thanks! Thought you were someone else for a moment with the marriage proposal lol. Looking forward to seeing some pics of your 26,did it use a sperry turret up top?

Cut off the plastic barrels and drilled holes for the metal ones

I added some ammo cans for a little more detail.

Not a lot of this will be seen once its buttoned up just had to add a little something to the otherwise stark assembly. Looking at photos of the real turret it was quite busy in there and rather tight,nothing compared to the close quarters in the ball turret of course.

Test fit looks good

on to the ball turret next!

  • Member since
    September 2009
  • From: Frisco, TX
Posted by B17Pilot on Monday, June 10, 2013 8:55 AM

Awesome, Trey! Love it and want to marry your B-17!

Currently up'ing my Microsoft certs so I haven't had much bench time. I did get my B-26 started before and have gotten the cockpit done and installed. Was finishing up the top turret before I stopped. Hopeful to get back to it by August.


JOIN OUR COMMUNITY!

Our community is FREE to join. To participate you must either login or register for an account.

SEARCH FORUMS
FREE NEWSLETTER
By signing up you may also receive reader surveys and occasional special offers. We do not sell, rent or trade our email lists. View our Privacy Policy.