SEARCH FINESCALE.COM

Enter keywords or a search phrase below:

Twin Boom Group Build 2013

46236 views
314 replies
1 rating 2 rating 3 rating 4 rating 5 rating
  • Member since
    December 2009
Posted by ww2psycho on Friday, January 11, 2013 12:17 PM

small update on my end. First, still no reply from squadron. Second, the mounts for the 20mm guns (I10 and I11 in the instructions) Extreme care must be given to remove these! just as I snipped one end of them, one of them snapped in half and flew who knows where. Good thing the gun doors will be closed so not much of a loss here. Will have to remember for next time.

Also, Im going to make this a ceiling hanger so the landing gear doors will all be closed. I have no room for another plane on my shelf.

  • Member since
    August 2009
  • From: Borlando Fla home of the rat
Posted by TREYZX10R on Friday, January 11, 2013 8:23 PM

ww2psycho hope you hear from squadron soon! The mishaps seem to be working in your favor, at least they wo'nt be seen! Looking forward to seeing some pics of your progress!

I've broke out the old stand by green squadron putty for the gun pods

Starting to add some detail to the office,avionics shelf

Placed the seats temporarily so I could figure the placement of the other components

Added the IP bulkhead for the back seater

Some side detail added

Up next will be some fiddly bits for the avionics shelf and the throttle /prop position levers


  • Member since
    September 2003
  • From: Australia
Posted by Helo H-34 on Friday, January 11, 2013 10:04 PM

Awesome work Trey .

I've been copying you WIP pics for reference as I have two of those 1/48 kits in the stash . I checked them both the other day and luckly my wings aren't warped like yours were .

Where did you get the resin seats from , I guess I should really buy four for my two 1/48 kits .

John .

  • Member since
    August 2009
  • From: Borlando Fla home of the rat
Posted by TREYZX10R on Saturday, January 12, 2013 9:12 AM

Thanks John,I got the seats off evil-bay $7.95 for both shipped. They are actually F-4 seats and are'nt correct for a Bronco ,best match I could find and for under 10 bucks I figure its close enough for my needs..

Heres a wierd find how about a Bronco on floats


  • Member since
    April 2003
Posted by shivinigh on Saturday, January 12, 2013 2:31 PM

Treyz your Bronco is looking really good. A Bronco with Pontoons????? Guess we know what your next project is going to be.


  • Member since
    December 2002
  • From: Bury St Edmunds, Suffolk, England
Posted by Bish on Saturday, January 12, 2013 2:41 PM

Thats coming along nicely TREY.

TREYZX10R

Thanks John,I got the seats off evil-bay $7.95 for both shipped. They are actually F-4 seats and are'nt correct for a Bronco ,best match I could find and for under 10 bucks I figure its close enough for my needs..

Heres a wierd find how about a Bronco on floats


Is this your next build Wink

I am a Norfolk man and i glory in being so


On the bench: Airfix 1/72nd Harrier GR.3/Fujimi 1/72nd Ju 87D-3

  • Member since
    August 2009
  • From: Borlando Fla home of the rat
Posted by TREYZX10R on Saturday, January 12, 2013 2:52 PM

Shivinigh,Bish thanks for the kind words fellas! I would be tempted to do the floats on this one but I've already put the gun pods on! I would love to do one on floats but not another Testors kit and as I only really do 1/48 scale its not likely to happen unless another manufacture steps up to the plate and puts out a better kit in 48.

I've managed to get the bulk of the office mods in place and a shot of primer


  • Member since
    January 2012
  • From: East Peoria, IL
Posted by stoutfella on Sunday, January 13, 2013 1:34 PM

Greetings,

Moving along on the Lightning. As mentioned previously, I'm going strictly OOB on this one, as I don't feel like spending three times more than the kit price in order to marginally spiff up what will definitely be a shelf queen.

Cockpit. Nothing much to see here, folks. Move along:

The more I work with this thing, the more I long for my Tamiya stash. Brittle plastic with giant attachment points, flash EVERYWHERE, 60s engineering and fit that is mediocre at best. Note the ragged leading edges:

Plowing ahead, though. Adding plenty of weight to the nacelles. I actually added more after taking pics.

Starting to put the puzzle together:

Like I said, plenty of weight in this bird.

OK, at least beginning to look like a Lightning:

I'm trying to do my best on cleaning up the fit and seams without being compulsive about it. It's funny, I'm willing to go the extra mile on seam cleanup (if there is any) on the Tamiya kits because I know a little extra work will make it perfect. But with this, I know that no matter what I do it will still be mediocre. The P-38 is still one of the coolest kits ever, but I guarantee this will be the last Revellogram version I do.

Got my decal situation sorted out. Returned the mistakenly ordered 1/72 sheet and now have the 1/48 sheet I wanted in hand. At the moment, leaning toward doing St. Louis Blues in NMF, but I'll have to see how I feel after finishing cleanup and what kind of surface I end up with. Other choice is Black Market Babe in OD/neutral gray. Onward!

Cheers,

Stoutfella

On the bench: 1/48 Tamiya Bristol Beaufighter

On deck: 1/48 Tamiya P51-B

  • Member since
    December 2002
  • From: Bury St Edmunds, Suffolk, England
Posted by Bish on Sunday, January 13, 2013 2:06 PM

Stoutfella, sounds like you have a challenge on your hands. Buts it looks to be coming along very nicely.

I am a Norfolk man and i glory in being so


On the bench: Airfix 1/72nd Harrier GR.3/Fujimi 1/72nd Ju 87D-3

  • Member since
    September 2003
  • From: Australia
Posted by Helo H-34 on Sunday, January 13, 2013 3:32 PM

Nice WIP pic's Stoutfella ;

I think the P-38 build is coming along well . I built the Revell 1/72 version last year , I was mezmorized by the fancy 'Box Art' and thought it was a new tooling kit but sadly it also dated back to the early eighties . I managed to build mine and it fought me all the way , here's a link to the finished pic's

cs.finescale.com/.../1473566.aspx

I know Dragon have a newer 1/72 P-38 kit available but their quite expensive , if I see one for under $15.00 , I might pick one up . I paid $30 for the Revell kit and have been kicking myself ever since .

John

  • Member since
    April 2003
Posted by shivinigh on Sunday, January 13, 2013 3:42 PM
The P-38 is looking good. I picked up Academy's 1/72 P-38 for around $15.00. Haven't started working on it yet but the parts look good and any other Academy kit I have done in that scale were good fits and the details were nicely done.


  • Member since
    August 2009
  • From: Borlando Fla home of the rat
Posted by TREYZX10R on Sunday, January 13, 2013 3:47 PM

Stoutfella you're doing a great job with a difficult kit for sure! Sadly every 1/48 kit of the 38 thats out has issues. About time one of the new kitmakers stepped up and put out a decent one in 48 scale. Looking forward to your next update ,cheers Trey.

I've got the office about %90 wrapped up just some minor tweaks needed. I added some fiddly bits and wiring to the avionics shelf and set the seats in place. I went ahead with the kit supplied Pilot figure,why Testors felt the need to put one with an O2 mask in this kit is beyond me. Of course look at the rest of the kit and it should'nt really be a shocker huh? Enough of my griping heres the pics.

Seats are really nice resin ones from Verlinden

I also rescribed the pod

  • Member since
    December 2002
  • From: Bury St Edmunds, Suffolk, England
Posted by Bish on Sunday, January 13, 2013 5:01 PM

Loking nice TREY, great work on those seats.

I am a Norfolk man and i glory in being so


On the bench: Airfix 1/72nd Harrier GR.3/Fujimi 1/72nd Ju 87D-3

  • Member since
    August 2009
  • From: Borlando Fla home of the rat
Posted by TREYZX10R on Monday, January 14, 2013 7:34 PM

Thanks Bish!


Wing rescribe is done. Looking at pictures of the real wing not much really shows in the way of panel lines,thankfully it made it pretty straight forward and simple. I'm going to have to rethink the vortex generators on the control surfaces ,might be too difficult  to get them thin and small enough to look right.

The wing fit is decent but will require some putty fore and aft to blend in the small gaps

  • Member since
    April 2003
Posted by shivinigh on Monday, January 14, 2013 9:57 PM

Plane is looking incredible Treyz.Have a feeling though once you are done that youwill not want to see any more panel lines for a while.

well got the first basecoat for the underside done. Used madelmaster acryl light grey

than the lighter first coat for the upper camaflafe using light gull grey

than the second camaflage colour using dark grey

and now for the telling moment to see if I did all the masking right


  • Member since
    January 2012
  • From: East Peoria, IL
Posted by stoutfella on Tuesday, January 15, 2013 7:38 PM

Trey: Agreed. Great work on that cockpit and the re-scribing, as well. If I was more ambitious, I'd sand off the rivets on the P-38 and re-scribe, but I'm not up to that yet. Wonder if you could details the tools and templates you use for the job?

Also, couldn't agree with you more about the state of 1/48 Lightning kits. This will likely be my last one, but I'll hang onto whichever set of markings I don't use on this one just in case Tamiya sacks up and brings one out someday.

Cheers,

Stoutfella

On the bench: 1/48 Tamiya Bristol Beaufighter

On deck: 1/48 Tamiya P51-B

  • Member since
    January 2012
  • From: East Peoria, IL
Posted by stoutfella on Tuesday, January 15, 2013 8:08 PM

Greetings,

Well, I'm already worn out. I've had just about enough trimming, filling, sanding and tweaking. As I said earlier, I'm just not gonna be obsessive about trying to make this perfect, but some things just weren't acceptable, such as the abysmal "fit" of the fairings on the big scoops on the booms. I mean, these just weren't even remotely close. Out came the Tamiya putty.
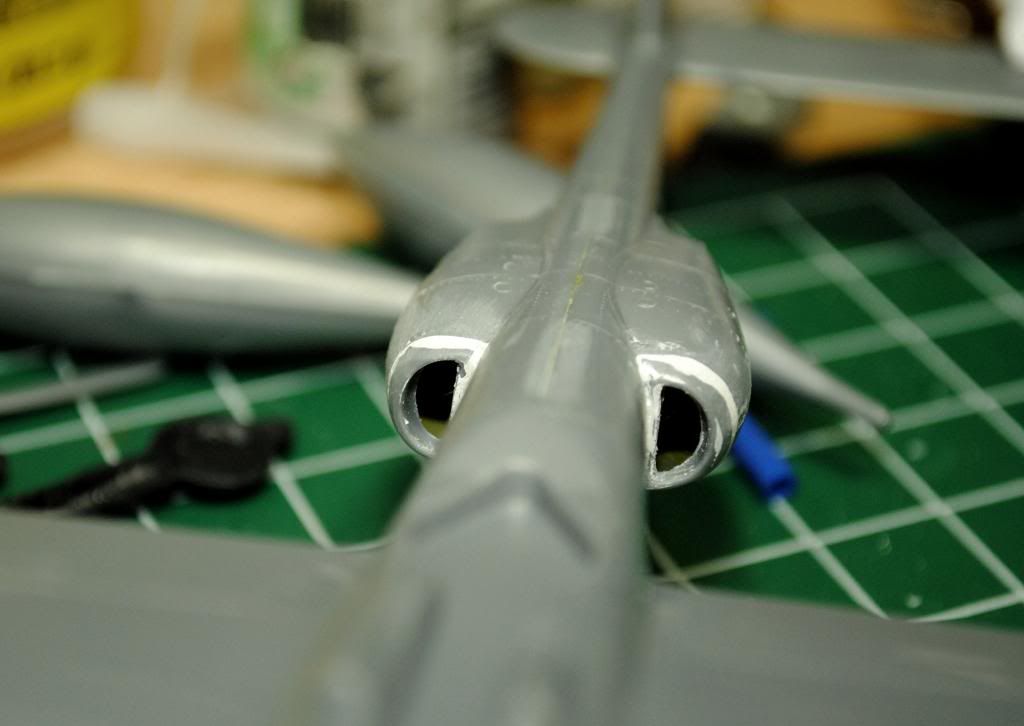
The gun bay doors and the nose piece were particularly hideous.
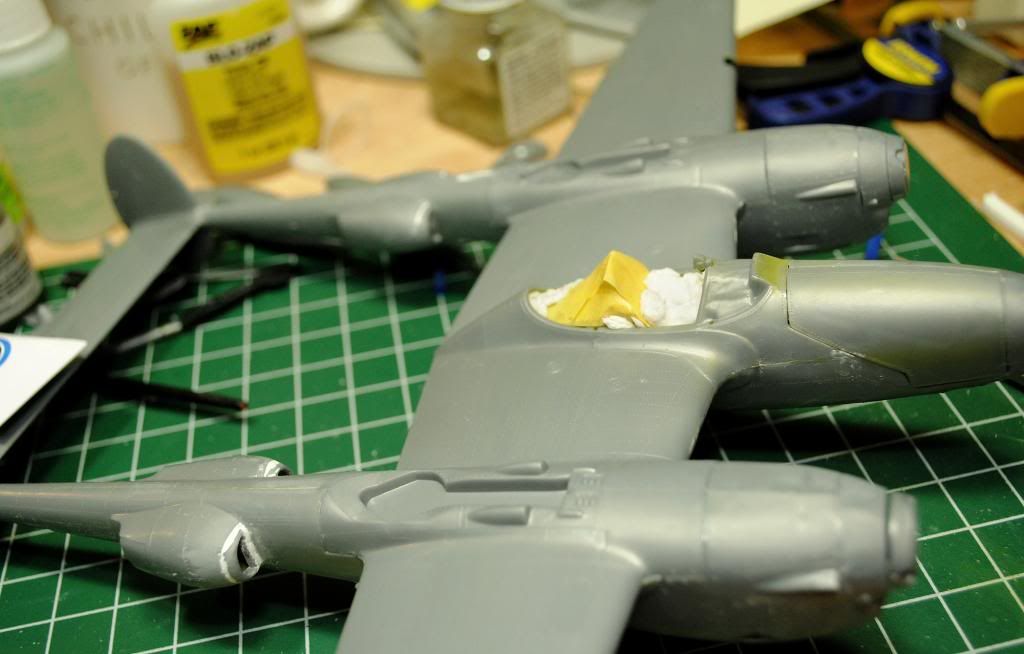
I've been fighting the good fight on those, and I'll try to do some more smoothing, but there's only so much I can stand. I know this kit can be turned into something excellent, but my skills aren't yet at the level where I can compensate for and correct brittle plastic that just doesn't fit.

So a little more smoothing and fiddling (not to mention about a cubic yard of damp TP to fill those wheel bays) and it'll be off to paint.
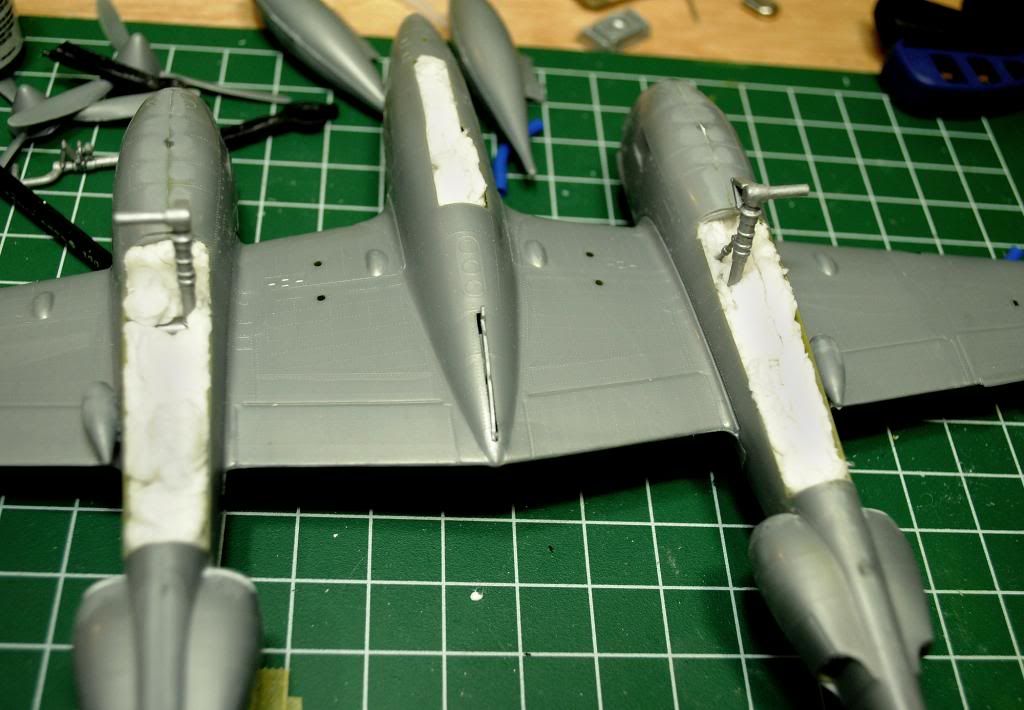
I'm still leaning toward the NMF "St. Louis Blues." I'll use MM Metalizer because I've used it before and it's what I have on hand. Which means I'll be spraying OD for anti-glare panels and blue for stripes first, as I don't want to mask over the delicate Metalizer. And that means I have to try to match the blue of the other markings. Unless I call an audible at the line and switch it to "Black Market Babe" in OD/gray, which would probably be the far simpler choice.

Cheers,

Stoutfella

On the bench: 1/48 Tamiya Bristol Beaufighter

On deck: 1/48 Tamiya P51-B

  • Member since
    January 2012
  • From: East Peoria, IL
Posted by stoutfella on Tuesday, January 15, 2013 8:16 PM

shivinigh: Nice work on the glider camo. I'm really looking forward to seeing that one finished!

Cheers,

Stoutfella

On the bench: 1/48 Tamiya Bristol Beaufighter

On deck: 1/48 Tamiya P51-B

  • Member since
    February 2003
  • From: Rothesay, NB Canada
Posted by VanceCrozier on Wednesday, January 16, 2013 12:41 PM

stoutfella

Greetings,

Well, I'm already worn out. I've had just about enough trimming, filling, sanding and tweaking. As I said earlier, I'm just not gonna be obsessive about trying to make this perfect, but some things just weren't acceptable, such as the abysmal "fit" of the fairings on the big scoops on the booms. I mean, these just weren't even remotely close. Out came the Tamiya putty.

The gun bay doors and the nose piece were particularly hideous.

I've been fighting the good fight on those, and I'll try to do some more smoothing, but there's only so much I can stand. I know this kit can be turned into something excellent, but my skills aren't yet at the level where I can compensate for and correct brittle plastic that just doesn't fit.

So a little more smoothing and fiddling (not to mention about a cubic yard of damp TP to fill those wheel bays) and it'll be off to paint.

I'm still leaning toward the NMF "St. Louis Blues." I'll use MM Metalizer because I've used it before and it's what I have on hand. Which means I'll be spraying OD for anti-glare panels and blue for stripes first, as I don't want to mask over the delicate Metalizer. And that means I have to try to match the blue of the other markings. Unless I call an audible at the line and switch it to "Black Market Babe" in OD/gray, which would probably be the far simpler choice.

StoutFella!!! This all sounds very familiar to me! Took that kit & did the nightfighter conversion on it a few years ago. Nothing going on there that can't be solved with putty, styrene and time! ;)

On the bench: Airfix 1/72 Wildcat; Airfix 1/72 Vampire T11; Airfix 1/72 Fouga Magister

  • Member since
    April 2003
Posted by shivinigh on Wednesday, January 16, 2013 3:13 PM

Submitted for your approval. The decals gave me some problems cause they didn't quite want to sit right but lots of setting solution helped with that. Still have to mount it with the ramps and Kublewaggen but the glider itself is finished.


  • Member since
    December 2002
  • From: Bury St Edmunds, Suffolk, England
Posted by Bish on Wednesday, January 16, 2013 4:02 PM

Nice looking build. I have a kubel coming out of the back of mine as well. What sort of base are you putting it on.

I am a Norfolk man and i glory in being so


On the bench: Airfix 1/72nd Harrier GR.3/Fujimi 1/72nd Ju 87D-3

  • Member since
    April 2003
Posted by shivinigh on Wednesday, January 16, 2013 4:15 PM

the piece of wood it is sitting on is going to be the base. It is a piece of board that I broke in my Tae-kwon-Do class for my first belt. Not going to do anything fancy just cover it with some grass so it is sitting in a field. Lost one of the ramps thanks to a surprise Cat Attack. I also have some German crew members for a Zepplin that I am using to load it on the Gotha.


  • Member since
    September 2012
Posted by GMorrison on Thursday, January 17, 2013 6:29 PM

shivinigh

the piece of wood it is sitting on is going to be the base. It is a piece of board that I broke in my Tae-kwon-Do class for my first belt.

Wow! Chop saw hands ehhh???

That is really cool. I have never seen that build before.

 Modeling is an excuse to buy books.


  • Member since
    December 2002
  • From: Bury St Edmunds, Suffolk, England
Posted by Bish on Thursday, January 17, 2013 6:42 PM

A nice little personal touch for the base shivinigh. Just be careful you don't get the modelling and Tae-kwon-Do mixd up, that could get messy.

I am a Norfolk man and i glory in being so


On the bench: Airfix 1/72nd Harrier GR.3/Fujimi 1/72nd Ju 87D-3

  • Member since
    April 2003
Posted by shivinigh on Thursday, January 17, 2013 9:19 PM
Thanks for the nice words. I'll try not to get modelling and martial arts mixed up. Besides knowing my luck the model would win. It would make giving planes that crashesd look eaier. "YAAAAAA CHOP" viola broken wing.


  • Member since
    December 2009
Posted by ww2psycho on Thursday, January 17, 2013 9:27 PM

Wow thats some really nice work shivinigh.

I Haven't made very much progress lately. I'm hoping to get some building hours in this weekend, I did put one of the booms together, fit is very very good. I'll get the other one together before posting some WIP pictures. There really isn't much to see since I'm still waiting on a reply from squadron. I think I'm just going to try scratch building the broken piece. It will be very hard to see being a ceiling hanger.

  • Member since
    January 2012
  • From: East Peoria, IL
Posted by stoutfella on Friday, January 18, 2013 3:19 PM

Looks really good, shivinigh! Makes me want to build a glider.

As for my P-38, I primed it with Mr. Surfacer 1200. Didn't look terrible, but there are enough remaining surface and seam flaws that I just don't feel like investing vast amounts more time addressing. I figured the NMF scheme would only spotlight the flaws, so I'm switching to the OD/neutral gray scheme for "Black Market Babe." I'll save the "St. Louis Blues" decals for the day Tamiya puts out a Lightning.

I sprayed MM enamel insignia yellow for the tail stripes and back half of the spinners. While I was at it, I tipped the props, then sprayed the blades with Tamiya flat black and decided to do a little preshading. I've never done much preshading and as the photos can attest, I didn't put a lot of steady-handed precision into the task. I'm only looking to create a bit of variation in the top coats.

A busy weekend awaits, with a Boy Scout campout and hockey games, so I won't be getting much done here until next week.

Cheers,

Stoutfella

On the bench: 1/48 Tamiya Bristol Beaufighter

On deck: 1/48 Tamiya P51-B

  • Member since
    August 2009
  • From: Borlando Fla home of the rat
Posted by TREYZX10R on Friday, January 18, 2013 4:41 PM

Stoutfella You're really whipping that kit into shape! Those fit issues are no small issue to deal with for sure. I rather like that you're not doing nmf on this one,looking forward to seeing the paint go on!

The rescribe tools that I use

As for the scribing tools its as follows;

Eduard makes the templates and they are a huge help. A simple sewing needle in the pin vise works well with the templates.

Dymo tape is great especially for working with curved surfaces. I use the Saw from UMM-USA for scribing next to the tape ,also with the thin metal straight edge. I also use a #11 blade with the tip broken off to clean up and go back over the scribed lines. Finally I apply straight laqcuer thinner on a small brush and allow it to 'wick' into the scribed lines to clean them up. Hope that helps Stoutfella

Shivinigh wow that Glider looks awesome! You've done a great bit of modelling on that and looking forward to seeing the base done. I'll wait to update the front page until you get it complete.

The Bronco is still trying to buck me me off. The booms did not want to square up so I had to apply a little pressure and mild heat with the hair dryer to get it aligned. Next up was dealing with the gaps fore and aft and some green putty took care of that.

The intakes on the engine nacelles are not correct 

 I scratched the second upper intake using the end tips cut from some old drop tanks.

Using layers of medium foam safe ca glue I then built up the areas around the intakes to shape. It took about 3 applications filing between each and then a thin application sanded smooth to get the final shape and fill imperfections

I've wet sanded the whole airframe and next will add the canopy assembly

cheers Trey


  • Member since
    December 2002
  • From: Bury St Edmunds, Suffolk, England
Posted by Bish on Friday, January 18, 2013 5:40 PM

Stout, TREY, some really nice work on two kits that seem to be real challengers. Keep it going and don't let them beat you.

I am a Norfolk man and i glory in being so


On the bench: Airfix 1/72nd Harrier GR.3/Fujimi 1/72nd Ju 87D-3

  • Member since
    December 2009
Posted by ww2psycho on Saturday, January 19, 2013 3:19 PM

I don't think I'll be getting much done this weekend, got sick while at work so I'll probably be resting all weekend

JOIN OUR COMMUNITY!

Our community is FREE to join. To participate you must either login or register for an account.

SEARCH FORUMS
FREE NEWSLETTER
By signing up you may also receive reader surveys and occasional special offers. We do not sell, rent or trade our email lists. View our Privacy Policy.