SEARCH FINESCALE.COM

Enter keywords or a search phrase below:

Twin Boom Group Build 2013

46239 views
314 replies
1 rating 2 rating 3 rating 4 rating 5 rating
  • Member since
    January 2012
  • From: East Peoria, IL
Posted by stoutfella on Tuesday, January 15, 2013 7:38 PM

Trey: Agreed. Great work on that cockpit and the re-scribing, as well. If I was more ambitious, I'd sand off the rivets on the P-38 and re-scribe, but I'm not up to that yet. Wonder if you could details the tools and templates you use for the job?

Also, couldn't agree with you more about the state of 1/48 Lightning kits. This will likely be my last one, but I'll hang onto whichever set of markings I don't use on this one just in case Tamiya sacks up and brings one out someday.

Cheers,

Stoutfella

On the bench: 1/48 Tamiya Bristol Beaufighter

On deck: 1/48 Tamiya P51-B

  • Member since
    April 2003
Posted by shivinigh on Monday, January 14, 2013 9:57 PM

Plane is looking incredible Treyz.Have a feeling though once you are done that youwill not want to see any more panel lines for a while.

well got the first basecoat for the underside done. Used madelmaster acryl light grey

than the lighter first coat for the upper camaflafe using light gull grey

than the second camaflage colour using dark grey

and now for the telling moment to see if I did all the masking right


  • Member since
    August 2009
  • From: Borlando Fla home of the rat
Posted by TREYZX10R on Monday, January 14, 2013 7:34 PM

Thanks Bish!


Wing rescribe is done. Looking at pictures of the real wing not much really shows in the way of panel lines,thankfully it made it pretty straight forward and simple. I'm going to have to rethink the vortex generators on the control surfaces ,might be too difficult  to get them thin and small enough to look right.

The wing fit is decent but will require some putty fore and aft to blend in the small gaps

  • Member since
    December 2002
  • From: Bury St Edmunds, Suffolk, England
Posted by Bish on Sunday, January 13, 2013 5:01 PM

Loking nice TREY, great work on those seats.

I am a Norfolk man and i glory in being so


On the bench: Airfix 1/72nd Harrier GR.3/Fujimi 1/72nd Ju 87D-3

  • Member since
    August 2009
  • From: Borlando Fla home of the rat
Posted by TREYZX10R on Sunday, January 13, 2013 3:47 PM

Stoutfella you're doing a great job with a difficult kit for sure! Sadly every 1/48 kit of the 38 thats out has issues. About time one of the new kitmakers stepped up and put out a decent one in 48 scale. Looking forward to your next update ,cheers Trey.

I've got the office about %90 wrapped up just some minor tweaks needed. I added some fiddly bits and wiring to the avionics shelf and set the seats in place. I went ahead with the kit supplied Pilot figure,why Testors felt the need to put one with an O2 mask in this kit is beyond me. Of course look at the rest of the kit and it should'nt really be a shocker huh? Enough of my griping heres the pics.

Seats are really nice resin ones from Verlinden

I also rescribed the pod

  • Member since
    April 2003
Posted by shivinigh on Sunday, January 13, 2013 3:42 PM
The P-38 is looking good. I picked up Academy's 1/72 P-38 for around $15.00. Haven't started working on it yet but the parts look good and any other Academy kit I have done in that scale were good fits and the details were nicely done.


  • Member since
    September 2003
  • From: Australia
Posted by Helo H-34 on Sunday, January 13, 2013 3:32 PM

Nice WIP pic's Stoutfella ;

I think the P-38 build is coming along well . I built the Revell 1/72 version last year , I was mezmorized by the fancy 'Box Art' and thought it was a new tooling kit but sadly it also dated back to the early eighties . I managed to build mine and it fought me all the way , here's a link to the finished pic's

cs.finescale.com/.../1473566.aspx

I know Dragon have a newer 1/72 P-38 kit available but their quite expensive , if I see one for under $15.00 , I might pick one up . I paid $30 for the Revell kit and have been kicking myself ever since .

John

  • Member since
    December 2002
  • From: Bury St Edmunds, Suffolk, England
Posted by Bish on Sunday, January 13, 2013 2:06 PM

Stoutfella, sounds like you have a challenge on your hands. Buts it looks to be coming along very nicely.

I am a Norfolk man and i glory in being so


On the bench: Airfix 1/72nd Harrier GR.3/Fujimi 1/72nd Ju 87D-3

  • Member since
    January 2012
  • From: East Peoria, IL
Posted by stoutfella on Sunday, January 13, 2013 1:34 PM

Greetings,

Moving along on the Lightning. As mentioned previously, I'm going strictly OOB on this one, as I don't feel like spending three times more than the kit price in order to marginally spiff up what will definitely be a shelf queen.

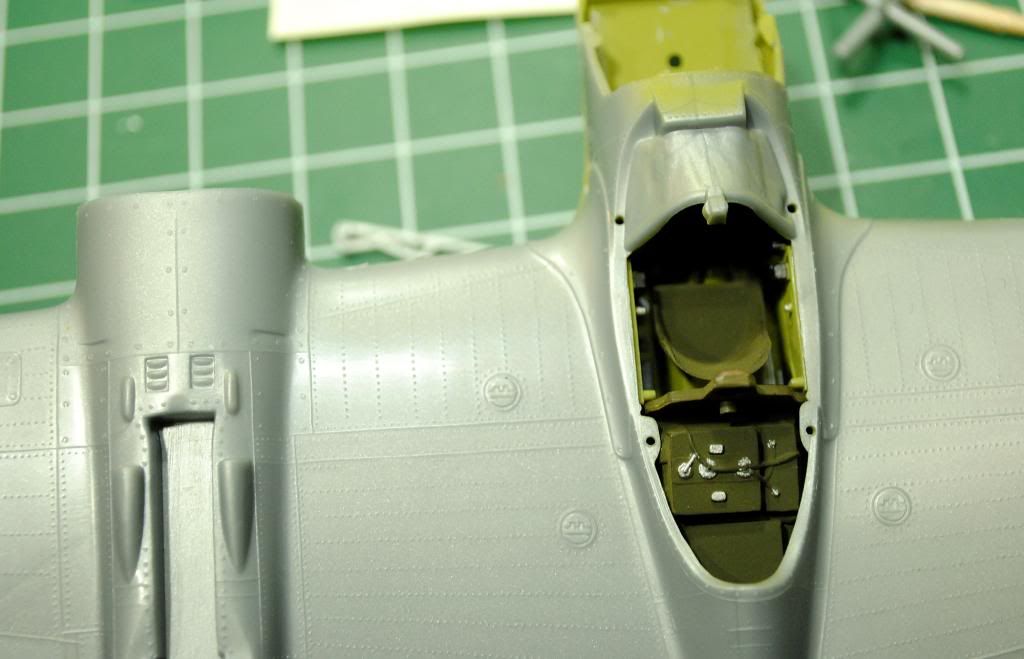
Cockpit. Nothing much to see here, folks. Move along:
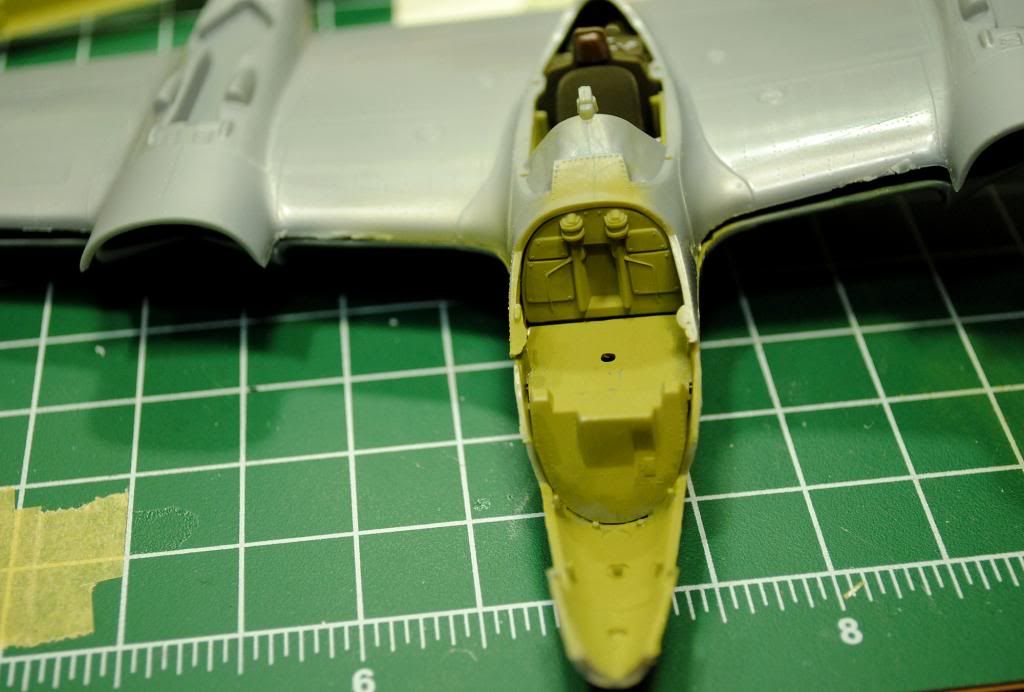
The more I work with this thing, the more I long for my Tamiya stash. Brittle plastic with giant attachment points, flash EVERYWHERE, 60s engineering and fit that is mediocre at best. Note the ragged leading edges:
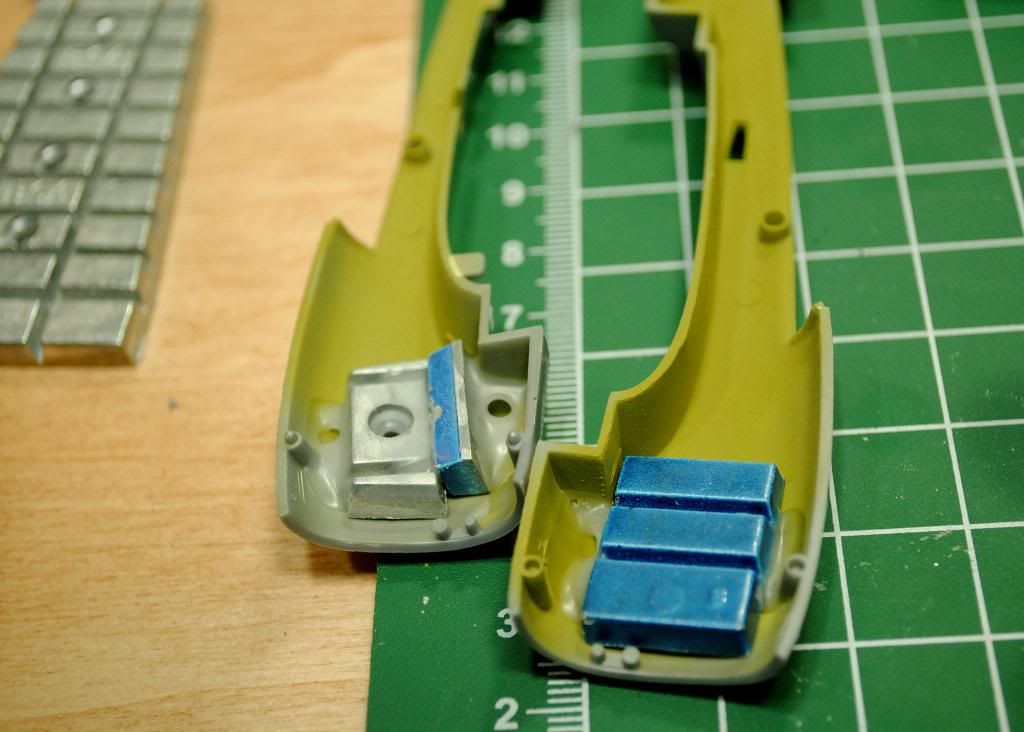
Plowing ahead, though. Adding plenty of weight to the nacelles. I actually added more after taking pics.
Starting to put the puzzle together:
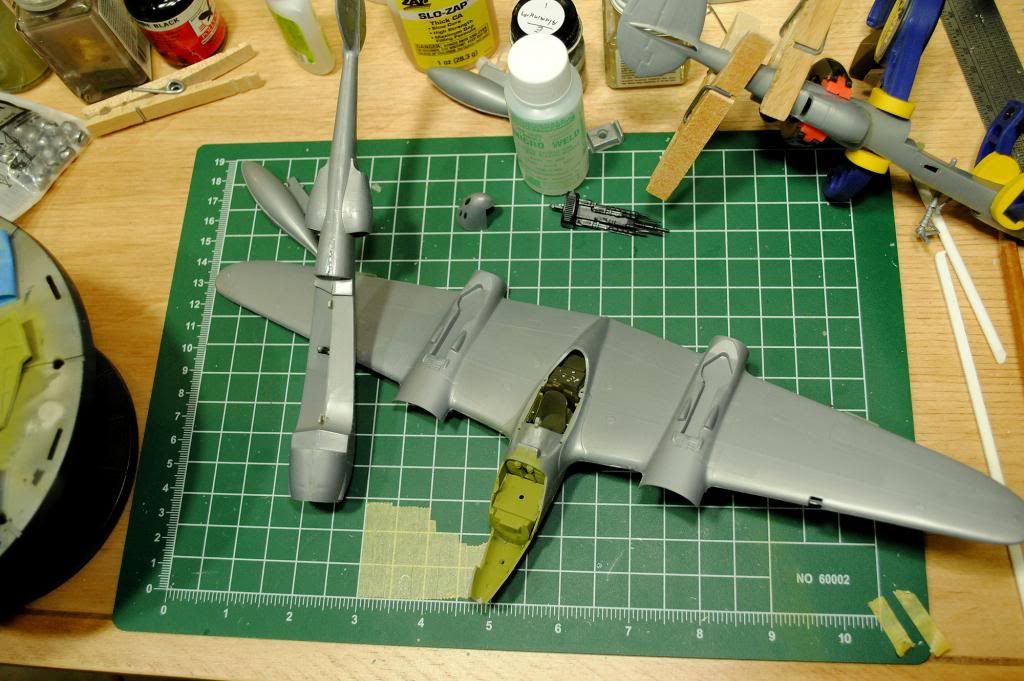
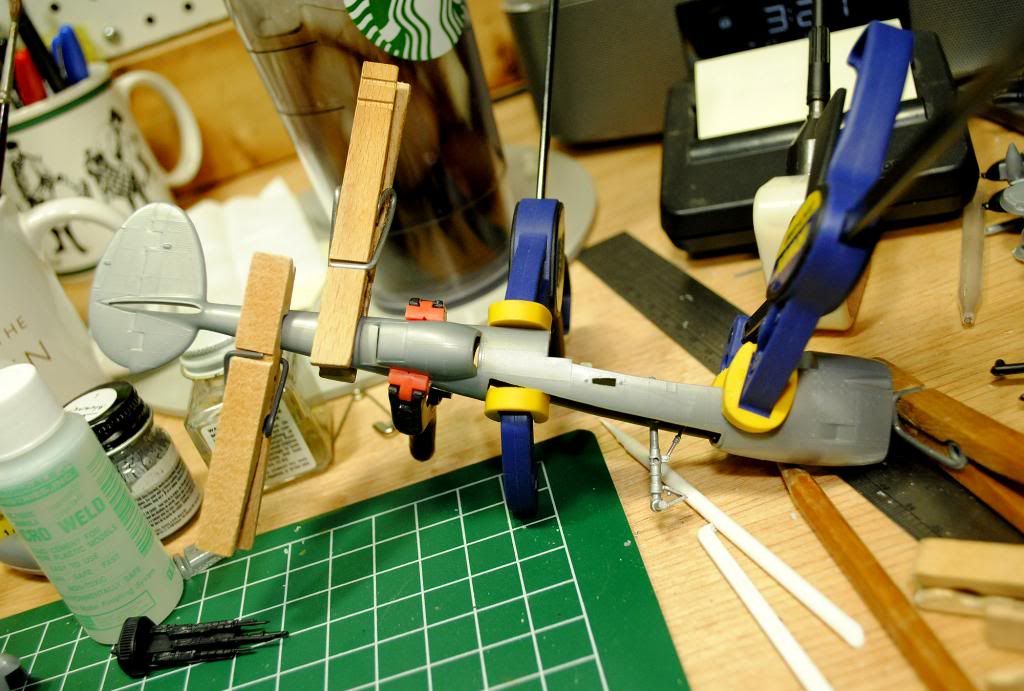
Like I said, plenty of weight in this bird.
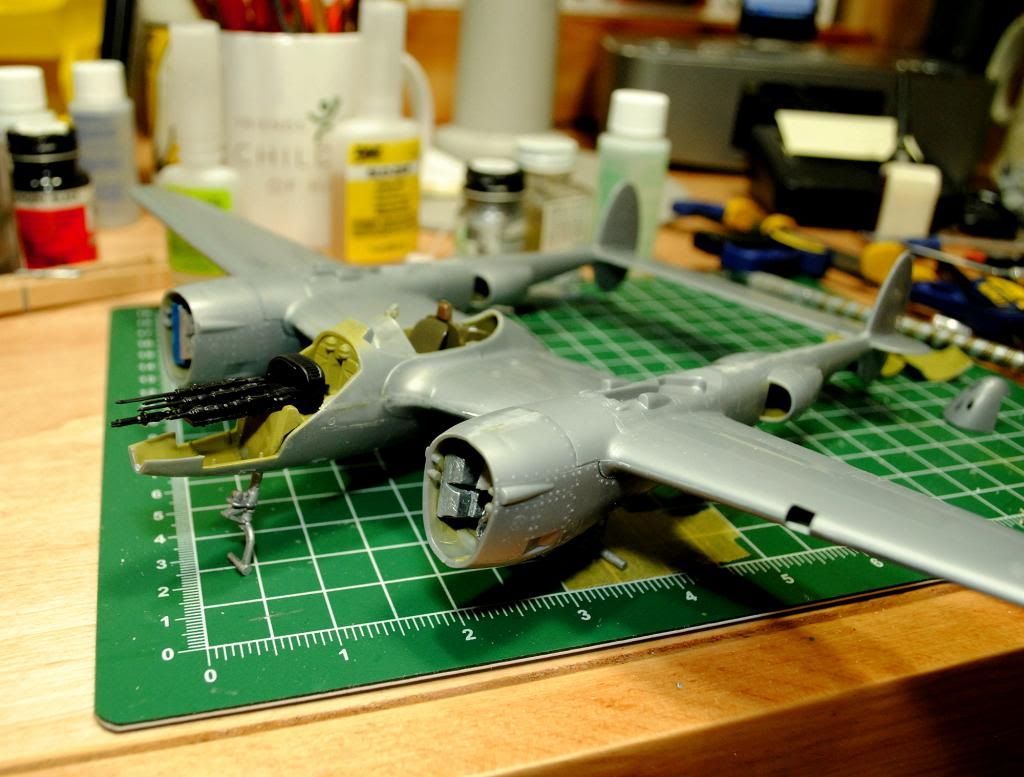
OK, at least beginning to look like a Lightning:
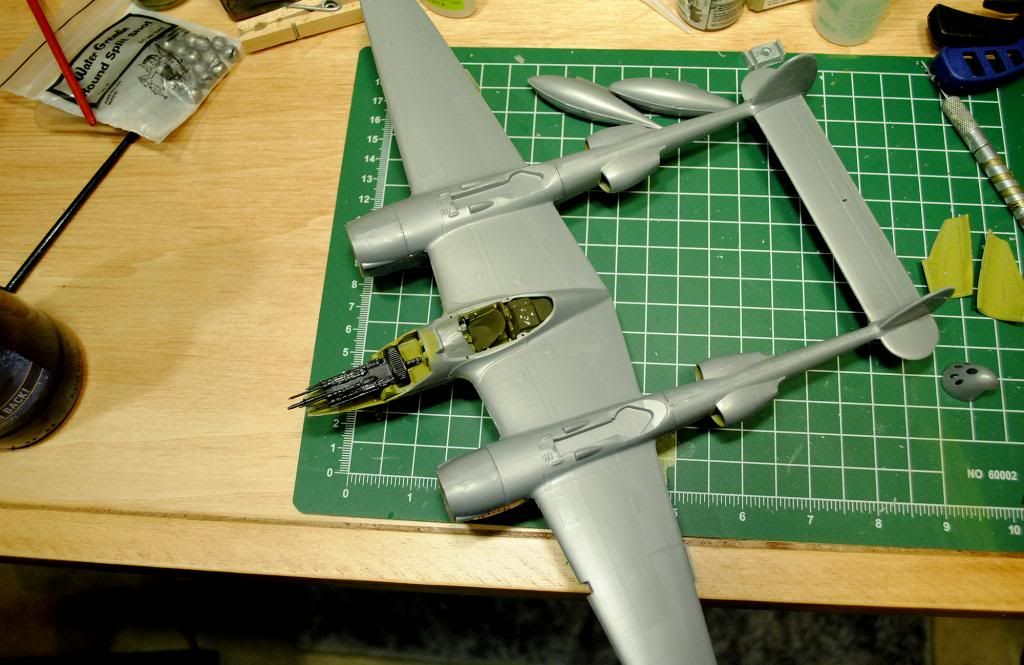
I'm trying to do my best on cleaning up the fit and seams without being compulsive about it. It's funny, I'm willing to go the extra mile on seam cleanup (if there is any) on the Tamiya kits because I know a little extra work will make it perfect. But with this, I know that no matter what I do it will still be mediocre. The P-38 is still one of the coolest kits ever, but I guarantee this will be the last Revellogram version I do.

Got my decal situation sorted out. Returned the mistakenly ordered 1/72 sheet and now have the 1/48 sheet I wanted in hand. At the moment, leaning toward doing St. Louis Blues in NMF, but I'll have to see how I feel after finishing cleanup and what kind of surface I end up with. Other choice is Black Market Babe in OD/neutral gray. Onward!

Cheers,

Stoutfella

On the bench: 1/48 Tamiya Bristol Beaufighter

On deck: 1/48 Tamiya P51-B

  • Member since
    August 2009
  • From: Borlando Fla home of the rat
Posted by TREYZX10R on Saturday, January 12, 2013 2:52 PM

Shivinigh,Bish thanks for the kind words fellas! I would be tempted to do the floats on this one but I've already put the gun pods on! I would love to do one on floats but not another Testors kit and as I only really do 1/48 scale its not likely to happen unless another manufacture steps up to the plate and puts out a better kit in 48.

I've managed to get the bulk of the office mods in place and a shot of primer


  • Member since
    December 2002
  • From: Bury St Edmunds, Suffolk, England
Posted by Bish on Saturday, January 12, 2013 2:41 PM

Thats coming along nicely TREY.

TREYZX10R

Thanks John,I got the seats off evil-bay $7.95 for both shipped. They are actually F-4 seats and are'nt correct for a Bronco ,best match I could find and for under 10 bucks I figure its close enough for my needs..

Heres a wierd find how about a Bronco on floats


Is this your next build Wink

I am a Norfolk man and i glory in being so


On the bench: Airfix 1/72nd Harrier GR.3/Fujimi 1/72nd Ju 87D-3

  • Member since
    April 2003
Posted by shivinigh on Saturday, January 12, 2013 2:31 PM

Treyz your Bronco is looking really good. A Bronco with Pontoons????? Guess we know what your next project is going to be.


  • Member since
    August 2009
  • From: Borlando Fla home of the rat
Posted by TREYZX10R on Saturday, January 12, 2013 9:12 AM

Thanks John,I got the seats off evil-bay $7.95 for both shipped. They are actually F-4 seats and are'nt correct for a Bronco ,best match I could find and for under 10 bucks I figure its close enough for my needs..

Heres a wierd find how about a Bronco on floats


  • Member since
    September 2003
  • From: Australia
Posted by Helo H-34 on Friday, January 11, 2013 10:04 PM

Awesome work Trey .

I've been copying you WIP pics for reference as I have two of those 1/48 kits in the stash . I checked them both the other day and luckly my wings aren't warped like yours were .

Where did you get the resin seats from , I guess I should really buy four for my two 1/48 kits .

John .

  • Member since
    August 2009
  • From: Borlando Fla home of the rat
Posted by TREYZX10R on Friday, January 11, 2013 8:23 PM

ww2psycho hope you hear from squadron soon! The mishaps seem to be working in your favor, at least they wo'nt be seen! Looking forward to seeing some pics of your progress!

I've broke out the old stand by green squadron putty for the gun pods

Starting to add some detail to the office,avionics shelf

Placed the seats temporarily so I could figure the placement of the other components

Added the IP bulkhead for the back seater

Some side detail added

Up next will be some fiddly bits for the avionics shelf and the throttle /prop position levers


  • Member since
    December 2009
Posted by ww2psycho on Friday, January 11, 2013 12:17 PM

small update on my end. First, still no reply from squadron. Second, the mounts for the 20mm guns (I10 and I11 in the instructions) Extreme care must be given to remove these! just as I snipped one end of them, one of them snapped in half and flew who knows where. Good thing the gun doors will be closed so not much of a loss here. Will have to remember for next time.

Also, Im going to make this a ceiling hanger so the landing gear doors will all be closed. I have no room for another plane on my shelf.

  • Member since
    August 2009
  • From: Borlando Fla home of the rat
Posted by TREYZX10R on Wednesday, January 9, 2013 7:21 PM

Hope they come thru for you ww2psyco

I've got some minor work done on the Pod. Canopy parts just required a little sanding on the edges to get the fit snug. Filed the seats down so they cleared the canopy and some plastic card covered the ugly seam on the IP. Next up will be scratching all the missing office details,not going to be 'rivet counter' perfect but enough so its not the barren waste land it is now.


  • Member since
    December 2009
Posted by ww2psycho on Wednesday, January 9, 2013 10:42 AM

I forwarded that email to squadron, just need to wait and see now. I've been working on the gun bay since I need the chair to finish painting the cockpit area. I note to anyone who builds this kit, the gun barrels are too thick to go through the front part that they mount to. Not the part that needs to be glued in but the vertical triangle parts that are molded to the gun bay already. sanding will be needed but from my test fitting anything that needs sanding wont be seen installed if you plan on leaving the doors open.

  • Member since
    August 2009
  • From: Borlando Fla home of the rat
Posted by TREYZX10R on Tuesday, January 8, 2013 6:25 PM

Shivinigh the glider is shaping up fast! Looking great too!

ww2psycho I would forward that to Squadron and get their input on it,sounds like Lion Roar is willing to step up to the plate for you and thats good.Seems to me if you can get  Yu Lin in touch with the person that orders for Squadron you'll be good to go.

I've gotten %90 of the booms rescribed,I'll have to add more once I sort out the intake shape issue. I also sanded off the small intakes and will replace one on each lower front starboard side boom,the second one up on the port side is'nt present on the ref aircraft I've photos of.

seats arrived today ,so at last I can start scratching an office

The Horizontal stab needs a few details,ie vortex generators and counter balancers but I'll add those just before paint.

The basic sub components so far

  • Member since
    December 2009
Posted by ww2psycho on Tuesday, January 8, 2013 11:21 AM

This is what I got from lion roar:

Dear sir.

Thank you buying our kit

For the part replacement, because we have not single spare parts, the only way is that you should buy the whole square, but we shoudl calcilate the price and it will not be very cheap. Meanwhile, for the high freight charge, we suggest you contact with the seller or region agent first and let them to contact with us. We can add the square in their order.

We'd like to know your opinion about it.

Thank you very much.

B.rgds.

Yu Lin

Now lets face it the English isn't that great but he is trying to help. From what I understand I should try putting an order though with the hobby store that I bought it from. Problem is I didn't buy from from a store, I got it from squadron. Anyone know if I would still be able to work something out with a store?

  • Member since
    February 2003
  • From: Rothesay, NB Canada
Posted by VanceCrozier on Tuesday, January 8, 2013 7:16 AM

shivinigh

Well my glider is finally starting to look like something that might actually fly. Going to be spending the next 2-3 days getting rid of all the seam lines though.

Looking good so far - I haven't seen many gliders completed.

On the bench: Airfix 1/72 Wildcat; Airfix 1/72 Vampire T11; Airfix 1/72 Fouga Magister

  • Member since
    April 2003
Posted by shivinigh on Tuesday, January 8, 2013 12:11 AM
No I have seen them go for a bit less but $50 or so is actually a good price. I have seen them run up over $100 for some. Just search for photo etch bender. I just showed that one cause I have ordered from that place a few times for stuff and like dealing with the company.


  • Member since
    December 2009
Posted by ww2psycho on Monday, January 7, 2013 11:52 PM

Hey  shivinigh, is that the cheapest tool for PE? I'll spend the money If I have to, its not a problem, I'm just wondering.

  • Member since
    December 2009
Posted by ww2psycho on Monday, January 7, 2013 10:29 PM

Still no reply about the parts yet, might have to find some small rod and try making the new part, too bad its the pilots seat but depending on how close the walls are to it no one will notice once together.

  • Member since
    April 2003
Posted by shivinigh on Monday, January 7, 2013 4:25 PM

Well my glider is finally starting to look like something that might actually fly. Going to be spending the next 2-3 days getting rid of all the seam lines though.


  • Member since
    August 2009
  • From: Borlando Fla home of the rat
Posted by TREYZX10R on Monday, January 7, 2013 4:16 PM

John thats quite a stable of ponies you've corraled up! I'm with Tony ,would like that stable for myself as well(just not the testors kits!) I too like the Marine tri color but I think that was a D only scheme? I found some a/m decals with a shark mouth so maybe going a solid green or grey with that,I've got pics of both aircraft just need to make a choice.

ww2psycho I think you'll be okay without the interior decals I left them off mine and do'nt miss them. The office is busy enough without them anyway imho. Looking forward to seeing some pics!

  • Member since
    April 2005
  • From: Australia
Posted by taxtp on Sunday, January 6, 2013 11:12 PM

I am very impressed with your OV-10 collection John. I have ambitions to have one like it one day.

Regards

Tony

I'm just taking it one GB at a time.

  • Member since
    December 2009
Posted by ww2psycho on Sunday, January 6, 2013 7:31 PM

So I'm going to have to contact great wall hobby for some replacement parts. Working on one of the seats some parts broke and went flying who knows where, found part of it cant find the other part. On the other hand I've been making progress. Almost ready to start painting the inside then I will take pictures and share. Looking at the instructions and seeing where some of the decals go on the sides of the cockpits, I have no idea how they think they fit there. I'm not going to put them all on since there isnt even room where they say there should be. Pretty sure no one will notice.

  • Member since
    September 2003
  • From: Australia
Posted by Helo H-34 on Sunday, January 6, 2013 6:52 PM

Excellent WIP pic's Trey and I didn't know about the liquid paper trick . A lot of times after wet sanding tamiya's putty I get a few very tiny pin holes in the putty surface , I suppose liquid paper would fill those little annoying holes nicely .

I wanted to ask what color scheme you were considing for your OV-10A  build ?

I've built some in 1/72 scale in a variety of color schemes and I have a few more in the stash with some aftermarket decals including some NASA markings ;

The USMC Tri-Color is my favourite

What are you contemplating Trey !!!

  • Member since
    August 2009
  • From: Borlando Fla home of the rat
Posted by TREYZX10R on Sunday, January 6, 2013 4:56 PM

John great work detailing the office! The IP shroud looks just right too. Fyi the lever on the overhead console is the rotor brake .


Spent most of the weekend sanding off those hideous rivets and incorrect panel lines. I stole Chuks liquid paper trick to fill in some of the more stubborn deep lines. I also used it to fill the repaired cracks in the wing

I cleaned up the booms and sealed the doors in the up position,suprisingly they fit good. I still have the intakes to tackle,they are far from correct and not sure what I'll do to fix them yet


JOIN OUR COMMUNITY!

Our community is FREE to join. To participate you must either login or register for an account.

SEARCH FORUMS
FREE NEWSLETTER
By signing up you may also receive reader surveys and occasional special offers. We do not sell, rent or trade our email lists. View our Privacy Policy.