Colin, quaint little build you have there. I find warships so much more interesting when they carry those broad swathes of colour camou. Good to see a ship in the mix of this GB as well.
--------------------------------------------
Hmm, well I thought building a Shermie would go faster than the Tiffie. I've doubts now that it will meet the deadline, but here is an update:
Staring with the hull floor, it is a bit wonky. On one side, the center curves outwards, while the opposite is slightly curved in. Could be just the nature of the beast, or a quality control issue.
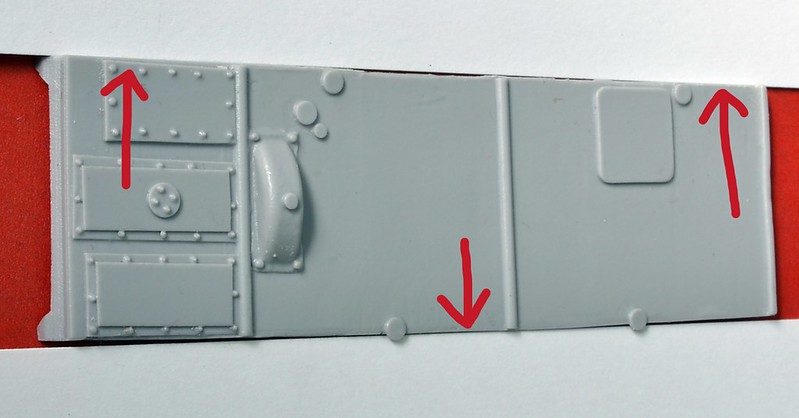
Four main pieces glued together. I didn't bother sanding too much of the 'yaw' shape of the floor as it won't be noticeable. Another problem area now is one side wall comes up short, (interestingly it is on the convex side of the curved floor edge).
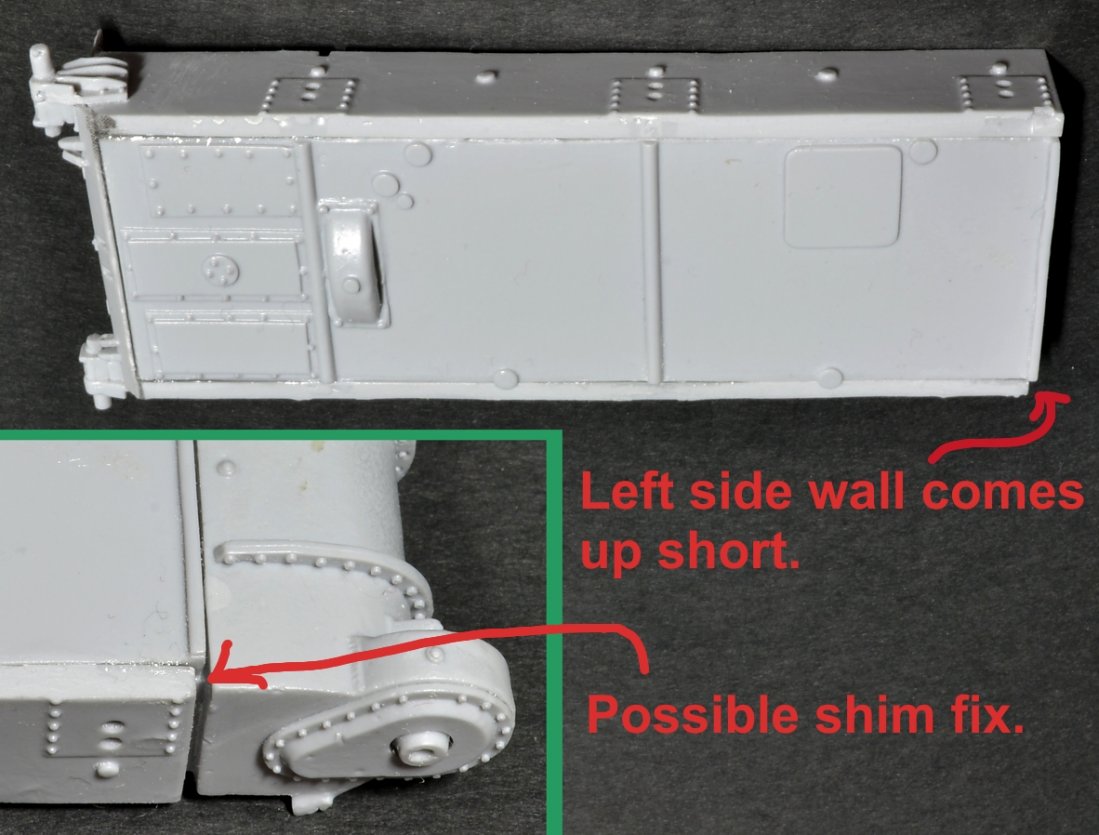
Dry fitting the transmission housing, it looks it can be corrected by placing a shim in the space. A little more sanding should close the gap, and make sure every angle is perpendicular.
Sherman Vc finally taking shape. After cutting the floor and attaching the front piece, replaced the lost detail with a thin strip of sheet plastic. Both upper and lower hulls had to be braced from inside to correct the wobbly shapes to the walls. This resin is not the type I'm use to. Very soft, and not very strong when thin - recycled product?
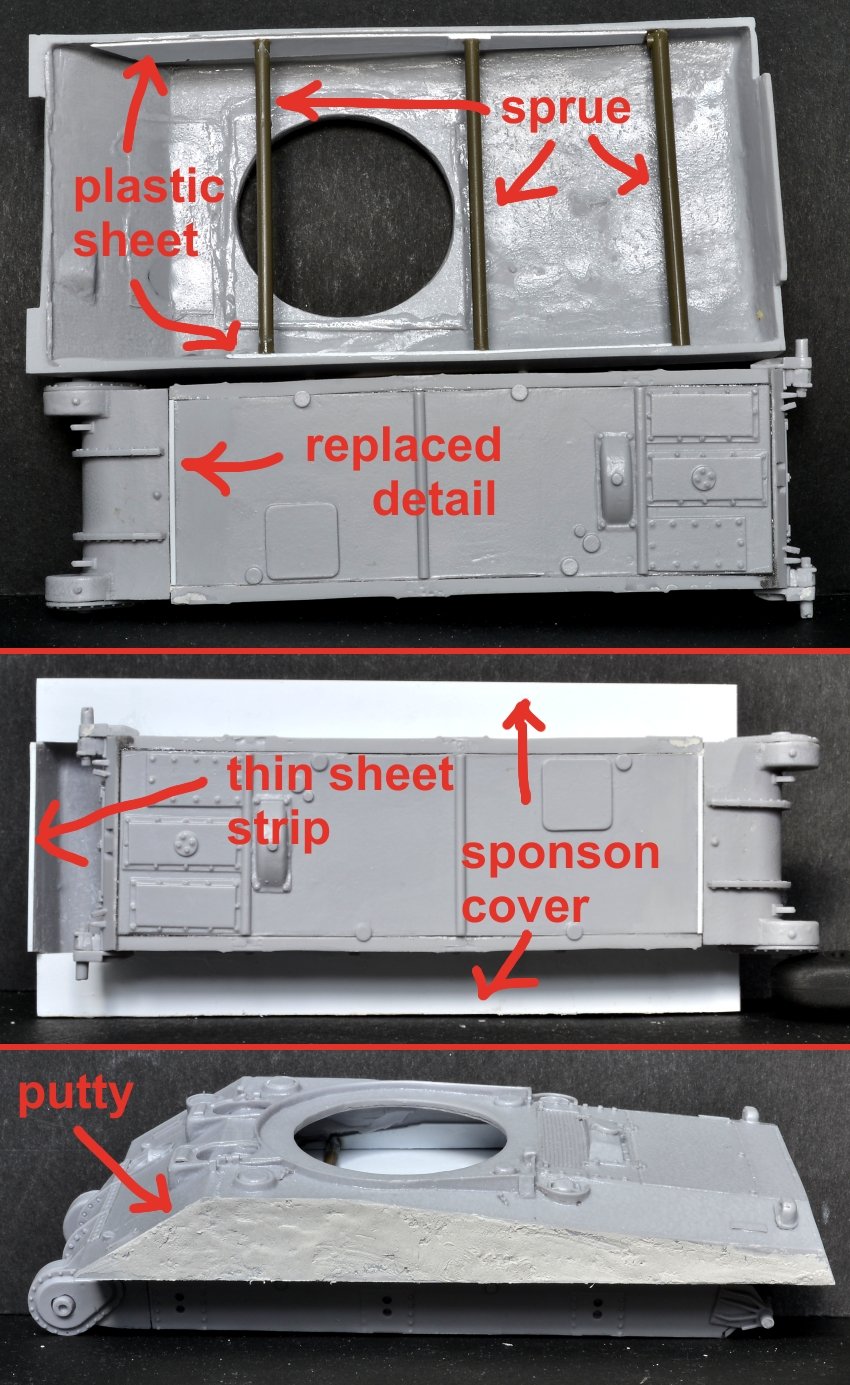
The back plate that over hangs the hull also had deformed edges. To achieve crisper corners, a thin strip was glued across the bottom, filled in, and then sanded.
The port hull side wall was still misbehaving, yawning inwards. Squadron putty to the rescue - this will take several sessions of building up and sanding.
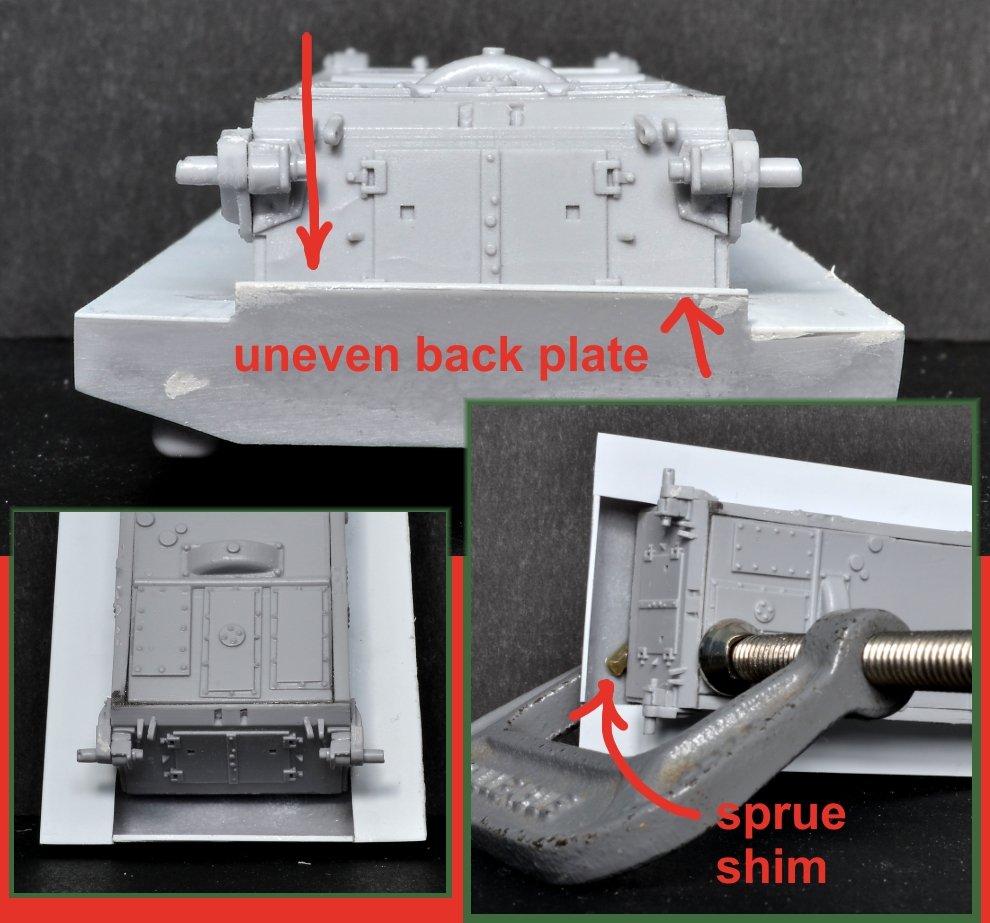
A single thin sheet of plastic was used to cover the hollow sponson areas, and once that was sandwiched between the upper and lower hull sections, I noticed the back plate wasn't parallel with the bottom hull. Another shim made of sprue, was strategically placed in the suspect corner, with a clamp holding it in place while the glue dried.
Front detail is now done, just one more shackle to make.
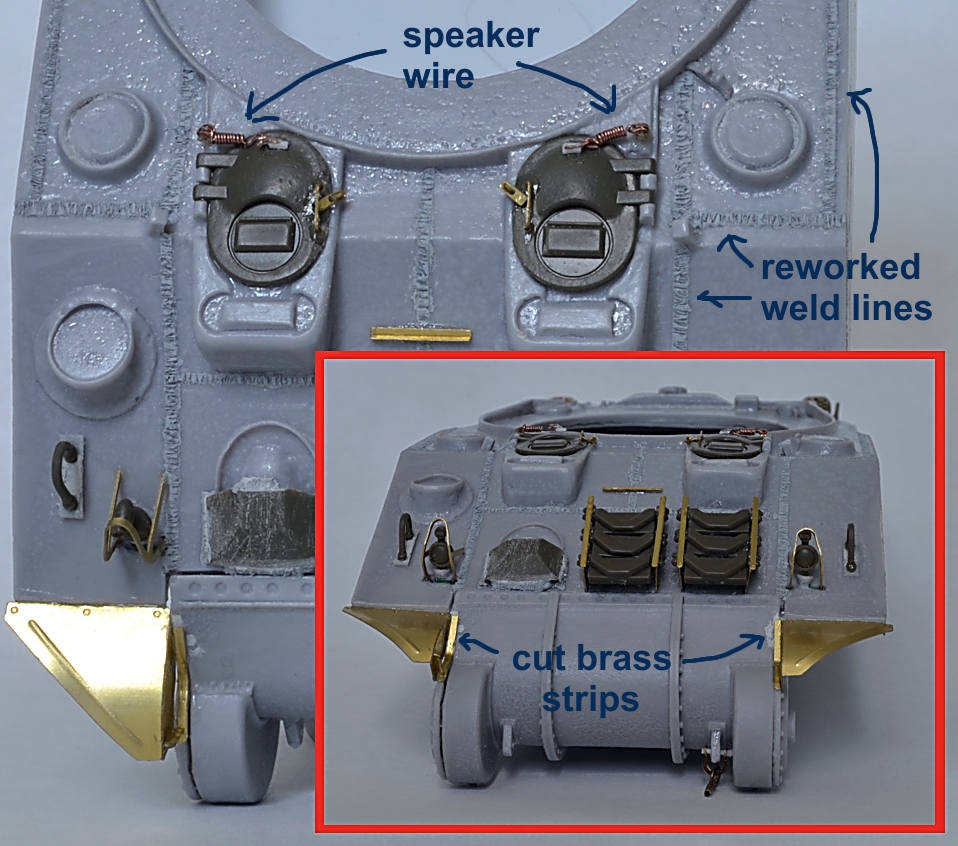
I've reworked the major weld lines, masking the edges off with Tamiya tape, brushing on a couple layers of surfacer, and then scouring with the sharp end of a knife before it completely cured.
The spring on the hatches was made by twisting speaker wire around a small drill bit.
regards,
Jack