Update:
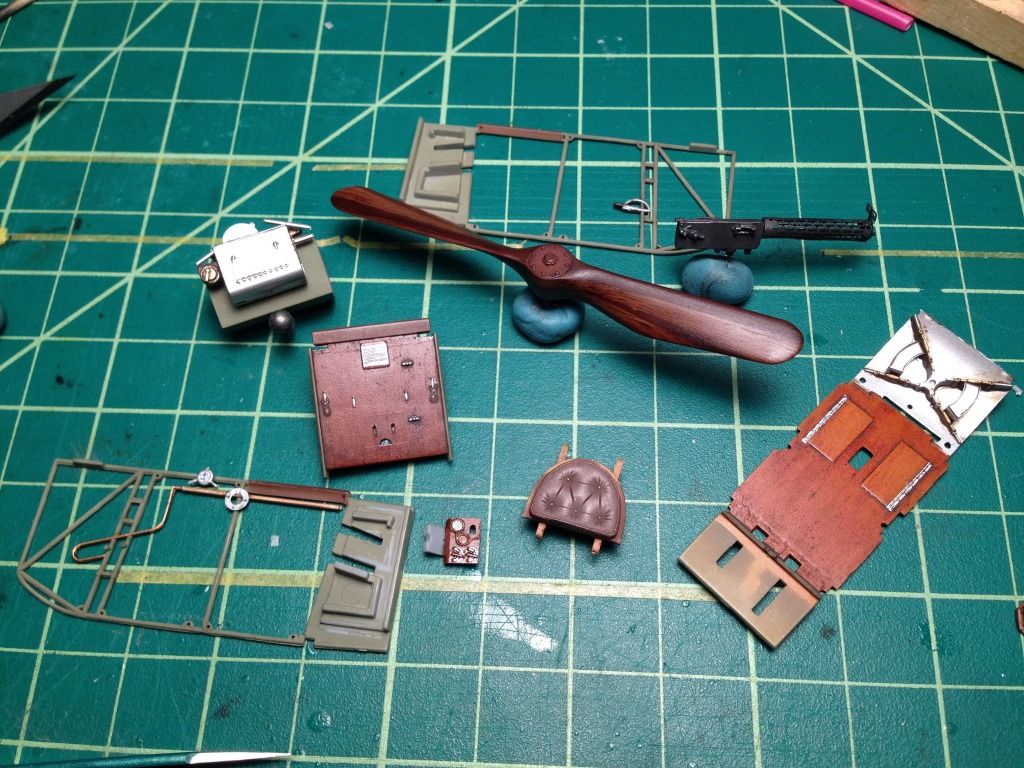
Thanks to my using a little Japan Drier in my paint, the oil "grain" in my woodwork dried and I was able to get some work done on the cockpit. Not done with it yet, but progress.

Once the oils had dried, I gave the woodwork a light coat of "varnish" made from a mix of Tamiya Clear Yellow & Red (3:1). Both the floor and the rear wall then got a wash using Flory Dark Dirt.
The metalwork is a 2:3 mix of Tamiya XF-49 (Khaki) & XF-22 (RLM Gray), with a little XF-2 (Flat White) to lighten it up.
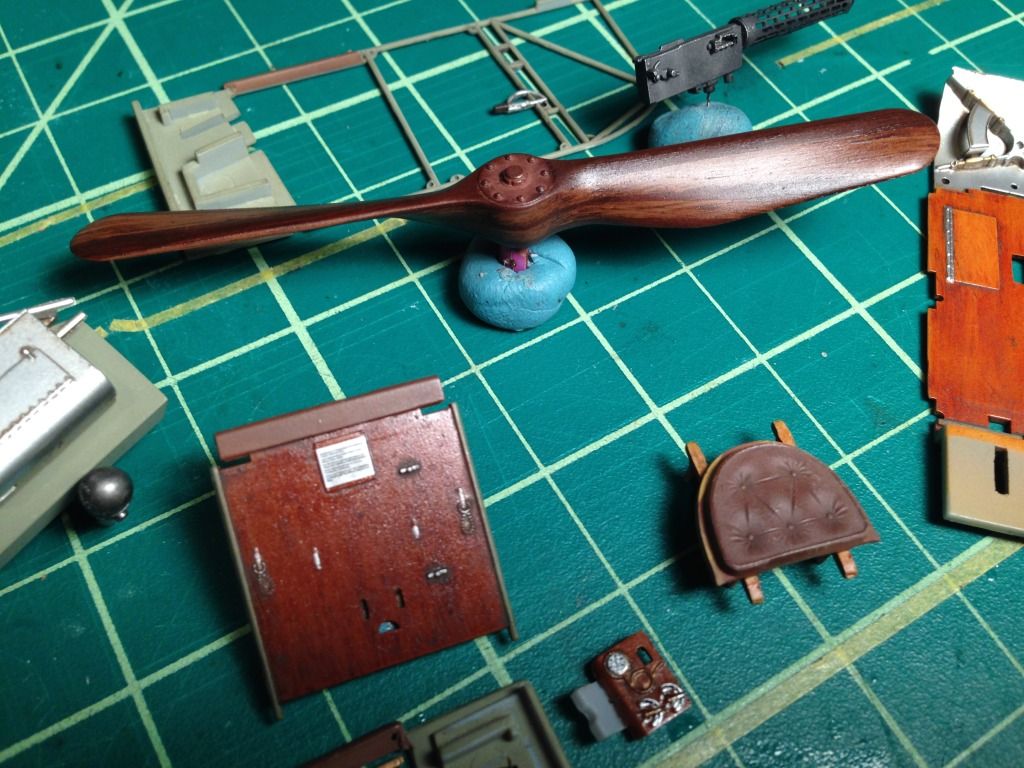
The Spandau machine gun is the kit plastic and photo etch combo. After priming it, I painted it flat black (XF-1) and then buffed it with AK Pigments Dark Steel which has the nice effect of giving it an overall steel / gun metal look, and highlighting the details (you can see it more clearly in the close up picture below.
As you can also see in this picture, I made my attempt(s) at the laminated prop. Having figured out that I wasn't going to get the results I wanted by freehand, I devised a jig out of Legos, a machine screw and a few nuts (which is pretty much what my wife thinks I am after seeing this thing!):

The idea is as follows: the prop sits on the thin green piece (actually the blue tape on the green piece) and is held in place with a small clamp. I hold the pencil flat on the smooth yellow pieces, and slide it from side to side to mark the prop. By changing the green shelf's height, parallel lines can be drawn to represent the edges of the laminations.
My first attempt used brown colored pencils over a Desert Yellow (XF-59) base, but I wasn't happy with the unevenness of the pencil's coverage. After looking at reference shots of Udet's aircraft, I also decided that I wanted a darker propeller, with less contrast between the laminations. Something more like this (actual) Garuda prop:

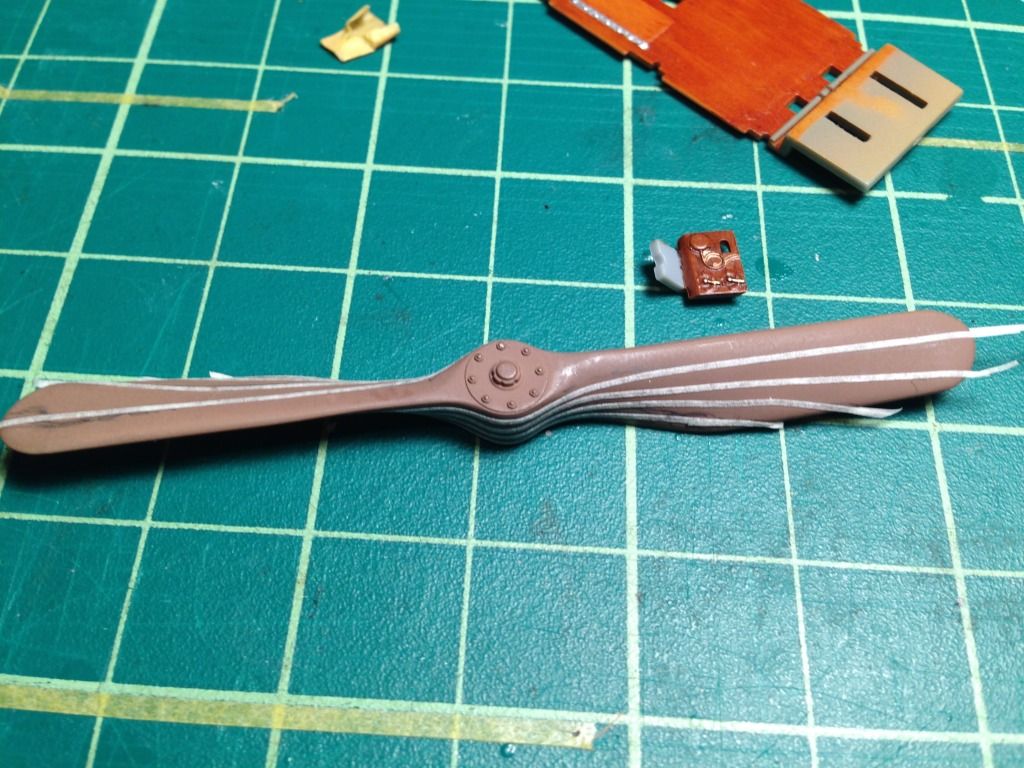
So on my second attempt, I gave the propeller a base coat of Flat Earth (XF-52), marked it using the jig, and then masked the lines with thin tape:

As you can see in the picture, my jig doesn't exactly give razor precise results (there's a bit of play in the structure), and the negatively sloped blade (left side in the picture) made tracking the pencil a challenge. I wound up getting the best results I could on the right hand blade, and then using the lines to match up on the back side.
Anyway, I filled in the laminations I wanted to mask with liquid mask, and sprayed XF-4 Flat Brown for the darker layers. Once done, I dragged oils (Burnt and Raw Umber) and got these results:

Sorry for the glare. Its far from perfect: my layers are not even, my lines aren't particularly symmetric, its still more contrasty than I wanted, and I only have 5 laminations (I believe the 1:1 scale versions are generally 6-8 layers), but the overall effect is what I was going for. I'll let it dry, "varnish" it, paint the boss, then apply decals and weather it a bit.
That's it for now,
Blue