SEARCH FINESCALE.COM

Enter keywords or a search phrase below:

Attention Comardes! Official Pride of Mikoyan-Gurevich GB Launches....

19696 views
216 replies
1 rating 2 rating 3 rating 4 rating 5 rating
  • Member since
    June 2007
Posted by Porkbits on Friday, March 27, 2015 12:38 PM

Hey, all...when I started the GB I indicated end of April as the deadline, but also noted that was a very flexible date. :-)

In any event, since I don't have a build I shouldn't be the leader anymore, so someone else should make an official deadline decision.

PB

Dre
  • Member since
    June 2007
  • From: here, not over there
Posted by Dre on Thursday, March 26, 2015 9:31 AM

Dang Dean, broke the AB again??   I was looking forward to seeing how you finished that one off...

End of April?   Yikes!

  • Member since
    April 2010
Posted by Theuns on Thursday, March 26, 2015 7:35 AM

End of April, dang that means I am out....good thing I never really "enlisted" my build LOL

Theuns

  • Member since
    October 2010
Posted by hypertex on Thursday, March 26, 2015 6:56 AM

Dean30

make the end of April deadline

Crud, I was thinking that this GB had a much later deadline. I guess I was confused with the other GB I am involved in. Gotta get back to work on this. Thanks for the reminder, Dean. Smile

  • Member since
    September 2013
Posted by Dean30 on Thursday, March 26, 2015 3:25 AM

I was told a long time ago by the local model shop owner that if you leave alclad for 24hrs to dry you'll not have any issues with it peeling, however my airbrush nozzle broke and I don't have time to get another one just yet so I'm afraid I won't make the end of April deadline, I have packed it away yet again as I have no space to keep it on the kitchen table either so it will be a while before I managed to get back on with it.

  • Member since
    April 2010
Posted by Theuns on Monday, March 23, 2015 11:07 AM

I have not had any hassles with alclad lifting if you use tamiya tape and remove it slowly.

Theuns

  • Member since
    September 2013
Posted by Dean30 on Sunday, March 22, 2015 10:47 AM

I've got more work done, not that it looks like it but I have been spraying another coat of alclad over the model and managed to get a lighter shade of metal and it looks spot on to me now. I will say this and some of you may disagree but I was handling the model and buffing the alclad probably too hard and some of the finish became uneven, however I actually think that by accident I have made it better, I have now got a metal effect that is somewhat uneven giving to me the appearance of an aircraft that's been outside, I didn't want to make the model dirty to get a realistic effect just a worn used look, I will add dirt but I thought the variations in the metal tones possibly would extend to beyond panel lines and differing metals to the whole aircraft if you follow me? Anyway here are a few more pictures so you can see what I mean.

It's not an obvious contrast but noticeable, also I used white aluminum on the spine and gloss blue on the leading edge air intake as a base coat which gave a really bright shine.

Everything has been sealed in now so it's not going to change beyond this, all I need to do is add a bit of weathering. to this after decals.

Wheels done, I painted the red slip markings on the wheels something I had not thought of doing before this one, I also sanded the tread to get a used look, though I think I will have to dust them with pigments to get a worn tyre look.

Here are the latest parts primed with humbrol green as I ran out of humbrol spray primer, either way the gunmetal I am going to use should stick well enough and then for the alclad, I found spraying a gloss colour onto an unprimed surface to be a pain so primed seems the best. Next for alclad and hopefully a decent result as more parts are attached.

Dre
  • Member since
    June 2007
  • From: here, not over there
Posted by Dre on Wednesday, March 18, 2015 11:09 AM

That's looking like a MiG to me, Dean.   I think that masking various panels and using differing Alclads will make this really sharp.   Just take care to seal the base Alclad before masking as I've heard that its really prone to lifting off when masked.

I would have sworn that my schedule would lighten up in the new year, but that has proven to be a joke, so absolutely no progress since my last photo update.   Effing work keeps all my free time locked down...

  • Member since
    September 2013
Posted by Dean30 on Tuesday, March 17, 2015 9:20 AM

Ich bin sehr gut Dre danke, und du? Well I have managed to get the Mig to the painting stage and I thought what the hell I CAN do a NMF if I apply myself so, I think it's the way a mig 21 looks best and it just requires more preparation than usual, so I decided it should take a methodical approach, I know that gloss black enamel takes a day to dry and gloss black acrylic not so, so I got to work last night, after a week of prep I had a smooth surface and most of the lost lines on the joins back. The seams were not hard as the kit fits really well, the only part was for some reason the left wheel well would not sit in properly, I also had a small gap under the fuselage where the front and rear meet. I used the existing detail on the interior of the main wheel wells as a template and glued wire over the top to enhance the overall detail and it worked quite well as there are no resin sets I know of and I had no access to photos and this seemed the logical thing to do as the detail in this scale was too flat. I have to say the finish is far from perfect on the fuselage but I have not finished with it, I used ALCLAD 2 aircraft aluminum and it seems quite dark to me but perhaps thats just me, the finish of the black paint afetr I used micromesh to get is glass smooth was uneven but I think I can use this to my advantage when it comes to weathering as I want the mig to look used and in service, it will be on a base with a frost on the ground with the supplied aircrew surrounding it and I want to get a few more things going on around it too if I can, I just don't know what yet. Okay so here it is so far,
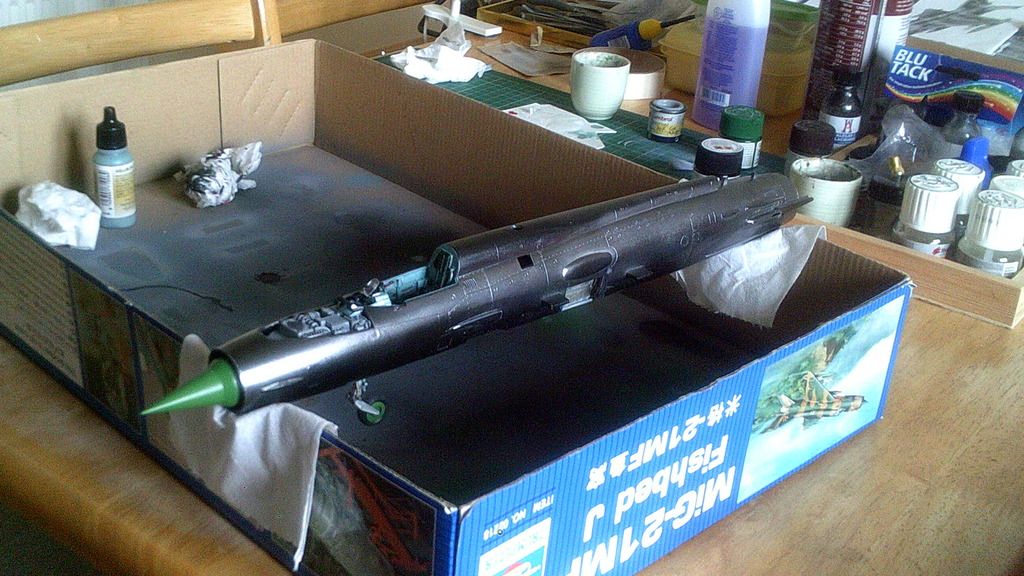
The plane is being built in sections as I think it will make masking various panels easier as the fuselage is basically a tube.
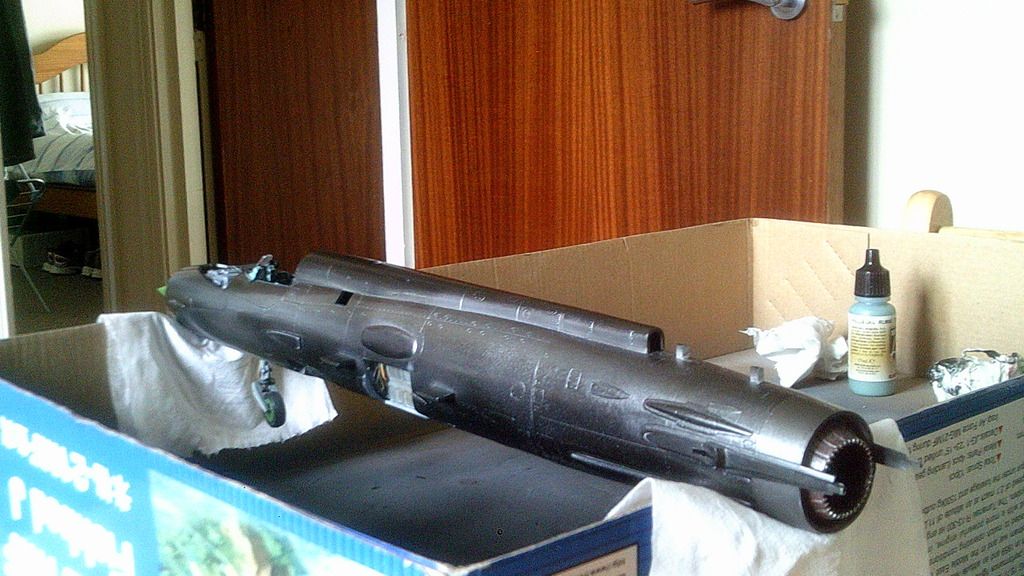
You can see the unevenness in the metal paint, I am still not sure if this will work to my advantage or not however I will hopefully get a good result, I have a great feeling about this one guys! One thing I also did that was new to me was to paint the engine matt brown and then drybrush silver over it, I saw it in a magazine and the results are actually pretty good, it gives a realistis heated effect.
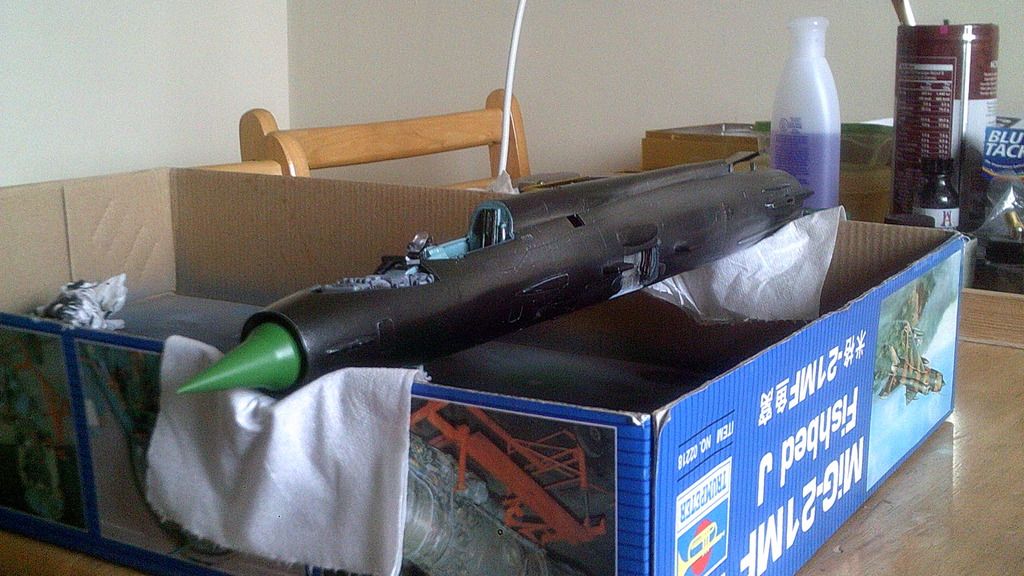
I still have to add much to the fuselage but I think the next layer will be different metal shades on the panels. Possibly I might paint the avionics but I doubt I will have that showing as it spoils the look of the aircraft for me.
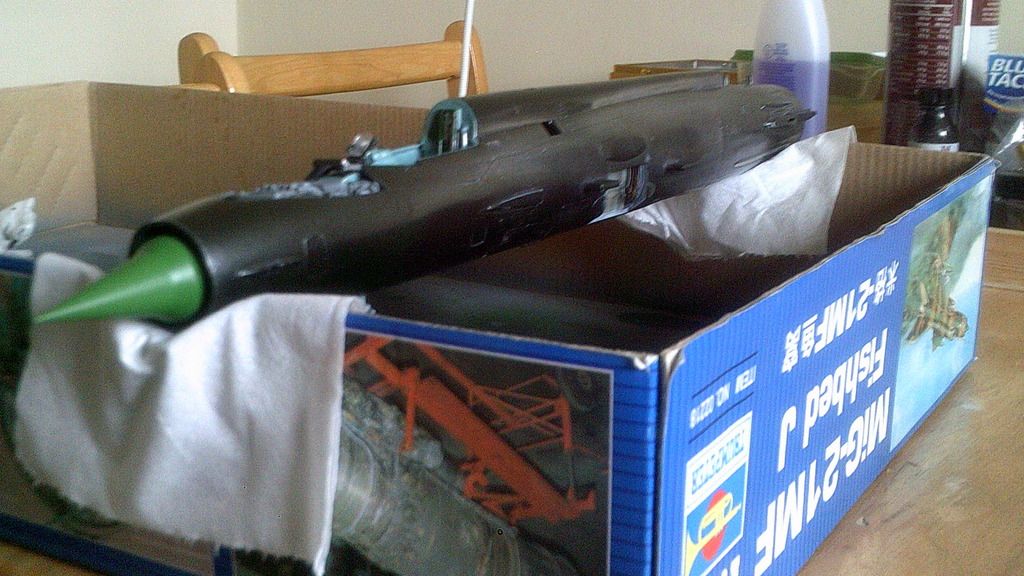
Last image you can sort of see the extra detail in the wheel wells on this one which was simply wire stuck where the detail was. Also I attached the nosewheel as per the instructions as I remember seeing a few of you guys saying the landing gear was weak so I thought I would use all the strength available so the strut was screwed in as per the instructions. One more thing I used toilet tissue to buff the surface of the alclad and it seemed to work quite well. Thats it for now, sorry I have been out of touch for a while, if anyone has pointers for me that would be appreciated. How is everyone elaes migs looking?

  • Member since
    April 2010
Posted by Theuns on Thursday, March 12, 2015 9:32 AM

I think of doing my Trumpeter MiG 19 as a Chinese J-6 (licence built 19), will it still qualify for this GB?

Theuns

Dre
  • Member since
    June 2007
  • From: here, not over there
Posted by Dre on Tuesday, March 10, 2015 5:37 PM

Good to hear from you, Dean.    Wie gehts?

Tex- I expect that you're right about time and a magnifier.  

  • Member since
    February 2003
  • From: Cameron, Texas
Posted by Texgunner on Friday, March 6, 2015 3:08 PM

I can relate Dean.  I have been working on my Flogger too.  I think I've re-scribed all I'm going to.  Sheeeit, that isn't for me.  I'll draw the rest of the panel lines with pencil, as I've done i the past.  Also been working on the kit seat, adding the Eduard PE parts.  But, they just don't seem "dimensional" enough or something and they are quite fiddly too.  So, I've bought a Pavla resin seat on Ebay and should get it in about a week.  I think that will look good with the rest of the Eduard PE.  

btw-Any tips/advice for painting the resin seat?  I expect a lot of time looking through the magnifier light for that!

Gary


"All you mugs need to get busy building, and post pics!"

  • Member since
    September 2013
Posted by Dean30 on Friday, March 6, 2015 4:43 AM

Hey guys just thought I'd let you know I am still making my mig, I have been really busy lately and had actually packed it away, I am aiming to get it finished by early April so fingers crossed, hope everyone is well!

Dre
  • Member since
    June 2007
  • From: here, not over there
Posted by Dre on Tuesday, February 24, 2015 8:16 AM

Actually, that does make sense.    

  • Member since
    February 2003
  • From: Cameron, Texas
Posted by Texgunner on Monday, February 23, 2015 3:53 PM

Lol! Yes, when one works as slow as I do, one needs ALL the time one can get.  If I was a fast builder, then I wouldn't NEED to save time...makes perfect sense to me?!?![:D]


"All you mugs need to get busy building, and post pics!"

Dre
  • Member since
    June 2007
  • From: here, not over there
Posted by Dre on Monday, February 23, 2015 3:01 PM

Uh... aren't you the self-professed  "slowest builder"?   And now you're looking to save time?

I think I broke my brain just thinking about this...Huh?

(all said in good humor)

  • Member since
    February 2003
  • From: Cameron, Texas
Posted by Texgunner on Monday, February 23, 2015 2:46 PM

Yeah, Tamiya tape is my go-to method for masking canopies on the majority of my aircraft.  I've had good results with it but of course, always looking for ways to save time.  Big Smile


"All you mugs need to get busy building, and post pics!"

Dre
  • Member since
    June 2007
  • From: here, not over there
Posted by Dre on Monday, February 23, 2015 2:03 PM

Gary- just do the tried and true method I plan on- lots of Tamiya tape in various widths to mask that greenhouse.   For once, I'm actually going to need to mask the interior framing too.

  • Member since
    February 2003
  • From: Cameron, Texas
Posted by Texgunner on Monday, February 23, 2015 1:06 PM

modelcrazy

Texgunner
have you any experience with Monogram's 1/48 Mi-24?

Gary,

I built Revell's 1/48 Mi 24 last year. I just hand painted the canopy.

And it looks fine too!  But, your hands must be steadier than mine brother; I know I'd make a mess out of that job.  I just checked the EZ Mask website and still no Monogram Hind.  Come on Chris, help a fella out here!! Big Smile


"All you mugs need to get busy building, and post pics!"

  • Member since
    July 2014
Posted by modelcrazy on Monday, February 23, 2015 1:00 PM

Texgunner
have you any experience with Monogram's 1/48 Mi-24?

Gary,

I built Revell's 1/48 Mi 24 last year. I just hand painted the canopy.

Edit: The "glass" was marred doe to a mix of gloss and then matt overcoat, then me trying to fix it. This was before I knew about Future and other methods.

Steve

Building a kit from your stash is like cutting a head off a Hydra, two more take it's place.


http://www.spamodeler.com/forum/

Dre
  • Member since
    June 2007
  • From: here, not over there
Posted by Dre on Monday, February 23, 2015 12:45 PM

Gary- I have no experience with that Monogram kit, but masking the Hind's canopy ought to be "fun" no matter the scale.   Even in 1/48 I doubt that kit would fit into any ordinary display cabinet because of the rotor span....  which is already giving me fits on mine and I haven't even cut the blades off the sprues yet!   I'm thinking of making a plywood travel case/storage case for this beast's rotor assembly.

And here's the kicker- in 1/35 scale the fuselage (on the sprue) is over 20" long.

  • Member since
    February 2003
  • From: Cameron, Texas
Posted by Texgunner on Monday, February 23, 2015 10:35 AM

Dre, have you any experience with Monogram's 1/48 Mi-24?  I've had one in the stash for years and years.  Masking that canopy has always intimidated me; not sure if a masking set is now available or not.  I had a phone conversation with Chris Loney, owner of EZ Masks, and asked him to consider doing one for that kit.  I'd like to see a finished Hind in my display cabinet  and that might be enough impetus to build it...nah, probably not even that, lol.  Too many in queue ahead of it now.  Good luck with yours, I bet it will be a winner!

Gary


"All you mugs need to get busy building, and post pics!"

Dre
  • Member since
    June 2007
  • From: here, not over there
Posted by Dre on Monday, February 23, 2015 9:50 AM

Sounds like you're making some progress there, Gary.   I don't know that I'll ever rescribe an entire kit- that sounds too much like work.

My two weeks have come and gone and still no paint on the MiG...  damned snow really disrupts everything!

FYI, I'm in the process of digging into a 1/35 MiL MI-24V Hind-E attack helicopter for another GB, so at least I'm staying Soviet!

  • Member since
    February 2003
  • From: Cameron, Texas
Posted by Texgunner on Sunday, February 22, 2015 8:32 PM

Wake up MiG builders!! Big Smile  It's been a while since anyone checked in so I thought I'd give an update on my project.  I used to say that I would rather poke my eye with a hot needle than re-scribe a kit.  Against my better judgement, I'm doing just that, or rather about half the kit as the horizontal surfaces of my AMT MiG-27 already have recessed lines.  I've had a session at the bench tonight with Dymo tape and a scriber.  Someone, please remind of me of earlier "pledge" re: re-scribing if I attempt another one.Tongue Tied 

Man, I'm making progress (I hope that's what to call it) but I'm not digging it much.  I've been following the raised lines as a guide, and then wet-sanding them after the line is scribed.  Some are looking pretty good but I find that the sanding fills my scribed lines and of course, they require another pass or two to clean them out.  And, I've had that crazy scriber go "off track" a few times and out comes the thin CA and work marches on.Big Smile   I guess a coat of primer will eventually show how they look but it's slow going for this old slow model builder.

On another front, my Eduard cockpit PE set arrived last week.  It looks quite nice and I hope to start the 'pit soon.  That should give a bit of a psychological boost to the build, or so I hope.  I removed the "molded to the front fuselage" gear doors too tonight.  Progress is slow, but that's progress.   I'll be back with more news as it happens!  

Gary


"All you mugs need to get busy building, and post pics!"

Dre
  • Member since
    June 2007
  • From: here, not over there
Posted by Dre on Thursday, February 5, 2015 12:47 PM

As an update, I hope to throw some paint at the MiG sometime in the next two weeks...

  • Member since
    February 2003
  • From: Cameron, Texas
Posted by Texgunner on Friday, January 30, 2015 2:46 PM

Dre

Cool, now get to work!Smile

(says the guy who has let his MiG sit still for a month...)

Big Smile


"All you mugs need to get busy building, and post pics!"

Dre
  • Member since
    June 2007
  • From: here, not over there
Posted by Dre on Friday, January 30, 2015 1:52 PM

Cool, now get to work!Smile

(says the guy who has let his MiG sit still for a month...)

  • Member since
    February 2003
  • From: Cameron, Texas
Posted by Texgunner on Thursday, January 29, 2015 7:56 PM

Dre, yes it does!  Thanks for the input brother!  That's the way I've been thinkin' too.

GB


"All you mugs need to get busy building, and post pics!"

Dre
  • Member since
    June 2007
  • From: here, not over there
Posted by Dre on Thursday, January 29, 2015 5:43 PM

Gary- I think I would just go with some basic cockpit PE and possibly some exterior dress-up bits if they can make a big difference in the appearance of things.   Some years back I went whole-hog on a Big Ed PE set for a Su-27 and wound up using only a small portion of the package- lots of moneys wasted on top of an expensive kit!

Nowadays, i tend to use AM products to dress up the cockpits of my models and not much else (resin cockpits are my weakness- I love using them) because the additional cost and work needed for the rest of the stuff doesn't really add up on the "Did I have fun on this?" bottom line.

So, compromise a little- cockpit PE, maybe PE seatbelts or a resin bangseat, and the rest is either kit parts or scratchbuilt.

hope this heps.

  • Member since
    June 2007
Posted by Porkbits on Wednesday, January 28, 2015 4:25 PM

Well, I'm probably a slower builder than you AND I have AMS, so bad person to offer any advice. :-)

JOIN OUR COMMUNITY!

Our community is FREE to join. To participate you must either login or register for an account.

SEARCH FORUMS
FREE NEWSLETTER
By signing up you may also receive reader surveys and occasional special offers. We do not sell, rent or trade our email lists. View our Privacy Policy.