SEARCH FINESCALE.COM

Enter keywords or a search phrase below:

Attention Comardes! Official Pride of Mikoyan-Gurevich GB Launches....

19693 views
216 replies
1 rating 2 rating 3 rating 4 rating 5 rating
  • Member since
    February 2003
  • From: Cameron, Texas
Posted by Texgunner on Wednesday, January 28, 2015 3:02 PM

Well, I've been planning my AMT MiG-27D build a bit more.  If I go "whole hog" and buy the 4 available sets of Eduard PE;  interior, exterior, exhaust and FOD, it will cost more than $80.Surprise   Yeah.  

I now find myself impaled of the horns of a dilemma.   I know all that PE will certainly make it look much better, but it will further slow down the slowest builder on Earth (that would be me!), not to mention adding $85 bucks cost to a kit I paid $8 for in the late-80s.

What to do, what to do?!?  I'm now really inclined (leaning towards?) doing it OOB...well, with minor scratch-building too I guess (ie, seat belts, brake lines, etc).   I've also thought about just buying the interior set only.  That would dress up that really bare kit 'pit and certainly help that pitiful kit seat.

Advice, suggestions, comments??   I could sure use some!  Thanks, Gary


"All you mugs need to get busy building, and post pics!"

  • Member since
    October 2010
Posted by hypertex on Wednesday, January 21, 2015 7:15 AM

Tons of good looking work going on here. Here is a photo of my progress on my Tamiya MiG 15. No fancy cockpit work here--it will be closed.

I was surprised to see two different colors of plastic under the chrome plating. And boy was that chrome a hassle to remove!

  • Member since
    September 2013
Posted by Dean30 on Friday, January 16, 2015 5:32 PM

Thanks Modelcrazy, so far so good! The cockpit literally clicked together.

  • Member since
    July 2014
Posted by modelcrazy on Friday, January 16, 2015 3:57 PM

That looks real Dean.

Steve

Building a kit from your stash is like cutting a head off a Hydra, two more take it's place.


http://www.spamodeler.com/forum/

  • Member since
    September 2013
Posted by Dean30 on Friday, January 16, 2015 3:23 PM

The cockpit is ready for full assembly this is the last time I'll see this much of it I think.

Dre
  • Member since
    June 2007
  • From: here, not over there
Posted by Dre on Friday, January 16, 2015 9:32 AM

Good luck!

  • Member since
    February 2003
  • From: Cameron, Texas
Posted by Texgunner on Friday, January 16, 2015 8:33 AM

Dre

You could always draw the panel lines back in with a pencil after all the painting...  might be easier than rescribing?

Well yeah, that's my usual MO, and I've found that it looks pretty good too.  But, I'm determined to give rescribing a try.  This old kit has a bunch of inaccurate panel I'm sure, and very few access panels so I'm thinking it might a good one to try.  We're sure gonna find out!  Big Smile


"All you mugs need to get busy building, and post pics!"

Dre
  • Member since
    June 2007
  • From: here, not over there
Posted by Dre on Friday, January 16, 2015 8:24 AM

You could always draw the panel lines back in with a pencil after all the painting...  might be easier than rescribing?

  • Member since
    February 2003
  • From: Cameron, Texas
Posted by Texgunner on Friday, January 16, 2015 8:12 AM

Dre

I'm looking forward to seeing the MiG-27, Tex.

Thanks Dre.  The AMT MiG-27 kit has recessed lines on the wings and raised lines on the fuselage.  I've always said I'd rather poke my eye with a hot needle than re-scribe an entire kit.  But, never say never I guess.  I've decided to try my hand at scribing those fuselage lines.  I figure that having to only do half the plane should make the task easier.  I did the entire lower rear section the other evening but I don't think I've got them deep enough; I tried a bit of Flory wash on the lines and some were barely there it seems.  I think I need a better scribing tool.   I'll be back with an update before too long.

Gary


"All you mugs need to get busy building, and post pics!"

  • Member since
    June 2007
Posted by Porkbits on Tuesday, January 13, 2015 11:14 AM

Cockpit looks really good.

Dre
  • Member since
    June 2007
  • From: here, not over there
Posted by Dre on Monday, January 12, 2015 8:55 AM

Looking good in there, Dean.   I have to say that this is one of Trumpeter's easier cockpits...

  • Member since
    September 2013
Posted by Dean30 on Monday, January 12, 2015 4:02 AM

Been doing all the detail painting in the cockpit so far and it's looking not bad in my estimation.

The photos turned out pretty bad actually I'm just realising but nothing new there! You should see just enough though.

Dre
  • Member since
    June 2007
  • From: here, not over there
Posted by Dre on Friday, January 9, 2015 3:02 PM

I'm looking forward to seeing the MiG-27, Tex.

  • Member since
    February 2003
  • From: Cameron, Texas
Posted by Texgunner on Friday, January 9, 2015 2:43 PM

Porkbits

Hey, Gary:

Let's just say that at this point, the closing date is "fluid." :-)

Gotcha!  Wink   I'm gonna get 'er done!


"All you mugs need to get busy building, and post pics!"

  • Member since
    June 2007
Posted by Porkbits on Friday, January 9, 2015 1:44 PM

Hey, Gary:

Let's just say that at this point, the closing date is "fluid." :-)

  • Member since
    February 2003
  • From: Cameron, Texas
Posted by Texgunner on Friday, January 9, 2015 12:47 PM

Hey, I haven't abandoned the GB either!   Surprise  I am the world's slowest modeler of course, but I will be starting that MiG-27 before too long...say, what's the closing date for this GB?   

I still need to decide on whether I'll buy the PE sets from Eduard or just scratch my way along.  Those detail sets do look good though!  But maybe that's like putting lipstick on a pig...after all, it is the AMT/Esci kit we're dealing with here.

Gary


"All you mugs need to get busy building, and post pics!"

Dre
  • Member since
    June 2007
  • From: here, not over there
Posted by Dre on Friday, January 9, 2015 12:34 PM

Dean, that seat is great-  really nice work adding the extra elements.   I have the decals to make that green/blue NorK MiG, but it isn't a M so I'll probably just use the kit decals to make it a grey/green Russian.

I wouldn't say that this GB has been abandoned, just that us Russophiles don't get the same amount of traffic as others- remember how slow the Big Russian Jet GB was?   The holiday work schedule has been brutal, but it should return to normal soon enough.

Too bad we can't get that guy with the totally reworked 1/32 MiG-23 Flogger to join in...

  • Member since
    June 2007
Posted by Porkbits on Thursday, January 8, 2015 9:28 PM

I'm here! As I mentioned a while back, imminent house renovations have thrown (or will throw) a wrench in my building plans (literally). :-( So I'll just have to spectate for now.

Dean, seat looks awesome, and Steve, I've always been a jet guy, but I really like your MiG-3.

  • Member since
    September 2013
Posted by Dean30 on Thursday, January 8, 2015 4:53 PM

Dre here's some pictures for your mig 29 I saw in a newspaper online.

Looks like a two tone grey and a green/blue, I prefer the grey though.

  • Member since
    September 2013
Posted by Dean30 on Thursday, January 8, 2015 3:52 PM

Thanks Steve! It took 5 hours no less to complete.

  • Member since
    July 2014
Posted by modelcrazy on Thursday, January 8, 2015 3:46 PM

Dean,

Fantastic! that's WAY beyond my best effort.

Steve

Steve

Building a kit from your stash is like cutting a head off a Hydra, two more take it's place.


http://www.spamodeler.com/forum/

  • Member since
    September 2013
Posted by Dean30 on Thursday, January 8, 2015 3:41 PM

I'm beginning to think this GB has been abandoned! I know we all had a slow start but come on people, is anybody making anything on here? I have only started I know so I can't say anything, but it's not really taking off (excuse the pun) anyway rant over, so I have been making the KM-1 seat, initially I though about buying a resin one, but the cost is just not justifiable as the seats looked a bit on the crude side so I decided to do what I almost always do, which is enjoyable, reference photos and scratch materials, on a seat it's pretty easy to make though and the results to me were better than I had thought, see what you think! If anyones actually looking!

After

I personally am proud of this one, I think it's my best effort yet.

  • Member since
    September 2013
Posted by Dean30 on Sunday, January 4, 2015 8:02 AM

Well I have officially started my mig, I have assembled the ejection seat which seems pretty adequately detailed, also the cockpit itself seems pretty well detailed, I was going to add more detail myself but I think I would be wasting my time as there does not seem to be any room for any more detail, plus I don't think I would get any within the space I have. 

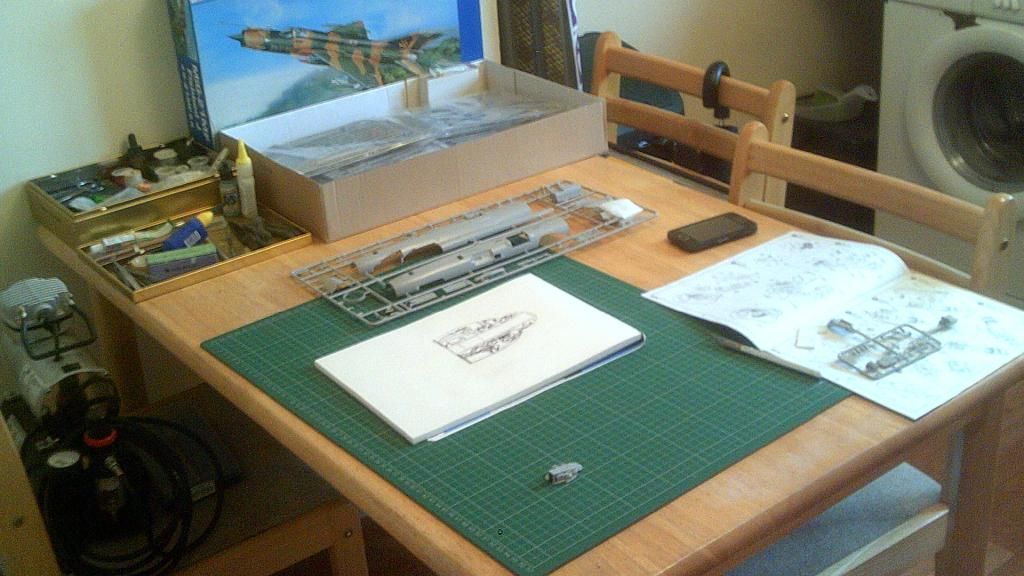
This is the worktop, my kitchen table, I decided to get a new cutting mat, as you can see space is limited but I need this large scale Mig in my life lol.
I decided to use a tip from the magazine about sketching parts that I could scratchbuild so I looked online at an Eduard resin part and copied it sort of.
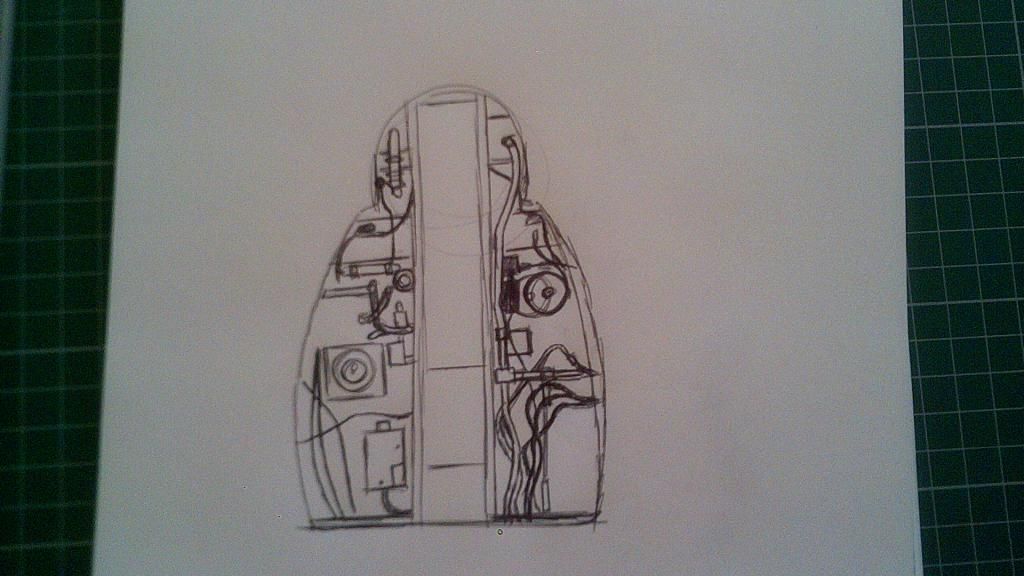
Seemed like a good idea, but I have no room for any of this, plus I am thinking it's the wrong shape anyway, probably something else on line mislabelled. 
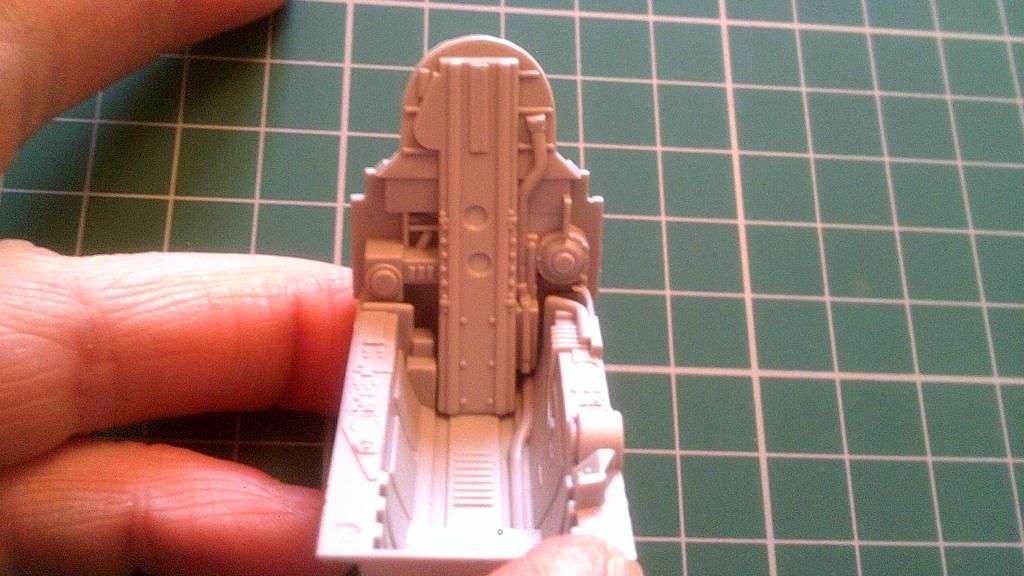
Still it seems like a good idea for later in the build.

The moulded on detail seems pretty good.
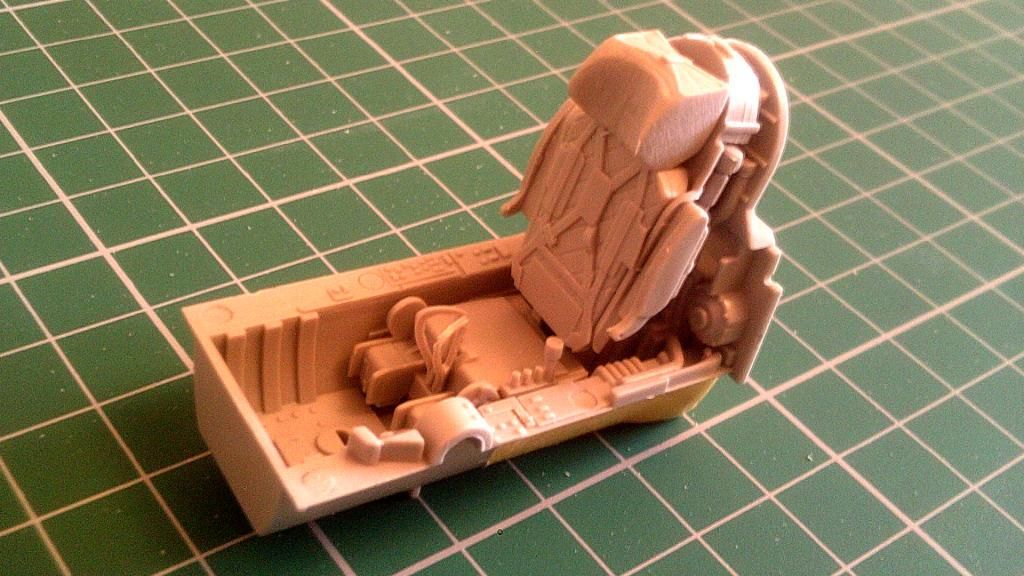
I would have done more but I realised at this point that I need liquid mask for the instrument panel, I will leave the seat a little while and probably paint it tonight. The build will have my full attention as this is a kit I must have owned for about 5 years or so, so a few more days to wait for the liquid mask wont hurt, plus it means I can start other areas of the aircraft. 

  • Member since
    July 2014
Posted by modelcrazy on Saturday, January 3, 2015 3:35 PM

Yeah,  the MiG 3 is a really sleek looking fighter.

Steve

Building a kit from your stash is like cutting a head off a Hydra, two more take it's place.


http://www.spamodeler.com/forum/

  • Member since
    September 2013
Posted by Dean30 on Saturday, January 3, 2015 2:57 PM

Fantastic looking build, I really like it, and being a mig fan I have to admit I had never given this aircraft a second glance before now.

  • Member since
    July 2014
Posted by modelcrazy on Saturday, January 3, 2015 1:30 PM

Finished it, Black 7 is done!

This is a very nice kit, and I would recommend it to anyone. It has a decent parts count, is very detailed, and comes with options for 3 different markings. My only caution is the wing attachment. Dry fit before gluing! The parts fit was superb with little to no flashing.

Well here it is, and as always, Comments and critiques welcome.

Thanks in advance my friends.


Steve 

Steve

Building a kit from your stash is like cutting a head off a Hydra, two more take it's place.


http://www.spamodeler.com/forum/

  • Member since
    June 2007
Posted by Porkbits on Friday, January 2, 2015 12:38 PM

Very nice!

  • Member since
    July 2014
Posted by modelcrazy on Friday, January 2, 2015 11:41 AM

Yes, I'm very impressed with this kit it as well.

Steve

Building a kit from your stash is like cutting a head off a Hydra, two more take it's place.


http://www.spamodeler.com/forum/

Dre
  • Member since
    June 2007
  • From: here, not over there
Posted by Dre on Friday, January 2, 2015 11:19 AM

I'm really liking this MiG-3.

  • Member since
    July 2014
Posted by modelcrazy on Friday, January 2, 2015 12:39 AM

Ok, now I've got all the fiddly bits on and ready for the future, decals, and weathering.

Steve

Building a kit from your stash is like cutting a head off a Hydra, two more take it's place.


http://www.spamodeler.com/forum/

JOIN OUR COMMUNITY!

Our community is FREE to join. To participate you must either login or register for an account.

SEARCH FORUMS
FREE NEWSLETTER
By signing up you may also receive reader surveys and occasional special offers. We do not sell, rent or trade our email lists. View our Privacy Policy.