SEARCH FINESCALE.COM

Enter keywords or a search phrase below:

The 2015 /16 Red Hot and Rollin Automotive Group Build--Ended

121083 views
2225 replies
1 rating 2 rating 3 rating 4 rating 5 rating
  • Member since
    May 2009
  • From: Poland
Posted by Pawel on Tuesday, February 7, 2017 2:29 PM

Hello Joe!

That dash is lookin' good!

If I might ask - could you mark the roster entry number 17 in red - completed? Thank you very much!

And good luck with your builds, have a nice day

Paweł

All comments and critique welcomed. Thanks for your honest opinions!

www.vietnam.net.pl

  • Member since
    January 2015
Posted by MOPAR - D on Tuesday, February 7, 2017 5:56 PM

Joe nice rework on the dash. 

  • Member since
    March 2012
  • From: Corpus Christi, Tx
Posted by mustang1989 on Wednesday, February 8, 2017 3:27 AM

Pawel :Thank you sir and you're request has been taken care of.

Dan: Thanks buddy!


 Forum | Modelers Social Club Forum (proboards.com) 

  • Member since
    January 2015
Posted by taaron76 on Sunday, February 12, 2017 5:40 PM

Just a couple of quick pics of it mocked up.  Still waiting for my seats to arrive, as well as a bunch of detailing thats left to do.

Tim


  • Member since
    January 2015
Posted by MOPAR - D on Sunday, February 12, 2017 6:54 PM

Tim, that looks nice with the doors and trunk opened up. 

This weekend I've been working on the cab again was able to get some primer on the cab after grinding around the inside of the windows to allow the glass to fit closer to the out side edge. Chromed the front bumper and started figuring out what to use for the air cleaner and air stack plus how to route the exhaust pipe. My co-worker said he was going to work on 3D printing the trailer fill ins for the wheels this weekend so I may have more updates tomorrow. Thanks for the comments I appreciate them. 


Still in test fitting 


  • Member since
    January 2014
Posted by Seabe on Monday, February 13, 2017 10:52 AM

Tim, that is really looking awesome! 

Dan, looks like you're also on another superb bit of building here.

You guys are putting me to shame. But at least I've had an excuse - did a two-day trail run this weekend. So I'm still recovering! Started sorting out thast shaky fork and also that very frustating paint job... which got some runs after clear-coating it! Seriously, I think this paint job is jynxed. But the brake calipers have been added, started with the actual steering column. So hopefully before too long I'll have a bike with two wheels attached! 

  • Member since
    January 2015
Posted by taaron76 on Wednesday, February 15, 2017 7:59 PM

Thanks, fellas!  I am still waiting on my seats to arrive, which should be any day now.  Once they get here, I can get them painted and install the 5-point belts.  I did some more detailing tonight like the bumpers and lights.  I still have to install the PE grill when it gets here.  I went ahead and built and added the strut tower braced and monte carlo bar. I made these out of tubing, bolts, nuts, rod ends and washers. Since this kit doesn't have the true strut towers like the original, I had to improvise a little.

Tim

11508902551131-vi.jpg

16508902556321-vi.jpg

06508902546013-vi.jpg

21508902561270-vi.jpg

26508902566160-vi.jpg


  • Member since
    January 2014
Posted by Seabe on Thursday, February 16, 2017 9:25 PM

Tim, that's a beaut! Hope the seats arrive shortly for us to see the final product!

Starting to represent a bike...

  • Member since
    January 2015
Posted by MOPAR - D on Friday, February 17, 2017 7:14 AM

Tim can't wait to see the Mustang with seats looking fantastic so far. 

Seabe your bike is coming together nicely 

  • Member since
    January 2015
Posted by taaron76 on Saturday, February 18, 2017 10:54 PM

Me too!  The racing seats I ordered were too tall... :(  I ordered another set, just in case and they will be here on Monday, so this one won't be finished for another weeks or so.


Just a quick update on the grille section.  Please don't blast me, I didn't model this grille to be identical to the Shelby, with relation to the Pony and lights, but just how I wanted them to sit.

Tim

22509172562326-vi.jpg

29509172569025-vi.jpg

34509172574243-vi.jpg

47509172347558-vi.jpg

41509172341331-vi.jpg


  • Member since
    January 2015
Posted by MOPAR - D on Sunday, February 19, 2017 8:02 AM

Tim I like how you did the grill it just adds that much more to your Mustang. 

  • Member since
    January 2015
Posted by MOPAR - D on Sunday, February 19, 2017 7:59 PM

Not to much to show worked on the cab spraying primer and sanding it plus I worked with my 9 year old grand daughter building a 67 Chevy Impala that she is going to enter in her first model show in April  

Got my 3D printed filler pieces for the trailer set in they fit nice I will need to add a little filler on them to fill in some little holes and then add the ribs. 

  • Member since
    March 2012
  • From: Corpus Christi, Tx
Posted by mustang1989 on Sunday, February 19, 2017 8:52 PM

Seabe: Man that bike's coming together nicely! Not much left?

Tim: Blast you? For what?! That looks terrifice man!!! Who said it had to be "numbers matching" anyways?? lol

Dan: Nice layout man! I'm going to plan on being at the Houston show on April 29th buddy. I missed the SA show this last weekend but am really going to try to make this next one.


 Forum | Modelers Social Club Forum (proboards.com) 

  • Member since
    March 2012
  • From: Corpus Christi, Tx
Posted by mustang1989 on Sunday, February 19, 2017 8:56 PM

 'Bout got the dash done here. First off I took the OOB steering wheel and cut out the spoke holes and shaved off the horn pad. I then drilled two holes in the column. One on the right for the ignition switch, key and key chain and the one on the left for a turn signal lever. I painted the steering wheel spokes with the newly acquired chrome pen that I just got in the mail and installed a PE "SS" horn pad. I then took a PE key along with a PE ignition switch bezel and a PE key chain with a "Bowtie" on it , made a scratch built key ring and put it all together and installed it into the column. The turn signal lever is made from a .019" needle I had in the spares box and I'll be painting a black knob on the end of it tomorrow morning. Any ways here it all is. I'll show the before picture (which I knew I should have taken a more clear "before" picture of the dash beforehand but this is all I've got) and then the improvement pics:

Before:

Image

After:

Image

Image

Image


 Forum | Modelers Social Club Forum (proboards.com) 

  • Member since
    January 2015
Posted by taaron76 on Monday, February 20, 2017 9:30 AM

Joe - looking good, brother!  I know its not a 1:1, but people (not here) will find something to criticize about my Shelby.  lol

Seats and seat belts assembled and installed.  I'm hoping to have this one finished today and ready to the DSLR photoshoot.

Tim


  • Member since
    January 2015
Posted by MOPAR - D on Monday, February 20, 2017 11:41 AM

Tim those seats were worth the wait. They look nice  

  • Member since
    March 2012
  • From: Corpus Christi, Tx
Posted by mustang1989 on Monday, February 20, 2017 12:11 PM

Thanks Tim. That's really too bad about the nitpickers. They're always gonna be there..............unfortunately. Those seats are da bomb man!


 Forum | Modelers Social Club Forum (proboards.com) 

  • Member since
    January 2015
Posted by taaron76 on Monday, February 20, 2017 1:55 PM

Anyone who has built this kit (AMT 1:24) knows that the quality is lacking in just about every area, but I did the best I could and made it salvageable.  I took way to many pics of the entire build to post here, but below you will find a link to the photo gallery, if you want to see more of the build, step-by-step.  Thanks for looking!

Tim

http://public.fotki.com/taaron76/1968-shelby-gt501/

C1-vi.jpg

C2-vi.jpgC6-vi.jpgC10-vi.jpgC13-vi.jpg

C21-vi.jpg

C25-vi.jpg

C24-vi.jpg

C14-vi.jpg

C9-vi.jpg


  • Member since
    January 2015
Posted by MOPAR - D on Monday, February 20, 2017 5:32 PM

Tim you did a awesome job with the old AMT kit. Great looking Mustang.  

  • Member since
    January 2015
Posted by taaron76 on Tuesday, February 21, 2017 6:50 PM

Thanks, Dan!  It was a kit that required a lot of work, but well worth it.

Now that the '68 Shelby GT500 is complete and under glass, I can start on her older sister.  This is what I have accomplished in a few hours so far and hope to make good timing on this one.

Tim

  • Member since
    January 2015
Posted by taaron76 on Monday, February 27, 2017 1:06 PM


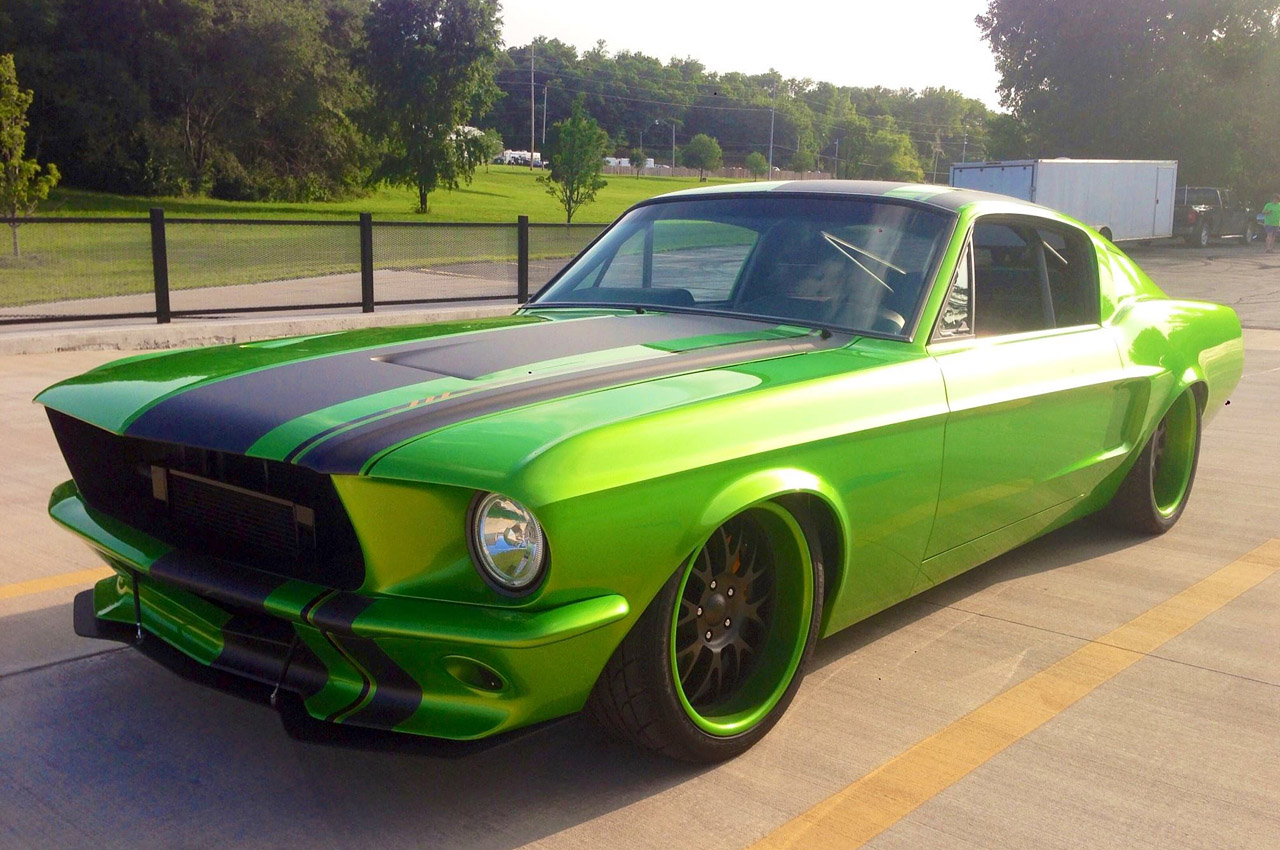
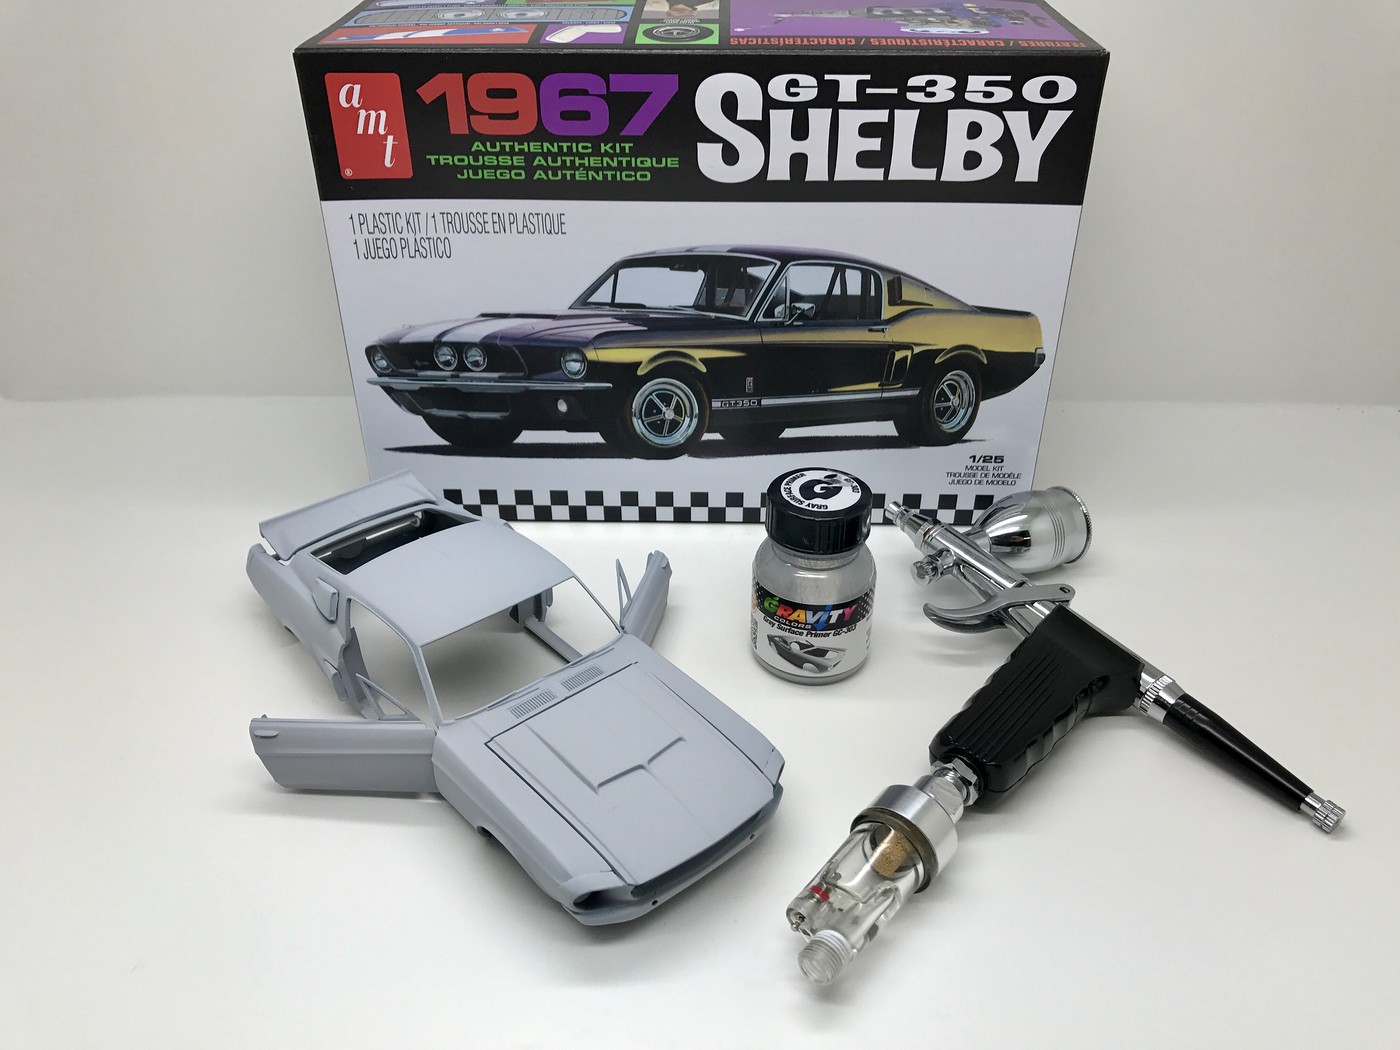
I ordered a new airbrush and wanted to try it out, so the '67 Shelby got some primer. I've never been big fan of spending hundreds of dollars on an airbrush, especially since I get amazing results with my Badger 350, but this was well worth the money... and half off, not to mention I love the gravity fed system and trigger style action. All of the doors and trunk are cut and hinged. I created the door jambs and got the inner door panels aligned. this one was a chore to recreate the new door jambs, based off of how the kit aligned up, so it was tricky. I also filled in the front bumper and cut the old grill out for the new photo etch one I ordered. A couple of small defects to fix that I noticed after the primer dried, but nothing major. Attached is a pic of the color scheme that I am going for, with the exact same wheels that it has, but I will add the 3-bar spinner to it. The only other difference is that it will be a matte finish, versus gloss, and I haven't exactly figured out if I will stripe it the same way, but it will be striped. This Shelby will also be getting the Coyote 5.0 in it as well, if it fits. Thanks for looking!

Tim
FullSizeRender58-vi.jpg

IMG_0551-vi.jpg

  • Member since
    March 2012
  • From: Corpus Christi, Tx
Posted by mustang1989 on Monday, February 27, 2017 4:23 PM

Tim: That is one helluva build there man. Your insight and imagination coupled with how to get it all down to your hands are among the best I've seen. Bravo to you on a fantastic finish. It's always good to have you in here as you bring some real good stuff to a GB.

 Which pic do you want to use for the Gallery on the intro post?

Can't wait to see what you bring to the table with this new build that you're doing here. That thing looks wicked!!


 Forum | Modelers Social Club Forum (proboards.com) 

  • Member since
    January 2015
Posted by taaron76 on Tuesday, February 28, 2017 5:00 AM

Thank you, and I appreciate all of those kind words.  You taught me a lot when I first started this a couple of years ago, and you lead by example!

I took some more pics since I forgot to attach the upper radiator hose on the ones I posted.  I also put some hood pins in.  Let's use this one, thanks!

Tim

  • Member since
    March 2012
  • From: Corpus Christi, Tx
Posted by mustang1989 on Tuesday, February 28, 2017 5:23 AM

Thanks for the good word Tim. Your pic is now posted up front on the wall of fame bud. Looking forward to watching the magic show proceed.........


 Forum | Modelers Social Club Forum (proboards.com) 

  • Member since
    January 2014
Posted by Seabe on Saturday, March 4, 2017 3:16 AM

After a bit of an absence, I did progress and most of the assembly is done. Did the tubing, which was a mission and added the low fuel tank... Most of all, I completed the basic decaling! Some patch-up work still to be performed, but I'll leave that for after assembly. (So unimpressed with masking followed by running paint, that I won't be putting this one at the front of any display case anyways - but will finish it. Not the best decals I have worked with from Tamiya, but it is what it is. Visor needs a quick rub to rif it of finger marks and decal solutions, etc.

Two of the sections:

  • Member since
    January 2015
Posted by taaron76 on Sunday, March 5, 2017 11:05 AM

I'll post some pics later after I get the wheels painted, but this one came out pretty good. First time I've painted a matte finish, versus a glossy one. No wet sanding or polishing happening with a matte finish.

Tim


  • Member since
    January 2014
Posted by Seabe on Monday, March 6, 2017 11:34 AM

Okay, that bike is as done as I'm going to get it at this stage. Will post some pics over the weekend, I hope. Photo oppurtunities are few and far between, since I'm leaving home for work before sunrise and getting back when it's gettig dark. Some personal issues between all of that, but will post some completion pics at some stage, don't worry.

The Ligier is slow on progress, since I wanted to get this one done. But should be able to work on it a bit inbetween shortly. 

  • Member since
    January 2015
Posted by MOPAR - D on Tuesday, March 7, 2017 8:30 PM

Tim nice paint job. How do you like using the Gravity paint? 

  • Member since
    March 2012
  • From: Corpus Christi, Tx
Posted by mustang1989 on Tuesday, March 7, 2017 9:05 PM

Seabe: I'm really looking forward to pictures of that bike! Decals looked like a bear on this one.

Tim: That paint!!!!! You're way ahead of me dude.

Dan: I'm planning on being in Houston on the 29th of April for Modelmania.


 Forum | Modelers Social Club Forum (proboards.com) 

  • Member since
    January 2015
Posted by MOPAR - D on Wednesday, March 8, 2017 11:59 AM

That's great Joe looking forward to seeing you gain. I'm bringing my grand daughter with her 67 Impala she is building now To the show. It's going to be her first show to attend. 

JOIN OUR COMMUNITY!

Our community is FREE to join. To participate you must either login or register for an account.

SEARCH FORUMS
FREE NEWSLETTER
By signing up you may also receive reader surveys and occasional special offers. We do not sell, rent or trade our email lists. View our Privacy Policy.