SEARCH FINESCALE.COM

Enter keywords or a search phrase below:

The 2015 /16 Red Hot and Rollin Automotive Group Build--Ended

121083 views
2225 replies
1 rating 2 rating 3 rating 4 rating 5 rating
  • Member since
    January 2015
Posted by MOPAR - D on Friday, January 27, 2017 7:35 AM

Tim, nice progress on your engine and chassis. 

Seabe, your front fork came out good. 

  • Member since
    March 2012
  • From: Corpus Christi, Tx
Posted by mustang1989 on Friday, January 27, 2017 7:58 AM

The details you guys put into your builds with that 4 link, engine and then the motorcycle forks is just crazy there Tim and Seabe. Wow!! Bravo fellas!!! Bravo!

Here's the PE sheet that I'll be using throughout the build here:

Image

I cleaned up most of the interior parts in regards to excessive flash and sprue joins got most of the small parts separated like the steering wheel and master cylinder and stuff like that. I acquired a spare kit just because I needed some parts that were missing or otherwise deemed unusable.

The parts I need are all there...........


 Forum | Modelers Social Club Forum (proboards.com) 

  • Member since
    January 2015
Posted by MOPAR - D on Friday, January 27, 2017 10:47 AM

Joe that PE will make this one look sharp 

  • Member since
    January 2014
Posted by Seabe on Friday, January 27, 2017 10:23 PM

The masking has been completed. Hope for the best! Will only be able to start with clear and then first layer of red later today. Rattle-cans in a sleeping house on a Sat morning can land me in the dog box! 

You'll see a mix between the templated sections for curvey sections and this had to be followed with own initiatives. And you'll see I actually remembered the rear side of the air intakes as well! Just one of the body parts. The shadow makes it look as if there's a lifting section on front where number decals wil be placed. I hope not, because I have triple checked that after seeing the photo. (And triple wiped it down again!)

  • Member since
    January 2014
Posted by Seabe on Saturday, January 28, 2017 11:46 AM

Now I know why I hate masking... Red seeped in EVERYWHERE! Not even the simplest of these masks were successful. I have a long week ahead to try and remedy this. The complex curves did not help. So it looks (in retrospect) as if some areas lifted a hair after a while. One thing I may have done wrong, was to have left the initial masks on for a bit too long due to work and other commitments. Let's blame it on that... ;)

One weird thing was that my "normal" Tamiya masking tape did not adhere very well to the Tamiya-supplied masking tape in the kit. Everywhere they joined, there was chaos.

Either way, I have a long clean-up job ahead.

The red itself came out quite nicely, though. There's a positive somewhere...

  • Member since
    January 2015
Posted by MOPAR - D on Saturday, January 28, 2017 9:51 PM

Joe that PE will make this one look sharp 

  • Member since
    January 2015
Posted by MOPAR - D on Saturday, January 28, 2017 9:53 PM

Seabe I have found that brushing cleat coat over the edges of the tape prevents that kind of seepage from happenin. 

  • Member since
    January 2014
Posted by Seabe on Sunday, January 29, 2017 3:50 AM

I knew there was something about clearcoat before spraying... so I sprayed clearcoat! It obviously helped bugger-all... Bang Head

  • Member since
    January 2015
Posted by taaron76 on Sunday, January 29, 2017 8:56 PM

Hope you all had a great weekend.  I didn't have time to get hardly anything done.  I am waiting on my seats I ordered to come in from Clearly Scale and my chrome pen from Amazon to arrive.  Not sure if you guys have seen them, but Google Molotow Chrome Pen and check them out.  They are perfect for those chrome interior pieces and they make them in different sizes.  I've seen guys use that instead of BMF on the trim and it looks great.  I will still use BMF on the exterior trim though.  I trust my blade I guess...

Nothing major from an update perspective, but I got the radiator and fan assembled.  This one is molded into the radiator support, which makes it difficult to do anything major with.  I was able to get the interior flocked as well.

Tim


  • Member since
    March 2012
  • From: Corpus Christi, Tx
Posted by mustang1989 on Monday, January 30, 2017 9:27 AM

I've never heard of the clear coating idea on the masking tape before. You guys are going to have to break that one down a little further for me to get. lol.

Awesome work with that electric fan Tim!! I love those things!! I used one on my 54 Chevy I built and it looked great!!


 Forum | Modelers Social Club Forum (proboards.com) 

  • Member since
    January 2015
Posted by MOPAR - D on Monday, January 30, 2017 12:23 PM

Joe , I use clear coat on the edge of the tape before I spray it seals the tape and prevents seepage. 


Tim I just ordered some charme pens looking forward to try them out. 

  • Member since
    March 2012
  • From: Corpus Christi, Tx
Posted by mustang1989 on Monday, January 30, 2017 1:00 PM

MOPAR - D

Joe , I use clear coat on the edge of the tape before I spray it seals the tape and prevents seepage. 


Tim I just ordered some charme pens looking forward to try them out. 


So you spray the tape before sticking it down? Sounds like a plan to me so far.


 Forum | Modelers Social Club Forum (proboards.com) 

  • Member since
    January 2015
Posted by MOPAR - D on Monday, January 30, 2017 6:06 PM

Joe place the tape on the model and put the clear coat over the tape and model before spraying on paint. The clear coat prevents paint seepage. I use  a brush to apply the clear coat and just at the edge of the tape. 

  • Member since
    January 2015
Posted by taaron76 on Thursday, February 2, 2017 8:55 PM

One of the Molotow chrome pens arrived today, the 1mm one and it works great fo the little details that you need chromed.  People are saying they will never use BMF again, but it won't replace BMF for exterior trim on my model.  It works really well though and looks good on a couple of parts that I did with it.  It is sensitive after you use it though, just like Alclad or similar products.

Finished up some of the firewall details, brake booster/MC, brake lines, MSD ignition, battery and cables.

Tim

  • Member since
    March 2012
  • From: Corpus Christi, Tx
Posted by mustang1989 on Thursday, February 2, 2017 9:30 PM

MOPAR - D

Joe place the tape on the model and put the clear coat over the tape and model before spraying on paint. The clear coat prevents paint seepage. I use  a brush to apply the clear coat and just at the edge of the tape. 


NOW I get it. Thanks Dan!!


Tim: Hell yeah those chrome pens are tha bomb aint they?? I got mine and love it!!!! Your detail looks freekin' hella cool!!!!


 Forum | Modelers Social Club Forum (proboards.com) 

  • Member since
    January 2015
Posted by MOPAR - D on Friday, February 3, 2017 8:25 AM

2 of the 3 chrome pens that I ordered came yesterday looking to try them out. I have a question when your done using the pen do you have to clean the tip or do you just put the cap back on?

  • Member since
    January 2015
Posted by taaron76 on Friday, February 3, 2017 8:36 AM

Dan, that's all I did and it seems to be ok.  I really like the 1mm, since it can do a bunch of fine details.  I have seen videos of guys putting it into an airbrush and spraying it as well, with great results.  I need to find out if there is a way to seal it afterwards without taking away the sheen.  It's just like Alclad, in that it doesn't like to be handled afterwards.

Tim

  • Member since
    January 2014
Posted by Seabe on Friday, February 3, 2017 10:02 AM

You may have all but forgotten about this little critter, but he's still around. While trying to sort out my masking mess, suddenly the front and rear suspension as well as the barge boards on this one seemed like less of a hassle! (How huge some of those holes look - they are 1mm!) 

  • Member since
    January 2015
Posted by MOPAR - D on Friday, February 3, 2017 9:58 PM

Started working on the trailer suspension so that I can get spacing with the new wheels and tires set up to get the side filler panels printed. I've got a co-worker that just bought a 3D printer and is looking for projects to print so he's waiting on me to give him the details. 


  • Member since
    January 2015
Posted by taaron76 on Saturday, February 4, 2017 7:02 PM

Dan - You are a model buidling machine!  :)

Still waiting on my seats to arrive, but I was able to complete some of the interior today and piddled with the suspension. Emergency brake cabling is next now that the pinion angle is set and the 4-link is mounted in the rear. I had to make a custom length drive shaft as well. Still have to run the soft lines to the calipers on all four corners and finish painting the exhaust.

Tim

  • Member since
    March 2012
  • From: Corpus Christi, Tx
Posted by mustang1989 on Saturday, February 4, 2017 9:37 PM

Dan: All I do with my chrome pen is just put the cap back on and it's ready for use the next time I need it. From what I've read , if the tip does get clogged you can let the tip rest in some lacquer thinner and it clears it right up. That rig and trailer look awesome BTW!!!!

Tim: Interior work looks nothing short of fantastic bud.

Everybody:

Still on this one fellas. I've managed to strip most of the paint from all the parts.

The body turned out pretty good and still needs some cleaning up. I ended up clipping one of the rear tail light openings at the bottom and knocked the thin strip at the bottom of the opening out so I'll have to work some fancy foot work to get that back in line but it shouldn't be all that bad.

I've got the wheels and tires picked out for it now after a few days of searching.

I started setting up two different stances but I like the second one alot better so I think we'll be going with that one.


This isn't going to be a "numbers matching Camaro" as I'll be changing a few things up to more of a mild modified street car. I'm currently looking for a blank grille with no Z/28 or RS emblems in it. I had 'em on ebay just last night and forgot to visit when I was supposed to and lost it. Indifferent


 Forum | Modelers Social Club Forum (proboards.com) 

  • Member since
    January 2015
Posted by MOPAR - D on Sunday, February 5, 2017 8:16 AM

Tim, your interior and chassis are looking good. 

Joe, thanks for the info and I like the second look too. 

  • Member since
    May 2009
  • From: Poland
Posted by Pawel on Sunday, February 5, 2017 11:02 AM

Hello everybody!

Joe - nice progress on the Camaro. So how much of the old kit are you keepeing here?

Dan - your rig is lookin' good. For the markings - you might want to check out the custom decals below - that might do the trick for your build.

As for my VW - I wanted to finish this one before the end of the year, but I was waiting for my custom decals. Those got delayed more than four weeks, but they finally got to me in the post:


Custom decals by Pawel


As you can see I'm also building an Army chopper in parallel. I slapped the decals on the VW and the model was done. I have also built a display base for it. An acrylic display case fits snugly around this base - you see I'm going to put that model at work, where we build 1:1 modern VWs. The Tarmac is made out of 800 grade sandpaper:


And that would be it - sure took longer than I expected! Thanks for looking and have a nice day


Paweł

All comments and critique welcomed. Thanks for your honest opinions!

www.vietnam.net.pl

  • Member since
    January 2015
Posted by MOPAR - D on Sunday, February 5, 2017 11:10 AM

Patel nice VW bus. I like how you did the flames. 

Working on getting the cab ready for paint and a sample mock up of the cab sitting on the frame.


  • Member since
    January 2015
Posted by taaron76 on Sunday, February 5, 2017 1:32 PM

Don't worry, the exhaust is just primed white... its just a mockup and will be stainless steel color, but the brake lines and emergency brake lines are hooked up.

Tim

  • Member since
    January 2015
Posted by MOPAR - D on Sunday, February 5, 2017 7:40 PM

Tim nice clean looking chassis 

  • Member since
    March 2012
  • From: Corpus Christi, Tx
Posted by mustang1989 on Monday, February 6, 2017 4:37 PM

Pawel: Man you're giving me inspiration to finish my bus. You finished that one up more than nicely and I really like that base you came up with. Nice to see this one come together. It's great to have had you in here bud. Got which one in mind that you'd like to see in the intro post?

Dan: That cab looks freekin' awesome test fitted onto that rolling chassis. Can't wait to see some paint fly onto this thing.

Tim: Great progress on that chassis!!!! This is going to be a mind blowing build when done. I can picture it in my mind already!!


 Forum | Modelers Social Club Forum (proboards.com) 

  • Member since
    March 2012
  • From: Corpus Christi, Tx
Posted by mustang1989 on Monday, February 6, 2017 4:39 PM
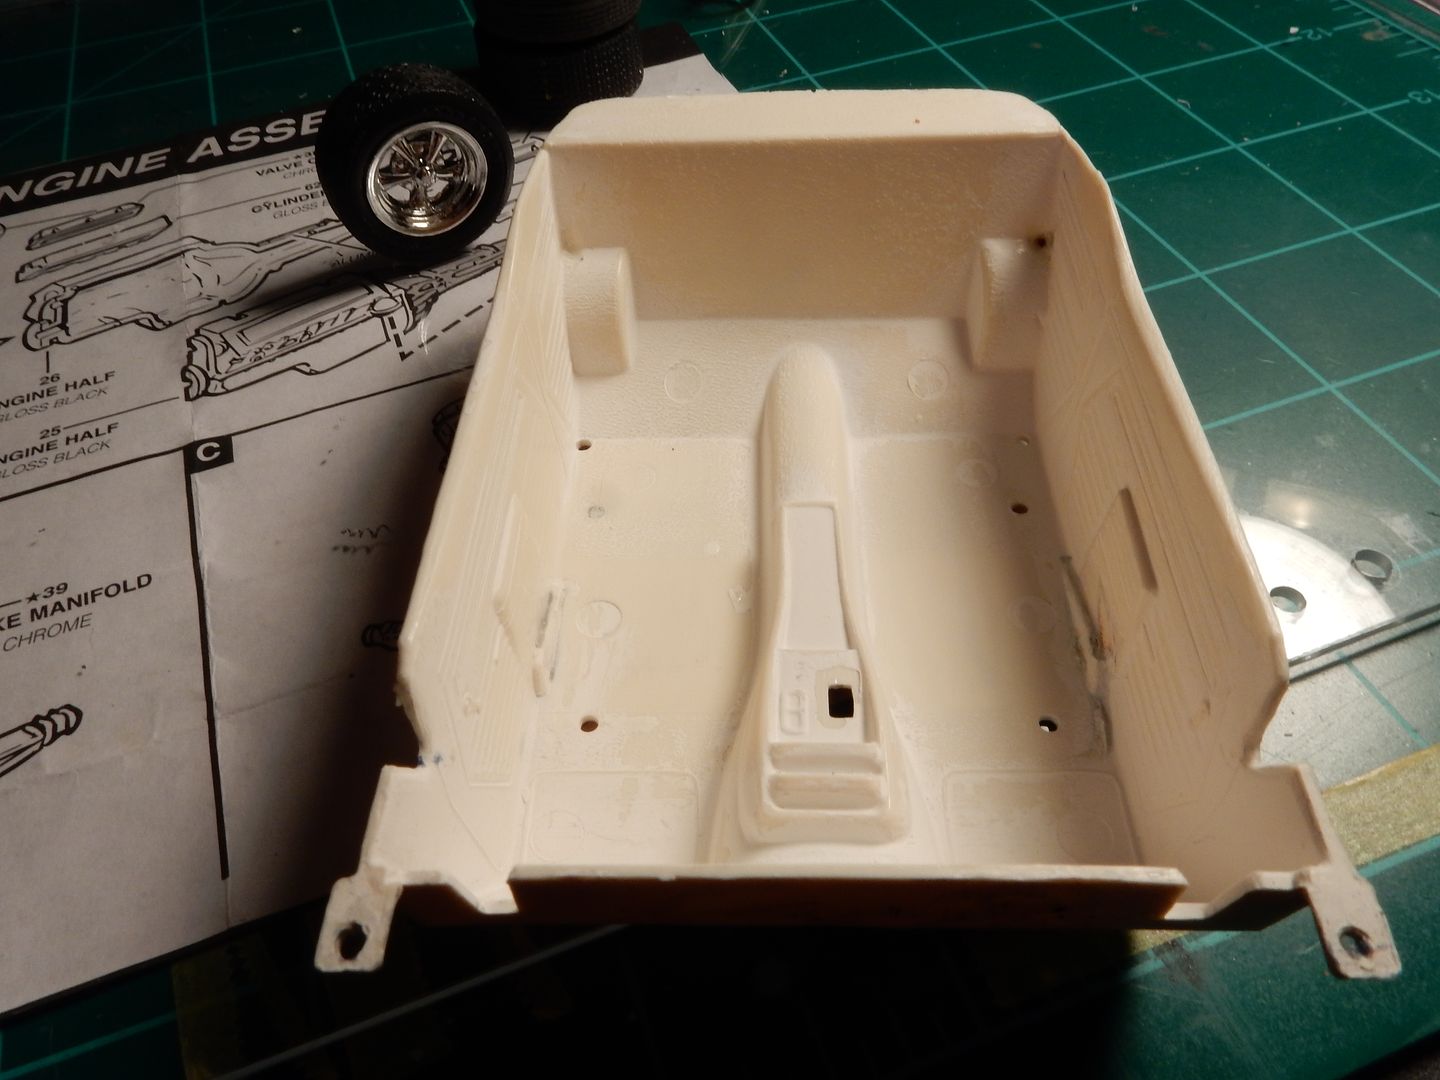
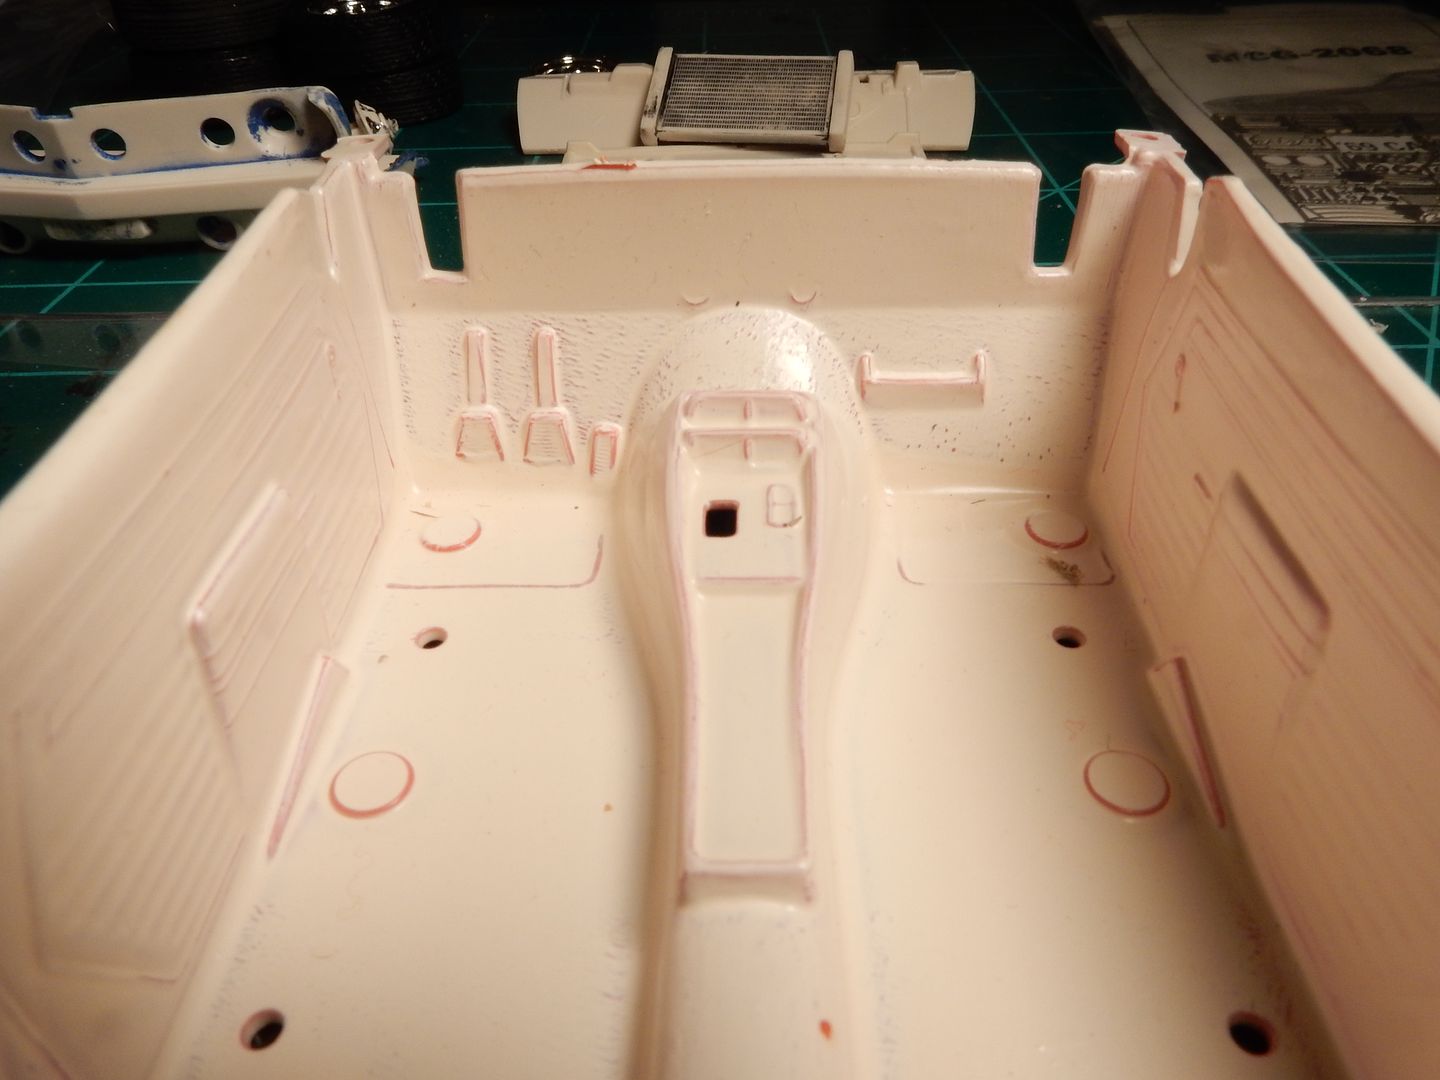
Ok folks. This is the very best that Monogram could do in the late 70's and throughout the early 80's I guess. It's not very accurate but it's what I've got ................so we'll deal with that.
Image

Image

It's not going to be perfect but I'm shooting for the best I can do with this interior bucket to transform it into something that somewhat resembles this....minus the wood grain of course. Yuck!

Image


 Forum | Modelers Social Club Forum (proboards.com) 

  • Member since
    May 2009
  • From: Poland
Posted by Pawel on Tuesday, February 7, 2017 11:50 AM

Hello Joe!

Thanks a lot for your kind words! I sure would like to see your "Frankenstein-Bus" finished, it's going to be a mean machine!

I think I'd like the photo that is third from the top (fourth if you count the decal shot). Now let's see if I can come up with something else to build, that is red, hot and rolling! Good luck with your build, guys, and have a nice day

Paweł

All comments and critique welcomed. Thanks for your honest opinions!

www.vietnam.net.pl

  • Member since
    March 2012
  • From: Corpus Christi, Tx
Posted by mustang1989 on Tuesday, February 7, 2017 12:29 PM

Pawel: That's in the works still and not at all "out of sight-out of mind". Just gotta work some engineering problems out. I've got your picture posted and am looking forward to your next one! Yes

I've been working on this thing but there are a lot of corrections to make. First off the PE bezels were NOT going to work with this dash ....................BUT I've got a different plan. Here's where we start at.....

Image

I drilled out the IP gauges and sanded down the back of them for the scale thickness factor and sanded the Camaro emblem off as well as cleaned up a bunch of flash and sinkholes that I found not only on top of the dash but the face of it as well. I also sanded that Camaro script from the dash.

We'll be slingin' paint on this thing about anytime now:

Image

Once I got really movin' on it , it seemed to go pretty quick. Here we are with the completed dash. I got the film instruments and the "Camaro" script from the PE set. All dash trim was brought out with a silver lead pencil. While it's not the best dash you'll ever see, it's Hell and gone from what it was!!

Image


 Forum | Modelers Social Club Forum (proboards.com) 

JOIN OUR COMMUNITY!

Our community is FREE to join. To participate you must either login or register for an account.

SEARCH FORUMS
FREE NEWSLETTER
By signing up you may also receive reader surveys and occasional special offers. We do not sell, rent or trade our email lists. View our Privacy Policy.