SEARCH FINESCALE.COM

Enter keywords or a search phrase below:

Pride of the Luftwaffe GB

42443 views
1268 replies
1 rating 2 rating 3 rating 4 rating 5 rating
  • Member since
    June 2014
Posted by BrandonK on Friday, June 29, 2018 9:15 AM

Man Doug, you are hauling through this build. The paint work looks great.

BK

On the bench:

A lot !! And I mean A LOT!!

2024 Kits on deck / in process / completed   

                         14 / 5 / 2  

                              Tongue Tied

  • Member since
    September 2014
Posted by rooster513 on Friday, June 29, 2018 8:17 AM

Coming together nicely Doug!

-Andy

  • Member since
    October 2008
  • From: Georgia
Posted by Rigidrider on Thursday, June 28, 2018 7:50 PM

Andy... The pitot tube is a nice touch! Its really taking shape and looking good. 

Alright... a bit more on me end.

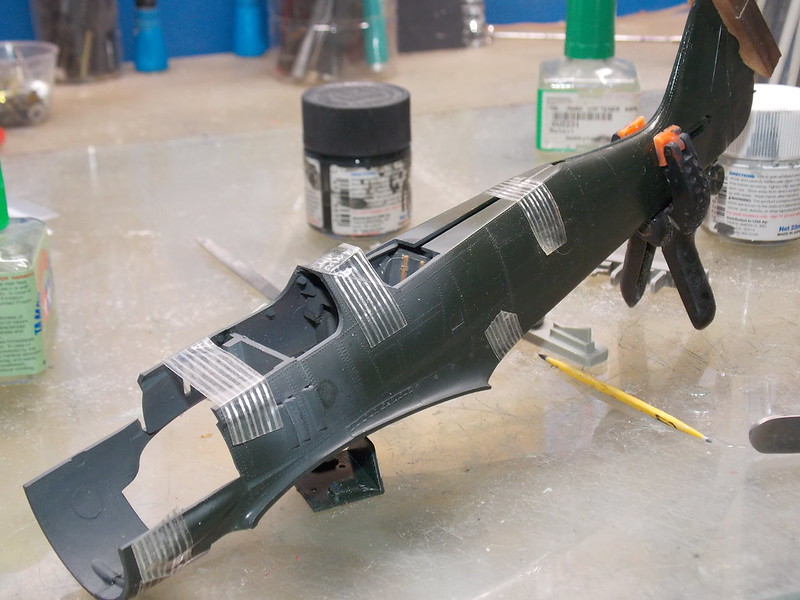
Well, here we are all closed up.lol... 

Getting the wings attached, The fit was actually real good with no putty required. What you see at the wing root is just a touch of good ole Bic White out, Correction fluid. That was all that was required, I dont like doing putty if I can avoid it, and when setting the diehedral, if a gap still exists I'll make and insert a spreader if possible to take up the gap. Well thats all for now, Thanks for looking and back in a bit! Take care !!!

Doug

When Life Hands You A Bucket Of Lemons...

Make Lemonade!

Then Sell It Back At $2 Bucks A Glass...

  • Member since
    September 2014
Posted by rooster513 on Thursday, June 28, 2018 10:41 AM

Thanks guys. I got some more paint laid down and I've got to say I'm not sold on using the black primer on these dark colors. The black primer seems to make the colors a little darker and being that they are so close to begin with they seem to just be washing together. I may try grey primer on the darker topside camo and keep the black for the RLM 76 bottom as I think it works really well with the lighter colors.

I might be able to shift the color some by marbling with different colors as well...Hmm

-Andy

  • Member since
    April 2015
Posted by Mopar Madness on Wednesday, June 27, 2018 8:45 PM

I like that marbled undercoat.

Chad

God, Family, Models...

At the plate: 1/48 Airfix Bf109 & 1/35 Tamiya Famo

On deck: Who knows!

  • Member since
    April 2005
  • From: Australia
Posted by taxtp on Wednesday, June 27, 2018 7:02 PM

That 190 is going to look really interesting Andy. I'm looking forward to it.

Cheers

Tony

I'm just taking it one GB at a time.

  • Member since
    September 2014
Posted by rooster513 on Wednesday, June 27, 2018 12:06 PM

I've managed to get a little more work done on my 190. First up I replaced the kit pitot tube with a length of brass. I'll add tip towards the end of the build....


Next up I got the whole thing primed and shot the RLM 04...


I was also able to get started on the marble coat of RLM 70. Looking forward to getting more paint on it soon!


-Andy

  • Member since
    October 2008
  • From: Georgia
Posted by Rigidrider on Monday, June 25, 2018 5:30 PM

Johan... Thats about all I can do...lolol I just mounted what I had and like you said, not much will be visable behind the fan. I had looked on Ebay for a part kit or a junk yard build, and even checked at the LHS in their "missing parts kits" but nothing turned up. It'll be OK... Once its closed up I'll just mount the exhaust directly to the outlets and hope for the best! Thank you and take care !

Doug

When Life Hands You A Bucket Of Lemons...

Make Lemonade!

Then Sell It Back At $2 Bucks A Glass...

  • Member since
    April 2005
  • From: Gothenburg
Posted by JohanT on Monday, June 25, 2018 3:59 PM

Hi Doug,

Sorry to hear about that misshap with the sprues. 

Is your intention to stock enough material in the forward end for the exhaust pipes to be mounted correctly?

Cuz right now the cyclone carburator is mounted in front of the second cylinderstack rather then from the back?

There is not much to see through the fan when assembled so this might be the best DIY. 

Best Regards

Johan

  • Member since
    October 2008
  • From: Georgia
Posted by Rigidrider on Sunday, June 24, 2018 6:26 PM

Clemens... Thanks ... Yes sir, its hard to beat Air Scale for gauge and plackard decals. They make the job SOOO much easier. The only thing about them is, you'll need a sealer over them onced dried. They don't stick well and will flake off at times if not sealed with a clear coat of some type. Far as the engine goes... We build models...So, I deal with it! lolol... Thanks again my friend!

Doug

When Life Hands You A Bucket Of Lemons...

Make Lemonade!

Then Sell It Back At $2 Bucks A Glass...

  • Member since
    April 2013
Posted by SchattenSpartan on Sunday, June 24, 2018 5:13 PM

Doug, that cockpit looks superb! Those airscale decals really set off the IP.

I'm sorry to hear about the incomplete engine, but so far you seem to be on the way to an excellent finished model nonetheless!

  • Member since
    October 2008
  • From: Georgia
Posted by Rigidrider on Sunday, June 24, 2018 12:20 PM

Well, Bish, again, Thank you. It takes a little bit of time and a bit of touching up, But all in all, I like em too!

MC... Thank you sir! As always, very much appreciated...

OK, A bit more from me.

Just a view or two of how its looking while going together...

Now... I have just ran into something, I have NEVER seen before from a Hasagawa kit. I started to get the engine parts ready to clean up and assy, and to my surprise... only half the engine was there. I looked on the part chart and it looks like the back half of the engine didn't for some reason recieve any material during molding. There are just a few nubs where the engine should be. the sprue is also incomplete. Oh well... I'll make due with what I do have. 

This is all I have for an engine, lol... Thats alright, I'll just build it closed up and make due.

Well any way, thats about all for now... more in a bit! Hope everyones having a good weekend!

Doug

When Life Hands You A Bucket Of Lemons...

Make Lemonade!

Then Sell It Back At $2 Bucks A Glass...

  • Member since
    July 2014
Posted by modelcrazy on Friday, June 22, 2018 4:25 PM

Dang Doug, supper looking pit man. Yes

Steve

Building a kit from your stash is like cutting a head off a Hydra, two more take it's place.


http://www.spamodeler.com/forum/

  • Member since
    December 2002
  • From: Bury St Edmunds, Suffolk, England
Posted by Bish on Friday, June 22, 2018 3:06 PM

Doug, those are really impressive, both the moulding and the painting. At first glance i thought they were fabric belts, it was only because you didn't mention it that i woundered if they were moulded.

I am a Norfolk man and i glory in being so


On the bench: Airfix 1/72nd Harrier GR.3/Fujimi 1/72nd Ju 87D-3

  • Member since
    September 2014
Posted by rooster513 on Friday, June 22, 2018 1:47 PM

Doug that cockpit is looking really good! You did a heck of a job painting those belts as well!

-Andy

  • Member since
    October 2008
  • From: Georgia
Posted by Rigidrider on Friday, June 22, 2018 9:37 AM

Bish... Thank you sir! And yes they are (molded .) I have to use my magnifying glasses with the x10 power lens insert and a 15\0 brush... But... They're done! Lolol...

Brandon K... Thank you and always good to hear from you!

Doug


When Life Hands You A Bucket Of Lemons...

Make Lemonade!

Then Sell It Back At $2 Bucks A Glass...

  • Member since
    June 2014
Posted by BrandonK on Friday, June 22, 2018 9:14 AM

That is some excellent work, Doug. I am loving it.

BK

On the bench:

A lot !! And I mean A LOT!!

2024 Kits on deck / in process / completed   

                         14 / 5 / 2  

                              Tongue Tied

  • Member since
    December 2002
  • From: Bury St Edmunds, Suffolk, England
Posted by Bish on Friday, June 22, 2018 8:02 AM

Looks real good Doug. Are those seat belts moulded on, if so they look amazing.

I am a Norfolk man and i glory in being so


On the bench: Airfix 1/72nd Harrier GR.3/Fujimi 1/72nd Ju 87D-3

  • Member since
    October 2008
  • From: Georgia
Posted by Rigidrider on Friday, June 22, 2018 7:59 AM

Tony, I hear ya! isn't it funny how the messes are the ones that stand out in memory? lol...

Silent Bob, Well, we're going to find out! Oft times (well, not too often) mine don't survive  they're "Maiden flight" when things go very badly! The last one was that POS Revell P61 Black Widow... I should've (and actually did) know better but thought to give it another try. Sorry, sorry, sorry kit! The worst Revell has ever produced.

Clemens! It is good to hear from you again! Thank you and were going to give it a go! 

Any way, A bit more progress from me... I will have to go a tad slower on this one, I dislocated my index finger the other day, and its immobilized at this time, but I tried a bit the other day and I think I can make due for now...
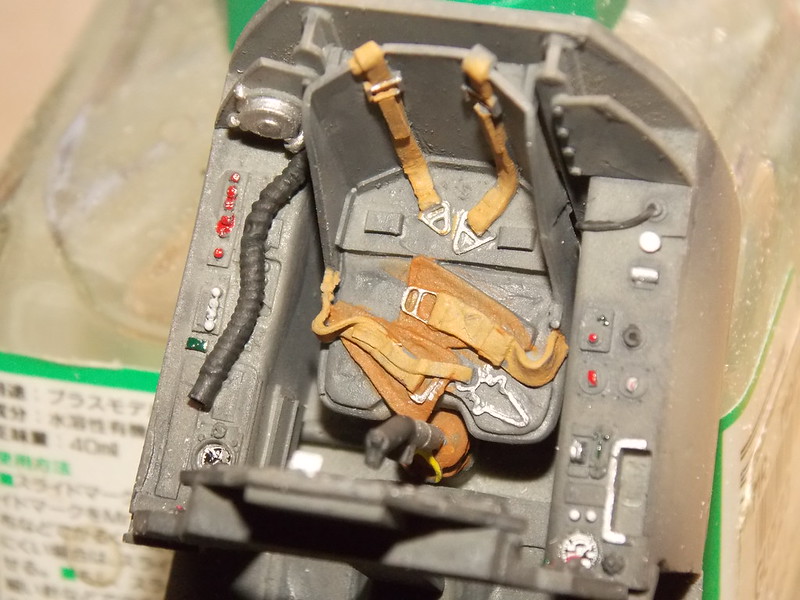
This is the resin pit from Signal Squadron... I like it loads better then the kit parts...
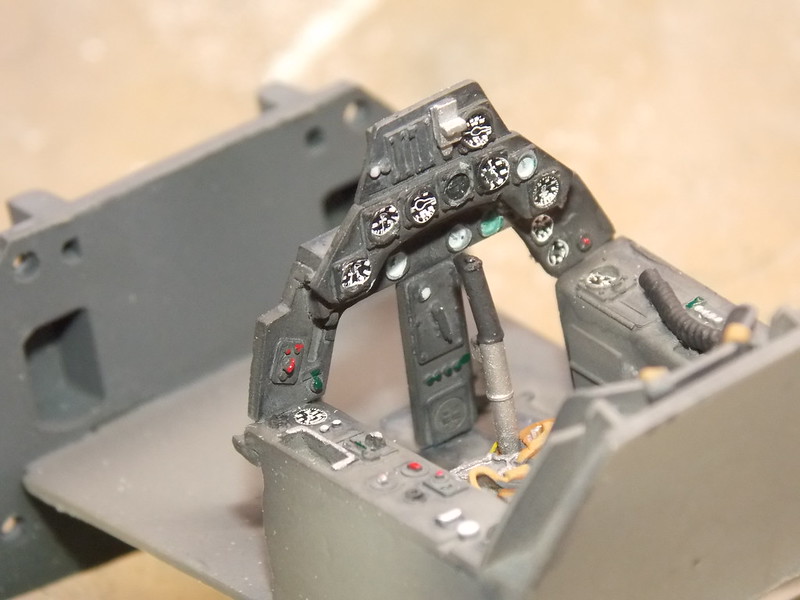
A few 32nd airscale decales... They also make the job much nicer...
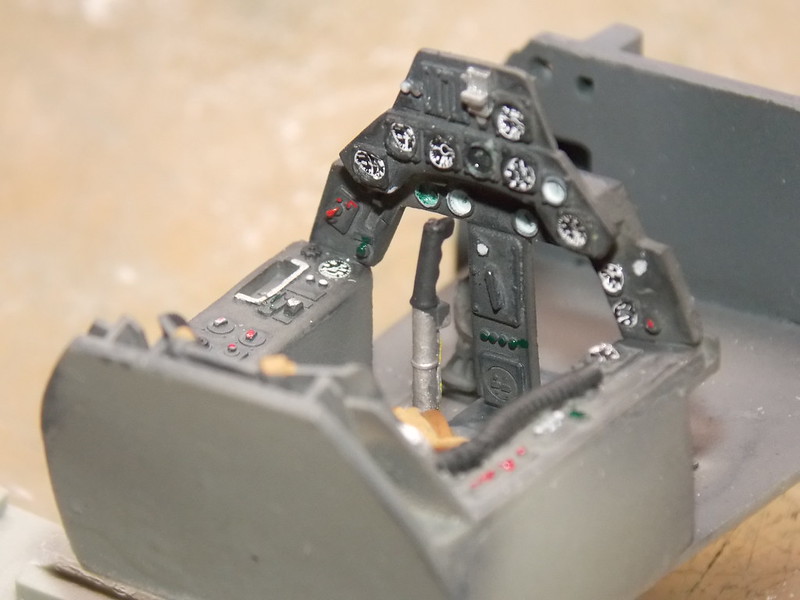
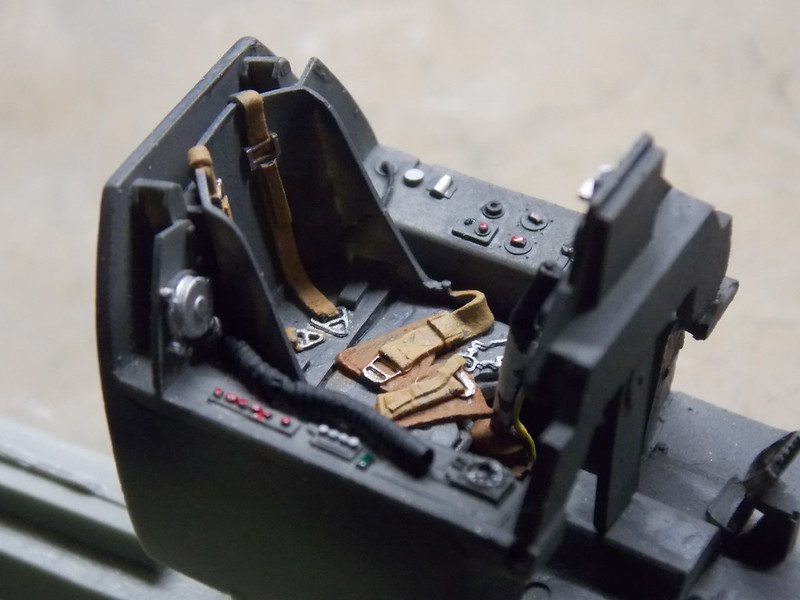
And we have it in the fuselage...Tis all for now, I'm trying to do two at the same time something I generally don't do, But... we'll see how that goes... Take care all! 

Doug

When Life Hands You A Bucket Of Lemons...

Make Lemonade!

Then Sell It Back At $2 Bucks A Glass...

  • Member since
    February 2014
  • From: Michigan
Posted by silentbob33 on Thursday, June 21, 2018 2:12 PM

Looking forward to see what you do with that kit Doug.  I built a Revell boxing of the kit a few years ago, but it didn't survive the Great Crash of 2014.

I've made a small start on my 109.  I'll post some pics after I finish up the cockpit.

On my bench: Academy 1/35 UH-60L Black Hawk

  • Member since
    April 2013
Posted by SchattenSpartan on Wednesday, June 20, 2018 3:50 PM

Eric, that 109 looks very nice! It's nice to see one of the early color schemes for a change.

Doug, I'm looking forward to watching you build that 190. It never ceases to amaze me what you can do with those old kits.

  • Member since
    April 2005
  • From: Australia
Posted by taxtp on Tuesday, June 19, 2018 9:12 PM

Doug, I built the Frog boxing of that kit waaaay back in the day. It has a detailed engine IIRC. Man, I made a mess of that one !

Looking forward to seeing it.

Cheers

Tony

I'm just taking it one GB at a time.

  • Member since
    October 2008
  • From: Georgia
Posted by Rigidrider on Tuesday, June 19, 2018 8:03 PM

Thanks Andy, I know for the most part the invitation is usually open, but I still like to ask. I'll get going right away, and again...Thanks! 

Doug

Well heres the kit any way...

I love these old kits... but I did get a resin  pit (Signal Squadron) and a PE fret to dress it up a bit...

Thanks again... 

Doug

OH... This will wind up being a G3 version...

Doug

When Life Hands You A Bucket Of Lemons...

Make Lemonade!

Then Sell It Back At $2 Bucks A Glass...

  • Member since
    September 2014
Posted by rooster513 on Tuesday, June 19, 2018 10:57 AM

Thanks for all the great builds everyone!

24 Completed Builds:

FW 190 - 13

Bf 109 - 11

Looks like the 190 is still in the lead lol

-Andy

  • Member since
    September 2014
Posted by rooster513 on Tuesday, June 19, 2018 10:48 AM

Very nice 109 Armor! I think the decals came out really nice! I'll get you added to the front page. Thanks for another great addition to the GB!

-Andy

  • Member since
    September 2014
Posted by rooster513 on Tuesday, June 19, 2018 10:47 AM

Rigidrider

Hey Andy... Ive caught up on some prior commitments and would like to do another of the Pride of the Luftwaffe build if ok. I have another Hasagawa FW 190 that I would like to do as a G3 fighter \ bomber configuration. I have to go back through the completed page and update comments on the amazing work being done!  Thanks and take care! Doug


Doug, sorry for the late respone but I was out of town. We'd love to see another 190 from you!

-Andy

  • Member since
    March 2017
Posted by Armor_Aficionado on Monday, June 18, 2018 4:43 AM
Don't mind at all - thanks, Jack!

  • Member since
    April 2015
Posted by Mopar Madness on Sunday, June 17, 2018 8:05 PM

Nice one Eric.  I love the Legion Condor colors.  That’s a good clean build!

Chad

God, Family, Models...

At the plate: 1/48 Airfix Bf109 & 1/35 Tamiya Famo

On deck: Who knows!

  • Member since
    April 2005
  • From: Australia
Posted by taxtp on Sunday, June 17, 2018 7:25 PM

Nice model A_A. You don't see many 109Cs completed.

Cheers

Tony

I'm just taking it one GB at a time.

  • Member since
    April 2006
  • From: ON, Canada
Posted by jgeratic on Sunday, June 17, 2018 9:52 AM

Eric, she looks good.  Yes

Hope you don't mind, but I went and directly linked your photos (what you have is just the web page linked).

Glad you were able to get past the decal issues.


regards,

Jack

JOIN OUR COMMUNITY!

Our community is FREE to join. To participate you must either login or register for an account.

SEARCH FORUMS
FREE NEWSLETTER
By signing up you may also receive reader surveys and occasional special offers. We do not sell, rent or trade our email lists. View our Privacy Policy.