SEARCH FINESCALE.COM

Enter keywords or a search phrase below:

Russian Armor Group Build November 2017 - November 2018

38259 views
940 replies
1 rating 2 rating 3 rating 4 rating 5 rating
  • Member since
    April 2005
  • From: Australia
Posted by taxtp on Thursday, November 23, 2017 12:16 AM

Looking good Griffin, I'm in the weekend GB. One year it took me three attemts before I finally got one done. Its one of my favourites.

Cheers

Tony

I'm just taking it one GB at a time.

  • Member since
    May 2015
Posted by Griffin25 on Wednesday, November 22, 2017 9:55 PM

Hope you're feeling better Bud


Griffin

  • Member since
    November 2009
  • From: SW Virginia
Posted by Gamera on Wednesday, November 22, 2017 7:33 AM

Actually you're an inspiration Griffin! Great to see you making such progress. 

I got back home Sunday but somewhere picked up a virus and have been under the weather since then. I did sand a few road wheels but that's it. I'm hoping I'll feel well enough to paint the interior and engine this weekend. 

"I dream in fire but work in clay." -Arthur Machen


  • Member since
    September 2017
  • From: Netherlands
Posted by Sailing_Dutchman on Tuesday, November 21, 2017 8:09 PM

I'm in the weekend madness build, will be building Tamiya's 1/35 AMX 13.


  • Member since
    May 2015
Posted by Griffin25 on Tuesday, November 21, 2017 7:59 PM

Thanks guys.I got a few more things done the last couple days. I don't want to be a thread hog but I have the week off Smile Primered and base coated the main hull and turret and fabricated the tow cables. The nylon string that Tamiya supplies for the steel cable worked great. Very little fuzz. I am feeling very tempted to join the weekend madness build. Sounds really fun and I have many smaller kits that I could build in 2 days. I'm hemming and hawing. I have a commitment problem. That is probably why I live alone with a cat. LOL. Who else is doing the weekend Madness group build here?


Griffin

  • Member since
    January 2016
  • From: A Galaxy Far, Far Away
Posted by Hunter on Tuesday, November 21, 2017 2:46 PM

Griffin25

 More stowage work. And my cat, Getty.


Griffin,

Great job on the stowage....and getty looks like his been hard at it.

Hunter 


  • Member since
    March 2007
  • From: Northeast WA State
Posted by armornut on Tuesday, November 21, 2017 1:23 PM

How did you paint her so life like? LOL My first thought was the kitty was from the Tamiya kit...oops LOL. nice work on the rucks Griffin

we're modelers it's what we do

  • Member since
    November 2009
  • From: SW Virginia
Posted by Gamera on Monday, November 20, 2017 4:20 PM

ManCityFan

Nice stowage and cute kitty.


Ditto Wink

"I dream in fire but work in clay." -Arthur Machen


  • Member since
    September 2016
  • From: Albany, New York
Posted by ManCityFan on Sunday, November 19, 2017 3:58 PM

Nice stowage and cute kitty.

Dwayne or Dman or just D.  All comments are welcome on my builds. 

  • Member since
    May 2015
Posted by Griffin25 on Sunday, November 19, 2017 3:42 PM

 More stowage work. And my cat, Getty.


Griffin

  • Member since
    November 2009
  • From: SW Virginia
Posted by Gamera on Friday, November 17, 2017 5:31 PM

ManCityFan

Found this on the bottom of my tank model:

 IMG_0700 by Dwayne Munk, on Flickr

In case the year is fuzzy, it is 1972.  LOL


A classic!


Tony: Great idea there too!

"I dream in fire but work in clay." -Arthur Machen


  • Member since
    May 2015
Posted by Griffin25 on Friday, November 17, 2017 4:46 PM

ManCityFan

Found this on the bottom of my tank model:

 IMG_0700 by Dwayne Munk, on Flickr

In case the year is fuzzy, it is 1972.  LOL


You know that is awesome. You are releasing it from 30 years of purgatory!! Look forward to seeing it


Griffin

  • Member since
    September 2016
  • From: Albany, New York
Posted by ManCityFan on Friday, November 17, 2017 2:52 PM

Found this on the bottom of my tank model:

 IMG_0700 by Dwayne Munk, on Flickr

In case the year is fuzzy, it is 1972.  LOL

Dwayne or Dman or just D.  All comments are welcome on my builds. 

  • Member since
    May 2015
Posted by Griffin25 on Thursday, November 16, 2017 6:44 PM

taxtp
I have an assortment of those circular little stickers you can buy in $1 stores too, sometimes you get lucky and the size is right, and they're cheap ! Cheers Tony
 

That's a good idea Tony. Like the one's you use to mark documents and the like. Didn't think of that. Very useful


Griffin

  • Member since
    April 2005
  • From: Australia
Posted by taxtp on Thursday, November 16, 2017 6:17 PM
I have an assortment of those circular little stickers you can buy in $1 stores too, sometimes you get lucky and the size is right, and they're cheap ! Cheers Tony

I'm just taking it one GB at a time.

  • Member since
    November 2009
  • From: SW Virginia
Posted by Gamera on Thursday, November 16, 2017 6:05 PM

Oh, I've been doing mine the same as Dwayne but now I'm going to look at pocket change and see if I can find something to match. Great idea Griffin!!!

"I dream in fire but work in clay." -Arthur Machen


  • Member since
    April 2005
  • From: Australia
Posted by taxtp on Thursday, November 16, 2017 5:34 PM
Same as Dwayne, but both ways are good if you have the right sized circle. Cheers Tony

I'm just taking it one GB at a time.

  • Member since
    September 2016
  • From: Albany, New York
Posted by ManCityFan on Thursday, November 16, 2017 3:11 PM

Those road wheels do look nice and clean!


I do the black first, then paint the middle using a cheap circle template.  Usually have to do a little clean up, but it works for me.

Dwayne or Dman or just D.  All comments are welcome on my builds. 

  • Member since
    May 2015
Posted by Griffin25 on Thursday, November 16, 2017 1:59 PM

Put a ball of poster putty on the center/ hub and press the nickel down onto it and center it so the edges of the road wheels are exposed. I suppose you can use all kinds of change for different size wheels. Ya? Foreign monies too Smile The laziest guy will find the easiest way to do it! LOL


Griffin

  • Member since
    March 2007
  • From: Northeast WA State
Posted by armornut on Thursday, November 16, 2017 1:28 PM

GREAT IDEA Griffin, I would like to borrow it for my Terminator, dat is slick trick comrad. Roobles are in da mail.

we're modelers it's what we do

  • Member since
    January 2016
  • From: A Galaxy Far, Far Away
Posted by Hunter on Thursday, November 16, 2017 1:06 PM

Griffin25

I figured out a great way to mask and paint the road wheels. I used nickels with a piece of poster tact putty to stick them to the wheels and airbrushed them. They were just the right size and their weight helped keep the wheels from moving around. It worked great.


Griffin,

They look great, and thank you for the tip.

Hunter 


  • Member since
    May 2015
Posted by Griffin25 on Thursday, November 16, 2017 10:19 AM

I figured out a great way to mask and paint the road wheels. I used nickels with a piece of poster tact putty to stick them to the wheels and airbrushed them. They were just the right size and their weight helped keep the wheels from moving around. It worked great.


Griffin

  • Member since
    November 2009
  • From: SW Virginia
Posted by Gamera on Wednesday, November 15, 2017 9:59 PM

Hey thanks guys! I'm going to leave all the hatches open though I'm not sure how much you can still see there. And I'm going to pop the engine hatches, I should be able to rustle up a Russian tanker that looks sorta like a mechanic.

Btw, maybe it just looks bigger in the photos? It's about the same length as a T-34 and and just a little wider.

"I dream in fire but work in clay." -Arthur Machen


  • Member since
    September 2016
  • From: Albany, New York
Posted by ManCityFan on Wednesday, November 15, 2017 7:59 PM

You are making great progress there, Gamera.  That is a nicely detailed kit.  Can't get a sense for how big this kit is, but I am thinking it is fairly huge.

Dwayne or Dman or just D.  All comments are welcome on my builds. 

  • Member since
    September 2016
  • From: Albany, New York
Posted by ManCityFan on Wednesday, November 15, 2017 7:57 PM

Sailing_Dutchman

I'm in with the MiniArt 1/35 SU-85.


Roster updated.  Welcome to the GB Comrade!  I have the Tamiya version in my stash, and that may be my next armor build, so I am interested to see how this comes out.

Dwayne or Dman or just D.  All comments are welcome on my builds. 

  • Member since
    September 2017
  • From: Netherlands
Posted by Sailing_Dutchman on Wednesday, November 15, 2017 7:50 PM

I'm in with the MiniArt 1/35 SU-85.


  • Member since
    May 2015
Posted by Griffin25 on Wednesday, November 15, 2017 6:29 PM

Gamera

Yeah, those look great Griffin. I might have to try that myself. And the MG does look good, great to see Tamiya quality.


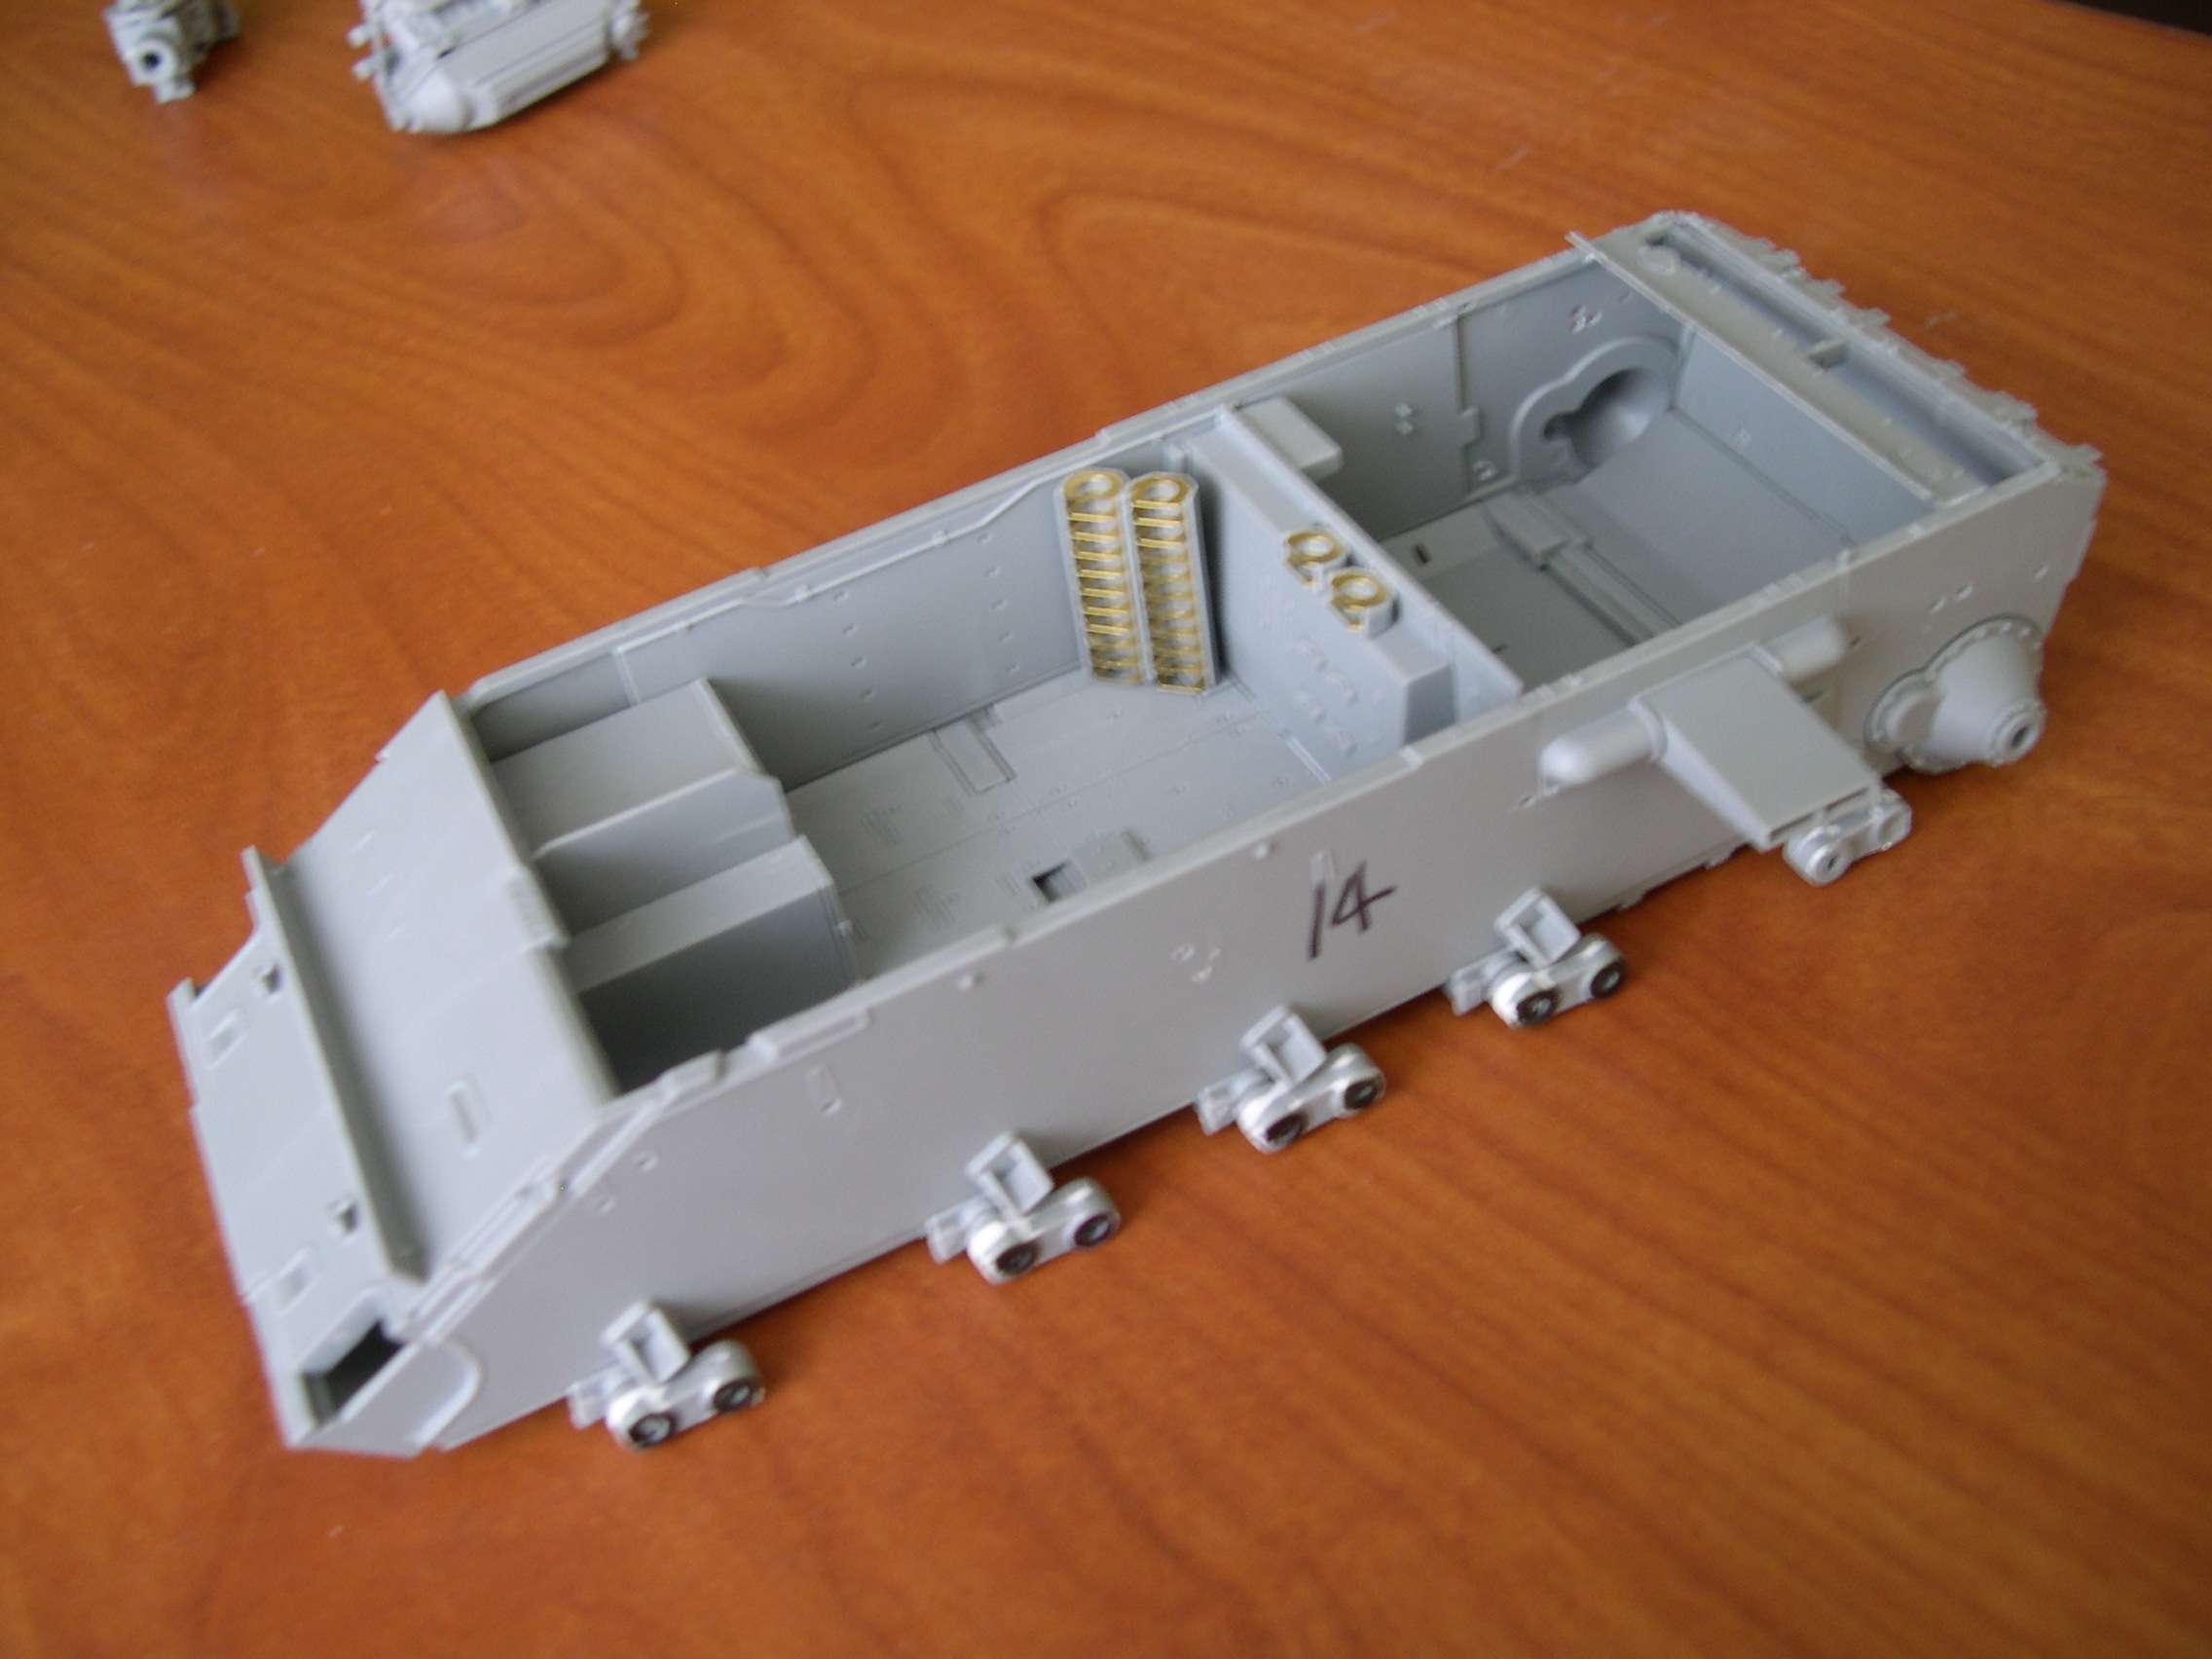
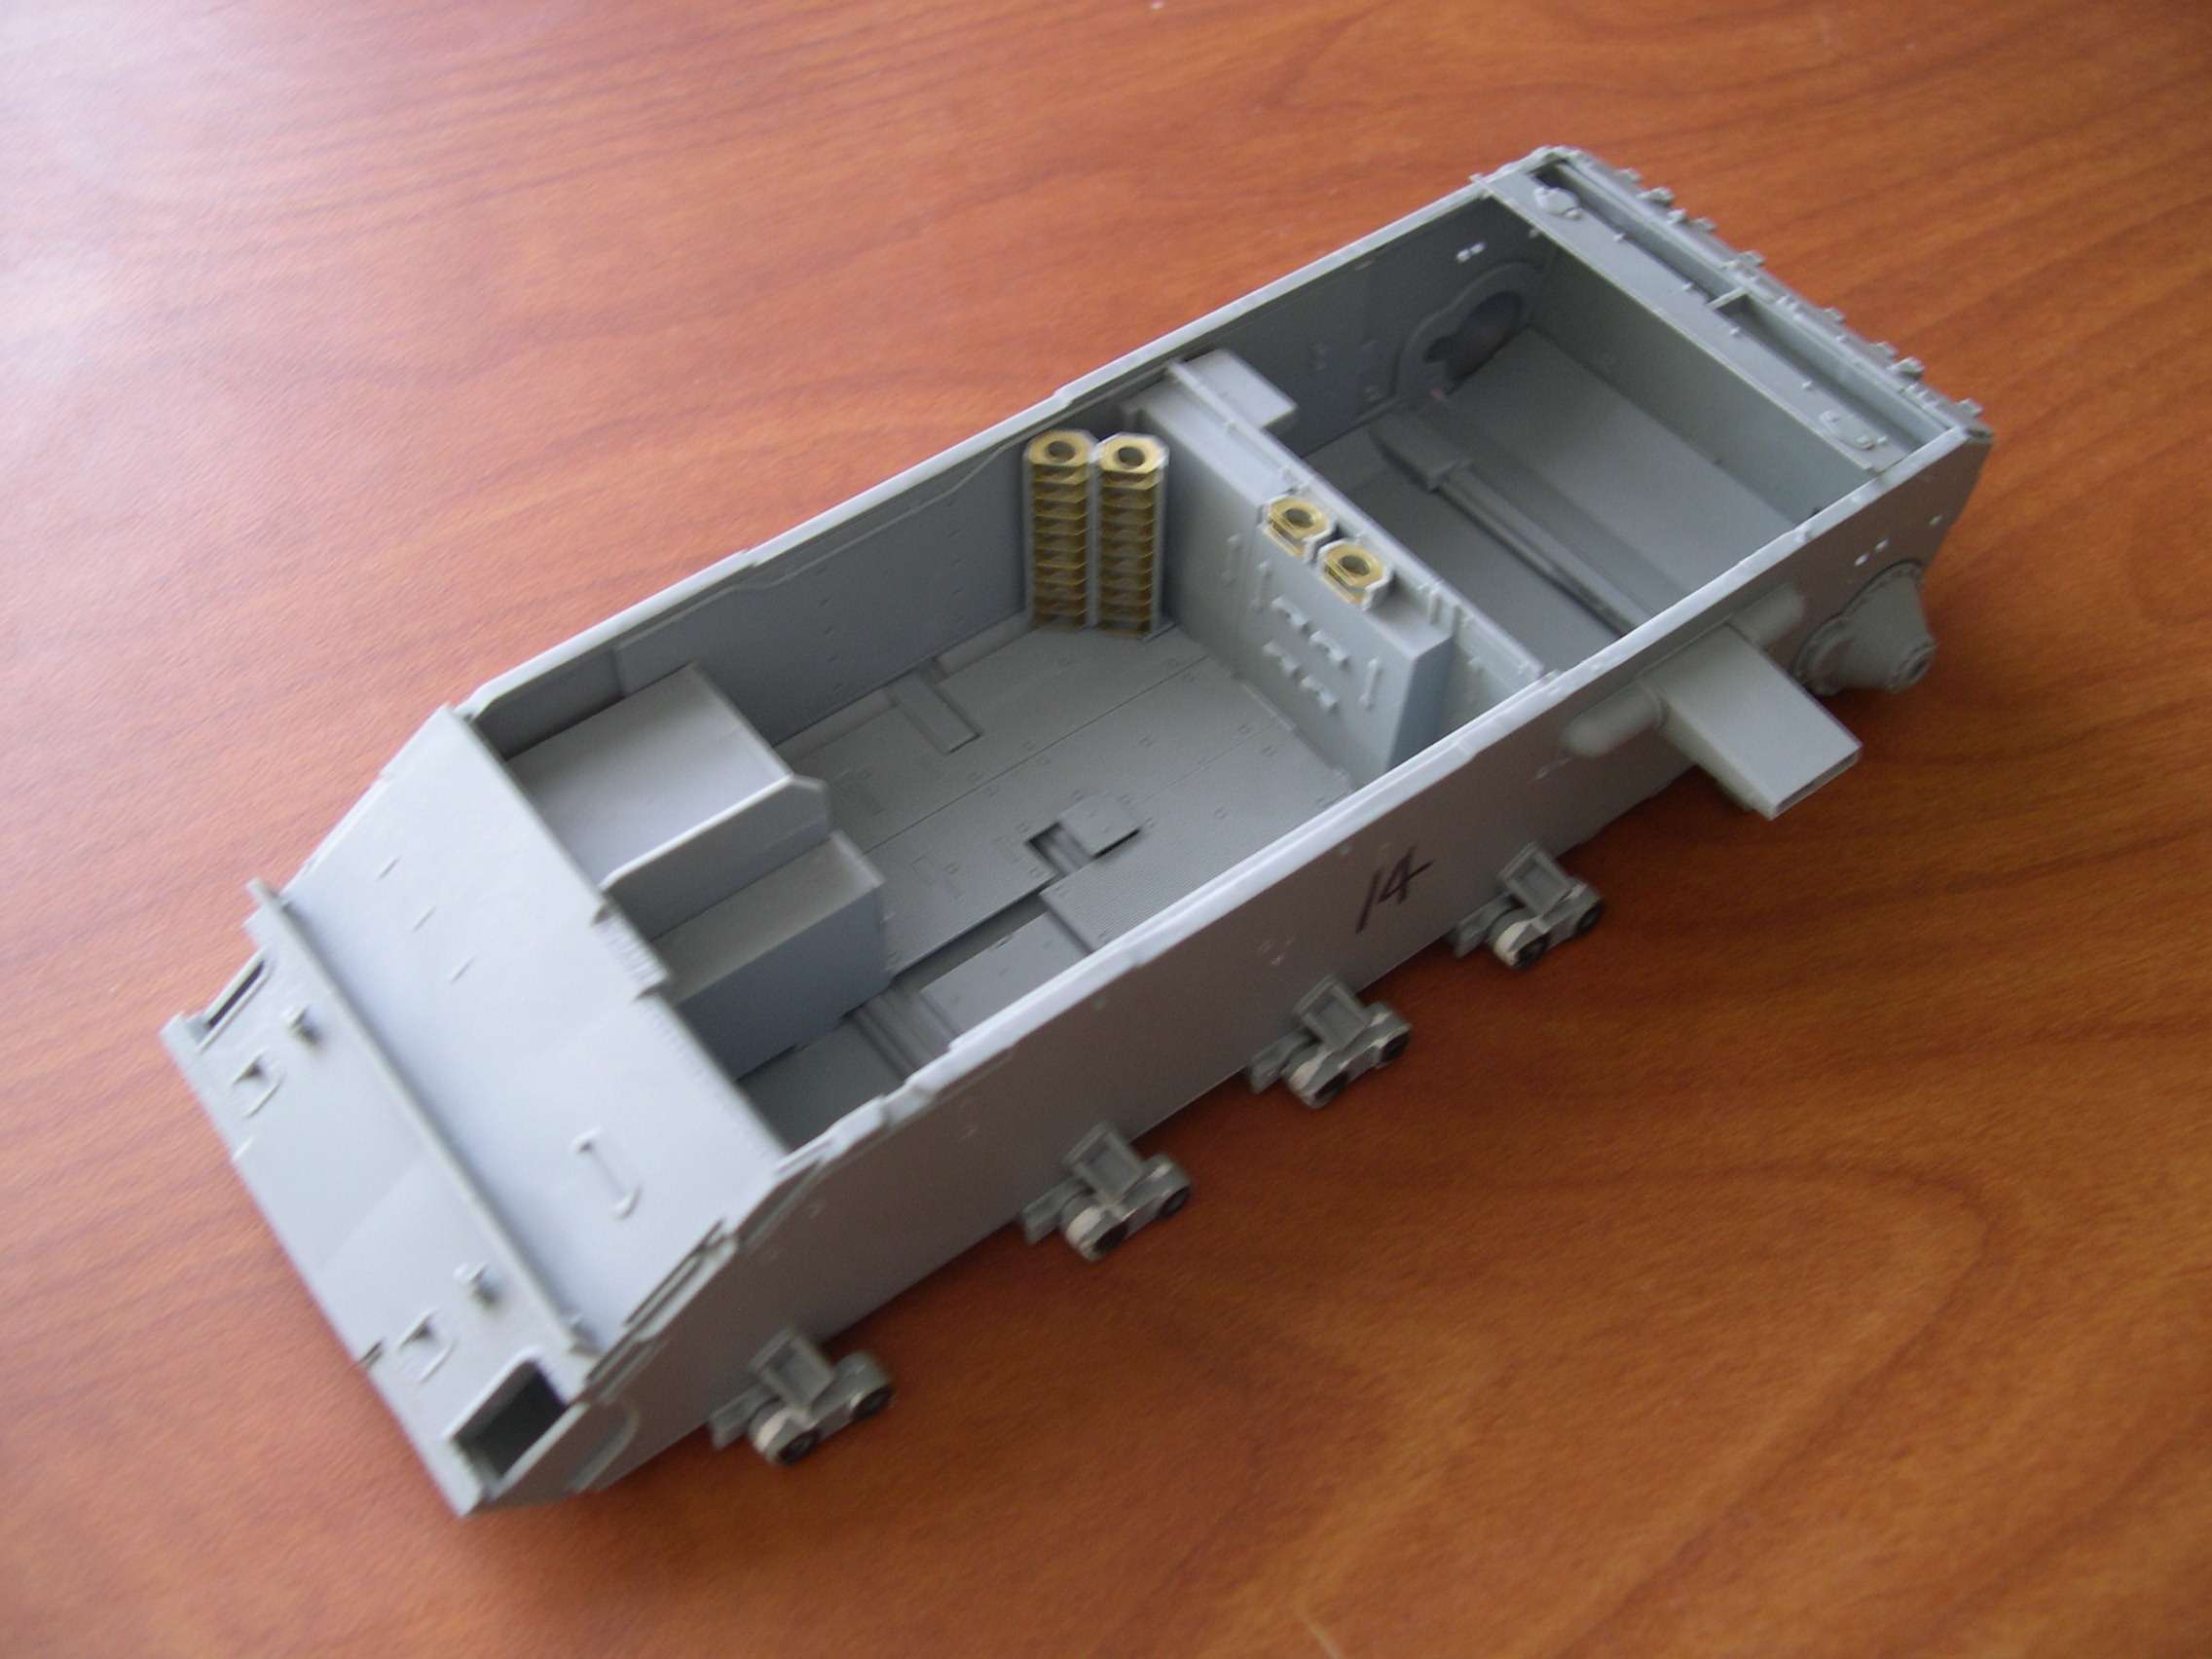
Anyway here's some of what I've gotten done on the hull. I really like the plastic and PE racks for the drum magazines for the MG:
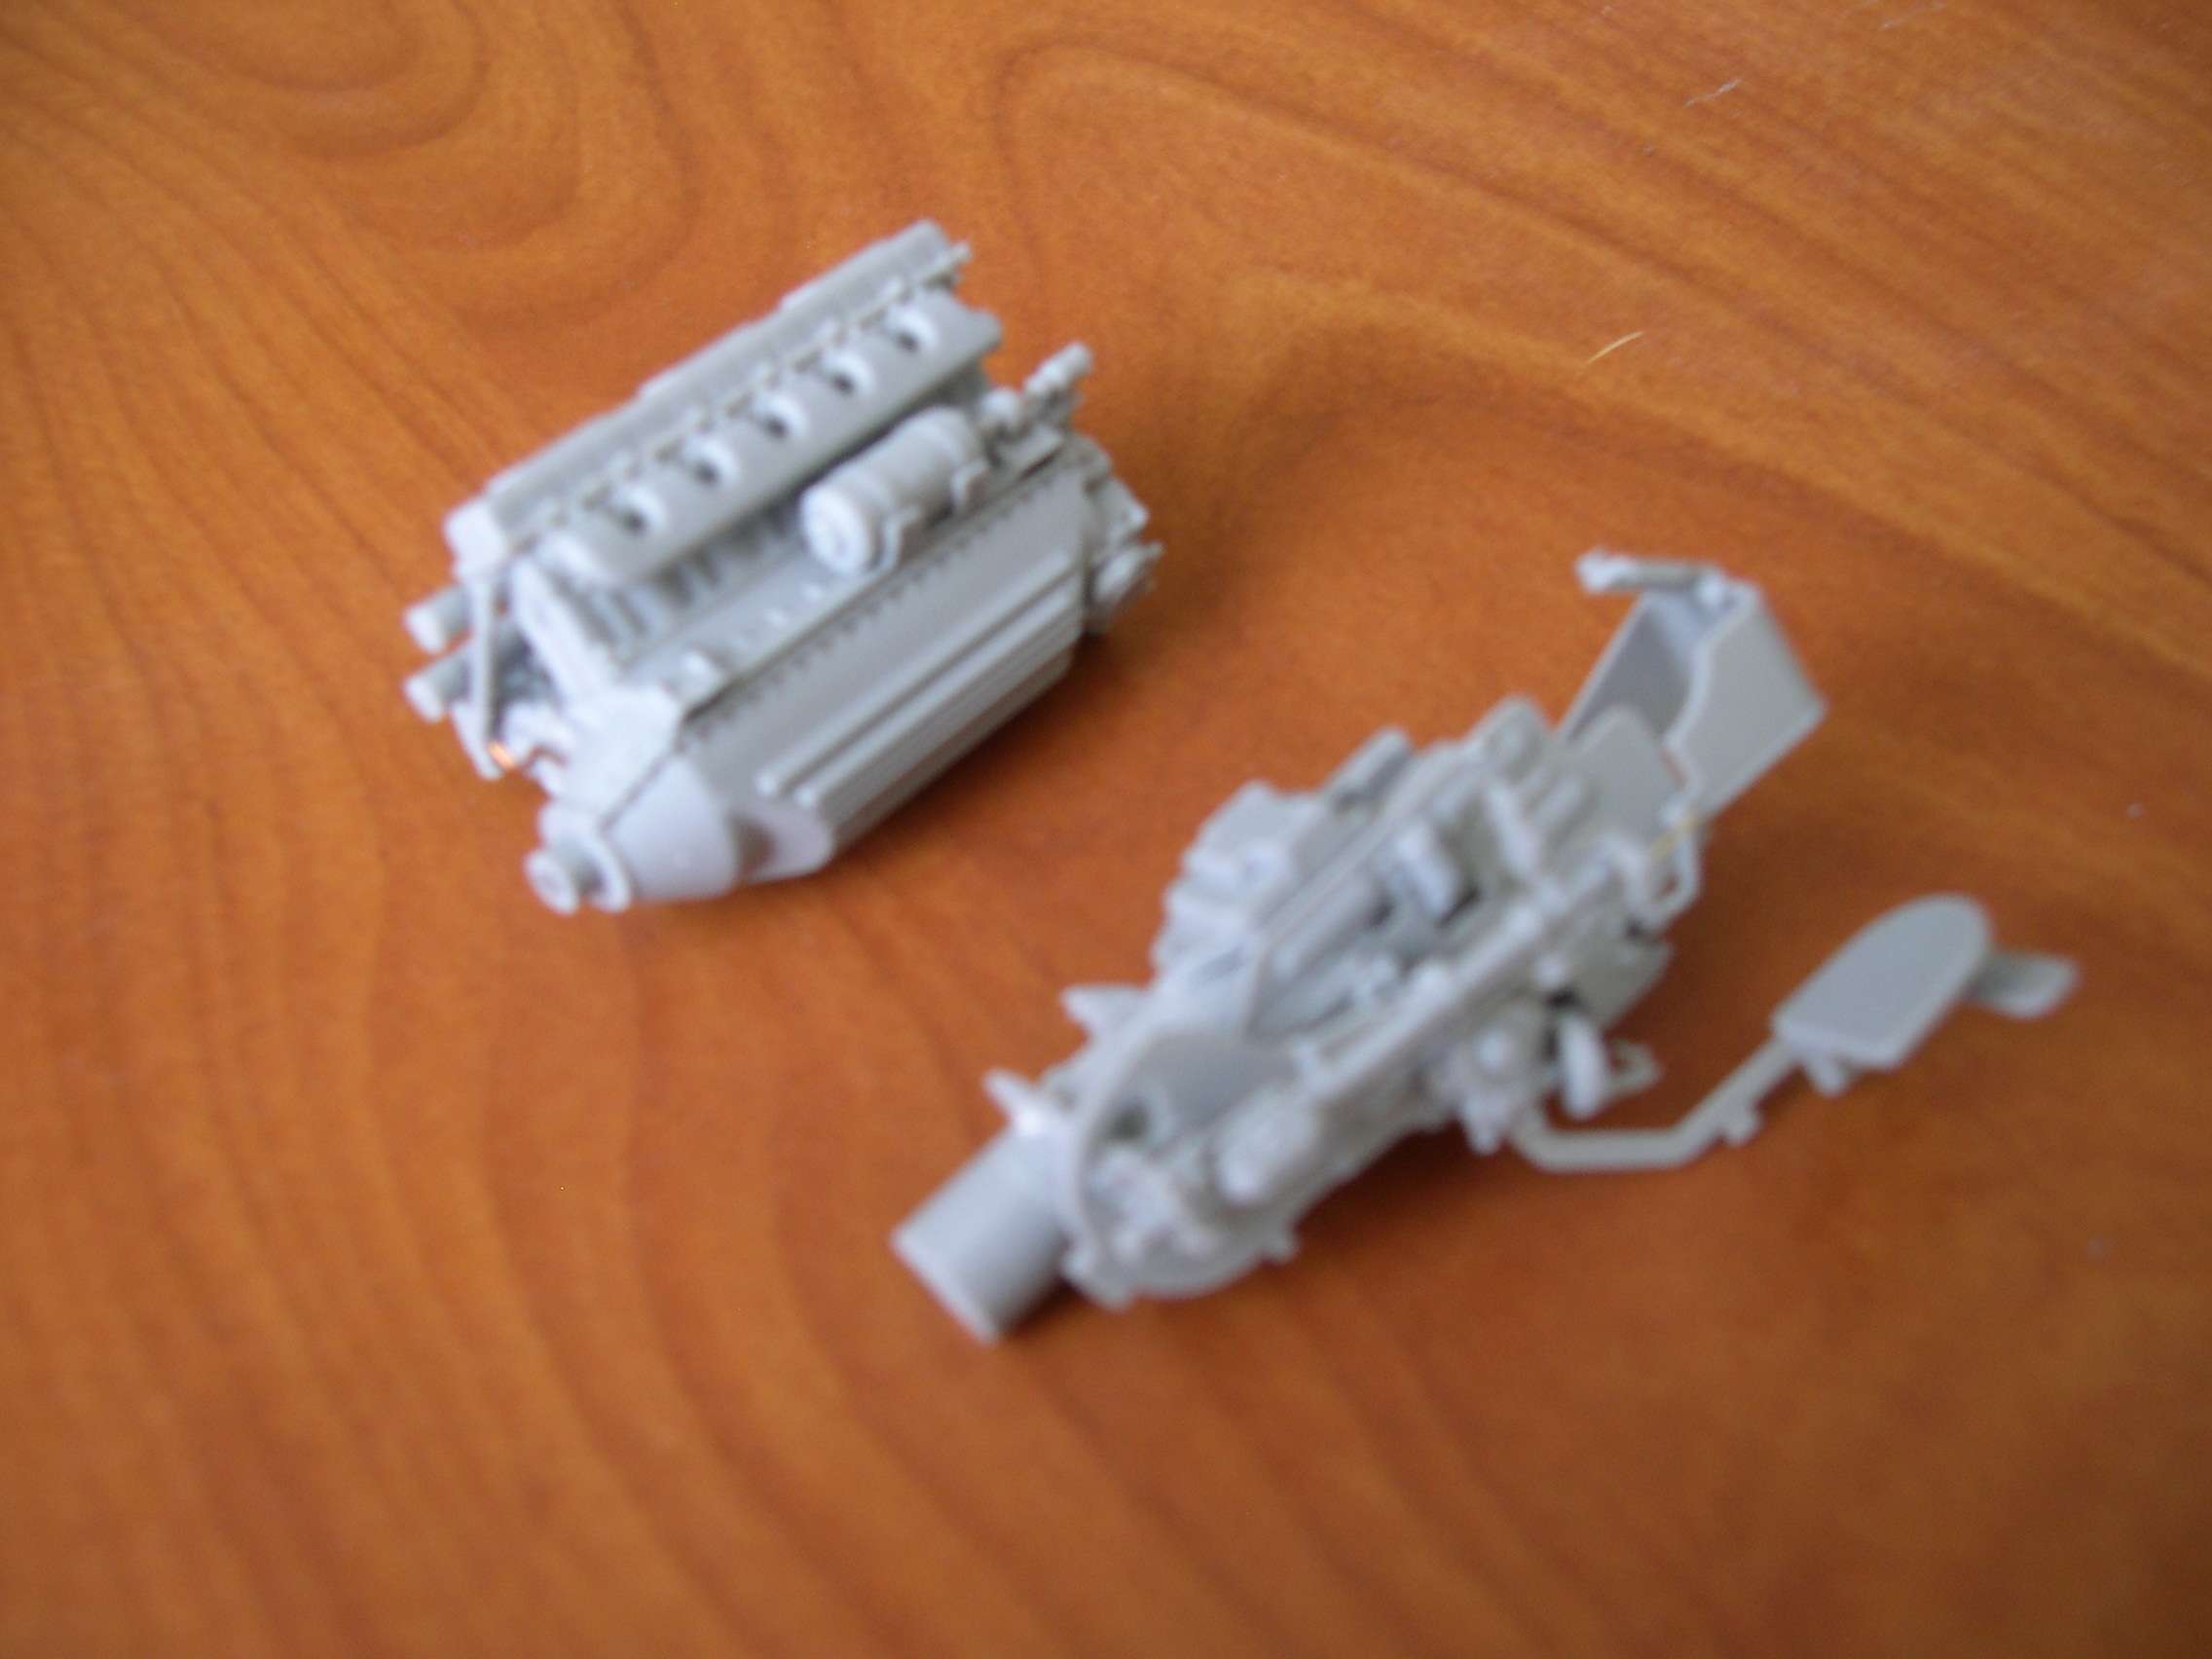
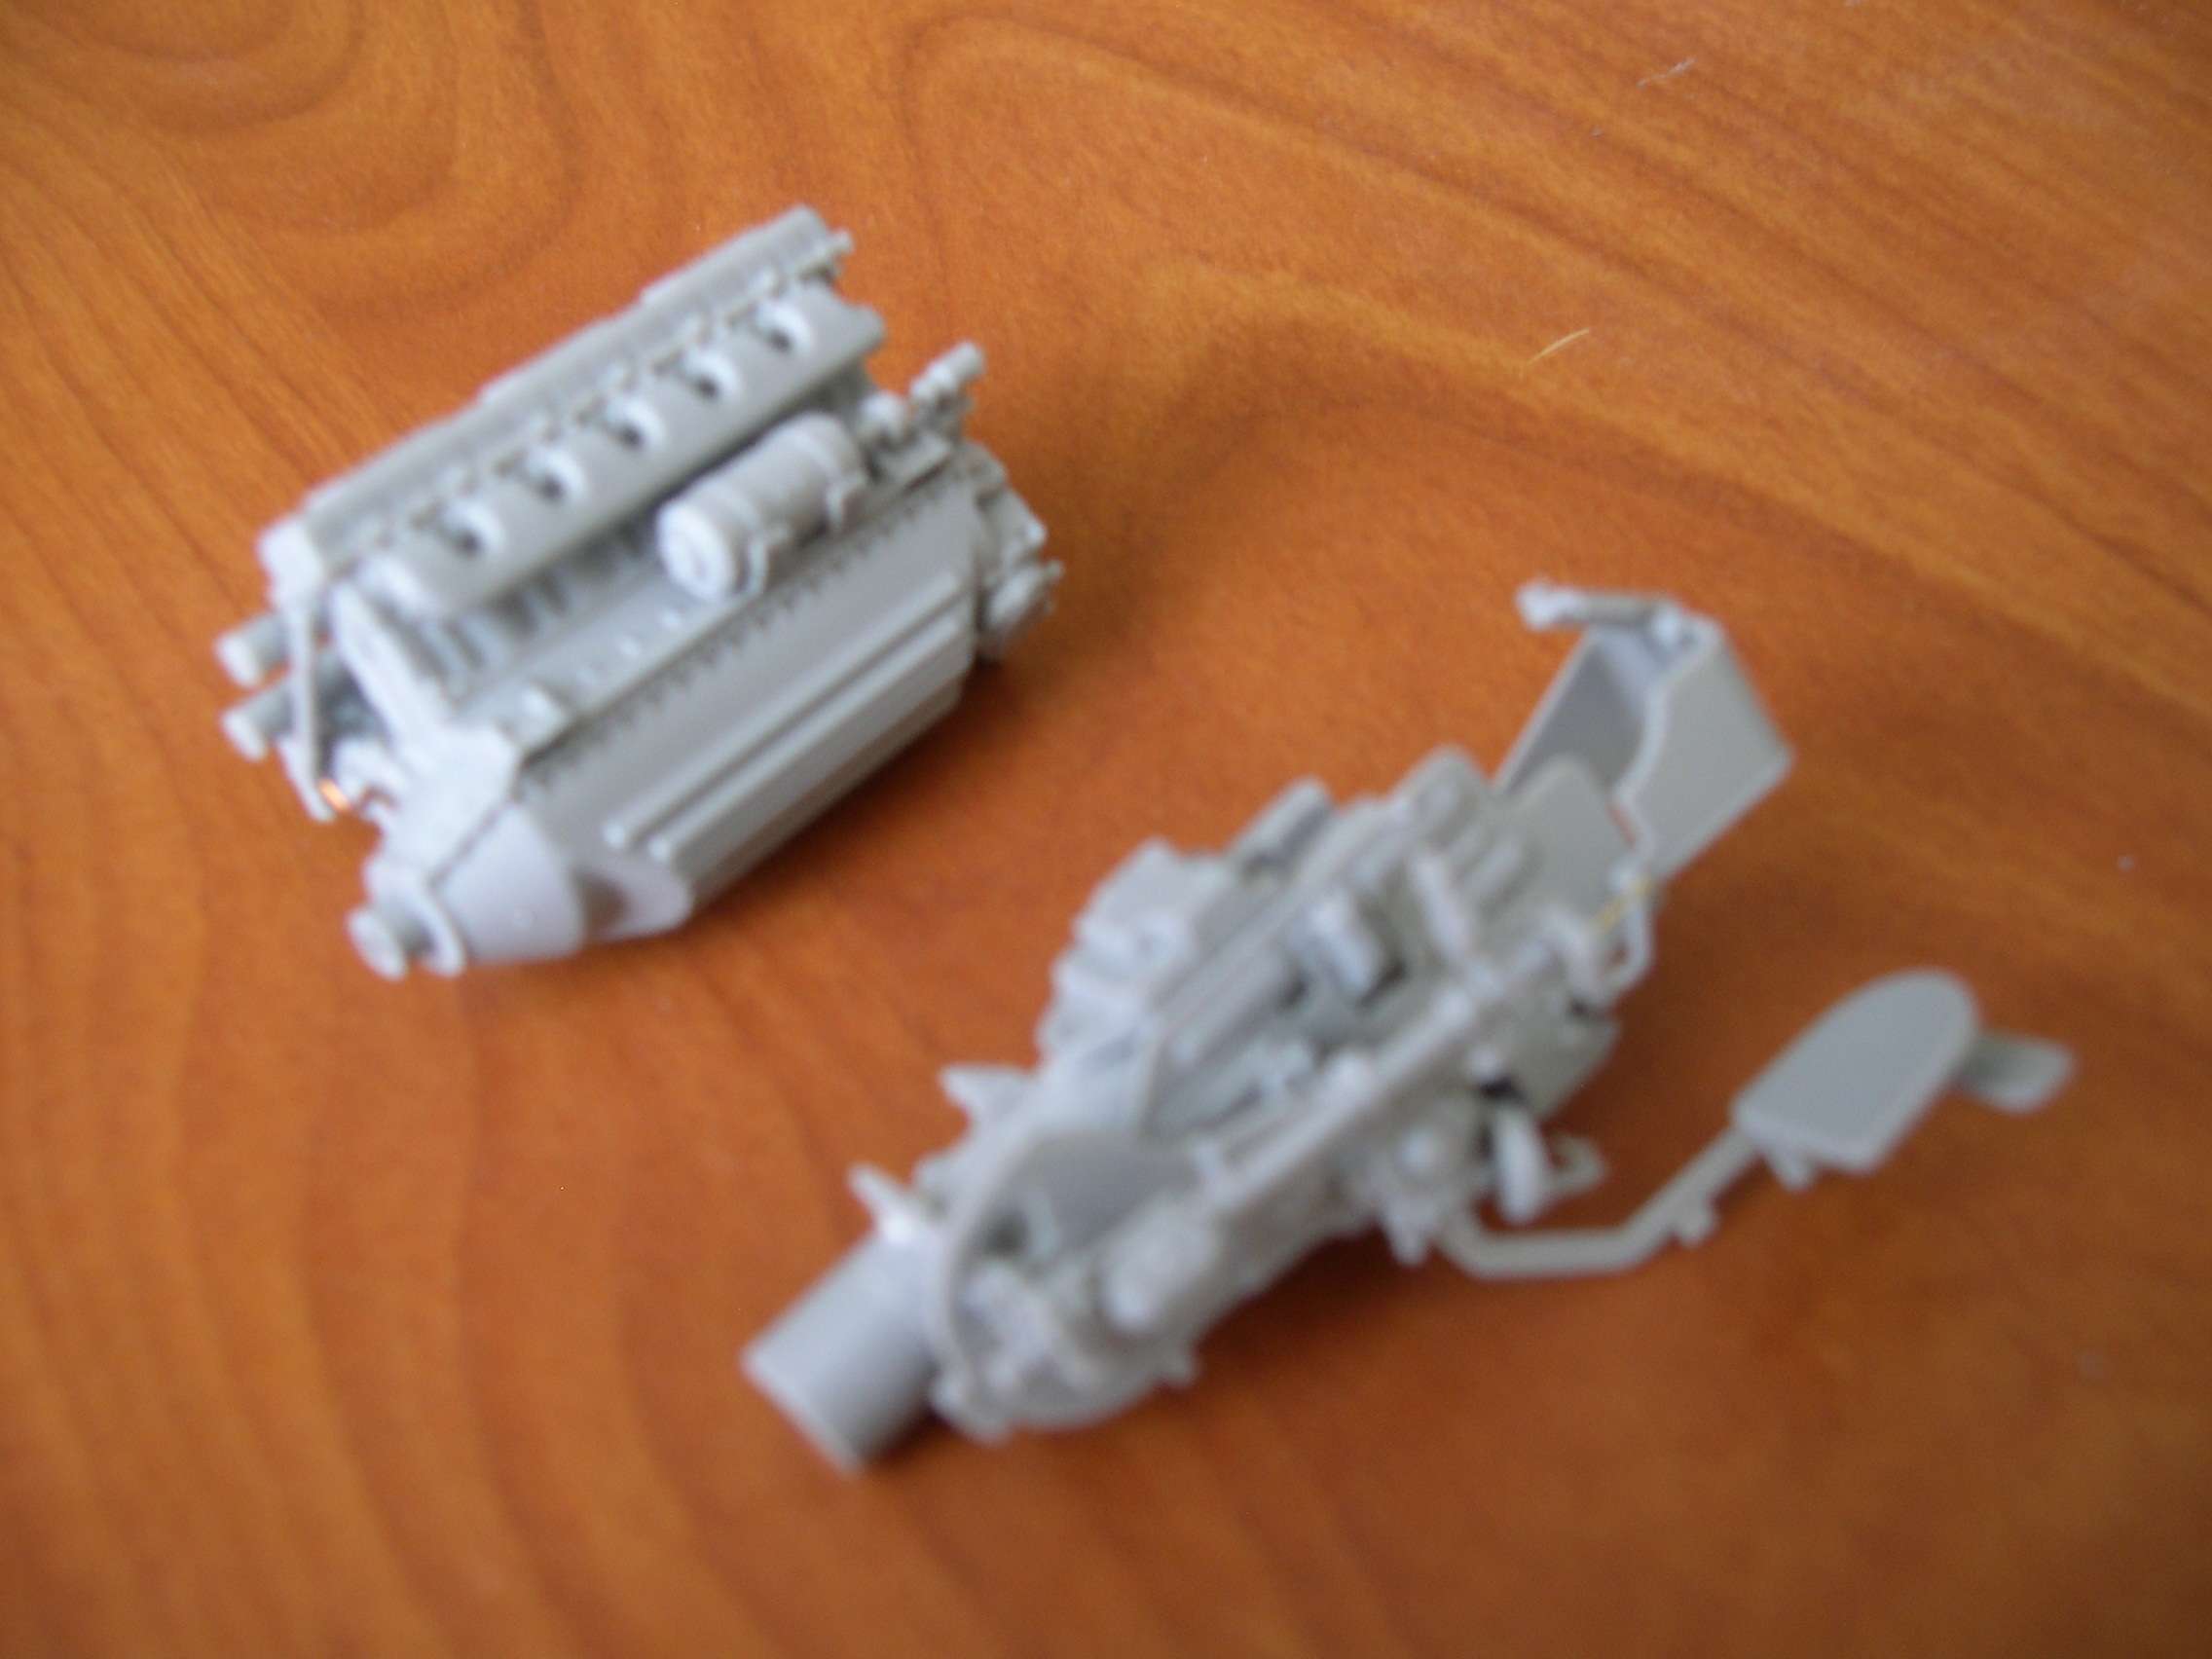
And the kit engine and gun breech. Sorry they're a little blurry, I don't have my camera mini-tripod with me:
The instructions are intricate but clear, I've only had a few parts where I was unclear on what to do next. Really important since I'm having to go out of order on some stuff since I don't have any paint here to prime or paint the interior:
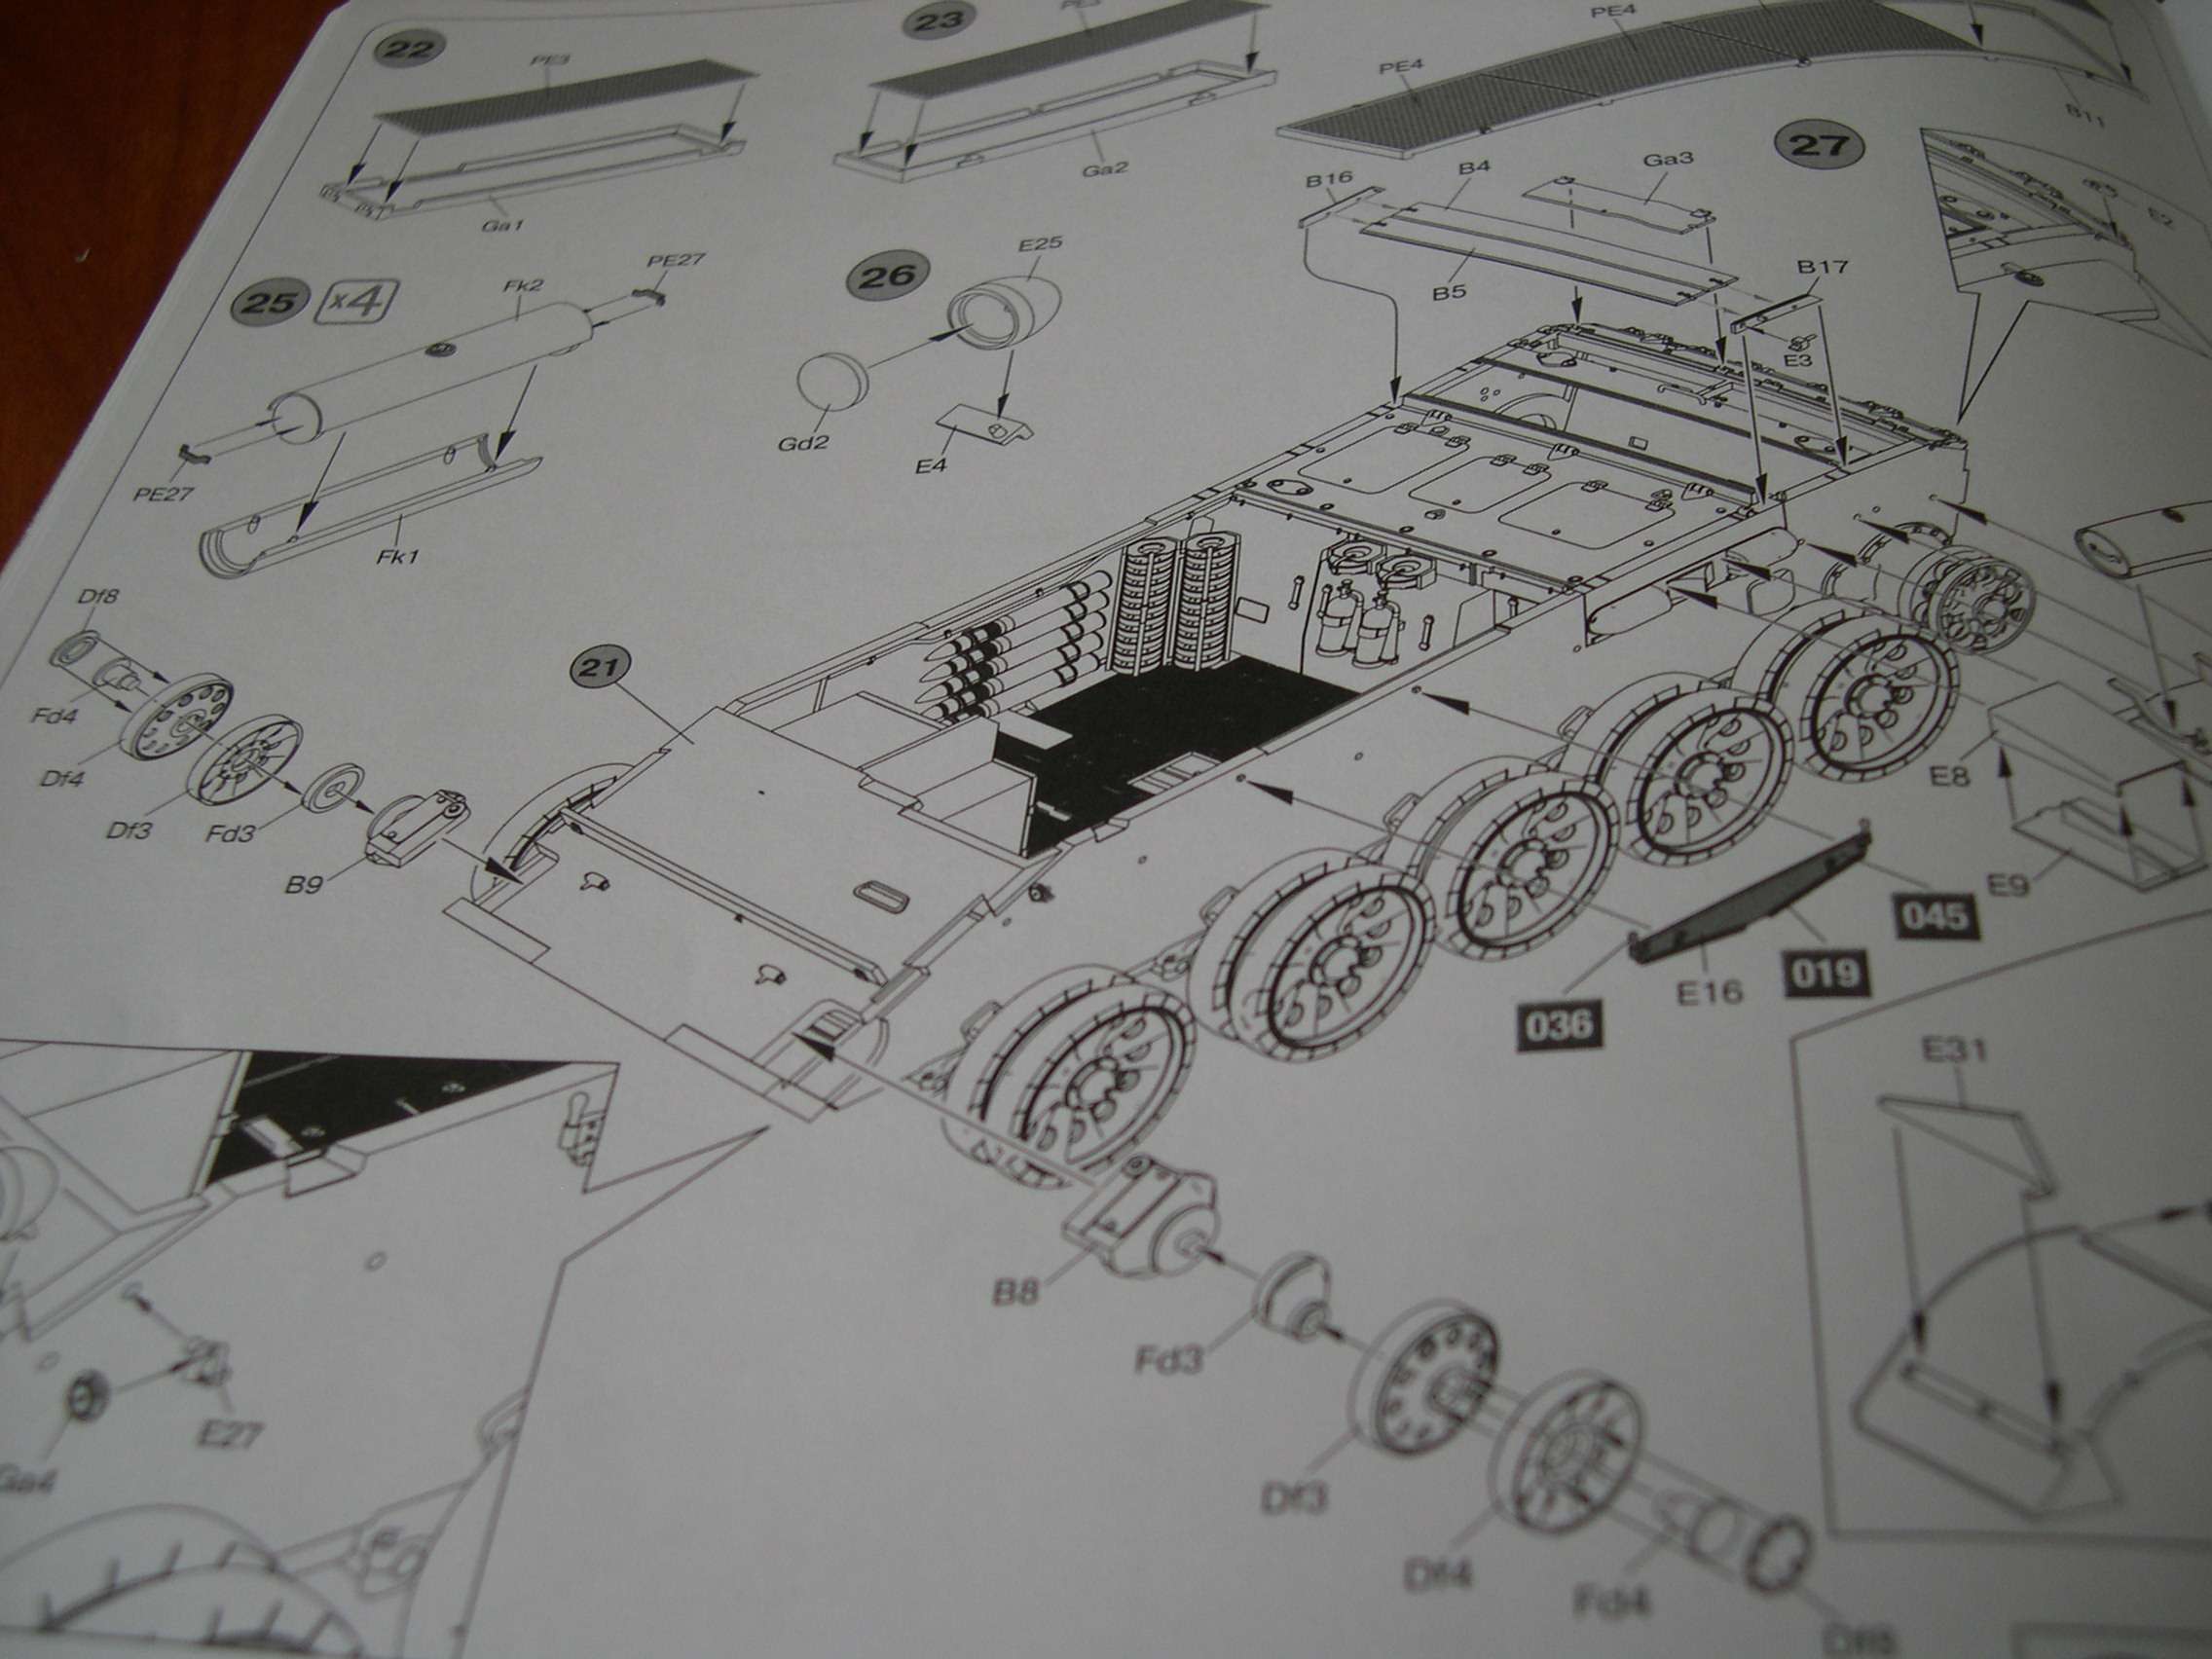
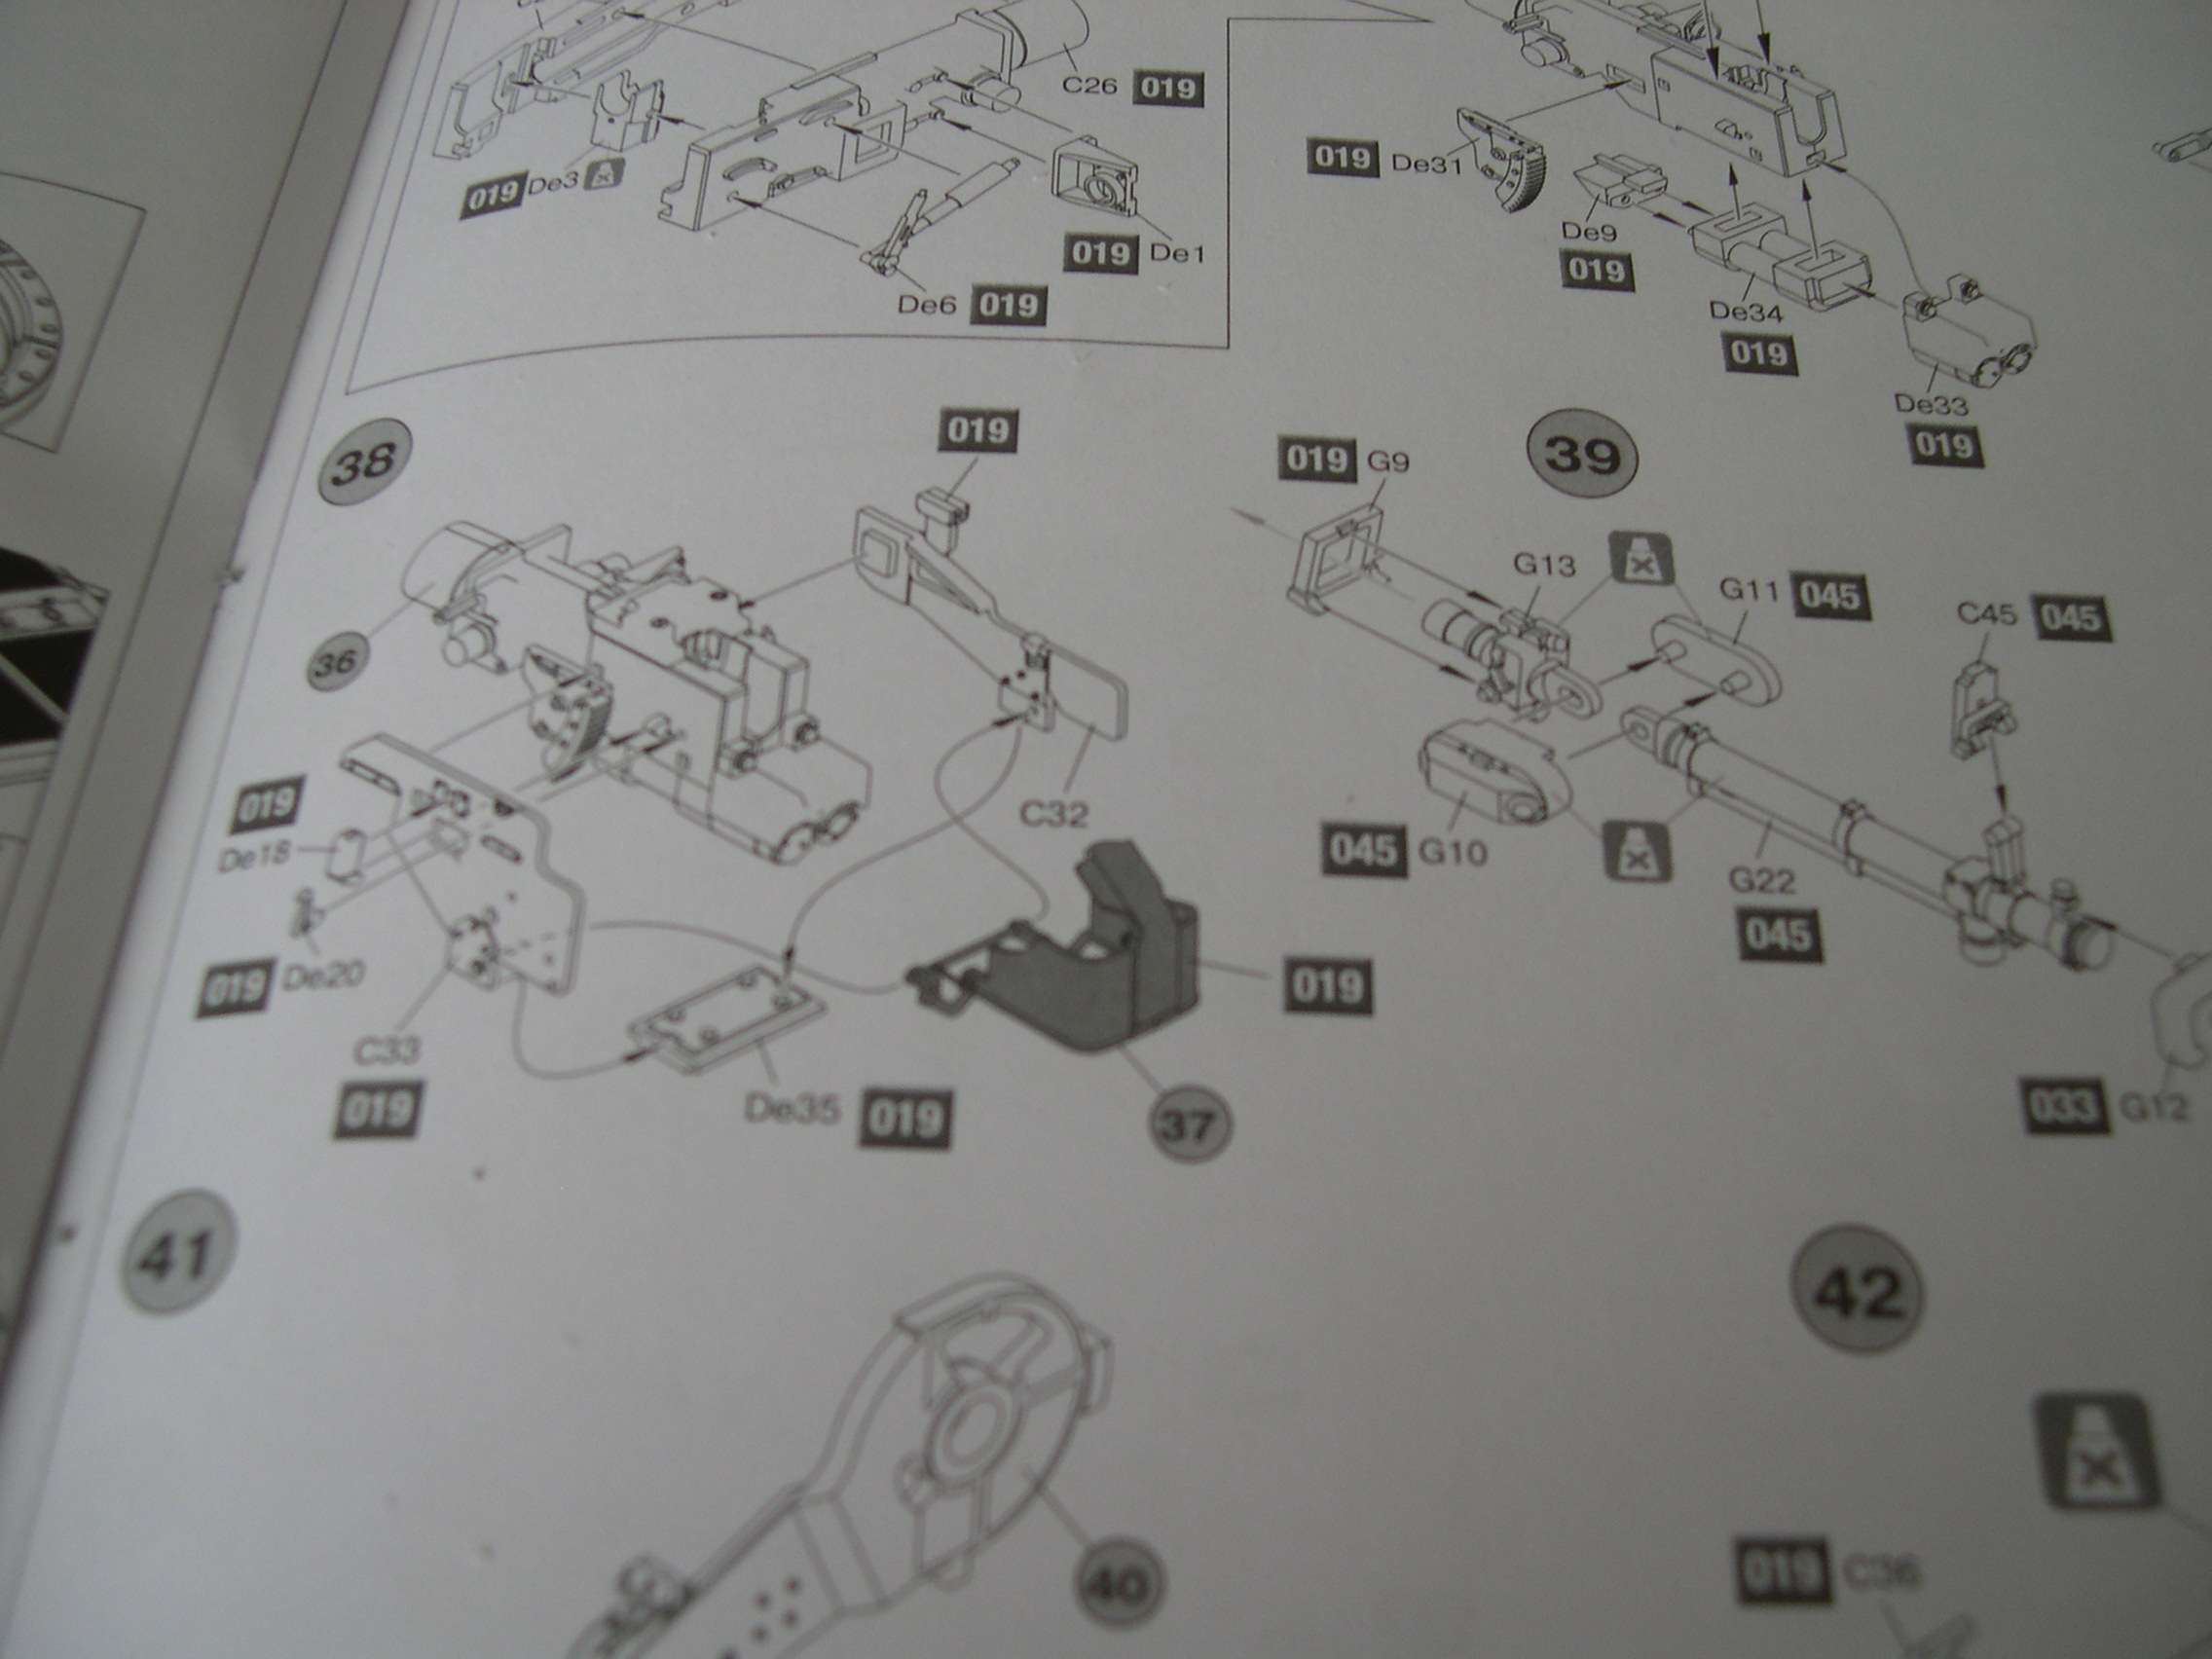
 

You're making good progress. That kit is something else. Super detailed. Very cool. With the hatches and engine cover open you will be able to see all that nice detail. Is that your plan? 


Griffin

  • Member since
    January 2016
  • From: A Galaxy Far, Far Away
Posted by Hunter on Wednesday, November 15, 2017 5:50 PM

Off to a great start Cliff....boy you weren't kidding about the instructions.

Hunter 


  • Member since
    November 2009
  • From: SW Virginia
Posted by Gamera on Wednesday, November 15, 2017 5:01 PM

Yeah, those look great Griffin. I might have to try that myself. And the MG does look good, great to see Tamiya quality.


Anyway here's some of what I've gotten done on the hull. I really like the plastic and PE racks for the drum magazines for the MG:

And the kit engine and gun breech. Sorry they're a little blurry, I don't have my camera mini-tripod with me:

The instructions are intricate but clear, I've only had a few parts where I was unclear on what to do next. Really important since I'm having to go out of order on some stuff since I don't have any paint here to prime or paint the interior:

"I dream in fire but work in clay." -Arthur Machen


  • Member since
    September 2016
  • From: Albany, New York
Posted by ManCityFan on Wednesday, November 15, 2017 10:13 AM

Griffin25

Thanks guys. The rough texture on the pots I would like to take credit for it but it's really just dumb luck I used an industrial type file drew the helmets back and forth on it until they had to shape I thought was right. I used those Tamiya makeup case weathering kits also that probably helped contrast the high and low areas. Hard to see it in the picture. 


That seems like something even I could do.  I have also read that you can use a dremel with a cutting bit and "bounce it" on the piece to get this kind of texture.  You have motivated me to try this on a scrap piece to see if it works.

Those Tamiya weathering kits are worth every penny!

Dwayne or Dman or just D.  All comments are welcome on my builds. 

JOIN OUR COMMUNITY!

Our community is FREE to join. To participate you must either login or register for an account.

SEARCH FORUMS
FREE NEWSLETTER
By signing up you may also receive reader surveys and occasional special offers. We do not sell, rent or trade our email lists. View our Privacy Policy.