SEARCH FINESCALE.COM

Enter keywords or a search phrase below:

#6 Polish Artillery Tractor C7P-WIP 4/18--More Weathering Pics Page 12

43333 views
170 replies
1 rating 2 rating 3 rating 4 rating 5 rating
  • Member since
    July 2004
  • From: Sonora Desert
Posted by stikpusher on Sunday, January 24, 2010 2:15 PM

Citadelgrad87

Hey, Carlos, yes, that was me!  I was hoping to meet up, now you know what I look like.  Are you going to the mini show? I hope ot have this across the line by then, but with my pace, you never know....

Thanks, Ed!  Just a little diversion that turned into another learning experience.  I guess I'm committed, I'll go start the other one.  I get some bench time today.

Bill 


No, unfortuantely my schedule at work is changing after Feb 6th, I will be working weekends until May, so that will be when my next meeting visit will be. At least taht will give me some time to get an armor kit finished! I do look forward to seeing this one done. Your work is really great to see firsthand.


F is for FIRE, That burns down the whole town!

U is for URANIUM... BOMBS!

N is for NO SURVIVORS...

       - Plankton

LSM


  • Member since
    April 2008
  • From: Ventura (at the beach) in California
Posted by *INDY on Sunday, January 24, 2010 1:46 PM

!They are beauties Bill, really--And I enjoy the look of a pristine Fender as much as the next guy

but I still say mutilate them ! But hey ---- that's me. Based on the wear inside the tractor, there should at least be a dent or ding somewhere.........

"Well...you gunna pull them pistols, or just whistle Dixie?"

  • Member since
    January 2012
Posted by I make stuff on Sunday, January 24, 2010 1:29 PM

Wow, guys, THANKS, really, the critical eyes around here are my yardstick, I can't express how nice it is to get such positive feedback.  Ed, Bill, Scott, Wayne, this really REALLY made my day.

Adam, thanks for the push...again.

As for the sewcond fender, that one was EASY compared to the first one.  I should open up an assembly line.  One nice thing was that hte shape is so simple, I just flipped the template over and had the other fender at the same dimensions.

Here are some comparison shots.


There is (was) a molded ridge to give strength to the plastic joint, nore surface are, but it interfered with the metal to plastic joint, so it had to get shaved off, cot me a return roller and one of the thin styrene mounting supports, but it had to happen:

FInally, some walk around shots of them just sitting in place, for some reason, the right side one stays put, the left side won't stay in place without glue.  I didn't feel lke taping it, so it droops in the back:


Above is one last shot of the plastic ones side by side with the bionic fenders.

A question, not that I CAN bend them up like realistically damaged fenders, SHOULD I???

Thanks for all the support on this, it was scary for a minute, then my inner metalsmith seemed to come out.  I helped my dad make a 1:1 airplane in his garage, so this was sort of familiar.  I need a tiny English wheel.....

Again, thanks for all the kind words about this fender deal, I've been around here long enough, and seen what the group likes, so it really means a lot.

Bill

  • Member since
    April 2008
  • From: Ventura (at the beach) in California
Posted by *INDY on Sunday, January 24, 2010 12:46 PM

~Very nice Bill~ Im sure your glad you ventured it by now~ Like WildBill said  "Definitely an improvement over the kit parts and, as you mentioned, you can add the remaining detail using strip styrene or even additional brass parts as you need..... Of course there the matching of the wo sides 1st...good luck with that.   Again, the new fender is nice Buddy, great J.O.B.


"Well...you gunna pull them pistols, or just whistle Dixie?"

  • Member since
    October 2009
Posted by Scott MacPhee on Sunday, January 24, 2010 11:47 AM

Wow.  I've been following this build since the first post, and you're an inspiration!  Those fenders look fantastic.  A little plasticard raised detail will help them pop.

  • Member since
    July 2004
  • From: Texas
Posted by wbill76 on Sunday, January 24, 2010 11:15 AM

Definitely an improvement over the kit parts and, as you mentioned, you can add the remaining detail using strip styrene or even additional brass parts as you need. It's funny in that the soldering station you picked up is the exact same one I bought from RS when I first needed to solder! Big Smile I use a different one now with different size tips that I picked up from Micromark but still keep the RS one handy for large work as it's very very reliable. Yes

  • Member since
    January 2009
  • From: Everett, WA
Posted by Schnobs on Sunday, January 24, 2010 11:10 AM

Bill,

A diversion is an hour in front of the Idiot box watching some mindless dribble.  This is well thought out scratch building using materials and methods that make most people cring.  Seriously color me red and spank me I am very impressed.  I was hoping to make a couple fenders to simulate damage on my next piece of armor with some aluminum from a pop can but you beat me to it with this and placed a very high bar in front of me.

Again Bill what a great job and well worth the effort!


"There is a principle which is a bar against all information, which is proof against all arguments and which cannot fail to keep a man in everlasting ignorance. That principle is contempt prior to investigation." Herbert Spencer
  • Member since
    January 2012
Posted by I make stuff on Sunday, January 24, 2010 10:37 AM

Hey, Carlos, yes, that was me!  I was hoping to meet up, now you know what I look like.  Are you going to the mini show? I hope ot have this across the line by then, but with my pace, you never know....

Thanks, Ed!  Just a little diversion that turned into another learning experience.  I guess I'm committed, I'll go start the other one.  I get some bench time today.

Bill 


  • Member since
    July 2004
  • From: Sonora Desert
Posted by stikpusher on Sunday, January 24, 2010 1:47 AM

OK, this build looks really familiar now. Did you happen to have this at the So Cal AMPS meeting a couple weeks ago for show and tell? If you did, all I can say is that it looks even more impressive in person!


F is for FIRE, That burns down the whole town!

U is for URANIUM... BOMBS!

N is for NO SURVIVORS...

       - Plankton

LSM


  • Member since
    January 2009
  • From: Everett, WA
Posted by Schnobs on Sunday, January 24, 2010 1:38 AM

As my friend Bob would say this is FREAKIN SWEET!!!

Seriously Bill this definitely was worth doing I am very impressed.  You will never have to purchase AM PE fenders again you know how to replicate your own!  How cool is that? Yes

Fish is in the water you are committed now!  GET ER DONE!!


"There is a principle which is a bar against all information, which is proof against all arguments and which cannot fail to keep a man in everlasting ignorance. That principle is contempt prior to investigation." Herbert Spencer
  • Member since
    January 2012
Posted by I make stuff on Sunday, January 24, 2010 12:26 AM

Thank you, Wingnut, it's a slow process for me, but I like the input I get here.


Oh, nothing...I just totally fabricated replacement fenders, front ot back, out of sheet brass (well, one so far, I wanted to make sure it was OK before doing two), then I soldered the front.  That's right.

This AM, off to a large chain of retail electronics shacks, to get this:


Yep, not a soldering iron, a soldering STATION!.

Then I did this:

 Dimensional check:


Looks OK compared to the kit one, but the kit one didn't fit too well, so here it is in place:


Check that scale thickness!!


Honest question-I spent some time on this, and it's my first large scale brass scratch-solder-replacement of kit parts.  I want this to look good, and I believe I have lost objectivity.

WHat do you think?  I didn't have to destroy the kit fenders to fab this, so I could go back.  I realize the brass is still missing some detail, but that sould be easy to add with styrene or even more brass.

Comments, please.

Bill the solder guy.

  • Member since
    April 2005
  • From: Piscataway, NJ!
Posted by wing_nut on Saturday, January 23, 2010 9:39 PM

Nearly forgot aboutthis one.  Coming along real nice.

Marc  

  • Member since
    January 2012
Posted by I make stuff on Saturday, January 23, 2010 5:59 PM

So now I have made up a template from some paper, and it seems to be the correct dimensions.  I think I will try to cut out the parts and fab up some 3d fenders!


  • Member since
    April 2008
  • From: Ventura (at the beach) in California
Posted by *INDY on Saturday, January 23, 2010 4:28 AM

~Yeah Radio Snack is a great place to get a solder set up, of course everything there is geared towards circut boards, meaning solder with flux core---you want flux paste or liquid you can add right to  the joints. I don't know about the battery power, haven't heard of it's use for scratchwork. I have a butane iron that doubles as a torch(pretty handy) and I have a little plug-in iron too. I've done a handful of solder projects, so far I've made it work when I needed it, but am still a novice.

Here's a LINK for a build you should read through. He's very proficient with solder,you'll get a few pointers  .Miraculous scratchbuilder! Same kit Im on too.

For a general descriptionof how -to-solder brass for the model builder    Linky    ( lots of great how-to articles there for the modeler      http://themodelmakersresource.co.uk/articles/article012.html


"Well...you gunna pull them pistols, or just whistle Dixie?"

  • Member since
    January 2012
Posted by I make stuff on Saturday, January 23, 2010 12:47 AM

Hi Indy.  Solder, huh?  Last soldering I did was to install a water heater, that thick copper was pretty forgiving.

Can I get a battery solder set from Radio Shack to do PE like this?  Or would I be better off with something else?  I like the idea of trying to do it all out of brass.  I can make a template by wrapping it with paper and then laying it flat.  I know just where to slit it, the beginning of the curve is marked with a rib, it won't be too bad if I can get a solder setup locally.

Thanks for the backup, Indy.

Bill

  • Member since
    April 2008
  • From: Ventura (at the beach) in California
Posted by *INDY on Saturday, January 23, 2010 12:00 AM

Yeah, that totally makes sense, Bill, and that's one way to do it, for sure.


The next 3 show the front section, which is tougher, but I think I have a solution.  The front portion of the fender itself is just curved, no raised ribs to follow the curve.  The problem is that a portion of the front curves down to form a vertical wall on the fron tportion of the tank.  I am thinking about cutting this part off of the plastic part and using it as intended, then simply carry the metal fender, glued to the plastic wall part, to the front of the fender.  Does that even make sense?

Pics

http://i365.photobucket.com/albums/oo91/citadelgrad87/DSCN6735.jpg

And that would avoid having to cut the length of the fender with that vertical as a 'flap'. If you did that you'd have to slit it where it meets the curve, then curve the front down, cut the 'flap' to fit that and solder the seem. Does that make sense?  Either way can work.

"Well...you gunna pull them pistols, or just whistle Dixie?"

  • Member since
    January 2012
Posted by I make stuff on Friday, January 22, 2010 11:05 PM

Thanks, Bill, I've got the patient on the table right now.

Here are the issues I am facing:

Overview-these are basically perfect rectangles, and therefore easy to cut, between the curved ends


The next two show the rear end portion, it'sgot a separation dividing it from the middle fender section.  I am thinking about attempting to bend this and replicate the rib detail with styrene, my rationale being that the center is nice and thin, I'd rather not add these over thick styrene ends.


The next 3 show the front section, which is tougher, but I think I have a solution.  The front portion of the fender itself is just curved, no raised ribs to follow the curve.  The problem is that a portion of the front curves down to form a vertical wall on the fron tportion of the tank.  I am thinking about cutting this part off of the plastic part and using it as intended, then simply carry the metal fender, glued to the plastic wall part, to the front of the fender.  Does that even make sense?

Pics


Here's a top view to show how simple the shape is if I cut off that inner part:


Anyway, that's the plan but I will hold off until I get some input, it's kind of a one way street at this point.

Thanks

Bill

  • Member since
    July 2004
  • From: Texas
Posted by wbill76 on Friday, January 22, 2010 9:43 AM

Looks like you've got some great advice here Bill on how to address the issues. Look forward to seeing the facelift on the fenders! The replacement of the exhaust is a nice touch as well. Yes

  • Member since
    April 2008
  • From: Ventura (at the beach) in California
Posted by *INDY on Friday, January 22, 2010 12:28 AM

Oh OK ...Me & my big mouth, er a.... typeface. So you got the brass right there. ok dokie

1st measure up the size pieces you're gunna need. Looks like there's going to be a long fold down the side to get an edge on the side, so include this in the width(likely you can scribe the bend-line on the bottom to get the bend crisp just like a P.E. sheet.(scribe with a knife or awl & metal straight-edge) To minimize the sheet metal work, you may choose to cut off the rounded ends of your styrene fenders to save from having to bend the fenders and recreate the detail. Decide if you want to do this before sizing the brass & cutting. _OR_ you may want to go the whole route and re-create all of it, particularly if you want to bang-up the end alot--or have some of it go missing? Anyways, you'll have to decide all of that prior to cutting.

To cut you could use your snips, if proficiant with them. Needing a long straight cut, I'd use a knife & straight-edge. Not the regular hobby knife, but a heavy utility blade. You got the .005 thou brass so it's no thicker than a typical Photo-etch sheet, thinner than many.

These are really handy and worth the $10 . The thick blade will give you a more consistaint cut. You need to hold that ruler down really firmly. to avoid slipping and getting your fingers, or getting squirly cut... you may want to clamp it down, with C-clamps or whatever you got.

That should get you started, maybe as far as the side-fold done, let us know what you decide about the rest and we'll go from there*

YesCool

"Well...you gunna pull them pistols, or just whistle Dixie?"

  • Member since
    January 2012
Posted by I make stuff on Thursday, January 21, 2010 10:39 PM

Indy!  Did you guys really have a tornado today?  Still raining and lightning here!

I thought I heard a challenge/push to new exploits, seriously, after the baby steps of the cobblestone base, you feel like walking me throught this?

What do you make of this?


Then, when gingely testing the glued joints, THIS happened:


The new status quo is one fender off, I am certainly not going to glue that back on


Indy, I'm going to need some serious backup.  FIrst things first, how is the best way to neatly cut this stuff, I have tin snips, but feel like it will curl and tear it up, maybe it's soft enough to beat back flat?

Second, the ONLY detail at all is the end pieces, they have some ribbing detail, how do I replicate that?

Let's get this party started!

Bill

  • Member since
    April 2008
  • From: Ventura (at the beach) in California
Posted by *INDY on Thursday, January 21, 2010 9:47 PM

~Billy'O'Bill~~~ Hey that interior looks terrific. Looks just right from what I know of these(which is nothing, but it still looks right Stick out tongue) would'nt be much of a vacation tour fighting inone  of these!

Dig the substitution of the exhaust---any time you can add in or substitute more brass the better, right? After-all, what better to model scale metal than tiny bits'o'metal? IF FACT....if you have any brass sheet or large P.E. pieces even, you may consider sub-ing out those ill-fitting fenders for some scratch-made ones that fit however you want.... The brass could give you some oppertunity for convincing damage,as the fenders are always the first thing to go--------In any case I vote mutilate them(I would, huh?)

Oh and jest out to Ed----Edmund, is there another kind of slight-of-hand besides the visual kind?Geeked

"Well...you gunna pull them pistols, or just whistle Dixie?"

  • Member since
    January 2009
  • From: Everett, WA
Posted by Schnobs on Thursday, January 21, 2010 9:07 PM

No worries Bill I am always willing to lend an ear Have two fairly large ones! 

First of all I love the brass tubing on the muffler.  Well done and that will really set it apart!  If you cannot remove the fenders and fix the height problem you could use a visual slight of hand and cut some evergreen stock down to pad out the space right below the strut until it is flush with the fender.  You could also drop a tarp or something over this because according to the non extreme modelers we only use extreme modeling and weathering to hide our mistakes!  That one made me laugh long and hard! 

I Will think about it for awhile and see if I can come with anything else.

Good to see you making progress on this Bill!!  Yes


"There is a principle which is a bar against all information, which is proof against all arguments and which cannot fail to keep a man in everlasting ignorance. That principle is contempt prior to investigation." Herbert Spencer
  • Member since
    January 2012
Posted by I make stuff on Thursday, January 21, 2010 8:48 PM

Thanks Edmund, Bill, and Rob.  Rob, I appreciate that, this is my first try at chipping.

Update!

So you may recall that the entire front section of the tractor cab was formerly a clear piece with windows molded into it.  I decided that masking the "clear" parts and painting the rest would result in the masks being on the windows for so long that they would never be clear again.  Also, they were very thick, scratched to heck, and the windshiled wipers molded in place looked bigger than 1/35 prybars.  SO... I dremeled out the windows and left the frames, and got this:
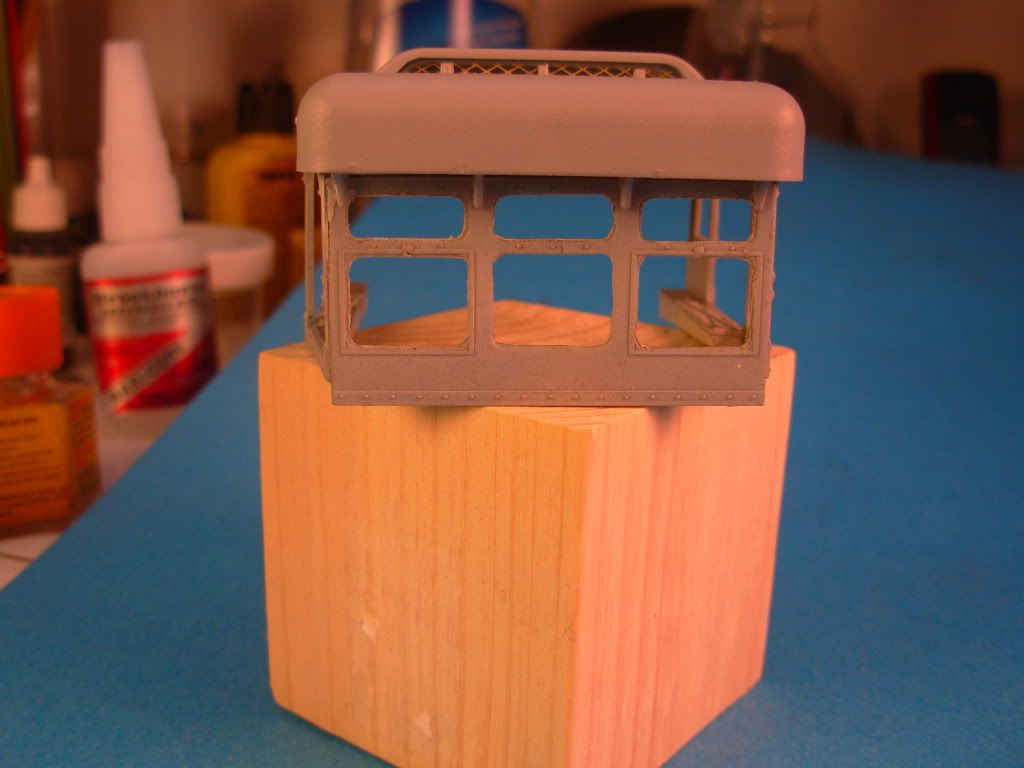
 

I planeed to simply make clear plastic windows and put them in after I paint it.  My problem was I should have made a rubbing of hte windows before I got rid of them so I would have templtes to make the clear windows.  I didn't, and had a mental block about the best way to go about getting properly sized windows.

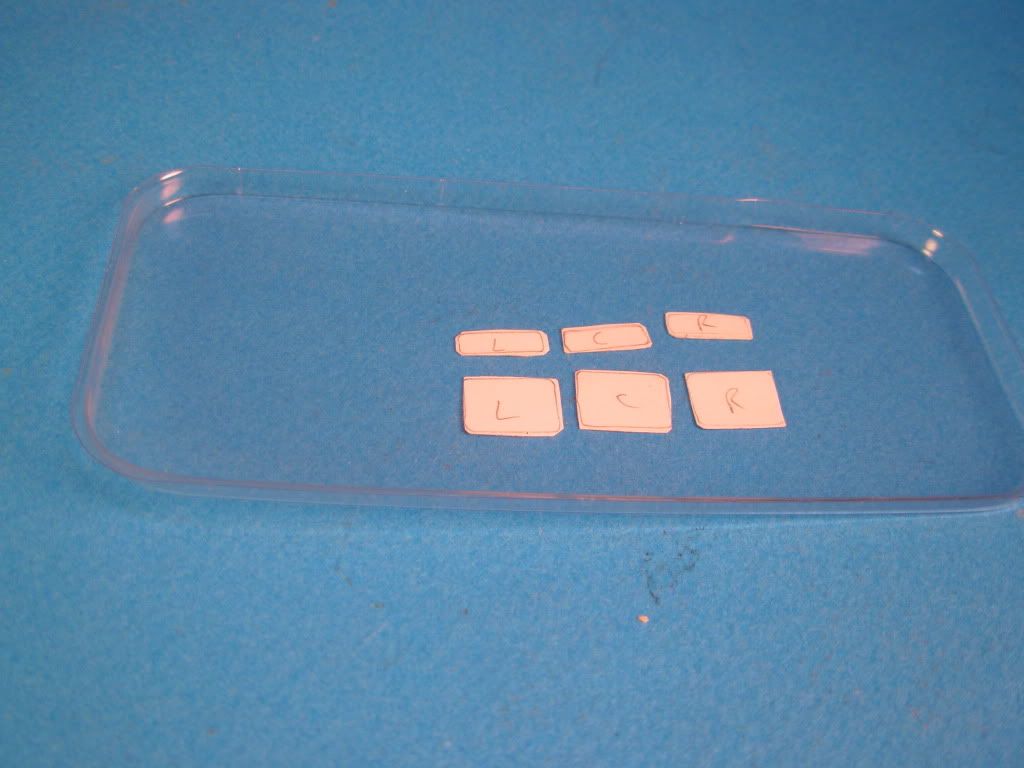
Enter Schnobs, in the finest FInescale tradition, he suggested tracing the window openings onto some card stock, and trimming those to fit, then transferring that to some clear packaging for nice clear scale thickness glass.

SO I did:
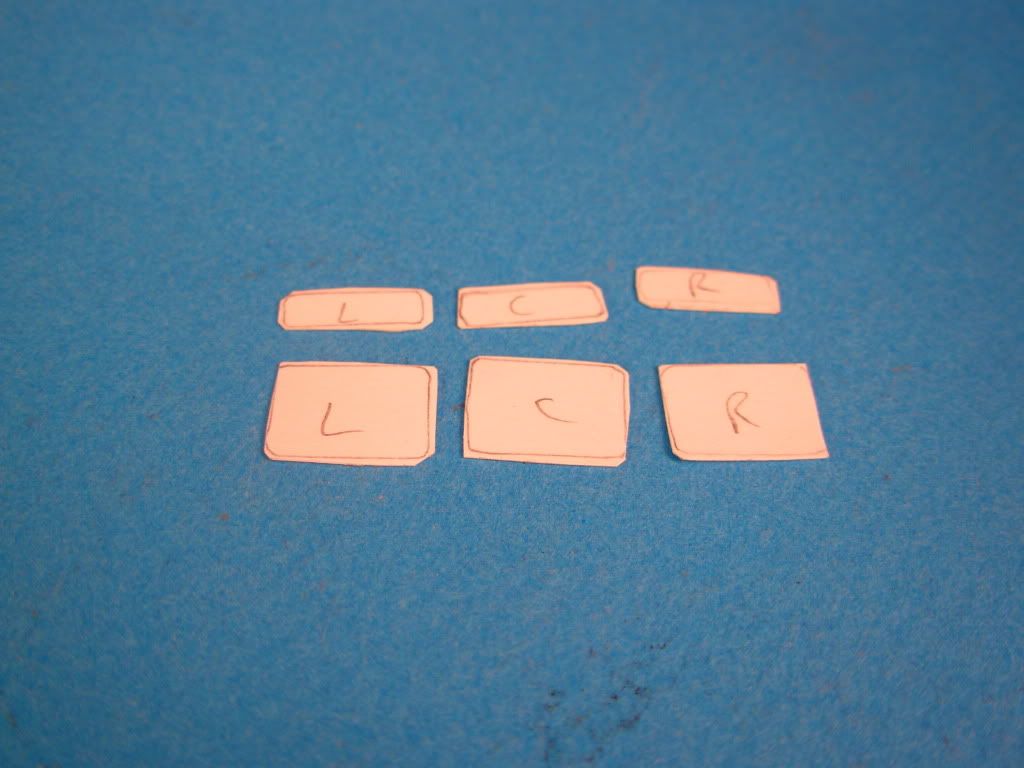
 

And a quick shot of the raw "glass" I intend to use.  Points to anyone but Schnobs who can guess what that package is for:


THen I started on the myriad of tiny outside details, starting with the exhaust.  Here's the first part, the tip, nice and solid:
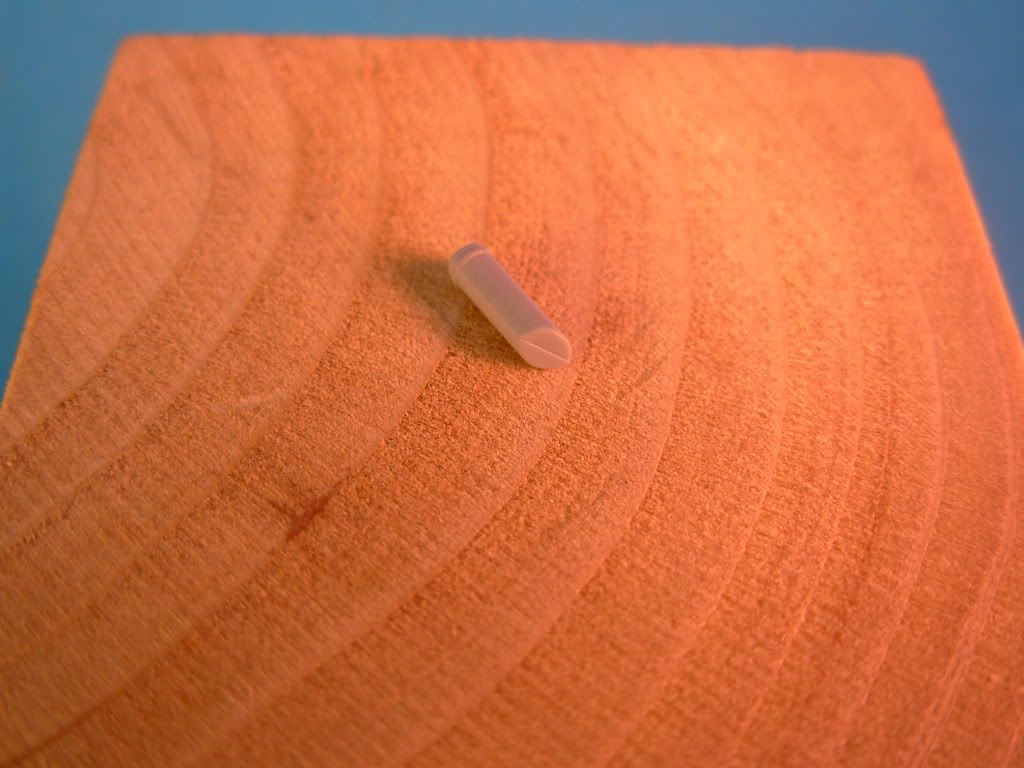
 

I started to root around for a bit to drill it out, then, brainstorm, I found some brass tubing that I bought for the BA 20 exhaust, and here we have a realistic ( I hope) tip.
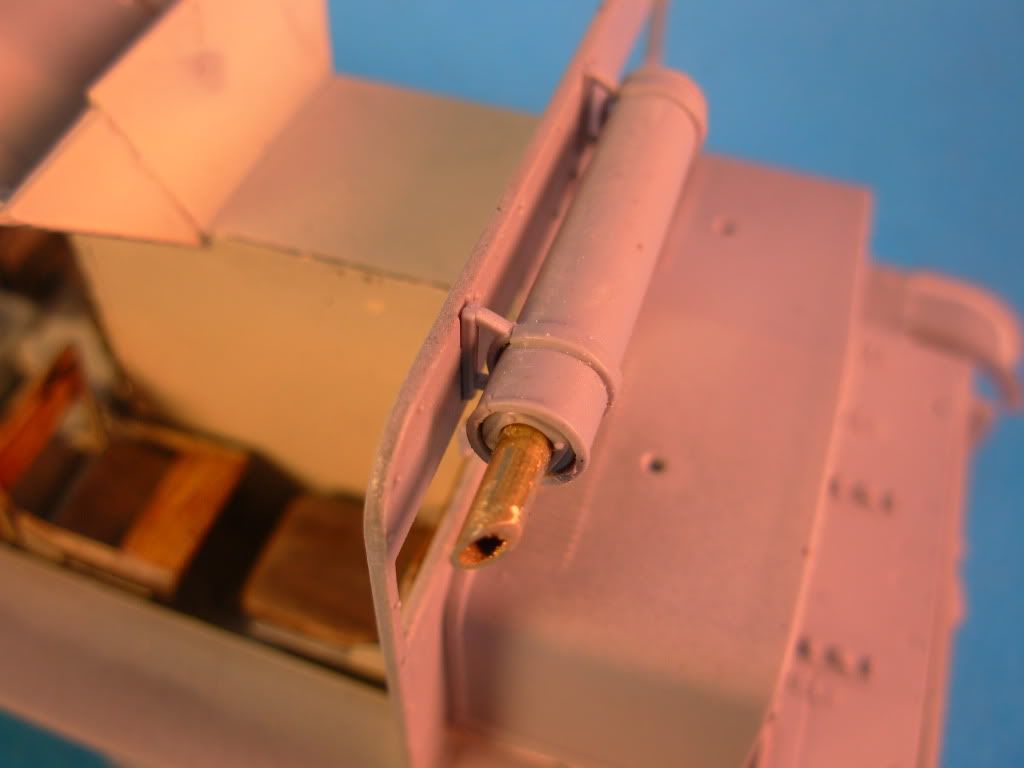
 

And here is the overlal shot, that thing didn't fit very well at all, I needed a couple extra hands
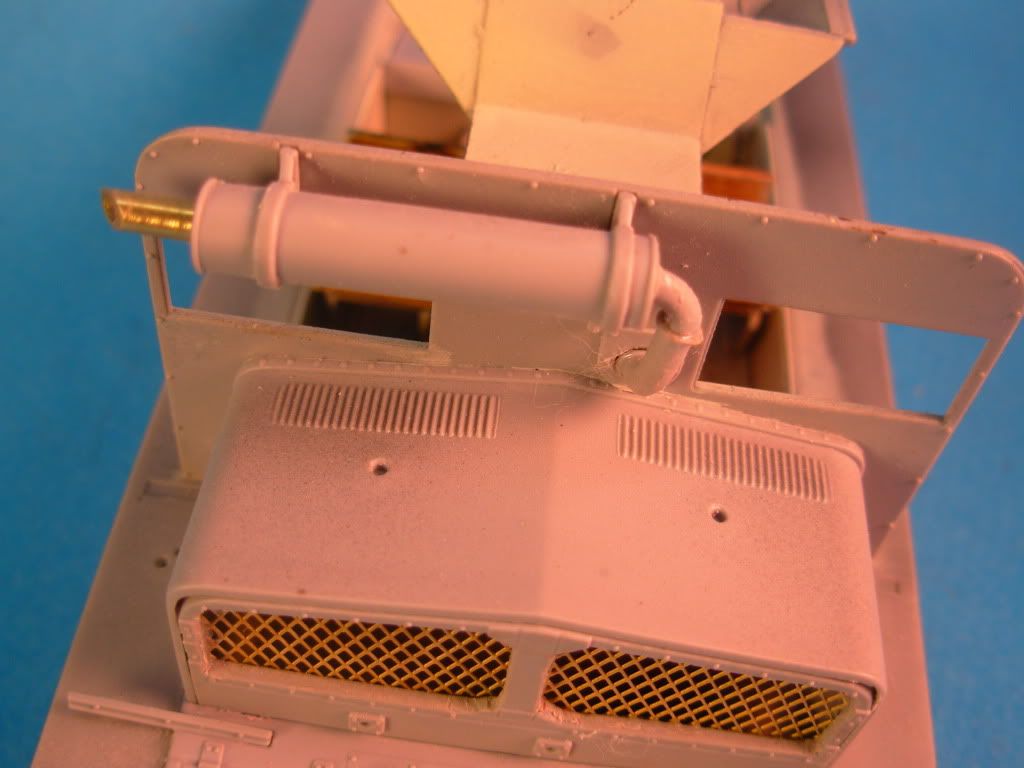
 

THen I started with some other smaller details, check these fender supports for WOW does that not fit well.  Combination the fenders took on a droop to get them flush with the hull, and the top plate is also warped.  Check these clearances, anyone have any suggestions?  I can CA them down and they will look bent, not out of the question, or they can remain straight and I can rip some holes in the fender and they can be "torn off."
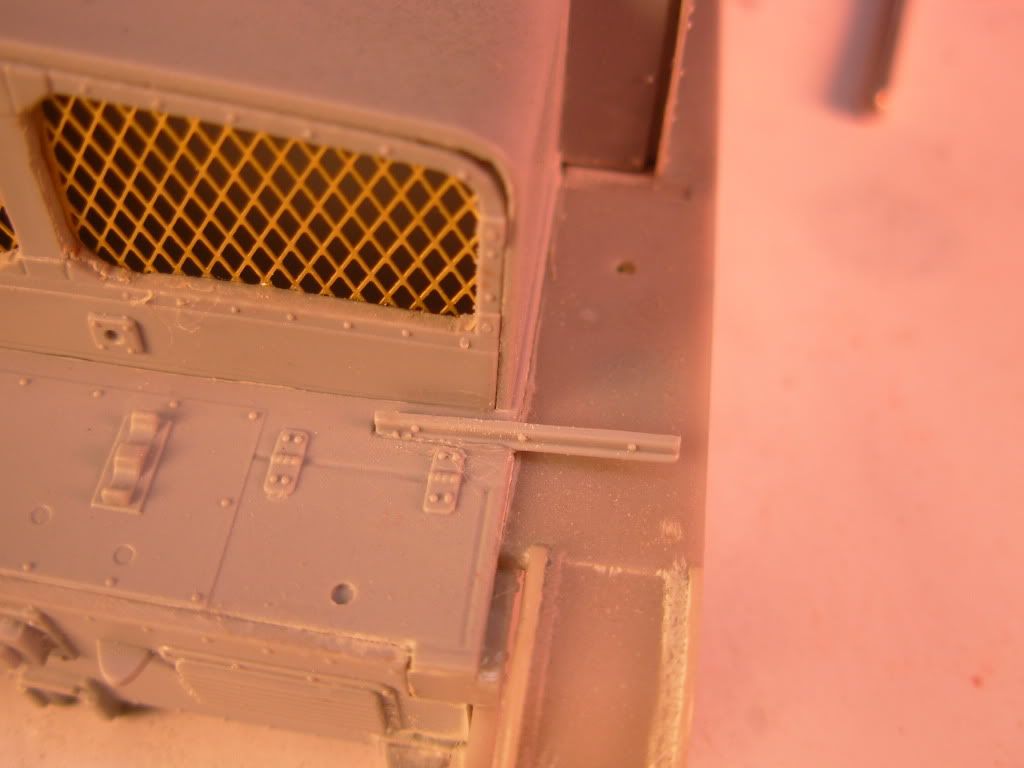
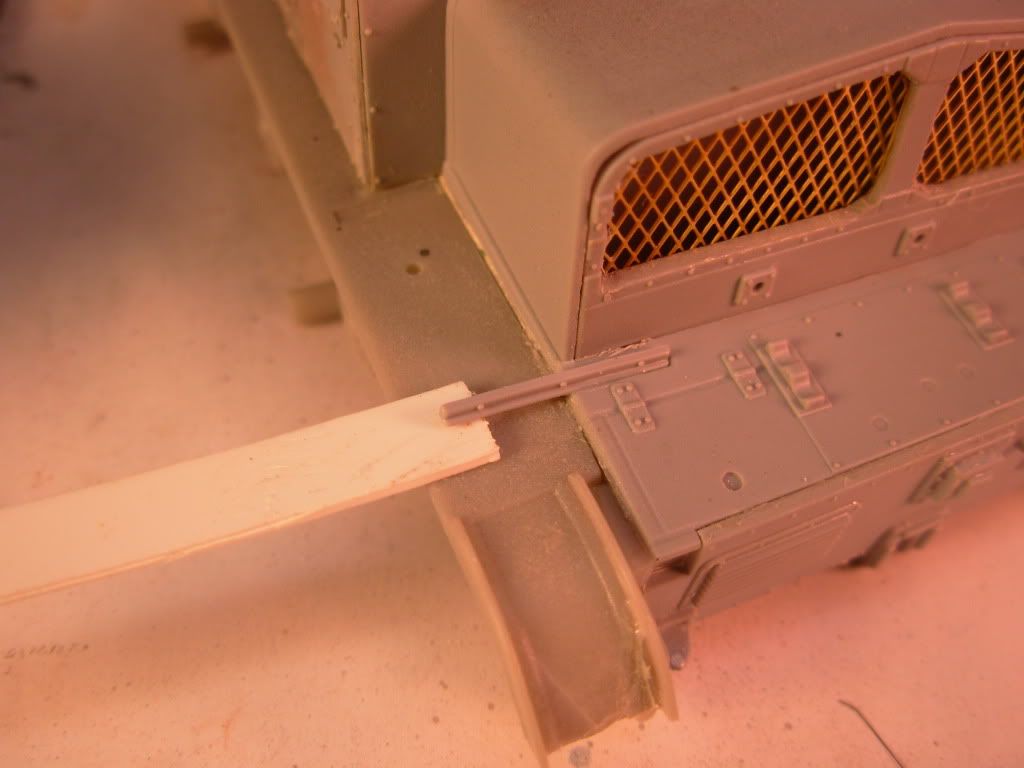


That's where we sit tonight, I will next drill another couple hundred thousand Fruil links, maybe get the first run finished.

Please weigh in with any comments, especially with teh fender supports.

Thanks, guys,

Bill  

  • Member since
    February 2009
  • From: mass,USA
Posted by scratchmod on Wednesday, January 20, 2010 1:31 PM

Love the look of the interior, the chipping looks great as do the rifles.


Rob

www.scratchmod.com

  • Member since
    July 2004
  • From: Texas
Posted by wbill76 on Wednesday, January 20, 2010 9:31 AM

Looking good Bill, nice work on the interior details. Yes Yes

  • Member since
    January 2009
  • From: Everett, WA
Posted by Schnobs on Wednesday, January 20, 2010 3:24 AM

Nice rifles and rack Bill. The interior is looking great!  If you have MIG Gunmetal pigment a little bit rubbed on the high points of the weapon like the sights is a nice touch.  Just a suggestion of course!

"There is a principle which is a bar against all information, which is proof against all arguments and which cannot fail to keep a man in everlasting ignorance. That principle is contempt prior to investigation." Herbert Spencer
  • Member since
    January 2012
Posted by I make stuff on Tuesday, January 19, 2010 11:46 PM

Thanks, Bill, Edmund, and Dave, so nice to have company for this ride.

A few nights ago, I cut some slings out of lead foil, glued them up, painted them to resemble leather, and then oil washed them to tone them down.

Tonight, I glued on the central stack that forms the center of the crew compartment, and fitted two rifles to the rack on the driver's side. I added a "leather" retainer strap out of lead foil painted vallejo leather.

Not much progress, but it's a step in the right direction!


And with the roof on, here's what we will see

  • Member since
    May 2005
  • From: Eugene, Oregon
Posted by hughes2682 on Thursday, January 14, 2010 11:38 AM

Bill,

A re-do can be a hard one to swallow.  They can often pay off in spades.  This is NO exception.  A very nicely done interior.  I agree with Bill (WildBill) about weathering the interior now before the interior gets buttoned up with the cab.  I am looking forward to following this build.  I somehow missed it before today but it is now marked to be followed.

Cheers

Dave

http://img.photobucket.com/albums/v317/Aaronw/Groupbuilds/ClassicAviationGB2010bomb.jpg

With enough thrust, pigs fly just fine.

  • Member since
    January 2009
  • From: Everett, WA
Posted by Schnobs on Thursday, January 14, 2010 11:28 AM

Hey Bill,

The interior had turned out really nice and your extra work and re-work really shows here.  I like the rifles and as I said on the the phone don't be intimated by slings because I was too and they are really quite simple to make and work with.  have had the best luck with thin strips cut off Yogurt foil lids.  The ones my wife uses has a pebble like texture which when painted looks just like leather.  Do not forget to make a loop on the inside of the sling to simulate the sling loop and use a touch of CA and you are done.  I often glue them on the he rifle and then paint them it is easier.

Keep firing down range Sir!!

"There is a principle which is a bar against all information, which is proof against all arguments and which cannot fail to keep a man in everlasting ignorance. That principle is contempt prior to investigation." Herbert Spencer
  • Member since
    July 2004
  • From: Texas
Posted by wbill76 on Wednesday, January 13, 2010 2:39 PM

I would definitely advise doing any weathering or washes for the interior that you want to accomplish now before you secure it in with the cab...if only because it's much more accessible now vs. later. A pin wash with Burnt Umber will help make some of the details pop, it's up to you if you want to put another overall wash in place but my vote would be no unless you want to show some heavy duty dirt accumulation or similar grime on the interior.

Rifles are looking good too Bill, keep up the good work. Yes

JOIN OUR COMMUNITY!

Our community is FREE to join. To participate you must either login or register for an account.

SEARCH FORUMS
FREE NEWSLETTER
By signing up you may also receive reader surveys and occasional special offers. We do not sell, rent or trade our email lists. View our Privacy Policy.