Thanks guys--I'm sorry I haven't replied, but I've been trying to get the last of this build done, and to document it all before I have to head north to NY on Monday. I'm happy to say that I've got 'er done now, and will present the final pics shortly!
Thanks, Mike, Steve, and SuppressionFire for comments! And SF--a good eye! I didn't notice the road wheels outside the guide horns on that photo, but yes, the wheels were loose, and came off the tracks when I was moving it around for photos. Mike--the "tampon method"--LMAO!
Manny--I appreciate your perspective on this build. I'm happy where it wound up with the gun barrel and brake!
Eric--yeah, I'll probably be writing this up for an article. Heck, it's such a new kit that I hope that FSM will bite on it!
Thanks, too, Tojo!!
Bill--I have to say, I give you credit for your skill with those tracks! I guess I"m just used to my "usual" method, but then, aren't we all?  Thanks for mentioning the varied panels--you ought to try it too on a future build; it's nice how it breaks up the monotony of the one color hull.
And now----the last installment of the WIP tutorial, and then the finished pics! 
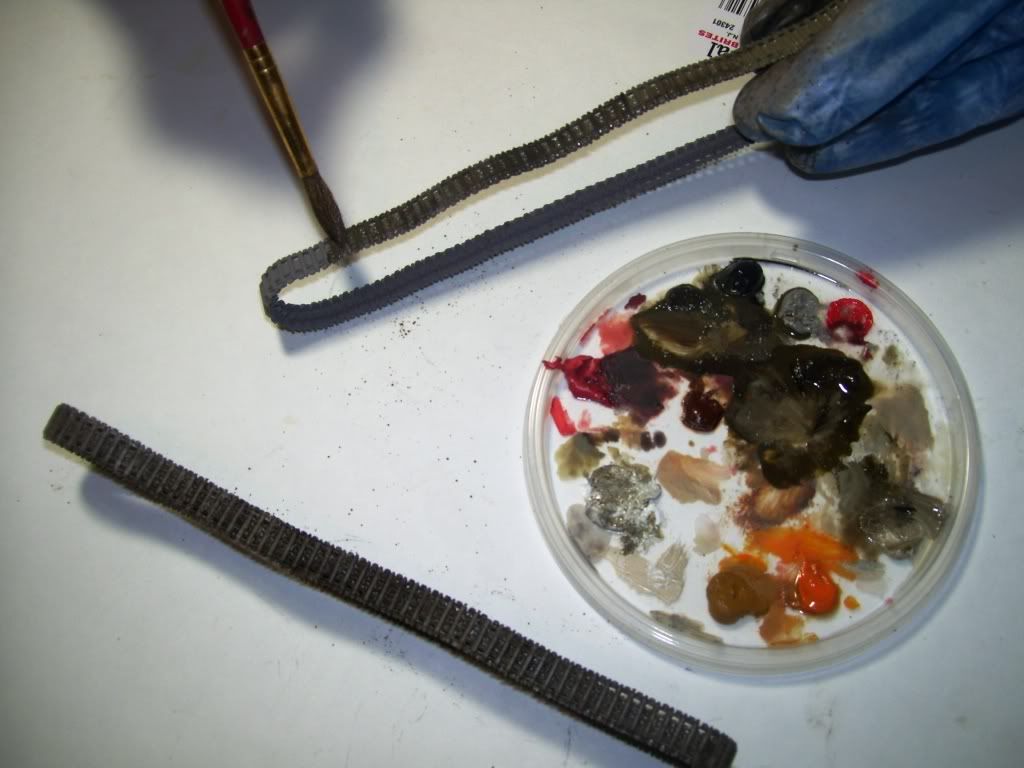
The tracks were first primed with Tamiya grey primer, and then a light overspray of brown added. I then ised a brown mix of oils--raw umber, MIG Gray, and Black in varying amounts--to coat the tracks in oil paint.

Now, I used MIG's 039 Industrial City Dirt to coat the still-wet tracks.

As soon as I was finished coating the tracks, I used my finger to scrape off the pigments from the tops of the track bars, and set them aside to dry. When they had dried, I drybrushed the bare tops of the tracks with metallic grey and then even more lightly in silver. The hull then got the same trearment with the same pigments. I added some MIG Dry Mud to both the completed tracks and the hull bottom, for variety of color tone.

Somebody was asking me how to get metallic chips and "lowlights"--Hinsky? Anyhoo, here's what I use--Testor's enamel "Rubber", plus Silver, plus some oils--ram umber, Black, etc. Mix them up on a flat brush, and then dab most of it off on a paper card...

Here I"m chipping the gun trunions and assembly. (I DID clean up that recoil absorber tube... )
)

I use the flat side of the brush to "drybrush" the sides and tops of the model. Just drop and drag the flat part of the brush against the edges.

The rest of the build was in small detail painting--adding dirt pigments to the rear spades, touching up some oil stains and some "wet effects" in the rear fighting compartment, rusting the front spare tracks with pigments and oils, painting tools...
And now, the finished build.... 12.8 cm Waffentrager!


You can see some of the "Wet effects" here in the rear...I didn't put in the shells yet, which would have been stowed under the gun base. I'll put them in when I finally get the figures painted.


And some close-ups.
I imagined the spare tracks rack to have been a field mod, ergo, rusty.

The tools were painted black, with careful drybrushing of silver. The handles were painted craft store acrylic tan+white, and washed with gray oil and then some raw sienna.

The muffler was rusted using pigments and oils.


The wheels have some MIG "Grease and Oil" mix on the hubs of some of the wheels. Note too that te guide horns are silvered, as they would contact the inside of the idlers.

And that's it, guys. 
Thanks to everyone who has followed this build, and taken the time to comment, critique, or send a kind compliment! I appreciate each and every comment, and in many cases, you've helped me in this build with information or suggestions that have only helped to improve the end results. I hope you've enjoyed the WIP and got some inspiration to try something different in your own modeling! 
Karl the doog.