SEARCH FINESCALE.COM

Enter keywords or a search phrase below:

IDF GB 4/20/08 - 4/20/09

94464 views
468 replies
1 rating 2 rating 3 rating 4 rating 5 rating
  • Member since
    December 2002
  • From: Jefferson City, MO
Posted by sgtsauer on Saturday, June 14, 2008 8:02 PM

Can I still get in on this?

If I understood correctly, I can but I want to make sure. Smile,Wink, & Grin [swg]

I have a Tamiya Merkava to build if I can.

  • Member since
    October 2007
Posted by White_R34 on Saturday, June 14, 2008 8:05 PM

Well well we were posting at the same time. I love the way you turret is coming out that back part looks cool and love that rack. Man you have skills. About the drivers place here's the only images that I found, with a guy in the drivers seat. I've done some work on that place also.

I have yet to hear if the solder can get to his seat from the rear. It look like the only way in is from the top. I'll keep asking at the IDF site.

Building the Impossible Is my main goal!!
  • Member since
    December 2002
  • From: Jefferson City, MO
Posted by sgtsauer on Saturday, June 14, 2008 8:10 PM
 White_R34 wrote:

Well well we were posting at the same time. I love the way you turret is coming out that back part looks cool and love that rack. Man you have skills. About the drivers place here's the only images that I found, with a guy in the drivers seat. I've done some work on that place also.

I have yet to hear if the solder can get to his seat from the rear. It look like the only way in is from the top. I'll keep asking at the IDF site.

You weren't talking to me were you? You posted right after I did. I'm not working on a turret with a rack if you are. I have no idea what you are talking about. Question [?]

  • Member since
    October 2007
Posted by White_R34 on Saturday, June 14, 2008 8:13 PM
 sgtsauer wrote:

Can I still get in on this?

If I understood correctly, I can but I want to make sure. Smile,Wink, & Grin [swg]

I have a Tamiya Merkava to build if I can.

Fantacmet is the boss here, I think he will let you in long as you show your work or progress. Hay wich Tamiya Merkava are you going to build. I'm working on the TAM-Merkava III D type.

Hay Fantacmet when you add him to the list here is his name and project type.

sgtsauer - TAM  Merkava  he will let us know wich type he's going to build soon I hope.

Building the Impossible Is my main goal!!
  • Member since
    October 2007
Posted by White_R34 on Saturday, June 14, 2008 8:22 PM
 russianfist wrote:

Some progress on the Sholef MK2.

Im deciding to change the drivers hatch and add the proto thermal imager from the LeClerc.

Also a french .50 cal from the AMX-30 kit.

I will open the back so we can see the loading bay and I think I will put a figure on the open door.

The mortar tube will be installed by the imager as well as a hand rail/brush guard.

I put a screen in the bustle rack and i will add some tie downs next for the gear.

I will soon start the lower hull by enclosing the sponsons and adding the side armor, however I'm not real sure about putting them on yet.

I will not install the spades because I don't see them in pic's of the Sholef MK1 and they are not used on the AMX-30.

I may still put a dozer blade on still but that will require serious surgery and I don't want to over do it on this project.

A person could get carried away and get over their head pretty fast, I better stick to the basics. LOL


Hay new guy I was talking to this guy. You funny American you funny.Laugh [(-D]Make a Toast [#toast]

Here's an image of my project.

This quote was done to bring some work over to this page and answer some ones question.

Building the Impossible Is my main goal!!
  • Member since
    October 2007
Posted by White_R34 on Sunday, June 15, 2008 4:44 AM

Hello there is a sale still going on at Squadron and I thought I should post some things some of you may need.

AMX 30 Modern Tow Cable[Cables only]:

http://www.squadron.com/ItemDetails.asp?item=MZ03522&Submit3=Go

Universal Vehicle Stowage (Stuff):

http://www.squadron.com/ItemDetails.asp?item=TX0055

These are some of the things I may buy.

http://www.squadron.com/ItemDetails.asp?item=LF1141 **

http://www.squadron.com/ItemDetails.asp?item=LF1142

I'm not going to buy this as I'm building my tank body to look as close to it as I can with the up to date turret. Not this old style.

http://www.squadron.com/ItemDetails.asp?item=LF1146

http://www.squadron.com/ItemDetails.asp?item=LF1084

Some more resin kit's

http://www.squadron.com/ItemDetails.asp?item=LF1106

There's juat no way I'm going to buy the Mk. IV I realy don't like the way it looks. I like the Mk. III more.

I think I'm going on an get this set.

http://www.squadron.com/ItemDetails.asp?item=MH1380

This M113 can be paint up a sand color or Olive with a (White circle with red jewish star) on it . I have photo links of the some real one's.

Here's a full list of Legend Productions Resin tank sets and parts.

http://www.squadron.com/SearchResults.asp?offset=0

http://www.squadron.com/SearchResults.asp?offset=0

Some Links:

Here it is from the fount: http://picasaweb.google.com/zippo132/IDFM113Version/photo#5159450829412684210

http://www.militaryphotos.net/forums/showthread.php?p=2398818

I can't seam to locate the images that I want to show you all so I'm going to take some time to locate it and come back and post it here. Any way look at this images of and old one to see the image of the


Building the Impossible Is my main goal!!
  • Member since
    September 2006
  • From: Dripping Springs, TX, USA
Posted by RBaer on Monday, June 16, 2008 12:06 PM

Man, there's some neat work going on in this GB. Maqke me feel all warm and fuzzy, too. Got a little done Sunday night on the obstacle clearing device on the Magach, still needs come clean-up on the welds. I had zip for detail pics (they always have a TON on junk pil;ed on them) so I made it up as if I was making it in 1/1. Also got the wheels and tires painted, and that was about it. A/C was out over the weekend, so spent very little time indoors......

The basic device. Welds are Aves 2-part putty. I really prefer using .025" styrene rod, but this whole structure is not strong enough to take the stress of the technique, so putty it is.

The welds really need some clean-up.....the device is pinned to the front tow shackle mounts. Hopefully more time will be available to me this week.

Apprentice rivet counter.

  • Member since
    October 2007
Posted by White_R34 on Monday, June 16, 2008 9:57 PM

RBaer The wealds look ok like a true infield mod. As for my build I got a lot done to day on the 3rd Generation Turret armor. I'm not done yet as I still have a lot of detail to add to the top of the turret. You know I realy don't like showing my work off at this stage but I just wanted you all to know that I'll still working and I need to take a brake from the net so I can focus on this project and all the detail I need to add.

All the shaded in places are the spots were I need to add items.

Man this thing has so mini angels to it but I got most of it done.

Some new info that I found on the frount drive wheels that some of you may want to know. There are holes in the drive wheel as well. I cut the holes in my wheels. An I'm thinking about doing the rear ones. Some of you may not want to go this far so you could just paint the shapes on. To see just were you need to start the V shape look at my V shape holes. Here's one way you can do this (Mod). Between each hole on the out-er wheel lip [Not the Teeth lip]are some bolts, point out 3 bolts make you stating V shape or angel line at one of the bolt's on the inner wheel once you have the full {V} shape from to bolts split by one bolt. Drill a hole through the wheel and use a hobby knife to carve out the shape. Look at my wheel to compare with yours once you get that far.

Doing the rear part will be hard, but you realy don't have to do them. You can leave them plane or paint on the shapes.

Once I get the full turret done I'm going to jump on the turret basket. I have alot of in fo on it.

Later you all and truly you all are doing a realy Magnificent job on your projects.Make a Toast [#toast]

Building the Impossible Is my main goal!!
  • Member since
    July 2004
  • From: Oregon, Rain country U.S.A.
Posted by russianfist on Monday, June 16, 2008 10:27 PM

WOW!!!!!

Everyone's work look's so FANTASTIC......

I haven't touched my kit in a week, I am such a LOSER Ashamed [*^_^*]

You got a telegram from headquarters today. Headquarters--what is it? Well, it's a big building where generals meet, but that's not important right now. [ img] f_armorsecretm_ac7eb73[/ img]
  • Member since
    October 2007
Posted by White_R34 on Tuesday, June 17, 2008 3:19 AM
 Thunderbolt379 wrote:

Hi all,

Latest WIP shots of the Merk -- assemblies are press-fitted. I left the skirts off for this shot as tape made it look daggy. At this point there's just over fifty components left to go. The periscopes are all done, the return rollers need adjustment on the port side and the rear hatch needs to be fixed in place.

Photobucket" border="0" />

Photobucket" border="0" />

I'll pop the tires off and mask their location points for painting, remount the tires afterward and dust them to cut the shine of the vinyl. I have MiG 'Gulf War Sand' pigment on its way, which appears to be a gray and should compliment the 'Sinai Gray' paintjob.

Keep sanding,

TB379

I'm bringing Thunder's project over to page 10 to keep up with all the othere work. I'd like to point out that this is a realy good Box stock build an that on this version (Merkava Mk. II) the bladed 2nd wheel after the first gear type drive wheel is [Right] for this version. An like the Mk. III the Mk. II can have that 2nd Generation Armor on it's turret to. If any of you were wondering. You know I'm thinking of getting this one my self to try that on. But till then I will keep up with his build.

Building the Impossible Is my main goal!!
  • Member since
    July 2004
  • From: Oregon, Rain country U.S.A.
Posted by russianfist on Wednesday, June 18, 2008 8:59 AM

MY PHOTOBUCKET HAS BEEN HACKED.............................................

Wait a sec, it's back...............disregard please.


You got a telegram from headquarters today. Headquarters--what is it? Well, it's a big building where generals meet, but that's not important right now. [ img] f_armorsecretm_ac7eb73[/ img]
  • Member since
    September 2006
  • From: Dripping Springs, TX, USA
Posted by RBaer on Wednesday, June 18, 2008 3:32 PM

Whew!

I decided to part out an old Tam Merkava 1, so I should be moving along a little better now that I have some little goodies for the turret detail. Time is a little short these days......

Apprentice rivet counter.

  • Member since
    October 2007
Posted by White_R34 on Wednesday, June 18, 2008 6:48 PM

russianfist hay there man can you do one thing for me and your self edit your post and chang the DA**$% word to DARN IT*** This is to keep the FSF Monitors off your back. About your Photobucket acc. Did you change you pass word like Photobucket E-Mail told you to. Or did you just trash it?Sigh [sigh]

RBaer take your time don't get in to a rush, that's when bad things tend to happen. I'm still working on my project also.

Building the Impossible Is my main goal!!
  • Member since
    July 2004
  • From: Oregon, Rain country U.S.A.
Posted by russianfist on Wednesday, June 18, 2008 11:58 PM
 White_R34 wrote:

russianfist hay there man can you doone thing for me and your self edit your post and chang the DA**$% word to DARN IT*** This is to keep the FSF Monitors off your back. About your Photobucket acc. Did you change you pass word like Photobucket E-Mail told you to. Or did you just trash it?Sigh [sigh]

RBaer take your time don't get in to a rush, that's when bad things tend to happen. I'm still working on my project also.

No problem, I wish no offence.

I left the "N" off the end of the word on purpose to avoid issue. 

You got a telegram from headquarters today. Headquarters--what is it? Well, it's a big building where generals meet, but that's not important right now. [ img] f_armorsecretm_ac7eb73[/ img]
  • Member since
    October 2007
Posted by White_R34 on Thursday, June 19, 2008 1:14 AM

Sorry to say that out loud like that next time I'm going to send E-Mails. I just want us tha's you and I to be on the safe side.

I went on and cut out the rear V shaped holes on my Merkava drive wheels. Not that any one will see the rear section but it was a challenge to see if I could do it or not.

I'm back working on the turret an once I'm done putting all the part that I need to build on I'll post new pix. I'm not going to do any of the interiors till I get a book on the interiors. The Images that I have found from the Military Photo site are of the Mk. III and the Mk. IV so once I get the book I will jump on the Mk. III's interior. Oh an I'm going to use some of the IDF Academy Tank Figures on the inside of the turret an drivers bay. I want to show one of the Figures loading a round. But once I glue the turret together the only way any one offline will get to see it is to look down through one of the turret hatches. You may want to know why I'm thinking of doing all this to the interiora. One reason I like to go to shows some times an it's cool to show up with something that know one has see at our local shows.

Building the Impossible Is my main goal!!
  • Member since
    September 2006
  • From: Dripping Springs, TX, USA
Posted by RBaer on Monday, June 23, 2008 11:00 AM

Progress! I wasn't happy with my battering ram on the front (sounds better than "obstacle clearing device") so I cut most of it off and built it with rectangular tube I picked up last week at the LHS. Welds were re-done with a mix Squadron "green" and Testor's thin liquid cement. I like this one a bunch more, as it's built as I feel it actually would have been. One of the things I do here at work is weld, build roll cages, do frames, and I built the ram as if I was building the real thing.

Some detail done on the hull, a little more PE and it's ready for paint. The turret got a hinged loader's hatch, with lock and handle. My scrapped Tam Merk 1 supplied the mortar, after some clean-up and additions, and the loader's MG. Not sure exactly how I'm going to do the commander's MG. I've got another Academy kit but really don't want to rob it. Also still need the mantlet ERA and 50-cal. Wheels are on for the photos only, tires cut up a little to represent heavy wear.

New ram:

mortar, with some added detail:

hatches, loader's MG:

Tow cable brackets, crew tent tie-downs (partial), ram and mount detail, chewed up tires:

Until next time, build on, Garth.

Apprentice rivet counter.

  • Member since
    October 2007
Posted by White_R34 on Monday, June 23, 2008 8:51 PM

Hello all I'm back with some new work on my M151 MUTT W/TOW Project but first I'd like to say to RB your new ram look even better that that first thing as for you welding you got it right on it should look close to a little mess. In Arc welding the welder can put down a realy good weld with time but to rush and build some thing like that infeld. Well your looks like a guy that would have a little skill and rushed. I't look a lot like the way I used to do it when it first started at it. Like my teacher told me not bad for your first time. It look like it's in good form and will hold. Grate job man, it brings back good mimores. Your build is truly one of the grates. As for my first build the M151 MUTT I have gone back to it to get it cout up with were it should have bean when I started on the Merkava. Any way here are some of the thing's I added.

I was these thing's on the top of a model's hood and liked them so I made some for my build as well as hood tye downs from styrene rod & strip.

I cut the TOW tub holders in/half and placed them on thin strip of brass sheet.

On the drivers side I made two mounts for my shovel and two tye bares on the rear seat, made from copper wire.

I had to add gas, brake, and clutch pedels as this kit did not have any.The rods in back of each pedel come from the kit and the pedels come from .015 sheet styrene. The side drivers review mirror is made from same thin brass sheet.

I added lugs to the rear tire holder to shoe where the old mount was. (I just thought it would look cool)

Next to the driver there's a place for a passenger (Side Guner) so in IDF standers that seat looks like a jump seat so I used thin brass wire that looks as thick as the rod shape on the kit's main drivers seat.


Building the Impossible Is my main goal!!
  • Member since
    October 2007
Posted by White_R34 on Monday, June 23, 2008 9:29 PM

Here's some shots of what it may but not with all the items on it will look like once I'm done.

This is just the way I chose to color my undercarriage.

Building the Impossible Is my main goal!!
  • Member since
    September 2006
  • From: Dripping Springs, TX, USA
Posted by RBaer on Tuesday, June 24, 2008 11:48 AM

White_R34, looks great! It's the details that make yours stand out, makes for lots of visual interest.

Thanks for the cudos, this weekend's session was good. Still need to finish out the tent stowage straps on the rt ft fender (may yet put the crew tent there, should be present if the tank's in action) and then it's time to finish the turret.

Apprentice rivet counter.

  • Member since
    October 2007
Posted by White_R34 on Wednesday, June 25, 2008 11:20 PM

Thanks man it's all in the details and this realy was a good session. I was going to start on the paint job to day ((BUT!!)) I thought there's just something missing so I added theas parts to add a little more detail.

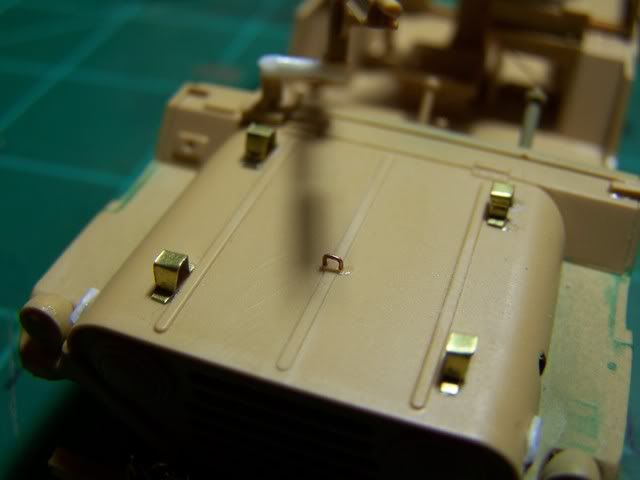
On the hood of the 1:1 Ford MUTT there's a small loop or bar so I sand of the molded in part and made one from copper wire.
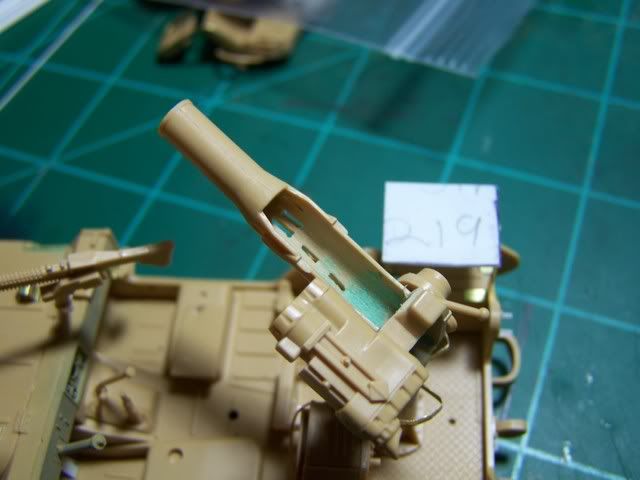
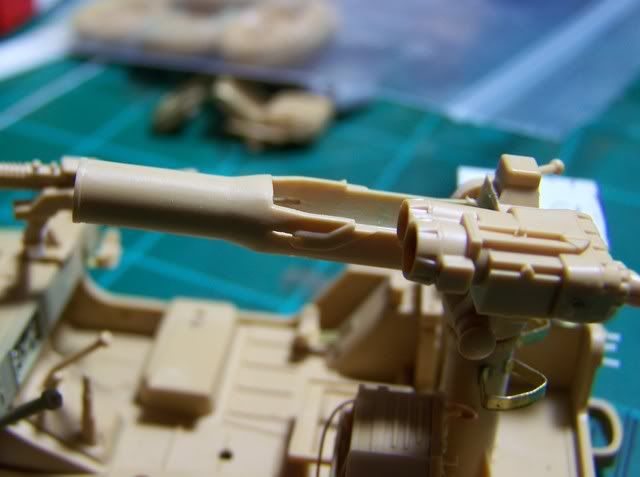
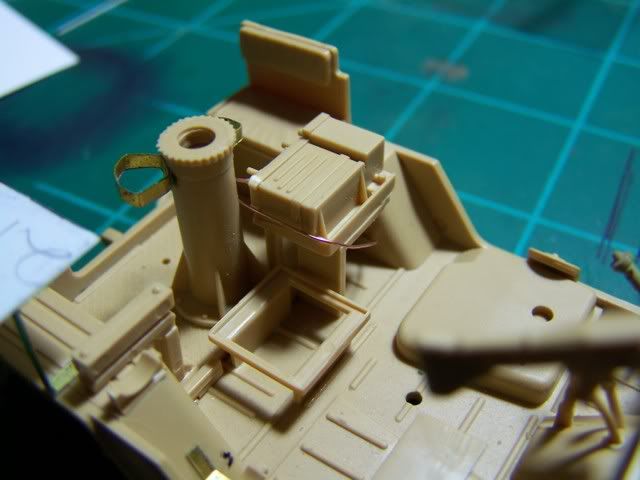
On to the TOW Launcher tub. First I Googled the unit under the images section so I could find some thing that I thought I saw to see if I was right. An yes there are slits or holes in the Launcher tub. Now I know that on the new Hummvee kit that the slits are there but not drilled out, so I added them to my tub. Oh and the number of hole's or slits are 7. See here:
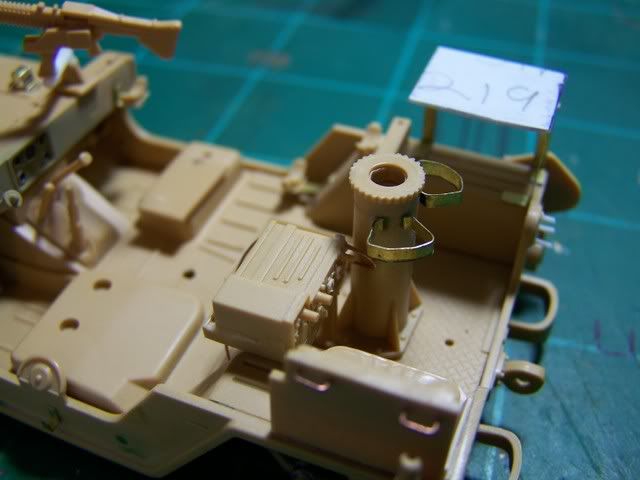
An then I thought man I need some more so I added an antenna wire running from the radio to the antenna mount. sorry if you can see it all that well as the color of the wire is copper. It loops from the frount pass the side an over the back of the radio and then under it and a long the floor of the jeep - TO - the antenna mount.
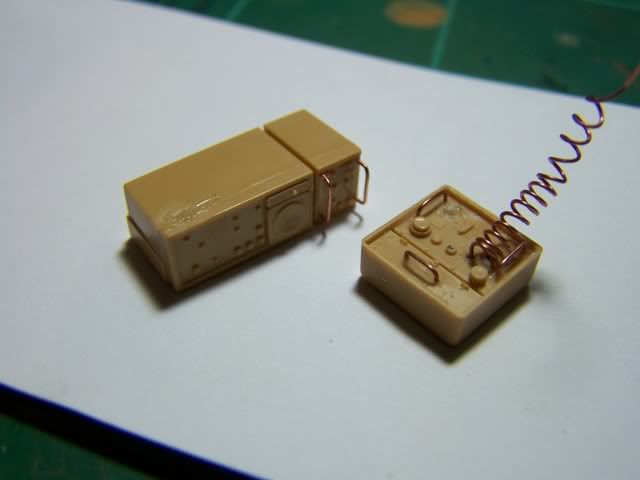
At this time I wanted to add those small handlebars to the TOW control box so I added them along with the cord running up to the TOW view unit. Oh the othere radio to the left is not going to be in this build I just thought I should go on and add bars to that unit so that If I need that radio, I will not have to go back and add them later.
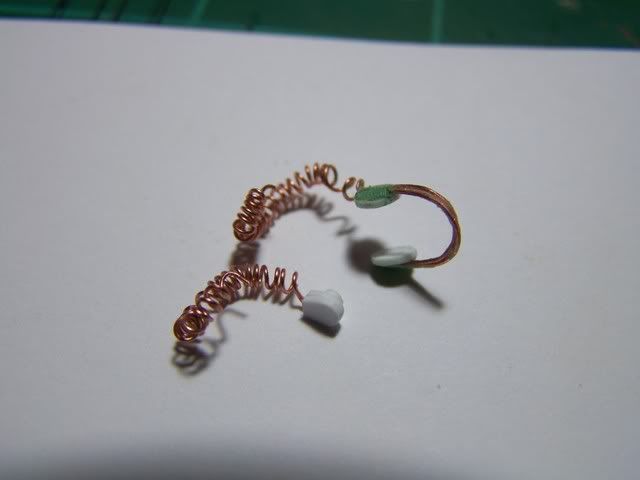
I all so added a microphone and head set. made from copper wire. Why some of you may ask I tried using styrene but it would not hold it's shape like wire will. The ear covers are made of .015 styrene and the same as the mic., but I put two sheets together and sanded it in to shape and used a rod on the back. I used Sq. putty to shape the ear covers.
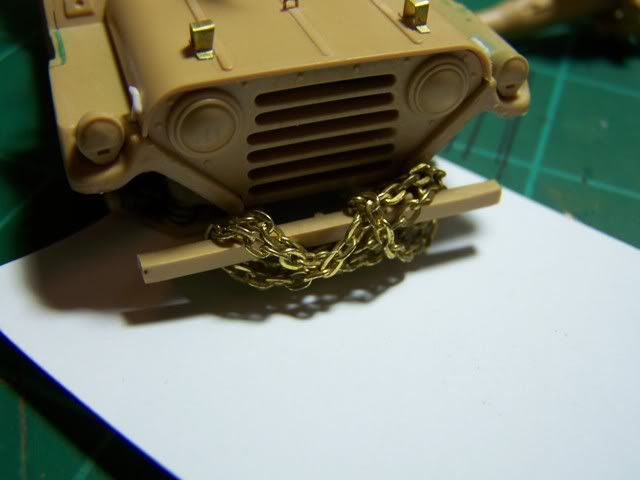
An I added a towing chain, it will be painted then put on the bumper at the end.
The only thing that I may add are tire stems. But othere than that I'm done with all the detailing. I'll try to get on that paint job this weekend. Oh and RB I need to ask you something what is that substance on the top of your turret and on the turret hach (Gray in Color). I like the texture of it, and I think you should put the tent in the straps.


Building the Impossible Is my main goal!!
  • Member since
    September 2006
  • From: Dripping Springs, TX, USA
Posted by RBaer on Thursday, June 26, 2008 11:16 AM

White_R34, nice Mutt.

The gray substance on the cupola is and the mantlet cover is Tamiya putty. Good stuff. And I think I will do the tent.

Apprentice rivet counter.

  • Member since
    October 2007
Posted by White_R34 on Monday, June 30, 2008 5:38 PM

Thanks RB I have started on the paint job. I first put down the base color of XF-62 Olive Drab, then went over that with a custom mix of 1. XF-57 Buff, 2. XF-60 Dark Yellow, 3. XF-49 Khaki. I have to go back and do all the othere parts then build it.

Tire valve stems and wheel weights.

I'm thinking of adding an IDF armored ambulance, if it looks like some of the guys have dropped off, I will then add it to keep thing's going. There are 2 version of it an M113A1, A2. An yes I will do a full interior on the A2 version.


Building the Impossible Is my main goal!!
  • Member since
    July 2004
  • From: Oregon, Rain country U.S.A.
Posted by russianfist on Tuesday, July 1, 2008 1:34 PM

Hey guy's.

I'm still in the build and got alot done last night.

I added some PE parts and other goodies to the turret and have started some things on the hull.

Because this is a fictional vehicle I hesitate to enclose the sponsons to save some time but yet I want it to look as real as possable.

I will take pics today and post them ASAP.

I am not as fast a builder as most people but she's getting their.LOL

You got a telegram from headquarters today. Headquarters--what is it? Well, it's a big building where generals meet, but that's not important right now. [ img] f_armorsecretm_ac7eb73[/ img]
  • Member since
    October 2007
Posted by White_R34 on Wednesday, July 2, 2008 10:46 AM

Hay Russ take your time, it's not that some of us are fast we just have a little more time that's all. The number one reason I want to get the MUTT done is so I can concentrate all my energy on the Merkava.

You all Remember Russianfist's SPG Concept.

Building the Impossible Is my main goal!!
  • Member since
    September 2006
  • From: Dripping Springs, TX, USA
Posted by RBaer on Wednesday, July 2, 2008 2:44 PM

W-R34, time to model comes unexpectedly, sometimes.....Wife had a girls' party in the pool last night, so:

Tow shackles from the scrapped Merk

Crew tent, smoke grenade boxes (mounts not finished) and mantlet Blazer. This time for the crew tent, I folded up the tissue first, then soaked it briefly in glue/water, and it retained its shape and definition much better than trying to fold wet tissue as I have done in the past.

Still lacking is the commander's MG, radio antenna masts, wind sensor cap and tow cables. The covers on the smoke grenade boxes are Aves putty, kind of came out like a shower cap, but should look better once painted. I also used some Aves to make a small bed roll, stashed in the turret basket.

This photo doesn't show the clear definition of the rolled sheet of putty, but it does look exactly like the rolled foam pads that seem to hung all over Israeli AFVs.

Russianfist, keep after it, I'm looking forward to more pics.

Apprentice rivet counter.

  • Member since
    October 2007
Posted by White_R34 on Wednesday, July 2, 2008 3:43 PM
WOW wow and more WOW! your work is just "Extraordinary"!!! Make a Toast [#toast]Bow [bow]Bow [bow]Bow [bow]
Building the Impossible Is my main goal!!
  • Member since
    September 2006
  • From: Dripping Springs, TX, USA
Posted by RBaer on Wednesday, July 2, 2008 3:54 PM
Why, thank you sir. Looking forward to painting this one.......

Apprentice rivet counter.

  • Member since
    August 2007
  • From: Peterborough, Ontario
Posted by Townsy11 on Wednesday, July 2, 2008 10:10 PM

WOW! Superb work going on this GB, I really need to chime in more often! RBaer your Magach is looking fantastic and as is your MUTT Vince!

"The object of war is not to die for your country, but to make the other bastard die for his."-- General George S. Patton
  • Member since
    July 2004
  • From: Oregon, Rain country U.S.A.
Posted by russianfist on Thursday, July 3, 2008 1:26 AM

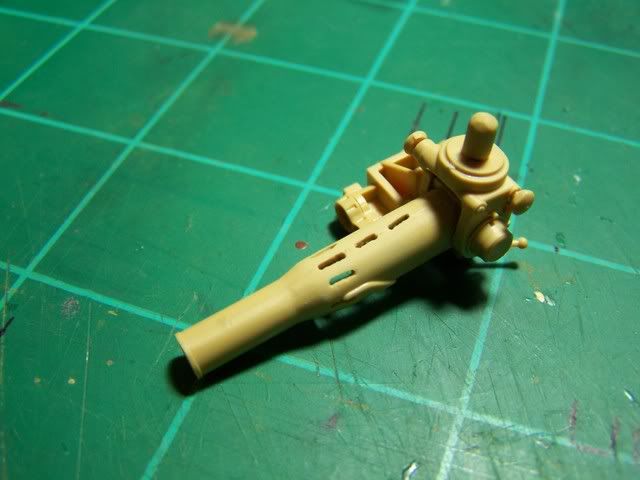
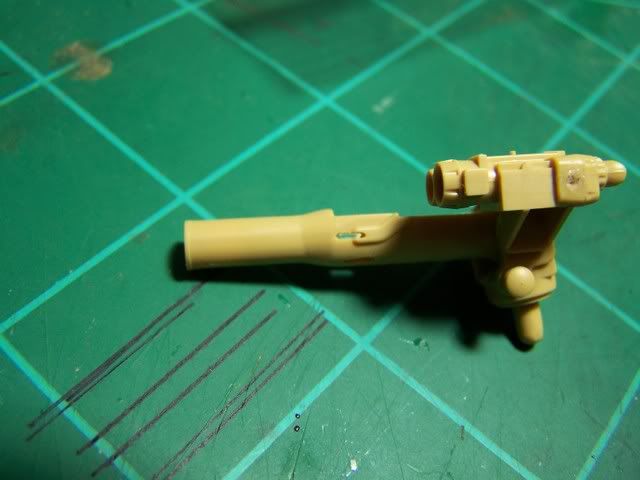
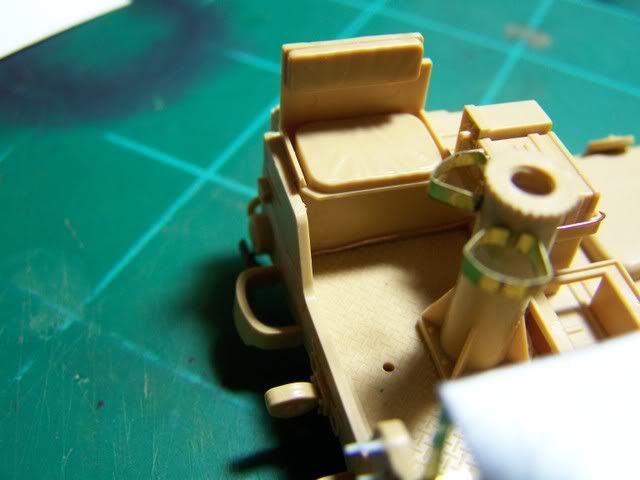
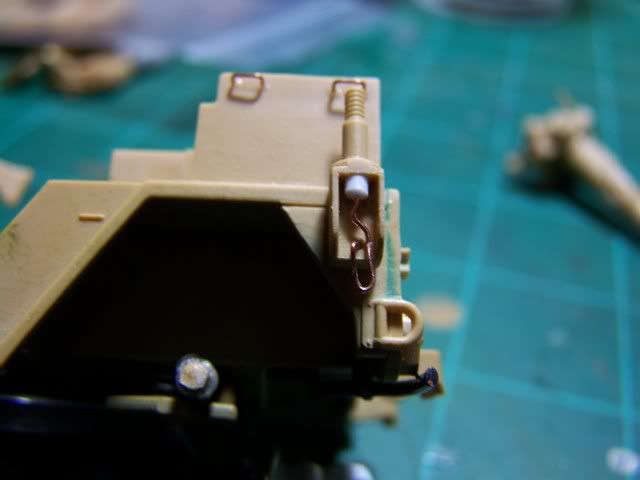
A little progress but i have been laid up with the flu for a couple days (during my vacation no less).

The white ball is part of the Advanced Battlefield Location Infomation System.

I also added covers to the smoke dischargers

I added some PE tie downs and changed the drivers hatch.

I think if I feel better tomorow I will close in the sponsons

and add the skirt armor on the hull.

Your guys work is outstanding Bow [bow] I am hummbled.

P.S. Before I get painting on this one can anyone here tell me why the IDF painted some items on their armored vehicles a bright banner red (like tow hooks,smoke dischargers,electical connections, and such)?

It seems a bit random to me but I'm sure ther's a system to it.

You got a telegram from headquarters today. Headquarters--what is it? Well, it's a big building where generals meet, but that's not important right now. [ img] f_armorsecretm_ac7eb73[/ img]
  • Member since
    October 2007
Posted by White_R34 on Monday, July 7, 2008 12:12 PM
russianfist that M113 turret part is a nice tuch me likesWink [;)] she's coming along realy well. Well as for my builds I'm detail painting the jeep and working on the Merkava's turret exterior till the book I ordered comes in to help me out with the interior of the body & turret.
Building the Impossible Is my main goal!!
JOIN OUR COMMUNITY!

Our community is FREE to join. To participate you must either login or register for an account.

SEARCH FORUMS
FREE NEWSLETTER
By signing up you may also receive reader surveys and occasional special offers. We do not sell, rent or trade our email lists. View our Privacy Policy.