SEARCH FINESCALE.COM

Enter keywords or a search phrase below:

First Annual Berny Memorial Group Build

224655 views
3649 replies
1 rating 2 rating 3 rating 4 rating 5 rating
  • Member since
    November 2010
  • From: Lafayette, Indiana
Posted by Son Of Medicine Man on Wednesday, November 14, 2012 6:39 PM

Gamera

Thanks Ken, funny I've got a pile more of the Yorktown, just figured I'd post the aircraft related ones.  I love digital cameras, I can fit over 340 photos on a card the size of a matchbook so there's really no reason not to go 'snap-happy'!

I totally agree with you Cliff!  Man I wish I had a digital camera back in my earlier years.  So many times I did not have enough film with me to take all the pictures I wanted to, not to mention the cost of developing the pictures and the film itself!

Ken

  • Member since
    November 2010
  • From: Lafayette, Indiana
Posted by Son Of Medicine Man on Wednesday, November 14, 2012 6:42 PM

Bockscar

Son Of Medicine Man

Hi Everyone,

Here are the pictures that I promised last night.  In this picture you can see the difference in height from the original wheel well and the new Aires resin piece.  You can see the part of the left original wheel well in the left side of the picture.  That is the air brakes directly behind the wheel wells.

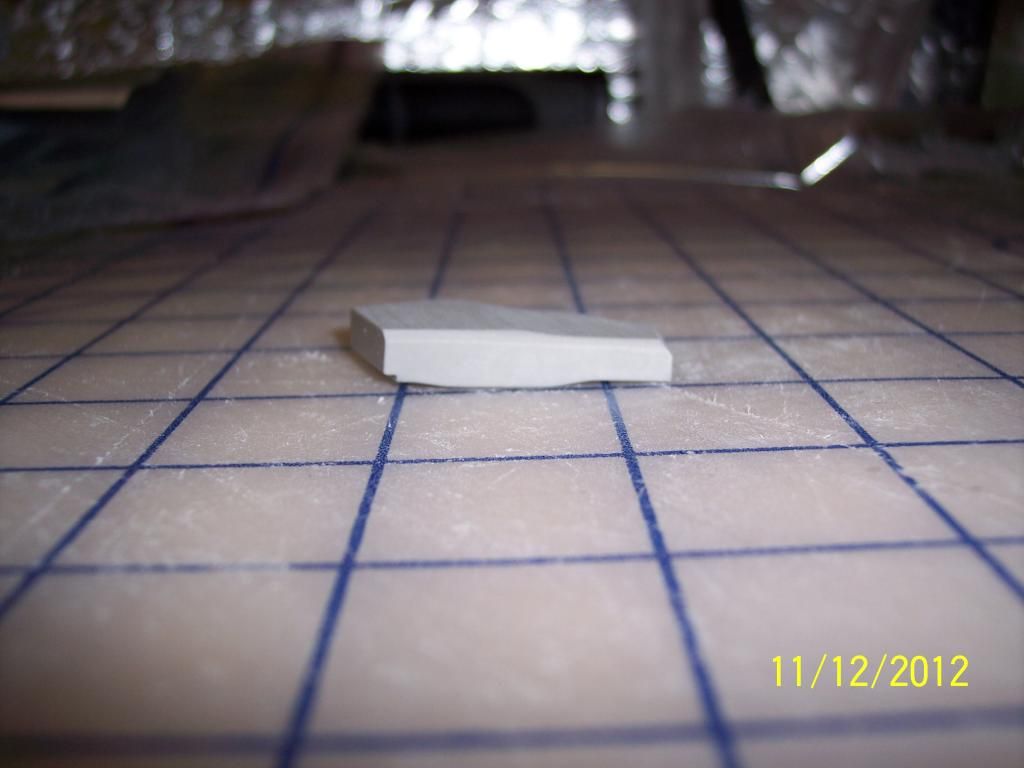
 And here is a picture of the other piece:

I mixed up some epoxy and glued the avionics bay back together.  Hopefully it will hold together so I can get started on the fuselage tomorrow.

By the way Dom, I always turn on my vent whenever I do any sanding or cutting on resin.  In fact, I turn on my vent any time I use any toxic substances such as epoxy, super glue, paint, etc.

Ken 

Ken;

Your patience is showing, very nice sculpting there!

Dom

Thank you for the compliment Dom!  Coming from you (being an artist) that really means a lot!  Smile 

Ken

  • Member since
    February 2010
  • From: Ontario, Canada
Posted by Bockscar on Wednesday, November 14, 2012 6:56 PM

Well Ken;

I can see how you contoured the cross-sectional outline of the wing root bulge to get that wheel well to fit snug! That means you are becoming an artist alright!

  • Member since
    February 2010
  • From: Ontario, Canada
Posted by Bockscar on Wednesday, November 14, 2012 7:27 PM

Hey Guys,

Rich is very sick with pneumonia.

He's had shots for it, but is pretty much

bed-ridden for a while.

He asked me to mention the Secret Santa GB,

I think I'll throw in a beginner's kit for a new enthusiast.

Link here:

http://cs.finescale.com/fsm/modeling_subjects/f/29/p/150747/1614511.aspx#1614511

His computer is also on the fritz so he will be rare.

Here's hoping you get better soon pal!Smile

Dom

  • Member since
    September 2010
  • From: California
Posted by mikeymize on Wednesday, November 14, 2012 7:32 PM

 Finally getting a chance to catch up on postings. I'm still using the "old sable brush" and certainly did so on the power plant as required. Did a little dry brushing etc. even though won't be seen; if only for practice. I'm currently doing much sanding and smoothing of the fuselage seams in prep of the metalizer. I'm a huge fan of century series aircraft Ken and hope to take what I'm learning and apply it to those builds when the time comes, plus when I get my Badger up and running I may try Alclad on some. BTW, the threads about using film instead of digital shows our collective age lol!

 I have been having a real heck of a time trying to determine what color to paint the radome in the intake of this jet. I've seen some a pale blue a green and even one red. I'm leaning toward the blue. I'm not sure how essential it is to accuracy but would like to come as close to real as possible. That being said, I could always just keep it roughly the same color as the rest of the plane but really would like to contrast it if possible. Any ideas / info will be much appreciated!

"Time you enjoy wasting is not wasted time".


  • Member since
    February 2010
  • From: Ontario, Canada
Posted by Bockscar on Wednesday, November 14, 2012 7:37 PM

Hey Mizer;

Given the Soviet era shortages of everything all the time,

I'll bet they painted in what ever color came out of the unmarked containers.

You do pretty well with that sable, but yeah, nothing like badger.

Dom

PS, Mizer, you've checked out the MiG Alley GB?

http://cs.finescale.com/fsm/modeling_subjects/f/29/t/137627.aspx

  • Member since
    April 2012
  • From: USA
Posted by Striker8241 on Wednesday, November 14, 2012 8:09 PM

Son Of Medicine Man

The vent I am using is a bathroom vent.  I went to the hardware store and purposely bought the highest air volume output unit they had.  I also got it with lights so it has a double function.  It really moves the air when I turn it on.  I also chose the quietest unit at that air volume since I did not want to go deaf.  It was almost the most expensive unit they had but worth every penny.  The only unit higher in price had heat in it but I did not see a purpose for that.

Ken

Cool! I didn't think of that!. As a matter of fact, I have one somewhere around the house - never installed it. Wonder where it is ....

Thanks!

Russ


  • Member since
    November 2010
  • From: Lafayette, Indiana
Posted by Son Of Medicine Man on Wednesday, November 14, 2012 8:14 PM

mikeymize

 Finally getting a chance to catch up on postings. I'm still using the "old sable brush" and certainly did so on the power plant as required. Did a little dry brushing etc. even though won't be seen; if only for practice. I'm currently doing much sanding and smoothing of the fuselage seams in prep of the metalizer. I'm a huge fan of century series aircraft Ken and hope to take what I'm learning and apply it to those builds when the time comes, plus when I get my Badger up and running I may try Alclad on some. BTW, the threads about using film instead of digital shows our collective age lol!

 I have been having a real heck of a time trying to determine what color to paint the radome in the intake of this jet. I've seen some a pale blue a green and even one red. I'm leaning toward the blue. I'm not sure how essential it is to accuracy but would like to come as close to real as possible. That being said, I could always just keep it roughly the same color as the rest of the plane but really would like to contrast it if possible. Any ideas / info will be much appreciated!

Hi Mike M.

I have not done any research on any MiGs so I could not give you any advice there.  Everytime I have seen any footage from that era it has always been black and white.  The U.S. National Air Force Museum has one done in SEA scheme but of course that won't help you.

Ken

  • Member since
    February 2010
  • From: Ontario, Canada
Posted by Bockscar on Wednesday, November 14, 2012 8:20 PM

I got an old 1/4 hp furnace blower fan and built it into a big card board box about 36" long and 20" or so high. i placed curved ducting inside to allow for smooth air flow and maximum over-spray take-up.

i think it moves about close to 700-900 CFM, but I paint inside the hood, and I designed an adaptor so the unit plugs into the outside dryer vent.

These days I wet-sand almost exclusively, i can't take anymore dust. If I get a chance this weekend I'll send pictures.

I think Ken has a great idea there. We do what we gotta' do.

  • Member since
    November 2010
  • From: Lafayette, Indiana
Posted by Son Of Medicine Man on Wednesday, November 14, 2012 8:37 PM

Hi Everyone,

Well the epoxy held and very well.  I did some filing and several fitting tests and no problems!  Here is a picture before I did the final filing.  You can see the panel rail is uneven against the fuselage:

And here it is after I straightened it up:

Well after all that work, I cut out the photo-etch panel rail (which came from the same Verlinden kit) and laid it on top and got a surprise.  It does not exactly match.  It is close, but not close enough:

Which means I have to do some more custom work to make this look right.  And I am going to make this look right.  What I think my plan of attack will be is to glue (epoxy of course!) the avionics panel in place first.  Then cut the fuselage just enough for the photo-etch piece to lay flat on top.  Then with the photo-etch piece out of the way, fill in the areas that need built back up with epoxy and square it off with a file.

Ken

  • Member since
    February 2010
  • From: Ontario, Canada
Posted by Bockscar on Wednesday, November 14, 2012 8:47 PM

Ken,

Will the fuselage panel fit over top of that rail flush with the fuselage when you are done, or is it going to be open permanently?

Dom

  • Member since
    November 2009
  • From: SW Virginia
Posted by Gamera on Wednesday, November 14, 2012 9:38 PM

Dom: yeah she's a Cougar. Probably some photos in there of the whole plane, my stupid ISP is on the fritz again and typing this on the phone or I'd look myself.

"I dream in fire but work in clay." -Arthur Machen


  • Member since
    November 2009
  • From: SW Virginia
Posted by Gamera on Wednesday, November 14, 2012 9:44 PM

Ken: that avionics bay looks great, I really want to see how it looks painted.

"I dream in fire but work in clay." -Arthur Machen


  • Member since
    April 2012
  • From: USA
Posted by Striker8241 on Wednesday, November 14, 2012 9:46 PM

Son Of Medicine Man

What I think my plan of attack will be is to glue (epoxy of course!) the avionics panel in place first.  Then cut the fuselage just enough for the photo-etch piece to lay flat on top.  Then with the photo-etch piece out of the way, fill in the areas that need built back up with epoxy and square it off with a file.

Ken

 
Sounds like a plan, man! Smile.  That's gonna look great, Ken!
 
Russ


  • Member since
    November 2010
  • From: Lafayette, Indiana
Posted by Son Of Medicine Man on Thursday, November 15, 2012 5:49 AM

Bockscar

Ken,

Will the fuselage panel fit over top of that rail flush with the fuselage when you are done, or is it going to be open permanently?

Dom

Hi Dom,

There are three panels that came with the kit that fit over the top.  But as far as I am concerned, why bother with them after all this work?  Unless I wanted to put together a diorama and have them laying on the ground next to the plane.

Ken

  • Member since
    November 2010
  • From: Lafayette, Indiana
Posted by Son Of Medicine Man on Thursday, November 15, 2012 5:50 AM

Gamera

Ken: that avionics bay looks great, I really want to see how it looks painted.

Thank you Cliff for the compliment!  It is getting closer.

Ken

  • Member since
    November 2010
  • From: Lafayette, Indiana
Posted by Son Of Medicine Man on Thursday, November 15, 2012 5:55 AM

Striker8241

Son Of Medicine Man

What I think my plan of attack will be is to glue (epoxy of course!) the avionics panel in place first.  Then cut the fuselage just enough for the photo-etch piece to lay flat on top.  Then with the photo-etch piece out of the way, fill in the areas that need built back up with epoxy and square it off with a file.

Ken

 
Sounds like a plan, man! Smile.  That's gonna look great, Ken!
 
Russ

Thank you Russ!  It is coming together, slow but sure.

Ken

  • Member since
    April 2012
  • From: USA
Posted by Striker8241 on Thursday, November 15, 2012 10:48 AM

Son Of Medicine Man

Bockscar

Ken,

Will the fuselage panel fit over top of that rail flush with the fuselage when you are done, or is it going to be open permanently?

Dom

Hi Dom,

There are three panels that came with the kit that fit over the top.  But as far as I am concerned, why bother with them after all this work?  Unless I wanted to put together a diorama and have them laying on the ground next to the plane.

Ken

Ken,

For some reason, I couldn't find a picture, but I'm pretty sure the avionics bay cover was hinged at the top and had a rod that supported it when open.

Russ


  • Member since
    April 2012
  • From: USA
Posted by Striker8241 on Thursday, November 15, 2012 10:58 AM

Thanks, Dom,

Wet sanding is looking more and more appealing to me. But what about sanding wheels for a Dremel tool? Are there wet sanding wheels and cylinders available?

Russ


  • Member since
    March 2010
  • From: New Zealand
Posted by Scorpiomikey on Thursday, November 15, 2012 12:16 PM

Wet sandings fantastic, but ive found using a sanding wheel on a dremel causes too much heat and melts the plastic, thats my experience with them anyway,

"I am a leaf on the wind, watch how i soar"

Recite the litanies, fire up the Gellar field, a poo storm is coming Hmm 

My signature

Check out my blog here.

  • Member since
    November 2010
  • From: Lafayette, Indiana
Posted by Son Of Medicine Man on Thursday, November 15, 2012 6:09 PM

Striker8241

Son Of Medicine Man

Bockscar

Ken,

Will the fuselage panel fit over top of that rail flush with the fuselage when you are done, or is it going to be open permanently?

Dom

Hi Dom,

There are three panels that came with the kit that fit over the top.  But as far as I am concerned, why bother with them after all this work?  Unless I wanted to put together a diorama and have them laying on the ground next to the plane.

Ken

Ken,

For some reason, I couldn't find a picture, but I'm pretty sure the avionics bay cover was hinged at the top and had a rod that supported it when open.

Russ

Hi Russ,

Sorry friend, but that is incorrect.  I do have pictures, courtesy of "The Modern Phantom Guide:  The F-4 Phantom Exposed" and the panels are held on entirely by screws and come completey off.  Apparently there was not a need to get into this area on a regular basis to warrant a hinged panel or panels.

Ken

  • Member since
    April 2012
  • From: USA
Posted by Striker8241 on Thursday, November 15, 2012 6:24 PM

Son Of Medicine Man

Striker8241

Son Of Medicine Man

Bockscar

Ken,

Will the fuselage panel fit over top of that rail flush with the fuselage when you are done, or is it going to be open permanently?

Dom

Hi Dom,

There are three panels that came with the kit that fit over the top.  But as far as I am concerned, why bother with them after all this work?  Unless I wanted to put together a diorama and have them laying on the ground next to the plane.

Ken

Ken,

For some reason, I couldn't find a picture, but I'm pretty sure the avionics bay cover was hinged at the top and had a rod that supported it when open.

Russ

Hi Russ,

Sorry friend, but that is incorrect.  I do have pictures, courtesy of "The Modern Phantom Guide:  The F-4 Phantom Exposed" and the panels are held on entirely by screws and come completey off.  Apparently there was not a need to get into this area on a regular basis to warrant a hinged panel or panels.

Ken

No problem, bud. My memory isn't too good any more - too long ago. Thanks for the correction.

Russ


  • Member since
    February 2010
  • From: Ontario, Canada
Posted by Bockscar on Thursday, November 15, 2012 6:33 PM

Russ:

Not sure about the Dremel bits for wet sanding. i use waterproof sandpaper and emery paper, and I have pieces of blue foam to act as sanding blocks. The water keeps the grit surface from filling with dust and most importantly, keeps the dust out of the air, I just rinse my portable sanding surface off and the sandpaper too and it's ready for another day.

Dom

  • Member since
    February 2010
  • From: Ontario, Canada
Posted by Bockscar on Thursday, November 15, 2012 6:38 PM

Scorpiomikey

Wet sandings fantastic, but ive found using a sanding wheel on a dremel causes too much heat and melts the plastic, thats my experience with them anyway,

Sounds right Mikey, styrene is so fragile and soft when addressed by a whining Dremel.....one little slip.....lol.....not to mention splattering swarf-fluid all over your hobby room....lol...I'll leave the Dremel cutting to Ken.....Sensei Ninja Ken San, that isSmile

  • Member since
    February 2010
  • From: Ontario, Canada
Posted by Bockscar on Thursday, November 15, 2012 6:57 PM

Okay:

Here's Ken's resin bay:

I think that third photo is the ECS bay, and you can see all the panel screws it needs to keep it snug:

I'm not sure it's even the same bay, but I sure want to get a copy of that book by now for sure!

Dom

  • Member since
    April 2012
  • From: USA
Posted by Striker8241 on Thursday, November 15, 2012 7:00 PM

Bockscar

Russ:

Not sure about the Dremel bits for wet sanding. i use waterproof sandpaper and emery paper, and I have pieces of blue foam to act as sanding blocks. The water keeps the grit surface from filling with dust and most importantly, keeps the dust out of the air, I just rinse my portable sanding surface off and the sandpaper too and it's ready for another day.

Dom

Good information, Dom. I'm going to look into it. Thanks! Big Smile

Russ


  • Member since
    April 2012
  • From: USA
Posted by Striker8241 on Thursday, November 15, 2012 7:10 PM

Hi, All,

Haven't made a lot of progress lately - been pretty busy. I did manage to finish scribing the horizontal sabilizers (see below). I cut the elevators loose and positioned them in a slightly down aspect - something you would often see. I also cut out the trim tabs and gave them a slight up angle just for intrest sake. I also thinned out the vortex generators.

Cheers,

Russ

Tags: B-52D , elevator


  • Member since
    February 2010
  • From: Ontario, Canada
Posted by Bockscar on Thursday, November 15, 2012 7:13 PM

Russ, Get some pieces of 1" dense blue insulating styrofoam, and you can shape them to help sand curved surfaces. I also use soft urethane foam for large contoured areas, the foam keeps the pressure very even on the surface - very usefull for cutting through rough putty patches back down to the surface. i have made dull points, inside curves for sanding curved surfaces, or strips for sanding a fixed piece, kind of like buffing a shoe with a shoe-shine cloth.

Also indispensible are those rubber sanding sticks that look like big black nail files, come in all different grits.

Of course i wrap the sandpaper around pencils, straws, or just make a tube out of it.

If you fold fine a small square of emery paper twice, the sharp corner (where the middle of the square was) is great for 'digging' into tight corners.

I guess when you get down to the 1000 grit or so you get pretty excited about painting! --errr, well, I used to in a former life anyways.....lol

Dom

  • Member since
    February 2010
  • From: Ontario, Canada
Posted by Bockscar on Thursday, November 15, 2012 7:18 PM

Striker8241

Hi, All,

Haven't made a lot of progress lately - been pretty busy. I did manage to finish scribing the horizontal sabilizers (see below). I cut the elevators loose and positioned them in a slightly down aspect - something you would often see. I also cut out the trim tabs and gave them a slight up angle just for intrest sake. I also thinned out the vortex generators.

Cheers,

Russ

Nice work on the trim tabs Russ!Yes

dom

  • Member since
    November 2010
  • From: Lafayette, Indiana
Posted by Son Of Medicine Man on Thursday, November 15, 2012 10:50 PM

Striker8241

Hi, All,

Haven't made a lot of progress lately - been pretty busy. I did manage to finish scribing the horizontal sabilizers (see below). I cut the elevators loose and positioned them in a slightly down aspect - something you would often see. I also cut out the trim tabs and gave them a slight up angle just for intrest sake. I also thinned out the vortex generators.

Cheers,

Russ

Nice work once again Russ!!  Top notch!!  Love the detail!  Yes  Yes 

Ken

JOIN OUR COMMUNITY!

Our community is FREE to join. To participate you must either login or register for an account.

SEARCH FORUMS
FREE NEWSLETTER
By signing up you may also receive reader surveys and occasional special offers. We do not sell, rent or trade our email lists. View our Privacy Policy.