Okay! Here's a quick repost from my WIP:
Okay. I've finally managed to wrap this up and clean off my bench. Since this kit from Academy has a tricky way of doing the props, I thought I'd drop a couple of quick photos of what I came up with and share what I might do next time. So buckle up and strap in cause I'm going to load this post with pictures! =D
To start...this is what the Academy kit sets up for the props. If they would have just formed the cone a little higher up it would have negated the need to remove the seam it leaves behind and the panel line they have could take it's place.
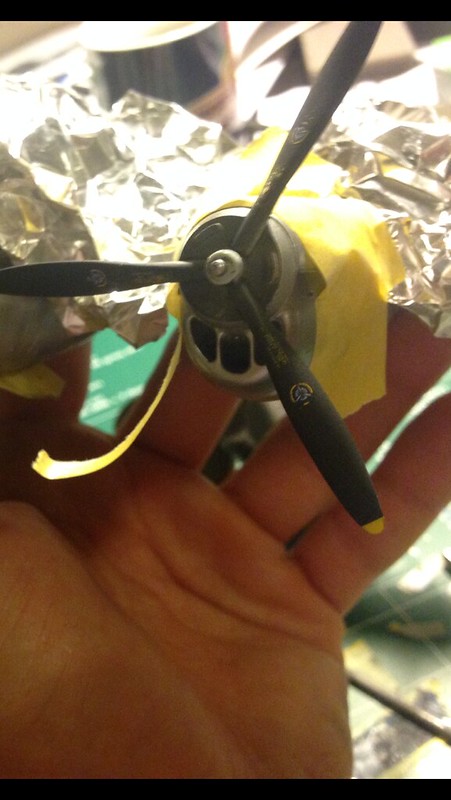 image by brittvallot, on Flickr
This time around I wanted to ensure that these props would spin, so before I placed the stopper onto the prop assembly I put a drop of mineral oil onto the rod that receives the prop. Just occurred to me as I was doing it and it works like a charm. =] As far as taking care of the seam here, I wasn't having the same luck with the CA I was using for some reason so I tried my hand at some Milliput for the first time and man that stuff is sweet. I think it made all the difference. To paint the cone of the spinner, I cut a 1/2 in circle and placed over the cone to mask it for paint/clearcoat/flat finishes.
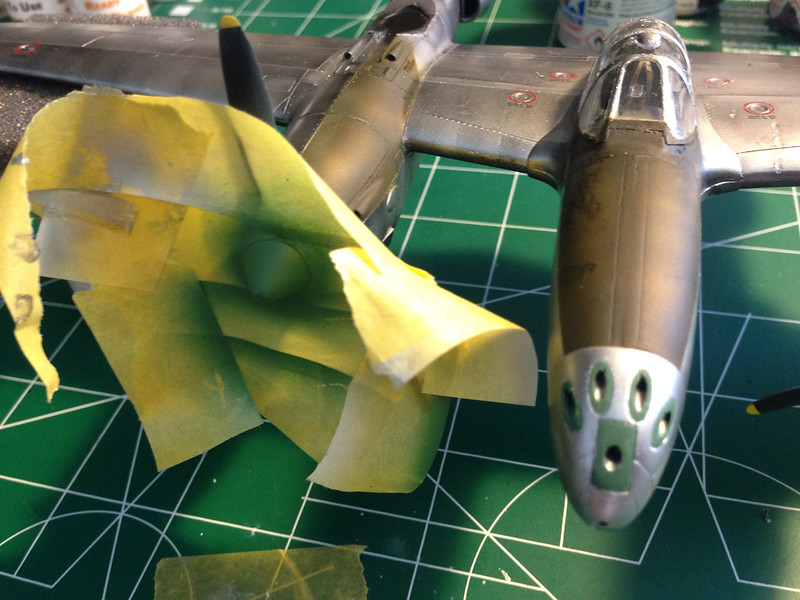 image by brittvallot, on Flickr
I went back and scratched away a little paint here and there to show the work that would've been done by removing it to get to the props themselves.
Okay. So that's that. Next time I think what I might do is to use a tube cutter to cut the bottom half of this cone to match up the first part of the prop assembly and take care of the seam before I even place it on the plane. That way the painted part of the cone can be painted and then glued on after if you're careful about such things. Either way it will make it loads easier to take care of the seam if it's something that's important to you. That's my thoughts on that. Did I mention I have perfect hindsight. lol
And here's the finished set of pictures. I have found that my new lightbox doesn't exactly accommodate planes larger than a that of a single engine fighter at 1:48. So I apologize for some of these. I did the best I could with what I've got. Next time I do one this big I'll try something a little different.
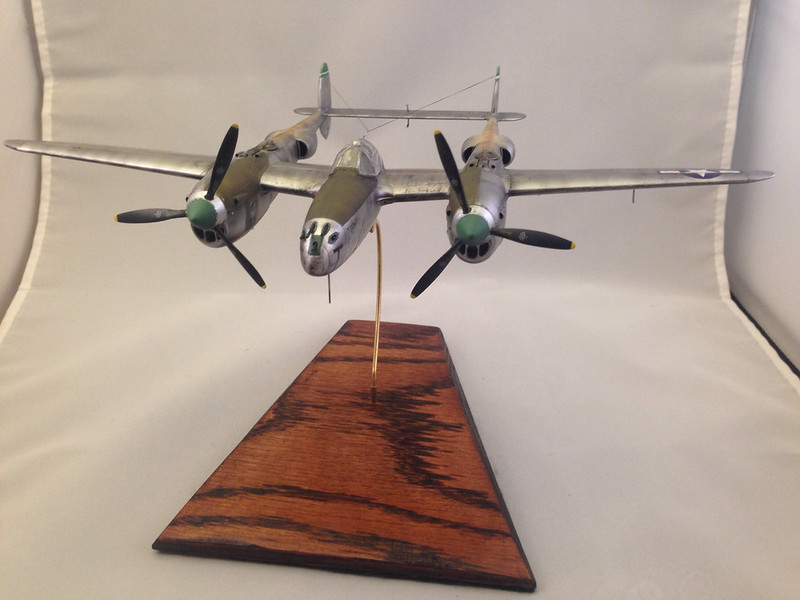 image by brittvallot, on Flickr
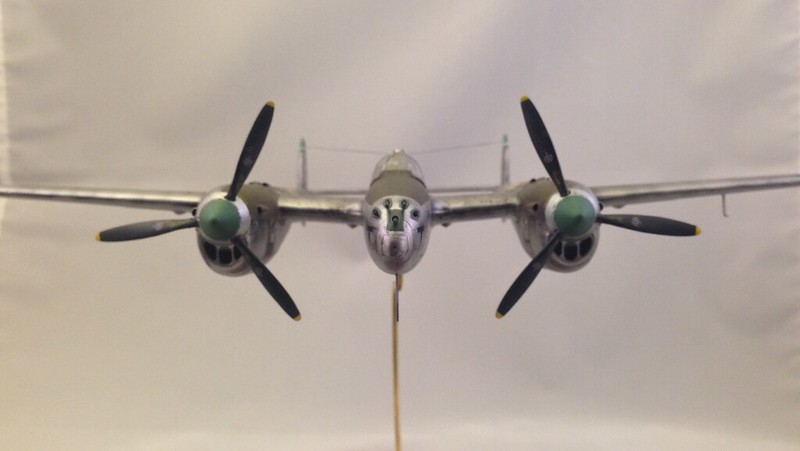 image by brittvallot, on Flickr
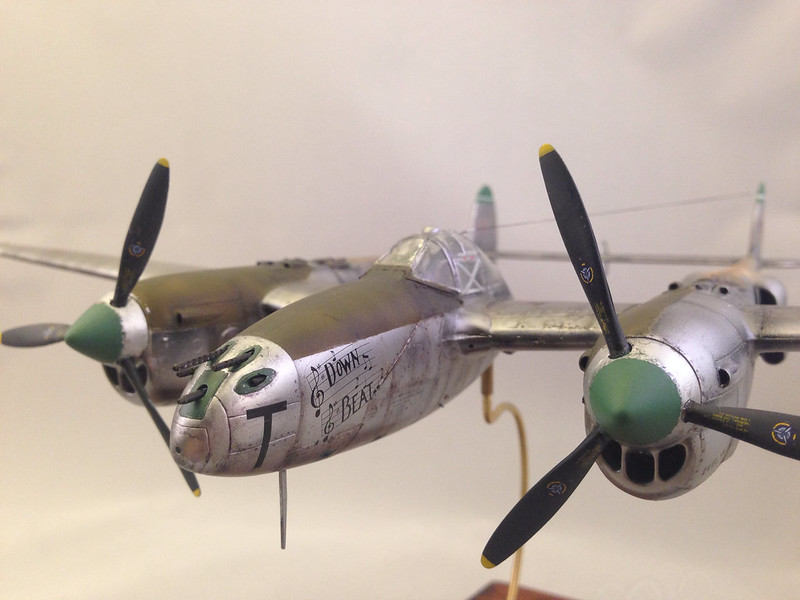 image by brittvallot, on Flickr
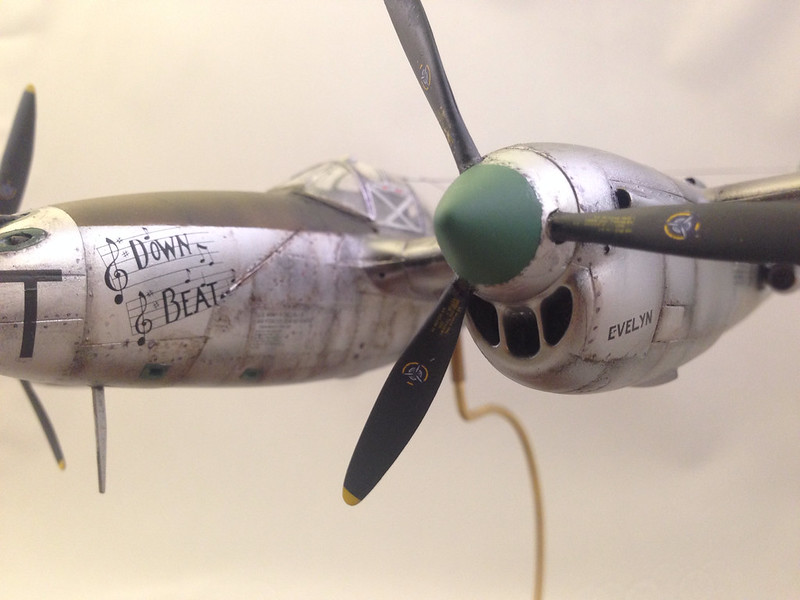 image by brittvallot, on Flickr
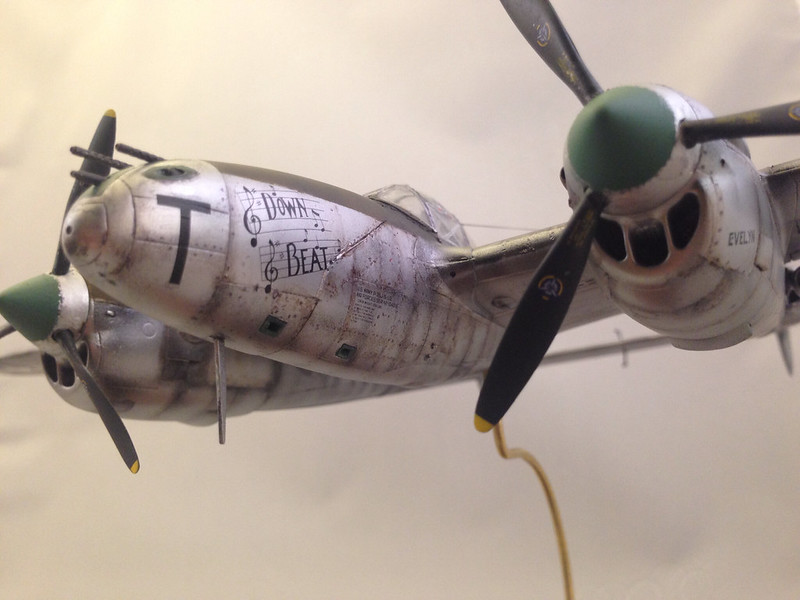 image by brittvallot, on Flickr
 image by brittvallot, on Flickr
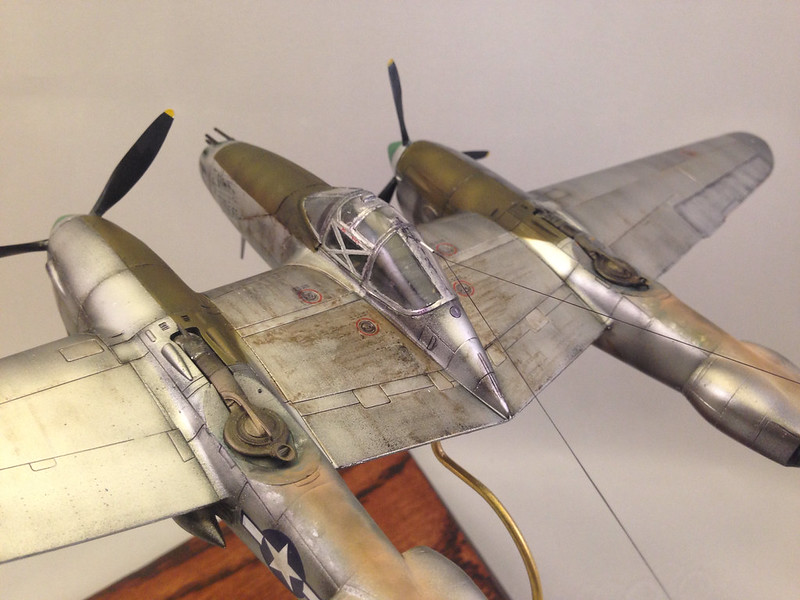 image by brittvallot, on Flickr
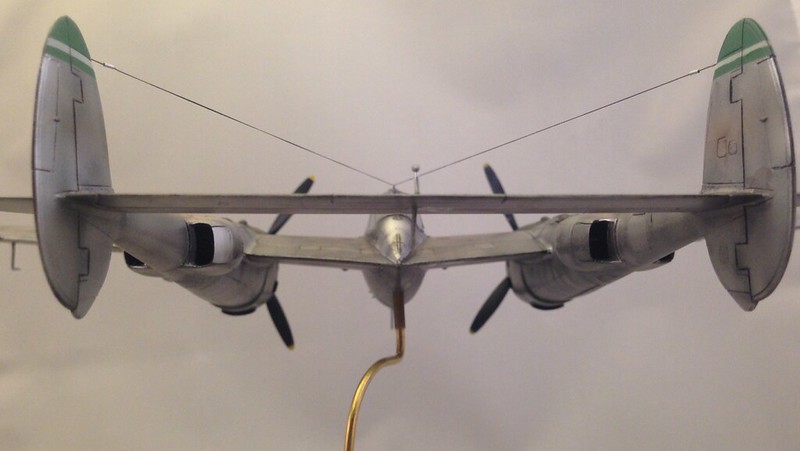 image by brittvallot, on Flickr
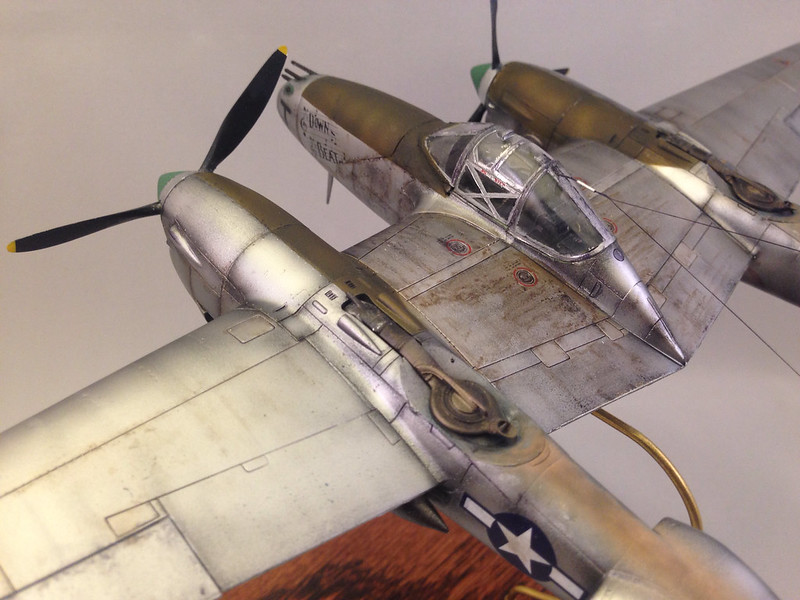 image by brittvallot, on Flickr
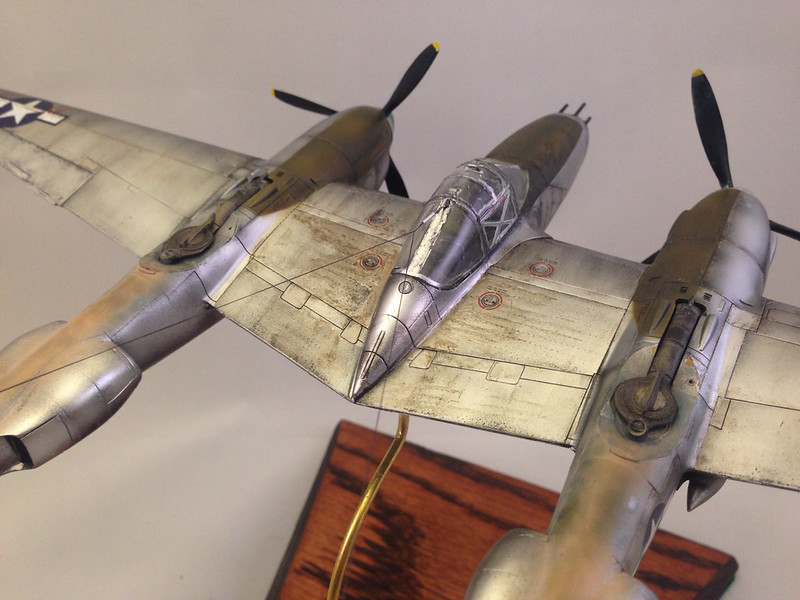 image by brittvallot, on Flickr
 image by brittvallot, on Flickr
Here's a detail of the seam cleaned up. I also replace this intake with an Albion nickel tube. Some were just the piping and not a sleeker intake.
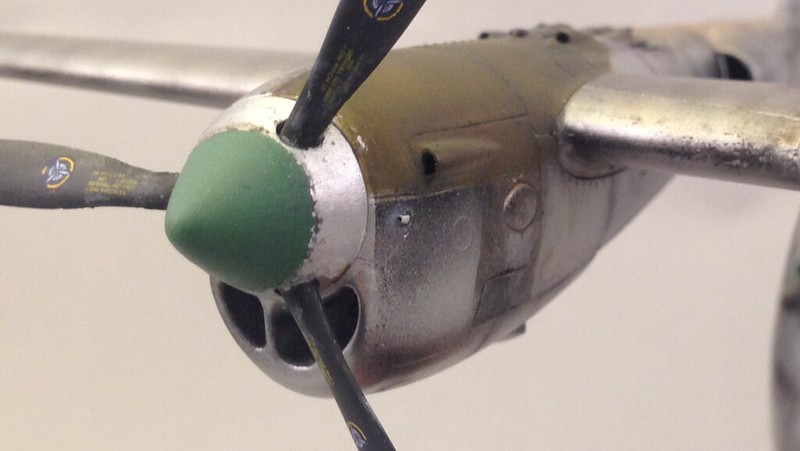 image by brittvallot, on Flickr
Detail of static pitot tube.
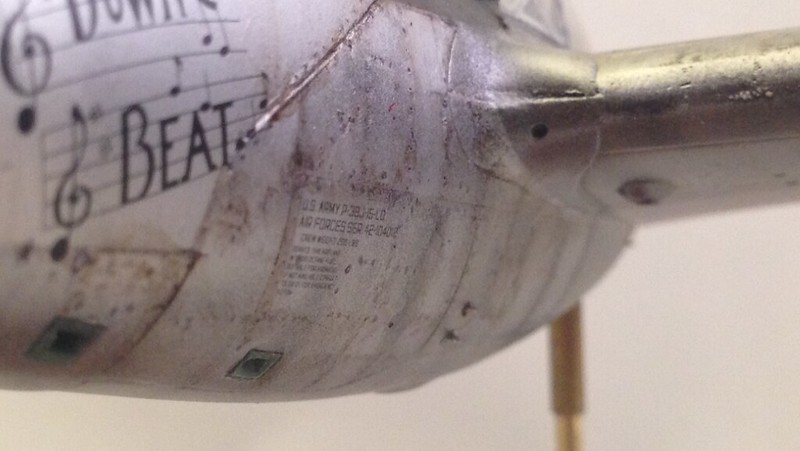 image by brittvallot, on Flickr
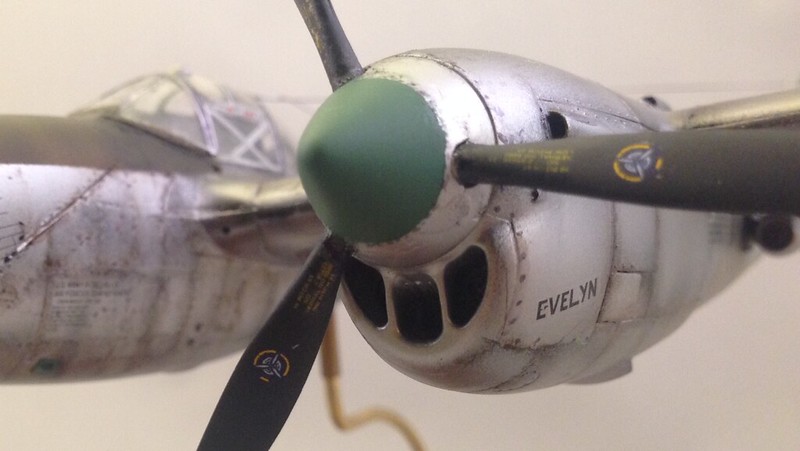 image by brittvallot, on Flickr
For the radio aerials, I have finally found the way I always want to make these!! I forget who it was on here that turned me on to EZ Line, but I did pick up the smaller gauge it comes in and it has made all the difference. This combined with the Albion tube set has allowed me to keep from pulling my hair out and has made this part of the build much more rewarding. I start by cutting two short lengths to act as the turnbuckles(term?? the word escapes me...any help here is appreciated. =]) and a longer one for the main attachment to the back of the cockpit. I slide the EZ Line through the smaller tube and place a drop of glue on each end of it to secure it's place along the line. Next, I secure the line to the vertical stabilizer with a small dab of CA. I pulled an appropriate length of line and passed it through the longer piece of tube and the left about a half inch here and doubled it back through being careful not to pull it all the way out. I place a drop of CA on the rear side to lock it down and then twist up the forward part of the line and tack it down with a dab of CA carefully onto the back hinge just behind the canopy door. Then, I pull the line taut so that it's equidistant on each side, repeat with the other smaller tube, and secure the line. Simple. I've never had a radio line come out so well before and be so tough to breaking. I have to laugh at how happy that makes me. =]
 image by brittvallot, on Flickr
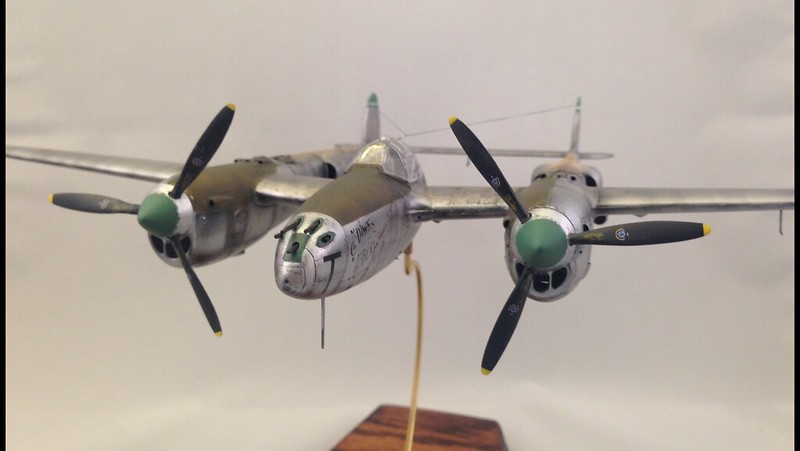 image by brittvallot, on Flickr
 image by brittvallot, on Flickr
Figured I'd show those spinning props too. =P
Any and all thoughts are welcome. Aside from the cockpit debacle, this was a very rewarding kit to build and with a little extra TLC here and there you'll get more bang for buck. I'd recommend this kit to anyone to try and do. Thanks for stopping to look.