SEARCH FINESCALE.COM

Enter keywords or a search phrase below:

"Century series Jets" GB 2014-2015 * CLOSED *

64890 views
891 replies
1 rating 2 rating 3 rating 4 rating 5 rating
  • Member since
    December 2012
Posted by flyerduke on Saturday, February 21, 2015 6:17 PM

Good to see you back at it 68GT.  Looks good so far.

I painted the last red stripe(s) this morning.  I also received the replacement insignia that a very generous Eagle90 sent me.  Thanks Bobby.  Hopefully I will have time to make some progress this evening or tomorrow.

Craig


  • Member since
    August 2014
  • From: USA
Posted by mailwalker on Saturday, February 21, 2015 8:33 PM

Good looking paint flyerduke.Yes

Finally got some free time and got a little more done on the F-100D. Installed the cockpit, joined the fuselage halves,wings, nose and exhaust. Nothing really lined up perfectly, so looks like quite a bit of sanding in my future. Any tips on sanding seams while not losing detail in the immediate area will be appreciated! 

Will this be of any use for filling some of the unevenes along the seams, and a gap along the wing roots?

http://www.tamiyausa.com/product/item.php?product-id=87075

I have it, never used it. I also have their putty. Have never used it either.

Still on the learning curve of producing better models.Embarrassed

At least it's starting to look like something that could fly.Smile

Thanks for the help folks, and everyone elses builds look great.Yes

It doesn't matter that you ARE the best, but that you DID your best!


  • Member since
    January 2014
  • From: Toronto
Posted by Rob S. on Saturday, February 21, 2015 10:44 PM

Both builds looking great...looking forward to that 107s big finish! Yes

______________________________________________________________________________


On the Bench: Nothing on the go ATM

  • Member since
    August 2014
  • From: USA
Posted by mailwalker on Sunday, February 22, 2015 3:52 PM

Sanding, sanding, sanding. Still couldn't get seams smooth. Sooooo.......Taped the seams that had raised detail close by and used Tamiya putty white. Hopefully will be able to get that smoothed out. A little leary about using this stuff what with all the precautions on it. Is it really that hazardous, anyone know? What precautions do you use? How long should it dry before sanding?

The worst area for fit was the burner can area!

It doesn't matter that you ARE the best, but that you DID your best!


  • Member since
    December 2012
Posted by flyerduke on Monday, February 23, 2015 11:14 PM

MW - I haven't used the Tamiya putty much, but I let it dry for a couple hours before sanding.  Filling and sanding is one thing about modeling I don't like.  I guess it's a necessary evil that comes with some older kits.  Just keep at it.  Your 100 is lookin' good.

I finished applying the decals this evening and glued the center line fuel tank on.  Next is the landing gear, doors, some paint touch ups, and a pin wash.  Gettin' close.

Craig

  • Member since
    December 2012
Posted by flyerduke on Tuesday, February 24, 2015 8:10 PM

I started the pin wash on the belly this evening.  It looks a little messy at the moment, but I'll wipe it down shortly.  Boy, I hope I don't screw it up.

Craig

  • Member since
    December 2012
Posted by flyerduke on Tuesday, February 24, 2015 9:21 PM

OK, I think I got the pin wash done.  Or at least that's all I'm going to give it.  Don't want to take any chances.  The wash really brought out the panel lines in the red areas.  Gonna let it dry for awhile, then shoot a clear coat on it.  Landing gear and doors are next then the probes.  Gettin' close.

Craig


  • Member since
    December 2012
Posted by flyerduke on Wednesday, February 25, 2015 10:24 PM

I got the landing gear on this evening.  I'll let it dry over night before I flip it over and see how it sits.  I put some clay in the nose section, so I hope I don't have a tail sitter.  I'll glue on the gear doors tomorrow.  Gettin' real close. Yeah

Craig

  • Member since
    December 2012
Posted by flyerduke on Thursday, February 26, 2015 9:18 AM

Flipped er over and tested the landing gear.  It's not a tail sitter.  Yeah  The nose gear is pretty flimsy, so I need to be careful.  Doors, exhaust cone, and nose probe next.

Craig

  • Member since
    December 2003
  • From: 37deg 40.13' N 95deg 29.10'W
Posted by scottrc on Thursday, February 26, 2015 11:45 AM

Looking good Craig.  

  • Member since
    January 2014
  • From: Toronto
Posted by Rob S. on Thursday, February 26, 2015 5:18 PM

Looks great Craig..didn't know the centreline tank on that bird sat flush to the bottom like that. Very unique. I like this plane more and more.

______________________________________________________________________________


On the Bench: Nothing on the go ATM

  • Member since
    December 2012
Posted by flyerduke on Saturday, February 28, 2015 12:08 AM

Gettin' real close.  I added the landing lights and doors this evening.  Just have the nose probe and exhaust nozzle to install, and the wing tip probes to stripe.

Craig

  • Member since
    January 2014
  • From: Toronto
Posted by Rob S. on Sunday, March 1, 2015 12:44 AM

Yup, she's close now, eh? Right on Craig...Yes

______________________________________________________________________________


On the Bench: Nothing on the go ATM

  • Member since
    March 2010
  • From: Boston
Posted by mach71 on Sunday, March 1, 2015 8:06 PM

That sure is a pretty airplane Craig!

  • Member since
    December 2003
  • From: 37deg 40.13' N 95deg 29.10'W
Posted by scottrc on Monday, March 2, 2015 8:46 AM

Almost there CraigYes

  • Member since
    December 2012
Posted by flyerduke on Monday, March 2, 2015 9:46 PM

Thanks guys.  I spent a few minutes on the plane this evening.  I striped the wing tip probes and glued on the nose probe.  Next I'm going to shoot one last clear coat then glue on the exhaust cone, paint the wing tip navigation lights, and peel the mask off the canopy.  Should be done after that.  Just hope the canopy mask comes off without any trouble.  It's been on there for almost 2 months.  Fingers crossed.

Craig

  • Member since
    December 2003
  • From: 37deg 40.13' N 95deg 29.10'W
Posted by scottrc on Wednesday, March 4, 2015 3:08 PM

I have my toes crossed as well when you peel that masking tape off.

  • Member since
    December 2012
Posted by flyerduke on Thursday, March 5, 2015 7:51 PM

Hey gang.  I wanted to let everyone know I finished the 107. Yeah  The canopy mask came off just fine.

I'll post a bunch of photos tomorrow when I have better light.  It actually looks pretty cool.

Craig

  • Member since
    January 2014
  • From: Toronto
Posted by Rob S. on Friday, March 6, 2015 4:48 AM

Right on Craig...looking forward to the reveal!

______________________________________________________________________________


On the Bench: Nothing on the go ATM

  • Member since
    December 2012
Posted by flyerduke on Friday, March 6, 2015 10:34 AM

OK, as promised, here's a few pics of my finished F-107.  Please bear in mind, I'm no pro photographer.  The photos will prove that.

I'd like to thank everyone for their support and advice during this build.  I would have put this sucker aside if it wasn't for you guys.  Thanks.

Overall, I'm happy with this build.  It's not perfect by any means.  Several issues were self inflicted (cracked canopy and a not so smooth NMF).  Also, there were some major gaps and the not so good decals.  This is my second completed model over the last 20 years.  So like I said, I'm happy with it.  It's just a cool looking airplane.

Rob had asked my to give my thoughts about this kit.  Sort of a review.  I'll do that in my next post.

Craig

Please use the top photo for the completed build section.

  • Member since
    December 2012
Posted by flyerduke on Friday, March 6, 2015 11:12 AM

Rob had asked me for sort of a review of this kit.  Now bear in mind, I'm no professional reviewer.  I call as I see it.

I picked this kit up off of ebay last Nov.  I think I paid $15 which included the shipping.  There are current 15 F-107 kits listed on ebay.  It's not that rare.  You might even be able to pick it up at your LHS for around $20.

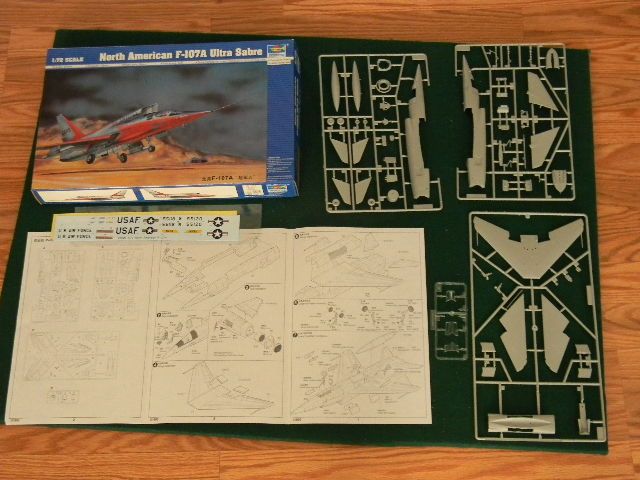
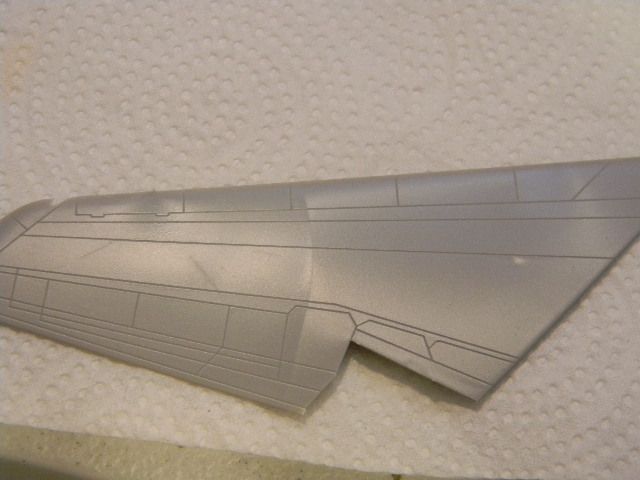
After first inspection, I noticed very nice engraved panel lines on the exterior parts.  However, there is very little cockpit detail and no detail at all in the landing gear bays.  Also the sprue attachment points are pretty thick.  Decals are sparse.  Only a few stencils.

Test fitting showed some serious gaps.  Be prepared to do some filling and sanding.

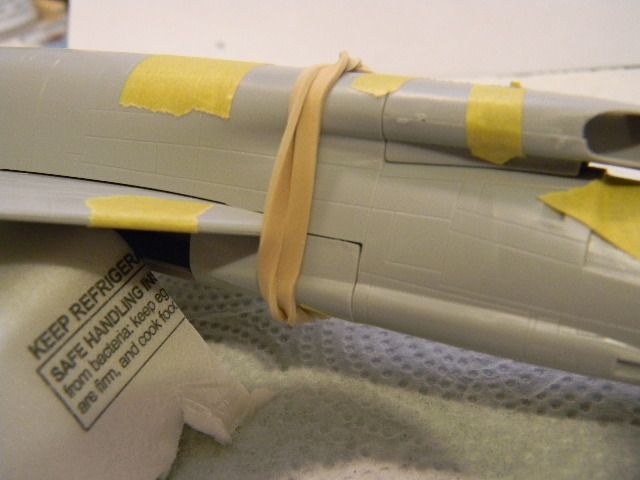
This paint scheme was quite ambitious for me.  This was my first NMF and masking the red portion took hours.  If I build this again, I would leave the horizontal and vertical stabilizers off until after painting.  It would make masking and painting much easier.  Both stabilizers fully move on a pivot point on the real aircraft.  So a small gap is expected.  I had some issues with the decals.  A couple broke and they just didn't want to suck down to the surface.  Even using Micro Sol.  Most of the decals on this plane are basic USAF.  So if you have so extra quality USAF 1/72 scale decals, I'd use them.

Would I recommend this kit, yes.  I think someone who is patient and has a few aircraft builds under their belt should have no problem.  Lots of room for scratch building.  For me, the exterior paint scheme was the toughest part of the build.  Careful with that canopy too.  I'm glad I built this kit.  It was fun, for the most part.  Hope this helps.

Craig

Here is a help link for painting.

http://www.primeportal.net/hangar/bill_spidle2/f-107a_55-5118/

  • Member since
    April 2010
Posted by Theuns on Friday, March 6, 2015 11:26 AM

Flyerduke, that is one very cool plane you built there mate , the maskng and paintwork is very neat.

All the hardship I am sure will be soon forggotten with that good result :-)

Thanx for takingpart.

Theuns

  • Member since
    January 2014
  • From: Toronto
Posted by Rob S. on Friday, March 6, 2015 6:09 PM

Craig...Wicked!! You did a great job on a really unique (if not a bit bizzare designed) aircraft. Many thanks for that review. Yup, she's a challenge for sure. But, to get that one in the collection, she seems to be the only game in town. I will update the front page shortly!! Again, well done mate!!                      YesCoolYes

______________________________________________________________________________


On the Bench: Nothing on the go ATM

  • Member since
    January 2014
  • From: Toronto
Posted by Rob S. on Friday, March 6, 2015 6:15 PM

Front page updated with that beauty done by flyerduke!!

______________________________________________________________________________


On the Bench: Nothing on the go ATM

  • Member since
    December 2012
Posted by flyerduke on Friday, March 6, 2015 6:50 PM

Thanks guys.  As a rookie, this kit was a challenge.  For an experienced modeler, it shouldn't be too tough.  I'd love for some company to produce a 1/48 scale version of this kit.  It would be big, but it would be sweet.

Craig

  • Member since
    February 2010
  • From: New Jersey
Posted by 68GT on Friday, March 6, 2015 8:42 PM

That's a nice one Craig!

On Ed's bench, ???


  • Member since
    March 2010
  • From: Boston
Posted by mach71 on Saturday, March 7, 2015 6:41 PM

Really nice job on an interesting aircraft!

  • Member since
    December 2003
  • From: 37deg 40.13' N 95deg 29.10'W
Posted by scottrc on Monday, March 9, 2015 11:35 AM

YesGreat job Craig!Beer

  • Member since
    December 2012
Posted by flyerduke on Friday, March 13, 2015 10:12 PM

Thanks for the kudos guys.   Is there anyone currently working on a model for this build?

Craig

  • Member since
    January 2014
  • From: Toronto
Posted by Rob S. on Saturday, March 14, 2015 6:04 AM

Good question Craig...I was wondering that myself? Quite quiet....though I've stalled on my  projects of late as well.

______________________________________________________________________________


On the Bench: Nothing on the go ATM

JOIN OUR COMMUNITY!

Our community is FREE to join. To participate you must either login or register for an account.

SEARCH FORUMS
FREE NEWSLETTER
By signing up you may also receive reader surveys and occasional special offers. We do not sell, rent or trade our email lists. View our Privacy Policy.