SEARCH FINESCALE.COM

Enter keywords or a search phrase below:

The 2015 /16 Red Hot and Rollin Automotive Group Build--Ended

120392 views
2225 replies
1 rating 2 rating 3 rating 4 rating 5 rating
  • Member since
    March 2012
  • From: Corpus Christi, Tx
Posted by mustang1989 on Wednesday, January 7, 2015 10:56 AM

Hey Seabe. You got any pics of this bubba? Sounds like sitcheeation!


 Forum | Modelers Social Club Forum (proboards.com) 

  • Member since
    March 2012
  • From: Corpus Christi, Tx
Posted by mustang1989 on Wednesday, January 7, 2015 11:49 AM

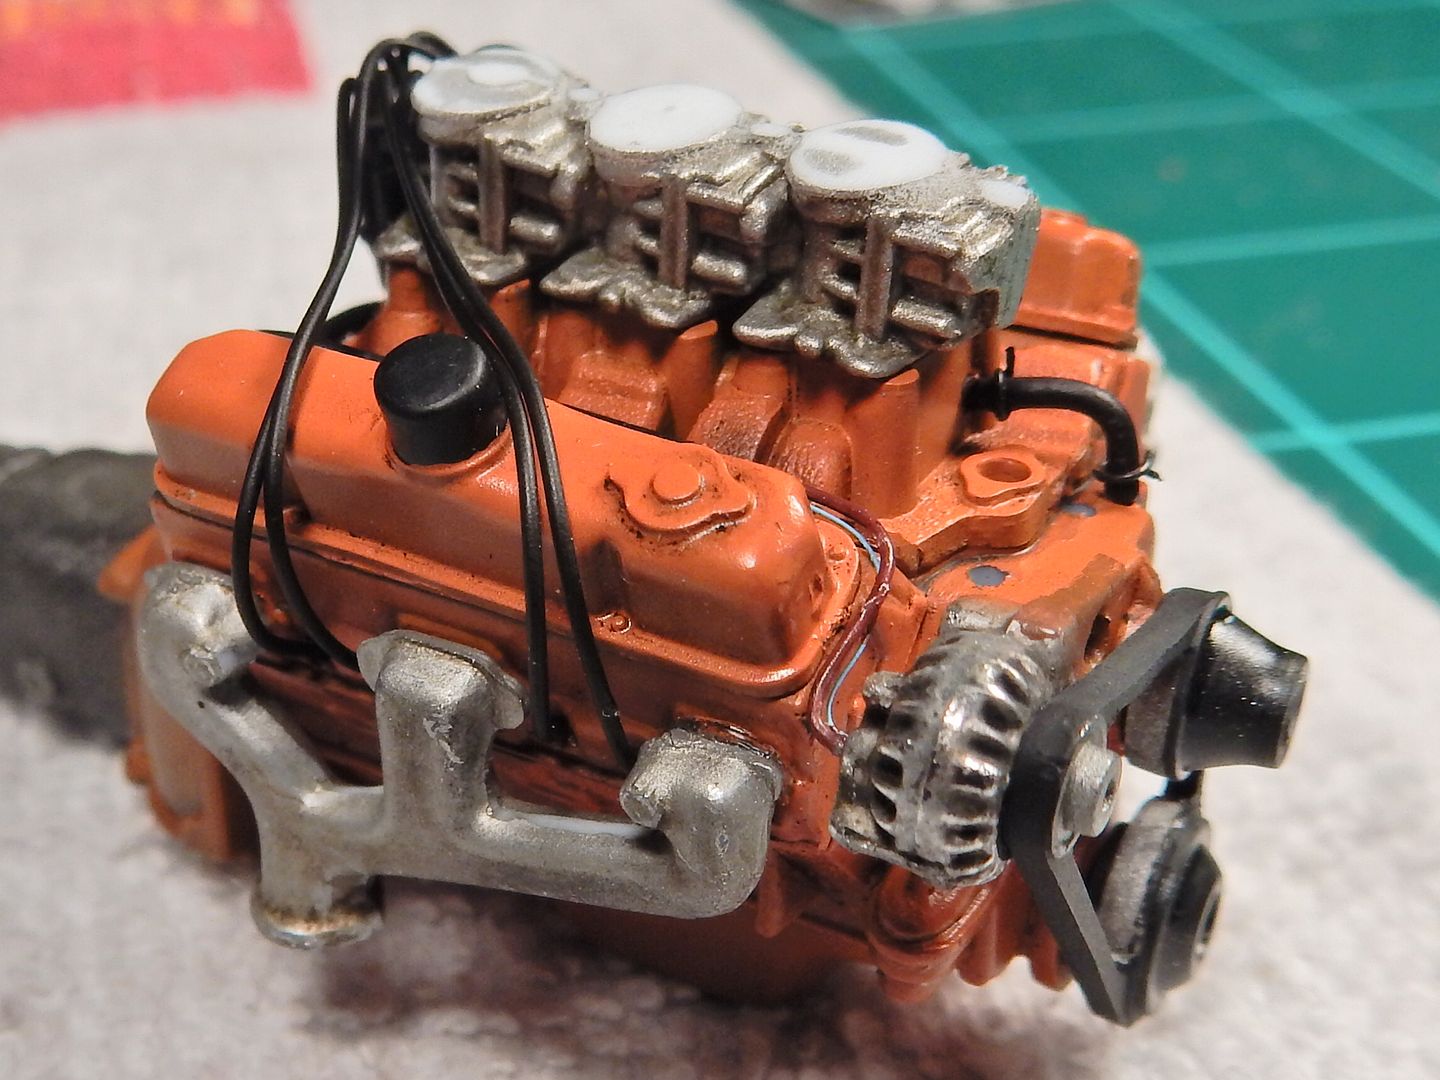
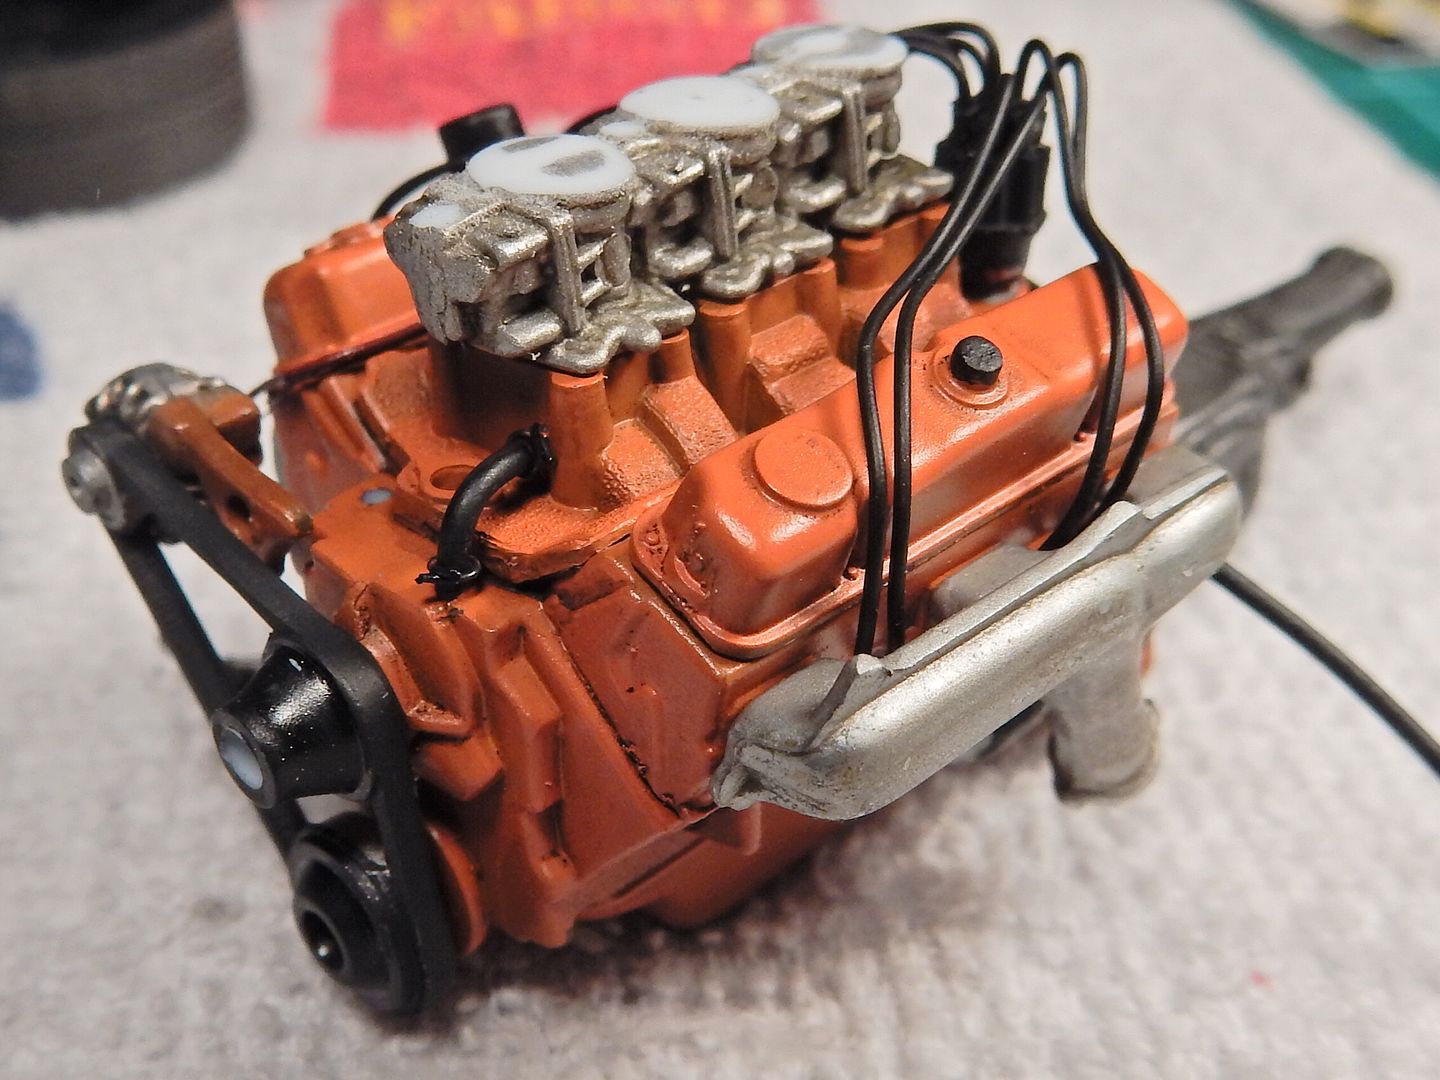
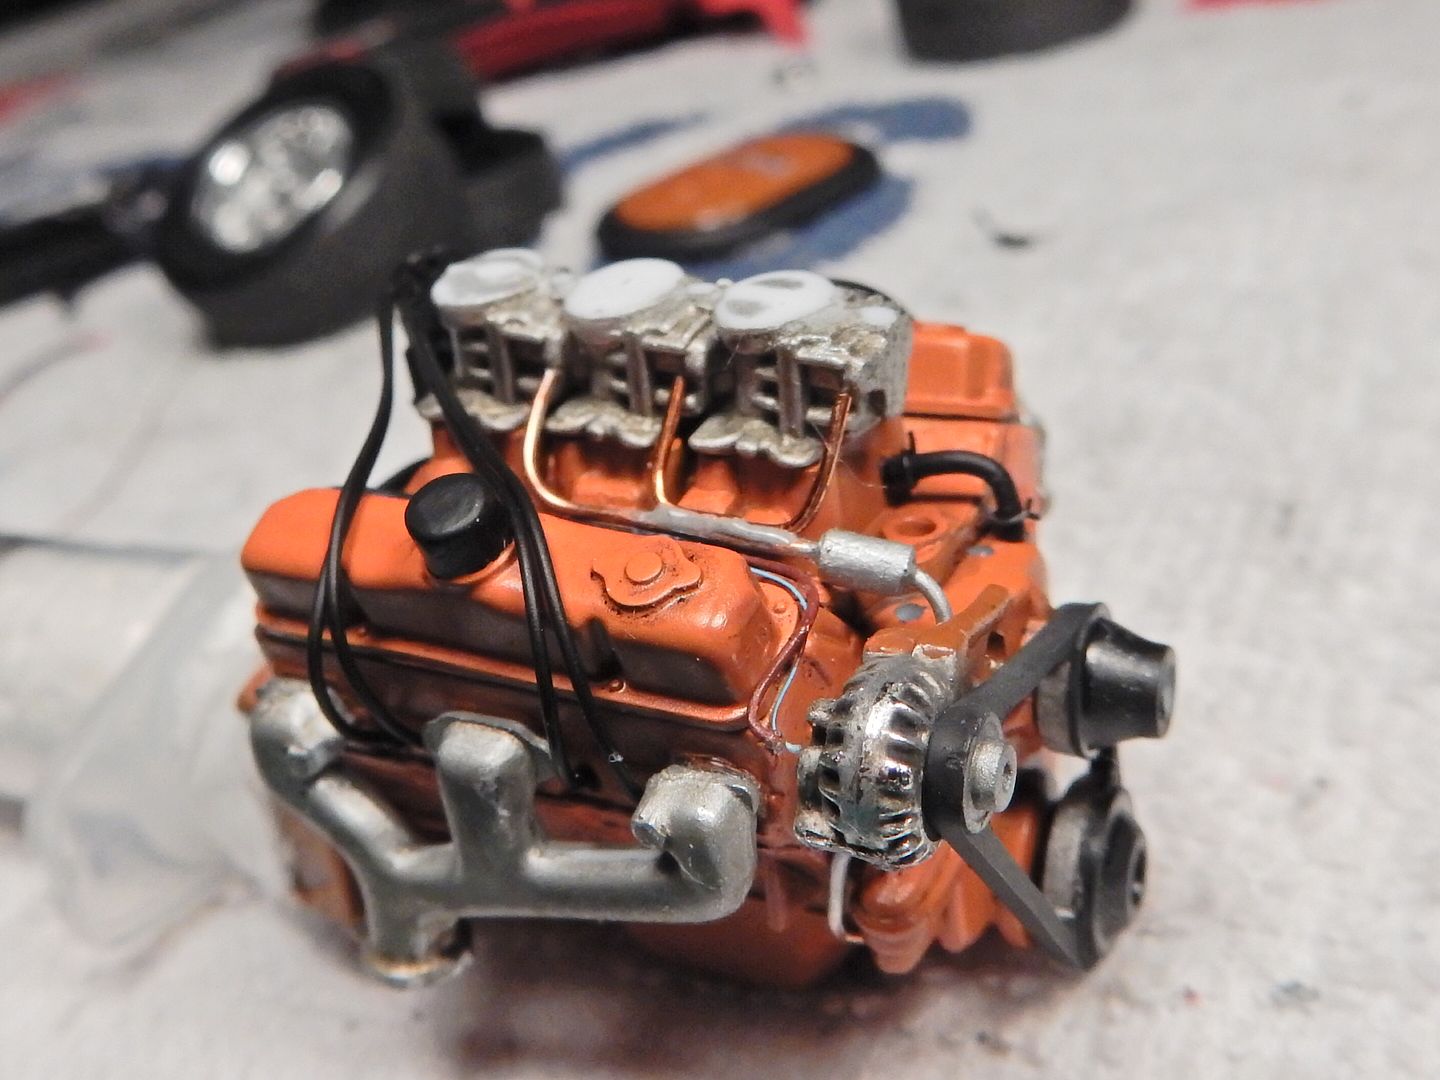
Well it's catch up time for the rest of the engine build up. This is where I left off from yesterday with the alternator and the alternator wiring to include the harness shrouding.

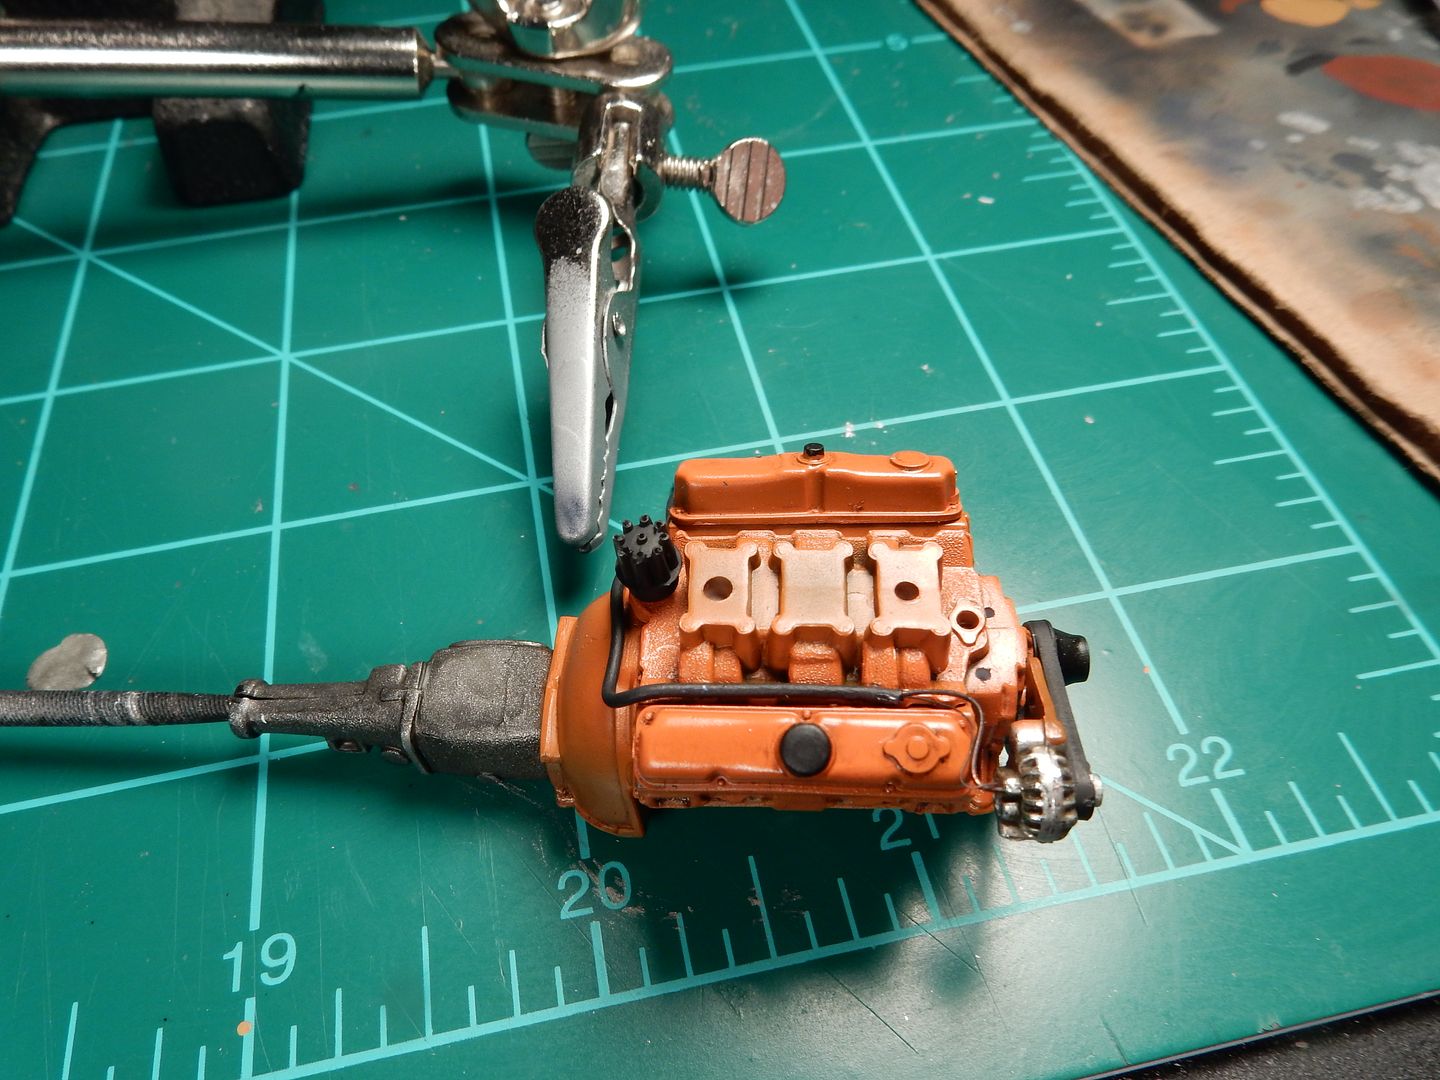
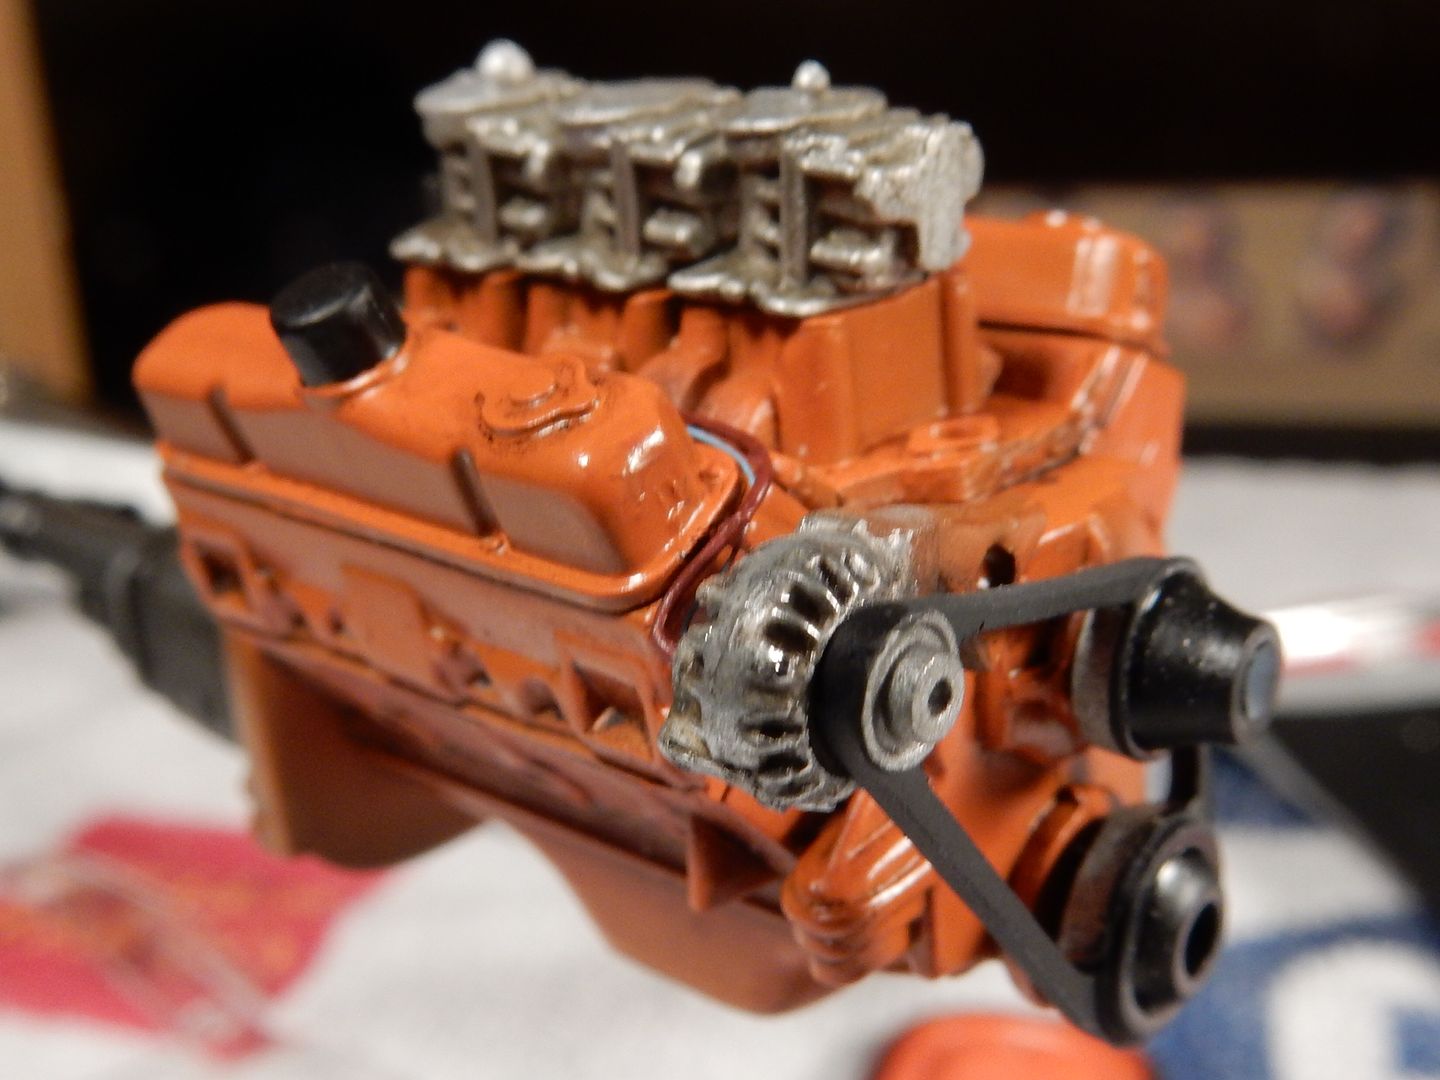
Then I painted and installed the carburetors and added a little extra weathering to the motor. 

After this I installed the bypass hose from the intake to the timing cover area. This is supposed to go to the water pump area but in this case, there is no water pump to attach it to so I worked with what I had here.

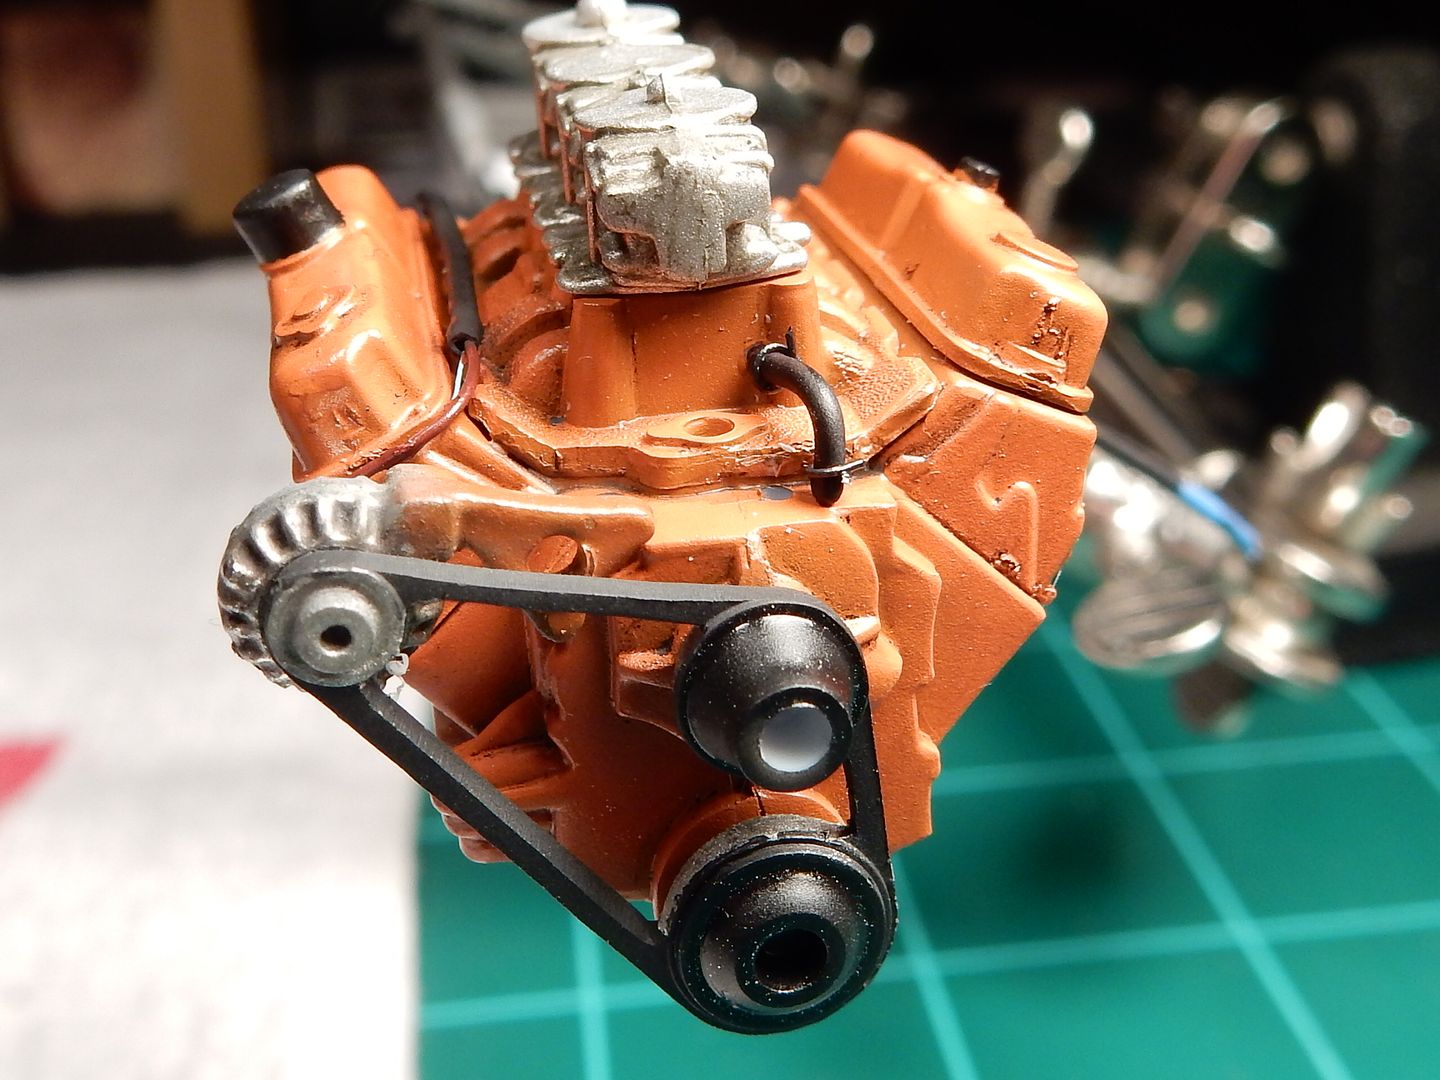
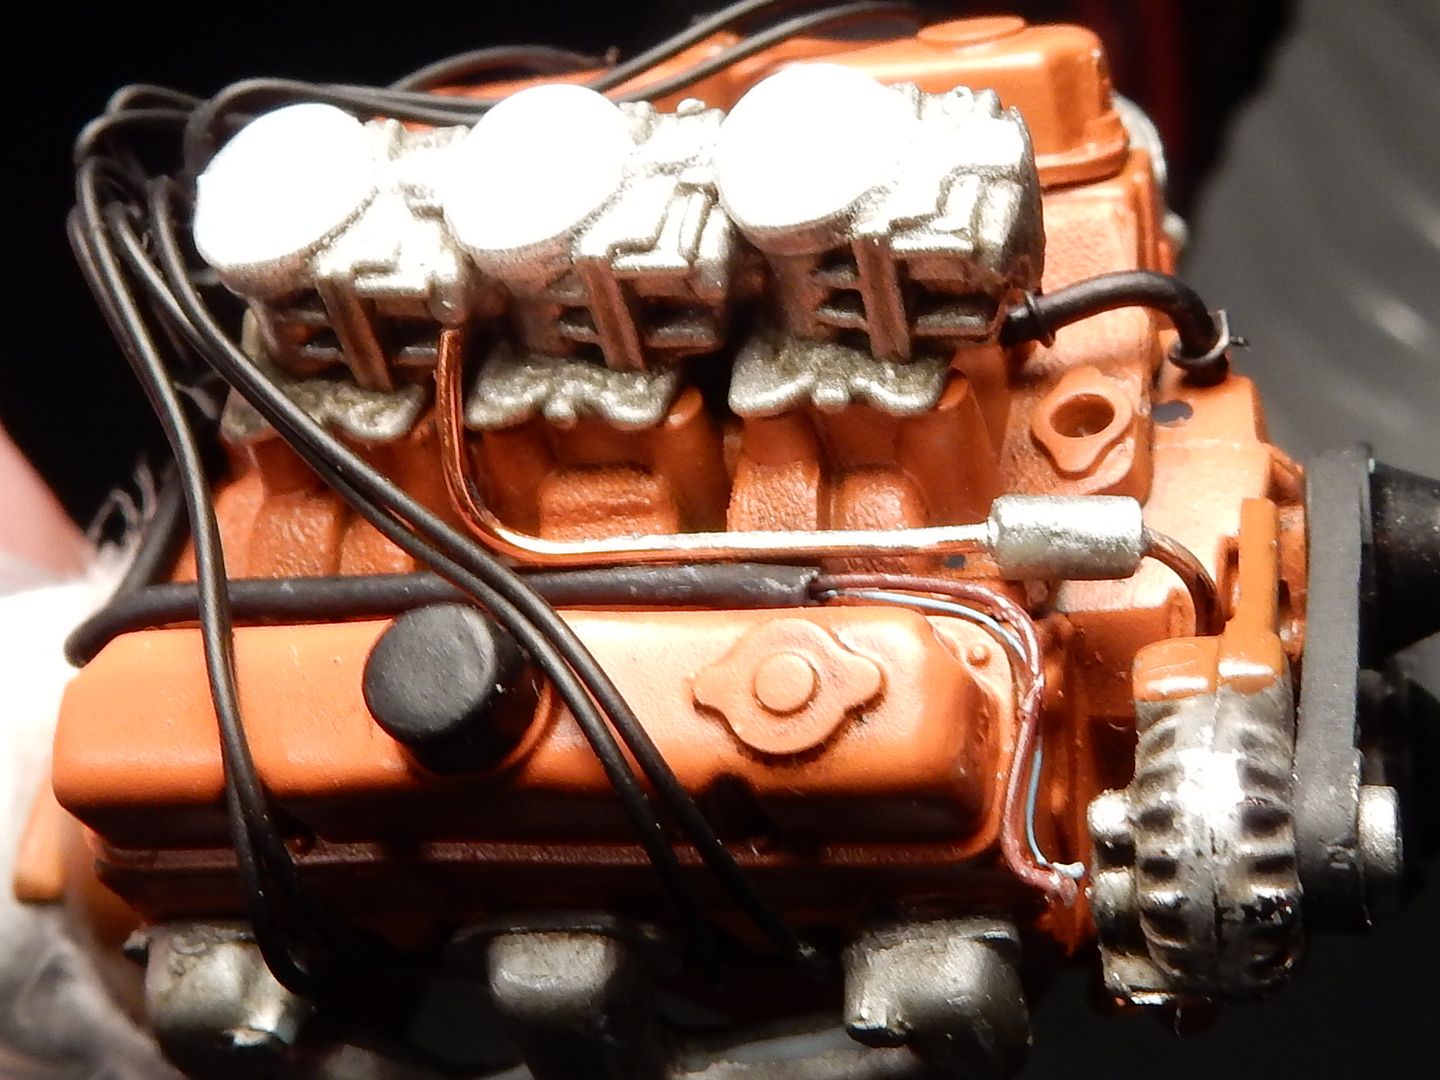
I fabricated the spring clamps out of small diameter copper wire.....

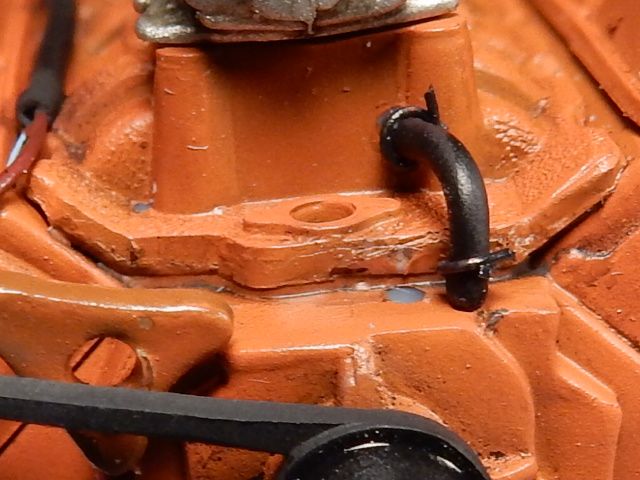
Macro pictures really bring out the worst sometimes. This isn't HALF as bad as it looks here as far as the area surrounding the hose:

Next I started prepping the heater hoses and made clamps for those. I'll post installation pictures later after I've taken care of the rest of the detail surrounding those  but for now here are the hoses:

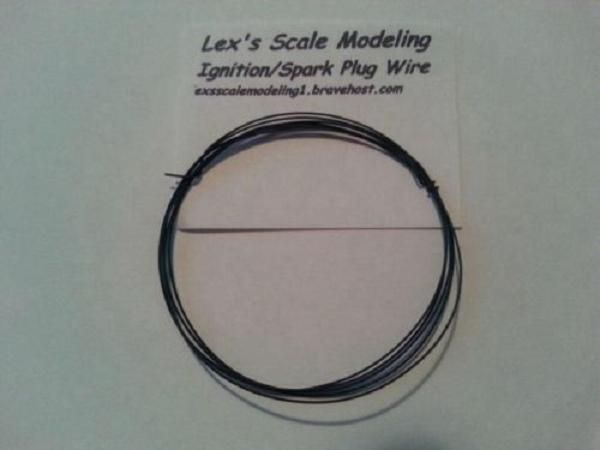
Then I started prepping the engine for ignition wire installation using Lex's Scale Modelworks colored ignition wire:

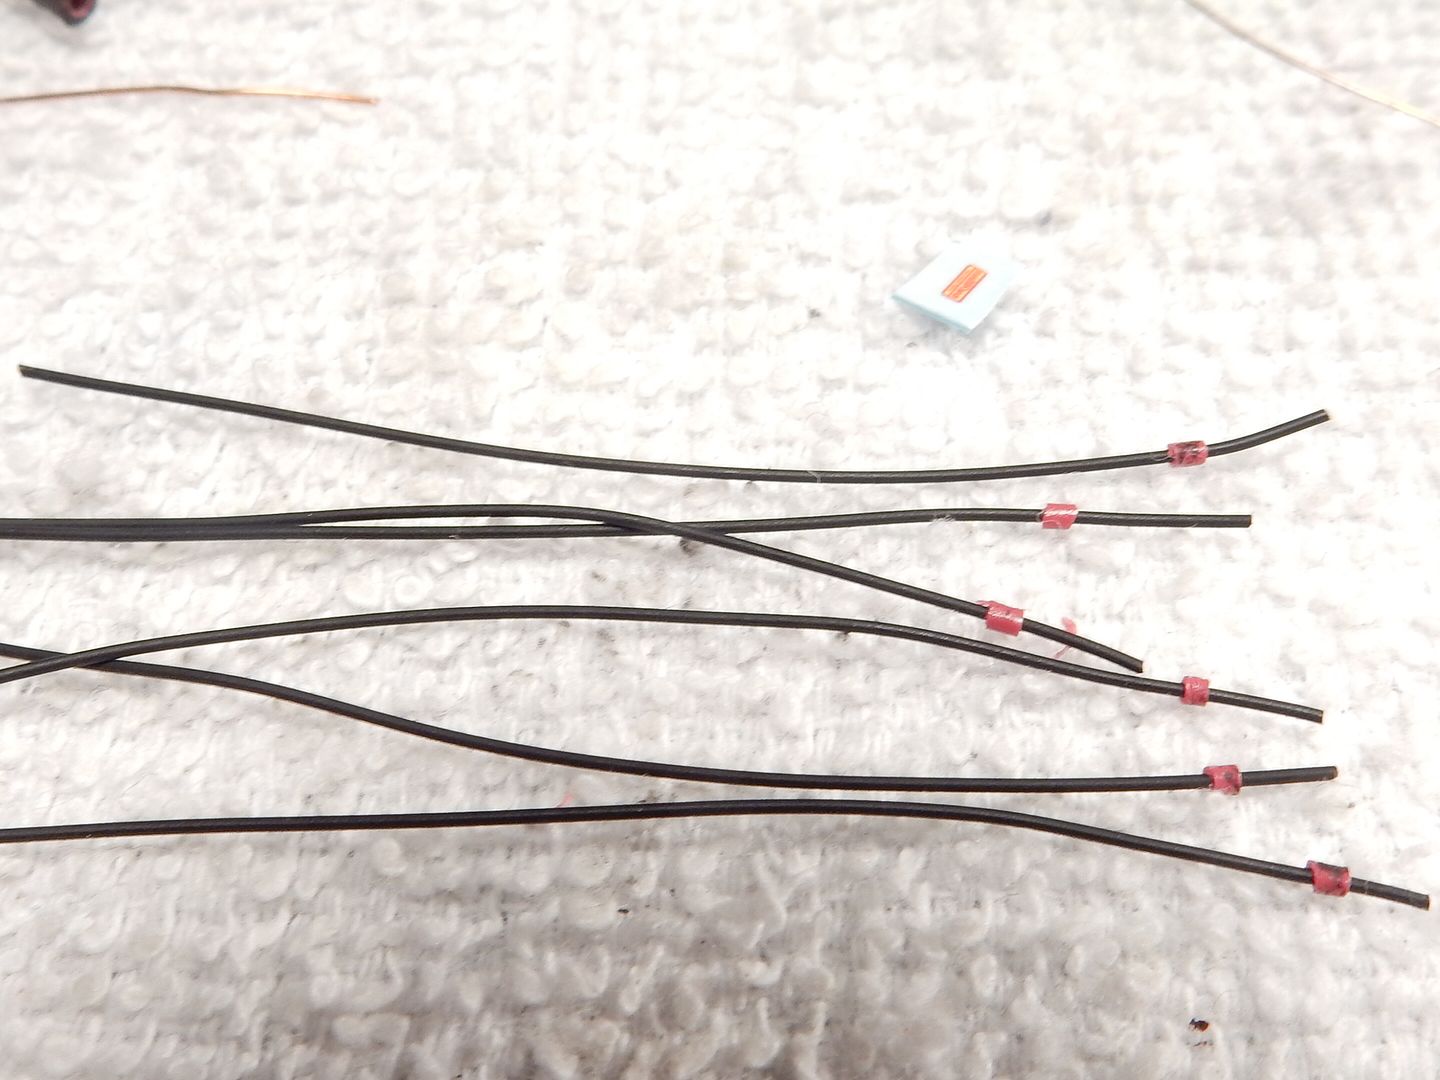
I got a tip from Fred (who you all will get a chance to meet here) on cutting wire insulation sections and sliding it over the wire to replicate ignition wire boots:

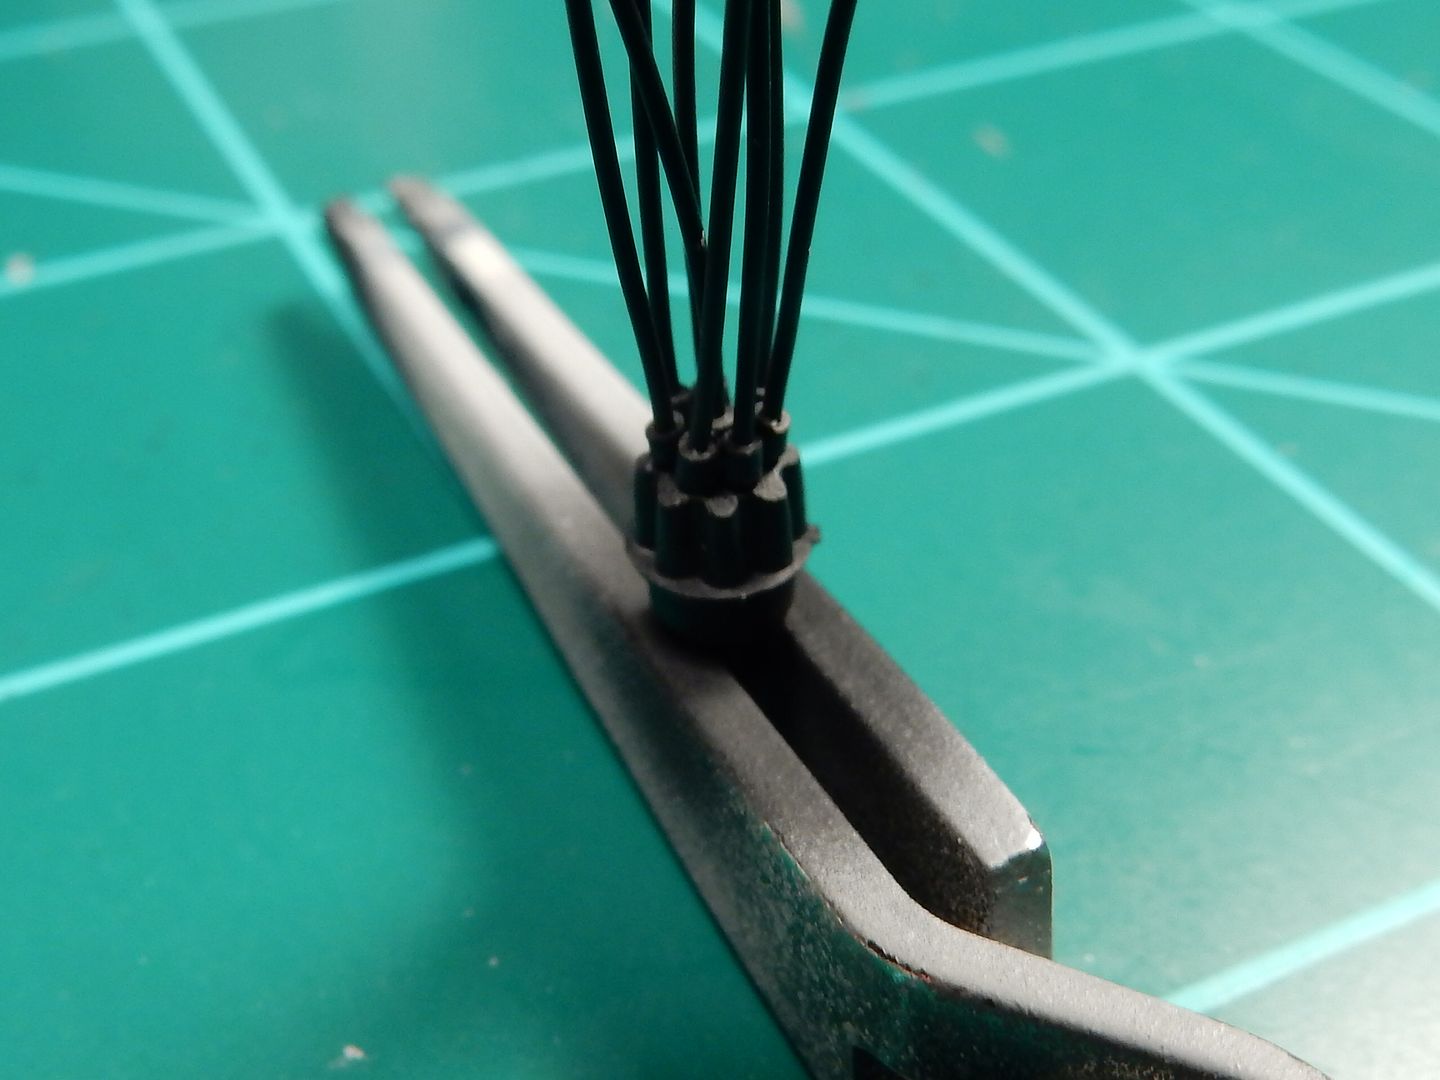
Then I painted the boots, drilled holes in the distributor cap and adhered the wires into the cap with super glue gel.

Here I installed the distributor into the engine and separated the wires out for routing:

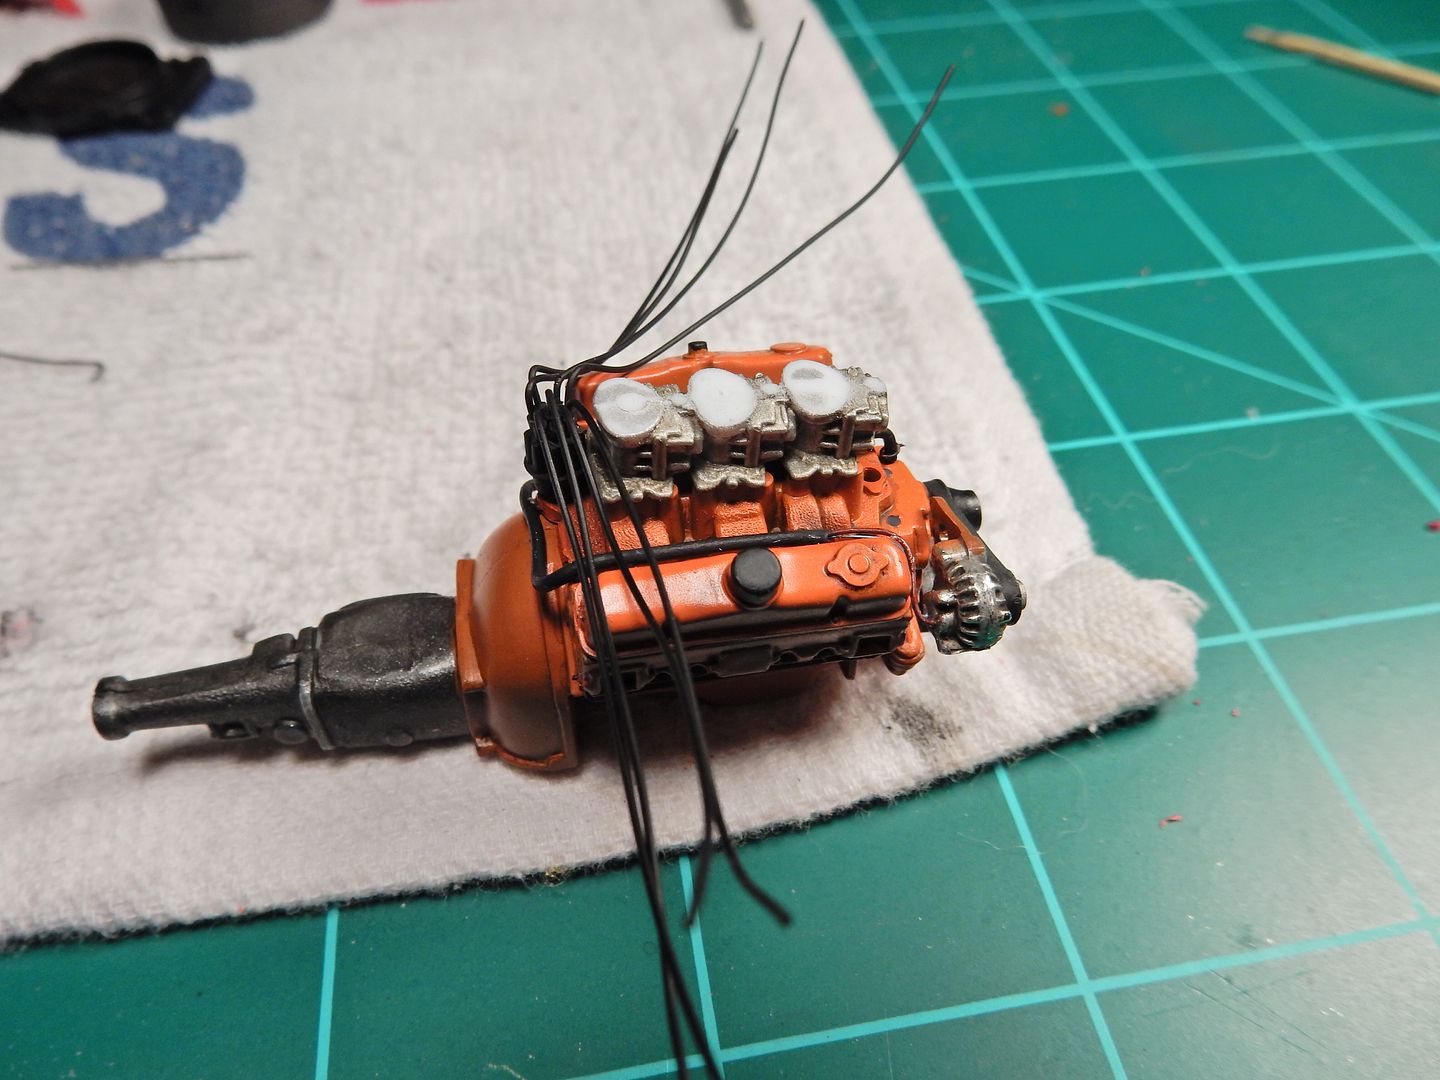
Here we have 'em routed and after drilling holes in the cylinder head, installed into the head.

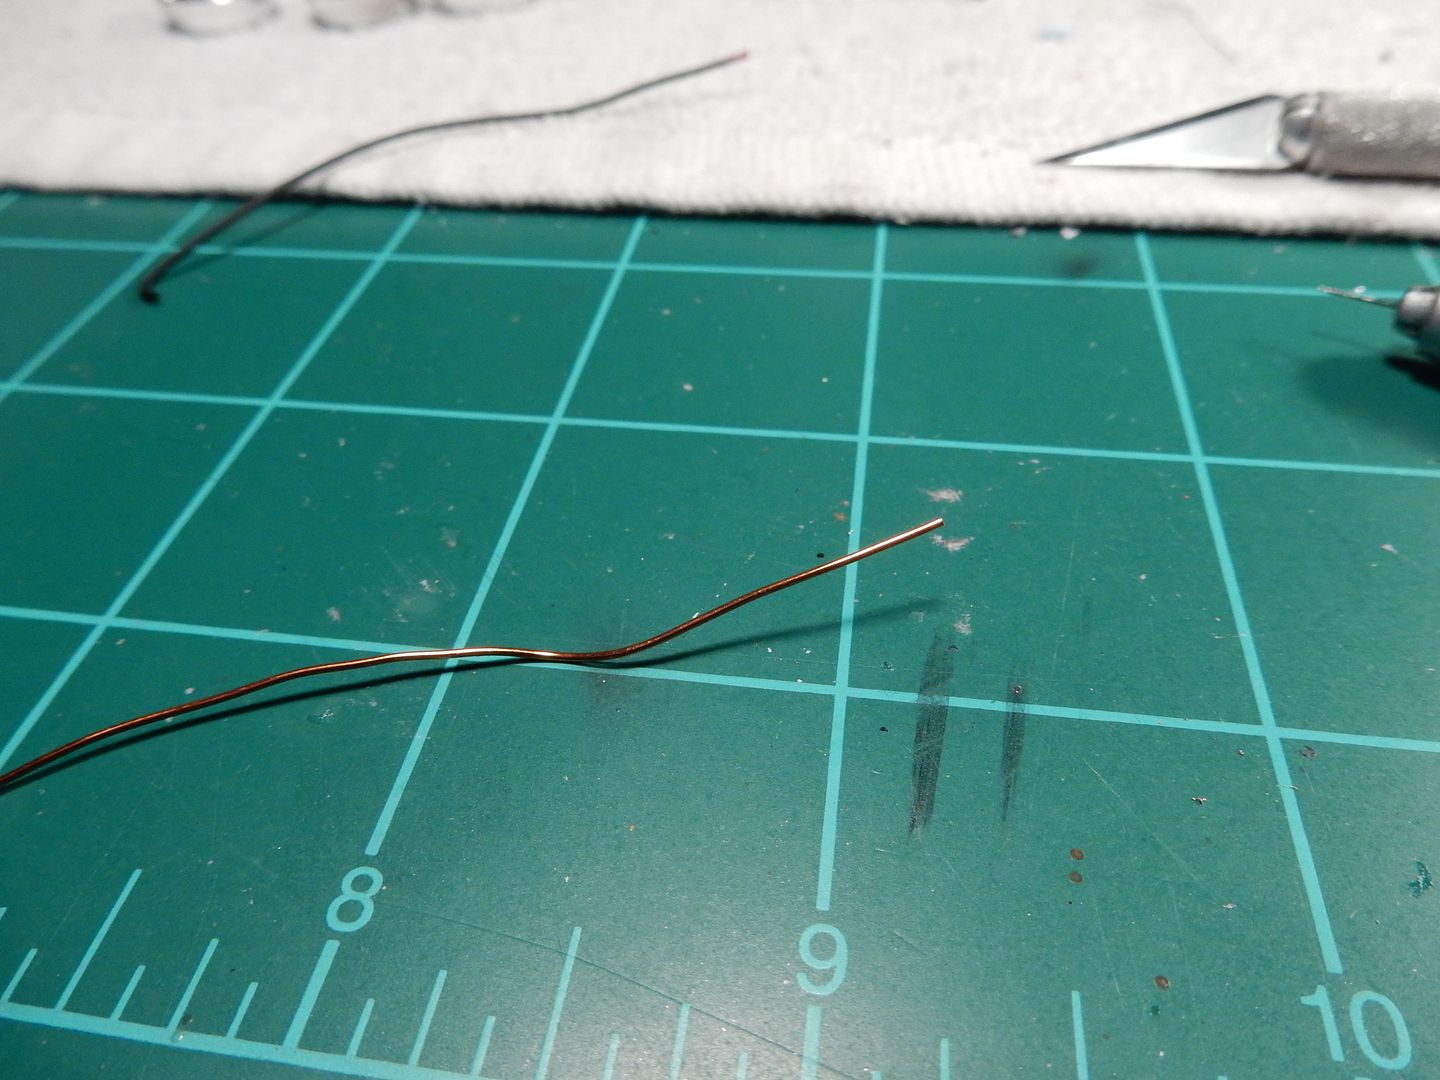
After this came the fuel inlet line that I formed out of copper wire. The fuel filter is a piece of round resin stock that I had cut to the length of a fuel filter and drilled a hole through. I then slid it up on the wire to the approximate place where the fuel filter is supposed to be and adhered it with super glue. Here is a test fit between the rear carburetor and the fuel pump:

I then beveled two lines out of the same diameter copper wire to merge into the main fuel inlet line and bent them at a 90 degree turn to route to the first two carbs.

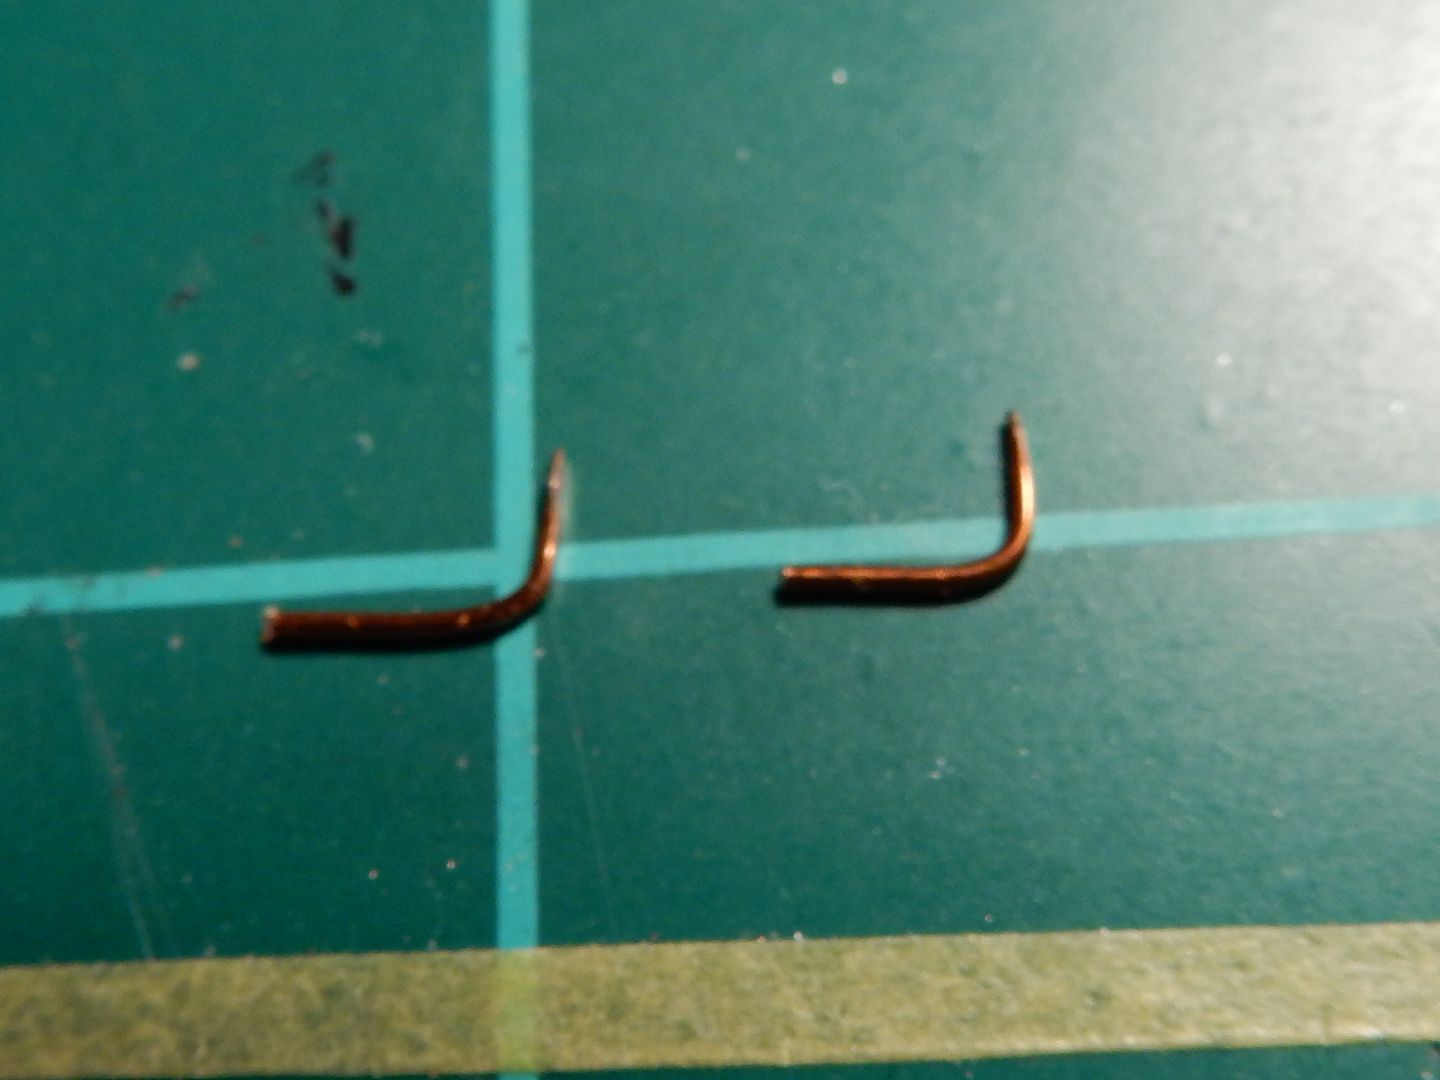
Test fit of the two lines to the carburetors....

While we are working on the fuel line I decided to install an engine oil dipstick in this thing too.

Here's what we start with for that. A piece of copper wire here:

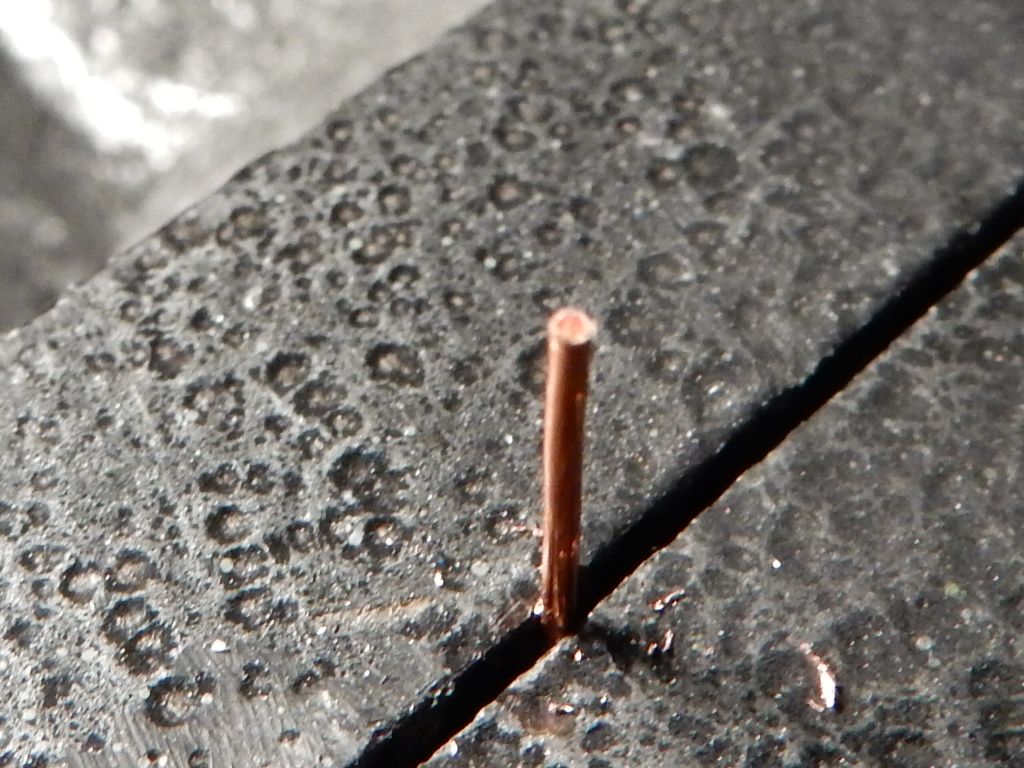
Then drill a fairly deep hole in it:
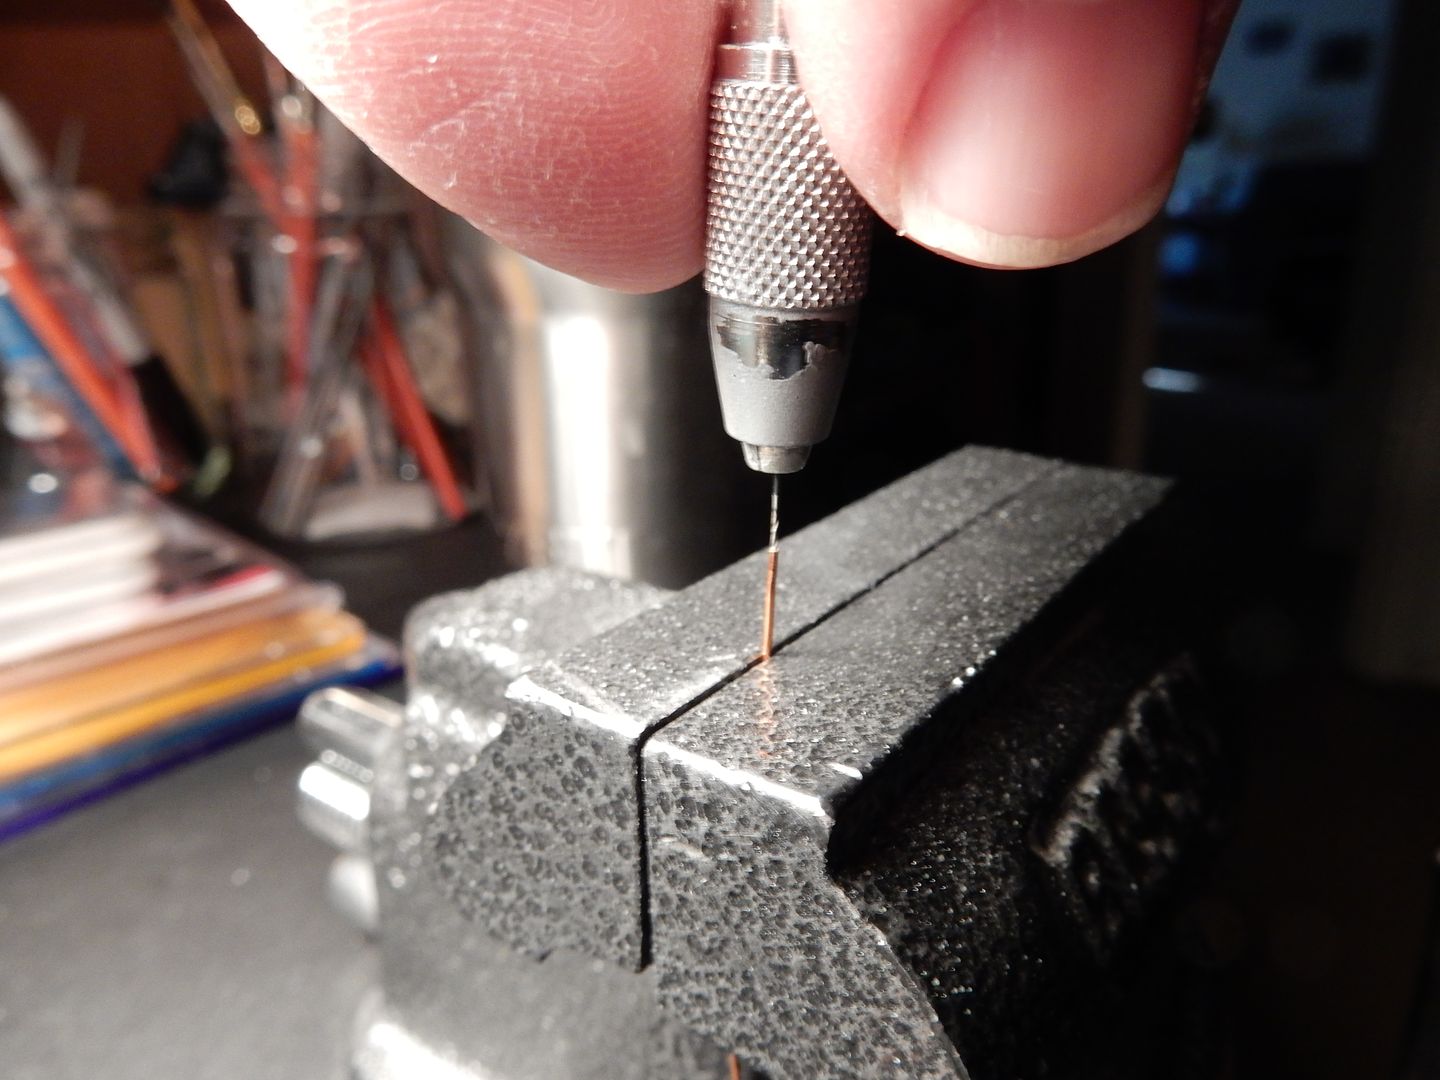
like so:

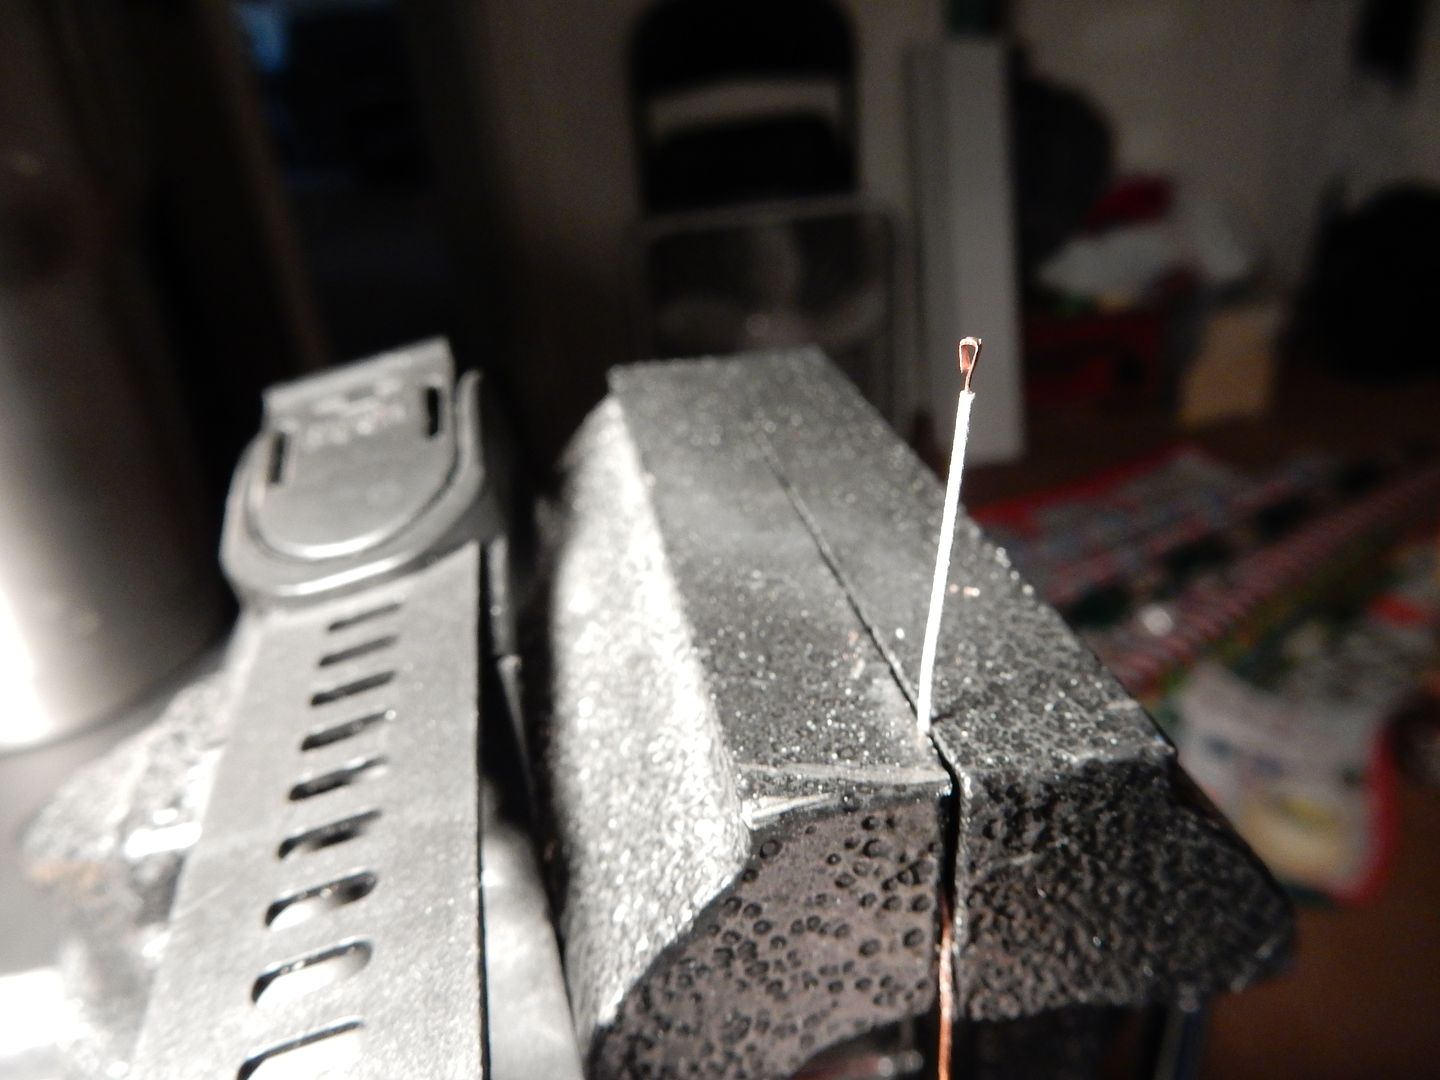
Then take a smaller piece of copper wire and hammer the end out to flatten it and wrap it around a drill bit to form the engine oil level indicator stick

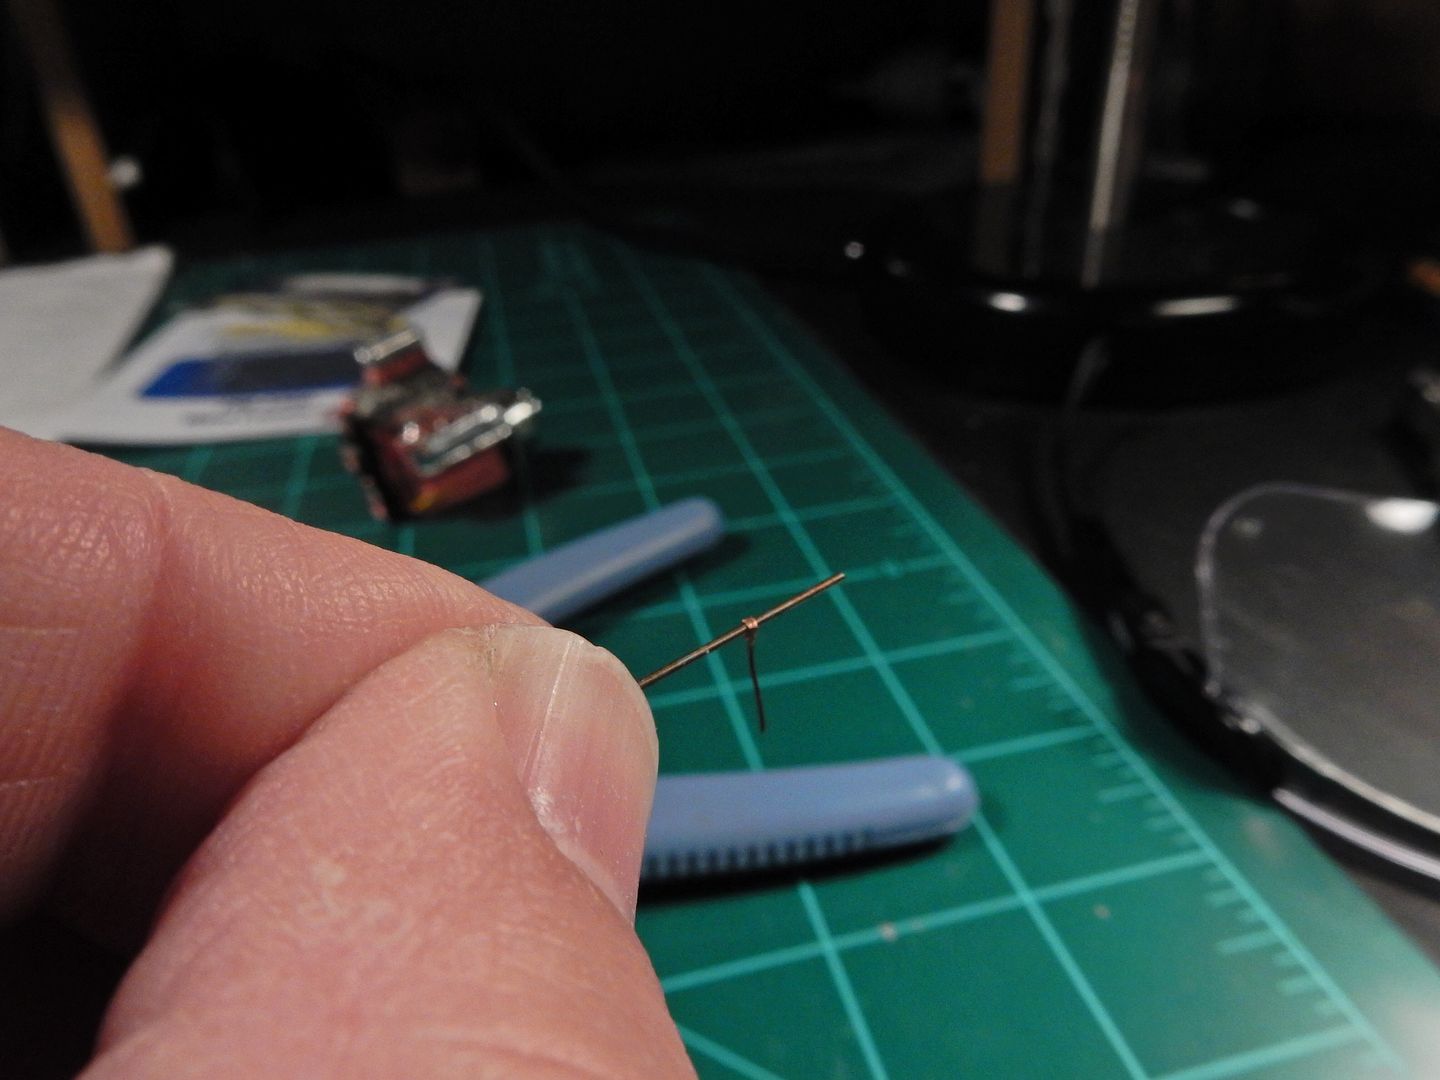
and trim the bottom off to where it's not so long and insert that all into the "tube":

and then paint it all up and install it into the engine. And now we have the fuel line, filter and dipstick tube with indicator handle all painted, installed and purdy'd up with no where to go:

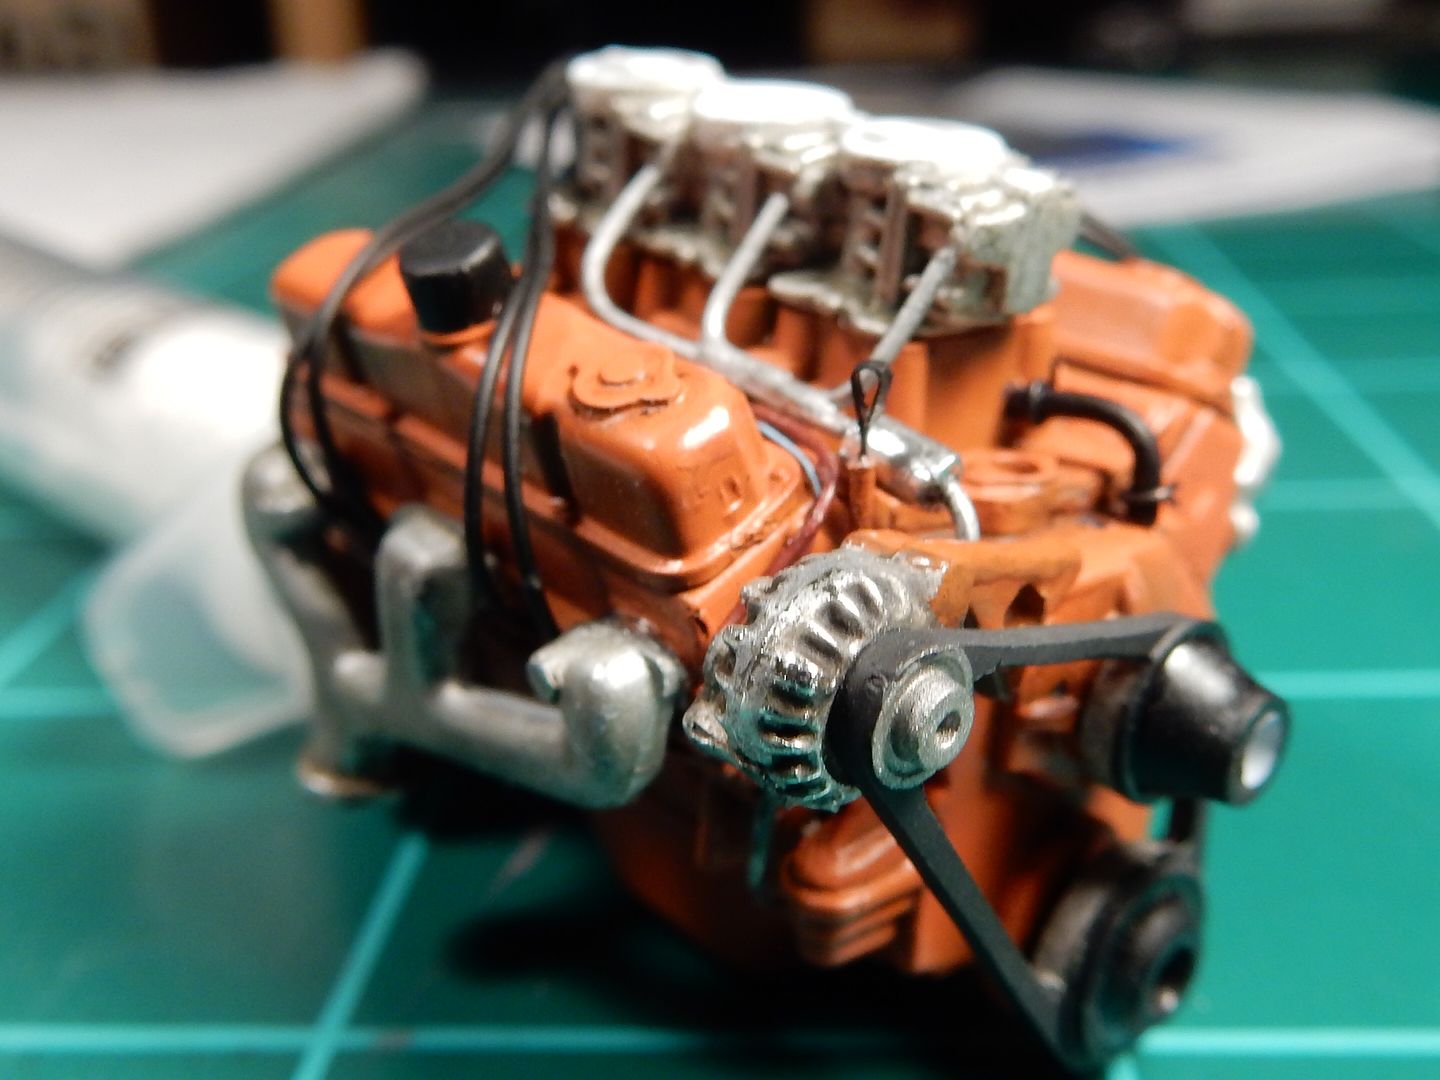
 Still adding some detail to the engine here and there but caught up to where I'm at now with it. More coming......


 Forum | Modelers Social Club Forum (proboards.com) 

  • Member since
    January 2015
Posted by Freakshow12 on Wednesday, January 7, 2015 3:09 PM
I'm in with a 71 duster, 67 camaro and possibly something else
  • Member since
    January 2014
  • From: Toronto
Posted by Rob S. on Wednesday, January 7, 2015 5:02 PM

OMG Joseph...didja really drill a hole in copper wire!!?? Wicked awesome thus far..what an amazing powerplant...superb

______________________________________________________________________________


On the Bench: Nothing on the go ATM

  • Member since
    January 2013
Posted by BlackSheepTwoOneFour on Wednesday, January 7, 2015 5:12 PM

You know what? Screw the Flip Nose Vette I had chosen for this build. The kit has been giving me a good fair amount of fits, swear words, and headaches - not to mention it's molded in red. I hate colored molds in auto kits!!! LOL!!

I have another kit in my stash I've been wanting to do - AMT's 1962 Chevy Impala SS Convertible. Found a little note inside of my plans for that kit and am going to go with it. Now I can rest easy and build. Will post pics of my progress soon.

  • Member since
    July 2014
Posted by modelcrazy on Wednesday, January 7, 2015 5:17 PM

Mustang

WOW! that's all I got.

Steve

Building a kit from your stash is like cutting a head off a Hydra, two more take it's place.


http://www.spamodeler.com/forum/

  • Member since
    January 2013
Posted by BlackSheepTwoOneFour on Wednesday, January 7, 2015 6:56 PM

I'm on a roll tonight. Managed to get a few parts painted. Will be heading back to the bench later tonight for more painting.

The kit :

i481.photobucket.com/.../DSCN0279.jpg

Dashboard and convertible top boot:

i481.photobucket.com/.../DSCN0271.jpg

Interior sides:

i481.photobucket.com/.../DSCN0270.jpg

Exhaust pipes, driveshaft, mufflers, etc...

i481.photobucket.com/.../DSCN0277-1.jpg

Rear shocks, springs, etc...

i481.photobucket.com/.../DSCN0272.jpg

i481.photobucket.com/.../DSCN0273.jpg

Undercarriage:

i481.photobucket.com/.../DSCN0274.jpg

Finally.. check out the Walmart receipt I paid for the kit back in 1998. The receipt was still in the box. LOL!

i481.photobucket.com/.../DSCN0278.jpg

That's all for now.

  • Member since
    March 2012
  • From: Corpus Christi, Tx
Posted by mustang1989 on Wednesday, January 7, 2015 7:23 PM

I remember those days of the 8 dollar kits!! Looks to be a good build BS214!


 Forum | Modelers Social Club Forum (proboards.com) 

  • Member since
    January 2013
Posted by BlackSheepTwoOneFour on Wednesday, January 7, 2015 7:57 PM

Yeah. I'm happy things are going right for me with the Impala SS. Did more painting and worked on the engine a bit. It won't be anywhere near as your mustang. Too much for me to wrap my head around it. LOL! I'm just gonna go with the flow and enjoy this build.

  • Member since
    March 2011
Posted by ewheeler454 on Wednesday, January 7, 2015 8:03 PM

Mustang,

That's some motivating work! Nice details.

BS214, I built the hardtop version of that kit. It is a nice kit.

Now if I can get some warm weather so I can something done hehehehe

L8TR,

Eric

  • Member since
    January 2014
  • From: Toronto
Posted by Rob S. on Wednesday, January 7, 2015 8:06 PM

Great start Blacksheep. I too got a bit of work in tonite on the Model T. I left off with the chassis completed with engine installed. I then painted the entire assembly enamel rust. Following that I sprayed the entire assembly with run of the mill hairspray last nite and let it all sit and set up to today. I oversprayed, tonite, the entire assembly flat black. After that dried, I went to work 'scratching' off black paint with a toothpick in random placed to reveal the rust underneath.

I realize I didn't explain what my plan was for this build..I want this roadster to be 'used', perhaps, 10 or so years old and still on the road. It's well cared for, but, it's starting to show its age. That's my theme. Not showroom new, rather, somebody's daily driver just prior to WW2.

So, here's the progress. Overall rust coat and a good layer of hairspray:

Here's the black coat ensuring I left some rust exposed in nooks and crannies:

Here it is now with scratched off black, some light rust drybrushing, some light gun metal drybrushing and some gray drybrushing:

I can't start wiring the engine until the 'cab' is mounted with the firewall, so, I started on the cab by scribing hard to release the right door from being molded in place:

Before

After some hard scribing

That's it for today. Thanks for lookin'!

______________________________________________________________________________


On the Bench: Nothing on the go ATM

  • Member since
    February 2006
  • From: Smithers, BC, Canada
Posted by ruddratt on Wednesday, January 7, 2015 8:55 PM

Can't begin to tell you fellas how much I'm enjoying watching your builds come together!  My modeling career started with cars all those decades ago and now I feel that same youthful enthusiasm - hard to describe, but it's a great feeling!

Joe, that engine is just, well, I'm just blown away man!.........and that dipstick?!  Never seen anything like it! Amazing stuff! Yes

Rob, that  Model T chassis/drive train is a beaut!  The finish looks flawless!

BS214, you're off to an excellent start on the Impala.  Love that car so I'll be watching that build closely for sure.

Eric, great stuff going on with the '51 Chev.  ....and those wheels look perfect!  Been building military stuff for so long, you car guys have me feeling like a beginner (and I'm sure learning a lot!).

rommelkiste, fine bit of kit bashing to get that engine looking the part.  All that work really paid off - beautiful stuff! Yes

Had a few compressor issues over the weekend but they've been resolved, and the chrome is finally stripped from all the engine components (thanks for the tip on the Westleys, Greg!) so I can finally get to work on that big KB 426 hemi.  Lots of flash and mold seams to clean up but it'll be worth it.  The hefty black band included for the blower belt will be replaced with one I plan on scratchbuilding.  Got a few ideas how to pull it off. 

Really, I just can't wait to join in on the fun here and get started on this beast! Yes

Mike

 "We have our own ammunition. It's filled with paint. When we fire it, it makes pretty pictures....scares the hell outta people."


  • Member since
    March 2012
  • From: Corpus Christi, Tx
Posted by mustang1989 on Thursday, January 8, 2015 6:48 AM

Rob: Thanks man! I've since gained some knowledge that will make this process a little easier with the dipstick. That's a great start on yours. What's the idea behind the hairspray?

modelcrazy and Eric: Thanks guys!

Mike: I'm actually surprising myself with half of this stuff. The last thing in 24th scale I built was a Trumpeter 109 and I didn't go near this far with it. Looking forward to your build as well and glad that your air compressor troubles are over.


 Forum | Modelers Social Club Forum (proboards.com) 

  • Member since
    November 2013
  • From: Jerseyville, ON
Posted by elass0wyp0 on Thursday, January 8, 2015 9:15 AM

Mustang, what the H?  I half expect to see some oil on that dipstick when you pull it to check it.  Awesome, awesome work.  Your 14 year old builder engine looks like my 42 year builder engine. 

Rob, I didn't realize you were in Toronto, I'm in Burlington!. lol  Nice work so far.  Well done everyone.  I'm looking forward to that Impala build, I love me some 60s Impalas.

Anyway, I beat the 57.  It didn't turn out as nice as I had hoped when I started but once again, I learned a lot.  Plus I got to do more BMF which I am really liking.  That doesn't mean I'm good at it but I don't dread it at all.

I'll keep the pics to a minimum as they mostly suck but I'll link the album.

The kit over all was pretty crappy.  It said level 2 but this was more like level 1, I'm not sure.  Minimal detail.  It had a molded on exhaust, the front suspension was like 2 pieces with the upper A arm just sitting like a hat on top of the "assembly".  The rear fit was far worse.  Very thin, chromed leaf springs(snapped), the shocks had to be set so far apart they don't look even close to realistic but realism is the least of the worries of the under carriage.  So don't flip it over.

The box claimed a whopping 70 parts! and molded in Aqua blue!  That is not a pretty colour at all.  The body seemed nice tho so just focus on that.

Slide show of horror - http://s293.photobucket.com/user/elass0wyp0/slideshow/Scale%20Models/AMT%201957%20Chevrolet%20BelAir%20HT

Good from far, and far from good.  She looks decent from arms length.  I'm going to put it in a plastic case and give it to my mother.  She won't notice any of it.  :)

I chose and started my next build.  The Revell 66 Chevy SS 396 HT.   Which is a funny way of saying a 1966 Chevy Impala SS.  I'm well underway with it and have some good time off this weekend to hopefully do some real damage to it. 

I am really digging these street burner kits.  Everyone I've looked closely at has been really nicely detailed.  After that molded on exhaust stuff it's the first thing I look for now.  lol  I'm going to keep an eye out for more of these.  I picked up 2 of this kit for $16 bucks each.  I'm glad now that I grabbed them both.

Box art:

Sprue spread:

Wish me luck, or rather wish the kit luck.  I'm going for Scarlett red as I some how have the most red paint.  lol

Gordy

  • Member since
    January 2013
Posted by BlackSheepTwoOneFour on Thursday, January 8, 2015 9:26 AM

Mmmmm... I just love those baby blues on classic cars - especially '57 Chevys. My dad owned a '57 Chevy 4-door in Aqua and white back in the day after he got out of the Navy.

  • Member since
    March 2012
  • From: Corpus Christi, Tx
Posted by mustang1989 on Thursday, January 8, 2015 10:31 AM

Man that '57 looks really good Gordy! I'm really liking the use of BMF on that car! I'll get your new build intro buddy!


 Forum | Modelers Social Club Forum (proboards.com) 

  • Member since
    March 2011
Posted by ewheeler454 on Thursday, January 8, 2015 11:32 AM

Rob,

That chassis and engine are look amazing.

Gordy,

I've built that kit and know it's not a well molded kit. You did an excellent job with it. Kudos!

It's funny that I also have the 66 Impala hat I was planning to do after the current two, so I'll move it down my build list and do it next year maybe so we're not doing the same thing hehehehe. They look sharp red. I already ave the paint for it, Stoplight Red Metallic. I got a 66 GTO off Ebay last night for 12 bucks so I may do it after I finish the current 2. I really want to do another 69 Chevelle, but can't find one at a decent price hehehehe.

L8TR,

Eric

  • Member since
    January 2013
Posted by BlackSheepTwoOneFour on Thursday, January 8, 2015 11:41 AM

Check Hobby Lobby and use a 40% coupon.

  • Member since
    March 2011
Posted by ewheeler454 on Thursday, January 8, 2015 11:52 AM

Thanks BS214.

They have the convertible, but I am looking for a hard top hehehehe. Hopefully Round@ will re-release it soon. :)

  • Member since
    March 2012
  • From: Corpus Christi, Tx
Posted by mustang1989 on Thursday, January 8, 2015 1:41 PM

A couple of more updates here. One being the instrument panel/ dash area. As pictured earlier we start here with the original built dash some 32 years ago. If I do say so myself , it wasn't bad for 14 years old.

We're shootin' for something like this(minus the aftermarket radio):

So we have to make some changes here starting with the gauges.....

Here's the result of the stepped drilling that I ended up doing cleaned up a bit:

 At this point I had a newer release of a Revell Challenger kit that I robbed these decals from......

I also needed a base in which to adhere the decals to.....

I cut it out of my sanding pad clear plastic package and painted the back of it black. I then applied the decals in correlation to the drilled holes in the instrument panel and sanded/filed the back of the IP so that the piece shown below would fit flat up against the back of the IP.

I also painted the instrument panel area where the gauges, radio and switches are with a coat of flat black and then shot a coat of flat coat over the whole dash to give it a uniform color. I brought out the raised radio and heater control detail with white and silver lead pencils and hit all the knobs with some gloss clear. Then I adhered the whole "gauge pod" to the back of the IP to look something like this:

There's a little dust in the speedo but that'll get cleaned up. I'll get back to all this in a minute.

Let's focus our attention to the steering wheel....

I took a shot of this before I went too far. I started with the original steering wheel and drilled the first of 9 holes to be drilled in the spokes...


and then we progress onwards until they are all done....


Then I repainted the steering wheel and drilled a hole in the column and added a turn signal lever with a drop of super glue at the tip to replicate a little "handle" and glued it into the column....

and just for a comparison recap so you can see the before and after results, here's the original dash build:

and here's the "after" result:


I'm happy with how it turned out  using all the original parts...Big Smile


 Forum | Modelers Social Club Forum (proboards.com) 

  • Member since
    January 2014
  • From: Toronto
Posted by Rob S. on Thursday, January 8, 2015 5:00 PM

Lovin' it Mustang...what an interesting way to do a build...taking what was old and making it new...AND awesome!! Very cool. As for the hairspray, if you spray acrylic paint over a surface sprayed with run of the mill hairspray, you can then scratch off the acrylic paint with a delicate tool, such as a toothpic, revealing the colour underneath. What it does is gives you that illusion of a layer of paint missing or chipped/eroded away revealing the metal underneath. In my case, the black paint has been chipped or worn away over the years and the metal underneath is rusted. Takes a bit of practice and I've not mastered it yet, so, I'm trying to get more opportunities to do it.

Gordy - Yup, I 'live' in Toronto (North York) but, I work south of Montreal, so, I only make to TO around once a month. Your Impala, despite the 'crappy' kit, looks excellent, by the way!!

Here's a bit more progress with the Model T. I started by painting the wood slats of the underneath wood and then drybrushed brown and then spayed some shadowing to age it up quite a bit. The rest was sprayed flat black then drybrushed with grey, gunmetal and brown.

______________________________________________________________________________


On the Bench: Nothing on the go ATM

  • Member since
    March 2012
  • From: Corpus Christi, Tx
Posted by mustang1989 on Thursday, January 8, 2015 9:36 PM

Looks great Rob and thanks for the pointers on the hairspray. I may end up giving that a shot down the line.........


 Forum | Modelers Social Club Forum (proboards.com) 

  • Member since
    July 2014
Posted by modelcrazy on Thursday, January 8, 2015 10:05 PM

You guys are really getting my blood boiling to start on my Shelby. Mustang the engine and dash.... wow.

Rob, that hairspray technique looks like it works great. I'm just ichin to get started now.

Steve

Building a kit from your stash is like cutting a head off a Hydra, two more take it's place.


http://www.spamodeler.com/forum/

  • Member since
    January 2014
  • From: Toronto
Posted by Rob S. on Friday, January 9, 2015 6:10 AM

Thanks Steve...I put a note on the Artillery GB. As for this little Lizzy, I got the chassis mounted to the body and a good start on the cab:

Here's the chassis mounted into the body. This was quite a pain to mount, believe it or not. Because of AMT's 'quality' and unbeknownst to me during construction, it was slightly warped, so, it took lots of persuasion (an frustration hits of CA glue) to get it to settle down in place

I had to do some bending to get the suspension to sit square, but, we'll see when I get the wheels on if it sits flat. If I had a dollar for every AMT car that didn't sit flat on its wheels..yadda..yadda......Stick out tongue

So, it's starting to look like a car. The cab went on easily with a dot of CA in each corner and the, what I'm callin' a COUCH for a seat...must've been a comfy ride!! I also lightly weather the body as I don't want it to be showroom shiny, so, I drybrushed a mix of enamel grey and brown.

And the seat with a dark oil wash to bring out the gaps between the 'plushness' of that monster piece of furniture!!

So, I can wire up the engine...really NOT much to do with this era car and there are two control rods I will scratch for the right side of the engine compartment. Also, the kit's hood is one piece BUT, it has grooves inside, thus, I decided to deepen them and forced the hood to be open on one side. More to follow....

______________________________________________________________________________


On the Bench: Nothing on the go ATM

  • Member since
    March 2012
  • From: Corpus Christi, Tx
Posted by mustang1989 on Friday, January 9, 2015 6:49 AM

Rob I don't know how some of you guys do it. Your methods are good this is true, but how do you guys build a model in a flash? I can tell you that this Challenger will at this point still take me another two months if not more making it a total time of 4-5 months to re-build this thing. I do spend a lot of time in thought on obstacles and techniques and I know that makes for lengthening the time on the build but it still fascinates me on how quickly some of you guys build these great looking models. One day I'll get there I suppose....

Ok todays catch up is on tires. I started with this for wheels and tires. The slick on the left will not be used in this build but was an idea at the time. The wheel is original and the tire on the right is original though.

Here's the replacement tires ,

that I robbed out of this kit(hey bonus here: there were two sets of these baby's in there!)

as you can see these tires are more "meatier" than the originals:

I began by "chuckin' 'em up"  in the drill with a 12mm socket.....

and spinning them up on medium grit sandpaper to get this effect....

Then I took the wheels and sanded the backs down like so....

till I got this effect: (before on the right..after on the left)

masked off the wheels...

...................................

and painted them with acrylic silver like so...

and then applied a very light dark wash to the center where the lugnuts are and mounted them onto the tires....

the stance I'm after wheel / tire wise and ride height are along the lines of this..(and with this tire combo it's gonna be a perfect match!)

more on the way....I aint done with these yet!!! lol 


 Forum | Modelers Social Club Forum (proboards.com) 

  • Member since
    January 2014
  • From: Toronto
Posted by Rob S. on Friday, January 9, 2015 6:54 AM

Ha, quite simply Mustang...this is all I have to do right now. I am disconnected from my family in Toronto due to being in the military, so, I have a small apartment to myself, AND, I build models...lots!! I probably spent 3-5 hours a day at the bench!!

______________________________________________________________________________


On the Bench: Nothing on the go ATM

  • Member since
    March 2012
  • From: Corpus Christi, Tx
Posted by mustang1989 on Friday, January 9, 2015 9:19 AM

I get those kinds of bench times 2-3 days a week and still can't make it happen. lol

Final update and we're caught up to where I'm at right now so everything I do from here on out is real time....................finally! 

Ok, I had thought I was finished here...and this was last week. I got a fine point acrylic paint pen from Hobby Lobby ( the point is actually a little squared off but if you use the side of the tip you're in business)

and initially came up with these results on the tire white lettering:

However I just wasn't satisfied here and so I picked at it some more with a sharpened toothpick and got these results............

Finally after all of this I rustled up my Model Master flat clear and cut it with 70% ISO and went to work. I'm not a glossy wet "Armor All " kinda guy and just like my tires to be black so here's the comparison before and after. Before on the left, after on the right:

and all four.....

and that's a wrap and gets me caught up to now. Looking forward to seeing all the builds in here and actually building with you guys now.


 Forum | Modelers Social Club Forum (proboards.com) 

  • Member since
    January 2013
Posted by BlackSheepTwoOneFour on Friday, January 9, 2015 2:08 PM

Very nice!

  • Member since
    January 2014
  • From: Toronto
Posted by Rob S. on Friday, January 9, 2015 3:27 PM

Super wicked tires Mustang! I really like your dulled down tires. Way more realistic for sure.

______________________________________________________________________________


On the Bench: Nothing on the go ATM

  • Member since
    September 2013
Posted by Raven728 on Friday, January 9, 2015 6:49 PM

Fantastic work, guys!

- Steve

JOIN OUR COMMUNITY!

Our community is FREE to join. To participate you must either login or register for an account.

SEARCH FORUMS
FREE NEWSLETTER
By signing up you may also receive reader surveys and occasional special offers. We do not sell, rent or trade our email lists. View our Privacy Policy.