SEARCH FINESCALE.COM

Enter keywords or a search phrase below:

Weekend GB: See you in November!

15452 views
403 replies
1 rating 2 rating 3 rating 4 rating 5 rating
  • Member since
    September 2017
  • From: Netherlands
Posted by Sailing_Dutchman on Wednesday, January 2, 2019 7:44 PM

Here are my finished build pics:

I had some trouble with the paint seeping under the masks and did not have time for much weathering, but overall I think that it came out well for the time that I had.


  • Member since
    December 2003
  • From: 37deg 40.13' N 95deg 29.10'W
Posted by scottrc on Wednesday, January 2, 2019 1:16 PM

Congrats Lewbud, Caveman, and Bob on some fantastic finishes.  This has been a great GB this year.

  • Member since
    June 2008
Posted by lewbud on Wednesday, January 2, 2019 2:36 AM

Bob and Tim,

Got the front page updated with your pics. 

SD,

Looking forward to the pics. What scale is your tank?

Buddy- Those who say there are no stupid questions have never worked in customer service.

  • Member since
    September 2017
  • From: Netherlands
Posted by Sailing_Dutchman on Tuesday, January 1, 2019 11:24 PM

I finished the build in time, but had a wild time New Years and did not get any pictures. I will post them in the morning when there is daylight.


  • Member since
    November 2003
  • From: Nashville, TN area
Posted by bobbaily on Tuesday, January 1, 2019 4:50 PM

Tim-great job-even weathered-looks great!

I'm done-finished a bit early and have more to add to the 747(r) but it's not gonna happen today-want to add some weathering and such-

Lewbud-again, thank you for running the Weekend Madness GB-it's always a great motivator for me...hopefully I can keep moving forward this year.

Cheers

Bob


  • Member since
    June 2008
Posted by lewbud on Tuesday, January 1, 2019 1:25 PM

Bill,

I keep the orientation the same for the circuit. If the left wing is on the inside, then it will stay that way until it gets back to the starting position. If another circuit is needed then I'll change the orientation. I rarely need more than a couple of circuits. I only use this method when the paint won't cure within a normal time frame. For some reason, I end up using the microwave when I use MM International Orange. It normally remains tacky for several days. Don't know what it's me, or the paint.

Tim,

Great job on the Cougar! I'll update the front page when iI get to work tonight.

Buddy- Those who say there are no stupid questions have never worked in customer service.

  • Member since
    March 2008
Posted by Caveman on Tuesday, January 1, 2019 12:35 PM

Thanks for the kind words.  You are right Daddy, this wasn't the best choice for weekend madness.  Took alot more that I thought it would.  I only finished with time to spare because the kit went together very well.   Any fit issues and I may have been scuppered.  I'm just glad I didn't go with the 8 wheel bigger brother "Coyote" which I was considering.  I guess I just don't build enough armour to make a proper assesment for time.  Glad it came out though.

Final Photos.  Choose witchever you like best Lew.

 P1011885 by Tim Bowers, on Flickr

 P1011886 by Tim Bowers, on Flickr

 P1011887 by Tim Bowers, on Flickr

 P1011888 by Tim Bowers, on Flickr

 P1011889 by Tim Bowers, on Flickr

 P1011893 by Tim Bowers, on Flickr

Now I just need to clean up the bench in preparation for another go.  I hope to get at least one more done by the 20th.  On a funny note, I just made a white screen to improve my photos, which worked well for the truck, then I go and build something white.  Better re-think that too.Bang Head

By the way..........Happy New Year to all.  I hope 2019 brings you all fortune.


  • Member since
    November 2004
  • From: Galloway,Ohio
Posted by Daddyman on Tuesday, January 1, 2019 11:25 AM

Caveman, looks like your Cougar is ready to go to work. That would have scared me to try in a 48 hour build. Well done.

Bill B 2.0

  • Member since
    November 2004
  • From: Galloway,Ohio
Posted by Daddyman on Tuesday, January 1, 2019 11:22 AM

Really nice Spitfire there, Lewbud. I really like the Swedish scheme. 

With the microwave, do you rotate the kit as you move it to the different positions inside or do you try and keep it in the same orientation as you move it? Does it work on all types of paint and is there a kit size limit?

Bill B 2.0

  • Member since
    June 2008
Posted by lewbud on Monday, December 31, 2018 8:52 PM

Bob,

Totally missed your second entry, looking great so far! As to the microwave, basically I put the model on the right side of the microwave and zap it for about 15-20 seconds. Then I move it to the back, then the left side and then the front, zapping it for about 15-20 seconds each time until the paint is no longer tacky. Basically I gently heat the model until the paint cures. Yes, the PR. XIX is one of Airfix's new tools. It's the second Airfix Spit I've built. The first was an anniversary edition of Airfix's first Spit, complete with blue plastic. Needless to say, it was a putty hog. This one not so bad, found some spots I missed when looking at the pics.

Buddy- Those who say there are no stupid questions have never worked in customer service.

  • Member since
    March 2008
Posted by Caveman on Monday, December 31, 2018 8:49 PM

Microwave to cure the paint.   I think someone should try it.  Nice Spit Lew.  Look forward to the finish on that Russian tank.

Three hours to spare and I calling it done.  A bunch of the smaller stencil decals disintigrated but other than that, no real issues. 

 PC311874 by Tim Bowers, on Flickr

 PC311884 by Tim Bowers, on Flickr

I will post some better pics. in the morning.

Till tomorrow.

  • Member since
    November 2003
  • From: Nashville, TN area
Posted by bobbaily on Monday, December 31, 2018 7:00 PM

Nice job Lewbud-love the PRU blue scheme.

You mentioned using a microwave oven to 'cure' the paint-what is the technique?

Bob


  • Member since
    June 2008
Posted by lewbud on Monday, December 31, 2018 5:13 PM

Tim,

That Cougar looks like an interesting build. The UN paintscheme is an interesting choice as well.

SD,

What scale is your Jagdtiger? Looks great so far.

As of last count, we have 15 models completed. Don't know if it's a record, but it's darned impressive. As for me, I finally managed to get one completed in time. Here's the story.

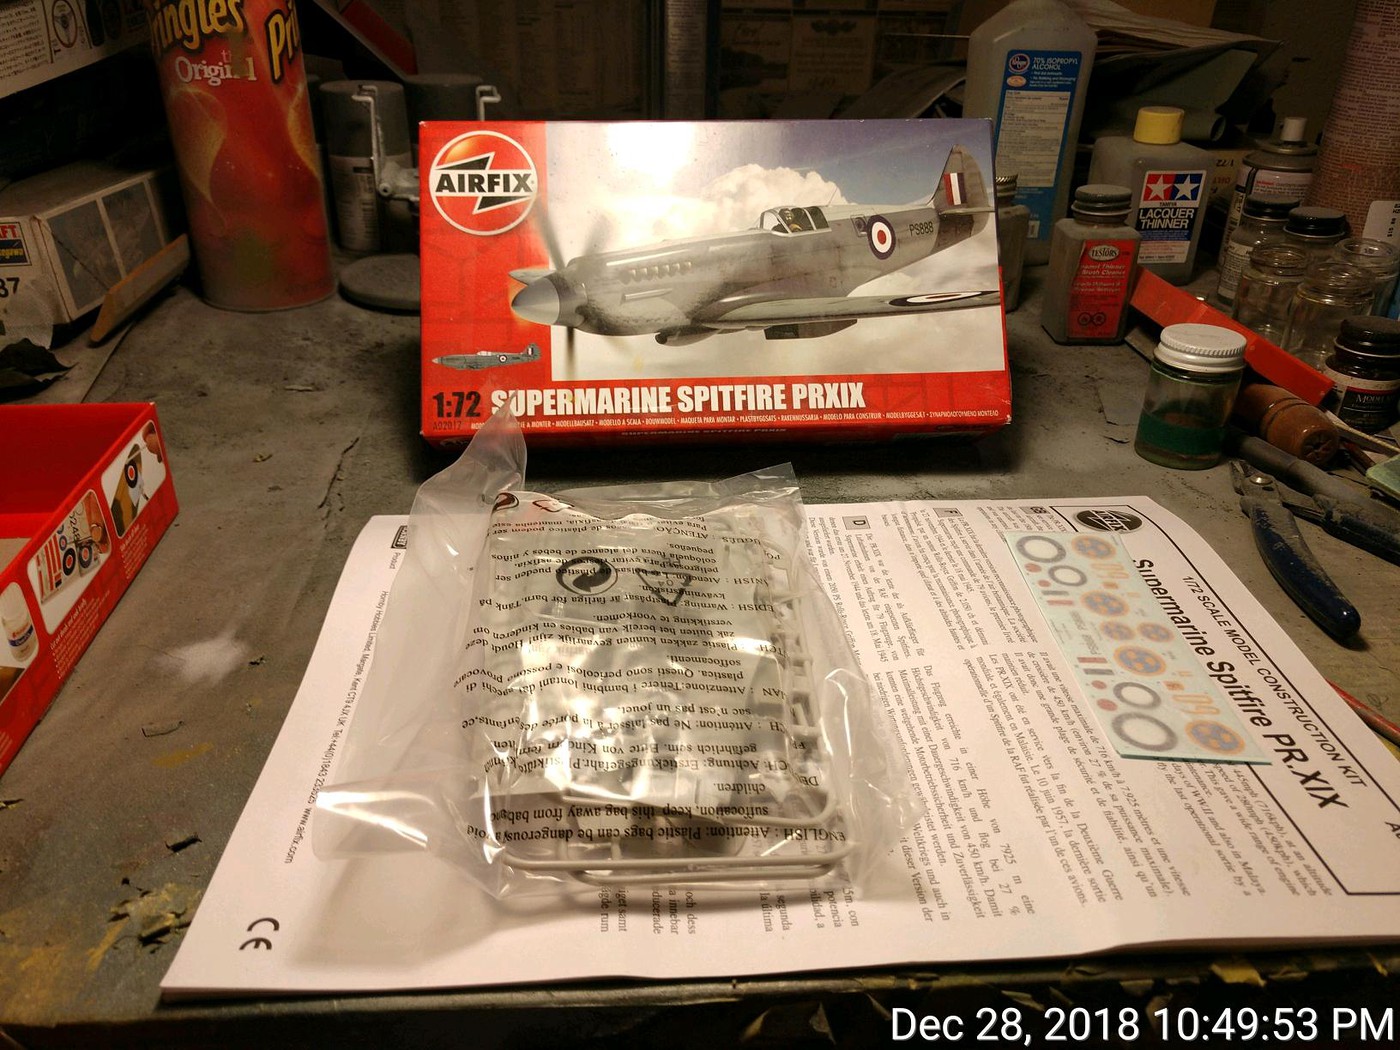
Proof of unstartedness.

The cockpit installed.

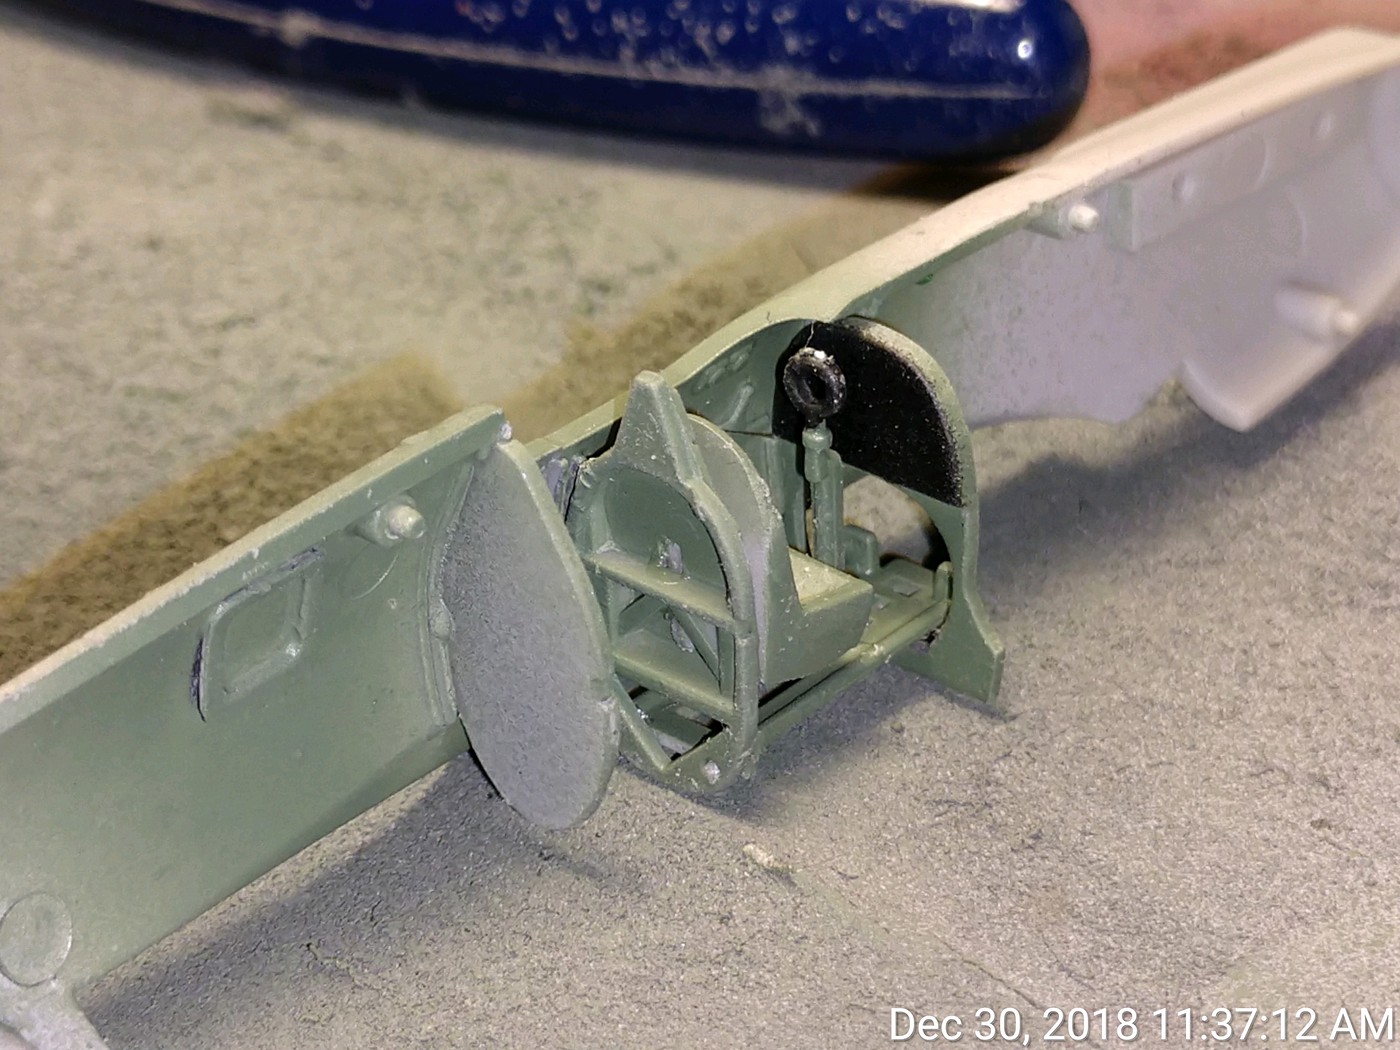
The cockpit in the PR. XIX is a very fidgety three piece affair. The fuselage has grooves molded in where the bulkheads and instrument panel go so once everything was glued together, I laid the cockpit in place until it dried. It's possible that I put the control stick in the wrong place, but I think it's a little too tall. On the other hand, I think it is the first control stick of the Airfix new tools that I've built that has survived being cut off the sprue without breaking (their 1/72 P-51 is really bad about this). There was no decal provided for the instrument panel. It doesn't really matter because you can't see it. There is no detail provided for the camera bay behind the cockpit, so I painted the clear piece black, then covered it with primer and British interior green so light wouldn't shine through. I do believe there is an aftermarket set by Pavla if you feel the need to fill it. The clear part for the camera porthole doesn't fit that great.

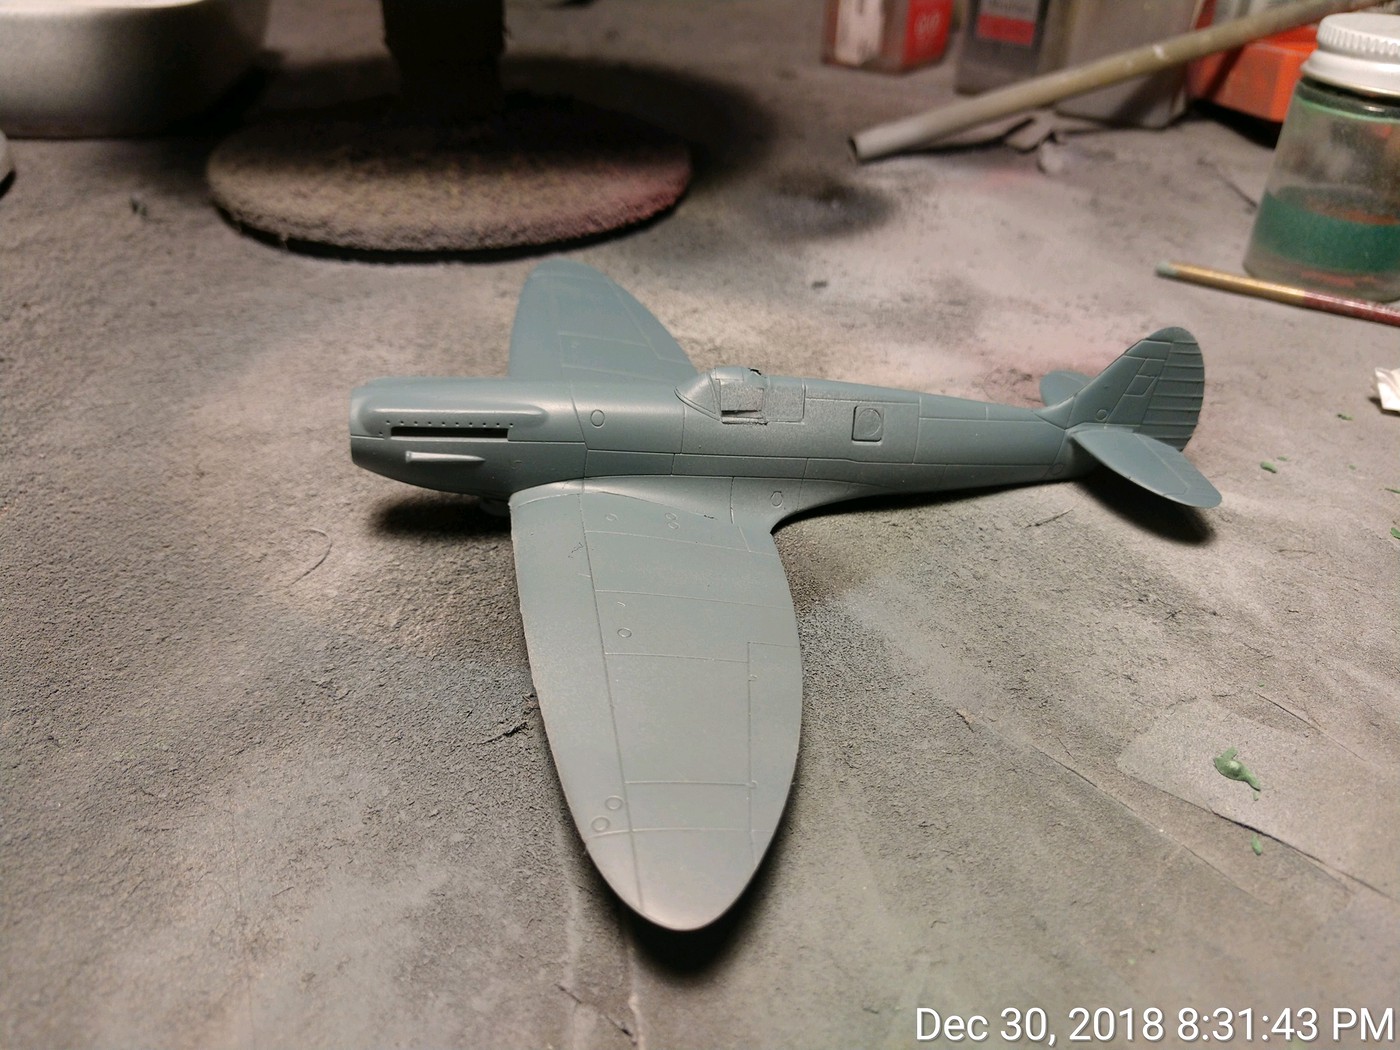
The fuselage fully assembled.

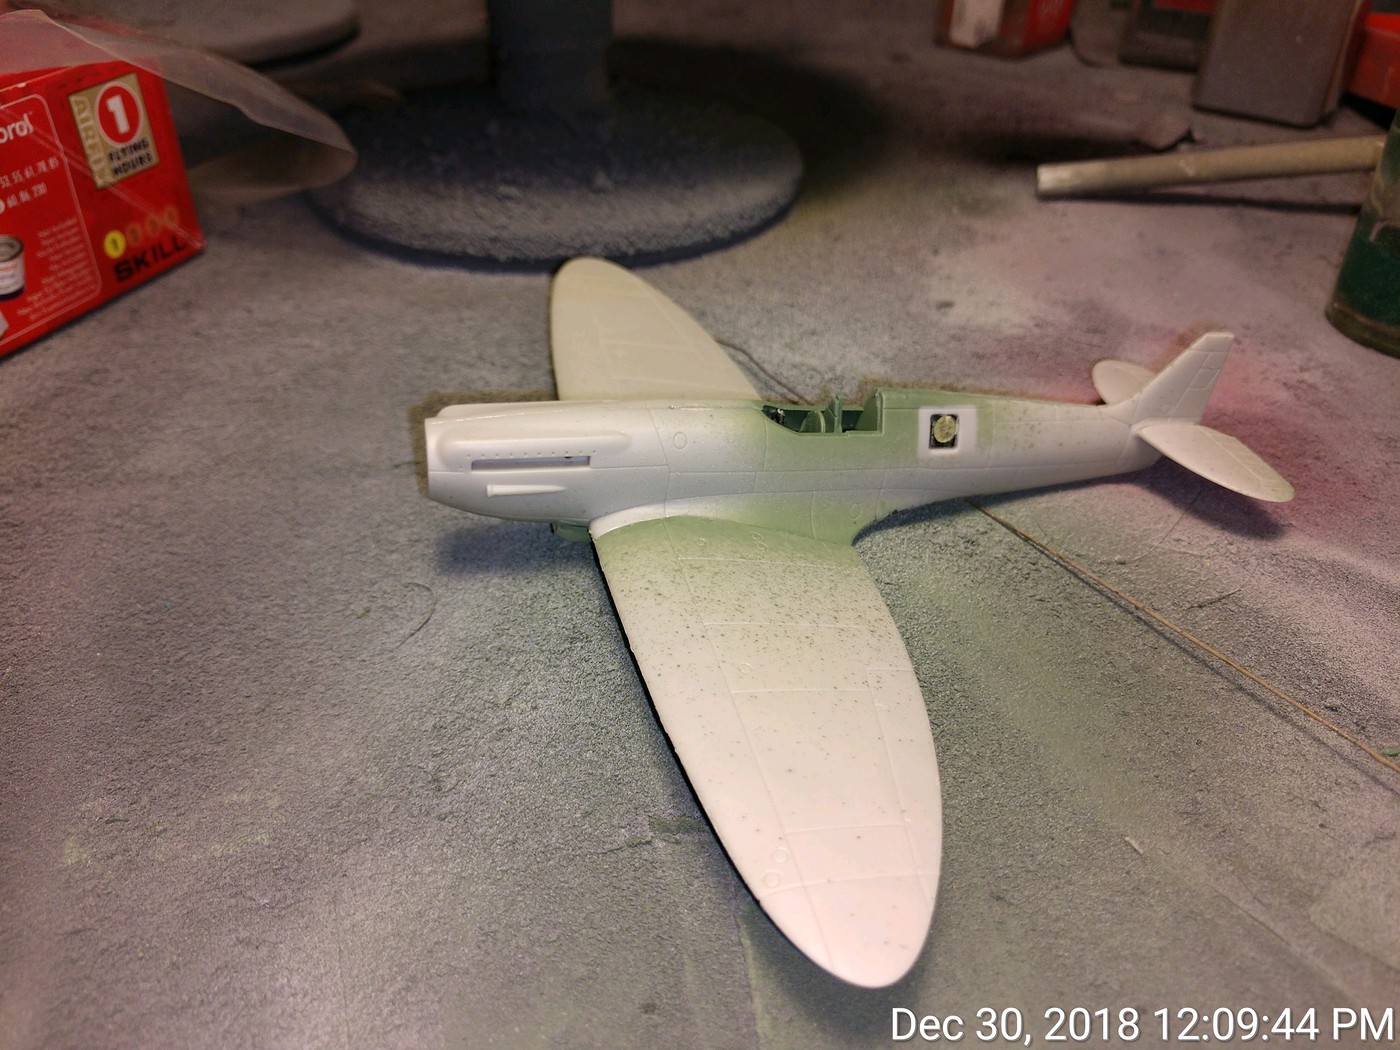
The painted fuselage, not quite ready for decals.

The paint is Vallejo Air's Faded PRU Blue. It caused me some concern as it was still tacky a couple of hours after I shot it. I thought I was going to have to use the microwave to get her done in time, but I didn't have to. I did notice the thin spots and repainted.
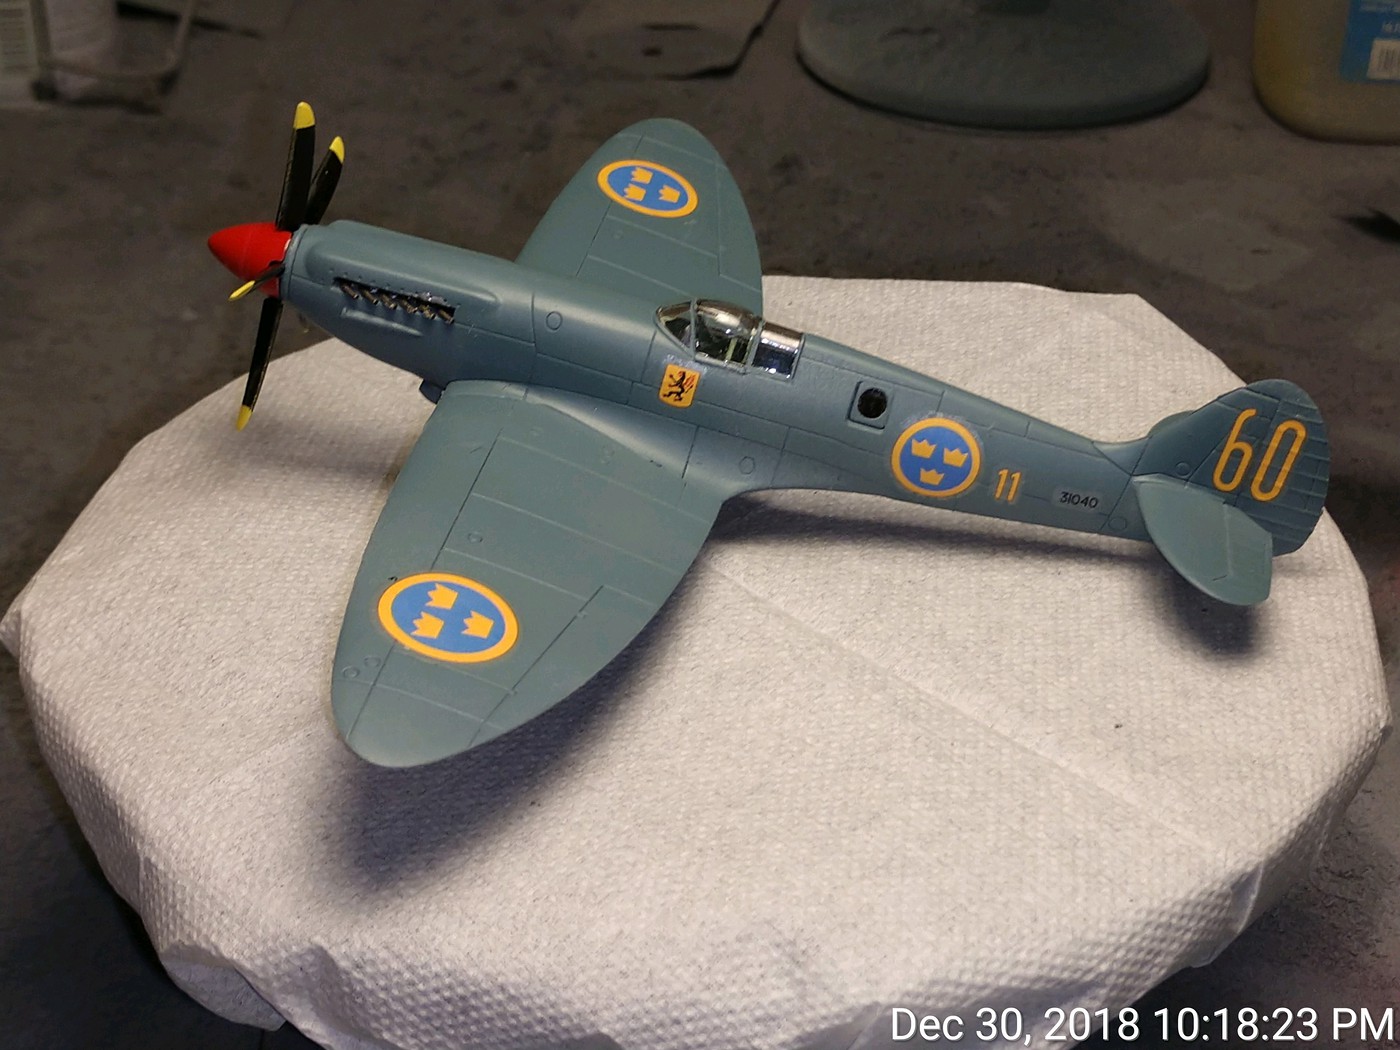
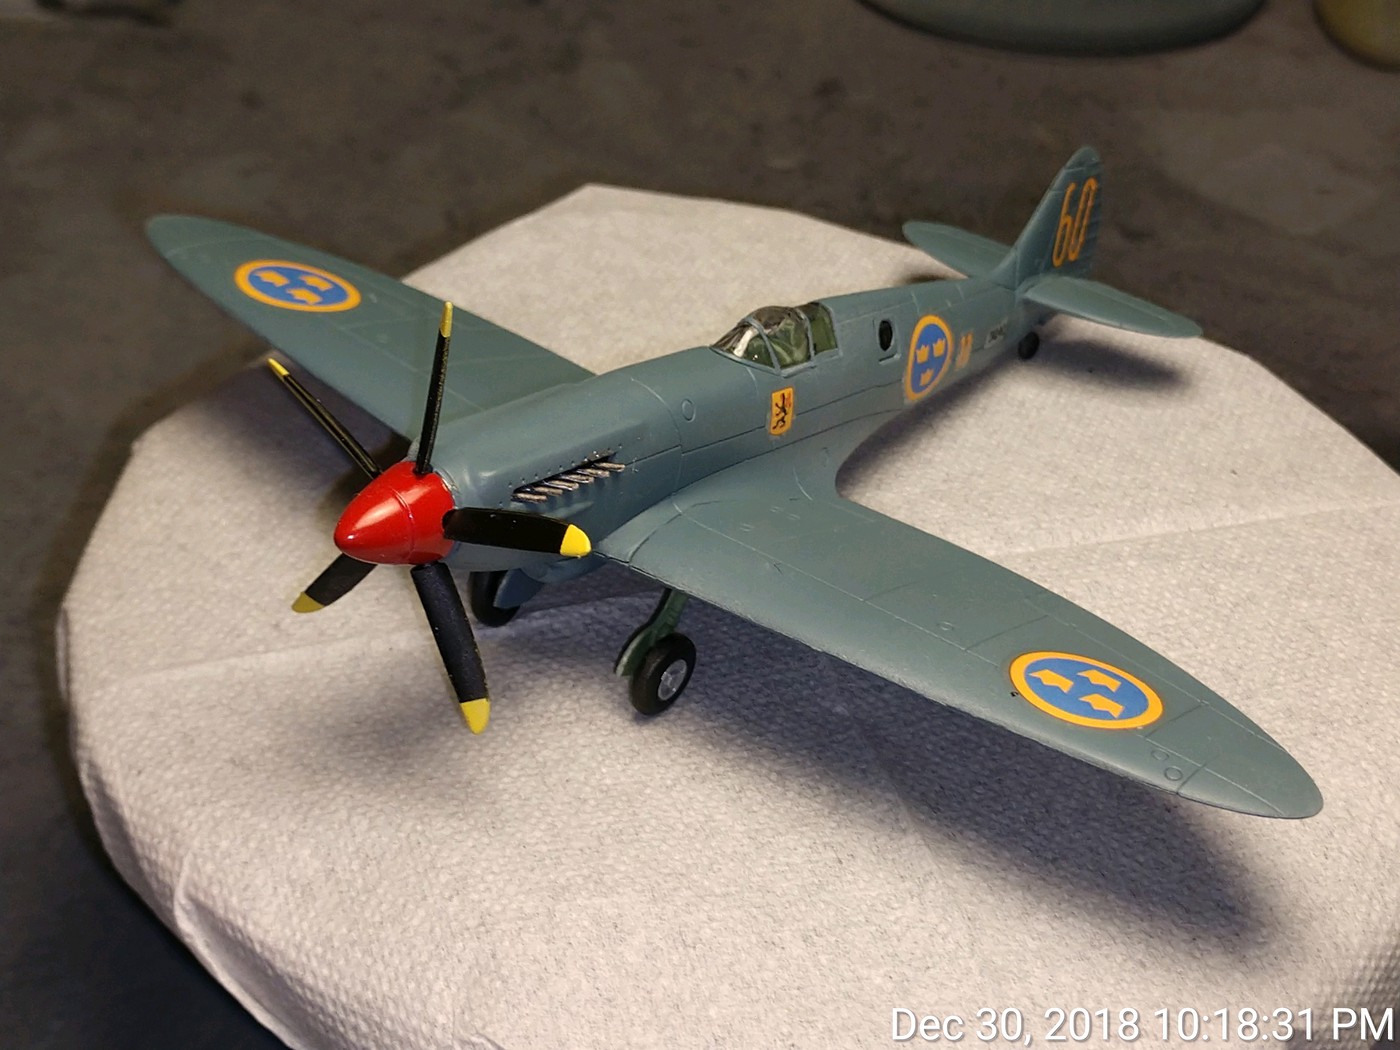
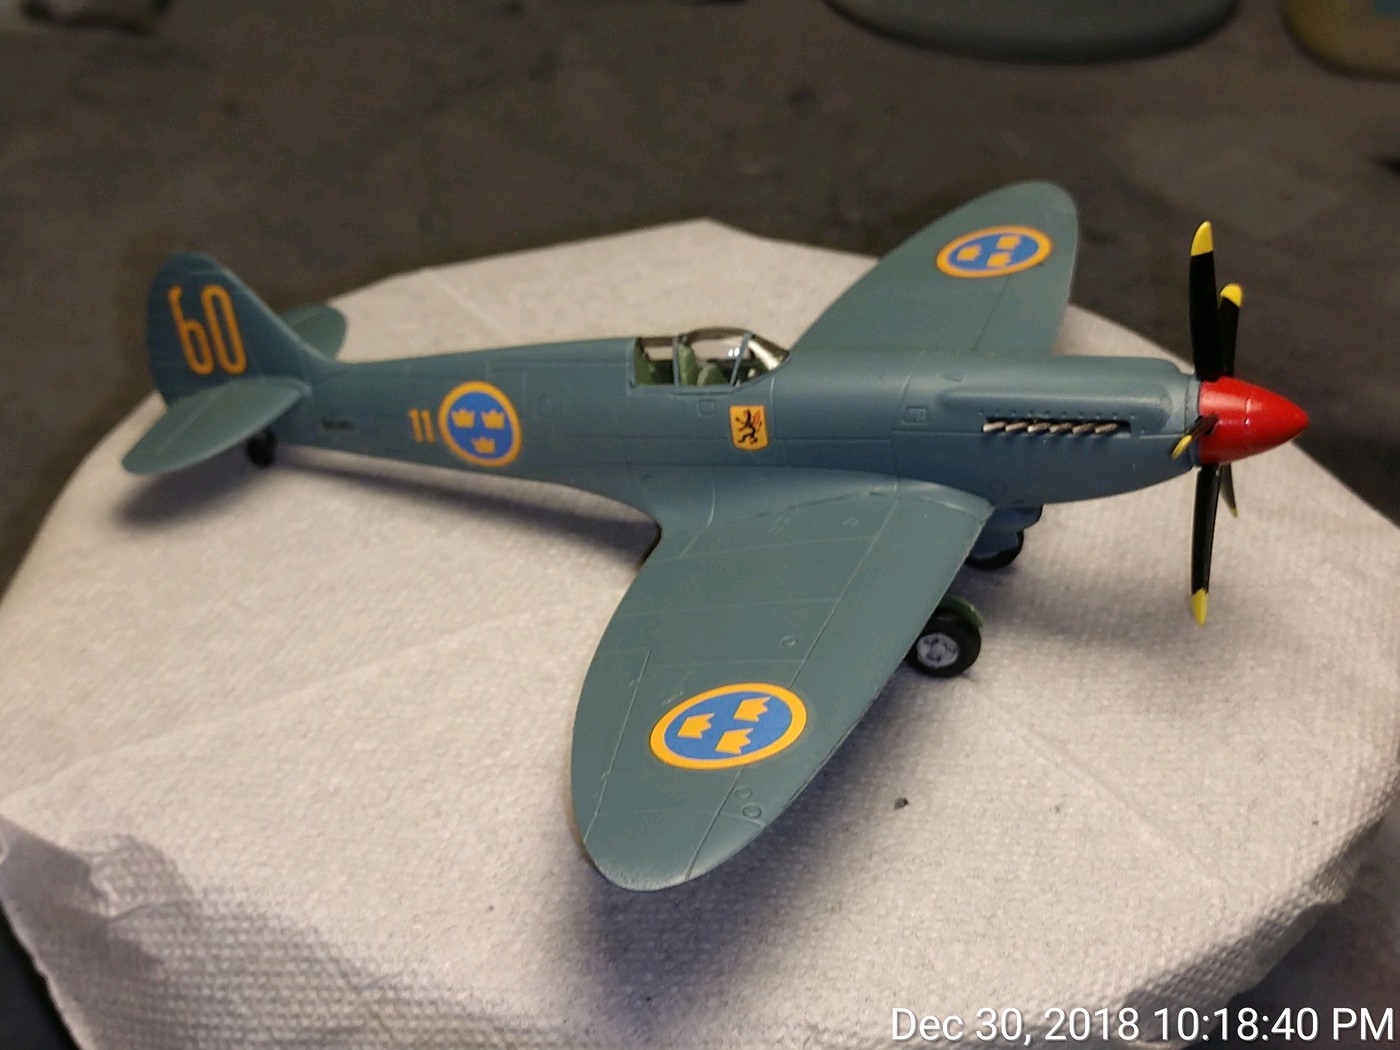
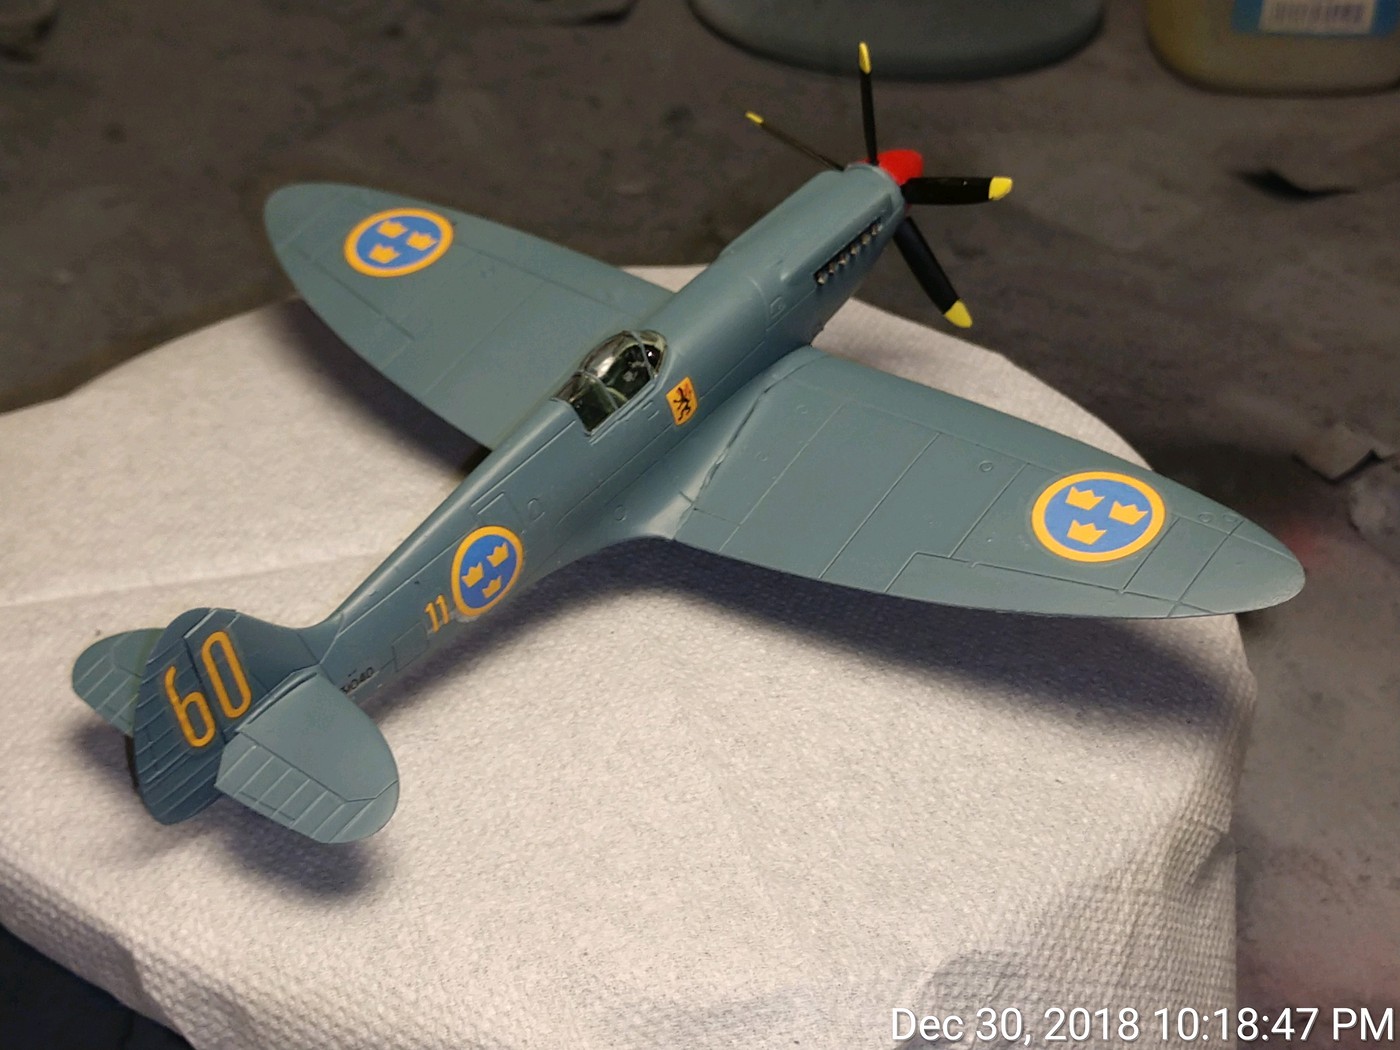
She's done.

A few afterthoughts. One is buy the Eduard canopy mask set. It makes life simpler. Although the mask set doesn't provide masks for the oblique cameras in the bottom of the fuselage, it does provide two full sets of wheel hub masks and the unused set will fit perfectly. I still have a problem with Spitfire wing root gaps, especially Airfix's. There's got to be a better way of doing that join, even if it's not along an existing panel line (in fact, I'd prefer it because then I could fill it without having to worry about rescribing or losing detail). Overall, the kit fits pretty good, just the usual seams in the usual places. I've seen a couple of attractive schemes in Fast Silver, so I'll probably be doing this one again eventually.

Buddy- Those who say there are no stupid questions have never worked in customer service.

  • Member since
    November 2003
  • From: Nashville, TN area
Posted by bobbaily on Monday, December 31, 2018 4:21 PM

Scott-so sorry for your loss-it's a very hard thing to walk thru

Been a while since I check in-sorry-watched a lot of great builds so if I miss anyone, I apologize

SteveCB-nice job-even more impressive in 1/144 scale

68GT-great looking Cobra-I need to add one to my collection

Scott-excellent build on the SBD-we all know that Monogram kits are not always friendly builds and given the age of the SBD molds, you rose to the occassion-very nicely done...in 48 hrs no less.

Lewbud-looking forward to seeing the Airfix Spitfire-is this one of the new generation kits?  Still yet, 1/72 is too small for my liking

Caveman & Sailing Dutch-looks like you're both off to great starts

Against my better judgement, I'm diving back in-started yesterday afternoon-Tamiya 1/35 T-34/76 1943-old kit, but still goes together well-here are pics of the journey thus far-will decal & finish up tomorrow (if all goes well)-

oh...btw-it's going to be a Beuttepanzer 747(r) 1943....

Bob


  • Member since
    December 2003
  • From: 37deg 40.13' N 95deg 29.10'W
Posted by scottrc on Monday, December 31, 2018 9:20 AM

Thank you everyone for the condolences and support.  It means a lot.

Caveman, that Cougar has a lot of parts.  A overall white paint job should make all those details stand out.

Good luck!

Scott

  • Member since
    March 2008
Posted by Caveman on Monday, December 31, 2018 12:20 AM

That SBD turned out great!   Nice finish.  Look forward to that Jagdtiger.  German paint can be a bear under normal circumstances, can't imaging attempting it in a 48 hour build.

Well, halfway through on the Cougar.  Most of the assembly is done in 4 major sections.  Funny, when I chose this kit I thought it would go together faster.  Didn't take all the fiddly bits into consideration.

 PC311864 by Tim Bowers, on Flickr

 PC311865 by Tim Bowers, on Flickr

 PC311866 by Tim Bowers, on Flickr

 PC311868 by Tim Bowers, on Flickr

 PC311867 by Tim Bowers, on Flickr

 PC311869 by Tim Bowers, on Flickr

 PC311871 by Tim Bowers, on Flickr

 PC311872 by Tim Bowers, on Flickr

I did notice a few issues.  I will need to glue the cannon into place.  The kit nicely provided a metal barrel but the assembly is not nearly tight enough to support it's weight.  Also, the rear doors should be flush and not stand proud as the kit has them.  Oh well.  I will also likely replace the plastic antennas with some cat whiskers as soon as the little fuzzball gives some up.

Next stop, paint shop.  I will be doing a UN overall white but hope to make up for the bland color with heavy weathering. 

Till tomorrow.


  • Member since
    November 2004
  • From: Galloway,Ohio
Posted by Daddyman on Monday, December 31, 2018 12:09 AM

Scott,

Sorry to hear about the loss of Molly. Losing a loved one always sucks. 

Nice job on the SBD. I'm glad you got to finish it.

Bill B 2.0

  • Member since
    July 2014
Posted by modelcrazy on Sunday, December 30, 2018 11:34 PM

Well done Scott. Like Buddy said, sometimes a distraction is just what one needs.

Steve

Building a kit from your stash is like cutting a head off a Hydra, two more take it's place.


http://www.spamodeler.com/forum/

  • Member since
    June 2008
Posted by lewbud on Sunday, December 30, 2018 10:37 PM

Scott,

Well done sir! Sometimes a distraction is what is needed. I will add your pic to the front page when I get to work tomorrow.

SD,

Not a big fan of German armor, but that is my favorite German WWII tank. I look forward to seeing it come together.

As for the Spit, finished with about thirty minutes to spare. Pics tomorrow.

Buddy- Those who say there are no stupid questions have never worked in customer service.

  • Member since
    December 2003
  • From: 37deg 40.13' N 95deg 29.10'W
Posted by scottrc on Sunday, December 30, 2018 10:06 PM

I'm back.  Last night was a long and sad night for my wife and I.  On that note, I couldn't sleep and spent the night working on the SBD and got it finished.  It was a challenge in that the old, worn tooling made part fit and shape non-existant.  It was no longer the kit that I built 45 years ago.

I even built the little blobs of plastic that once resembled the LSO and airdale.

The build was good therapy.

I left the kit vintage. The flaps extend, wheels retract, and the bomb drops.  I even left most of the injector pin marks and the raised rivets.

Lewbud, use the first picture for the front page.  Thanks again for hosting this GB.  

  • Member since
    September 2017
  • From: Netherlands
Posted by Sailing_Dutchman on Sunday, December 30, 2018 3:09 PM

I began the build at 22:08 last night and have finished construction.

Now for the painting, I am going to try a three-tone camo which will be the hardest paint scheme that I have tryed. Hopefuly it comes out well.


  • Member since
    June 2008
Posted by lewbud on Sunday, December 30, 2018 2:57 PM

Scott,

Sorry to hear about your loss. My condolences to you and your family.

Tim,

Looking forward to seeing your build.

No pics yet but the PR. XIX is primered and ready for paint. It's going to be tight, but I think I'll be alright.

Buddy- Those who say there are no stupid questions have never worked in customer service.

  • Member since
    March 2008
Posted by Caveman on Sunday, December 30, 2018 4:26 AM

Great work guys.  Glad we have so many finished so far.  I find myself with a few days to finally get to the bench.  Got out of the gate at 1 AM with a 35 scale Canadian AVGP Cougar.

 PC221851 by Tim Bowers, on Flickr

 PC301853 by Tim Bowers, on Flickr

 PC301857 by Tim Bowers, on Flickr

 PC301856 by Tim Bowers, on Flickr

I am fortunate to have one of these parked in front of a business within 20 min. from me.  Kit looks to be rather nice and is going together well. 

Four hours in and my brain hurts.  Lower hull is almost complete and was a surprising number of parts.  Powertrain, suspension and steering are all together.  Needed some care to keep things aligned but it looks the part and I am happy with things thus far.  Going to let things harden up and will press on tomorrow.

 PC301858 by Tim Bowers, on Flickr

 PC301859 by Tim Bowers, on Flickr

 PC301860 by Tim Bowers, on Flickr

 PC301861 by Tim Bowers, on Flickr

 PC301862 by Tim Bowers, on Flickr

 PC301863 by Tim Bowers, on Flickr

Till the morning...............


  • Member since
    March 2008
Posted by Caveman on Sunday, December 30, 2018 1:13 AM

Sorry Scott.  A dog is a part of the family and their loss is tough.  Sympathy Bro.


  • Member since
    July 2014
Posted by modelcrazy on Sunday, December 30, 2018 12:40 AM

I am sorry Scott. Losing a dog is very heartbreaking.

You have my sympathy and condolences.

Steve

Building a kit from your stash is like cutting a head off a Hydra, two more take it's place.


http://www.spamodeler.com/forum/

  • Member since
    April 2014
  • From: Australia
Posted by lostagain on Saturday, December 29, 2018 8:31 PM

Oh man, Scott that is terrible, so sorry to hear that, you look after Molly and see her on her way.

Piers

  • Member since
    December 2003
  • From: 37deg 40.13' N 95deg 29.10'W
Posted by scottrc on Saturday, December 29, 2018 8:12 PM

 I'm not going to finish.  My dog Molly just had a heart attack and died about 10 minutes ago.  

  • Member since
    December 2003
  • From: 37deg 40.13' N 95deg 29.10'W
Posted by scottrc on Saturday, December 29, 2018 11:37 AM

Well, I need to stop and do some other work.  This is a good stopping point.  A lot of filler that needs time to dry in places that there is no longer plastic due to the mold wear and material shrinkage.  

  • Member since
    December 2003
  • From: 37deg 40.13' N 95deg 29.10'W
Posted by scottrc on Saturday, December 29, 2018 9:36 AM

Lewbud, I look forward to you getting to finish this one with meBig Smile

This old kit really is showing its age.  I could not have built it as a 10 year old now with all the flash and misalignment of locator pins.  The bombs are just chunks of plastic that require a lot of carving and sanding.  Lots of modeling fun though.  

The dive breaks need drilled. This will be an easy job with the old Dremel drill press.

So now all my pre-painting is done and drying and I am drilling holes.  Not bad for being two hours in the project.  However, 40 years ago, I would have been done and starting on a mission to hunt down and dive bomb the cat.  Ahh, what memories.


  • Member since
    June 2008
Posted by lewbud on Saturday, December 29, 2018 7:39 AM

Front page is updated with Ed's snake and that brings the number of completions to 13! As with all good things they must eventually end, so it is with this GB. You have until the stroke of midnight on 20 January to start your builds. This is approximately two months from it's start date and as good a date as any to end it on. If you have unfinished builds like your fearful leader, please continue to post their progress here as we'd like to see them finished. They will be added to the front page under the heading of refused to quit.

Hopefully, the third time will be the charm for me. Last night at 2249, I started Airfix's new tool Spitfire PR XIX in 1/72.

Proof of unstartedness:

About two hours later, I called it a night because I had to be at work at 0600 this morning.  Before I went to bed, progress was made but nothing really pic worthy. She'll be in Swedish markings and in this case she's PRU Blue with a red spinner. The spinner was primed and painted red. The prop has been primered and is ready for a coat of yellow for the tips. The wings have been glued together and the glass for the fuselage camera bay has been installed. Somewhere in the mists of time, I had a case of the smarts and bought a canopy mask for this and a Spit Mk. Ia. I found them the other day as I was cleaning up the apartment and took this as a sign. Before retiring for the night, I masked the canopy and the porthole for the fuselage camera. Before I left for work, I hit one side of the wheels with Tamiya gloss aluminum and will do the other side when I get home this afternoon. I would have started painting the cockpit, but it seems I've run out of British interior green and will pick that up on the way home (I had a partial bottle this last time I did a paint inventory, but couldn't find it last night).  I am off today at 1400 and don't have to be at work until 1200 Monday so I don't have an excuse for not finishing this build in time. Hopefully by bed time tonight, she'll be in PRU blue, ready for gloss. A boy can dream, can't he?

Buddy- Those who say there are no stupid questions have never worked in customer service.

JOIN OUR COMMUNITY!

Our community is FREE to join. To participate you must either login or register for an account.

SEARCH FORUMS
FREE NEWSLETTER
By signing up you may also receive reader surveys and occasional special offers. We do not sell, rent or trade our email lists. View our Privacy Policy.