SEARCH FINESCALE.COM

Enter keywords or a search phrase below:

Achtraden! 8x8 Group Build '09-'10

45450 views
373 replies
1 rating 2 rating 3 rating 4 rating 5 rating
  • Member since
    May 2005
  • From: Dublin Rep Of Ireland
Posted by terry35 on Saturday, April 17, 2010 6:50 PM

Hi, Mike thanks for the kind words, I'm nearly there and I must say its the most enjoyment I've had in a while. The kit is well worth having, I seen the vehicle for the first time in a magazine acouple of years ago and at the time it was only available as a resin kit. Trumpy have really done a great one with this one. I took delivery of their M1131 stryker and that is even better just stunning. I've never seen so much in a box for theh price.

Any way I want to finish one or two other projects before I touch another kit. I will do a stryker for this GB but won't be starting right away.


I will keep posting as I progress and will meet the deadline.

Terry.

  • Member since
    March 2007
  • From: Carmel, CA
Posted by bondoman on Thursday, April 15, 2010 9:48 AM

T-Bolt: don't forget to post my BTR when you getta moment...

  • Member since
    April 2005
Posted by Thunderbolt379 on Thursday, April 15, 2010 8:14 AM

DP -- I'll use that shot for sure! Great piece of work and an honour to have hosted the GB that gave birth to it!

Terry -- stunning is the word! That Centauro is amazing! The detail level and the finishing techniques do justice to a spectacular vehicle, and I'm really feeling the urge to add one to my collection!

Talking to all members here, there's six weeks left in this GB's scheduled run, we have eight or nine completions at this point with two more very close -- do we have any more projects forthcoming?

Cheers, guys,

Mike/TB379

http://worldinminiature.blogspot.com/

  • Member since
    May 2005
  • From: Dublin Rep Of Ireland
Posted by terry35 on Wednesday, April 14, 2010 4:28 PM

Andy that out door shot is stunning excellent. Wall of fame for sure.

Well I got painting fever at the weekend and got the highlighting done and the wash in. I mixed the base humbrol colour with some oils to allow for blending as opposed to actual drybrushing which can be pretty harsh.

With the blending you can get more time to work the colours as opposed to just working with enamels straight.This allowed me to subdue any harshness from chipping. So after 2 days drying I was away with the first light wash. I have only got he first in so far and tonight done some mud. Its still drying and I need a while to decide my next move.

So on with the pic's.

Early wheel.

The wheel installed and mud etc added.  The harsh chips are almost gone but still visible.

Almost finished roof I think I need to get another wash in to bring out the anti-slip plating.

Just a quick line of pic's.

Thanks for looking,

Terry.

  • Member since
    April 2009
  • From: Carmel, IN
Posted by deafpanzer on Sunday, April 11, 2010 8:07 PM

Terry- Loving your process so far! Yes  After being away for more than a week on a cruise, I was hoping to see more activity on our GB when I return and it is happening.  I look forward to see when it is done.

TB- Thanks!  Please use this photo for the hall of fame... I had FUN building this one.  That's what really counts...


Andy

  • Member since
    May 2005
  • From: Dublin Rep Of Ireland
Posted by terry35 on Wednesday, April 7, 2010 5:57 PM

 I'm posting some progress shots of where I am at the moment. I've started the undercoats for the chipping. I want to keep it to a minimum, but have decidecd that in service the turret would get a fair bashing with crews climbing on and off. but on the upper parts of the hull I'm trying to get a balance.It's kinda hard to put into words so I'll just post pics and wait on opinions of my colleagues here, I will appreciate any advice.

I have done very little work on modern vehicles that have not been in battle so to say.

Well on wit the pics.

The front plate, I think maybe more here?

The welds can be seen on the back here.

The outer wheels. I'm happy with this and hope to finish the wheels at the weekend. Remember Thursday is beer night.

The inner wheels I painted the brake discs shiny because they are constantly in use.

The turret side the homemade chains are clear now and I'm looking forward to drybrushing these to see how they look.

The roof the two lifting lugs on the sight thingy are grandt line.

An idea of how big this monster is, its about teh sizr of a king Tiger.

Thanks for looking.

Terry.

  • Member since
    May 2005
  • From: Dublin Rep Of Ireland
Posted by terry35 on Wednesday, April 7, 2010 7:51 AM

Thanks for the comments Mike, and to answer the question, stretched sprue for the welds with copious amounts of liquis poly applied with a fine brush.

Thanks again Mike,

Terry.

  • Member since
    April 2005
Posted by Thunderbolt379 on Monday, April 5, 2010 7:04 AM

Nice work, Terry -- this looks like another first rate offering from Trumpeter. You've done some good things with those weld seams -- is there any paritcular trick to it? It looks like super-thin lines of putty, textured with a knife. The only time I've done extra weld seams I used fine strip plastic and textured it with a hot knife point. I'm looking forward to adding this one to the leaderboard!

Andy -- I still need to add yours to the roll of honour too, don't worry, I haven't forgotten!

My own Stryker will be back on the bench before long for its weathering phase.

Cheers, Mike/TB379 (still recovering from submission of his PhD thesis on March 31st!)

http://worldinminiature.blogspot.com/

  • Member since
    May 2005
  • From: Dublin Rep Of Ireland
Posted by terry35 on Saturday, April 3, 2010 6:56 PM

Well it's been a while since I posted an update on this one. Well I have made progress and am looking forward to the final leg of this project.

I got the kit primed about 2 weeks ago and left it to sit for a couple of days for the primer to cure/harden properly. I then decided to got back to Humbrol paints because they provided the closest match that was readly available in a hobby shop here in Dublin.

I have not used humbrol in a couple of years and decided to use their thinners as well. I used a very dilute mix and go for the several light coats as opposed to my usual heavier acrylic coats.

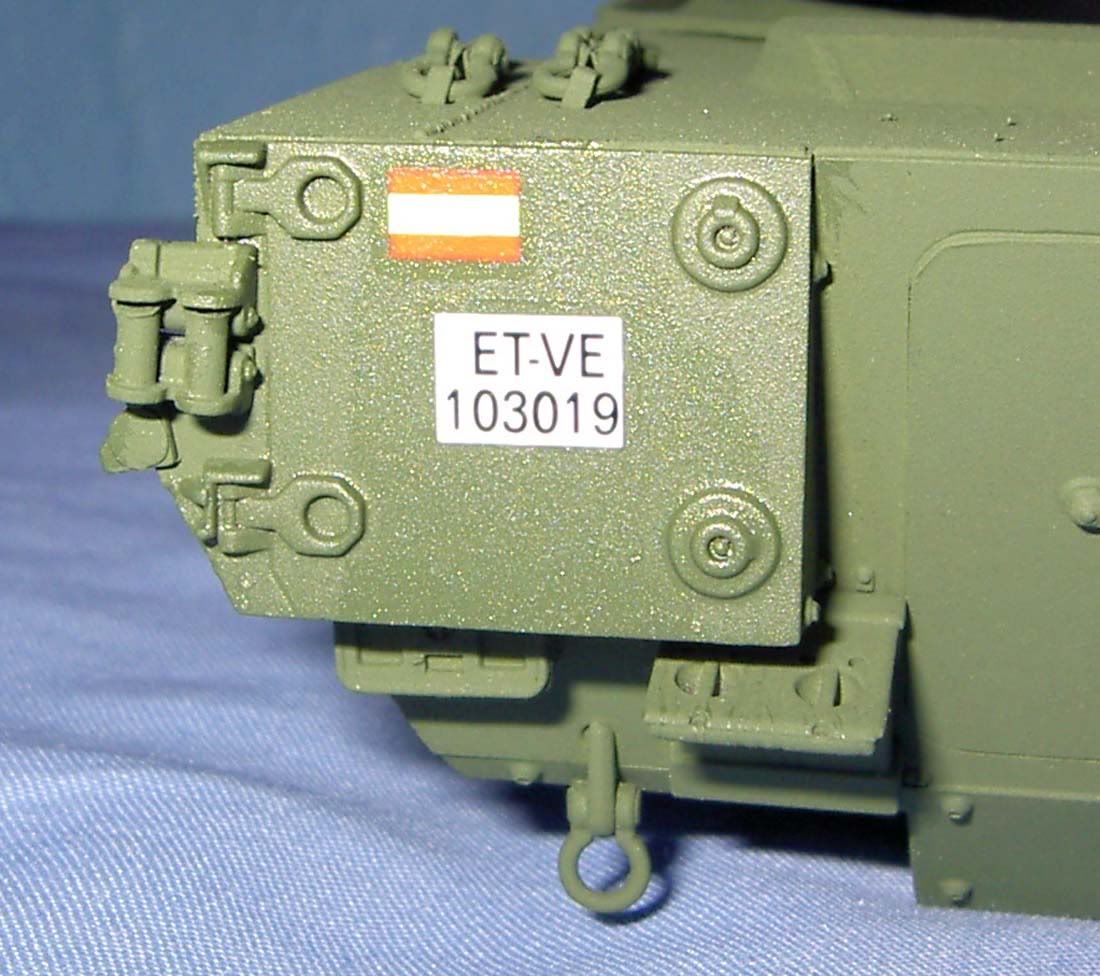
I finally finished getting the base coat down over a couple of sessions during the week and today decided to get the decals down and take some pic's of the progress.

So on with the pics.

This is an earlier shot of the turret showing some of my home made welds. I'm now glad I took the time to do all these on visible parts of the vehicle as in straight green it would be quite boring and these details washed and lightly drybrushed should add some eye candy to any blandness and break up any open spaces.
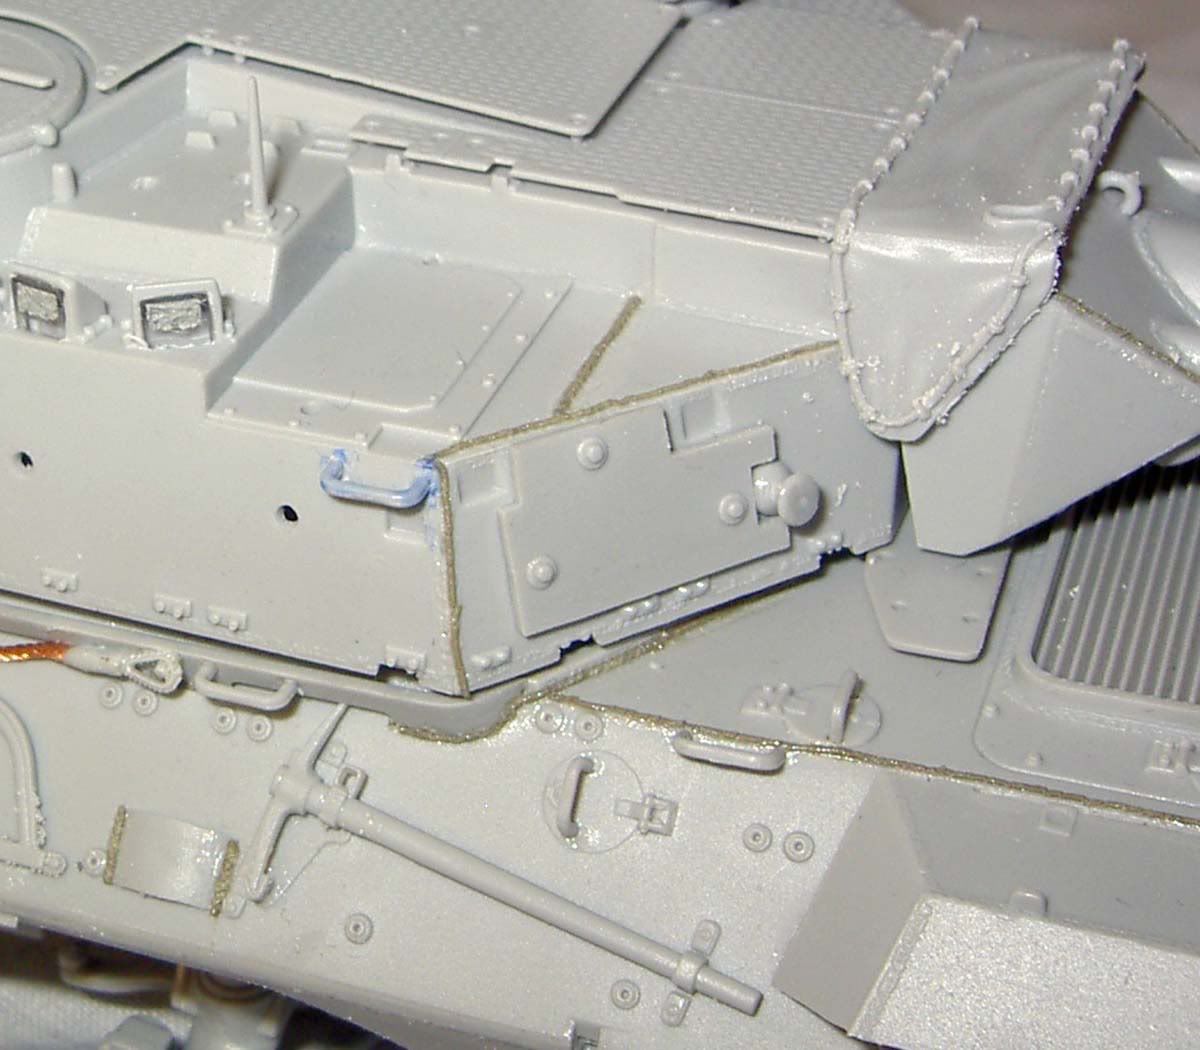
The same area with just a base coat.

This shot shows the anti slip plating on the roof armour.
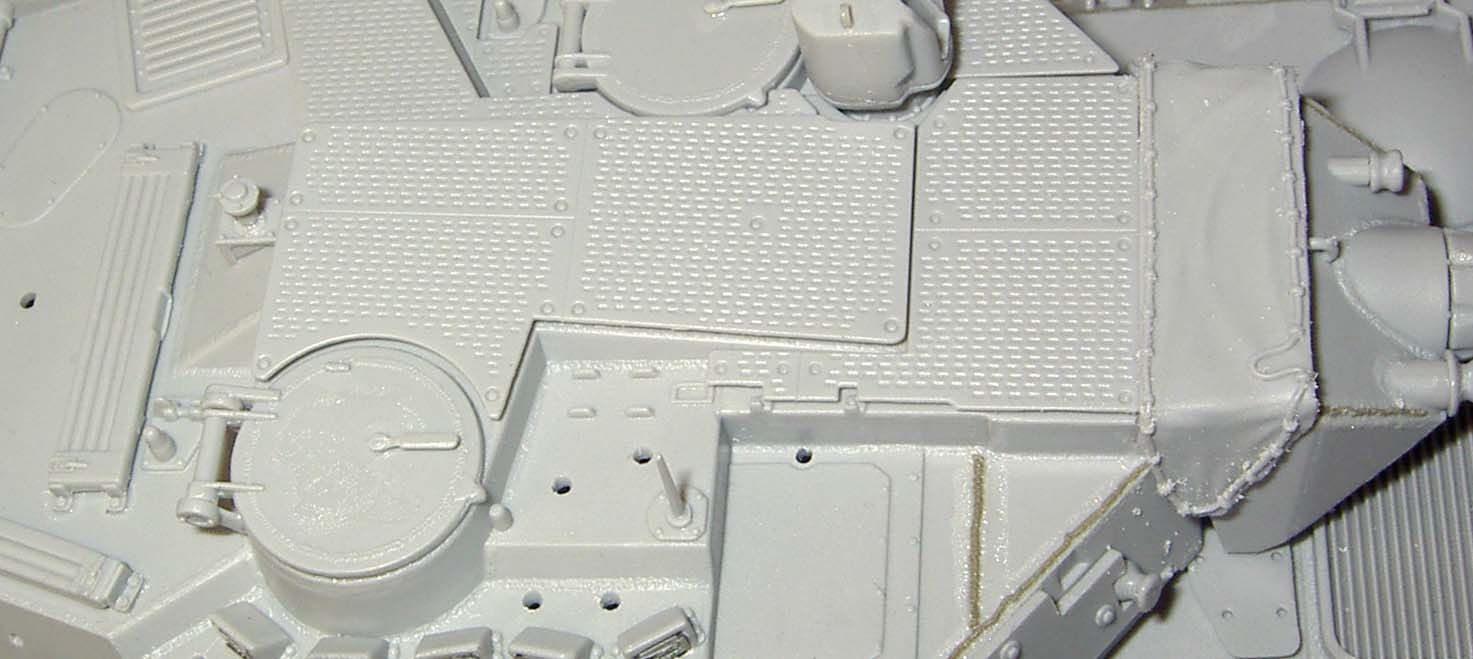
this one shows the spacing.

More home made welds.
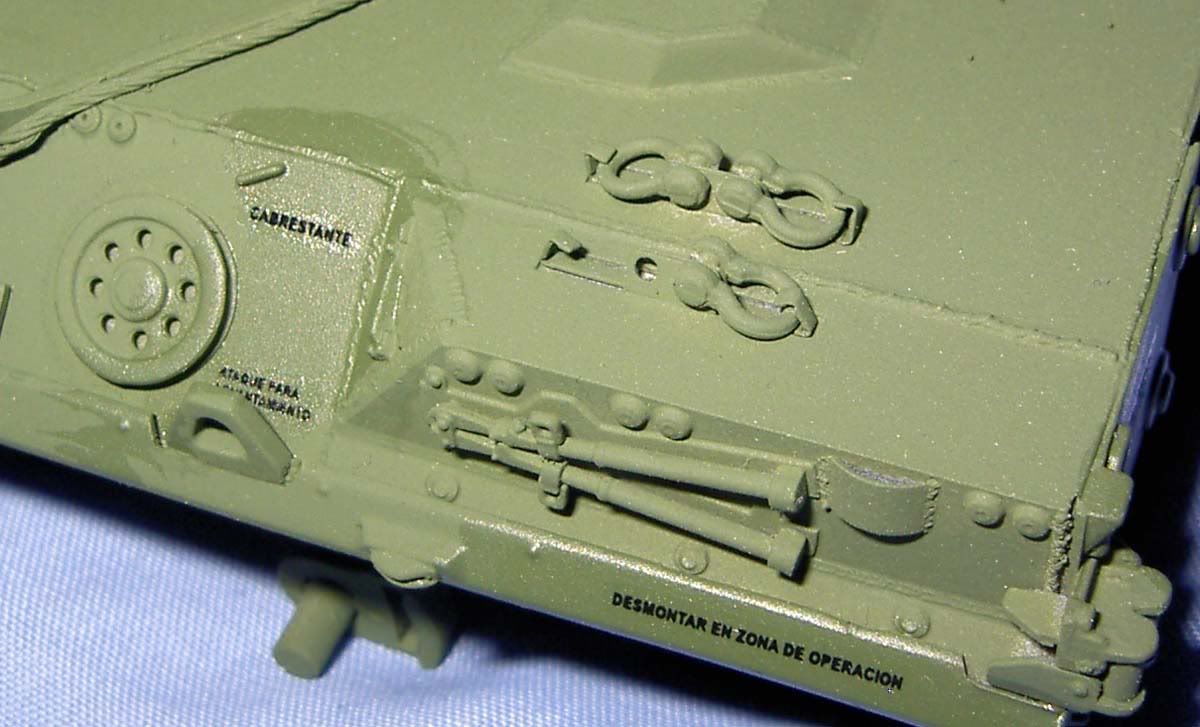
I think this shot gives a good impression of the turret, I know about the gloss, its just there for the decals, I'm going to give a nice coat of matt mixed slightly with satin if I get the weather tomorrow.
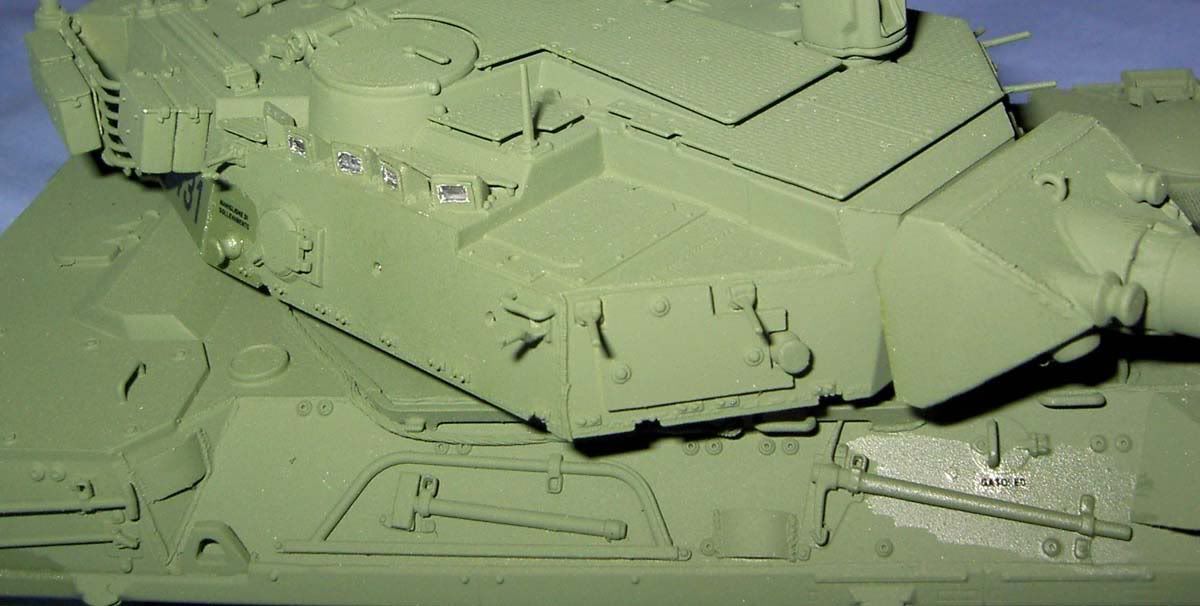
Just more Decals.
THese next two clearly show the spacing on the frontal armour.
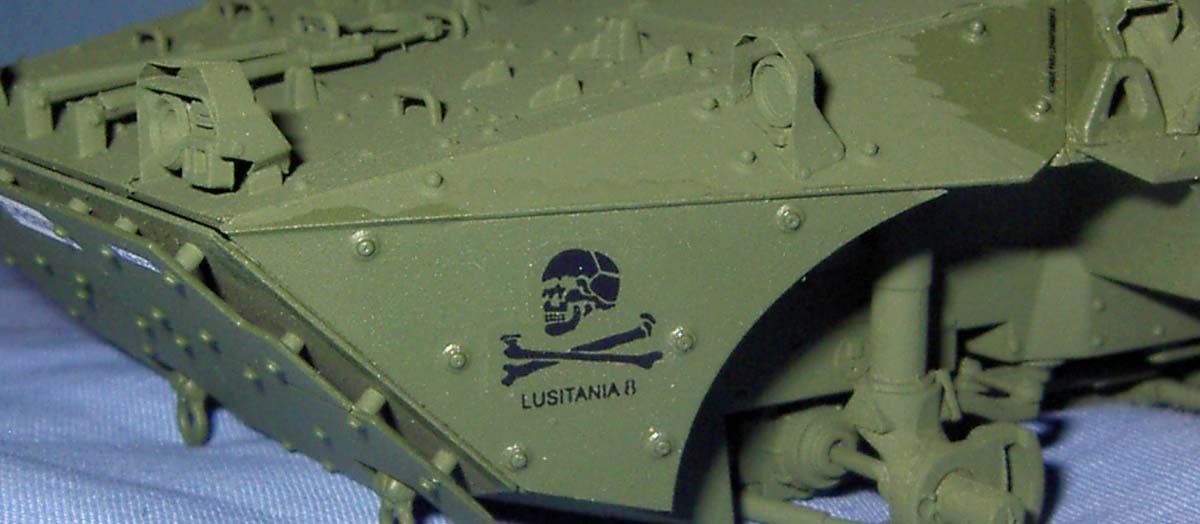
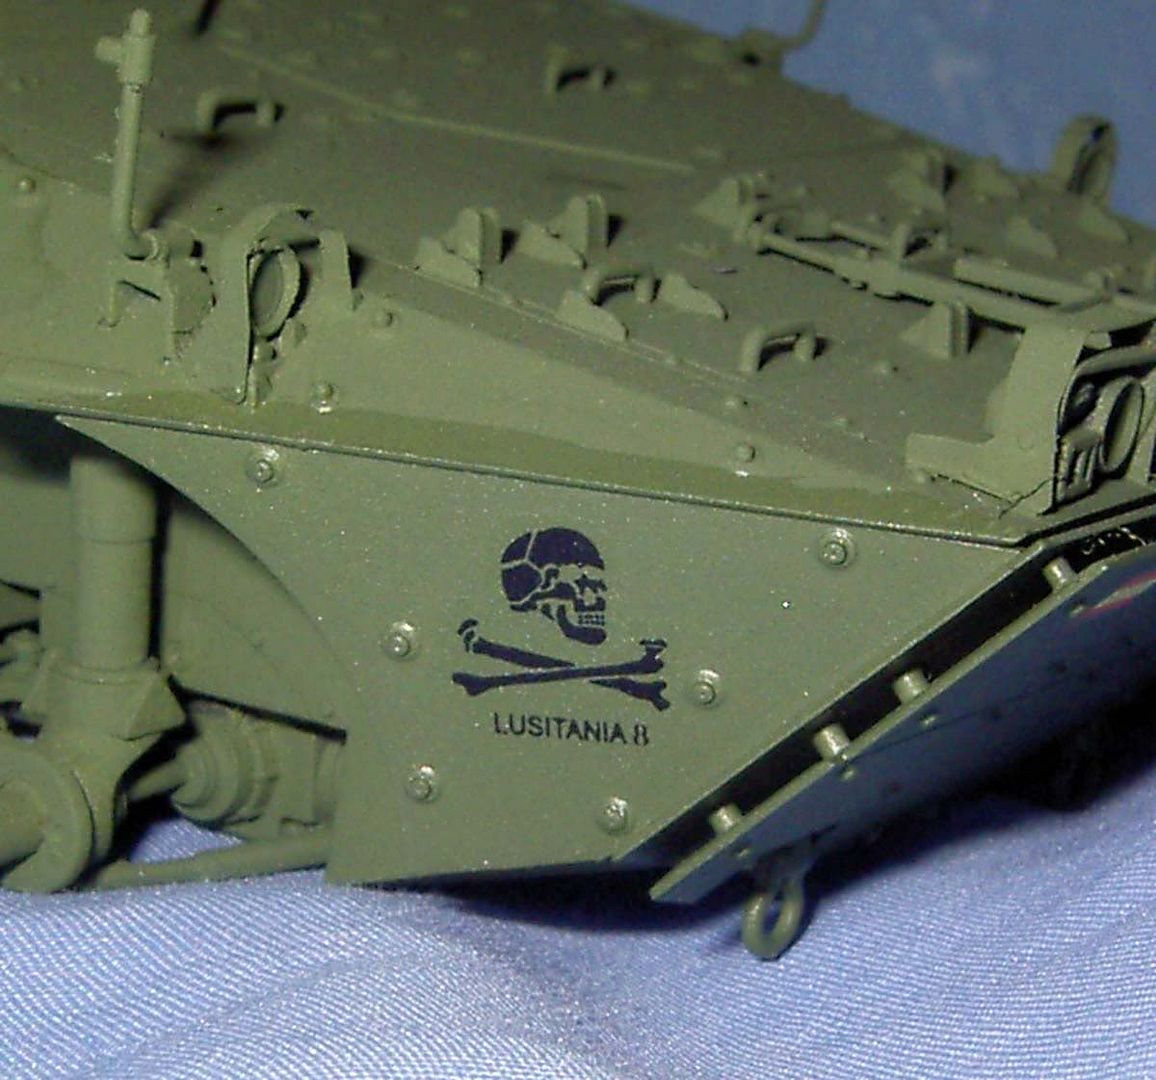
I'm going to try and get all the detail painting done by next weekend.

I must just add that this is one classic kit te only problem was the side steps provided by trumpeter in etch that was useless, actually as I've stated elsewhere I think that trumpeter could easily have provided these parts in plastic.

It's not like they can't do it. a lot of there new releases have super fine moulded detail and I think they have simply jumped on a popularity wagon of providing etch parts.


Thanks for dropping by.

Reagrds.

Terry.


P.S. happy easter to everybody .

  • Member since
    May 2005
  • From: Dublin Rep Of Ireland
Posted by terry35 on Friday, April 2, 2010 4:33 PM

Hi guys, Bondoman nice BTR. Andy I like the 234/1 I can appreciate your wows waiting to get better photography conditions, but the finish so far is amazing the weathering is first class.


Terry.

  • Member since
    April 2009
  • From: Carmel, IN
Posted by deafpanzer on Sunday, March 28, 2010 10:38 PM

I tried to take more pictures using my Sony camera but I don't think it came out that good.  I have to wait for the weather to clear so I can take more pictures outside using natural light.

I am going to build a diomara with this kit.  I have already started working on two figures... bought for only $5!  From Verlinden...

You can see that those idiots are smoking while handling gas... they will be holding jerry cans.  And I will have few gas barrels next to the figures with a post and sign saying 'No Smoking" in German.  Can't think of a good diomara name for this other than 'No Smoking, Idiots'...

I think I am done... off to start a new kit Stug III B for the Turretless GB.  Take care...

Andy

  • Member since
    April 2009
  • From: Carmel, IN
Posted by deafpanzer on Sunday, March 28, 2010 10:29 PM

VERY NICE WORK on your BTR!  Are you in process of building a diomara using a plane as shown in the background?  It looks great too! Yes

Andy

  • Member since
    March 2007
  • From: Carmel, CA
Posted by bondoman on Sunday, March 28, 2010 12:16 AM

Wow you guys are great modelers. Really swell stuff deaf and bert! I'm no armor modeler, more aircraft and it sure shows! But I had fun with this little guy, a 1/72 Trumpeter BTR-80 that I didn't really do anything to except add an antenna.

"Bagram Airforce Base, Fall 1988"

Thanks for looking.

  • Member since
    April 2009
  • From: Carmel, IN
Posted by deafpanzer on Saturday, March 27, 2010 11:55 PM

Good news, I was able to finish my kit today... FINALLY... I know I work at slow pace but I am pleased with my work. 

Applied MIG pigment to the tires and space under the hull... mixature of Rubbel Dust, Industrial City Dirt and very little Vietnam Earth.


Down under...

Added the antennas... the main one broke!  I couldn't believe how many pieces I have broke during this build.  ARRRGGH!  It was a good thing DML kit came with a spare antenna unfortunately its thicker than the original.  I may have it replaced when I run into better spare part one day.

It only need one more little thing... that peel-and-stick mirror that wbill uses for his kits.  I am hoping that I can buy it at AMPS show in Auburn, IN next month.   Please feel free to let me know if you see any mistake I may have made another than several broken parts.

Tomorrow I will take more pictures using my camera (not my BlackBerry as I have been using).  So for now I say it will be treated as COMPLETED as soon as I send better pictures tomorrow!  Stick out tongue


Andy

  • Member since
    August 2012
Posted by Brett2501 on Saturday, March 27, 2010 10:38 AM

Thanks men! I apprecite the kudos. This is my first group build and I  must say it is quite the motivator.

I look forward to more pics of finished kits :)


Bertt


  • Member since
    April 2009
  • From: Carmel, IN
Posted by deafpanzer on Saturday, March 27, 2010 10:17 AM

TB- Completely understand how things can be while working for PhD.  Mind if I ask what's it for? 

Guys- ALMOST THERE! I'd say I about 95% completed... gonna work on the tires over the weekend. Remember I am married and have two little boys so I build at snail pace... I work 1-2 hours at late nights when they all are in bed.  But last night I was able to work on my baby kit for more than 4 hours finally.  My OCD doesn't help me as you can see how clean my hobby desk is!  Here's my update... enjoy!

Applied thinned MM Flat Clear Lacquer using airbrush... it really helped to tone down the gloss. Unfortunately with me being so clumsy I dropped the turret part in the garage and it broke into 4 pieces but I was able to put them all back in one piece fortunately.

Then I applied MIG Dark Wash and Light Wash that I bought at local IMPS show "Roscoe Turner" in Indy last weekend for $10 each and I LOVED IT!  It was alot easier to weatherize that way...

Light wash was applied to the whole kit.  Dark wash was applied to all outlines and corners where dirt would be trapped.  Alot of dark wash was applied under the hull too!

Before I did the washing, I applied MIG Light Rust pigment that I bought at the show too.  Not sure if I should tone it down or leave it that way...

 Wheels are next... last part I hope!  I will apply mixature of MIG sand pigment... have a great weekend guys!

Andy

  • Member since
    April 2005
Posted by Thunderbolt379 on Saturday, March 27, 2010 12:00 AM

Terry -- No worries, I shall look forward to your Stryker with all the add-ons!

DP -- SWEET finish on this beast, it really looks the part! The PE screens make the turret, without them it wouldn't be half so convincing. Wonderful work on a top kit, can't wait to see her 100% done.

Apologies again for being a ghost around here, the PhD is in its final death throes, it won't be long now...

Cheers, M/TB379

http://worldinminiature.blogspot.com/

  • Member since
    August 2009
  • From: Cary, North Carolina
Posted by M1Carbine on Tuesday, March 23, 2010 12:57 AM

Bertt and Def...............SWEET MAN!


Bob

  • Member since
    April 2009
  • From: Carmel, IN
Posted by deafpanzer on Monday, March 22, 2010 11:54 PM

Bertt- I REALLY LIKE your 232!!! Yes  Did you use a plant root as tree?  It really WORKS!

Guys- Update on my 234/1... I am almost there.  Added banged up jerry cans.  Scratched the hull.  Will apply second coat of Future tomorrow so I can try the dots oil-painting procedure.

My wife will be visiting her mother for 3 days starting tomorrow.  So it means I will have more time to work on this as soon as my boys are in the bed!  I hope to finish this before my boys spring break as we will be going far south where the warmer weather is! 

Andy

  • Member since
    May 2005
  • From: Dublin Rep Of Ireland
Posted by terry35 on Saturday, March 20, 2010 8:59 PM

Almost forgot, Bertt that is excellent progress on that 232 so far. Really looks brilliant in its winter scheme.

Terry.

  • Member since
    May 2005
  • From: Dublin Rep Of Ireland
Posted by terry35 on Saturday, March 20, 2010 8:48 PM

Andrew great finish on the  ASLAV, looks great. Andrew the 234/1 is shaping up really well.

Mike its going to take a bit of research and gathering stuff but I will be starting in on the  stryker when it arrives.

PM inbuond.

Terry.

  • Member since
    May 2009
  • From: Hobart, Tasmania
Posted by Konigwolf13 on Friday, March 19, 2010 6:06 PM

I think you need more red round the neck for that Christoper Walken/Headless Horseman look. OK bad joke, just the tree and general colouring and bleakness along with headless guy jumped out and said Sleepy Hollow. So yeah well done on gives me a cold bleak dark feeling.

Andrew

  • Member since
    August 2012
Posted by Brett2501 on Friday, March 19, 2010 6:51 AM

Here are a couple of progress pics of my 232. Feedback welcome :)


Cheers,


Berttt

  • Member since
    April 2005
Posted by Thunderbolt379 on Friday, March 19, 2010 6:42 AM

Terry -- yes, an overrun is definitely possible, no great builds are gong to be stifled for little things like deadlines!

KW13 -- fantastic finish on the ASLAV, the leaderboard has been updated with your model. That's the 7th completed item in this GB and there are several more still in the works I believe.

DP -- looking great, I hope to be adding your 234/1 to the honour roll before long too!

Sorry I've been quiet lately, I'm a few days away from submitting a final completed draft of my PhD for the very last round of checks before it goes off to the examiners, and at the same time I've started having log-on problems at the FSM site. It doesn't recognise me when I log on from my own terminal, and I have to use another to get in, which is very frustrating.

I had hoped to have the Stryker done weeks ago but the workload has been too steep. I should be out from under the PhD in a matter of days now, and will finally be able to get back to the bench.

Cheers all, and great work,

Mike/TB379

http://worldinminiature.blogspot.com/

  • Member since
    April 2009
  • From: Carmel, IN
Posted by deafpanzer on Monday, March 15, 2010 12:29 AM

Andrew- Congrats!  You have built a real good looking one! Yes

Guys- Having a great time with my kit...

- The damaged wheels have been fixed. 

- Airbrushed mist of base coat 12 inches from the kit... it really helped to tone it down and bring the camo together!  Thanks wBill for the tip!

- I applied first coat of Future before I added the decals.  Not many for this one...


- Painted the tools and accessories...

- Completed the PE for the grenade guard atop of the turret... you gonna Heart LOVE Heart this Dragon kit that came with nice amount of PE stuff.  I still need to paint those screens...

Tools and accessoires have been added... that will make my wife very happy as she never leaves the house without accessoires.  The jerry cans are next... they have been painted but needs to be banged up first. Stick out tongue

Can't wait to finish this... thanks for looking!

Andy

  • Member since
    May 2009
  • From: Hobart, Tasmania
Posted by Konigwolf13 on Sunday, March 14, 2010 7:13 PM

DONE, Yay!!!

  • Member since
    May 2005
  • From: Dublin Rep Of Ireland
Posted by terry35 on Sunday, March 14, 2010 6:49 PM

Mike I think I need to request an overrun on the time limit. I can probably get the Centauro done, but I've fallen in love with the stryker series and have ordered one, that I would lve to have included here.

Terry.

  • Member since
    May 2009
  • From: Hobart, Tasmania
Posted by Konigwolf13 on Sunday, March 14, 2010 1:27 AM

Looks like Frankenstein on wheels, but thats as best I can help. Beastly

Andrew

  • Member since
    August 2012
Posted by Brett2501 on Saturday, March 13, 2010 9:02 AM

Gday lads. Nice work all around so far. Still working on my 232 \and should have some progrtess pics soon. Since we are talking all thing eight wheeled, can anyone explain abit more abou the machine in this pic I found while trawling for ideas?


 Looks like a 231 or 232 has lost a turret and someone has installed a pak 38 in its place. Anyone know anything more?


Cheers Berttt

  • Member since
    May 2005
  • From: Dublin Rep Of Ireland
Posted by terry35 on Saturday, March 6, 2010 4:52 PM

Andrew the ASLAV is really taking on a new form, the weathering is cool and the flag is a really nice touch of extra colour. I like the splatter on the vehicle. Maybe it could use some touching up around the running gear. I always find finishing a hard part of the project, deciding how much is enough.

Mike nice STRYKER.. Comming along great.

Andy YES I did make the chains myself. The trick is getting a piece of wire as narrow as you can find. Double it in half and grip one end in a vise. Grab the other in a pliers or similar. Now twist until the twists are very tight.

Now the trick take a flat pliers, the kind jewelers use with flat jaws .

Flatten out the twisted wire and you will immediately get chain.

Hope that helps.

Terry.


JOIN OUR COMMUNITY!

Our community is FREE to join. To participate you must either login or register for an account.

SEARCH FORUMS
FREE NEWSLETTER
By signing up you may also receive reader surveys and occasional special offers. We do not sell, rent or trade our email lists. View our Privacy Policy.