SEARCH FINESCALE.COM

Enter keywords or a search phrase below:

FW-190 Reich Defender III 5/10-2/11

437394 views
1810 replies
1 rating 2 rating 3 rating 4 rating 5 rating
  • Member since
    October 2007
  • From: Rhode Island
Posted by jmabx on Sunday, May 16, 2010 9:28 PM

SC - I just finished a 109 for the 70th anniversary BoB group build and I'll be working on the Dora and a Italeri Tornado at the same time. I may not be able to catch up... you're building way too fast. And what's this nonsense about Frank pacing himself? Stick out tongue

Daywalker
.

Jeremy- Your wife has good taste (besides the obvious LOL!),

She must have good taste, Frank... how else could she resist this???

Big SmileBig SmileBig Smile

Jeremy    Propeller


  • Member since
    March 2006
Posted by simpilot34 on Sunday, May 16, 2010 9:44 PM

WOW All round EXCELLENT work guys!!!!! Loving these builds!!!!!!!Bow Down

Cheers, Lt. Cmdr. Richie "To be prepared for war, is one of the most effectual means of preserving the peace."-George Washington
  • Member since
    December 2005
  • From: back seat of your car with duct tape streched out
Posted by soulcrusher on Sunday, May 16, 2010 11:10 PM

jmabx

SC - I just finished a 109 for the 70th anniversary BoB group build and I'll be working on the Dora and a Italeri Tornado at the same time. I may not be able to catch up... you're building way too fast. And what's this nonsense about Frank pacing himself? Stick out tongue

 Daywalker:
.

Jeremy- Your wife has good taste (besides the obvious LOL!),


She must have good taste, Frank... how else could she resist this???

http://farm3.static.flickr.com/2490/4185943615_bf27ff6faa_o.jpg

Big SmileBig SmileBig Smile

Ah yes I just left you some nicelies over at Swanny's about the fine job you did on the E-4. I really am just building my 190 to get away from the nightmare of a kit I should have finished long ago. The 1/48  Classic Airframes Boeing P-12 E. It a bear of a kit and I really needed a break from it so I started my 190 now just to calm my nerves! I will have to go back to it soon but for now I am enjoying my 190.

Soulcrusher:hump:


  • Member since
    March 2010
  • From: Brisbane
Posted by Julez72 on Monday, May 17, 2010 1:44 AM

simpilot34

WOW All round EXCELLENT work guys!!!!! Loving these builds!!!!!!!Bow Down

Ditto Stunning BuildsYesYesYes


  • Member since
    September 2003
  • From: South Central Wisconsin
Posted by Daywalker on Monday, May 17, 2010 9:18 PM

Small WIP update from me...

The bomb loading cart is nearly finished, just needs some pastels when the flat coat is completely cured.

And, the "black men" who will be operating it...

Wheel bays are nearly done, just have add the metal effects to the cannons and add the pastels yet.

And, a spinner pic! Propeller  Not much to look at yet, but plan to give it a Future coat tonight so I can add the spiral.

More to come!

Frank 


  • Member since
    December 2005
  • From: back seat of your car with duct tape streched out
Posted by soulcrusher on Monday, May 17, 2010 10:01 PM

Oh sure get me all excited about a spiral spinner pic and then make me wait!:spank:

I fit the tail section on the fuselage tonight and it was a nice fit. The wing on the other hand was a nightmare. Everything from the engine plug sits right onto of the wing spar keeping it from letting the wings come up and sit in the fuselage. I had to snip sand and clip fopr about an hour before I got it to fit but only with some pressure apllied. The left wing root is great but there is a small gap on the right. Not big enough for me to bust out the putty and sanding sticks. I was just a little disappointed because this a newer kit. I think the kit falls into the same class as the 1/48 Eduard 190. Alot of detail in a small area. If one part is slightly mis aligned you will have headaches down the line. Pics tomorrow!

Soulcrusher:bad:


  • Member since
    March 2006
Posted by simpilot34 on Monday, May 17, 2010 11:04 PM

Looking good Frank!!!! Can't wait to see more


Cheers, Lt. Cmdr. Richie "To be prepared for war, is one of the most effectual means of preserving the peace."-George Washington
  • Member since
    July 2008
  • From: USA California
Posted by vetteman42 on Tuesday, May 18, 2010 12:39 AM

Eats This is gonna be fun

Randy So many to build.......So little time

  • Member since
    February 2007
  • From: Bournemouth UK
Posted by Luftwoller on Tuesday, May 18, 2010 7:07 AM

Wow Frank, that cart is the shizzle (Gratuitous Youth reference) Your chipping is spot on.

Hopefully ill be able to post up some pics today. This kit is starting to get me a bit. I know its a brand new kit release but there is an awfull lot of it that just isnt...err...spot on. I know thats being picky but hey Eduard have made a rod for there own back here. There is flash on some of the smaller bits! Yes flash. Also there is a fair bit of ambiguity with the fitment of bits and bobs. One of the biggest oddities is the total lack of reference to where the top I/P fits. Very odd. Also i reckon that Eduard want the builder to build the thing with all hatches open. If, like me, you want to build it smooth, its a little tricky. Anyhoo, no point in whining. Better get on and do something. Oh and i found on the net that a compant called MDC do an exterior kit for the 190D. This includes NEW PROPELLORS!! and corrected spinner. It also comes with smooth and treaded tyres complete with inserts for each. Also it comes with a corrected top cowl for the tamiya kit. All for the more than reasonable price of  £5.95.

Had to have it,

.Pics soon,

...Guy

..'Your an embarrassment to the human genus, makes me ashamed to call myself Homo'.
  • Member since
    January 2007
  • From: Cleveland, OH
Posted by Clebode on Tuesday, May 18, 2010 7:11 AM

Like the cart Frank.  Your build will be a dio, right?

Struggled all weekend with the resin upgrade for the wheel wells and engine frame.  It was probably a mistake by trying to use the upgrade.  Too ambitious!  Indifferent  I have not mastered a technique for gluing resin with CA.  Also, the resin is very brittle and my planning was probably deficient as I keep breaking off little bits of the parts.  I have had to build some replacement parts with styrene stock and PE scrap.  I will try to post some photos tonight.

Hugh

  • Member since
    July 2003
  • From: waynesboro va, via Ireland
Posted by sidure on Tuesday, May 18, 2010 12:32 PM

Frank, sorry for my lack of participation so far, been tied up with work etc but I have been building. By the way I am building the Eduard A-8 and hopefully hope to build the Tamiya D-9 of JV-44. This is my first Eduard kit and its giving me fits of trouble which shocked me, thought it would come together easily. Dont know if it was my fault but Had a terrible time getting the wing tops to fit. You have to build the wheel wells and supports and they all had to be sanded and cut to get them to mate. Also having trouble getting all the interior parts to fit so more sanding and cutting to get the fuselage together. I have some pics that I will post later.

Great work so far guys and enjoying seeing the progress.

Steve

  • Member since
    July 2003
  • From: waynesboro va, via Ireland
Posted by sidure on Tuesday, May 18, 2010 1:26 PM

So here is one of my previous builds. Its an Arii kit and not bad for a cheapie

Steve

  • Member since
    July 2003
  • From: waynesboro va, via Ireland
Posted by sidure on Tuesday, May 18, 2010 1:30 PM

Heres my progress pics of the engine, pit and ip. Lots of nice PE from Eduard.

Great detail all over this kit. Still need to figure out if the fit issues are my fault

Steve

  • Member since
    February 2007
  • From: Bournemouth UK
Posted by Luftwoller on Tuesday, May 18, 2010 3:18 PM

Great looking work Steve. Love the motor.

Ive been battling mine today.

Heres the MDC set that arrived today,

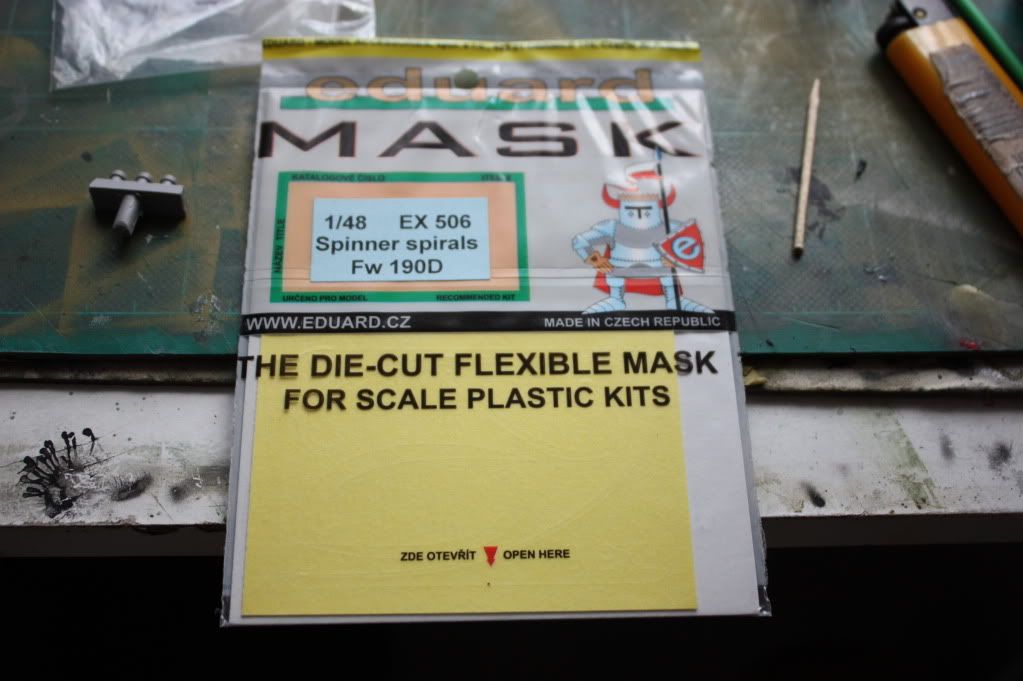
I also had in my stash some Eduard spiral masks!! These things rule. As anyone who knows me, kjnows i hate spinner spiral decals with a loathing that is immeasurable,

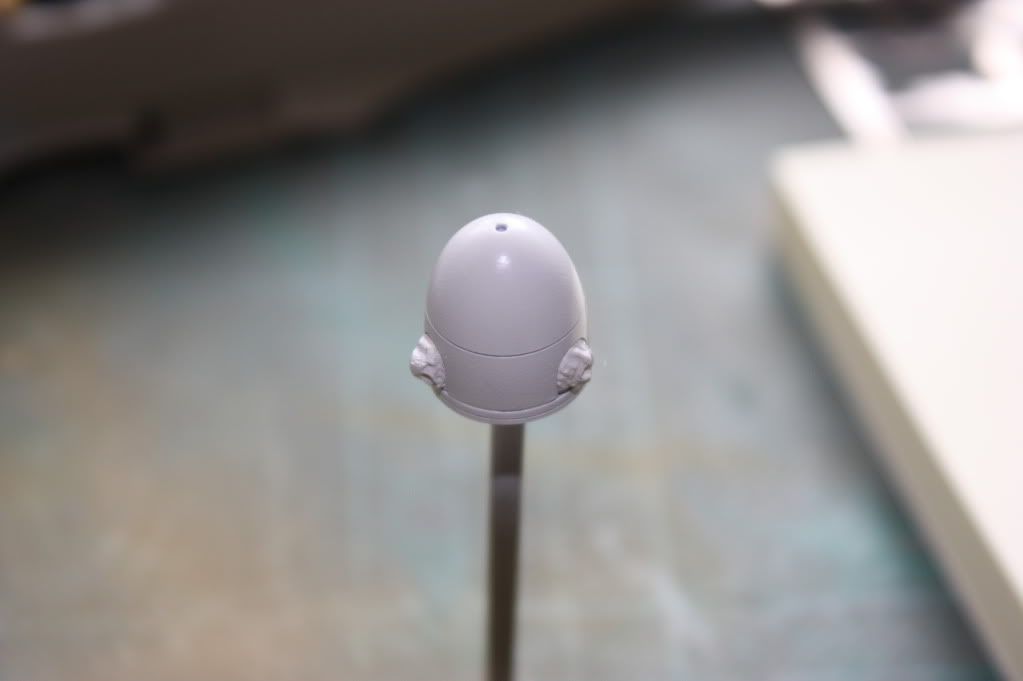
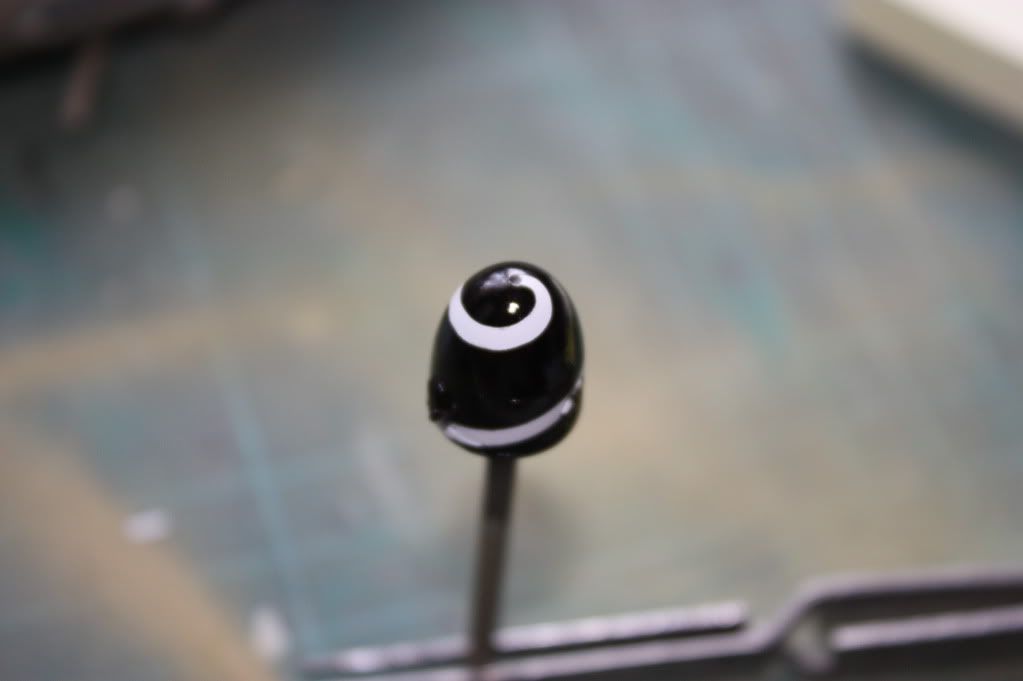
Heres how easy they are to work with. 1st Spray the spinner white,

..apply spiral mask,
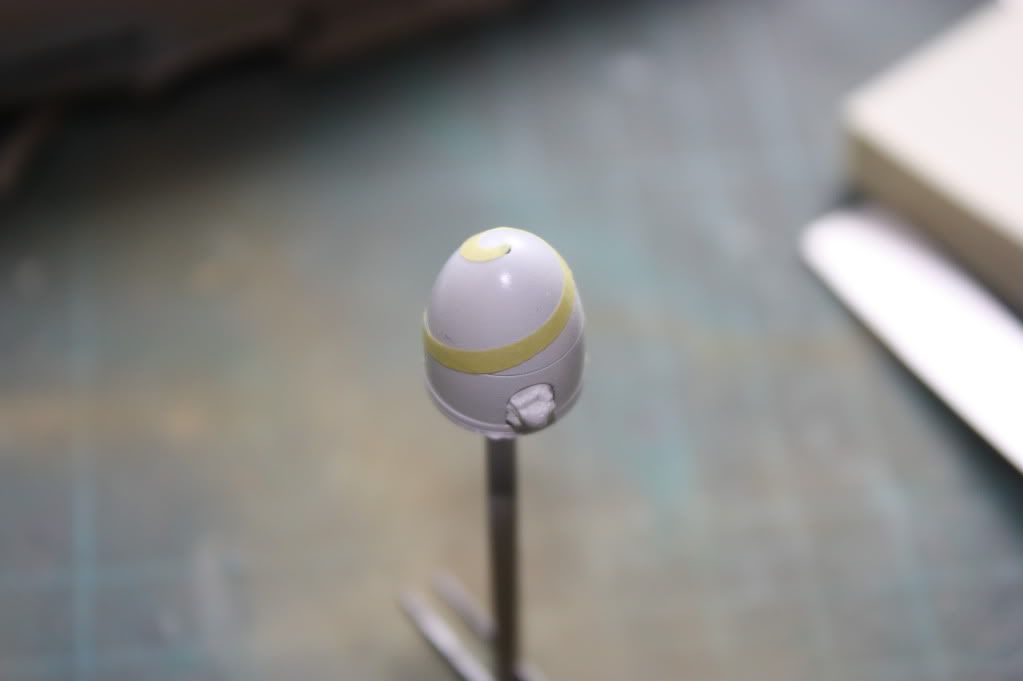
...spray black,

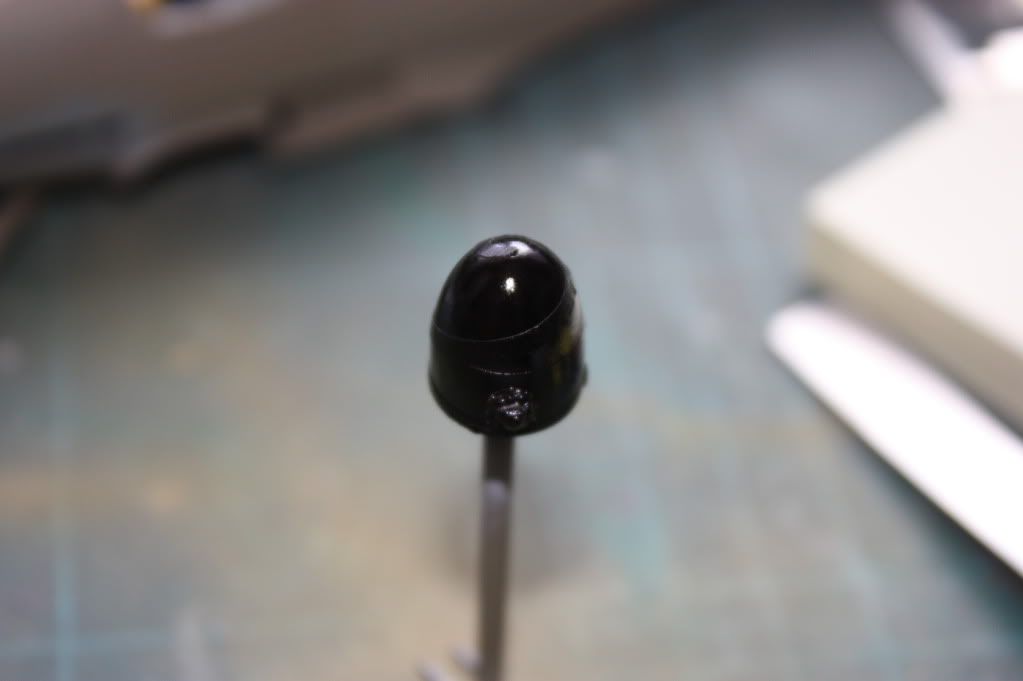
...then remove mask,

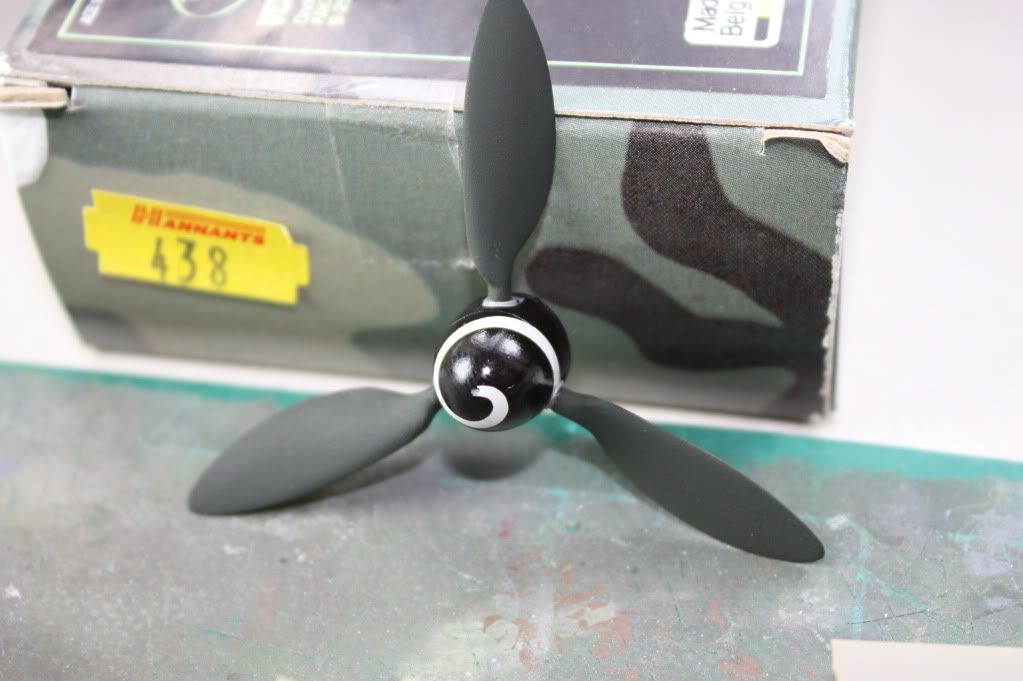
Ta daa. In the MDC set you get the prop collars as well which makes painting the whole thing fantastically easy. Heres the finished prop,

Next up i attacked the IP coaming. There is a leather cushion on the front edge that isnt represented in the kit. I replicated this with some CA applied with a cocktail stick,

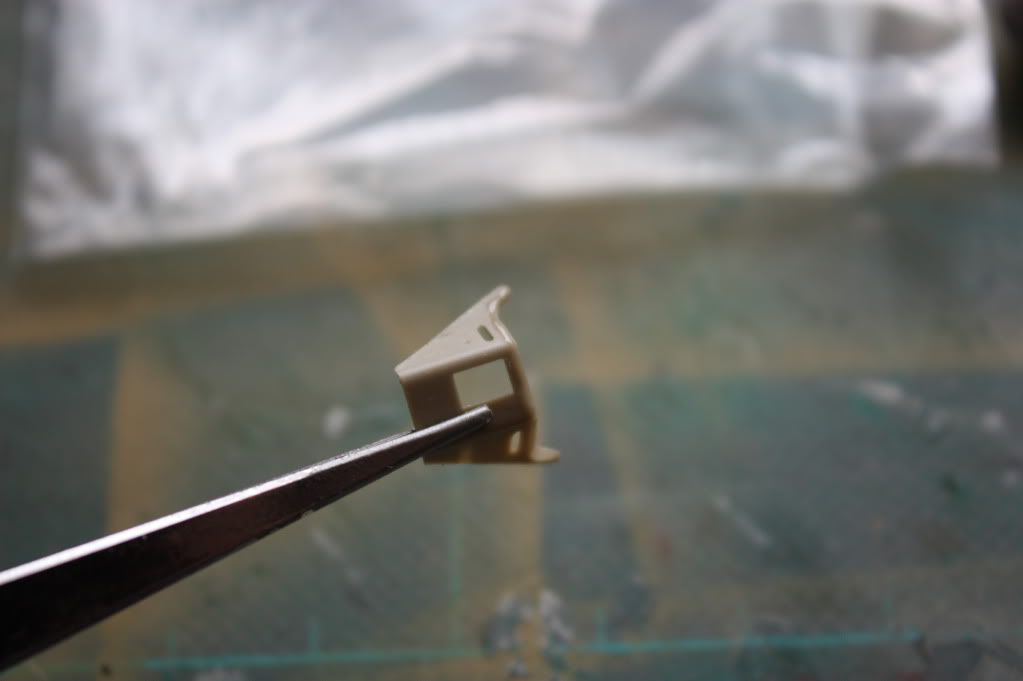
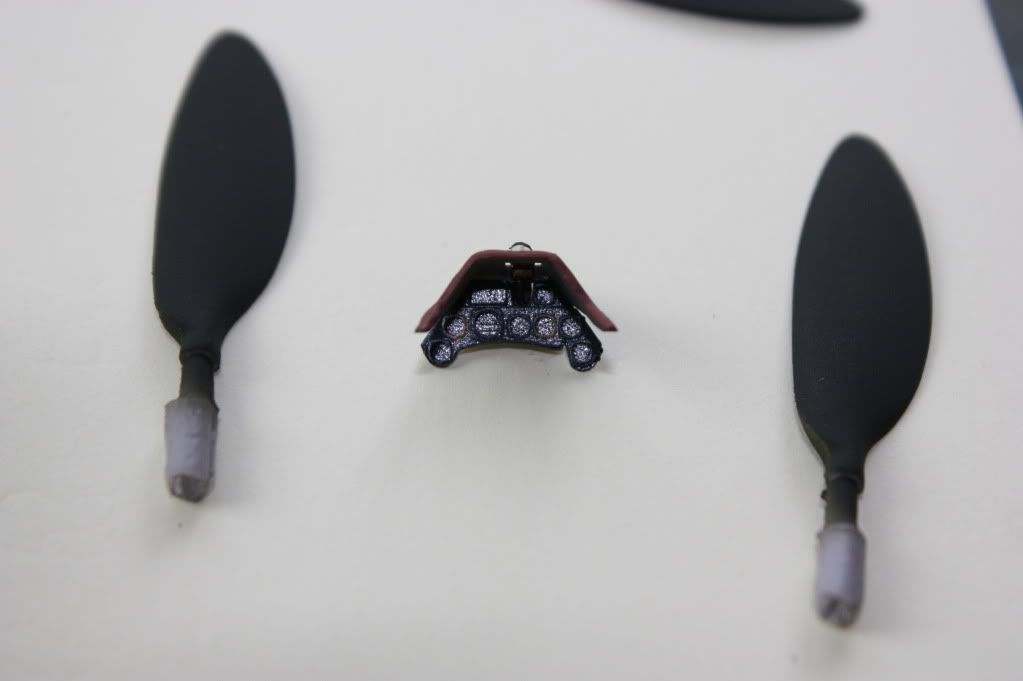
sprayed the whole thing RLM66 then started on the top IP. This is another Eduard wonder. Married them all together,

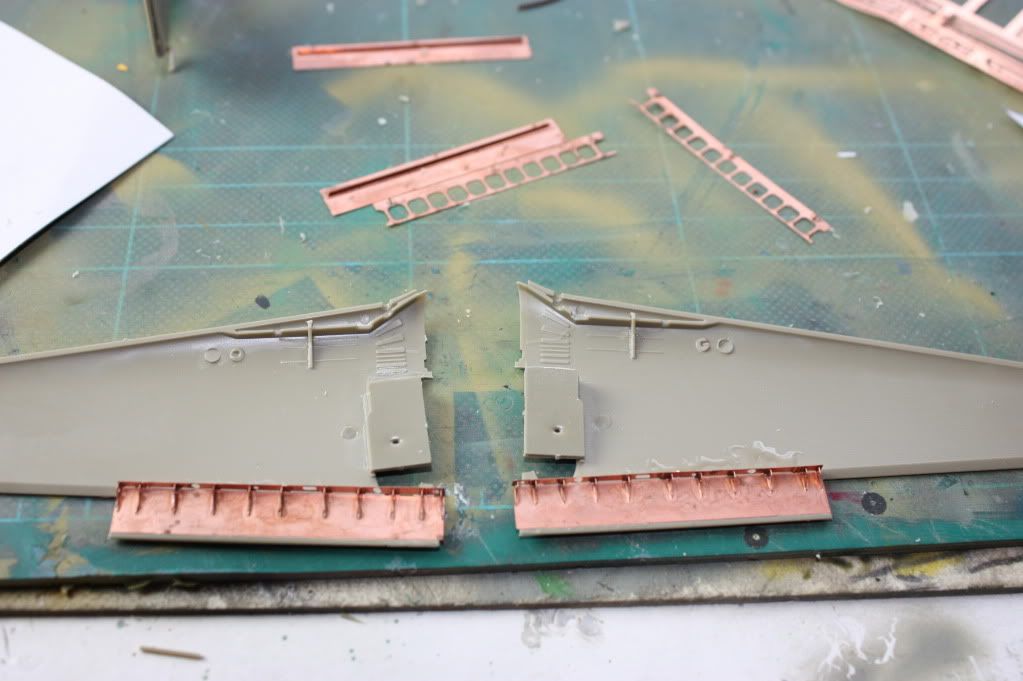
Next up i started on the flap boxes, Eduard handilly recessed the lower wing, ready for you to cut them out,

The flaps themselves come from a huge Verlinden set,

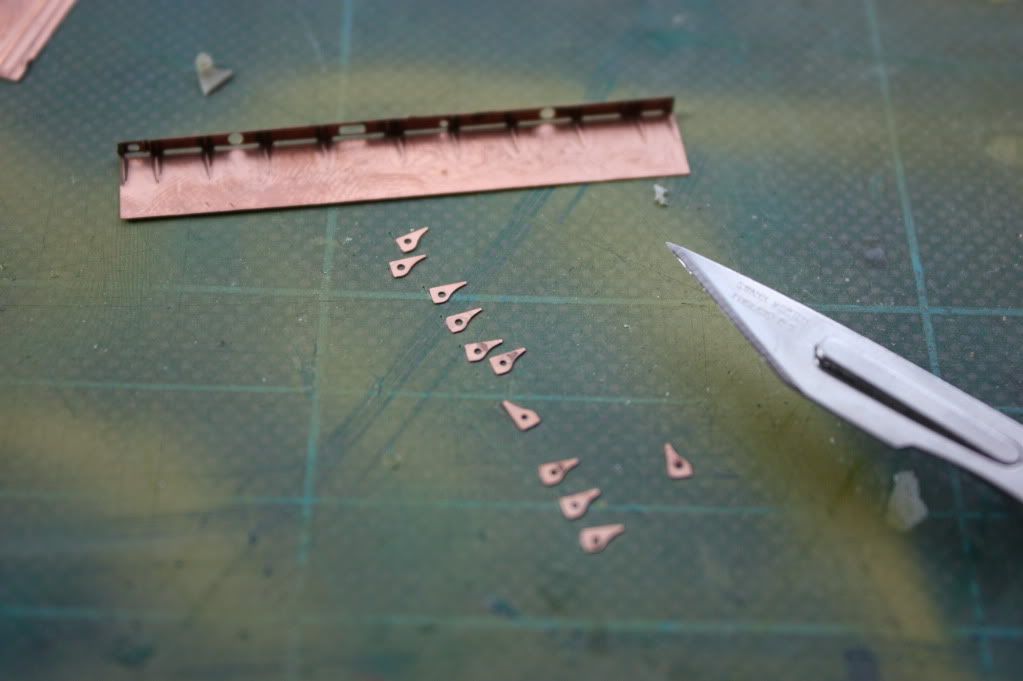
there is a fair bit of wing thinning in order to get the wing halves together but got there in the end,

More soon,

...Guy

..'Your an embarrassment to the human genus, makes me ashamed to call myself Homo'.
  • Member since
    July 2003
  • From: waynesboro va, via Ireland
Posted by sidure on Tuesday, May 18, 2010 3:40 PM

Hey Guy, its great to see ya back building over here again, you were missed greatly. Hope to see Sarge back some day. That looks like the same kit im building, the Eduard A-8. The wing is identical to mine. I had to spend a whole evening sanding the main spar and some of the supports to get the wings together, sounds like you had the same problem. Makes me feel better to know I am not alone with this issue. Great tutorial on the spinner, ive never had a problem doing spinners but I like the masking method and may have to try it some day.

Steve

  • Member since
    September 2003
  • From: South Central Wisconsin
Posted by Daywalker on Tuesday, May 18, 2010 4:20 PM

Thanks fellas!  Not sure yet if it will be a dio (I have never done one Embarrassed) or simply a base with the cart and figures.  Sure was a lot of fun just painting it all up.

Great to see you Steve, and some excellent progress pics to boot!  Cockpit looks very good, and the previous build is simply stunning!  Well done.  I updated page one for you as well! Yes

Guy- As always, you make the difficult look easy!  And done at a lightning pace to boot.  Would you mind terribly measuring the diameter of those MDC wheels?  The Tamiya ones are a bit undersized, so I went out and bought some Aires ones intended for the Eduard kit.  They are the exact same diameter as the Tamiya wheels! Bang Head

Frank 


  • Member since
    December 2005
  • From: back seat of your car with duct tape streched out
Posted by soulcrusher on Tuesday, May 18, 2010 4:43 PM

Guy stunning work as always. Glad t see you back at the bench building where you belong. It's just not the same without you mate.

Steve I am battleing the same issues with my Hasegawa 1/32 D-9. Like the Eduard kit is has alot of sub-assemblies that are glues in the fusel;age and wing spars. If they are off just a hair you have a hard time getting the big parts to play nice. I have read numerious reviews of complaints about the fit of the Eduard kit. It is not a bad kit just a kit that requires that evey part be precisely located otherwise you are in trouble

Frank a little doi would be cool buddy. I build several back in the day and I enjoyed them. They really set a model off.


Soulcrusher:outtahere:


  • Member since
    January 2009
  • From: Springfield, MA
Posted by sk3tch on Tuesday, May 18, 2010 8:59 PM

Sidure...Isn't it ironic that Eduard has all this great detail...yet they stop short at the engine components?  I'm pretty sure the fit issues aren't all your fault...After dry fitting that kit a ton of times I still have a spinner a tad out from the engine cowl.

Great work by all, by the way!  I haven't gotten to a stage to show pictures...  But this thread is great motivation.

  • Member since
    July 2003
  • From: waynesboro va, via Ireland
Posted by sidure on Tuesday, May 18, 2010 9:32 PM

Thanks for the comments guys. The kit details are great and like SC said a hair off on the placement of some items and im in trouble. I almost sanded all the way through the upper wings and filled the main spar down a ton and had to cut out the placement in the wheel wells to get the wings on. That couldent be all my fault i think. Just spent this evenings work sanding the sides of all the interior components to get the fuselage together. All the parts were lined up with their tabs and still it was way off. Now I just found out I sanded off the engine mount area on the firewall so the engine placement will be a hoot. Still enjoying the kit though and it should be a good looking model

Steve

  • Member since
    March 2006
Posted by simpilot34 on Tuesday, May 18, 2010 9:49 PM

Guy, I'm loving that spinner and prop!!!! Really looking forward to seeing more!!!Toast

Steve the office is looking great!!!! Toast

Cheers, Lt. Cmdr. Richie "To be prepared for war, is one of the most effectual means of preserving the peace."-George Washington
  • Member since
    February 2007
  • From: Bournemouth UK
Posted by Luftwoller on Wednesday, May 19, 2010 9:31 AM

I hear you on these Eduard kits. Especially my D9. The kit, I believe, is supposed to be built with all the knobs and whistles open and displayed. If , like me, you intend to build it all closed up you have a hellish time getting the 'open' panels fit. My inner gun covers were sods. I had to trim them all over in order to get them any where near right. I know this sounds strange, but if i wanted to build a closed up D9, id probably buy the dragon or Tamiya kit and do the fixes. A lot less work than this beast LOL,

...Guy

..'Your an embarrassment to the human genus, makes me ashamed to call myself Homo'.
  • Member since
    December 2005
  • From: back seat of your car with duct tape streched out
Posted by soulcrusher on Wednesday, May 19, 2010 10:56 AM

Many reviews of the Eduard kit are in agreement that if you want to button her up you will be doing alot of grinding on the wing cannons and engine. This is not ay type of mis alignment problem just the way the kit is made. I still have the Eduard Royal Class with the two A-8 R-2 kits in the box and 8 choices for markings plus all of the other goodies like the masks and the Knights Cross replica and the little scrap of alluminum supposively from a crashed 190. I do'nt know if I want to tackle it hearing about all of these fussy fitting parts.

SoulcrusherPirate


  • Member since
    July 2003
  • From: waynesboro va, via Ireland
Posted by sidure on Wednesday, May 19, 2010 2:06 PM

After much sanding, cutting and filing and some choice words the fuselage is closed up with everything inside. I did loose some PE that shot off to who knows where but it was stuff you cant see anyway. Here it is before closing

Then a pic of the wings put together. You cant see any of the surgery that went into it. My camera died before I got a pic of the wheel wells so that will be in a later post

I have most of the work to get the fuselage to mate with the wings done, just have to tweek it a bit more tonight. I had to put a sprue spreadder into the fuselage to fill a gap at the wing roots and had to sand down the gun bays  and wheel wells to paper thin but it looks good and I only sanded through the bays once so no biggie

Steve

  • Member since
    February 2007
  • From: Bournemouth UK
Posted by Luftwoller on Wednesday, May 19, 2010 3:41 PM

soulcrusher

Many reviews of the Eduard kit are in agreement that if you want to button her up you will be doing alot of grinding on the wing cannons and engine. This is not ay type of mis alignment problem just the way the kit is made. I still have the Eduard Royal Class with the two A-8 R-2 kits in the box and 8 choices for markings plus all of the other goodies like the masks and the Knights Cross replica and the little scrap of alluminum supposively from a crashed 190. I do'nt know if I want to tackle it hearing about all of these fussy fitting parts.

SoulcrusherPirate

Well Crushlikins, as a mate ill take them off your hands for nothing. Im such a good mate to you, arnt I?

Steve, looking real fine, my friend,

...Guy

..'Your an embarrassment to the human genus, makes me ashamed to call myself Homo'.
  • Member since
    December 2005
  • From: back seat of your car with duct tape streched out
Posted by soulcrusher on Wednesday, May 19, 2010 6:00 PM

Luftwoller

 soulcrusher:

Many reviews of the Eduard kit are in agreement that if you want to button her up you will be doing alot of grinding on the wing cannons and engine. This is not ay type of mis alignment problem just the way the kit is made. I still have the Eduard Royal Class with the two A-8 R-2 kits in the box and 8 choices for markings plus all of the other goodies like the masks and the Knights Cross replica and the little scrap of alluminum supposively from a crashed 190. I do'nt know if I want to tackle it hearing about all of these fussy fitting parts.

SoulcrusherPirate


Well Crushlikins, as a mate ill take them off your hands for nothing. Im such a good mate to you, arnt I?

Steve, looking real fine, my friend,

...Guy

Sure just bring back that towel you borowed last year and never brought back and we'll call it even!:bad:

Besides you already got my OOP 1/48 Classic Airframes Cr 32. I have to think now do I want Wingus or Dingus to square us up now?:biglaugh:

Steve I am going at my kit agian with the sanding stick tonight. This time to fit the panel that covers the center area of the wheel wells that fits way to tight I can't even push it into place. Looks like were are building the same kit even though we are not!

Soulcrusher:buttkick:


  • Member since
    March 2006
Posted by simpilot34 on Wednesday, May 19, 2010 10:06 PM

Sidure she is coming along nicely!!!! Looking forward to more!!!!Toast

Cheers, Lt. Cmdr. Richie "To be prepared for war, is one of the most effectual means of preserving the peace."-George Washington
  • Member since
    December 2005
  • From: back seat of your car with duct tape streched out
Posted by soulcrusher on Wednesday, May 19, 2010 11:18 PM

Moving right along! I have everything glued up now. Tomorrow I am going to have to do some work on the front wing root area where it meets the fuselage. The parts break down is weird and it is going to need some putty to smotth it up a bit. I'm getting ready for this crazy paint job next. This should be interesting!

Soulcrusher:chairfall:


  • Member since
    July 2003
  • From: waynesboro va, via Ireland
Posted by sidure on Thursday, May 20, 2010 12:15 AM

SC, I hear ya on that.  But hey you got it together and its looking good from here mate. Way to beat it into submission. I did a lot of sanding to try get the fuselage into the wings but I need a little bit more work to reduce the step in the joint. Its slowly getting there.

Steve

  • Member since
    March 2010
  • From: Brisbane
Posted by Julez72 on Thursday, May 20, 2010 1:26 AM

Luftwoller

I hear you on these Eduard kits. Especially my D9. The kit, I believe, is supposed to be built with all the knobs and whistles open and displayed. If , like me, you intend to build it all closed up you have a hellish time getting the 'open' panels fit. My inner gun covers were sods. I had to trim them all over in order to get them any where near right. I know this sounds strange, but if i wanted to build a closed up D9, id probably buy the dragon or Tamiya kit and do the fixes. A lot less work than this beast LOL,

...Guy

Thanfully i chose the Eduard A-5 because i wanted to open her up....

You guys building these Eduard 190's have my certainly have my attentionYes

So what is the issue with the wing join? A heads up will certainly be helpfull....


  • Member since
    December 2005
  • From: back seat of your car with duct tape streched out
Posted by soulcrusher on Thursday, May 20, 2010 2:26 AM

Steve I never did get my wing joint perfect but I made sure it looked good in the most noticable spots like the leading edge and the rear of the wing where it jions the fuselage. It took a nice blob of puttly on both front wing roots to fill it all in. Its drying right now so I can san it all into shape tomorrow.

Soulcrusher:wiggle:


JOIN OUR COMMUNITY!

Our community is FREE to join. To participate you must either login or register for an account.

SEARCH FORUMS
FREE NEWSLETTER
By signing up you may also receive reader surveys and occasional special offers. We do not sell, rent or trade our email lists. View our Privacy Policy.