SEARCH FINESCALE.COM

Enter keywords or a search phrase below:

Falklands/Malvinas War 30th Anniversary GB

244448 views
1492 replies
1 rating 2 rating 3 rating 4 rating 5 rating
  • Member since
    October 2008
  • From: italy
Posted by bsyamato on Thursday, April 28, 2011 9:27 AM

Great strike Vance! Many thanx Cool this weekend i'll start the harrier cockpit

I read one or two month ago that an 11 years old boy bought on ebay an harrier t.4 without dad permission Embarrassed


  • Member since
    February 2003
  • From: Rothesay, NB Canada
Posted by VanceCrozier on Thursday, April 28, 2011 7:10 AM

bsyamato

...

we can easily found on web picture of valves used on ex urss planes radar but.... a decent picture of harrier gr3 cockpit is not avaible!!! Bang Head it's a national secret??

I hear you could simply buy a real Harrier now that they are retired! I've spotted a couple on the Britmodeller website, not sure if you've seen these or not:

http://www.britmodeller.com/forums/lofiversion/index.php/t15068.html


On the bench: Airfix 1/72 Wildcat; Airfix 1/72 Vampire T11; Airfix 1/72 Fouga Magister

  • Member since
    October 2008
  • From: italy
Posted by bsyamato on Wednesday, April 27, 2011 4:26 PM

little super etendard update:

the well seems fit good

Photobucket

added other seat details, throttle and minor pieces

Photobucket

Photobucket

Photobucket

soon some news ..

we can easily found on web picture of valves used on ex urss planes radar but.... a decent picture of harrier gr3 cockpit is not avaible!!! Bang Head it's a national secret??


  • Member since
    January 2003
Posted by el_jere on Tuesday, April 26, 2011 11:57 AM

Moober

Hey everyone,

This is my first post and first group build. Towards some sort of meager introduction, I am a graduate student of history in Southern California who uses modeling as a means to avoid getting on with real work.

I have a 1/48 Tamiya Sea Harrier FRS.1 that I have been looking for an excuse to build, so this will be perfect.

Cheers,

Michael


Hello,

wellcome to the forum! it will be nice to see a 1/48 Harrier in the group. I hear that the Tamiya kit is a bit tricky to build so good luck LOL It´s a shame no one did a better kit of that important plane, let´s hope that change some day.

best regars

Jeremias

Res non verba

  • Member since
    October 2008
  • From: italy
Posted by bsyamato on Tuesday, April 26, 2011 10:07 AM

wellcome here! Moober! Welcome Sign

  • Member since
    December 2002
  • From: Bury St Edmunds, Suffolk, England
Posted by Bish on Monday, April 25, 2011 10:17 PM

Hi Michael and welcome aboard. And diving straight into a GB as well. Might i suggest you pop onto the introduce yourself page as a little post there will introduce you to the whole forum.

I am a Norfolk man and i glory in being so


On the bench: Airfix 1/72nd Harrier GR.3/Fujimi 1/72nd Ju 87D-3

  • Member since
    February 2003
  • From: Rothesay, NB Canada
Posted by VanceCrozier on Monday, April 25, 2011 7:48 PM

Moober

Hey everyone,

This is my first post and first group build. Towards some sort of meager introduction, I am a graduate student of history in Southern California who uses modeling as a means to avoid getting on with real work.

I have a 1/48 Tamiya Sea Harrier FRS.1 that I have been looking for an excuse to build, so this will be perfect.

Cheers,

Michael

Avoid real work?? I wish, my real work seems to be interfering with my models recently! Welcome to the build Michael, and welcome to the forum as well. Feel free to ask anything regarding the group builds or forum. I'll add you to the roster page up front.

Vance

On the bench: Airfix 1/72 Wildcat; Airfix 1/72 Vampire T11; Airfix 1/72 Fouga Magister

  • Member since
    February 2009
  • From: Southern California
Posted by Moober on Monday, April 25, 2011 6:29 PM

Hey everyone,

This is my first post and first group build. Towards some sort of meager introduction, I am a graduate student of history in Southern California who uses modeling as a means to avoid getting on with real work.

I have a 1/48 Tamiya Sea Harrier FRS.1 that I have been looking for an excuse to build, so this will be perfect.

Cheers,

Michael


  • Member since
    October 2008
  • From: italy
Posted by bsyamato on Monday, April 25, 2011 6:23 AM

VanceCrozier

Beautiful cockpit work bsyamato, and a great how-to for boxing in the gear bay. I really need to pick up a hole-punch so I can try some of that instrument panel scratching you do so well. (Or I could try it with a slowly-turning drill bit Hmm )

me too need the hole-punch tool but here i used just hand drill Whisper

  • Member since
    February 2003
  • From: Rothesay, NB Canada
Posted by VanceCrozier on Sunday, April 24, 2011 7:01 PM

Beautiful cockpit work bsyamato, and a great how-to for boxing in the gear bay. I really need to pick up a hole-punch so I can try some of that instrument panel scratching you do so well. (Or I could try it with a slowly-turning drill bit Hmm )

On the bench: Airfix 1/72 Wildcat; Airfix 1/72 Vampire T11; Airfix 1/72 Fouga Magister

  • Member since
    October 2008
  • From: italy
Posted by bsyamato on Sunday, April 24, 2011 6:27 PM

Azorean


thanx for comments Azorean which individual number you would to do?


I will do a diorama with the "3-A-203" who sunk the Sheffield.


ok.. then mine will be  the four!!! if he don't sunk nothing, i'll sign the mark of Abramovich Yatch

but at the war time he was not with many money and without the yacht.

Cool ... Should be better some yacht of a casual european prime minister  named B... Zip it!

----------------------------------

thanx for comments Smile

I'm triyng search more details on the damned gr3 cockpit but nothing relevant till now. I read recently that gr3 during this war had some details that the italeri kit not include. Some antenna on the nose (or some other sensor) and a chaff dispenser housed rear the airbrake, and on the wing's gears some sort of ring to aid anchorage on carriers. Still searching for good pictures, here the whole article including all gr3 involved in the war

  • Member since
    December 2002
  • From: Bury St Edmunds, Suffolk, England
Posted by Bish on Sunday, April 24, 2011 8:20 AM

bsyamato  Finally able to catch up on some of whats going on on this GB and thats some great scratch building going on there. And this is a great WiP on how to do it. I know i will be watching closely haveing never tried scratching at this level before your post are very informative. Look forward to seeing more.

I am a Norfolk man and i glory in being so


On the bench: Airfix 1/72nd Harrier GR.3/Fujimi 1/72nd Ju 87D-3

  • Member since
    February 2011
  • From: Argentina
Posted by bigua on Sunday, April 24, 2011 2:16 AM

Hello BSYAMATO, very good the work that these doing with the Super Etendart.

 Regards

 Pablo

"Los soldados de la patria no conocen el lujo, sino la gloria."

General Don José de San Martin


  • Member since
    December 2002
  • From: Bury St Edmunds, Suffolk, England
Posted by Bish on Saturday, April 23, 2011 11:51 AM

No worries OWL, still plenty of time left to run on this GB. I haven't been around much either, but will be home in a week so will get back to keeping up with the forums more often.

I am a Norfolk man and i glory in being so


On the bench: Airfix 1/72nd Harrier GR.3/Fujimi 1/72nd Ju 87D-3

  • Member since
    January 2010
  • From: Nebraska, USA
Posted by CallSignOWL on Saturday, April 23, 2011 7:32 AM

wow, impressive scratch building bsyamato!


Just to let everyone know, I have not forgotten about this GB; Ive just been really busy with school. Smile

------------------------

Now that I'm here, where am I??

  • Member since
    December 2009
  • From: San Miguel Island, Azores, Portugal
Posted by Azorean on Saturday, April 23, 2011 5:59 AM

thanx for comments Azorean which individual number you would to do?

I will do a diorama with the "3-A-203" who sunk the Sheffield.


  • Member since
    October 2008
  • From: italy
Posted by bsyamato on Saturday, April 23, 2011 5:19 AM

heres a good reference picture for SUE details at this link

updated on it

others pieces on cockpit

Photobucket

joined the two consolles by a styrene sheet piece, to keep the right distance between, and added other details

more shaping on ejection seat

Photobucket

And started the new front gear well

used the gear hole for cutting a raw shape of the top

Photobucket

Photobucket

added a millimeter to lines

Photobucket

and starting to add walls to the well

Photobucket

this is actual situation before sleep take me over

Photobucket

at next updates


thanx for comments Azorean which individual number you would to do?


  • Member since
    February 2003
  • From: Rothesay, NB Canada
Posted by VanceCrozier on Wednesday, April 20, 2011 6:33 PM

bondoman


 VanceCrozier:


 bondoman:


Put the cockpit together, at least the plastic.


How is the fit of the cockpit? I seem to remember somebody mentioning the fuselage walls (or cockpit floor etc.) could use a little thinning.


As you can see, I had to move the side consoles in from the edges. There are absolutely no marks or indications of where these glue down on the floor, but if they were at the edges the cockpit definitely wouldn't fit.


Use the seats as a guide for where to put the consoles. Photos show there's not a lot of room in there, so I made them pretty tight against the sides of the seats.

Will file that away for when I get started on that Pucara,

On the bench: Airfix 1/72 Wildcat; Airfix 1/72 Vampire T11; Airfix 1/72 Fouga Magister

  • Member since
    March 2007
  • From: Carmel, CA
Posted by bondoman on Wednesday, April 20, 2011 4:01 PM

VanceCrozier


 bondoman:


Put the cockpit together, at least the plastic.


How is the fit of the cockpit? I seem to remember somebody mentioning the fuselage walls (or cockpit floor etc.) could use a little thinning.

As you can see, I had to move the side consoles in from the edges. There are absolutely no marks or indications of where these glue down on the floor, but if they were at the edges the cockpit definitely wouldn't fit.

Use the seats as a guide for where to put the consoles. Photos show there's not a lot of room in there, so I made them pretty tight against the sides of the seats.

  • Member since
    December 2009
  • From: San Miguel Island, Azores, Portugal
Posted by Azorean on Wednesday, April 20, 2011 3:56 PM

Excelent work on the SUE cockpit!

  • Member since
    February 2003
  • From: Rothesay, NB Canada
Posted by VanceCrozier on Wednesday, April 20, 2011 1:00 PM

bondoman

Put the cockpit together, at least the plastic. In order from lower right and counterclockwise-

our favorite scaling tool: the cockpit floor and consoles; the resin bang seats; the fusie, and a scaling element (ground attack bird).

http://i295.photobucket.com/albums/mm150/6134rdm/DSCN9802.jpg

How is the fit of the cockpit? I seem to remember somebody mentioning the fuselage walls (or cockpit floor etc.) could use a little thinning.

On the bench: Airfix 1/72 Wildcat; Airfix 1/72 Vampire T11; Airfix 1/72 Fouga Magister

  • Member since
    February 2003
  • From: Rothesay, NB Canada
Posted by VanceCrozier on Monday, April 18, 2011 7:33 AM

bsyamato

http://i405.photobucket.com/albums/pp139/bsyamato/modellismo/Suer%20Etendard%20acad%2072/100_2445.jpg

bsyamoto - I am always shocked at what you are able to do at 1/72 scale. That is some amazing work on the cockpit. Bow Down

On the bench: Airfix 1/72 Wildcat; Airfix 1/72 Vampire T11; Airfix 1/72 Fouga Magister

  • Member since
    October 2008
  • From: italy
Posted by bsyamato on Sunday, April 17, 2011 5:14 PM

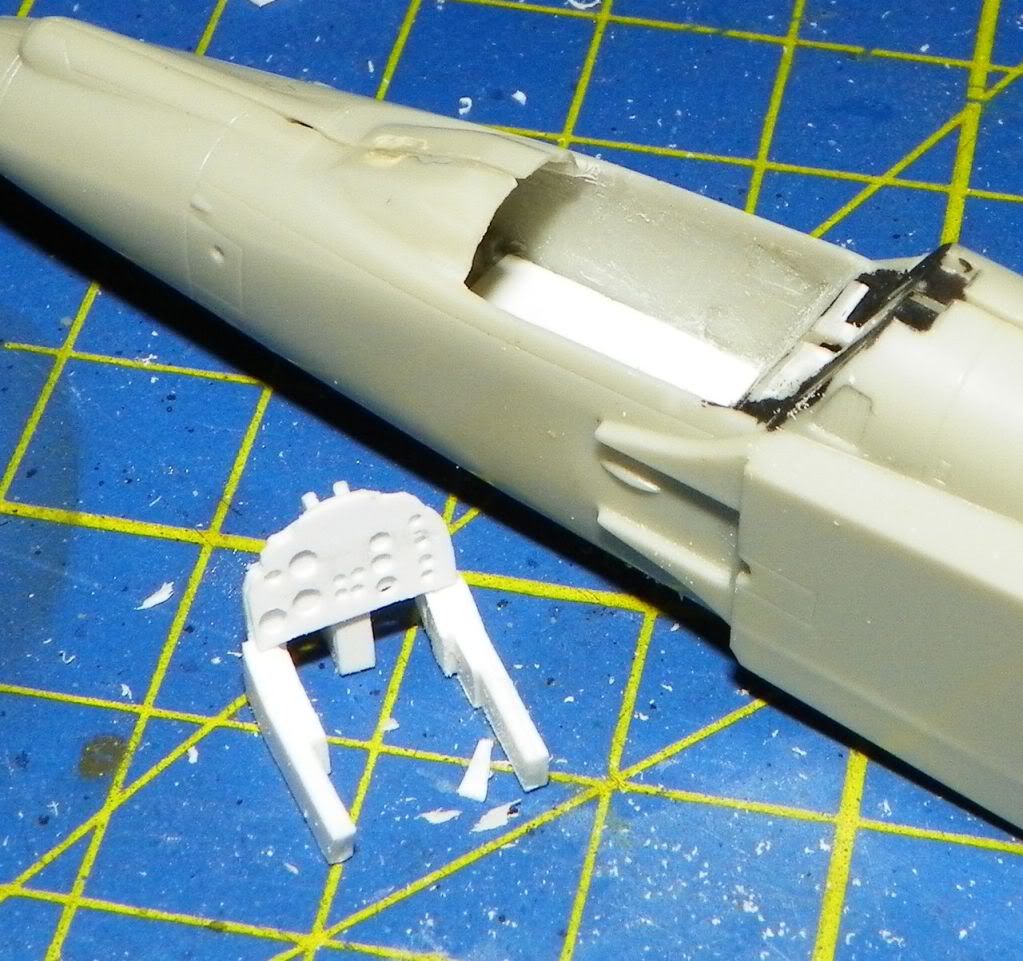
Waiting for the super etendard from airfix (to stole some decals) i started the academy kit..

I know that lots of academy mouls are from others brands. I was very surprised few days ago to discover that the original mould of the super etendard was from italeri !!! Indifferent

And the harrier (italeri box) i'm building was from esci.. hobby kits it's a big mess!! Boo Hoo

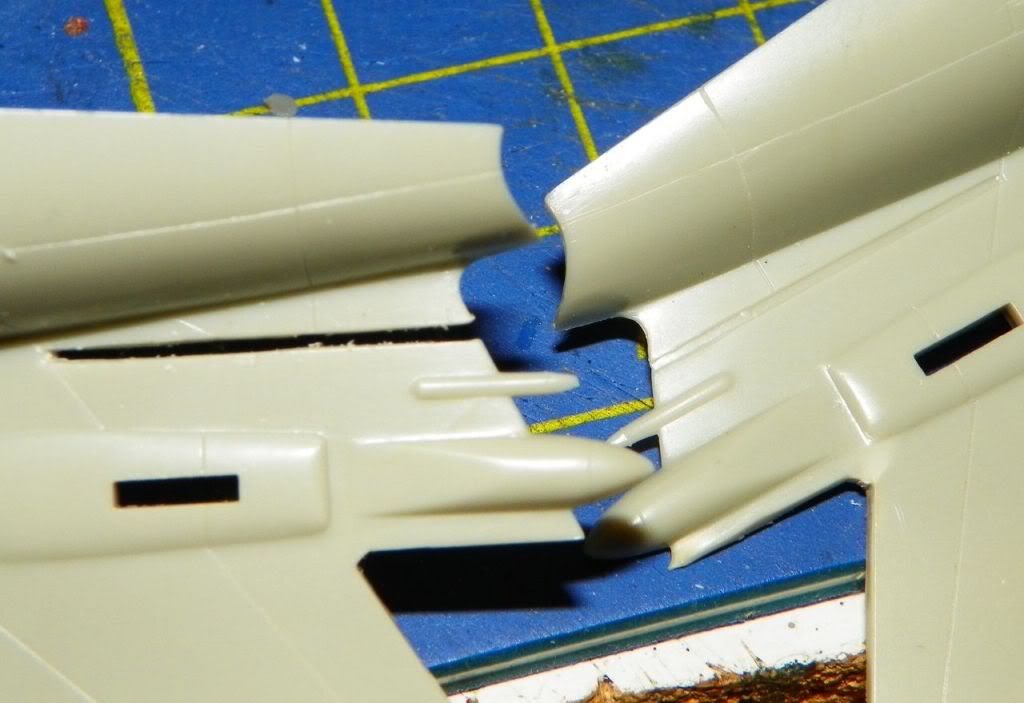
then the SE real start !

vertical rudder base corrected with this cut
Photobucket

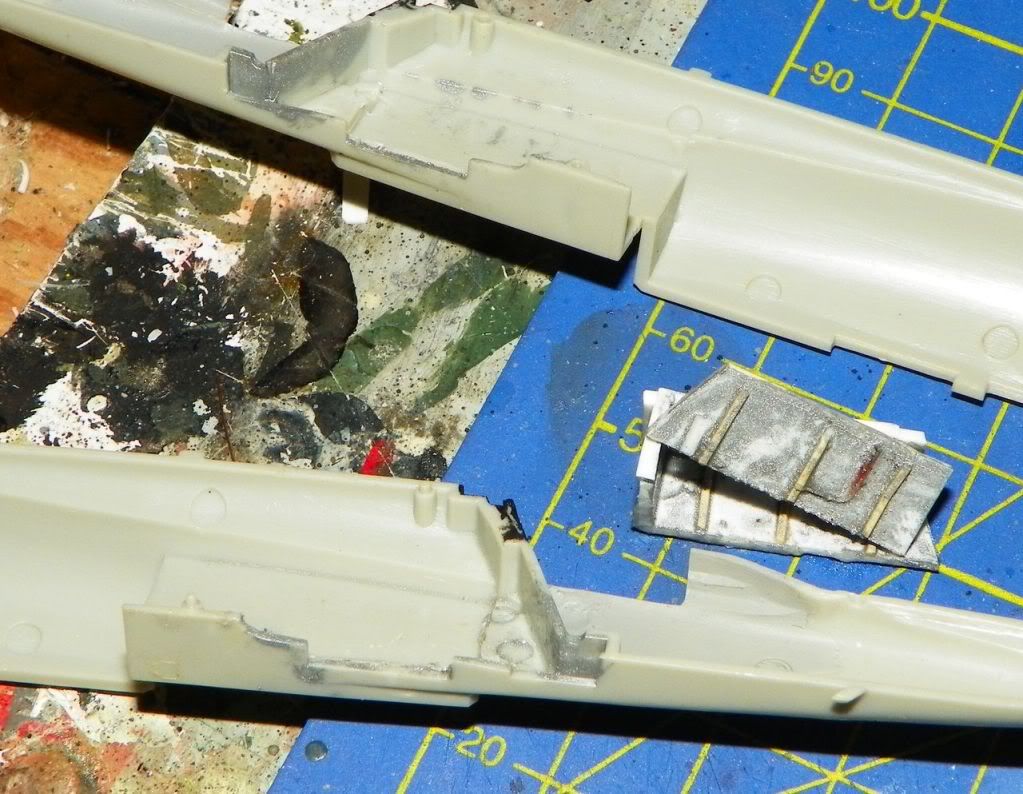
removed old scratched front well (totally wrong)
Photobucket

After documentation consultig, these pieces over cockpit are not in the real .rear the ejection seat is full of various instrumentation box.
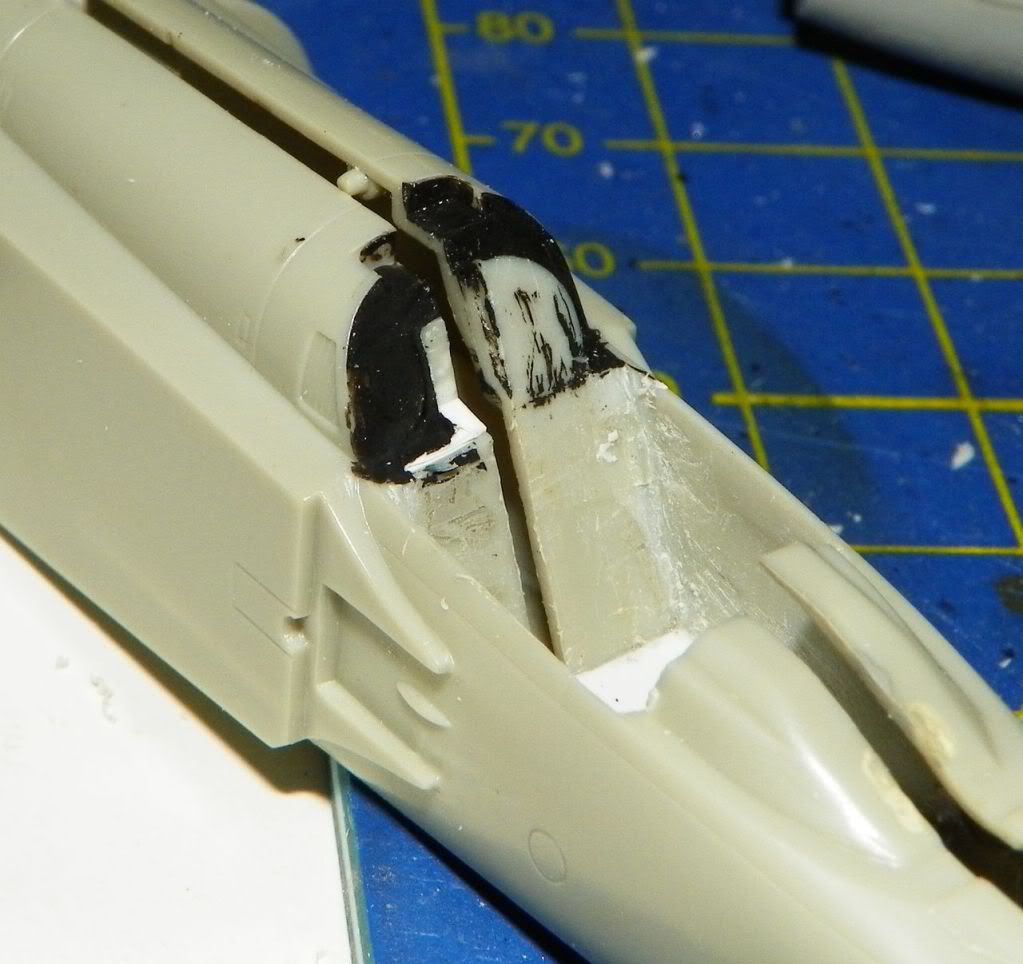
Photobucket

added thin floor to save space. First piece for instuments panel
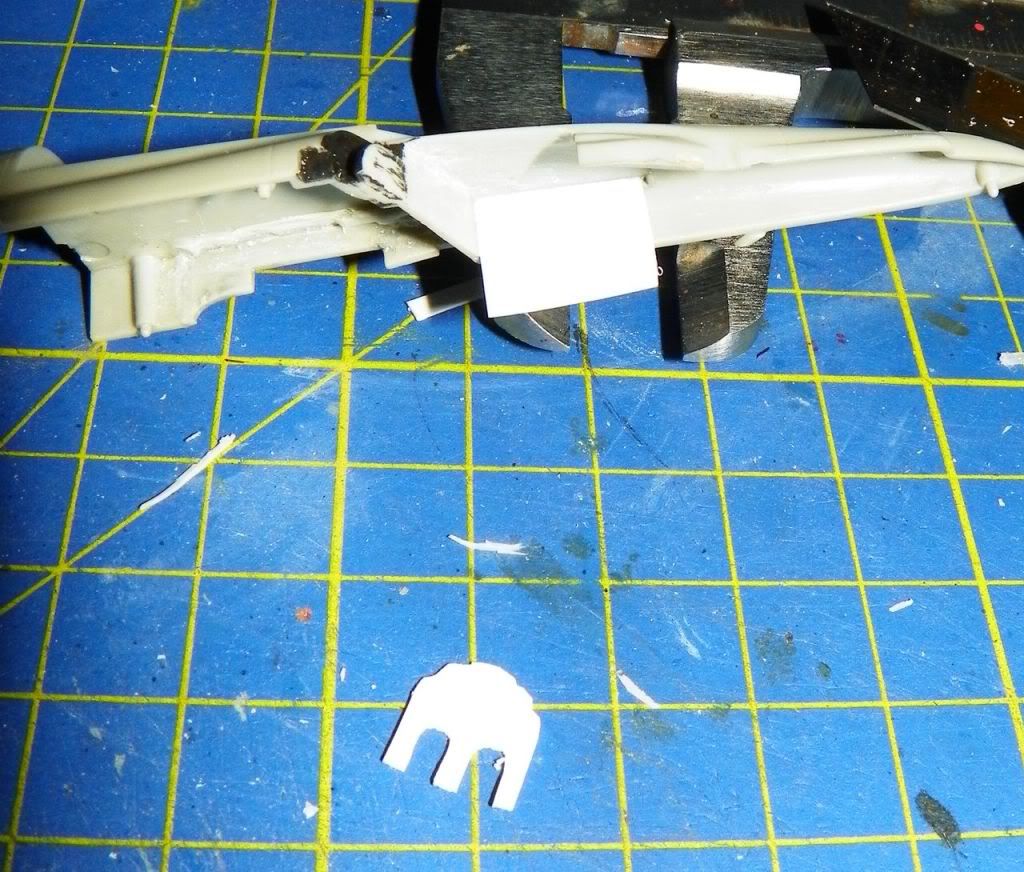
Photobucket

Founded an old ejection seat (from italeri f-4 phantom) to use as base for stratching the SE seat.

Also added latteral consolles of cockpit
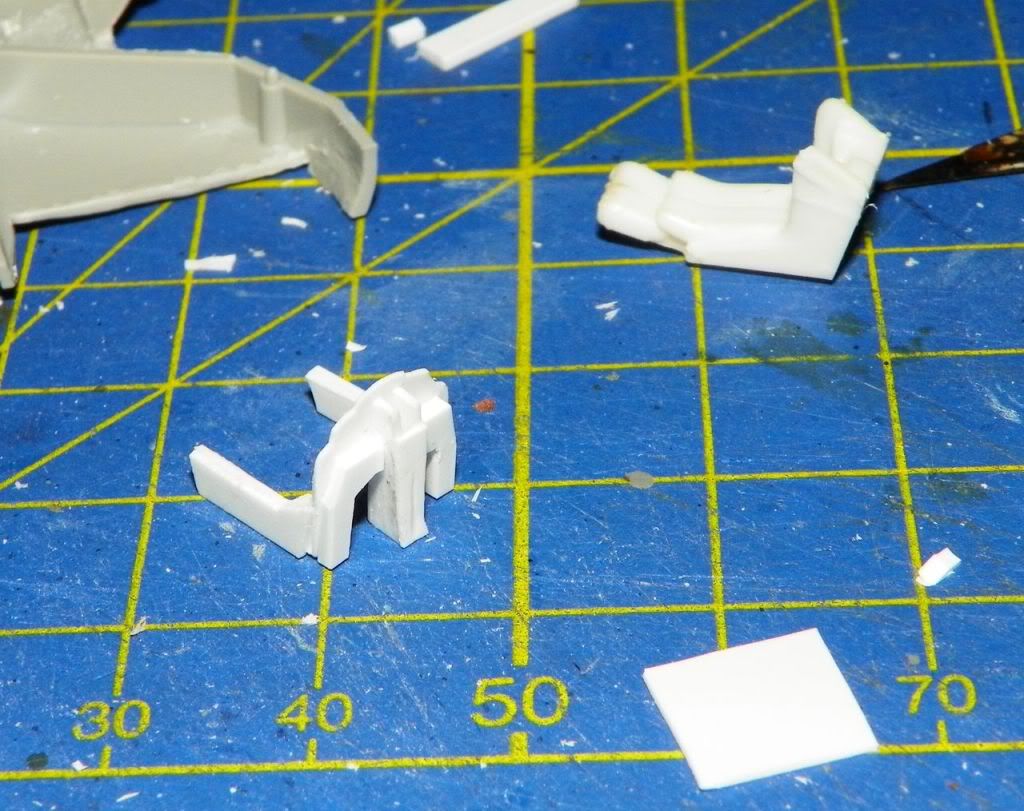
Photobucket

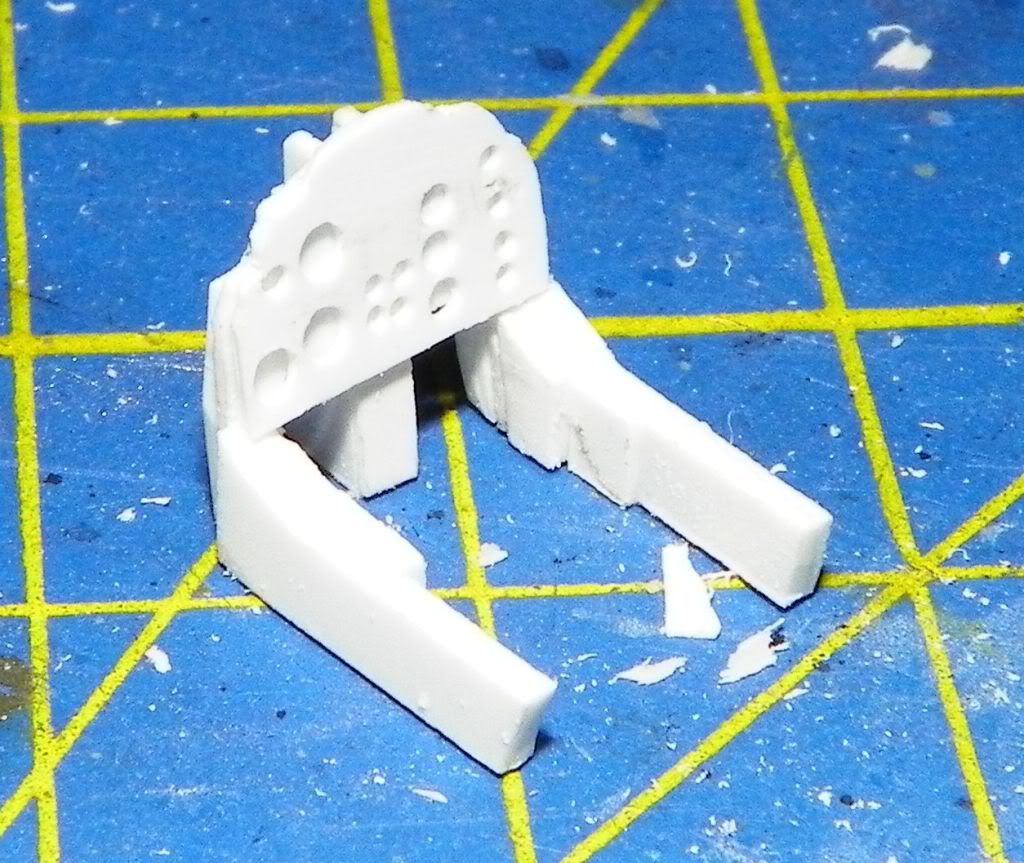
second frame of IP. This version (even if not too precise) should be the most correct between all SE cockpit i see. On recent upgrades the clocks on left was replaced by digital instruments , but at the falklands time i think all was in analogic way
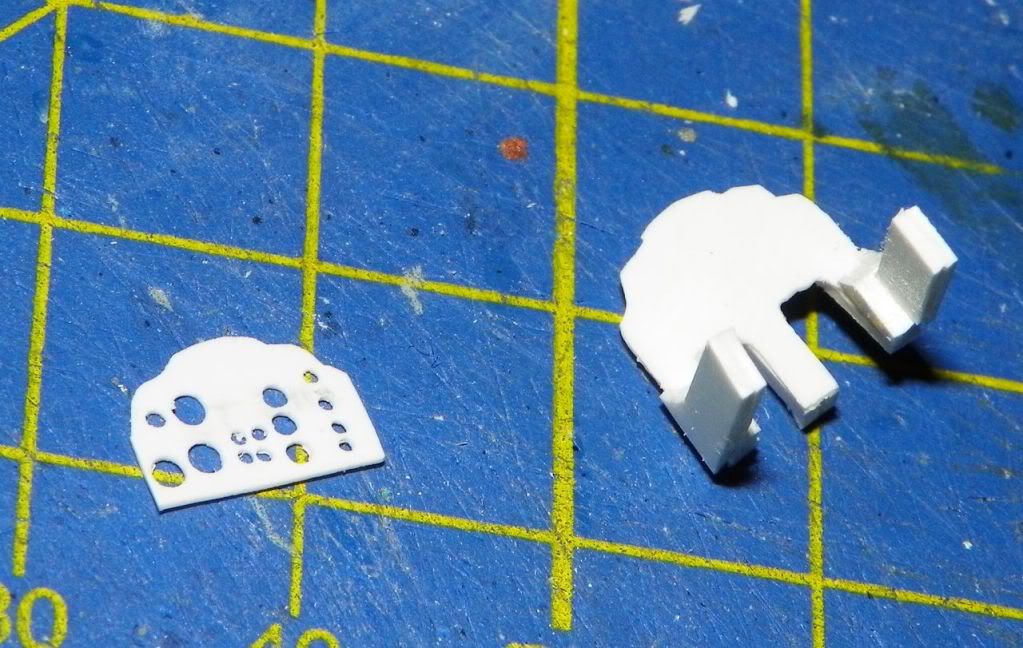
Photobucket

Photobucket

Photobucket

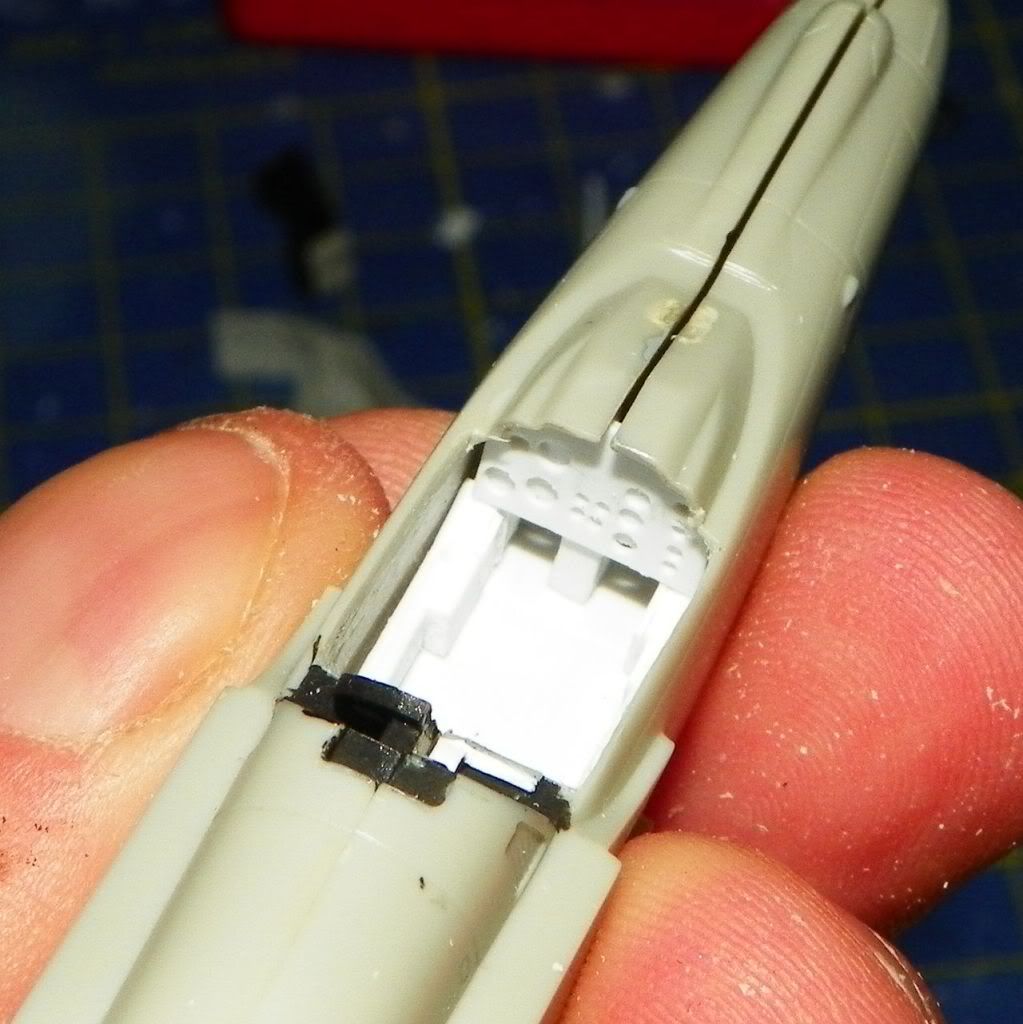
final test fitting

Photobucket

IP cover was shortened and thinned . I must move one or two millimeters forwad the whole instrumentation complex, the SE have a very claustrophobic cockpit Dead

No updates for the harrier, but finally fouded good pictures for the cockpit (Bang Head another scratchbuild needed)

At the next!!!

  • Member since
    October 2008
  • From: italy
Posted by bsyamato on Friday, April 15, 2011 4:33 AM

VanceCrozier


 bsyamato:


Vance i heard even about helle super etendard, sure you want to build this kit??


It's third on the list, I'm hoping to get to it before the Build is over. I've found several of the old Heller and Airfix 1/72 jets. I know they have issues but after paying only $5 each for them, I figure I can put up with some building issues - they'll be in my "build something quick" pile! Big Smile

actually found airfix super etendard for 3.00 € i'll buy it with others airfix kits at same price!!! if needed i'll sacrifice it for the academy kit.

Big Smile finally some start here

  • Member since
    March 2007
  • From: Carmel, CA
Posted by bondoman on Friday, April 15, 2011 1:03 AM

Put the cockpit together, at least the plastic. In order from lower right and counterclockwise-

our favorite scaling tool: the cockpit floor and consoles; the resin bang seats; the fusie, and a scaling element (ground attack bird).

  • Member since
    December 2002
  • From: Bury St Edmunds, Suffolk, England
Posted by Bish on Wednesday, April 13, 2011 9:49 AM

dupes, hope you can get some photos up, will be nice to see it. You just had me stumpped then, FV107, i have not heard that before. And i was in an Armoured Inf Battalion for 12 years. But in my defence we had Sabres and they were only used by Recce, so i never got to work on them.

I am a Norfolk man and i glory in being so


On the bench: Airfix 1/72nd Harrier GR.3/Fujimi 1/72nd Ju 87D-3

  • Member since
    February 2003
  • From: Rothesay, NB Canada
Posted by VanceCrozier on Tuesday, April 12, 2011 10:53 AM

bondoman

Wow, cracked open the Pucara. The cockpit is about a dozen little rezzy pieces, the whole thing maybe the size of a pair of dice. Grab the optivisors...

Beautiful stuff though isn't it!! I was kind of surprised at the size of the airframe myself, quite a bit larger than the little Sea Harrier.

On the bench: Airfix 1/72 Wildcat; Airfix 1/72 Vampire T11; Airfix 1/72 Fouga Magister

  • Member since
    March 2007
  • From: Carmel, CA
Posted by bondoman on Tuesday, April 12, 2011 9:37 AM

Wow, cracked open the Pucara. The cockpit is about a dozen little rezzy pieces, the whole thing maybe the size of a pair of dice. Grab the optivisors...

  • Member since
    February 2003
  • From: Rothesay, NB Canada
Posted by VanceCrozier on Monday, April 11, 2011 2:46 PM

bsyamato


Vance i heard even about helle super etendard, sure you want to build this kit??

It's third on the list, I'm hoping to get to it before the Build is over. I've found several of the old Heller and Airfix 1/72 jets. I know they have issues but after paying only $5 each for them, I figure I can put up with some building issues - they'll be in my "build something quick" pile! Big Smile

On the bench: Airfix 1/72 Wildcat; Airfix 1/72 Vampire T11; Airfix 1/72 Fouga Magister

  • Member since
    November 2006
  • From: Coastal Maine
Posted by dupes on Monday, April 11, 2011 9:20 AM

Plugging away on the FV107 - need to figure out how to get pics from my phone to photobucket so I can throw something up here. A bit bogged down on the etch set, but I'll be sure to put a pre-paint photo up!

JOIN OUR COMMUNITY!

Our community is FREE to join. To participate you must either login or register for an account.

SEARCH FORUMS
FREE NEWSLETTER
By signing up you may also receive reader surveys and occasional special offers. We do not sell, rent or trade our email lists. View our Privacy Policy.