SEARCH FINESCALE.COM

Enter keywords or a search phrase below:

The OFFICIAL Panzer III and Its Variants GB

298259 views
2308 replies
1 rating 2 rating 3 rating 4 rating 5 rating
  • Member since
    June 2010
  • From: Austin, TX
Posted by DoogsATX on Monday, August 29, 2011 11:12 AM

Excellent work going on here guys! Just excellent!

Satch - I'm friuling this build, so when it comes time to attach the tracks, I'll be using the inner road wheels, idler wheel and return rollers, attaching track and sprocket, the attaching the outer wheels. I'm actually a bit worried about it, since the wheel fit is crap compared to the Pz.IV. Very vague, whereas with the IV they would stick together, and stick good, all on their own.

ogrejohn - Nice winterketten! I've got all the second set of friuls filed clean, and about half drilled out. Have to go in stages or else my eyes hate me. Thankfully I've got a pretty good system, and once I start assembling, it goes fast.

Carl - I am in awe of that box. Wow, just wow.

Brian - man that PE is epic!

Rob - diggin' the wood as well! I too would be curious as to your method. I'm contemplating revisiting the streaked oils + clear yellow/orange + gloss that I used building my Sopwith Pup, but my Panzer only has two wood bits (shovel and axe), so it may be more hassle than it's worth in my case!

112. That's what it got up to here in Austin yesterday. Tied for the all-time record. It honestly felt so hot outside than if you were in the sun, any part of you that was facing away and thus shaded actually felt cold.

Fortunately it cooled down into the low 90s at night, so the garage was bearable. Mostly.

Got a bit more done on the friuls last night, got a start on the tools and whats-its. It'll be a few more days yet fussing with those.

And...I got the markings on. Dragon's decals are remarkably thin and clear, and that Vallejo gloss varnish is the BEST GLOSS I have ever used. However, I have a major bone to pick with Dragon. If you're going to supply the turret numbers as individual numbers that have to be positioned relative to one another, perhaps decals that don't suck immediately to the surface and then rip at any attempt to adjust them would be advisable. Just sayin'. My original number choice, 113, had to be nixed due to ripped and crumpled numbers, so 135 it is. Also, the 3 is a little shorter than the 1. Sigh. I can see why people like dry transfer in these cases!

Here's the L this morning after the sealing coat of Vallejo on the decals:


On the Bench: 1/32 Trumpeter P-47 | 1/32 Hasegawa Bf 109G | 1/144 Eduard MiG-21MF x2

On Deck:  1/350 HMS Dreadnought

Blog/Completed Builds: doogsmodels.com


  • Member since
    September 2009
  • From: Rugby, England
Posted by Hinksy on Monday, August 29, 2011 12:32 PM

Hi guys,

Another day of little production. Family visit so it's down tools and drink tea and eat biscuits for 2 hours!!!

I like to start a session and mark in highlighter on the build guide where I would like to get to - i.e this session I wanted to get the turret assembled. I don't have my own bench so I use the kitched table and that means working between mealtimes or going out to the workshop to use the airbrush which is permanently set up in there ready to go. I also like to highlight the little bits & bobs that I leave off the build until after painting.

Anyway, for a Tamiya build it's quite an involved Turret and Cupola - not to mention the smoke launchers and associated wiring. So I've got the 'shell' and mantlet/barrel assembled and next weekend I'll have no pressure to get the turret built in time for tea!

Oh yeah - I was thinking about buying some Jerry cans when Idea I remembered that have some from an old build - I've counted up and there's 12 or 13 Jerry cans and some barrels too. The Jerry cans should suit that racking I'm planning perfectly Yes

I also wanted to find some nice size COPPER wire for the Smoke Launcher Wiring and stumbled across a spool of the stuff in a perfect size. I also found 2 Dragon shell crates which I might use too Yes

Here she is so far - still not much to show but give me another session on it and she'll definately be taking some shape.

Finally - I made my first error! It had to happen! I must have put glue somewhere I wasn't supposed to on the mantlet as the barrel won't elevate now Bang Head No problem as it's at a nice angle and will just have to stay there!

Btw: The upper and lower hull halves aren't glued yet-

Progress:


Here's the Copper wire and Dragon crates:


Here's my Jerry can set - I've only used one out of it I think!


Thanks for looking guys,

Back to work tomorrow so no more building until next weekend!

Have a good week everyone and take care.

All the very best,

Ben Toast 

On the Bench - Dragon Pz. IV Ausf. G (L.A.H.) Yes

Your image is loading...


  • Member since
    April 2005
  • From: Monster Island-but vacationing in So. Fla
Posted by carsanab on Monday, August 29, 2011 1:45 PM

Alright!!!  Finally finished my Wirbelwind.....Toast

I posted more pics on a nother thread...

NOW ON TO THE III ~~~~

carlos

 Photobucket

  • Member since
    March 2006
  • From: Right Side of a Left State
Posted by Shellback on Monday, August 29, 2011 7:56 PM

carsanab

Alright!!!  Finally finished my Wirbelwind.....Toast

http://i164.photobucket.com/albums/u3/carsanab/2-1.jpg

I posted more pics on a nother thread...

NOW ON TO THE III ~~~~

carlos

Also seen at three word post ..................Whistling

  • Member since
    March 2006
  • From: Right Side of a Left State
Posted by Shellback on Monday, August 29, 2011 8:34 PM

Rob , the tools and equipment look superb !

  • Member since
    April 2009
  • From: Carmel, IN
Posted by deafpanzer on Monday, August 29, 2011 9:49 PM

Doogs- Great job with the decals.  I have to agree with you about DML decals... rarely had problems with them.  Tamiya?  That's a different story... that's why I ordered decals from Archer Transfer for my Pz IV and I can't wait to try them for the first time.  I dig the elephant on the rear of turret! Yes

Remember you are always welcome to use my basement for airbrushing but you will have to let me fondle your models.

Ben- Looking good!  Good thing Carl too the lead with the grenade launcher wiring so you can just follow what we have learned so far.  I can't picture you drinking tea but I sure miss those clotted cream & scones!!! Eats

Carlos-  Congrats!  It looks great especially your first armor build in 25 years. Yes   It looks shiny to me so I would spray a coat of MM lusterless flat over it.  Always worked great on my armors every time.  Sometimes it takes two coats to tone it down...

Looking forward to have you aboard with your Pz III!!

Andy

  • Member since
    April 2005
  • From: Monster Island-but vacationing in So. Fla
Posted by carsanab on Monday, August 29, 2011 9:52 PM

Shellback


 carsanab:


Also seen at three word post ..................Whistling

Embarrassed

 Photobucket

  • Member since
    October 2009
Posted by PANZERWAFFE on Monday, August 29, 2011 10:13 PM

Hey all, the tools are real easy to paint.  First paint the wood using MM wood and let dry overnight.  Next use Winsor & Newton artists oil Raw Umber and just paint on a heavy coat and set aside.  When dry to touch take a real stiff bristle brush and scrub off the oil paint in the direction you would like the grain.  I often stipple or randomly swril the brush to get different effects.  If you scrub to much (I often do) you may scrub through all layers of paint if that happens just heavely thin some oil paint with Weber turpenoid (turpentine, blue can) making a wash and put on as needed.  Thats it.

Next set of tools I have will take pics as I paint them.  Glad all of you liked them.

DOOGS - The decals look great with that camo, I'm loven it!

All that was done on the build tonight was put three decals on, the German crosses.  One on each side and one in the rear.

Rob

  • Member since
    March 2006
  • From: Right Side of a Left State
Posted by Shellback on Monday, August 29, 2011 10:55 PM

Thanks for the explanation Rob . Looking forward to the pics . Substitute turpenoid , is that orderless ?

Are you leaving the barrel on your vehicle black ?


  • Member since
    April 2005
  • From: Monster Island-but vacationing in So. Fla
Posted by carsanab on Tuesday, August 30, 2011 12:54 AM

deafpanzer

Carlos-  Congrats!  It looks great especially your first armor build in 25 years. Yes   It looks shiny to me so I would spray a coat of MM lusterless flat over it.  Always worked great on my armors every time.  Sometimes it takes two coats to tone it down...

http://i.ebayimg.com/t/LUSTERLESS-Lacquer-Overcoat-Testors-Spray-1960-NEW-/03/!B9KC!OwCGk~$(KGrHqF,!jUEzKMW-kJMBM4+viinq!~~0_35.JPG

Looking forward to have you aboard with your Pz III!!

Thanks...it already has a coat of flat clear....the "shine" you see in part is some mettalic grey I used to drybrush some edges especially on the turret to hightlight wear....also I brightened the image a bit with picture software... I might have brought out the flash a bit too much....I did hit it again with another coat though....looks like it helped..

I could use some hints on interior colors for the III...from the pics Ive seen, is it a flat white on the inside or a light grey??

C

 Photobucket

  • Member since
    April 2009
  • From: Carmel, IN
Posted by deafpanzer on Tuesday, August 30, 2011 9:22 AM

Carlos- For Pz and StuG III interior... they were usually off white.  I use this paint from ModelMaster.  Perfect match... no mixing needed. 

Rob & Eric- I am with Rob... it worked great!  I think I learned from Rob or somebody else here in FSM of course!  But for the thinner I use this instead as seen in the picture below... 'Mona Lisa Odorless Mineral Spirit' because its odorless for an obvious reason.  Bought it at Hobby Lobby using 40% coupon.

Guys- My package has arrived this morning... several RB aluminum and brass barrels!  I plan to use them on both Pz and StuG III builds.  I can't just go back to plastic barrel!!!  Help...

Y'all have a great day!

Andy

  • Member since
    June 2010
  • From: Austin, TX
Posted by DoogsATX on Tuesday, August 30, 2011 9:37 AM

Andy - agreed on that Mona Lisa Odorless Thinner. That stuff is fantastic - and gentle enough that you can use it over bare enamel and it won't lift it (well, unless you REALLY scrub!). 

Also agreed re: aluminum barrels. I actually used the kit plastic on my Pz.IV and was rather happy with it, but it was also a very well-done barrel, muzzle brake, etc. But I think ALL of the kits in my stash have an accompanying barrel from somebody or other. 

On the Bench: 1/32 Trumpeter P-47 | 1/32 Hasegawa Bf 109G | 1/144 Eduard MiG-21MF x2

On Deck:  1/350 HMS Dreadnought

Blog/Completed Builds: doogsmodels.com


  • Member since
    September 2009
  • From: Spring Branch, TX
Posted by satch_ip on Tuesday, August 30, 2011 12:25 PM

I'm not much for WIP pics but here are a couple of my III F.

Primed with Vallejo grey surface primer.  Then I used Vallejo black primer in the shaded areas.

After the base coat of Vallejo German Grey.  I think most of the preshading is lost with the two dark colors.

After post shading with the German Grey with some white.  After re watching Mig's video about acrylics I should have used some satin varnish with the base to give it the smooth semi glossy surface.  Oh well, next time.


I bought some of the AK Interactive Brown/Blue wash for Panzer Gray vehicles.  Has anyone used this before?  Got any suggestions?

  • Member since
    February 2003
  • From: Allentown, PA
Posted by BaBill212 on Tuesday, August 30, 2011 12:30 PM

Brian,,  Nice PE and lots of it too!        That base is interesting too,,,  will be looking for updates.

Rob,,  Dang, that equipment looks great!         And, thanks for the painting tips too.

Doogs,,  I am liking that paint / camo even more,,  very nice

Ben,,   Great progress!

Carlos,, Good looking Wirbelwind,,,, will be looking for your Pz III

Satch,,  Looking good too,,  sorry cannot help with the product question though

Enjoy the ride!


  • Member since
    March 2003
  • From: Rain USA, Vancouver WA
Posted by tigerman on Tuesday, August 30, 2011 1:45 PM

PANZERWAFFE

Hey all, the tools are real easy to paint.  First paint the wood using MM wood and let dry overnight.  Next use Winsor & Newton artists oil Raw Umber and just paint on a heavy coat and set aside.  When dry to touch take a real stiff bristle brush and scrub off the oil paint in the direction you would like the grain.  I often stipple or randomly swril the brush to get different effects.  If you scrub to much (I often do) you may scrub through all layers of paint if that happens just heavely thin some oil paint with Weber turpenoid (turpentine, blue can) making a wash and put on as needed.  Thats it.

http://i951.photobucket.com/albums/ad352/PANZERI/WORK%20BENCH/DSC00197.jpg

Next set of tools I have will take pics as I paint them.  Glad all of you liked them.

DOOGS - The decals look great with that camo, I'm loven it!

All that was done on the build tonight was put three decals on, the German crosses.  One on each side and one in the rear.

When I did this, the finish still looked glossy. I hit it with a dull coat. Is that normal?

   http://i7.photobucket.com/albums/y269/wing_nut_5o/PANZERJAGERGB.jpg

 Eric 

  • Member since
    September 2009
  • From: Spring Branch, TX
Posted by satch_ip on Tuesday, August 30, 2011 3:17 PM

Ben, didn't you use Magic Tracks on your last armor build?  If so how did you connect the links?  IE, all in one run or did you break it up into sub sections?  Did you paint and wx them before hand or on the tank? 

This is my first experience with Magic Tracks.  Previous Dragon indie links suck and caused me much grief.  If these fail I have a bunch of DS tracks I can use.

Anyone else with experience, please chime in.

Satch

  • Member since
    September 2009
  • From: Rugby, England
Posted by Hinksy on Tuesday, August 30, 2011 5:03 PM

Hey Satch,

I've used Magics on quite a few builds and love them - and yep, I used them on my last build (SIG 33) too.

On previous builds I've assembled them all in one run but have not glued the last joint so when set I removed them for painting but on my SIG I left them on for some reason - I wish I hadn't but it was okay. I recommend removal as painting wheels and tracks in the assembled position is a real PITA!

One thing to remember - think that you are going to have to slide them back on after painting so make it easy for yourself and leave the idlers and drives removable or at least leave the magics so they will fit easily back on.

If you feel happy painting them in place that's cool.

I assemble mine between two straight edges:

I find it easier to properly glue the straight run that will sit under the roadwheels (that short piece above) then carry on as you see fit - these other bits will be left loose and glued with Tamiya Thin Cement and left for 3 odd minutes and fitted.

VERY IMPORTANT - as the cement dries it contracts and any sag will be reduced so at least an extra link on each side is a good idea and put a fair bit of sag on the tracks if you like sag. The below tracks were off my SIG and were really saggy when fitted - this is them dry! They shrunk BIG TIME!

I'll know for next time!

Finished!


I hope this help - if you need any more help just pm me buddy.

Seriously, if I can do these then you guys can for sure! Wink

Ben Toast 

On the Bench - Dragon Pz. IV Ausf. G (L.A.H.) Yes

Your image is loading...


  • Member since
    September 2009
  • From: Spring Branch, TX
Posted by satch_ip on Tuesday, August 30, 2011 5:03 PM

Here is what I've come up with so far.  I'm building the tracks in four pieces and merging them into two.


  • Member since
    February 2003
  • From: Allentown, PA
Posted by BaBill212 on Tuesday, August 30, 2011 7:44 PM

Great info Ben and Satch,,,,  I have been a bit hesitant on these types of track assembly's

You make it seem a bit more doable,,,,     thanks

Enjoy the ride!


  • Member since
    May 2011
  • From: Bedford, Indiana
Posted by AceHawkDriver on Tuesday, August 30, 2011 10:07 PM

Ben and satch:  Good tips on the magic tracks.  Should come in handy Yes.

BaBill:  Thanks!  It's a lot of PE but it looks good

Rob:  Nice heads up on how you did the tools.  I was just about to give up on them and you've inspired me to try again.  We'll see.

DoogsATX:  Really digging the camo scheme.  For some reason it makes it look mean!

Andy:  A litle after market shopping has occured I see.  Didn't know you're PZ III had that many barrels! Wink

I've been able to get quite a bit of work done the past few days since my wife's had to work.  And while she's away. . . . I'll hit the bench!

Finally she's got some primer on her!  Surprisingly with all the PE stuff I only had about a half dozen spots to clean up.  If anyone sees anything that needs attention please let me know.  I've looked it over pretty well but it always helps to have more eyes than just mine looking at it. 

Any spots that show the bare brass i've had to clean up.  Also, there are a couple of spots along the side of the fighting compartment and right below the rear center rack support.  Thankfully all of the detail on the surface of the fenders is still showing through just fine.

And the base I've been working on for a break from the Stug. . .

Comments and criticisms are always welcome!

Peace through superior firepower.

Brian


  • Member since
    March 2003
  • From: Rain USA, Vancouver WA
Posted by tigerman on Tuesday, August 30, 2011 10:15 PM

Brian, I love your base and want to marry it, or has Manny got dibs?

Ben thanks for sharing that. I wondered why it was so difficult to get my Jagdtiger tracks back on the model. I had to loosen the idler and move it, and many very well have been the shrinkage you mentioned.

   http://i7.photobucket.com/albums/y269/wing_nut_5o/PANZERJAGERGB.jpg

 Eric 

  • Member since
    March 2006
  • From: Right Side of a Left State
Posted by Shellback on Tuesday, August 30, 2011 10:23 PM

Good looking builds everyone .Yes

Thanks to all of you that commented about the storage box . I finished it tonight , I'm not satisfied completely with the finished product . Scratch building is something new i've started doing lately so i'm still learning and its been a challenge and fun .Ok the pics. By The way i played with the exposures to break up the monotony of a series of pics . Here 's some discription of what i used .

Everthing is scratch built from variouse thickness and widths of styrene . The hasp was made from from .010" x .060" styrene . The lock eye is tightly bent .025" copper wire .

The bolt heads are .020" styrene rod inserted into a pre drilled .020. hole .In the photo's i looked at the storage box is attached to the engine vent covers .

The wood grain is carved into the plastic by dragging a #10 hobby blade backwords which carves a wider groove instead of cutting the plastic .

The photo i looked at had a box with rope handles in the side . I twisted several strands of fine ( less than .010" )copper together to simulate .

  • Member since
    April 2009
  • From: Carmel, IN
Posted by deafpanzer on Tuesday, August 30, 2011 10:45 PM

Satch- It got the paint on and it is looking real good! I find those Magic Tracks great and easier to work.  At first I wasn't too sure but once glue is dry enough to hold tracks together while they re still flexible.  Right now I'd rather to do Magic Tracks than ModelKasten... I used MK for my Pz IV and it broke few times already! Angry

I wish I can asnwer your question about AK washes.  I brought few recently and I haven't tried them yet.  But I know Ben has and maybe he can help too.

Brian- WOW the base looks great!  Nah, I am just turning my Pz III into an Ausf R which is short for 'Rambo' version.  Big Smile  Figured it is cheaper to order many because of the shipping cost.

Carl- Sorry buddy!  I am not going to fall for this trick... obviously you had the storage box photoshopped into the picture!  Nice try... Wink  Seriously beautiful work on the box!  Beer


Andy

  • Member since
    March 2006
  • From: Right Side of a Left State
Posted by Shellback on Tuesday, August 30, 2011 10:50 PM

Thanks Andy Beer. Dang , you figured that out ? It was difficult finding a 3 dimension photo of a white storage box . All for not .Crying

  • Member since
    September 2009
  • From: Rugby, England
Posted by Hinksy on Wednesday, August 31, 2011 5:12 AM

satch_ip

I bought some of the AK Interactive Brown/Blue wash for Panzer Gray vehicles.  Has anyone used this before?  Got any suggestions?

Hey Satch,

Shellback - I WANT that box (seriously, I do actually want it) Yes

As Andy says I do like my 'off the shelf' washes. I really rate the SIN Filters (they do all sorts of filters for Panzer Grey vehicles). As for the AK washes I only use their mud wash and dust wash - basically it's applied in specific areas and dries like dust or wet/dry mud. The normal washes, according to my AK DVD, would just go on as normal. I'm yet to try it. The only wash that I buy ready made are the MIG ones which are great. The MIG dark wash is perfect for pin washes.

If I were you I'd try the AK muddy/dusty washes and SIN Filters. Filters first after painting, then normal washes, then the dusty washes near the end of the build when weathering but not all over unless you want a tank that looks like it's been driven through a shell hole in a very wet and muddy field-just around the running gear and front/rear armour etc. Sorry, I'm sure you don't need me to tell you this!

MIG also do a 'Cold, Grey Wash' for winter Panzer Grey vehicles. That's a favourite of mine.

 I'll be interested to see how you get on - photos please!

Take care,

Ben Toast

On the Bench - Dragon Pz. IV Ausf. G (L.A.H.) Yes

Your image is loading...


  • Member since
    March 2006
  • From: Right Side of a Left State
Posted by Shellback on Wednesday, August 31, 2011 8:04 PM

Ben , glad you like the box . Beer

Question , would the storage box be painted the same as the vehicle or left in its natural wood ? I've seen photo's where the box's look painted and in others i cant distinguish if its painted or not because of the black and white photo .

  • Member since
    March 2003
  • From: Rain USA, Vancouver WA
Posted by tigerman on Wednesday, August 31, 2011 9:00 PM

Being way too hard on yourself Carl. That is sweet!

   http://i7.photobucket.com/albums/y269/wing_nut_5o/PANZERJAGERGB.jpg

 Eric 

  • Member since
    February 2003
  • From: Allentown, PA
Posted by BaBill212 on Wednesday, August 31, 2011 9:02 PM

You fine folks are throwing so many great pics and info out there of fantastic looking stuff.....   well, it is time to bring it down a notch,,,   (hopefully not too far though)

First, thanks for all the great posts. It actually saves me time by observing your work rather than digging through my library...  and looking at your work is more fun anyway.     Plus, I am lazy sometimes...


Andy,,,   before I post the latest pics,,,,  take two of these please - - 


Scanty and lacking detail on the upper hull...   not horrible, but not near good either....


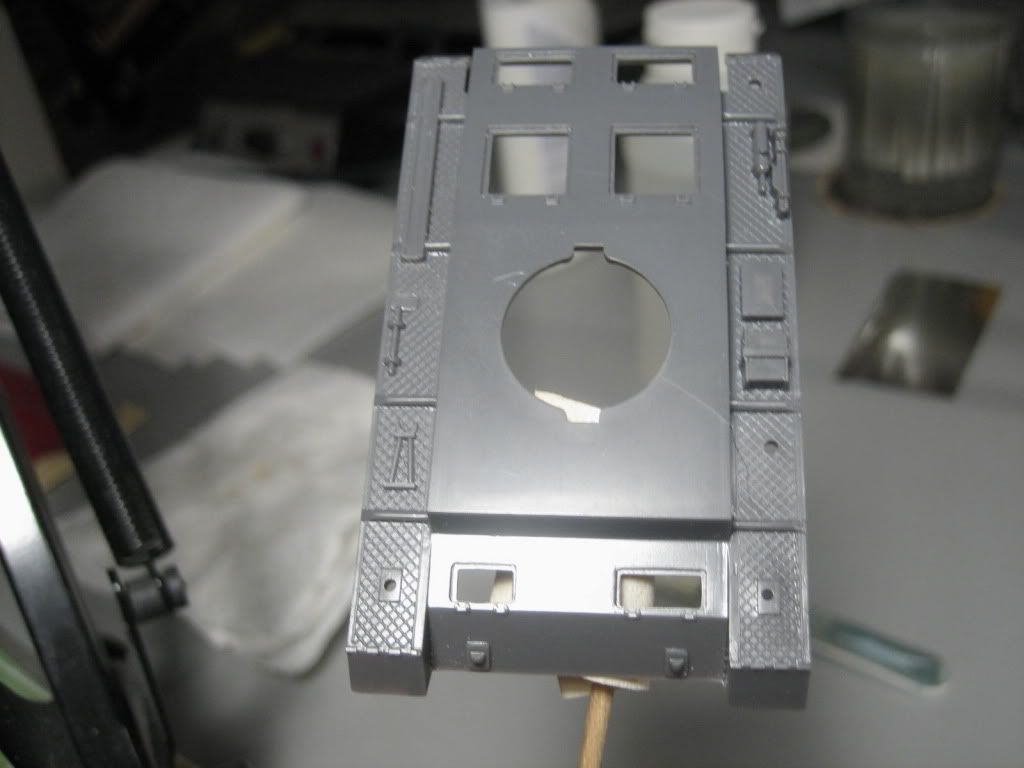
Radio and driver forward armored plate...  the radio operator's machine gun / mount was beyond me letting it slide.

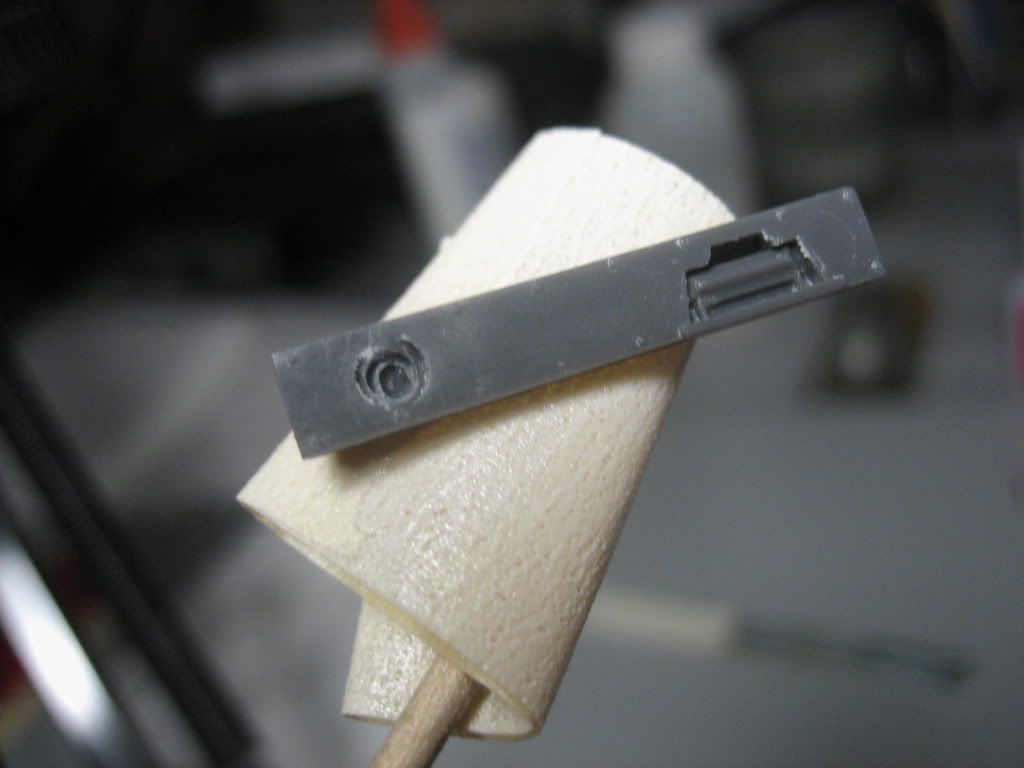
I ground out the area and figured I could make my own ball mount.....  (yeah, sure).   I found an appropriate sized piece of sprue and sanded it to a rounded half moon / edge.

I then pin-viced a hole for the machine gun....

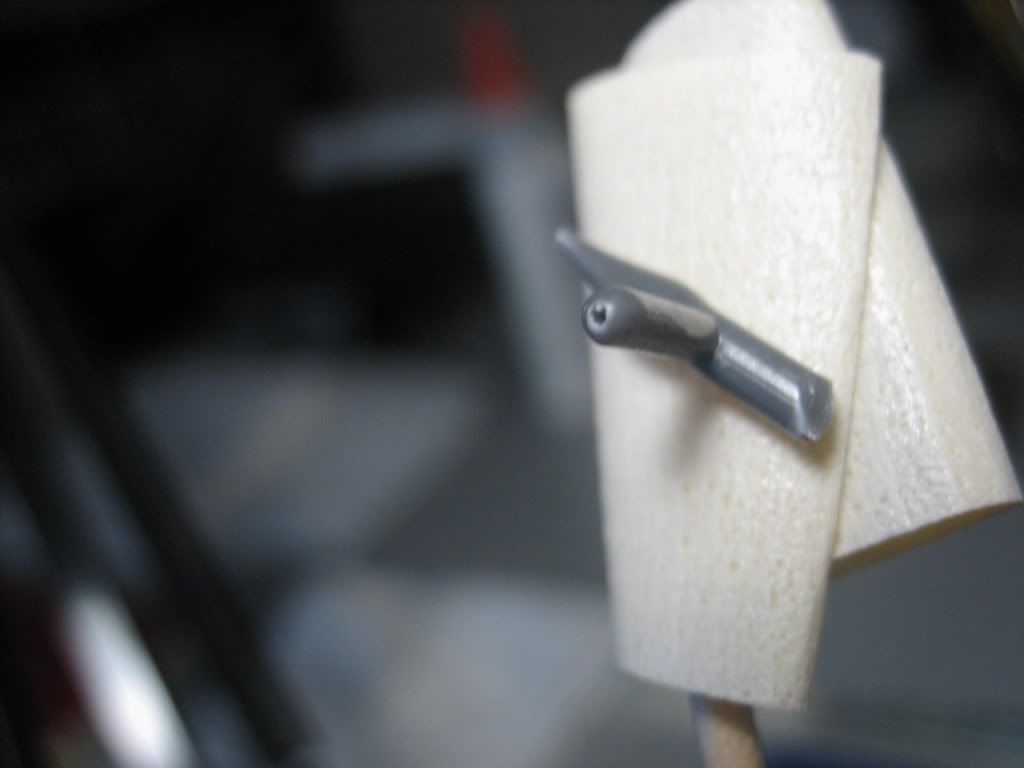
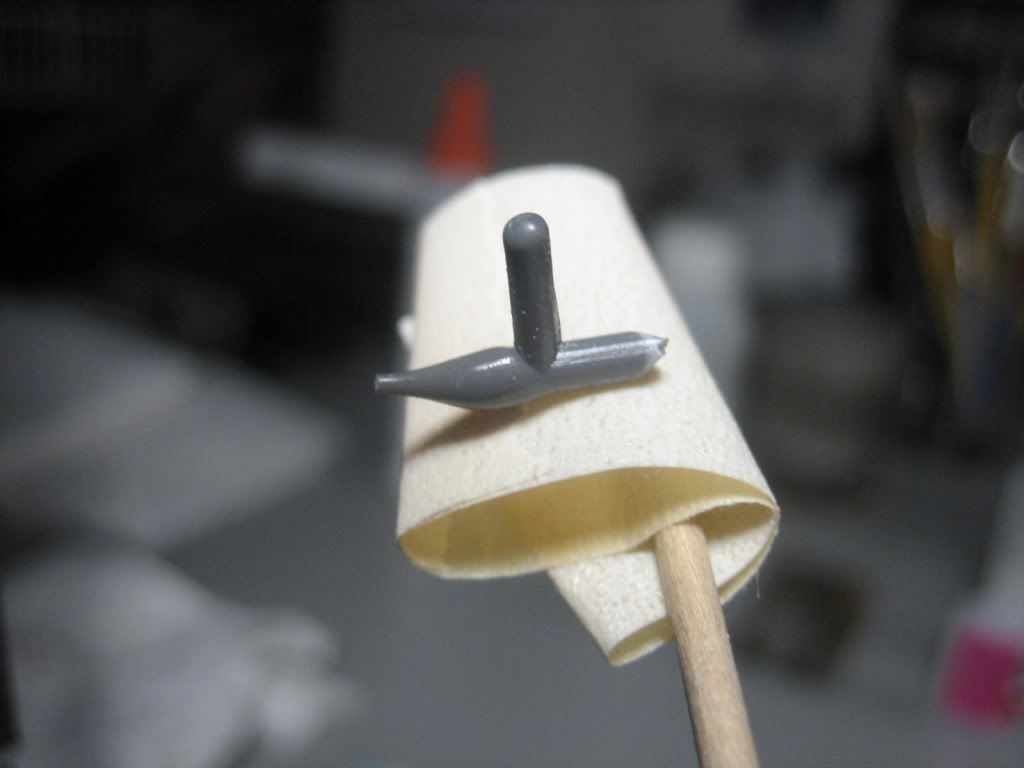
I cleaned it up a bit and carefully cut the "ball" end away from the sprue....

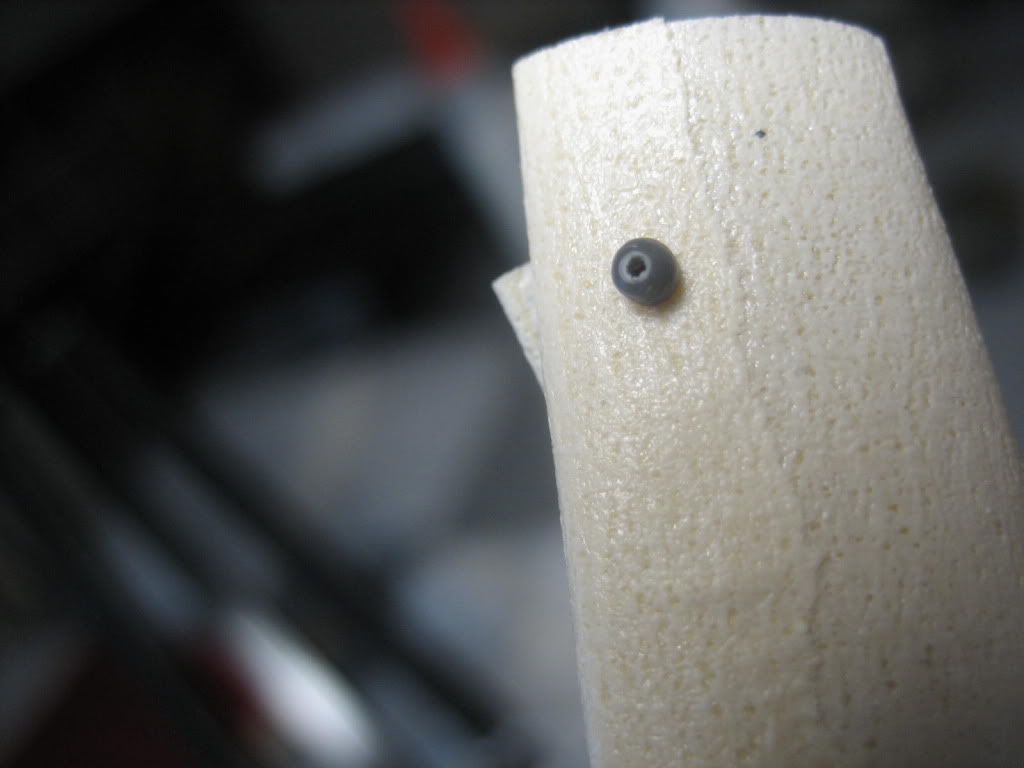
From there I stretched some sprue to "machine gun barrel dimensions", hollowed out the barrel and glued into the ball,,,,     I then glued this assembly into the ball mount.


Along with the driver / radio armor plate, I added the hatches, vents, and various superstructure surface kit parts......


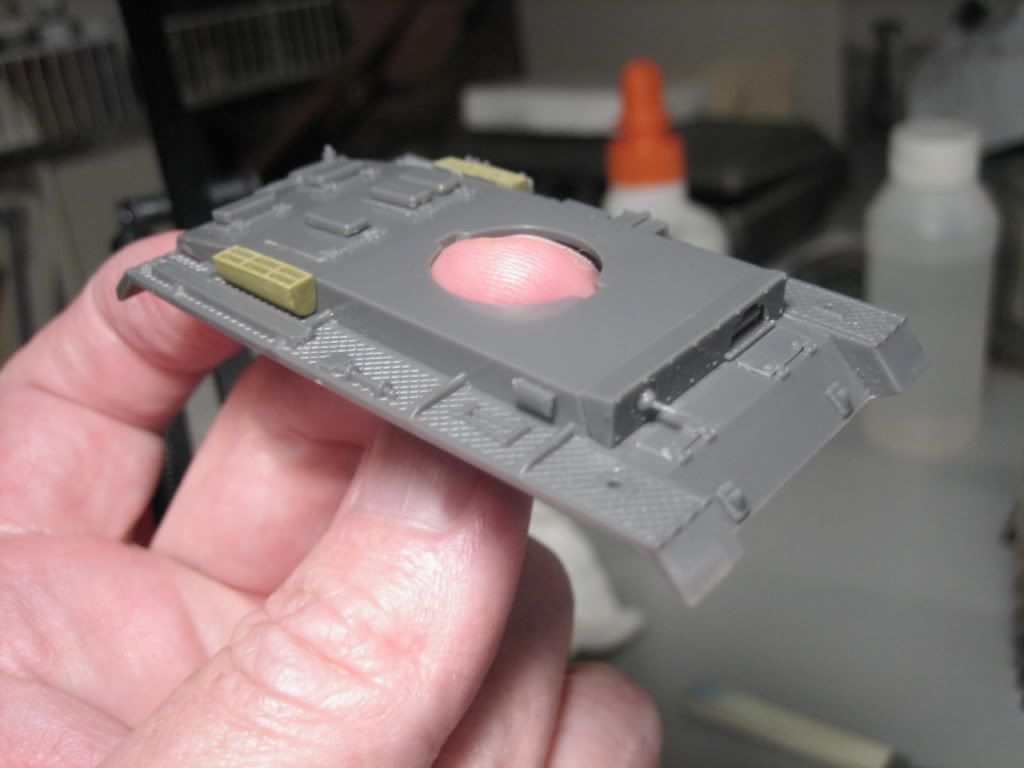
The pz yellow painted portions / filters were part of an abandoned plan... I was going to paint and add screening as a sub-assembly and then attach these towards the end of the build. I had since decided to attach them now and add the screening later.

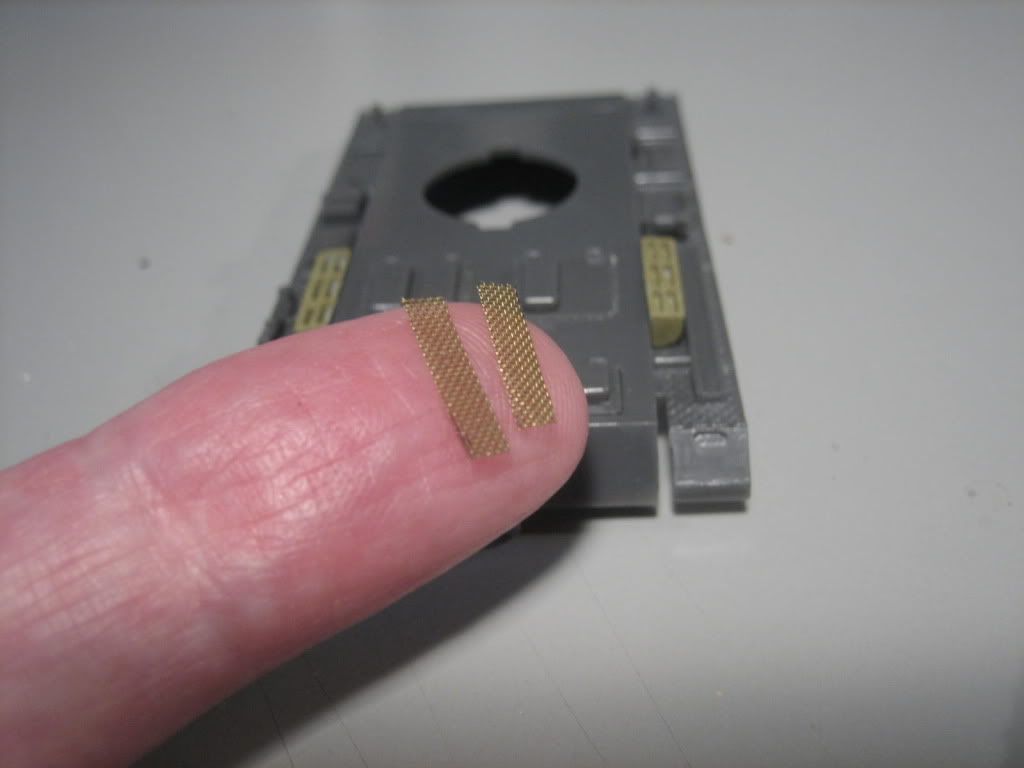
It was fun measuring and cutting out the brass screening (wait, did I just say that?)


Well that is it for now,,,,  I will be working on and  finishing up the turret shortly,, cannot wait to get into painting,,,,,,         hopefully     very soon,,,,       unless I go insane first,, ha ha,   (perhaps I,, I already,,, umm,, nevermind)

Thanks guys,,,   all advice, comments, suggestions, etc. etc.  welcome         

Bill


Enjoy the ride!


  • Member since
    March 2006
  • From: Right Side of a Left State
Posted by Shellback on Wednesday, August 31, 2011 9:27 PM

Eric , thanks .Beer

Bill , nice scratch work there .Beer

  • Member since
    April 2009
  • From: Carmel, IN
Posted by deafpanzer on Wednesday, August 31, 2011 9:50 PM

Bill- Thanks for letting me take five of those first... http://i951.photobucket.com/albums/ad354/babill1/Asprin/asprin.jpg  It really helped!  Beautiful work there especially scratch built MG turret.  I have learned a great deal of modeling tips from your and other WIPs.  Beer

Hope everything is back to normal after wrath of Irene...

Andy

JOIN OUR COMMUNITY!

Our community is FREE to join. To participate you must either login or register for an account.

SEARCH FORUMS
FREE NEWSLETTER
By signing up you may also receive reader surveys and occasional special offers. We do not sell, rent or trade our email lists. View our Privacy Policy.