SEARCH FINESCALE.COM

Enter keywords or a search phrase below:

Fw 190 Butcher Bird 2013 (extended to June 2014) Group Build

564936 views
5865 replies
1 rating 2 rating 3 rating 4 rating 5 rating
  • Member since
    September 2011
  • From: Milaca, Minnesota
Posted by falconmod on Tuesday, January 14, 2014 8:41 AM

mustang1989

You know I just wanted to take a sec or two here and recognize John's build. If I've said it once I've said it a thousand times, "How you guys can pull off some of the stuff you do in 1/72 scale and make it look like a 48th scale build is truly nothing short of amazing". That is one spectacular build you've got goin' on there John.

EmbarrassedEmbarrassedEmbarrassed  Thanks for the compliments, I'm turning red allover.  It's been alot of experimentation and alot of looking through my magnifying hood. Surprise

On the Bench: 1/72 Ki-67, 1/48 T-38

1/144 AC-130, 1/72 AV-8A Harrier

  • Member since
    September 2011
  • From: Milaca, Minnesota
Posted by falconmod on Tuesday, January 14, 2014 8:49 AM

Joe,

   you keep posting any more pictures of that D-9 and I'll have to add one to my stash!  I have everything but the D-9 in the there I think. Surprise  that is a Eduard right?

John

On the Bench: 1/72 Ki-67, 1/48 T-38

1/144 AC-130, 1/72 AV-8A Harrier

  • Member since
    April 2013
Posted by SchattenSpartan on Tuesday, January 14, 2014 9:54 AM

Blackdog: You are going to love that kit! I think the Hasaegawa kits are the best 190s out there. The Eduard kits are almost as good IMO but they are not as much mun to build because you have to watch out for fitting issues with each new sub assembly.

John: First of all, Joe is right about your tiny 190! Most impressive. He is building Tamiya's D-9 with lotsa AM goodies (and Eduard landing gear because the tamiya legs are too short)

  • Member since
    August 2009
  • From: MOAB, UTAH
Posted by JOE RIX on Tuesday, January 14, 2014 12:49 PM

I remember reading, quite some time ago, about the reasoning behind no longer painting aircraft by the allies. It was all about weight reduction. So, this discussion got me to thinking. A gallon of paint weighs 12 lbs. I know because I weighed one when I got to work this morning. Now, I can't tell you exactly how many gallons of paint it took to cover, let's say, a P-38. But, I'll fathom it took more than 5. That's 60 lbs. Now 60 lbs+ added to a high performance fighter plane begins to have an adverse effect on speed and performance. Consider how much paint it would take to paint a B-17. Anyway, I think you get the just of why it made sense to omit paint from the airframe of combat aircraft.

"Not only do I not know what's going on, I wouldn't know what to do about it if I did". George Carlin

  • Member since
    April 2013
Posted by SchattenSpartan on Tuesday, January 14, 2014 1:16 PM

Wait, they didn't just do it because NMF planes look so sexy? Hmm

On a more serious note: I think as well that the weigth of the paint was an important factor. And remember: Paint costs something too, especially big amounts of it Wink

  • Member since
    October 2008
  • From: Georgia
Posted by Rigidrider on Tuesday, January 14, 2014 6:18 PM

Thats right Joe... and another thing I had seen was that the allied pilots were growing bolder and in a way "daring" the enemy to come up and "dance". They were in a sense saying, that we dont need to hide from you... here we are!

Now in the Pacific Theater, the paint was a must to cut down on the oxidation and corrosion from the sea spray, and constant humidity, which also picked up salt from the water and the dust and sand of the islands. Or atleast thats what I read.

I know when I was a young Marine doing my WesPac tour, we had a guy in motor "T" that stripped the OD paint from his M151A1 Jeep radiator and other parts, and polished the brass till you could shave in the reflection. The next afternoon at inspection, he opened the hood and all that brass had turned green!

Doug

When Life Hands You A Bucket Of Lemons...

Make Lemonade!

Then Sell It Back At $2 Bucks A Glass...

  • Member since
    September 2013
Posted by blackdog62 on Tuesday, January 14, 2014 9:32 PM

Joe rix.  Ya that's true not sure but most paint requires primer wich would add more. Reading these articles on aircraft about additional weapons or cameras droping performance.

Shattenspatan.  This would be my first hasegawa I have always heard good things about there aircraft kits. As for the edwards I have bin following what the gang has bin saying about there fit isues. I got a 190d for xmas its a werkend version that's wy I was asking earlier if was the same mold as the profipack edwards. Looks like they are.

  • Member since
    September 2013
Posted by blackdog62 on Tuesday, January 14, 2014 9:43 PM

That may be true about gbeing bold to get the axis to come up and play. One of my favorites is when the the fighters flew over Europe in bomber formations and the axis boys seen it on there radar and flew up to meat some heavys and got a surprise.

  • Member since
    June 2008
Posted by jugjunkie on Wednesday, January 15, 2014 4:53 AM

For your information guys the paint on a Jumbo jet weight 1.3 tons (1300 Kg)

  • Member since
    March 2012
  • From: Corpus Christi, Tx
Posted by mustang1989 on Wednesday, January 15, 2014 5:26 AM

Wow! Thats alot of weight in paint!!!! Alot of weight!!! And alot of money!!!


 Forum | Modelers Social Club Forum (proboards.com) 

  • Member since
    April 2013
Posted by SchattenSpartan on Wednesday, January 15, 2014 1:35 PM

I have a very short update, but this one step changed a lot regarding my Eduard 190s!

First things first: I got my Qusickboost gun access panels today:

There's nothing special about them at all. They are basically a resin copy of the kit parts with some minor modifications: They have no detailed bottom and are very thin at the rear end to make them fit the wings without surgery. Anothe "modification" is the size. The resin parts a just a tiny bit smaller than the kit parts (probably because of the resin shrinking as it dries)
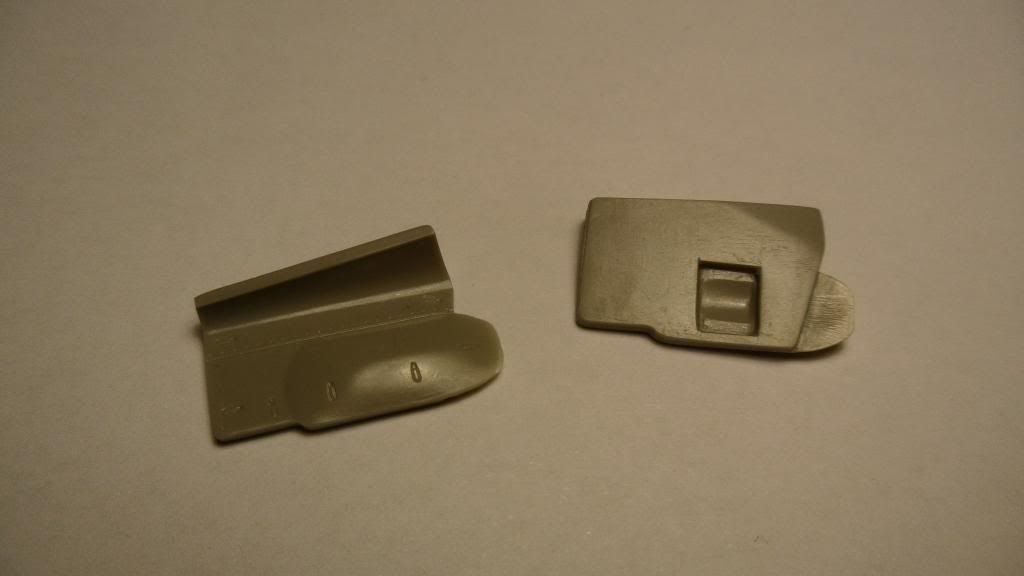
Comparison with the kit part:
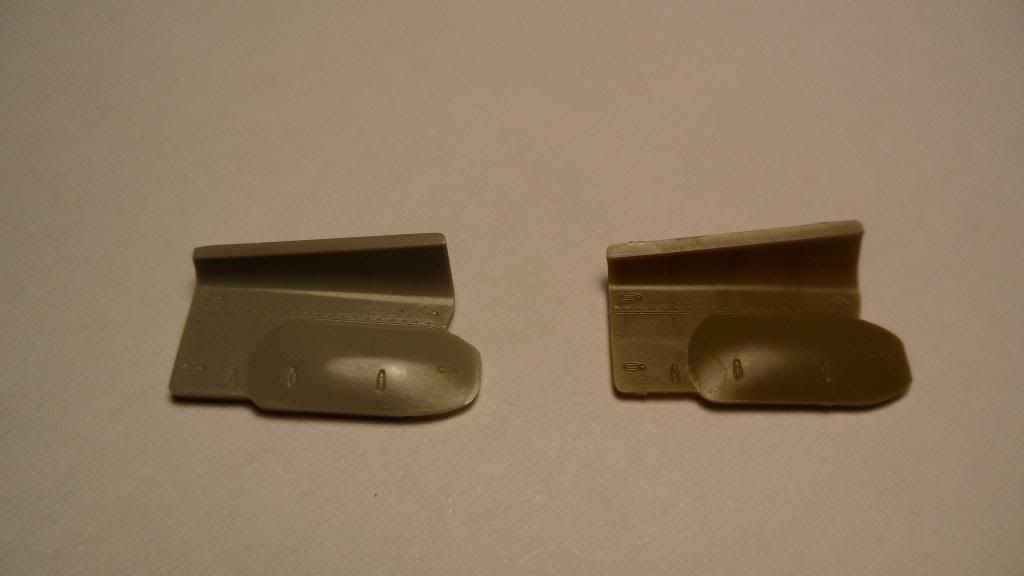
I'd never thought about ordering them if I hadn't destroyed one of my plastic parts by accident. I can't use them on my A-8/R2 either because they require different gun bay inserts on the wings - those without detail and that "spacer" to glue the hatches on (Eduard's A-8/R2 is their only kit with the instructions not mentioning this Bang Head) I simply robbed the plastic hatches from my 2nd A-8/R2 kit and I'll use the resin parts on that one (the gun bays are not in place on that one yet, so the AM parts will fit)

I'm writing way too much again... Zip it!

Now to the real update:

I FOUND THE SOLUTION!!!!

And with solution I meant the proper way of installing the gun covers. Eduard tells you to cut out a part of the wing to fit them. I simply ignored that step and came up with something different: I looked at the Quickboost parts and had an idea. All you have to do to get the hatches to fit without major surgery is to sand down ALL the surface detail of the gun hatch bottoms. jsut try to get them as thin as possible and they should fit the wing without any issues.

Before:
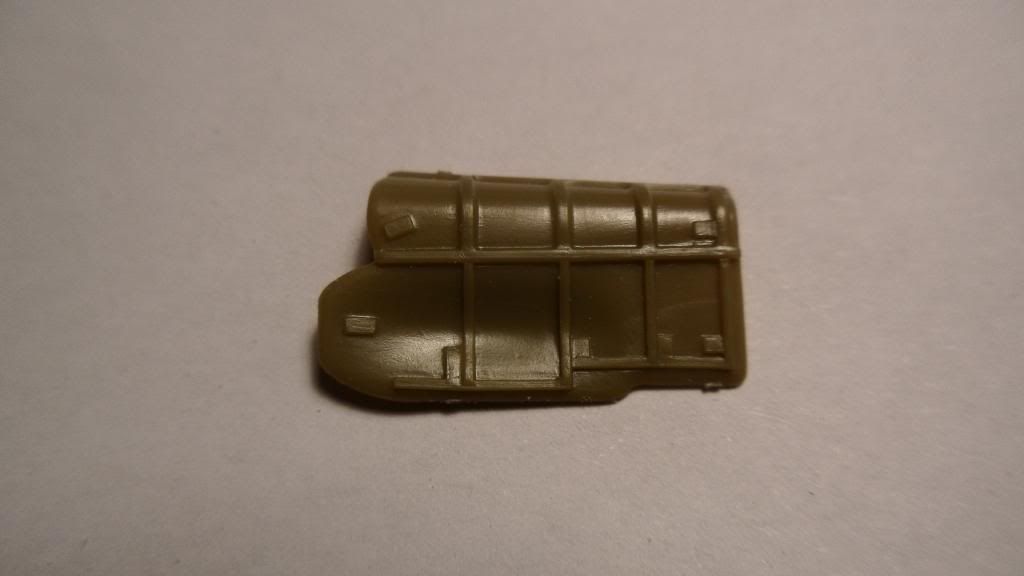
After:
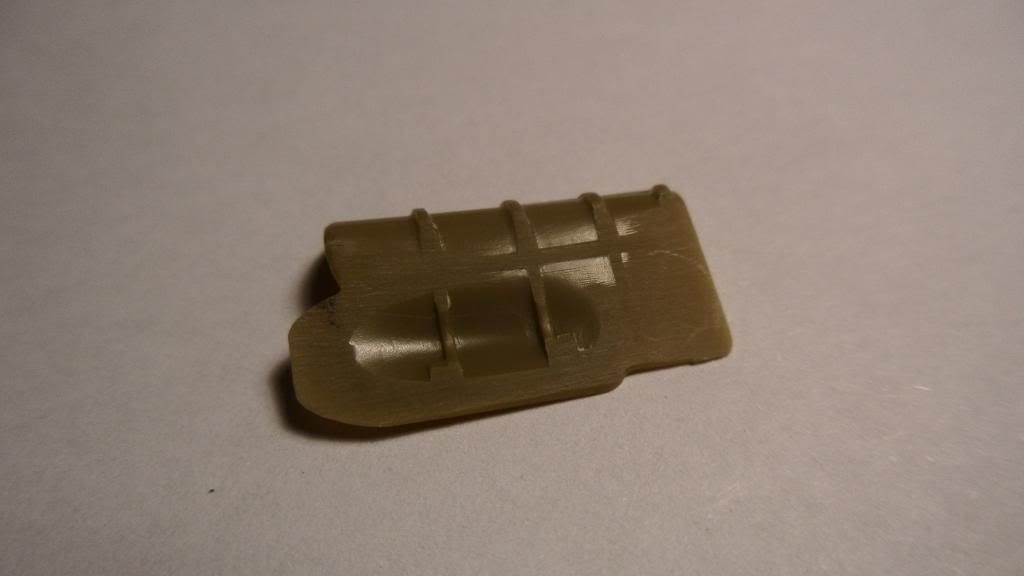
The wing WITHOUT surgery (i originally planned on leaving this hatch open, but the wing was badly molded, so i had to "fix" it with a few layers of plastic sheet):
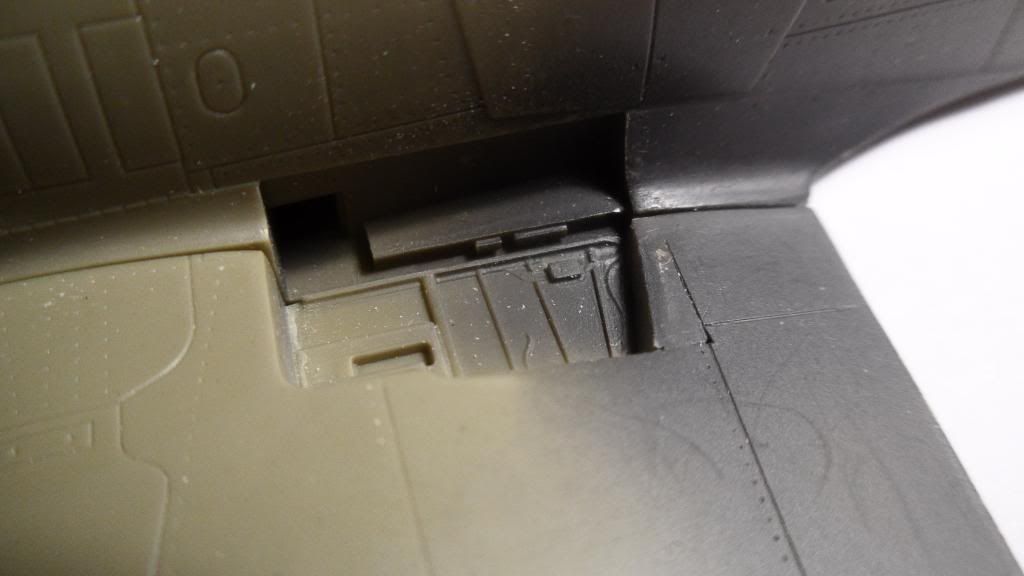
Gun cover in place. It fits almost perfectly with only a slight gap at the front edge (a very thin plastic strip should do the trick here):
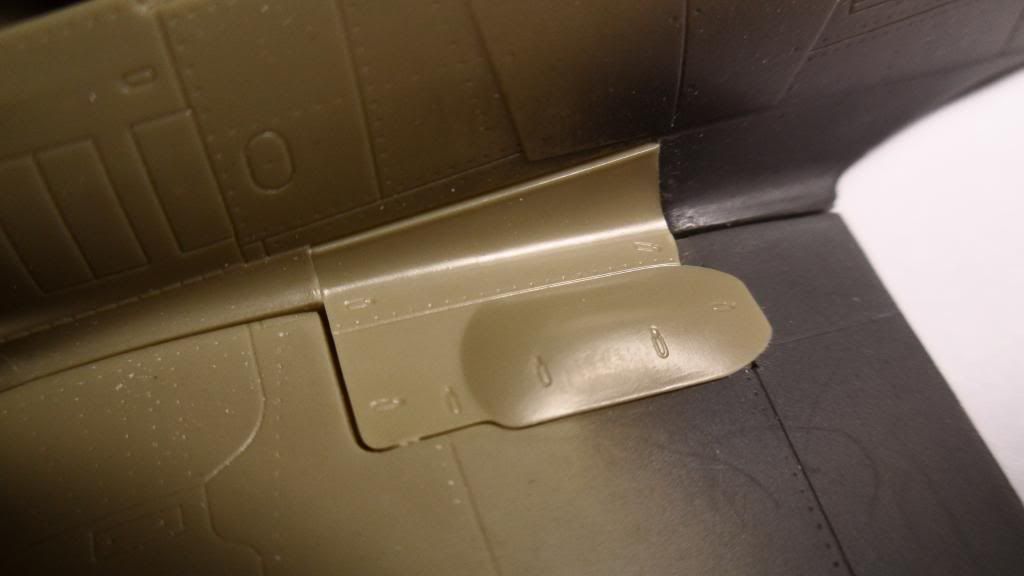
You might notice the rather large step at the rear end of the wing root. This is caused by me sanding away a raised panel in this area while repairing the wing. I'll add that panel again after glueing the fuselage and wings together, so the step will disappear.

And the other side (I followed the Eduard instructions on this side):
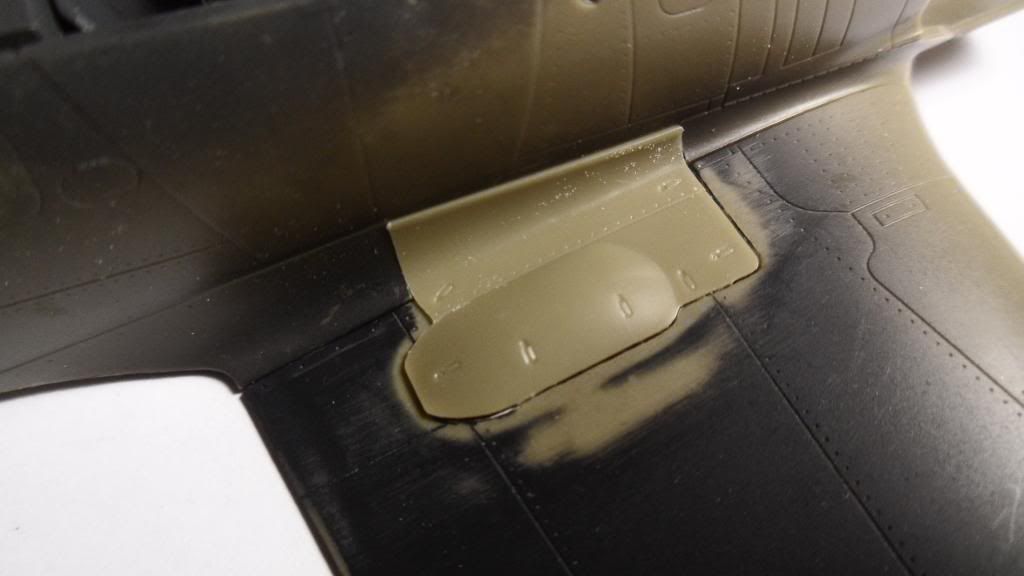
Thae dark edge around the cover is no gap, just some paint remnants.

I hope this is of any help to those building an Eduard 190.

Cheers, Clemens 

  • Member since
    April 2013
Posted by SchattenSpartan on Wednesday, January 15, 2014 1:37 PM

I know this was supposed to be a short update, but i couldn't help it and just wrote another XL-post... Please bear with me, I jsut tend to overdo it a bit with all the explanations and pics...

  • Member since
    April 2013
Posted by SchattenSpartan on Wednesday, January 15, 2014 1:43 PM

Hey Joe, I have an idea: How about asking the guys at FSM about including pics of all the great builds here in the magazine? I really think the great work posted in this GB deserves getting some extra attention (and they included some pics of the WW1 aircraft GB in the current issue as well...

  • Member since
    April 2013
Posted by SchattenSpartan on Wednesday, January 15, 2014 1:51 PM

Another shot of the left panel to show how well it fits the wing:

  • Member since
    March 2010
  • From: MN
Posted by Nathan T on Wednesday, January 15, 2014 3:34 PM

So you didn't use the Quickboost covers? I too don't cut out like Eduard tells you if you want the covers closed. Just sand the heck out of the bottom like you did. I don't even add the gun bays to the inside of top wing. No need if you are closing thins up.


  • Member since
    December 2006
  • From: N. Georgia
Posted by Jester75 on Wednesday, January 15, 2014 3:35 PM

Clemens, those look great!! I will definitely try this on my next 190. I saw those Quickboost covers and wondered how well they worked.

Eric


  • Member since
    April 2013
Posted by SchattenSpartan on Wednesday, January 15, 2014 3:44 PM

Nathan: Yeah, I didn't use them. I'll use them on the 190 is robbed the replacement plastic covers from though. The only problem with this method is that it leaves a tiny step at one edge, but that area is so small that it's not really noticeable... That's the only thing the Quickboost set prevents. It's really not worth the money if you don't happen to need additional gun covers like I did.

Eric: The Quickboost covers work as well as the Eduard parts but they are a tad easier to install. It's a great idea Quickboost came up with in this case, but it's just so easy to do yourself with a sanding stick and a bit of patience... Like I said already: The only reason I bought them was the fact that I destroyed one of my plastic covers, so I needed to find a replacement.

I just love how well everything's working ou right now. All the problem areas are no problem areas anymore after a little bit of special attention Wink

  • Member since
    August 2009
  • From: MOAB, UTAH
Posted by JOE RIX on Wednesday, January 15, 2014 8:51 PM

Clemens, Nice persistence to achieve some excellent results.

"Not only do I not know what's going on, I wouldn't know what to do about it if I did". George Carlin

  • Member since
    September 2013
Posted by blackdog62 on Wednesday, January 15, 2014 10:22 PM

Thank you guys for the info on the Edward kits ill remember them for mine. Just wondering do there 190d have the same fit issue as the 190a-8 ?

  • Member since
    March 2010
  • From: MN
Posted by Nathan T on Wednesday, January 15, 2014 10:44 PM

blackdog62

Thank you guys for the info on the Edward kits ill remember them for mine. Just wondering do there 190d have the same fit issue as the 190a-8 ?

...Yes...


  • Member since
    June 2008
Posted by jugjunkie on Thursday, January 16, 2014 3:39 AM

Great thing about us doing builds of the same is that we pick up the common problems and highlight what needs to be done, so eventually if anybody wants to build an Eduard 190, they don't have to be afraid - just read through all the fabulous information here and all the problems go away!

  • Member since
    April 2013
Posted by SchattenSpartan on Thursday, January 16, 2014 4:14 AM

JJ: I completely agree with you. It's great to have all that info in here. The Eduard kits are great models, but they have a scaring amount of small parts and some minor fit issues that keep some modellers from building them.

Blackdog: They are very similar. There is no engine, so some of the fit issues occuring with that subassembly are missing, but the different nose assembly causes some minor problems on it's own.

Joe: Thank you. Persistance is the only real solution to all the "issues" with the duard kits. They fit well, but it takes time to get there...

  • Member since
    September 2011
  • From: Milaca, Minnesota
Posted by falconmod on Thursday, January 16, 2014 7:41 AM

No pictures today on the update for my 1/72 snakehead Fw190, but I got it dull coated so I can start to weather it, I also got the wheels and doors painted.  tonight  I'll mask the canopy and start shooting some  exhaust weathering.

John

On the Bench: 1/72 Ki-67, 1/48 T-38

1/144 AC-130, 1/72 AV-8A Harrier

  • Member since
    April 2013
Posted by SchattenSpartan on Thursday, January 16, 2014 5:37 PM

Hey guys, does anyone of you have any experience with Hasegawa's Fw 190 A-8 (1/32)? I just picked it up at ebay for a pretty darn good price: 43€ including shipping. Heck, it's even cheaper than their 1/48 190s Big Smile Normal retail price here would be 70€...

I'm thinking of getting some Eduard PE for the flaps and wheel wells and this awesome cockpit set. Maybe I'll even convert her to an A-8 and paint her in my favorite 190 scheme (Black 13, standard camo with field-mixed dark green overspray):


  • Member since
    April 2013
Posted by SchattenSpartan on Thursday, January 16, 2014 5:43 PM

I'm blaming you guys for my 190 addiction! Especially you, Joe! This GB one of the best group builds, if not the best, on this site. Thanks for being such a great host and awesome guy to build models with! (the latter goes to all of you)

Cheers, Clemens

  • Member since
    March 2012
  • From: Corpus Christi, Tx
Posted by mustang1989 on Thursday, January 16, 2014 8:13 PM

Well thanks Clemens. I will give credit to where its due though. It's really all you guys that keep this thing going. I'm merely the host and will say because of all you guys that this GB has got to be one of the most successful builds I have seen on here. When I started this all I expected to run the course of a year and hopefully have 15 participants and run about the usual 1200 or so posts. Well now we are at around 4500 posts , over 300 pages and around 50 participants and still going strong so I thank all of YOU for making this all what it is guys. Thanks a mil..you guys are da bomb!! 


 Forum | Modelers Social Club Forum (proboards.com) 

  • Member since
    March 2012
  • From: Corpus Christi, Tx
Posted by mustang1989 on Friday, January 17, 2014 4:48 AM

Todays update comes in the form of the NMF finish on the bottom of the wings. I've done the best I could with the references I had (to include Nathan T's last build) and have altered a couple of things but the general layout and application is coming along fairly well in my opinion. First we have the port wing:

and then the starboard wing:

Thanks again Nathan for the reference.


 Forum | Modelers Social Club Forum (proboards.com) 

  • Member since
    September 2011
  • From: Milaca, Minnesota
Posted by falconmod on Friday, January 17, 2014 8:05 AM

SchattenSpartan

I'm blaming you guys for my 190 addiction! Especially you, Joe! This GB one of the best group builds, if not the best, on this site. Thanks for being such a great host and awesome guy to build models with! (the latter goes to all of you)

Cheers, Clemens

I'm not sure who to blame Surprise but I know without this GB I would have never improved my modeling skills the way I have,  or increased my stash count. Whistling 

I almost bought the Hasegawa 1/72  combo 190 set that had one of the planes the snake head squadron last week at my LHS but I haven't pulled the trigger on that one yet.

This has been the best thing in modeling I've ever been invloved in, I look forward every day to what new posts will be out there.

John

On the Bench: 1/72 Ki-67, 1/48 T-38

1/144 AC-130, 1/72 AV-8A Harrier

  • Member since
    March 2012
  • From: Corpus Christi, Tx
Posted by mustang1989 on Friday, January 17, 2014 4:15 PM

falconmod

This has been the best thing in modeling I've ever been invloved in, I look forward every day to what new posts will be out there.

John

That sir, is a mutual feeling! Every day somebody posts something worth remembering on here it seems.

This is the latest. Got the decals on the bottom and ready for a light wash to bring out the panel lines and then a dull coat.


 Forum | Modelers Social Club Forum (proboards.com) 

  • Member since
    March 2012
  • From: Corpus Christi, Tx
Posted by mustang1989 on Friday, January 17, 2014 4:19 PM

err...........that'll be after the additional gloss coat first!


 Forum | Modelers Social Club Forum (proboards.com) 

JOIN OUR COMMUNITY!

Our community is FREE to join. To participate you must either login or register for an account.

SEARCH FORUMS
FREE NEWSLETTER
By signing up you may also receive reader surveys and occasional special offers. We do not sell, rent or trade our email lists. View our Privacy Policy.