SEARCH FINESCALE.COM

Enter keywords or a search phrase below:

Gift GB

73676 views
605 replies
1 rating 2 rating 3 rating 4 rating 5 rating
  • Member since
    December 2012
Posted by Z Square 8 on Friday, March 8, 2013 10:41 AM

Bish

Glad you were able to get the info you wanted Z. That looks awasome. Did you use future, or just go straight with the black.

Good pick out for info Bish...should have included it here since the question was first posed in this thread.

The answer is straight to gloss black...no future for sanding mark filler. 

Main reasons I chose to follow recommendations were:

1. potential reactions in the layers

2. thickness of future and would fill good details as well as the bad

3. Using Mr. Surfacer is a great, proven method followed by very fine grit sand/polish even after gloss black applied.

4. I can use the bomb halves that I am not using as test pieces just to see what would have potentially happened...nobody had tried it over in the painting forum since there are several other proven and probably easier/quicker methods to obtain great results.

Thanks for the directional nudge to the painting guru's in that forum...very insightful and informative chaps.Yes

--Rich

Site builder of CooksonTributeB29.com 


  • Member since
    December 2012
Posted by Z Square 8 on Friday, March 8, 2013 10:51 AM

That's going to look really good CMK.

I had read about that scanning/masking technique on site when I was looking for info on making your own custom decals...nice to see it "live" here.

--Rich

Site builder of CooksonTributeB29.com 


  • Member since
    December 2002
  • From: Bury St Edmunds, Suffolk, England
Posted by Bish on Friday, March 8, 2013 11:08 AM

I just read through the thread you posted in painting. Using this Lacquer paints can be tricky, i had forgot about the issue of using it over an Acrylic. The Lacquer paint can be damaging if not done right, but touch wood in 3 builds i have had no problems yet. Look forward to seeing the 29 nice a shiny.

I am a Norfolk man and i glory in being so


On the bench: Airfix 1/72nd Harrier GR.3/Fujimi 1/72nd Ju 87D-3

  • Member since
    September 2003
  • From: AandF in the Badger State
Posted by checkmateking02 on Saturday, March 9, 2013 11:15 AM

Thanks, Z.  Here are photos of the Battle unmasked.

Undersurfaces are black, but I believe the RAF called it "Night."

Upper surfaces are Dark Earth and Dark Green.  I used WEM Colourcoats for all the exterior colo(u)rs.

Masking went really well.  I didn't have to do any touchups for oversprays, cuz it came out exactly right the first time.  I don't know how that happened Confused !

Those pesky ailerons are supposed to be movable, but the left one fit so tightly, it won't budge.  The right one is so loose, it flops around.  I tacked the right one with glue after I took the photos, so it stays put.

Thanks for looking.


  • Member since
    December 2002
  • From: Bury St Edmunds, Suffolk, England
Posted by Bish on Saturday, March 9, 2013 11:19 AM

Thats looking great.

I am a Norfolk man and i glory in being so


On the bench: Airfix 1/72nd Harrier GR.3/Fujimi 1/72nd Ju 87D-3

  • Member since
    December 2012
Posted by Z Square 8 on Saturday, March 9, 2013 11:31 AM

CMK- she is looking sharp! The top masking results are top shelf  Wow

--Rich

Site builder of CooksonTributeB29.com 


  • Member since
    September 2003
  • From: AandF in the Badger State
Posted by checkmateking02 on Saturday, March 9, 2013 12:15 PM

Thanks very much, Bish and Z.  Very nice of you both.

I'm off now to deal with the bombs.  Fooled around with masking tape yesterday; didn't like the way it was working, so I think I'll experiment with decal stock.


  • Member since
    October 2008
Posted by eatthis on Saturday, March 9, 2013 12:25 PM

that looks ace!

i always thought the battle was begging for a griffon motor make it our version of the il2


snow + 4wd + escessive hp = :)  http://www.youtube.com/watch?v=x7egUIS70YM

  • Member since
    October 2008
Posted by eatthis on Saturday, March 9, 2013 3:51 PM

i think this looks spot on


SURPRISE


snow + 4wd + escessive hp = :)  http://www.youtube.com/watch?v=x7egUIS70YM

  • Member since
    December 2012
Posted by Z Square 8 on Sunday, March 10, 2013 1:29 PM

Z Square 8

Bish

Glad you were able to get the info you wanted Z. That looks awasome. Did you use future, or just go straight with the black.

Bish- Looks like member "Kermit" over in the NMF GB 2012-2013, tried the future as a filler process I was thinking about. It did not appear he had any adverse issues but wasn't impressed either. FYI

--Rich

Site builder of CooksonTributeB29.com 


  • Member since
    September 2003
  • From: AandF in the Badger State
Posted by checkmateking02 on Sunday, March 10, 2013 4:54 PM

Thanks for the compliment, eatthis.  Your jet is looking good and coming along nicely, too.

While I fiddle around with the bombs and other small parts, here's a look at some of the details already finished.

First is the nose, which was a pest because the prop had to be installed when the fuselage was closed, then sanded, masked and painted, all without getting the prop messed up.

The next two phots show the pilot's 'pit with the plastic detail bits added.

The last three photos show the gunner's position, again with the little plastic bits.  The panel under the gun position seems to have had a round dial of some kind.  I didn't have anything close, so I used a square instead.  As I think I mentioned before, I chopped up a B-17 instrument decal and used the dials and knobs where they seemed appropriate.

About all I have left are the final painting on small parts, then assembling them.  Thanks for looking.


  • Member since
    December 2002
  • From: Bury St Edmunds, Suffolk, England
Posted by Bish on Sunday, March 10, 2013 5:17 PM

eatthis, now that looks nice. Whats the colour scheme going to be.

Rich, i wasn't in on that GB, thanks for the heads up.

I am a Norfolk man and i glory in being so


On the bench: Airfix 1/72nd Harrier GR.3/Fujimi 1/72nd Ju 87D-3

  • Member since
    October 2008
Posted by eatthis on Sunday, March 10, 2013 5:43 PM

raf grey/green same for the twin engined spitfire im making


snow + 4wd + escessive hp = :)  http://www.youtube.com/watch?v=x7egUIS70YM

  • Member since
    December 2012
Posted by Z Square 8 on Monday, March 11, 2013 9:45 PM

Z Square 8

The original image...

and the initial rework to make a custom decal...need to rework a lot more,

(like the "A" in Albuquerque  and include the "l" after the "A"),.  

I will be trying Don's method of inkjet to white decal sheet ultimately and scaling her down to size. I still have yet to add color to it, but this is the first rendition in B/W...still needs quite a bit of work though. From other B/W images of hair color on the pin up gals, I am of the impression that this gal is blonde and maybe a tan color of shorts/skirt.

The next tier of nose art work: Master image below...

This is all fine and well, except...the white around the ship name has to be printed on white sheet.

Now think about Hazel on the arrow...no white base. I would have to make a white base for her (which would not be accurate). As is on white paper, I would have to cut out the overall shape and cut out each individual letter of "Hazel" and properly space! Devil

Hazel and arrow will have to be printed on clear.

So...on white

and on clear:

Used some creative latitude with the colors and shading...

 Looks like I still need to work on that "A" shape in Albuquerque a bit more...I kinda get a bit lost looking at little squares when I enlarge 1600 times...work in progress.

Thoughts?


--Rich

Site builder of CooksonTributeB29.com 


  • Member since
    September 2003
  • From: AandF in the Badger State
Posted by checkmateking02 on Monday, March 11, 2013 11:08 PM

Nice work, Z!! Yes That is turning out great.


  • Member since
    September 2003
  • From: AandF in the Badger State
Posted by checkmateking02 on Tuesday, March 12, 2013 10:01 AM

Currently I'm fiddling around with the canopies.  The don't fit the best.  I thought I had dry-fitted them enough, but when it came time to glue them on, they are now being uncooperative.  It will take a lot of filler in the form of white glue run into the gaps, I'm afraid. 

Here's what they looked like after painting (still masked).  You can see where the lower frame chipped when I was cutting the mask to fit.  I hope this will be hidden by the sliding part of the canopy.

The rest of the photos are of the landing gear, including the bronze colored parts.  These are pretty chunky and oversize, compared to photos of the real plane.


  • Member since
    December 2012
Posted by Z Square 8 on Tuesday, March 12, 2013 10:36 AM

CMK- the battle continues to impress.

Regarding the canopy mask...did you use a liquid mask or tape?

--Rich

Site builder of CooksonTributeB29.com 


  • Member since
    September 2003
  • From: AandF in the Badger State
Posted by checkmateking02 on Tuesday, March 12, 2013 12:46 PM

Hi, Z.  Both, actually.  I cut thin strips of masking tape (cheap walmart stuff); outlined the windows; filled the centers with MicroMask, then trimmed the excess tape with a sharp xacto knife. 

I've never had any luck with using just a liquid mask.  I haven't had success using clear tape, then cutting out the windows.

Most times the method I outlined works pretty well, although there is always room for the occasional failure.


  • Member since
    September 2003
  • From: AandF in the Badger State
Posted by checkmateking02 on Tuesday, March 12, 2013 6:49 PM

An update on the Battle's bombs.

I used a paper punch to cut out little cresents from a sheet of clear decal stock.  These would be the basis for the tiny red band around the nose.  It would have worked better to have two concentric diameters of holes, but I only had once punch size, and I figured that only the top half of the bomb had to look decent, since the whole bomb is sunk into the wing.

I also cut some thin strips for the green bands.

Then I airbrushed the colors on the decal stock.

I applied the red nose bands first.

Then the green, and voila--the finished bombs! 

Thanks for putting me onto this idea of decorating the bombs, Z.  It worked pretty well and should liven up the black undersides.

Thanks for looking.


  • Member since
    December 2012
Posted by Z Square 8 on Wednesday, March 13, 2013 11:45 AM

nice work on the bombs CMK! Looks like some very tedious work with the red band/circles, but handled very well by your pics. Yes

I may dismount the bombs on the 29 and follow your method of the stripe application...I just have to wait until the body paint work is completed as the bombs are covered with masking right now.

I have completed the polishing and respray of the black base gloss w/Testors. She will get a good allowance of drying and curing time...meanwhile, work will continue on the nose art decal customization.

Stay tuned...

--Rich

Site builder of CooksonTributeB29.com 


  • Member since
    October 2008
Posted by eatthis on Wednesday, March 13, 2013 11:53 AM

what a great idea for the bombs!


snow + 4wd + escessive hp = :)  http://www.youtube.com/watch?v=x7egUIS70YM

  • Member since
    December 2002
  • From: Bury St Edmunds, Suffolk, England
Posted by Bish on Wednesday, March 13, 2013 12:53 PM

Those bombs look great. Nice work.

I am a Norfolk man and i glory in being so


On the bench: Airfix 1/72nd Harrier GR.3/Fujimi 1/72nd Ju 87D-3

  • Member since
    September 2003
  • From: AandF in the Badger State
Posted by checkmateking02 on Wednesday, March 13, 2013 2:18 PM

Thanks, Z; eatthis; and Bish.  I appreciate the comments.

And the more I build RAF planes, the more I love how the RAF painted up things in WWII.

Maybe I should add, in case anyone wants to try the bomb method at home, is not to let the paint dry too long, after you apply it to the decal stock.  

If you wait too long, the paint will get brittle and crack when the decal flexes.  I only waited about an hour from painting to applying.  I used Floquil RR "Signal Red," and it was dry to the touch by that time.

I used WEM RAF "Light Green," and that was still tacky to the touch after about 1 /1/2 hours, but the painted decal still went on fine.

I've only got a very few parts to add before finishing the Battle, but work is interfering with time again.

I'd really like to finish up by the weekend sometime.  I'm at that "antsy-to-finish" stage.


  • Member since
    December 2012
Posted by Z Square 8 on Wednesday, March 13, 2013 3:47 PM

Roger the "antsy"...I'm already feeling it too. I have to exercise a little self discipline still as I have a ways to go yet. LOL

Will be looking forward to the "calling her complete" transmission and pics from the Battle office. I'm sure she will be stellar.

--Rich

Site builder of CooksonTributeB29.com 


  • Member since
    September 2003
  • From: AandF in the Badger State
Posted by checkmateking02 on Wednesday, March 13, 2013 10:19 PM

Thanks, Rich.  The time I start making mistakes is the time I get impatient and rush things.


  • Member since
    October 2008
Posted by eatthis on Thursday, March 14, 2013 5:19 PM


snow + 4wd + escessive hp = :)  http://www.youtube.com/watch?v=x7egUIS70YM

  • Member since
    September 2003
  • From: AandF in the Badger State
Posted by checkmateking02 on Friday, March 15, 2013 12:14 AM

Wow, nice color and NMF, eatthis!!  They really enhance each other.  Looks great.


  • Member since
    December 2012
Posted by Z Square 8 on Friday, March 15, 2013 7:54 AM

Nice work eatthis!

29 build update: struggling with getting a smooth gloss applied a bit due to the large surface area, overspray and experience. I had hoped to get her cladding started this wknd, but we'll see. If I can get some control over the areas that show more of a "satin" finish today (as opposed to smooth gloss), I may clad her.

I did play with the nose art decal work last night. below is a before and after:

first color rendition-

and after adding more shading and definition

and a couple of other custom decal items: (ending serial #'s for the rudder and ship ID for the tail):

--Rich

Site builder of CooksonTributeB29.com 


  • Member since
    September 2003
  • From: AandF in the Badger State
Posted by checkmateking02 on Friday, March 15, 2013 10:20 AM

That is admirable work with the artwork, Z.  Nice job!


  • Member since
    September 2003
  • From: AandF in the Badger State
Posted by checkmateking02 on Friday, March 15, 2013 7:56 PM

I finished the Airfix Fairey Battle from the "Victoria Cross Icons" set, but before I post photos of the model, I'ld like to pay tribute to the aircrew who gave their lives earning their place among the VC icons.

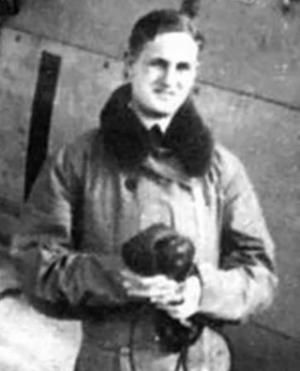
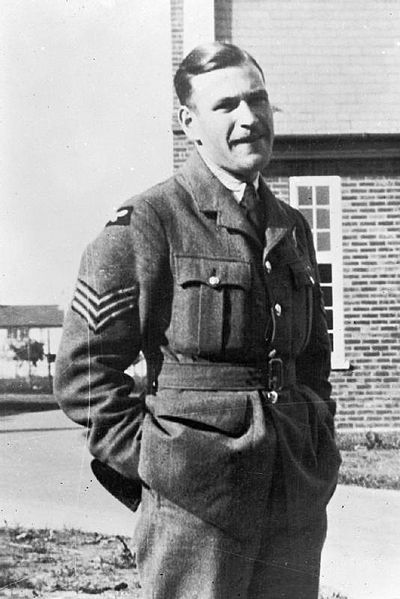
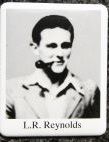
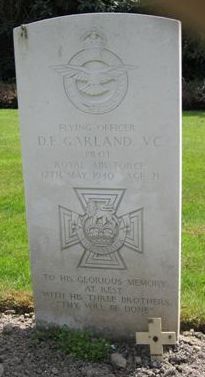
The Fairey Battle represents the aircraft from 12 Squadron, flown  on 12 May, 1940, by Flying Officer Donald Edward Garland with observer Sergeant Thomas Gray, when they earned the Victoria Cross.  A third crewman, Leading Aircraftsman Lawrence R. Reynolds, received no honors.

Flying Officer Garland was born in Ballincor, Ireland, on 28 June, 1918.  He joined the Royal Air Force in 1937. 


Sergeant Gray was born in Urchfont, England, on 17 May, 1914, and joined the RAF in 1929. 


Leading Aircraftsman Reynolds came from Onslow Village, Guildford, Surrey, and was 20 years old at the time of the mission.

The Germans had launched their blitzkrieg in the west, on 10 May, 1940, attacking into France and the low countries. Wehrmacht troops were using two bridges to cross the Albert Canal in Belgium at Veldwezelt and Vroenhoven.  Five Fairey Battles from the Advanced Air Striking Force were ordered to take out the bridge at Veldwezelt at all costs.  By that time, the area was heavily defended by anti-aircraft emplacements, machine guns and Luftwaffe fighters.  Flying Officer Garland was detailed to lead the attack, with Sergeant Gray acting as navigator.  All the aircrew in 12 Squadron volunteered to undertake the mission, so the five crews dispatched were finally selected by drawing lots. 

The assault on the bridges was to take place at minimum altitude to achieve decisive results, and was met with a withering barrage of gunfire when the Battles dived bombed.  Nearby RAF fighters reported that the bridge was obscured by the bomb strikes on the bridge and around it.  Although damaged, the bridge was not completely destroyed and was still serviceable.

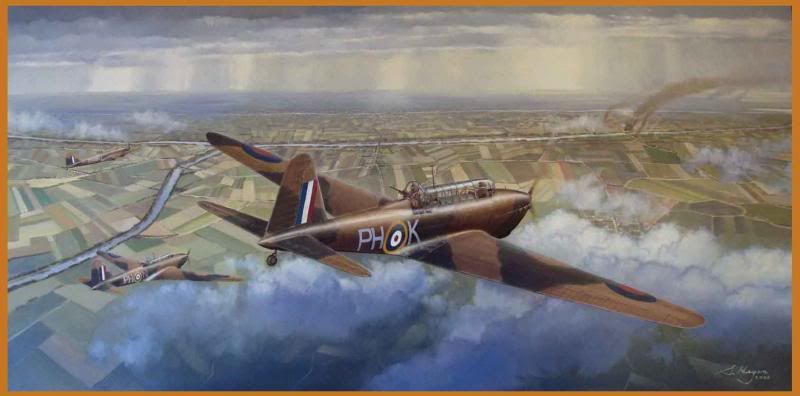
The painting is titled “Unquestionable Courage,” and depicts the air assault approaching its target.  The painting is by Steve Heyen; the original is in a private collection.

Fairey Battle “PH-K” was shot down immediately after the bomb run, and all three occupants of the aircraft were either killed or died later in hospital.  

Credit for the degree of success the mission attained was attributed to the leadership of Flying Officer Garland and the “coolness and resource” of Sergeant Gray, whose navigation effectively brought the five-plane formation to the target.

It is said that Leading Aircraftsman Reynolds was denied the VC or any other commendation, because he was not in a decision-making position during the raid.

In addition to the loss of the Garland/Gray/Reynolds aircraft, three of the other Battles were shot down also, and only one survived to return to base.  The crew of that Battle reported that the formation had additionally been attacked by Luftwaffe fighters after the completion of the bomb run.

Flying Officer Garland had three brothers who also served in the RAF during the war.  None of them survived.

The crew of “PH-K” is buried in Heverlee War Cemetery near Leuven, Belgium.


The London Gazette published the notice of the awards of the Victoria Cross for the two airmen on 11 June, 1940.  The citation notes their “most conspicuous bravery.”

Sources:

http://www.bomber-command.info/vcgarlandvcgray.htm

http://en.wikipedia.org/wiki/Donald_Edward_Garland

http://en.wikipedia.org/wiki/Thomas_Gray_(VC)

http://www.scaleplasticandrail.com/kaboom/index.php/all-things-aviation/172-176-scale/kit-reviews/1081-172-victoria-cross-icons-boxed-set-from-airfix

http://www.warcemetery.eu/pagina38.html

http://www.stevenheyenart.com/


JOIN OUR COMMUNITY!

Our community is FREE to join. To participate you must either login or register for an account.

SEARCH FORUMS
FREE NEWSLETTER
By signing up you may also receive reader surveys and occasional special offers. We do not sell, rent or trade our email lists. View our Privacy Policy.