SEARCH FINESCALE.COM

Enter keywords or a search phrase below:

Pride of the Luftwaffe GB

42445 views
1268 replies
1 rating 2 rating 3 rating 4 rating 5 rating
  • Member since
    December 2002
  • From: Bury St Edmunds, Suffolk, England
Posted by Bish on Tuesday, January 9, 2018 3:36 PM

Time for me to put in an apperance.

This is my first Tamiya aircraft and one thing i noticed with this and some of the other i have is that there is not much to it.
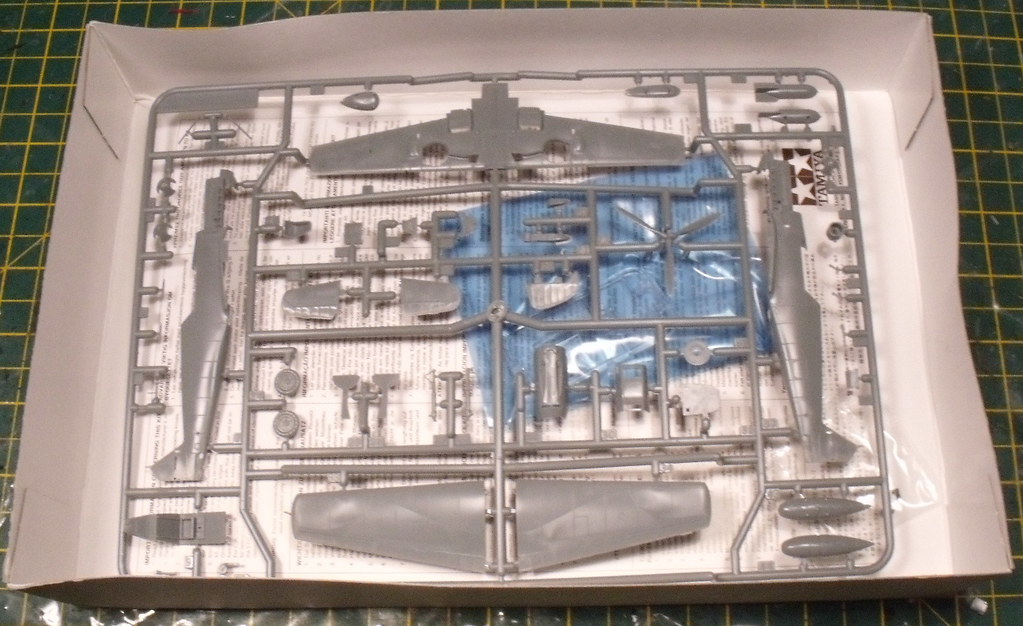
But it does look very nice and so far the fit has been pretty good as well.

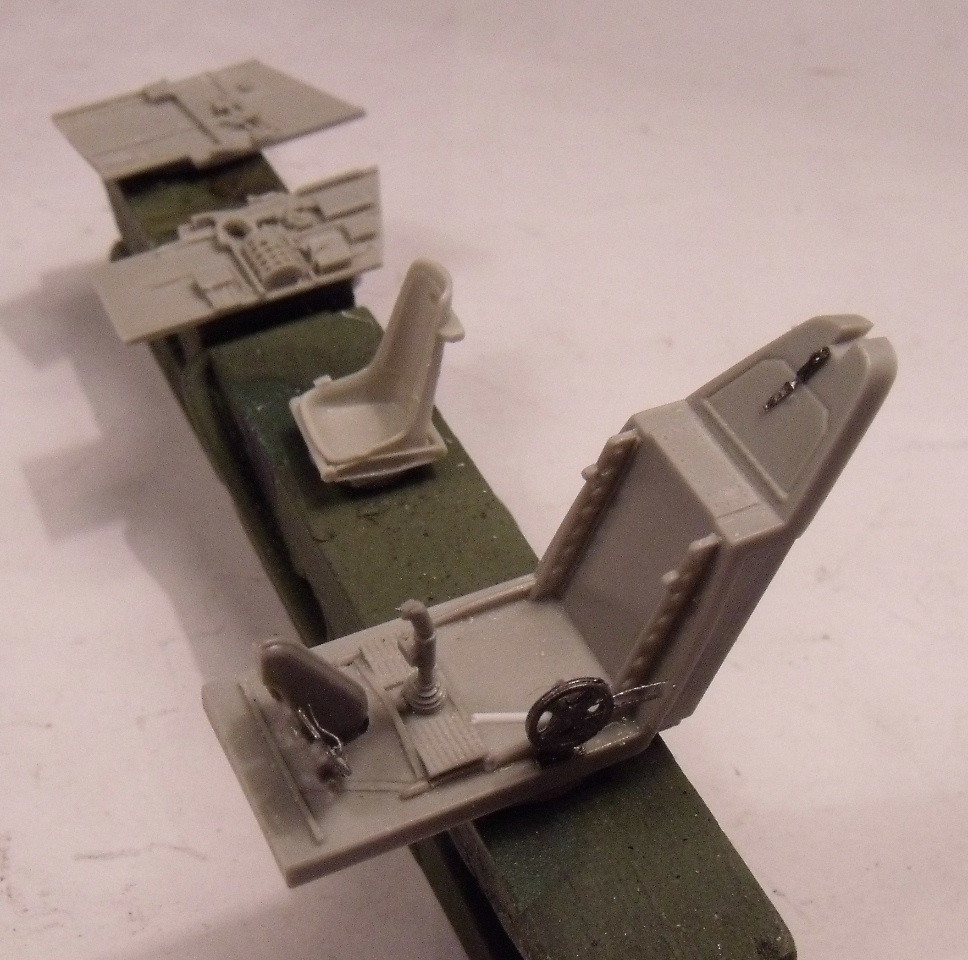
Of course, i started with the pit, useing the Aires resin one.
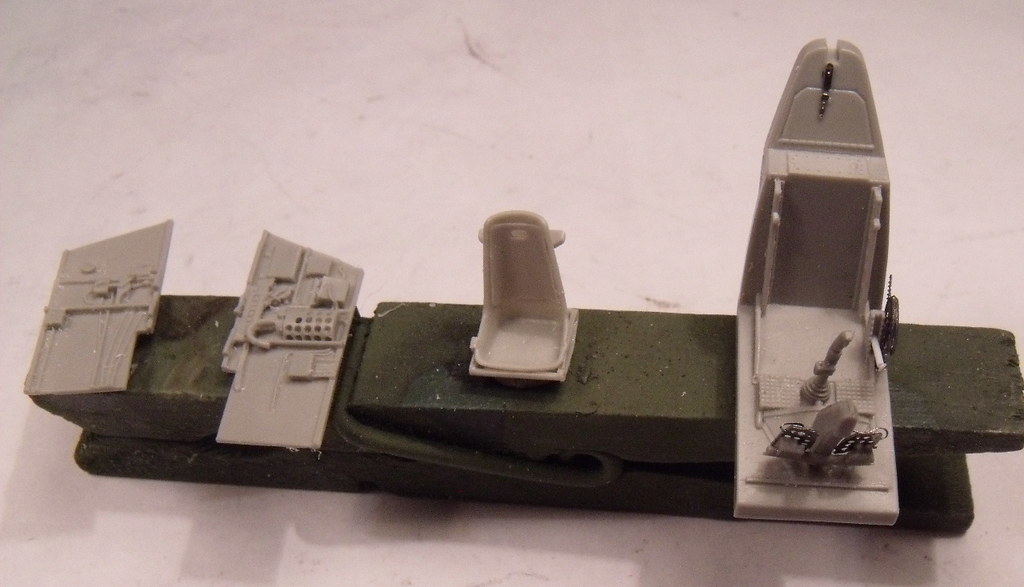
After a coat of primer and some RLM 02, it was lightly weathered and the detail painted in.

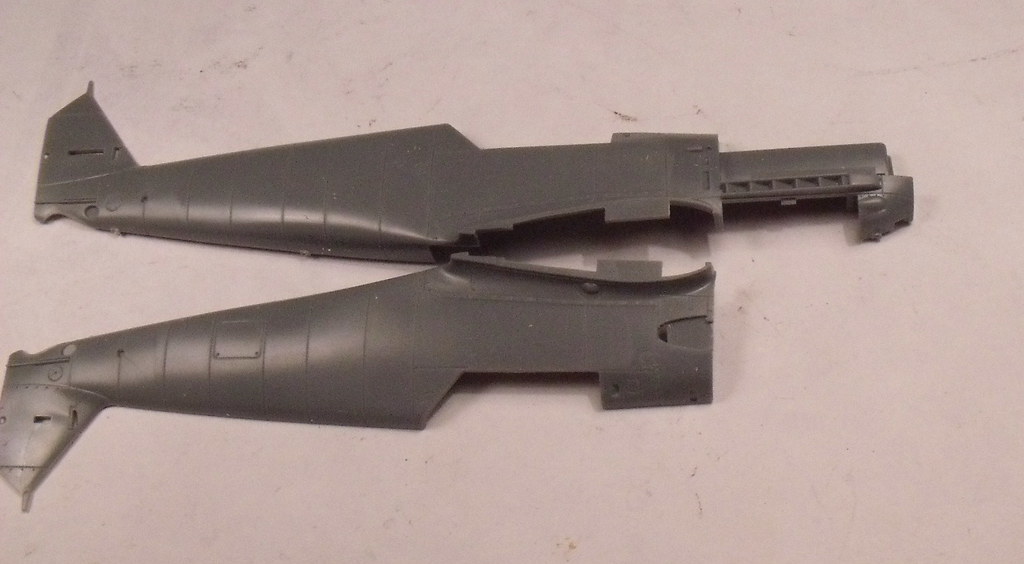
I am doing a engine maintanence dio for this, so am useing the CMK engine. For that i need to remove the from of the kit fuselage.
I have out the resin engine together ready for painting. This one comes with the botom cover molded on, which i have not seen before even on a CMK engine.

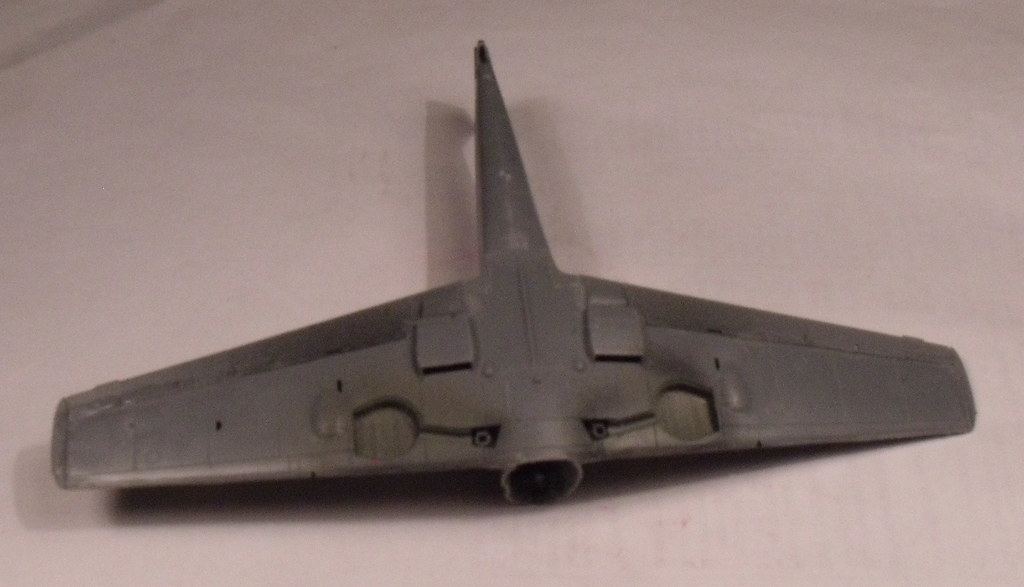
With the pit ready that was fited and the fuselage and wings all put together.

And that it for now. This wil be my 5th engine maint dio, i rather like them as they give a good scene for activity. But hopefully this will have a little extra.

I am a Norfolk man and i glory in being so
 

On the bench: Airfix 1/72nd Harrier GR.3/Fujimi 1/72nd Ju 87D-3

  • Member since
    November 2008
  • From: Central Florida
Posted by plasticjunkie on Monday, January 8, 2018 8:57 AM

Thanks Jack and Andy! Used some stretched sprue and electric wiring for the added plumbing.

 GIFMaker.org_jy_Ayj_O


Too many models to build, not enough time in a lifetime!!

  • Member since
    September 2014
Posted by rooster513 on Monday, January 8, 2018 6:34 AM

I've got to agree with Jack on that PJ...the wheel bay looks awesome!

-Andy

  • Member since
    April 2006
  • From: ON, Canada
Posted by jgeratic on Sunday, January 7, 2018 10:13 PM

Pj, great upgrades on the details, but that plumbing in the wheel bay is just brilliant!


regards,

Jack

  • Member since
    November 2008
  • From: Central Florida
Posted by plasticjunkie on Sunday, January 7, 2018 9:04 PM

This center part took lots of dry fitting and a couple of DeWalt clamps to get it to sit evenly then I hit it with Plast I Weld in a Touch N Flow applicator. The two sharp tips broke off and two tiny white plastic sheet triangles were fitted and melted in place by the glue. This is the only part so far that required some work for a god fit.

The wells were painted RLM02 and more lines were added along with a grime wash. Click on the image for an extreme closeup.

The cannon shell ejector locations were dressed up in the wing interior otherwise it's just dead space when viewed thru the ammo ejection slots. Pieces of plastic sheet were cut and placed where the cannon would be.

I feared that paint would give a poor bonding surface to these parts eventually becoming loose inside the wing so they will pe painted black after assembly. Now there's something there intead od dead space.

The tiny hood scoop was drilled open

And so were the wing cannons and nose guns


Beginning to look like a Dora


 GIFMaker.org_jy_Ayj_O


Too many models to build, not enough time in a lifetime!!

  • Member since
    November 2008
  • From: Central Florida
Posted by plasticjunkie on Saturday, January 6, 2018 3:51 PM

Hi Bish

Yes you would think they would have the right dimentions for that cut line. And not a fan of that white back side. I painted mine the same color as the front sides. Thank God for Tweezers, the optivisor and lots of cuss words LOL!

Eduard make some that are fabric textured and are super cool looking and WAY easier to apply. Oh well, one needs to try something different once in a while. 

 GIFMaker.org_jy_Ayj_O


Too many models to build, not enough time in a lifetime!!

  • Member since
    December 2002
  • From: Bury St Edmunds, Suffolk, England
Posted by Bish on Saturday, January 6, 2018 2:43 PM

Sorry to hear you didn't like the belts PJ. I know what you mean about them being to wide if you follow the line, that and the blank rear are the two problems i have noticed with them. Those belts are the original ones, they also do pre cut belts but they don't do many for specific types, just generic ones for German fighters.

I am a Norfolk man and i glory in being so

 

On the bench: Airfix 1/72nd Harrier GR.3/Fujimi 1/72nd Ju 87D-3

  • Member since
    July 2014
Posted by modelcrazy on Saturday, January 6, 2018 12:56 PM

I'm sorry to hear about the belts PJ. The British Sutton belts look great but they are a lot of work. I guess they come short on the German belts.

Steve

Building a kit from your stash is like cutting a head off a Hydra, two more take it's place.


http://www.spamodeler.com/forum/

  • Member since
    November 2008
  • From: Central Florida
Posted by plasticjunkie on Saturday, January 6, 2018 12:56 AM

Rooster

The scratch work looks great.

Steve

Looks like you are off to a good start.


Well I finally got the HGW belts and man they are a PITA to put together. As a matter of fact I wasn't impressed at all with them. You have to cut these things and the printed cut line is way off cause it's too wide for the pe buckles. I had to trim off more material so it would fit thru the pe buckle. By doing this, most of the printed stitching is lost. It took me 2 evenings to assemble these belts but the Eduard PE ones only takes me a few minites.

The package has another belt to be assembled and I will use it simply because I have it but I will not be getting this product again. I also had to paint the back side since it's just blank.

I drilled two holes with a #80 bit to attach the shoulder belts with very thin wire. I think the PE belts look better and have more detail than these but they will stay regardless.

I also used my mini drill bit to drill out the exhaust pipes and carefully cleaned them up with a blade.

 GIFMaker.org_jy_Ayj_O


Too many models to build, not enough time in a lifetime!!

  • Member since
    November 2008
  • From: Central Florida
Posted by plasticjunkie on Thursday, January 4, 2018 11:17 AM

modelcrazy
 The stripes are all on one carrier sheet so I'll cut out each one but that won't be too hard.


It's best if you cut them separate as you said, this way you will eliminate any silvering that may show up after shooting the clear flat.:frusty:

 GIFMaker.org_jy_Ayj_O


Too many models to build, not enough time in a lifetime!!

  • Member since
    July 2014
Posted by modelcrazy on Thursday, January 4, 2018 10:49 AM

plasticjunkie
At least shooting red then using white decal stripes. 

That's what I was going to do. The decals don't come red and white thank goodness. The stripes are all on one carrier sheet so I'll cut out each one but that won't be too hard.

Bish, here's a copy of the decal sheet. The lower half is the 262's sheet. I'm going to do Red 13. There's not much diffrence between Red 1 and Red 13.

Steve

Building a kit from your stash is like cutting a head off a Hydra, two more take it's place.


http://www.spamodeler.com/forum/

  • Member since
    November 2008
  • From: Central Florida
Posted by plasticjunkie on Thursday, January 4, 2018 10:42 AM

Steve 

On something like that I think you are better off painting the scheme. At least shooting red then using white decal stripes. 

 GIFMaker.org_jy_Ayj_O


Too many models to build, not enough time in a lifetime!!

  • Member since
    December 2002
  • From: Bury St Edmunds, Suffolk, England
Posted by Bish on Thursday, January 4, 2018 10:23 AM

So you get decals with the kit. The RV kit doesn't but i have a set of masks so you paint the white, mask it and then the red. Could be fun Big Smile

I am a Norfolk man and i glory in being so


On the bench: Airfix 1/72nd Harrier GR.3/Fujimi 1/72nd Ju 87D-3

  • Member since
    July 2014
Posted by modelcrazy on Thursday, January 4, 2018 9:33 AM

Cheers Bish,

I was going with the white stripes that came with the kit. I don't know if they come separately or if I need to trim them though. Painting white on red just seem like a recipe for disaster for me.

Steve

Building a kit from your stash is like cutting a head off a Hydra, two more take it's place.


http://www.spamodeler.com/forum/

  • Member since
    October 2008
  • From: Georgia
Posted by Rigidrider on Thursday, January 4, 2018 5:55 AM

Tony... Great finish... I do love a Trop scheme! 

PJ, Andy... Both very nicely detailed... Extra detailing really makes a kit come to life. 

5, Good kit and good progress... Gonna look great!

Take care all!

Doug

When Life Hands You A Bucket Of Lemons...

Make Lemonade!

Then Sell It Back At $2 Bucks A Glass...

  • Member since
    December 2002
  • From: Bury St Edmunds, Suffolk, England
Posted by Bish on Thursday, January 4, 2018 2:15 AM

Looking forwardto seeing that one Steve. How you planning on doing the underside.

I've got an R.V. D-11 i plan on doing in the same scheme.

I am a Norfolk man and i glory in being so


On the bench: Airfix 1/72nd Harrier GR.3/Fujimi 1/72nd Ju 87D-3

  • Member since
    July 2014
Posted by modelcrazy on Wednesday, January 3, 2018 8:44 PM

Time to start the next one.

The Hasegawa 1/72 Fw-190D9 from the JV44 Combo kit. I built the Me262 a few years back.

Here is the box art I was saving. The the 190s were used as CAP for the 262s during take off and landing. The undersides were painted red with white stripes to identify them to the AA gunners.

The 262 I built a few years ago. I need to try another one. I kbnow I could do a better job now.

The start of the Dora

Steve


ON THE 

Steve

Building a kit from your stash is like cutting a head off a Hydra, two more take it's place.


http://www.spamodeler.com/forum/

  • Member since
    December 2002
  • From: Bury St Edmunds, Suffolk, England
Posted by Bish on Tuesday, January 2, 2018 10:30 AM

Thats good news. I have a couple of the Hase 1/72nd 190 kits, an A-8 and F-8, but not built any yet. I will have to remember that improvment.

I am a Norfolk man and i glory in being so


On the bench: Airfix 1/72nd Harrier GR.3/Fujimi 1/72nd Ju 87D-3

  • Member since
    September 2014
Posted by rooster513 on Tuesday, January 2, 2018 10:23 AM

Bish, the kit comes with a decent engine and exhaust back there so it should look ok with everything buttoned up.

-Andy

  • Member since
    December 2002
  • From: Bury St Edmunds, Suffolk, England
Posted by Bish on Tuesday, January 2, 2018 10:06 AM

Andy, i like that, nice touch. Will you be putting anything in behind those.

I am a Norfolk man and i glory in being so


On the bench: Airfix 1/72nd Harrier GR.3/Fujimi 1/72nd Ju 87D-3

  • Member since
    September 2014
Posted by rooster513 on Tuesday, January 2, 2018 8:23 AM

Tony - You are a 109 building machine my friend! Thanks for another great addition to the GB!

5 high - That's great start!

PJ - Really nice looking cockpit and scratchwork buddy!

     Well the cold spell we have been having in the Northeast has put a damper on my modeling as my bench is in the basement and it's like a meat locker down there lol! But I have been able to get some bench time in. 

     I've never been really happy with the way the molded cooling vents on any of the 190's I've build have looked so I thought I would try to scratch some out to make them look more interesting. I started by removing the molded in detail with my dremel. I then measured and cut .005 thick brass sheet to the apporiate width and length. Then I just used a dap of superglue to put them in place. The right side just seemed to fall into place but the left took a lot of fiddling and some patience. Not perfect but I'm fairly happy with how they turned out and look forward to seeing them with paint on. That is if I can keep from knocking them off! 

You can see in the last pic the gap I've had to fill with some styrene. So I have some sanding in my future.

Keep up the great work everyone!


-Andy

  • Member since
    December 2002
  • From: Bury St Edmunds, Suffolk, England
Posted by Bish on Tuesday, January 2, 2018 2:17 AM

5-high, some nice progress there.

I am a Norfolk man and i glory in being so


On the bench: Airfix 1/72nd Harrier GR.3/Fujimi 1/72nd Ju 87D-3

  • Member since
    December 2002
  • From: Bury St Edmunds, Suffolk, England
Posted by Bish on Tuesday, January 2, 2018 2:16 AM

Amazing job on that pit PJ, love the IP.

I am a Norfolk man and i glory in being so


On the bench: Airfix 1/72nd Harrier GR.3/Fujimi 1/72nd Ju 87D-3

  • Member since
    December 2002
  • From: Bury St Edmunds, Suffolk, England
Posted by Bish on Tuesday, January 2, 2018 2:15 AM

Now thats impresive Tony, and in such a short time. I started mine on Sun night and still haven't finidhed the cockpit yet.

Lovely job on the scheme.

I am a Norfolk man and i glory in being so


On the bench: Airfix 1/72nd Harrier GR.3/Fujimi 1/72nd Ju 87D-3

  • Member since
    June 2010
Posted by 5-high on Tuesday, January 2, 2018 2:02 AM

Tax ..thats one beautifully done Emil. Plastic junky that i.p looks way better then what I did !! .I plan on not haveing the canopy open anyways so it will be hard to see in side . The next 190 A8 .Will be different all open 

  • Member since
    April 2006
  • From: ON, Canada
Posted by jgeratic on Monday, January 1, 2018 10:20 PM

Tony, that desert based Emil looks incredible, evem more so considering the short amount of time it took.  Yes

regards,

Jack

  • Member since
    November 2008
  • From: Central Florida
Posted by plasticjunkie on Monday, January 1, 2018 10:18 PM


The first day of 2018 has been a very lazy and relaxed day.  It's been raining the entire day, very windy and cold in the 40's. The wife has been watching tv the whole day so it's been a perfect modeling day.

Got the IP done. Each instrument has a drop of Clear Parts Cement.

and the pit tub

I still have to do some more weathering and light griming. I thought I had PE belts but I don't have any so I ordered a set from HGW which are supossed to be fantastic and better than the PE ones.

I also added more lines. I also made my own braided line by wrapping thin copper wire around another wire then painted it grey.

 GIFMaker.org_jy_Ayj_O


Too many models to build, not enough time in a lifetime!!

  • Member since
    November 2008
  • From: Central Florida
Posted by plasticjunkie on Monday, January 1, 2018 9:51 PM

Oh my! That is one fantastic looking paint scheme.Beer

 GIFMaker.org_jy_Ayj_O


Too many models to build, not enough time in a lifetime!!

  • Member since
    April 2005
  • From: Australia
Posted by taxtp on Monday, January 1, 2018 4:55 PM

They're both looking great. PJ, your engine is great, I always admire blokes who do that.

I finished my 1/72 Me 109E. Hope you like it. I'm happy with it in the context that I built it in 2.5 days. It showed me that I can speed things up and still achieve a reasoable standard, just by planning and reducing the drying time on things.

I think the first photo is good for the front page please. I've got some more 109s and 190s in my stash, so I think I'll be back fairly soon :)

Keep them coming guys, this GB is looking great.

Cheers

Tony

I'm just taking it one GB at a time.

  • Member since
    June 2010
Posted by 5-high on Monday, January 1, 2018 3:48 PM

Sorry about the last post ..have issues with my confuser..lol .I figured out what happened..fixed now  . So next post will be better ..5-high 

JOIN OUR COMMUNITY!

Our community is FREE to join. To participate you must either login or register for an account.

SEARCH FORUMS
FREE NEWSLETTER
By signing up you may also receive reader surveys and occasional special offers. We do not sell, rent or trade our email lists. View our Privacy Policy.