SEARCH FINESCALE.COM

Enter keywords or a search phrase below:

Military Veterans GB

23382 views
410 replies
1 rating 2 rating 3 rating 4 rating 5 rating
  • Member since
    November 2006
  • From: Coastal Maine
Posted by dupes on Tuesday, March 27, 2007 12:13 PM

Looks like I may make it in just under the deadline....hehe.

Almost done with this thing, just have to paint and attach the canopy. I have new respect for aircraft modelers after having built a bunch of armor during my recent return to modeling.

Had some decaling issues, despite half a bucket of micro sol and a layer of future most of the smaller decals failed to sit down properly (although the larger ones came out alright). Silvering galore...The biggest fit problem was the wing roots, tried filling them with super glue, made my maiden voyage to the land of zip kicker...and had a big mound of super glue in the gap. Was able to sand most of it away, but had to stop in it's current position so as not to remove all of the detail on half of the wings. The finished product looks decent on my table, but I can certainly see LOTS of things I need to improve on in future builds.

More pics when I'm done, all feedback certainly welcome. 

  • Member since
    June 2004
  • From: Pumpkin Harbor, Vermont
Posted by Dave DeLang on Tuesday, March 27, 2007 12:40 PM

Academy 1/48 F-16C block 25 - Vermont Air Guard 50th anniversary markings. 

I may not be very fast, but I sure am mediocre. I won't get this finished by the end of the month but I'm still plugging away at it.


At long last, another update. It's almost ready for the paint barn. I think all the filling is done, the first coat of paint will confirm that, or, reveal what faults remain.

The exhaust is painted with Alclad II, I forget the shades, Magnesium and dark aluminum I think. Then I masked and painted the areas where the petals overlap with Floquil grimy black. The interior is Floquil reefer white with some areas of grimy black and then streaked with W&N oils, burnt umber and Payne's grey. It is too reddish - should be more tan - but I'm going to leave it.

The missiles are LGG with Alclad Magnesium for the fins, which I thinned quite a bit and tried to fashion the "faceted" look to the 120s fins. The seeker heads of the 'winders are a mix of MM Helo Drab and steel. The rollerons were masked and painted Alclad dark aluminum. Since I took the picture I added the bands between the 'winders sections out of Bare Metal matt aluminum foil.

I just added the anti-skid cables to the main gear and used Bare Metal foil (chrome) for the bands and for the retraction struts and the oleo part of the main gear leg. I've seen both polished metal and sort of an O.D. there. I think the O.D. is more correct but most people won't know. I drilled the landing and taxi lights and put in conical disks of a heavier adhesive foil I got as part of some electronics packaging. It works good for this, I punch a disk and then slit it from the center to the edge in one spot. That way, when I put it in the drilled depression it automatically forms into the conical shaped depression the tip of the drill left. Then I put in a drop of 5 minute epoxy. It makes a very convincing lens - easy and cheap!

  • Member since
    May 2003
  • From: Staten Island, New York
Posted by kenny_conklin on Tuesday, March 27, 2007 4:35 PM

dupes nice build and very fast

dave coming along nicely dont worry about the time me and the rest of the group will be here watching.

"Rakkasans Lead the Way!"
  • Member since
    February 2003
  • From: phoenix
Posted by grandadjohn on Tuesday, March 27, 2007 7:38 PM

dupes and dave, nice builds you have going, keep it up

Like Kenny I check this thread daily and will continue util everyone is done

  • Member since
    July 2003
  • From: waynesboro va, via Ireland
Posted by sidure on Tuesday, March 27, 2007 9:51 PM

Nice looking bird you have on your hands dupes. You are moving very fast on this one and she is looking great.

Dave, very nice progress on your build. I especially like the main gear photos. keep up the good work and like the others I will be looking forward to seeing this one completed.

Steve

  • Member since
    November 2006
  • From: Coastal Maine
Posted by dupes on Wednesday, March 28, 2007 1:36 PM
Well, it was sort of fast...that thing has been sitting half completed on the back of my workbench for, ohhh, say 4 months now. I got pretty bummed about that big mound of superglue and stopped working on it... I guess I just needed a bit of motivation to get off my butt and finish it finally so I made one big push the last week or so. Hopefully I can snag a couple more pics of it tonight and move onto my next project...thanks for the accolades. I've got a few BF-109's in my stash so it looks like more aircraft in the near future for me!
  • Member since
    November 2006
  • From: Coastal Maine
Posted by dupes on Friday, March 30, 2007 10:15 AM
Slow day here at work for me, and I finally got some time to go back through the rest of this thread...glad I did. Just have to say that you guys cranked out some spectacular work. Everybody's stuff really came out well. Thanks for letting me get in on this! Can't wait for the next Veteran's build so I can either put together a deuce and a half (in motor pool setting - ours never really went anywhere) or maybe even that Verlinden "Desk Jockey" set...Big Smile [:D]
  • Member since
    January 2004
  • From: Rockford, Iowa
Posted by usaf ssgt on Saturday, March 31, 2007 10:51 PM

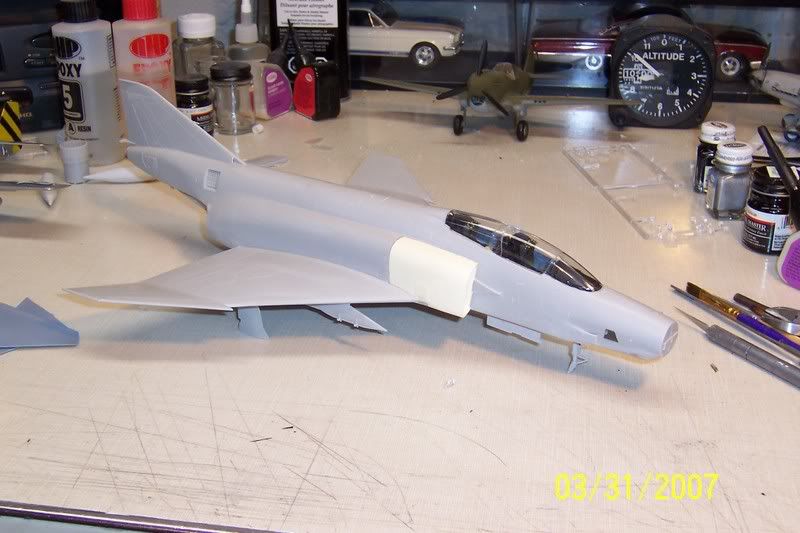
Well here I am, at the end of the build, and not done with the Phantom.

In my own defence, I did start this build late, and at that time, I was layed-off, so time wasn't a problem.

Enter my new job, starting 5Feb07.

11 hour days leave little time for modeling, and I have fallen WAY behind.

My appologies to the GB leader, my fellow modelers, and the forum as a whole.

I will understand if I don't deserve to display the GB badge, and have it removed.

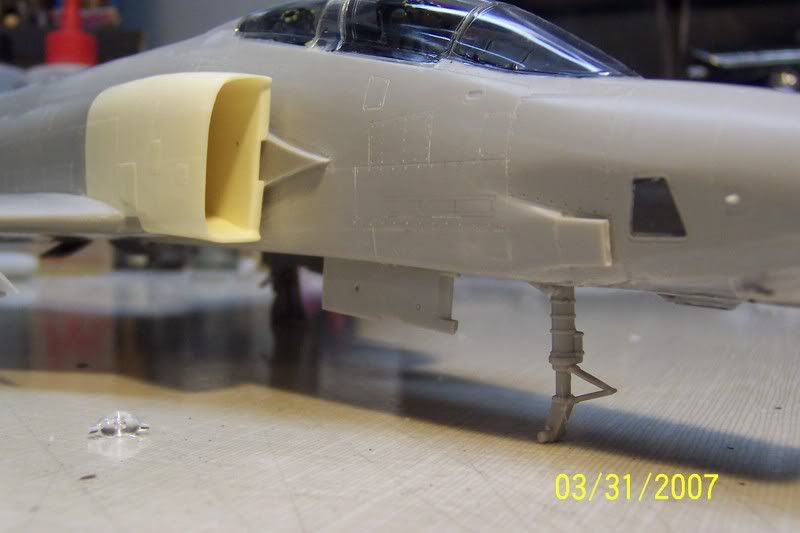
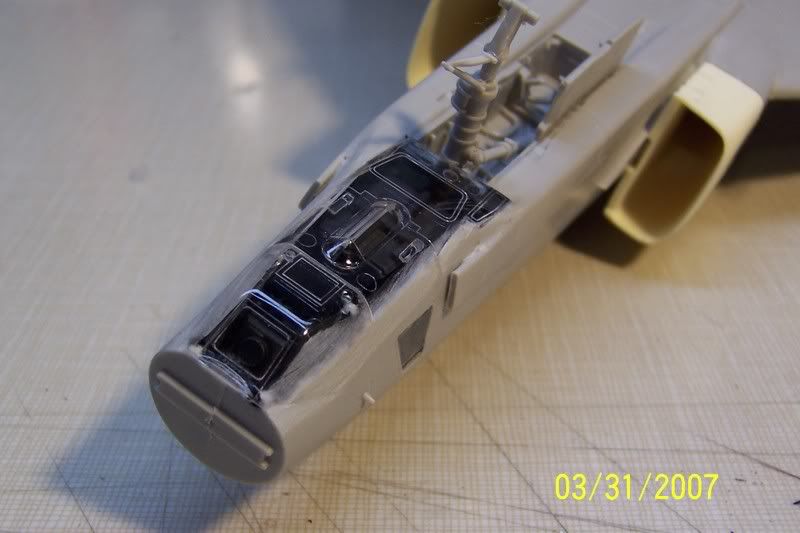
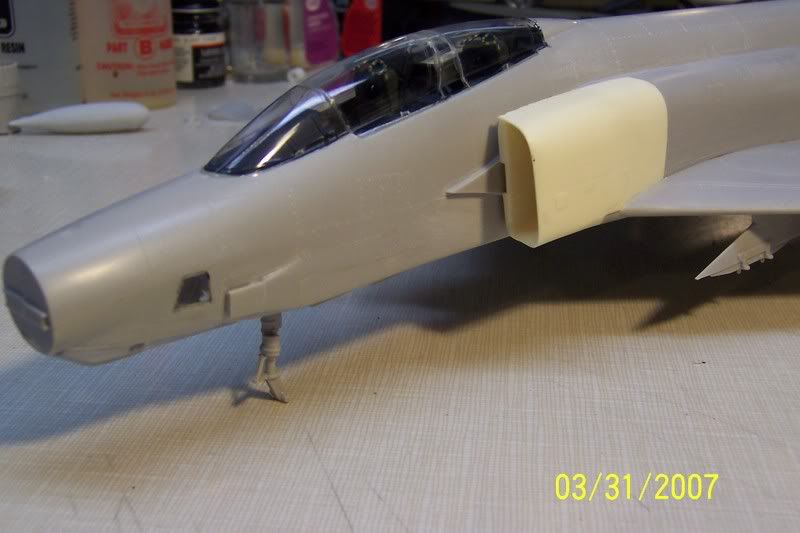
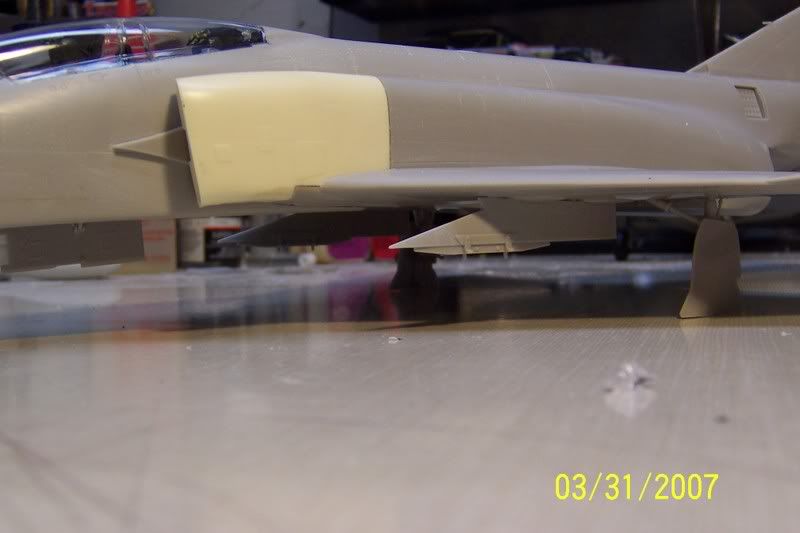
I did start this with my best intentions, and will continue my build and photoghraph the progress, but if we are done here then these may be my last pictures.

I have enjoyed being a part of this build, as it has been a pleasent reminder of the years I had the chance to work on the Phantoms.

She always has been, and always be one of my favorite jets.

Thanks everyone, you have all done a wonderful job at recreating your piece of history.


Leon


  • Member since
    February 2003
  • From: phoenix
Posted by grandadjohn on Sunday, April 1, 2007 2:05 PM
Sometimes life interfers with modeling, what you have done looks great to me. Has far as I am concerned keep building and post has you can.
  • Member since
    May 2003
  • From: Staten Island, New York
Posted by kenny_conklin on Sunday, April 1, 2007 4:21 PM
leon looking great keep us updated on your build
"Rakkasans Lead the Way!"
  • Member since
    June 2004
  • From: Pumpkin Harbor, Vermont
F-16C VTANG 50th anniversary - 1/48th Academy kit
Posted by Dave DeLang on Tuesday, April 3, 2007 10:08 AM

Only a week and already another update!

The paint is on. Model Master FS36270 - Neutral Gray and FS16118 - Gunship Gray, both lightened with about 25% white. I had the tanks and stations 2 and 8 painted with straight neutral gray but it looked way too dark to me so I repainted them along with the airframe. I had already decaled the tanks but there are sufficient duplicates on the decal sheet to do them over again. The radome is a mix of I think neutral gray and and light ghost gray, the instructions tell which and give proportions. I used more of the lighter of the two colors to make it over all lighter.


Glossed with MM clear gloss enamel. I'll give it a few more days to dry and then start gluing on the decals. The nice, thick, stiff Academy decals...

  • Member since
    February 2003
  • From: phoenix
Posted by grandadjohn on Tuesday, April 3, 2007 1:12 PM
Paint job looks good
  • Member since
    June 2004
  • From: Pumpkin Harbor, Vermont
Posted by Dave DeLang on Wednesday, April 4, 2007 9:23 AM

Thanks!

I looked at the instructions, they say to do the radome in 60% Gunship gray, 40% Dark Ghost Gray. I used 50/50 or maybe a touch toward the dgg. I think it looks the part.

  • Member since
    May 2003
  • From: Staten Island, New York
Posted by kenny_conklin on Wednesday, April 4, 2007 6:27 PM
looking really good dave cant wait to see more
"Rakkasans Lead the Way!"
  • Member since
    June 2004
  • From: Pumpkin Harbor, Vermont
Posted by Dave DeLang on Thursday, April 19, 2007 7:33 AM

Academy 1/48 F-16C, VTANG 50th anniversary.

The decals are on, some a little crooked... I used a Future-Solvaset mix to apply them and once that stuff begins to set up you can't shift them. I didn't notice the hoist marker on the vertical tail was so askew until it was much to late to fix. I guess I need more practice!


All that remains is a light panel wash, dull coat and the attachment of the sticky-outy bits.

  • Member since
    May 2003
  • From: Staten Island, New York
Posted by kenny_conklin on Thursday, April 19, 2007 5:27 PM
looking excellent dave great job
"Rakkasans Lead the Way!"
  • Member since
    February 2003
  • From: phoenix
Posted by grandadjohn on Friday, April 20, 2007 10:46 AM
Nice job, Dave
  • Member since
    June 2004
  • From: Pumpkin Harbor, Vermont
F-16C VTANG 50th anniversary - 1/48th Academy kit
Posted by Dave DeLang on Monday, April 30, 2007 10:04 AM

Finished, only a month late!

The kit is not too bad. There are a moderatly large number of ejector pin marks in visible areas of the wheel wells, the intake is a bit of work if you want to get rid of seams inside and the top seam on the wings is a little trouble but over all I'd give it a 7.5 on a 1 to 10 scale.

I used the kit decals which worked fine once I concocted a brew of equal parts Solvaset, Future and water. When used liberally, it got the decals to conform and stay stuck. It's a little tricky in that you can't adjust the position of the decal once the Future starts to set up so you have to get it right the first time. You can move it as long as it's wet, but as soon as it starts to set you can't seem to re-wet and readjust.

The only non OOB stuff are belts made from lead foil, a couple of punched out buttons on the stick and throttle and to cover the seam on the back end of the wing tanks, and some lights.

I drilled out the landing, taxi and rear fuselage flood lights and lined the depression with a punched disc of foil and then filled the depression with 5-minute epoxy to make the lens. I also made the wingtip lights and the anti-smash beacon on the top of the vertical tail out of bits of clear sprue. I filed the sprue into an oval cross section and then polished it. Once it was nice and shiney I heat stretched it until it was at the right diameter for the wingtip lights. It stays oval when you stretch it. I cut one end of the stretched sprue flat and then drilled a #80 hole in about 30 thousandths of an inch and filled the hole with paint to represent the colored bulb in the clear housing. I did that four times, two red and two green. I also used some silver after the green and red dried to back up the color and make it more visible. I cut off a tiny bit of the sprue including the painted in hole and glued it to the wing tips, one on top and one on the bottom of each wing.

The anti-smash beacon was done the same except that I just filed a rectangle shape in clear sprue and then polished it. I didn't need to heat stretch it because the light was bigger. I did the drill bit light bulb too, but left it unpainted because that light is white.


  • Member since
    February 2003
  • From: phoenix
Posted by grandadjohn on Monday, April 30, 2007 12:35 PM
Great build, Dave, have that kit in my stash and will build it soon, so your kit comments will come in handy
  • Member since
    May 2003
  • From: Staten Island, New York
Posted by kenny_conklin on Monday, April 30, 2007 7:27 PM
excellent work dave she came out awsome
"Rakkasans Lead the Way!"
  • Member since
    July 2003
  • From: waynesboro va, via Ireland
Posted by sidure on Monday, April 30, 2007 11:41 PM

Great job Dave, really like the paint job and the decals are excellent, well worth the work you put into them.

Steve

JOIN OUR COMMUNITY!

Our community is FREE to join. To participate you must either login or register for an account.

SEARCH FORUMS
FREE NEWSLETTER
By signing up you may also receive reader surveys and occasional special offers. We do not sell, rent or trade our email lists. View our Privacy Policy.