SEARCH FINESCALE.COM

Enter keywords or a search phrase below:

Kriegsmarine GB

32432 views
254 replies
1 rating 2 rating 3 rating 4 rating 5 rating
  • Member since
    December 2002
  • From: Reno, NV
Posted by espins1 on Wednesday, May 30, 2007 4:00 PM

Coming along nicely Fordboy!  Smile [:)]

Sad to say, I haven't even started my Bismarck yet.  I have so many other projects going right now, and I must admit I don't feel ready yet to tackle all the PE that came with the three White Ensign Models PE sets.  Sigh [sigh]

Scott Espin - IPMS Reno High Rollers  Geeked My Reviews 

  • Member since
    February 2006
Posted by fordboy on Wednesday, May 30, 2007 3:40 PM

Some shots with the tape removed and the deck installed.


Regards


Fordboy

  • Member since
    February 2006
Posted by fordboy on Monday, May 28, 2007 7:29 PM
Pictures of the deck on and taped up


Regards


Fordboy

  • Member since
    February 2006
Posted by fordboy on Sunday, May 27, 2007 1:43 PM

Here is a picture of the lower hull on the stands

Regards


Fordboy

  • Member since
    February 2006
Posted by fordboy on Wednesday, May 23, 2007 3:00 PM

Pictures of the portholes under the deck installed


Regards

Fordboy

  • Member since
    February 2006
Posted by fordboy on Tuesday, May 22, 2007 12:11 PM

A picture with the portholes in place

 Regards

 Fordboy

  • Member since
    February 2006
Posted by fordboy on Monday, May 21, 2007 12:22 PM

The latest progress shots - the bow glued and tape etc. removed.


Regards


Fordboy

  • Member since
    February 2006
Posted by fordboy on Sunday, May 20, 2007 12:33 PM

Here is a picture of the deck and portholes to be actioned.

Regards

Fordboy


  • Member since
    February 2006
Posted by fordboy on Thursday, May 17, 2007 12:15 PM

Here are some pictures of the bow gap to be attacked:

Regards


Fordboy

  • Member since
    February 2006
Posted by fordboy on Wednesday, May 16, 2007 12:17 PM

Here is a picture of the hull taking shape.

Regards


Fordboy

  • Member since
    February 2006
Posted by fordboy on Monday, May 14, 2007 2:30 PM

A picture with the tape removed from the stern:

Regards


Fordboy

  • Member since
    February 2006
Posted by fordboy on Sunday, May 13, 2007 1:28 PM

Further update here are some shots of the work on the rear third of the hull and with the bow glued in.

Regards

Fordboy

  • Member since
    February 2006
Posted by fordboy on Saturday, May 5, 2007 9:22 PM

Jeepers Chuck I feel for you buddy.

Better luck with the second attempt.

A further update on my E -Boat.

Here is a picture of gluing the middle section of the hull.

Here is another picture of the front hull gap

Here is another picture of the rear hull gap 

Here is a picture of the hull drying

The next step will be gluing the rear section and stern section.

Regards

Fordboy

  • Member since
    March 2007
Posted by Chuck0 on Friday, May 4, 2007 8:48 AM

  Just to give everyone a good laugh I thought I'd post a couple pics of my "progress" **cough cough**.

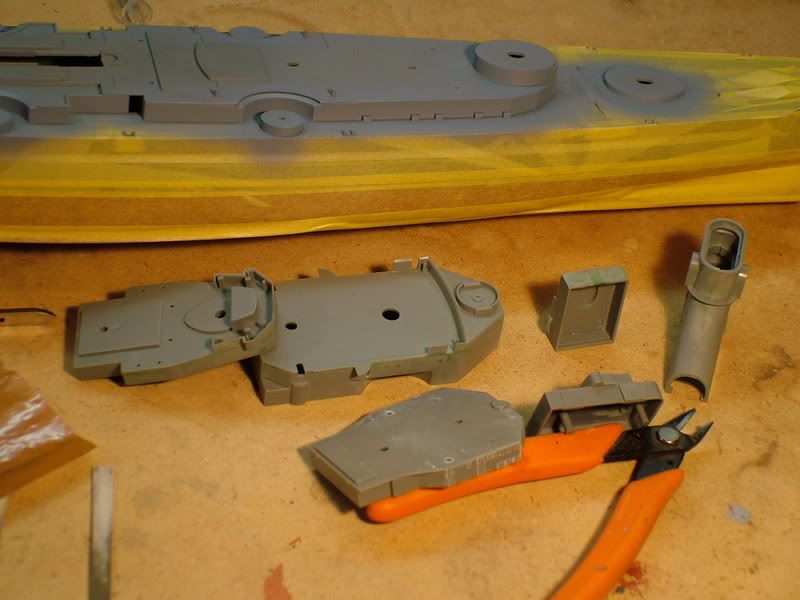
In this first image you can see my careful masking job as I paint the bulwarks on the first level, carefully masking the deck as well to keep from filling up the plank detailing with paint. In tho foreground you can see some of the sub assembly peices being prepped by filling seams and removing molded on details that will be replaced by brass:
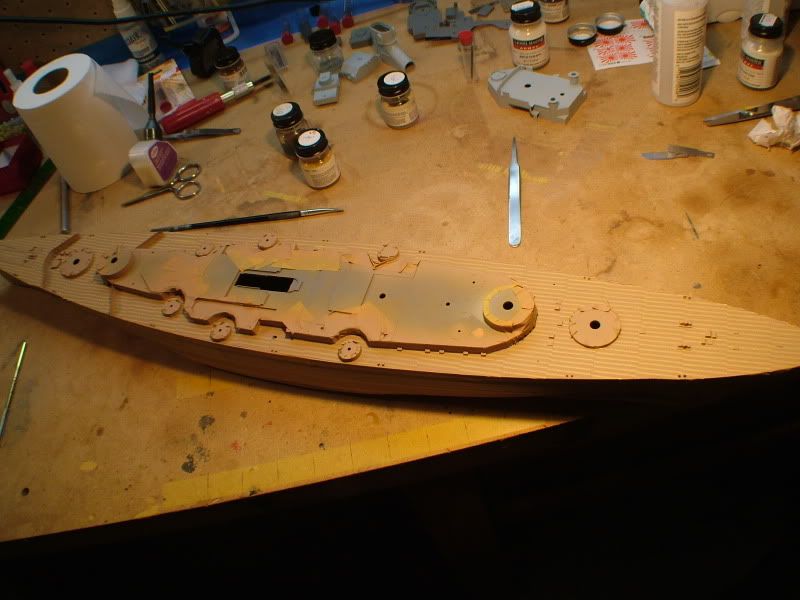
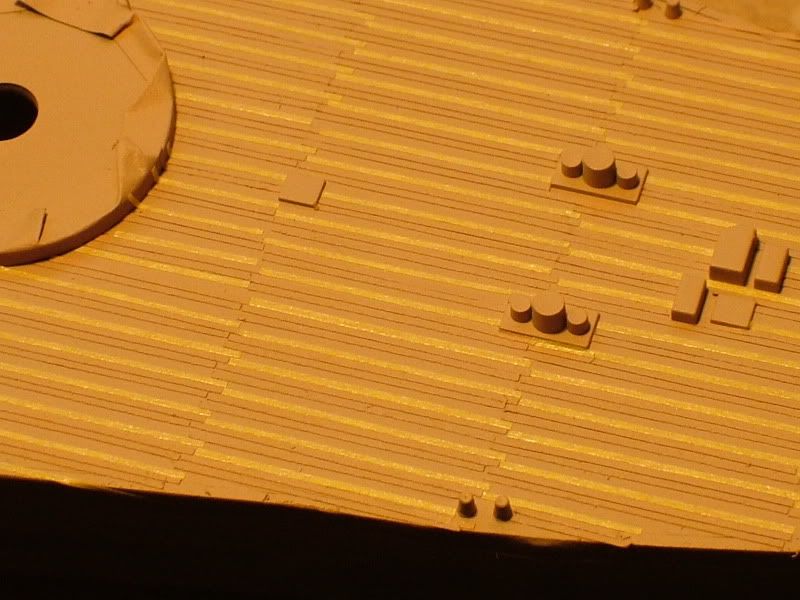
In the second picture you see the deck progress well under way, hundreds of individual tape strips replicating individual planks in four different shades of tan:
And in this final picture you can see the deck stripped of ALL paint in preperation of doing it all over again:
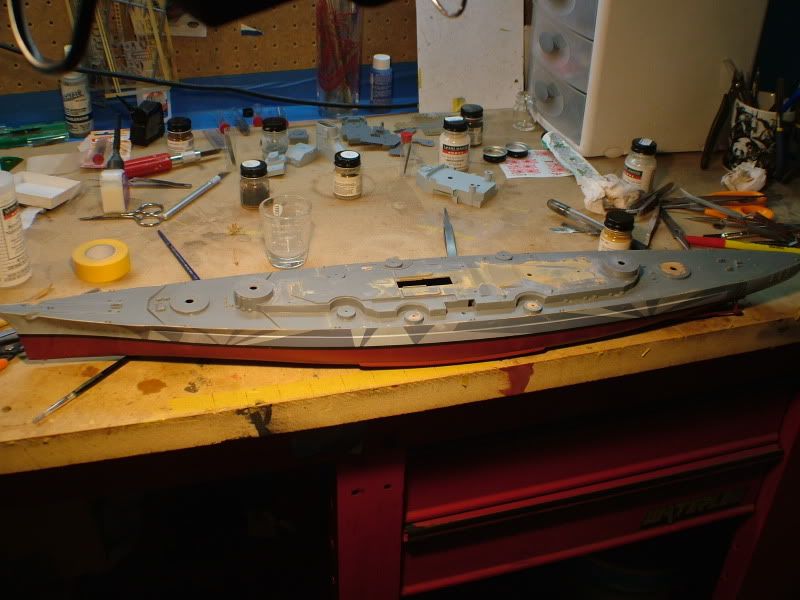
After the stripping EVERYTHING will have to be repainted, well at least the camo pattern is still visible on the hull, that will save a couple days work.

   Let the snickering commense.

  • Member since
    March 2007
Posted by Chuck0 on Thursday, May 3, 2007 5:09 PM
  Well I just ran into a little snag on my Tirpitz. All the paint lifted off with the masking tape on my deck. I used the exact same system as I did on my Mikasa, even the same paint. The only difference was instead of thinning with acetone I thinned with the testors acryl thinner to try and extend the dry time and get a little smoother finish and thinner layers. So about six weeks work is ruined as now I have to strip the entire thing. I'm just about all through with modelmaster paint, I NEVER had a problem with Tamiya acrylics doing this.
  • Member since
    February 2006
Posted by fordboy on Thursday, May 3, 2007 1:24 PM

You maybe right Chuck but I think I have worked out a way to avoid too much putty and too much sanding.  Lets see how it works out.

Here is the hull ready for action

Here is the hull after I have removed the pegs from the bottom

Regards

Fordboy

  • Member since
    March 2007
Posted by Chuck0 on Wednesday, May 2, 2007 12:54 PM
  Nothing a few tubes of putty and a couple dozen peices of sandpaper won't fix?Big Smile [:D]
  • Member since
    February 2006
Posted by fordboy on Wednesday, May 2, 2007 12:43 PM

Progress update

The hull review after being pulled from the box.

The hull

Front Hull

Rear Hull

I think there is going to be some modelling troubleshooting on this hull to get no gap in the hull.

Regards

Fordboy

  • Member since
    February 2006
Posted by fordboy on Tuesday, May 1, 2007 1:18 PM

Progress update.

The box is open.

The stands are prepared and completed.

I suspect my work area will shortly be covered in a film of blue sanding dust.

More progress to follow.

Regards

Fordboy

  • Member since
    March 2007
Posted by Chuck0 on Thursday, April 26, 2007 2:51 PM

  I'll put up a series of pictures showing the process when the main deck is fully painted. In 350th scale I think it looks better than actually using wood planking. (imo)


  • Member since
    December 2002
  • From: Reno, NV
Posted by espins1 on Wednesday, April 25, 2007 10:07 AM

 Chuck0 wrote:
  So where did everybody go? I've got my first deck plank color down and nearly masked, I figure there are somewhere around 600 individual strips of tape one inch long by .020 inches wide involved so far. When I go to spray the fourth color there will be 1800 strips of tape layed down.

Zoinks! Shock [:O] you've been busy!  Looking forward to seeing some pics  Smile [:)]

Scott Espin - IPMS Reno High Rollers  Geeked My Reviews 

  • Member since
    March 2007
Posted by Chuck0 on Tuesday, April 24, 2007 10:30 PM
  So where did everybody go? I've got my first deck plank color down and nearly masked, I figure there are somewhere around 600 individual strips of tape one inch long by .020 inches wide involved so far. When I go to spray the fourth color there will be 1800 strips of tape layed down.
  • Member since
    March 2007
Posted by Chuck0 on Saturday, April 7, 2007 8:40 PM

  Thanks Dan.

  My photoetch just arrived today, I love opening that stuff up for the first time. I've already used the WEM set on Bismarck so I left those closed for now but I just had to go through the Eduard set. They add a huge number of details that WEM left out, and vice versa, the two sets, while there will obviously be a lot of parts the same, are going to compliment each other very nicely.

   After a minor setback painting the hull after my dullcoat clouded over and I had to sand it down and repaint I'm back on track. (with half a bottle of Testors dullcoat in the trash)

  • Member since
    March 2004
  • From: Belgium
Posted by DanCooper on Friday, April 6, 2007 4:33 AM

Good to know our crew hasn't died yet Smile [:)]

Chuck, who cares about deadlines anyway ??? I certainly don't, so, welcome aboard Thumbs Up [tup]

On the bench : Revell's 1/125 RV Calypso

  • Member since
    March 2007
Posted by Chuck0 on Sunday, March 25, 2007 2:06 PM

  Well, since me Bismarck is nearly finished and can't be entered in the group build I'll have to start my Tirpitz next. She will have the Eduard and WEM detail sets along with other details.

    Preliminary research shows that the Tamiya Tirpitz is pretty much just the Bismarck with a couple different peices. The Eduard set seems to address many of the problems. Up first though are the vent collumns present on Bruno and Caesar turret barbettes. From what I can find they should be removed on Tirpitz but frankly I'm not sure I could do that to my satisfaction. I guess they may get left and simply dressed up as on Bismarck, not accurate, but will look better than gouged and scarred barbettes.

   I doubt she will be finished in the timeframe of the group build though.Sigh [sigh]

  • Member since
    November 2005
Posted by Anonymous on Saturday, March 24, 2007 9:59 AM
I'm still here! lol. Sorry I hven't posted in a while. Things have been crazy, as usual. Progress has been very slow, so far I've only opened my U-Boat box and browsed through the instructions and parts. Hopefully I'll actually get started soon, just wanted to let you know I haven't abandoned the GB. BTW, all your models look outstanding. Great work!
  • Member since
    March 2007
Posted by Chuck0 on Monday, March 19, 2007 4:29 PM
 Archangel Shooter wrote:

Hi Chuck..did you encounter any major problems using the WEM set? I'm certain the AA gun set was a bear to do but they do look good! What did you used to prep/prime the PE parts? Looking at your Bismark is making me want to put my U-boat project on hold and start work on mine.

Scott


   The pe is pretty standard fare, shouldn't be a problem for anyone used to working with photoetch. One thing I really wasn't prepared for that you might want to take into account was the amount of splinter shielding that has to be removed when utilizing the brass deck plate set.  The weapons set isn't too bad to do, most people say the quads are the hardest but I think the doubles were a little more involved and there's a whole lot more of them. I used GMM parts for the singles, the shoulder rests, sights, and elevation wheels from the Oerlikon detail set. Shoulder rests and wheels are similar, and just cut off the mount on the sight and fixed it all onto the plastic kit part. Used the magazine and the counterweight from the wem set but the wem fixture with base was just a little too two dimensional for my taste. 

   The only priming on the brass I do is a light coat of the primary color airbrushed on. 

  • Member since
    October 2006
  • From: Tucson, AZ
Posted by Archangel Shooter on Monday, March 19, 2007 3:36 PM
Good looking E-boat Thumbs Up [tup] I have one in the stash which I tried putting together last summer but the fit of the hull was horrible and I tossed it back in the stash for a later attempt. Guess I could work it out as a diorama and show the last few feet of the bow before it slips below the water

 Your image is loading...

 On the bench: So many hanger queens.


  • Member since
    October 2006
  • From: Tucson, AZ
Posted by Archangel Shooter on Monday, March 19, 2007 3:28 PM

Hi Chuck..did you encounter any major problems using the WEM set? I'm certain the AA gun set was a bear to do but they do look good! What did you used to prep/prime the PE parts? Looking at your Bismark is making me want to put my U-boat project on hold and start work on mine.

Scott

 Your image is loading...

 On the bench: So many hanger queens.


  • Member since
    March 2007
Posted by Chuck0 on Monday, March 19, 2007 7:38 AM

 Well, I still have to detail the float planes, add a couple more peices of rail, flags, and make a display case, but yeah, almost done. I have the Tirpitz in my stash, which should come out a bit better.

  There are two or three things on Bismarck I could have done better, the main deck ended up with WAY too much paint on it, when I glued the sub assemblies down there was some gappage I didn't notice until the glue was dry, a couple of seams on the back of the bridge assembly I let go that in retrospect I should have made more effort to finish. I'll post the photo bucket file with the build pics in it if you like, starting from the end and working toward the front you can see pretty much the way I put it together.


http://s35.photobucket.com/albums/d197/coberg1/Bismarck/

JOIN OUR COMMUNITY!

Our community is FREE to join. To participate you must either login or register for an account.

SEARCH FORUMS
FREE NEWSLETTER
By signing up you may also receive reader surveys and occasional special offers. We do not sell, rent or trade our email lists. View our Privacy Policy.