Thanks Townsy11! It was a loooong build, but worth it!
OK, here's the deal with the tracks and exhaust. Sorry, I didn't take any WIP photos of anything so I'll do the best I can to explain it:
First the tracks. Credit for this goes to the doog and to Tom Cockle's "Modelling the Early Panzerkampfwagen IV", one of OSPREY Publishing's fine modeling guides. If you read the doog's (Karl Logan) "Indy Track Link Tutorial" on the Armorama website you will know what I'm explaining. The tracks were basecoated with "dark earth", my personal mix of Tamiya Flat Earth, Red Brown and Black. I just mixed them until I got a medium brown color. When this was dry I applied a heavy wash of Raw Umber followed by a medium heavy wash of black. At this point the tracks looked pretty good, but I wanted a grittier, dirtier look to them. For this I used the track weathering method in Tom Cockle's book. He first basecoats in a dark earth enamel. He then wets a brush with Tamiya acrylic thinner, dips it into different shades of ground pastels (tans, browns and rust), then daps the mix randomly over the tracks. Since I basecoated in acrylic I simply switched to enamel thinner and dipped into Mig Pigments instead of pastels. I used European Dust, Dried Mud and Black in different applications. The European Dust dries very light so I had to tone it down with the Mud and Black. This gave the tracks a very mottled, gritty, dirty, stained look...close to what I wanted, but not quite. However, not wanting to spend any more time on it I left them as is. I then stuck my fingertip into some Gunpowder Mig Pigment, ground the pigment into my fingertip until it had a nice shine and then rubbed it over the raised outside part of the tracks, and over the guide horns on the inside. Lastly I took a black charcoal art pencil and rubbed it in over the inside part of the tracks that the roadwheels would contact. That's it!
I tried something new with the exhaust: First I hand brushed the exhaust with Vallejo Model Color #835 Salmon Rose, which is a light pink color, over the Panzer Gray basecoat. This left a nice mottled effect. Yeah I know...PINK! Then using a chocolate colored mix I dabbed on small dots, concentrating on the inside and outside corners and the places that would get very hot. Looked pretty strange at this point! Then I took a heavily thinned black/brown mix and post shaded with my AB over the exhaust aiming for a very mottled look. Its was looking pretty good now, but I wanted a grittier look so I took some dark brown pastels and some Old Rust Mig Pigments and starting dabbing it on with a little enamel thinner. When this was almost dry I took a brush wet with enamel thinner and removed some of the rust and brown in certain areas. Then I mixed dark brown and black pastels and did the same in random areas, using the enamel thinner to tone down areas that were overdone. A little flat black ABed on the exhaust pipe and that's it! To be honest I went overboard with the dark colors and as a result the exhaust came out darker than I wanted, but it still looked pretty good...better than any of my previous efforts. I learned this technique from Sam Dwyer's articles in "Model Military International" magazine (sorry! no plug intended FSM!), so credit goes to him!
I hope this explained things well enough. I'm not a professional writer so my composition is lacking!
dupes, THANKS for your great hosting of an awesome GB!!
I'm eagerly awaiting WINTER WARRIORS II!!!
Ernest
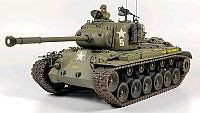
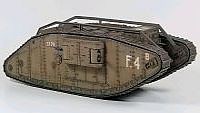
Last Armor Build - 1/35 Dragon M-26A1, 1/35 Emhar Mk.IV Female


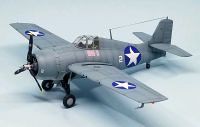
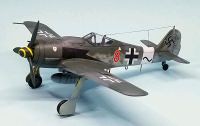
Last Aircraft Builds - Hobby Boss 1/72 F4F Wildcat & FW-190A8

