SEARCH FINESCALE.COM

Enter keywords or a search phrase below:

#6 Polish Artillery Tractor C7P-WIP 4/18--More Weathering Pics Page 12

43145 views
170 replies
1 rating 2 rating 3 rating 4 rating 5 rating
  • Member since
    May 2009
  • From: Poland
Posted by Pawel on Friday, November 13, 2009 2:41 AM

Hello Bill!

Good luck with your project. It's always good to see a Polish accent. For those who would like to find out more about the machine, here's the link:http://en.wikipedia.org/wiki/C7P

So, good luck again and have a nice day

Pawel

All comments and critique welcomed. Thanks for your honest opinions!

www.vietnam.net.pl

  • Member since
    January 2009
  • From: Everett, WA
Posted by Schnobs on Friday, November 13, 2009 3:37 AM

Awesome Bill I was hoping I would see this hit the Forum soon!

I will be watching this one closely!

"There is a principle which is a bar against all information, which is proof against all arguments and which cannot fail to keep a man in everlasting ignorance. That principle is contempt prior to investigation." Herbert Spencer
  • Member since
    May 2009
Posted by F Matthews on Friday, November 13, 2009 10:46 AM
Those are the correct tracks for the Vickers/T-26/7TP series. Nice tracks-I've built and finished five kits this year and three were T-26 variants with Friuls. This is one of the few versions of this chassis that I don't have yet, but I think this whole family of kits are fun to build whether Zvezda/Italeri origin or Mirage/RPM/TOM/Spojnia, etc (the same base molds).
I'll be watching this one with keen interest!
  • Member since
    January 2012
Posted by I make stuff on Friday, November 13, 2009 11:55 AM

Thanks, Pawel!  I just got an urge to build different, and this one fit the bill, so to speak.  No surviving examples, though, so that's a shame.

Ed, welcome, sorry it took so long to declare the BA-20 completed so i could cut the plastic on this one and get a look at it.

F Matthews, thanks for the confirmation, I noticed that the T-26 lower chassis was identical, so I took a chance.  Later I learned that both derived from the Vickers, but Fruil doesn't mention Vickers, that I could find, on their T-26 box.  They certainly are tiny tracks.

I'll try to get some progress posted this weekend, it has a transmission (no motor) and a full interior, so it should be a handful for me.

Bill     

  • Member since
    July 2004
  • From: Texas
Posted by wbill76 on Friday, November 13, 2009 2:48 PM

Bill,

I asked in the BA-6 thread what was next and here's the answer! Looking forward to seeing what you do with this one. Thumbs Up [tup]

  • Member since
    January 2012
Posted by I make stuff on Friday, November 13, 2009 11:48 PM

Tonight, I got a little tricky, and decided to take the one side of the mesh off, leaving the other intact just so it would photograph better.  I used the trusty Dremel with a cutting bit, it looks a bit like a drill bit made out of a rough file.  It works very quickly, so take it easy adn plan on doing the final trimming with a file.  I'm pretty happy with the edges of the removed panel, a bit more trimming, sanding, and scraping, and it will look like it was made this way.

Here is what it looks like with just one side finished:

Here it is with the pe mesh behind it

Sorry for the baby update, tomorrow I will finish this part.

Bill

  • Member since
    May 2005
  • From: Dublin Rep Of Ireland
Posted by terry35 on Saturday, November 14, 2009 7:42 PM

Hi, Bill I done this one a few years ago and its truely enjoyable, good luck.

Terry

  • Member since
    January 2012
Posted by I make stuff on Saturday, November 28, 2009 10:48 PM

I have had a busy weekend, but finally got a chance to make some progress on this one.  WHen we last left off, I was soliciting advice on how to best cut these side pieces , and settled on clamping a straightedge on adn scribing it with a #11 blade.

The discard pieces are above.

Then I put together the bogies, these are 12 piece units, Dragon has nothing on Mirage in this department:

Then, this being a Euro style kit, I assembled the hull from basically flat pieces:

Here it is boxed in, and another with a driver figure for scale, it's REALLY small for something with tracks:

And, lastly for tonight, we have the fenders, which needed a dab of putty to fill some amazingly deep punch out plugs holes, after this I hit them with some Mr Surfacer for a nice smooth result

That's it for tonight, more tomorrow, I hope.

Thanks as always for looking in.

Bill

  • Member since
    January 2009
  • From: Everett, WA
Posted by Schnobs on Sunday, November 29, 2009 1:43 AM

Lookin great Bill I am glad to see you found a little time to model over the Holidays!

Tell your boss to settle down Mr Cratchet or I will have to send three ghosts to see him!

"There is a principle which is a bar against all information, which is proof against all arguments and which cannot fail to keep a man in everlasting ignorance. That principle is contempt prior to investigation." Herbert Spencer
  • Member since
    November 2012
Posted by dioramator on Sunday, November 29, 2009 5:05 AM


G'day Bill

I fell in love with this kit a couple of years ago, so I bought it. Then I found some RPM indy link tracks to suit. Then the problem began, I also found the PE interior manufactured by PART, then went on to buy PE exterior vol 1, then vol 2, then I come across the PE fenders and finally the PE side tarpaulin roller blinds (all made by PART). The problem I have created is that the build is now bigger than Ben Hur, and unfortunately keeps dropping down the priority list of the stash collection. (and I have easily tripled the original purchase price of the kit).

Anyway I will get around to building it one day. In the meanwhile, Ill have to be content to watch your build. (and see what I'm in for).

Brett


  • Member since
    July 2004
  • From: Texas
Posted by wbill76 on Sunday, November 29, 2009 11:36 AM
I'll echo Edmund on this one Bill, nice to see you getting some more time in on this one. Those bogie assemblies look like they needed a lot of cleanup but look good for the effort! Thumbs Up [tup]
  • Member since
    January 2007
Posted by the doog on Sunday, November 29, 2009 4:38 PM

I've a;ways wondered what this kit woul dlook like built up?

Good call on that mesh job, there, but aren't you going to have to canter the weave diagonally to replicate it accurately?

  • Member since
    January 2012
Posted by I make stuff on Sunday, November 29, 2009 6:12 PM
 the doog wrote:

I've a;ways wondered what this kit woul dlook like built up?

Good call on that mesh job, there, but aren't you going to have to canter the weave diagonally to replicate it accurately?

Hi Karl,

Yes, there's a definate slant to the pattern, I plan to cant it, but my bigger problem is that I am going to try to find some railroad chain link fencing, as the PE stuff I have been able to find is not really very close to the pattern on the part.  Nobody will ever know, except me, that is.  Gota get something I am comfortable with.

Thanks, Ed, Wbill, and Dioramator for following along and checking in!  I hope to get some more done tonight.

Bill  

  • Member since
    January 2012
Posted by I make stuff on Tuesday, December 1, 2009 11:13 PM

Today I made some real progress.  First, I was able to find exactly what I needed in terms of PE screen to replace the plastic intakes:

I cut it with some heavy shears, and it looks like this from the back

And the front, pretty close to what I decided it would look like before I cut it

versus, the same part before modification

Here it is in place on the fixture for the rear hull

And that piece glued to the rear, pardon the day glo .99c clamps

Another view showing off my first full interior

And finally for tonight, a close up of the transmission and final drive area

  • Member since
    November 2012
Posted by dioramator on Wednesday, December 2, 2009 12:18 AM


lookin' sweet Bill

that mesh is a huge improvement over the original kit molding, (and the pattern is spot-on as well)

keep up the good work

Brett


  • Member since
    July 2004
  • From: Texas
Posted by wbill76 on Wednesday, December 2, 2009 9:26 AM
Looks like you found the perfect replacement mesh Bill, huge improvement over the kit molded part for sure.
  • Member since
    December 2006
  • From: t.r.f. mn.
Posted by detailfreak on Wednesday, December 2, 2009 12:16 PM
Great job so far.I must remember to add one or three of these to my collection.And I to must congrat you on the excellent grill fix.Bow [bow]

[View:http://s172.photobucket.com/albums/w1/g-earl828/]  http://i158.photobucket.com/albums/t104/cycledupes/1000Roadwheels4BuildBadge.jpg

  • Member since
    January 2012
Posted by I make stuff on Wednesday, December 2, 2009 12:59 PM

Thanks dioramator, WBill, and detailfreak, glad to have you along for the ride.

Turning to the interior, I plan to do some chipping like Edmund did on his Sahriana exterior, anyone have any idea what color the crew compartment and transmission areas would be?  I think a general idea of Polish production, German captured and painted Grey is going to have to suffice, all examples are lost, no color photos that i can find anywhere.

Anyone have any suggestions?

Thanks

Bill 


  • Member since
    December 2006
  • From: t.r.f. mn.
Posted by detailfreak on Wednesday, December 2, 2009 1:20 PM
There is one here who may be able to help.If I remember his user name perhaps he will answer a pm.I have'nt seen him around in a while.In his signature he stated that anyone with a question on polish arms and armor he may be able to help.THE MAN YOU SEEK IS :BEAV

[View:http://s172.photobucket.com/albums/w1/g-earl828/]  http://i158.photobucket.com/albums/t104/cycledupes/1000Roadwheels4BuildBadge.jpg

  • Member since
    February 2003
  • From: Indiana, USA
Posted by cassibill on Wednesday, December 2, 2009 2:48 PM
Interesting beast there.  I think I considered getting this once. It's looking pretty good. I might have to think about this little oddball. I'll be most interested in how those Fruil tracks are. I've managed to get a few of this family in the stash. I've got a T-26 in this scale and two variants of the Vickers and a 7TP in 1/72.

cdw My life flashes before my eyes and it mostly my life flashing before my eyes!!!Big Smile The 1/144 scale census and message board: http://144scalelist.freewebpage.org/index.html

  • Member since
    May 2009
Posted by F Matthews on Wednesday, December 2, 2009 3:23 PM
I've got most of the Vickers and T-26 series in 1/35 and just picked up my first 1/72 kits since 1979(!). A Braille scale version of this one just arrived yesterday and it is miniscule!! Comes with PE for the screens though.
Your progress looks great!
  • Member since
    January 2012
Posted by I make stuff on Wednesday, December 2, 2009 4:23 PM

Thanks detailfreak, I have sent an email and PM to beav, and will wait for a response.

Bill

  • Member since
    January 2009
  • From: Everett, WA
Posted by Schnobs on Wednesday, December 2, 2009 5:56 PM

Sorry Bill we talk all the time and I forget to post on your WIP because I think I did because I am providing verbal feedback and gossip about Indy!  :)  Just teasing Adam because I know you are reading. Smile [:)]

The PE replacement screen was well worth the effort I know you put in to find it.  It really sets off the front of the vehicle.

Keep it coming Bill! 

"There is a principle which is a bar against all information, which is proof against all arguments and which cannot fail to keep a man in everlasting ignorance. That principle is contempt prior to investigation." Herbert Spencer
  • Member since
    January 2012
Posted by I make stuff on Wednesday, December 2, 2009 6:25 PM
 Schnobs wrote:

Sorry Bill we talk all the time and I forget to post on your WIP because I think I did because I am providing verbal feedback and gossip about Indy!  :)  Just teasing Adam because I know you are reading. Smile [:)]

The PE replacement screen was well worth the effort I know you put in to find it.  It really sets off the front of the vehicle.

Keep it coming Bill! 


LOL, in my best Austin Powers, that's no FRONT, that's a REAR, man!

The grill faces the back, but thanks, Edmund.  Call me later, I have some new dirt on Indy.

Bill 


  • Member since
    January 2009
  • From: Everett, WA
Posted by Schnobs on Wednesday, December 2, 2009 6:37 PM
 Citadelgrad87 wrote:
 Schnobs wrote:

Sorry Bill we talk all the time and I forget to post on your WIP because I think I did because I am providing verbal feedback and gossip about Indy!  :)  Just teasing Adam because I know you are reading. Smile [:)]

The PE replacement screen was well worth the effort I know you put in to find it.  It really sets off the front of the vehicle.

Keep it coming Bill! 

LOL, in my best Austin Powers, that's no FRONT, that's a REAR, man!

The grill faces the back, but thanks, Edmund.  Call me later, I have some new dirt on Indy.

Bill 

LOL!  Will do!  We should get Adam's numbr and we can three way conference and talk about someone else!!  I have ran out of adjectives for hisKubelwagen!

"There is a principle which is a bar against all information, which is proof against all arguments and which cannot fail to keep a man in everlasting ignorance. That principle is contempt prior to investigation." Herbert Spencer
  • Member since
    December 2006
  • From: t.r.f. mn.
Posted by detailfreak on Wednesday, December 2, 2009 6:41 PM
Beav was eyeballs deep in a polish tankette last time I heard from him.He's a college student in Fargo No.Dak..Have'nt heard boo so I certainly hope he is in good health.I understand he's also a JROTC member,so maybe his studies have kept him away.He's quite knowledgable in the background of polish afv's.

[View:http://s172.photobucket.com/albums/w1/g-earl828/]  http://i158.photobucket.com/albums/t104/cycledupes/1000Roadwheels4BuildBadge.jpg

  • Member since
    November 2012
Posted by dioramator on Wednesday, December 9, 2009 6:04 AM

Citadelgrad87

Turning to the interior, I plan to do some chipping like Edmund did on his Sahriana exterior, anyone have any idea what color the crew compartment and transmission areas would be?  I think a general idea of Polish production, German captured and painted Grey is going to have to suffice, all examples are lost, no color photos that i can find anywhere.

Anyone have any suggestions?

Thanks

Bill 


It seems the interior was painted the same colour as the exterior (they probably just walked through the thing with the paint gun)


Brett

  • Member since
    January 2012
Posted by I make stuff on Thursday, December 17, 2009 11:14 PM

Tonight I started priming the beast, seeing how much people around here love monochrome, well, here are some pictures:


CHair close up


The front piece was a clear pice of plastic, the idea is you mask off the windows, paint the "metal", then the windows are clear.  THe problem was, the windows were so scratched up, and the goofy ginormous windshield wipers were about 1/16 scale.  Solution:  DREMEL, DREMEL, DREMEL.

I just hogged out the windows, and I'll paint it up and I will use some clear plastic packaging to replace them.  Here's a shot, but I can see I have some more clean up to do:


And lastly, a couple "assembled" shots, to show what it is going to look like some day


This weekend, I will do my best Ed impression:  a base coat, some hair spray, some more paint, some chipping, we shall see!

THanks for looking,

Bill

  • Member since
    January 2009
  • From: Everett, WA
Posted by Schnobs on Thursday, December 17, 2009 11:37 PM

Hey Bill

"Tonight I started priming the beast, seeing how much people around here love monochrome, well, here are some pictures"

You wouldn't be talking about me wouldcha?  Big Smile

Bill I have to ask do you use a hand model for your WIP pictures because that is one nice looking hand!

Seriously though nice progress this is going to look cool with paint on!

Good to see you back on the bench Sir!


"There is a principle which is a bar against all information, which is proof against all arguments and which cannot fail to keep a man in everlasting ignorance. That principle is contempt prior to investigation." Herbert Spencer
  • Member since
    April 2008
  • From: Ventura (at the beach) in California
Posted by *INDY on Friday, December 18, 2009 1:32 AM

~OK<OK I'm here ^&^ I'm ROFLing! Stop that !

~Really Bill, could you please find somthing more unusual to model? Please. LOL Very facinating my friend. ^&^ Fantasic build-work going on here. sorry I missed the start..It's down to not being able to deal with the new Forum this last week*(I'm liking it better by now, especially since my thread started functioning again and I could add some new post!!) but enough aout me(Man! These self-absorbed, know-it-all-artist types!!)   Looking good Buddy...I'll be back to see more.....                    Indy Out

"Well...you gunna pull them pistols, or just whistle Dixie?"

  • Member since
    April 2005
  • From: Piscataway, NJ!
Posted by wing_nut on Friday, December 18, 2009 5:04 AM

OMG...someone is building one of these AGAINWhistling

Looks good (now that I found this threadWink

Marc  

  • Member since
    July 2004
  • From: Texas
Posted by wbill76 on Friday, December 18, 2009 9:36 AM

Looking good Bill! Have to agree with Edmund about the hand model question...way too "clean" to be a real modeler's hands! Big Smile

  • Member since
    January 2012
Posted by I make stuff on Sunday, January 3, 2010 7:31 PM

Thanks,  Bill, Wingnut, and Indy!  Sorry about the soft hands, the last couple months have been at my desk, not my workbench.

Today, I tried my HANDS at hairspray chipping.  I took some Mr Surfacer 1000 and primed the interior several weeks ago, then I took some MMgunmetal and sprayed the interior surfaces, and highlighted some transmission structures with aluminum, and some high wear areas drybrushed with steel.  Then I coated it with some hairspray, but it was late, so I let it sit.  Out of caution, I recoated it with hairspray today, and discovered that more is not always better, I got some cracking on the areas where there was too much hairspray.

Anyway, this is a captured vehicle, so I figured the Germans would have sprayed the interior as well as the exterior, I chose MM Panzer buff interior.  I let it sit for 1 hour, and went at it with various tools, a stiff brush, my favortie was a pointy file, I used it to make random scratches and to start teh chipping for the brush to attack the paint.

It "got away" from me in a couple places, but all in all I'm pretty happy and think I can refine the trechnique, not bad for a first attempt. 

On to the pictures, please let me know what you think!


And finally, an idea of how it will look with the roof on:


Sorry about the slow updates, it's tough to get to the bench, and even harder to get better with such little practice.

Thanks for looking and weighing in,

Bill 

  • Member since
    January 2012
Posted by I make stuff on Monday, January 4, 2010 11:25 PM

Well, two sessions in two days, that's a personal best for the years, so far.

Tonight, i did a Mig filter for white, followed by a filter for german gray, followed by a pinwash using Mig dark wash, followed by some detail painting, mainly the various control sticks and shifters, and the leather seat cushions.  I plan to drybrush the seats with some darker and lighter tones to depict wear.

Here are the shots, it really seemed to tone down the chipping, does it look too grungy?


And a shot of a seat, with a question.  I painted the seat backs a tan to simulate wood, then "chipped" it with the hair spray method.  MY problem is the tan is so close to the Panzer interior, there is no contrast.  I need to visibly beat up these seatbacks, does anyone have any ideas?  Maybe WBill's tool treatment?

Here's a seat:


Thanks for looking, guys, I appreciate the advice and support I get here.

More to come,

Bill

  • Member since
    July 2004
  • From: Texas
Posted by wbill76 on Tuesday, January 5, 2010 9:32 AM

I'd say the interior looks good with the filter Bill! As for the seat backs, giving them a wash to add some color depth and variation would probably be your best bet to generate some contrast. It's highly unlikely they would've been left as raw lumber and instead would've probably received some kind of lacquer or varnish treatment in order to keep them from cracking/splintering over time...especially given their semi-exposed condition. Two sessions in two days...you're on a roll! Beer

  • Member since
    January 2009
  • From: Everett, WA
Posted by Schnobs on Tuesday, January 5, 2010 9:55 AM

Looking great Bill.  I agree with Wayne about method to simulate wood and another method is to paint the wood areas a pale or light sand Vallejo and then paint the area with Burnt Umber oils and then wait 20 minutes and then use mineral spirits on a brush to remove the majority of the pain in the direction of the "Wood grain".  Th end product looks great.

Tank makes the rife set you were asking about last night for the empty rifle racks.


"There is a principle which is a bar against all information, which is proof against all arguments and which cannot fail to keep a man in everlasting ignorance. That principle is contempt prior to investigation." Herbert Spencer
  • Member since
    January 2007
Posted by the doog on Tuesday, January 5, 2010 12:42 PM

Nice work so far, Bill!

  • Member since
    January 2012
Posted by I make stuff on Wednesday, January 6, 2010 10:08 PM

Thanks, Bill, Wayne, Edmund, and our world traveller, Karl!  I appreciate the feedback.

After pondering how to do the seat backs (review, I tried to hairspray chip them, but the selected undercoat, a vallejo light tan, was too close to the interior gray overcoat--the result, far from the spectacular high contrast chipping, there WAS no result.)

Solution:  fix it somehow.  I settled on MM enamel wood brown, followed by some Windsor and Newton water soluble oil paint raw umber to darken it up. I had trouble getting grain, but I think I like it.

Results:


I still need to do some touch up, but I think it's what I was looking for.  AS ALWAYS, please weigh in either way.

Oh, I almost forgot, I tackeled the instument panel, man, not much detail, I think I wil put some (gasp) future on the dials or something.


Well, how do you like the seat solution???

Thanks,

Bill

  • Member since
    July 2004
  • From: Texas
Posted by wbill76 on Wednesday, January 6, 2010 10:10 PM

Looking good Bill! If you want to introduce a little more grain pattern, try dry brushing some of the tan or wood color very lightly over the current dark color and see where that gets you. If you get it on too heavy, you can counter dry brush the darker color until you get the look you want.

  • Member since
    January 2009
  • From: Everett, WA
Posted by Schnobs on Wednesday, January 6, 2010 10:41 PM

Hey Bill nice to see you consistently hitting the bench you have been working so hard lately it's important you get some hobby time.  yes I am your Forum wife I admit it. 

Okay I going to be honest I don't like the wood effect here and I think you can do better. Bear with me I think I have a simple solution for you. Waterboard the chairs in windex and get rid of that plastic toy like finish and then use your razor say to put in some wood grain or use a hot needle tip in your wood burner or just a heated hat pin held with teasers.  Lot's of different ways to skin that cat. Now I know you have some light colored Vallejo's like Light sand or something light tan.  Then paint with Burnt Umber oils and then remove most of it with with Mineral spirits brushed along the granin and I think you will be much happier.  You could also use Flat Each Vallejo and deck tan dry brushing on the wood grain to pop it.

Instrument Panel looks great just build up the future with light coats dropped in on a tip of a needle.

Call me if you want o run through the steps or yell at me! Wink


"There is a principle which is a bar against all information, which is proof against all arguments and which cannot fail to keep a man in everlasting ignorance. That principle is contempt prior to investigation." Herbert Spencer
  • Member since
    January 2012
Posted by I make stuff on Saturday, January 9, 2010 11:34 AM

Well, that's now 4 days this week I got a chance to work on this, uh, bad boy(?)

Thanks to Edmunds...encouragement (Just kiding, man, I appreciate the critical eye, I don't post here for attaboys, I always welcome comments, and the critical ones are how I learn) I stripped the seats down, added some grain detail with a razor saw, re painted with some Vallejo Iraqui sand, then hit is with some burnt umber oil paint, this time not the water soluble type, let it sit out for 20 minutes on some paper to absorb the oils, then lightly brushed it on the seat backs, grinding it into the newly made wood grain.

Again I waited 10 minutes, then I came back and LIGHTLY tried to take some paint off but leave it in the grain.  The first try I used mineral spirits, but that took it all off, so I went back and re applied it, taking it off by using a damp, soft brush (the same one I use for oil dot fading) and gently stroked it along the grain pattern.  Please take acriticval look, did I leave TOO much on?

Well, other than some rifles, the interior is ready to be called finished.  I still have several pages of directions to follow, so the build is going to last a while longer.

Take a look, please, and thanks for taking the time to follow and weigh in!


What do you think?

THanks, Bill

  • Member since
    January 2007
Posted by the doog on Saturday, January 9, 2010 11:38 AM

Bill, I think that the seats look fine--they're enough to give any modeler a "woody"! Whistling....Big Smile

  • Member since
    January 2009
  • From: Everett, WA
Posted by Schnobs on Saturday, January 9, 2010 11:42 AM

Hey Bill!

Much better look my friend and the fact that there are tonal differences between the seat backs makes it even better.  Well done Sir!

Yes

"There is a principle which is a bar against all information, which is proof against all arguments and which cannot fail to keep a man in everlasting ignorance. That principle is contempt prior to investigation." Herbert Spencer
  • Member since
    July 2004
  • From: Texas
Posted by wbill76 on Saturday, January 9, 2010 11:50 AM

Nice work on the redo Bill. Yes

  • Member since
    April 2008
  • From: Ventura (at the beach) in California
Posted by *INDY on Saturday, January 9, 2010 1:45 PM

Sorry Buddy, you're going to have to re-do the rest of NOW !    Stick out tongue   Ok,  so the seat-backs do look better don't they?       Guys what did we learn here?  Ed bravely witheld giving an 'ata-boy' when it was time to give a friend a little nudge to get him to live up to his potential. It's not often easy to do that. We often see room for improvement in projects that we didn't even think to start in the 1st place, but we all know it's different when immersed in the myriad of detail in any project.    Ok now I gotta go point out to Edmund all his flaws again....wish me luck, SurpriseBig SmileSmile

"Well...you gunna pull them pistols, or just whistle Dixie?"

  • Member since
    January 2012
Posted by I make stuff on Wednesday, January 13, 2010 12:46 AM

Thanks, Indy, Bill, and of course the conscience/palooka muse of all "artistic" endeavors, Edmund.  Adam, I totally agree that the nudge, while sometimes uncomfortable, is the best move when you see something that you KNOW can be better.

Last night, I put in the seats, and painted up, or started to paint, some wonderful rifles I got in a Gen 2 DML figure set, they really are something, and I will be hitting you guys up for some sling advice, I have PE slings from the kit, maybe good patterns, and some lead foil and dental foil to choose from, but I need some toot action.

On to the pics:


Inside:


Lid on


And I have the option of leaving this open, I think I will


Question for the well rounded, should I wash the seats and the interior now that they are joined, just to tie them in, and if so, with what?

THanks for following this strange build

Bill

EDIT!  These pictures are pretty rushed, with harsh lighting, and don't really show the interior. I will snap some more tomorrow from a higher angle with better light, sorry about that.

Bill

  • Member since
    July 2004
  • From: Texas
Posted by wbill76 on Wednesday, January 13, 2010 2:39 PM

I would definitely advise doing any weathering or washes for the interior that you want to accomplish now before you secure it in with the cab...if only because it's much more accessible now vs. later. A pin wash with Burnt Umber will help make some of the details pop, it's up to you if you want to put another overall wash in place but my vote would be no unless you want to show some heavy duty dirt accumulation or similar grime on the interior.

Rifles are looking good too Bill, keep up the good work. Yes

  • Member since
    January 2009
  • From: Everett, WA
Posted by Schnobs on Thursday, January 14, 2010 11:28 AM

Hey Bill,

The interior had turned out really nice and your extra work and re-work really shows here.  I like the rifles and as I said on the the phone don't be intimated by slings because I was too and they are really quite simple to make and work with.  have had the best luck with thin strips cut off Yogurt foil lids.  The ones my wife uses has a pebble like texture which when painted looks just like leather.  Do not forget to make a loop on the inside of the sling to simulate the sling loop and use a touch of CA and you are done.  I often glue them on the he rifle and then paint them it is easier.

Keep firing down range Sir!!

"There is a principle which is a bar against all information, which is proof against all arguments and which cannot fail to keep a man in everlasting ignorance. That principle is contempt prior to investigation." Herbert Spencer
  • Member since
    May 2005
  • From: Eugene, Oregon
Posted by hughes2682 on Thursday, January 14, 2010 11:38 AM

Bill,

A re-do can be a hard one to swallow.  They can often pay off in spades.  This is NO exception.  A very nicely done interior.  I agree with Bill (WildBill) about weathering the interior now before the interior gets buttoned up with the cab.  I am looking forward to following this build.  I somehow missed it before today but it is now marked to be followed.

Cheers

Dave

http://img.photobucket.com/albums/v317/Aaronw/Groupbuilds/ClassicAviationGB2010bomb.jpg

With enough thrust, pigs fly just fine.

  • Member since
    January 2012
Posted by I make stuff on Tuesday, January 19, 2010 11:46 PM

Thanks, Bill, Edmund, and Dave, so nice to have company for this ride.

A few nights ago, I cut some slings out of lead foil, glued them up, painted them to resemble leather, and then oil washed them to tone them down.

Tonight, I glued on the central stack that forms the center of the crew compartment, and fitted two rifles to the rack on the driver's side. I added a "leather" retainer strap out of lead foil painted vallejo leather.

Not much progress, but it's a step in the right direction!


And with the roof on, here's what we will see

  • Member since
    January 2009
  • From: Everett, WA
Posted by Schnobs on Wednesday, January 20, 2010 3:24 AM

Nice rifles and rack Bill. The interior is looking great!  If you have MIG Gunmetal pigment a little bit rubbed on the high points of the weapon like the sights is a nice touch.  Just a suggestion of course!

"There is a principle which is a bar against all information, which is proof against all arguments and which cannot fail to keep a man in everlasting ignorance. That principle is contempt prior to investigation." Herbert Spencer
  • Member since
    July 2004
  • From: Texas
Posted by wbill76 on Wednesday, January 20, 2010 9:31 AM

Looking good Bill, nice work on the interior details. Yes Yes

  • Member since
    February 2009
  • From: mass,USA
Posted by scratchmod on Wednesday, January 20, 2010 1:31 PM

Love the look of the interior, the chipping looks great as do the rifles.


Rob

www.scratchmod.com

  • Member since
    January 2012
Posted by I make stuff on Thursday, January 21, 2010 8:48 PM

Thanks Edmund, Bill, and Rob.  Rob, I appreciate that, this is my first try at chipping.

Update!

So you may recall that the entire front section of the tractor cab was formerly a clear piece with windows molded into it.  I decided that masking the "clear" parts and painting the rest would result in the masks being on the windows for so long that they would never be clear again.  Also, they were very thick, scratched to heck, and the windshiled wipers molded in place looked bigger than 1/35 prybars.  SO... I dremeled out the windows and left the frames, and got this:


I planeed to simply make clear plastic windows and put them in after I paint it.  My problem was I should have made a rubbing of hte windows before I got rid of them so I would have templtes to make the clear windows.  I didn't, and had a mental block about the best way to go about getting properly sized windows.

Enter Schnobs, in the finest FInescale tradition, he suggested tracing the window openings onto some card stock, and trimming those to fit, then transferring that to some clear packaging for nice clear scale thickness glass.

SO I did:


And a quick shot of the raw "glass" I intend to use.  Points to anyone but Schnobs who can guess what that package is for:


THen I started on the myriad of tiny outside details, starting with the exhaust.  Here's the first part, the tip, nice and solid:


I started to root around for a bit to drill it out, then, brainstorm, I found some brass tubing that I bought for the BA 20 exhaust, and here we have a realistic ( I hope) tip.


And here is the overlal shot, that thing didn't fit very well at all, I needed a couple extra hands


THen I started with some other smaller details, check these fender supports for WOW does that not fit well.  Combination the fenders took on a droop to get them flush with the hull, and the top plate is also warped.  Check these clearances, anyone have any suggestions?  I can CA them down and they will look bent, not out of the question, or they can remain straight and I can rip some holes in the fender and they can be "torn off."


That's where we sit tonight, I will next drill another couple hundred thousand Fruil links, maybe get the first run finished.

Please weigh in with any comments, especially with teh fender supports.

Thanks, guys,

Bill  

  • Member since
    January 2009
  • From: Everett, WA
Posted by Schnobs on Thursday, January 21, 2010 9:07 PM

No worries Bill I am always willing to lend an ear Have two fairly large ones! 

First of all I love the brass tubing on the muffler.  Well done and that will really set it apart!  If you cannot remove the fenders and fix the height problem you could use a visual slight of hand and cut some evergreen stock down to pad out the space right below the strut until it is flush with the fender.  You could also drop a tarp or something over this because according to the non extreme modelers we only use extreme modeling and weathering to hide our mistakes!  That one made me laugh long and hard! 

I Will think about it for awhile and see if I can come with anything else.

Good to see you making progress on this Bill!!  Yes


"There is a principle which is a bar against all information, which is proof against all arguments and which cannot fail to keep a man in everlasting ignorance. That principle is contempt prior to investigation." Herbert Spencer
  • Member since
    April 2008
  • From: Ventura (at the beach) in California
Posted by *INDY on Thursday, January 21, 2010 9:47 PM

~Billy'O'Bill~~~ Hey that interior looks terrific. Looks just right from what I know of these(which is nothing, but it still looks right Stick out tongue) would'nt be much of a vacation tour fighting inone  of these!

Dig the substitution of the exhaust---any time you can add in or substitute more brass the better, right? After-all, what better to model scale metal than tiny bits'o'metal? IF FACT....if you have any brass sheet or large P.E. pieces even, you may consider sub-ing out those ill-fitting fenders for some scratch-made ones that fit however you want.... The brass could give you some oppertunity for convincing damage,as the fenders are always the first thing to go--------In any case I vote mutilate them(I would, huh?)

Oh and jest out to Ed----Edmund, is there another kind of slight-of-hand besides the visual kind?Geeked

"Well...you gunna pull them pistols, or just whistle Dixie?"

  • Member since
    January 2012
Posted by I make stuff on Thursday, January 21, 2010 10:39 PM

Indy!  Did you guys really have a tornado today?  Still raining and lightning here!

I thought I heard a challenge/push to new exploits, seriously, after the baby steps of the cobblestone base, you feel like walking me throught this?

What do you make of this?


Then, when gingely testing the glued joints, THIS happened:


The new status quo is one fender off, I am certainly not going to glue that back on


Indy, I'm going to need some serious backup.  FIrst things first, how is the best way to neatly cut this stuff, I have tin snips, but feel like it will curl and tear it up, maybe it's soft enough to beat back flat?

Second, the ONLY detail at all is the end pieces, they have some ribbing detail, how do I replicate that?

Let's get this party started!

Bill

  • Member since
    April 2008
  • From: Ventura (at the beach) in California
Posted by *INDY on Friday, January 22, 2010 12:28 AM

Oh OK ...Me & my big mouth, er a.... typeface. So you got the brass right there. ok dokie

1st measure up the size pieces you're gunna need. Looks like there's going to be a long fold down the side to get an edge on the side, so include this in the width(likely you can scribe the bend-line on the bottom to get the bend crisp just like a P.E. sheet.(scribe with a knife or awl & metal straight-edge) To minimize the sheet metal work, you may choose to cut off the rounded ends of your styrene fenders to save from having to bend the fenders and recreate the detail. Decide if you want to do this before sizing the brass & cutting. _OR_ you may want to go the whole route and re-create all of it, particularly if you want to bang-up the end alot--or have some of it go missing? Anyways, you'll have to decide all of that prior to cutting.

To cut you could use your snips, if proficiant with them. Needing a long straight cut, I'd use a knife & straight-edge. Not the regular hobby knife, but a heavy utility blade. You got the .005 thou brass so it's no thicker than a typical Photo-etch sheet, thinner than many.

These are really handy and worth the $10 . The thick blade will give you a more consistaint cut. You need to hold that ruler down really firmly. to avoid slipping and getting your fingers, or getting squirly cut... you may want to clamp it down, with C-clamps or whatever you got.

That should get you started, maybe as far as the side-fold done, let us know what you decide about the rest and we'll go from there*

YesCool

"Well...you gunna pull them pistols, or just whistle Dixie?"

  • Member since
    July 2004
  • From: Texas
Posted by wbill76 on Friday, January 22, 2010 9:43 AM

Looks like you've got some great advice here Bill on how to address the issues. Look forward to seeing the facelift on the fenders! The replacement of the exhaust is a nice touch as well. Yes

  • Member since
    January 2012
Posted by I make stuff on Friday, January 22, 2010 11:05 PM

Thanks, Bill, I've got the patient on the table right now.

Here are the issues I am facing:

Overview-these are basically perfect rectangles, and therefore easy to cut, between the curved ends


The next two show the rear end portion, it'sgot a separation dividing it from the middle fender section.  I am thinking about attempting to bend this and replicate the rib detail with styrene, my rationale being that the center is nice and thin, I'd rather not add these over thick styrene ends.


The next 3 show the front section, which is tougher, but I think I have a solution.  The front portion of the fender itself is just curved, no raised ribs to follow the curve.  The problem is that a portion of the front curves down to form a vertical wall on the fron tportion of the tank.  I am thinking about cutting this part off of the plastic part and using it as intended, then simply carry the metal fender, glued to the plastic wall part, to the front of the fender.  Does that even make sense?

Pics


Here's a top view to show how simple the shape is if I cut off that inner part:


Anyway, that's the plan but I will hold off until I get some input, it's kind of a one way street at this point.

Thanks

Bill

  • Member since
    April 2008
  • From: Ventura (at the beach) in California
Posted by *INDY on Saturday, January 23, 2010 12:00 AM

Yeah, that totally makes sense, Bill, and that's one way to do it, for sure.


The next 3 show the front section, which is tougher, but I think I have a solution.  The front portion of the fender itself is just curved, no raised ribs to follow the curve.  The problem is that a portion of the front curves down to form a vertical wall on the fron tportion of the tank.  I am thinking about cutting this part off of the plastic part and using it as intended, then simply carry the metal fender, glued to the plastic wall part, to the front of the fender.  Does that even make sense?

Pics

http://i365.photobucket.com/albums/oo91/citadelgrad87/DSCN6735.jpg

And that would avoid having to cut the length of the fender with that vertical as a 'flap'. If you did that you'd have to slit it where it meets the curve, then curve the front down, cut the 'flap' to fit that and solder the seem. Does that make sense?  Either way can work.

"Well...you gunna pull them pistols, or just whistle Dixie?"

  • Member since
    January 2012
Posted by I make stuff on Saturday, January 23, 2010 12:47 AM

Hi Indy.  Solder, huh?  Last soldering I did was to install a water heater, that thick copper was pretty forgiving.

Can I get a battery solder set from Radio Shack to do PE like this?  Or would I be better off with something else?  I like the idea of trying to do it all out of brass.  I can make a template by wrapping it with paper and then laying it flat.  I know just where to slit it, the beginning of the curve is marked with a rib, it won't be too bad if I can get a solder setup locally.

Thanks for the backup, Indy.

Bill

  • Member since
    April 2008
  • From: Ventura (at the beach) in California
Posted by *INDY on Saturday, January 23, 2010 4:28 AM

~Yeah Radio Snack is a great place to get a solder set up, of course everything there is geared towards circut boards, meaning solder with flux core---you want flux paste or liquid you can add right to  the joints. I don't know about the battery power, haven't heard of it's use for scratchwork. I have a butane iron that doubles as a torch(pretty handy) and I have a little plug-in iron too. I've done a handful of solder projects, so far I've made it work when I needed it, but am still a novice.

Here's a LINK for a build you should read through. He's very proficient with solder,you'll get a few pointers  .Miraculous scratchbuilder! Same kit Im on too.

For a general descriptionof how -to-solder brass for the model builder    Linky    ( lots of great how-to articles there for the modeler      http://themodelmakersresource.co.uk/articles/article012.html


"Well...you gunna pull them pistols, or just whistle Dixie?"

  • Member since
    January 2012
Posted by I make stuff on Saturday, January 23, 2010 5:59 PM

So now I have made up a template from some paper, and it seems to be the correct dimensions.  I think I will try to cut out the parts and fab up some 3d fenders!


  • Member since
    April 2005
  • From: Piscataway, NJ!
Posted by wing_nut on Saturday, January 23, 2010 9:39 PM

Nearly forgot aboutthis one.  Coming along real nice.

Marc  

  • Member since
    January 2012
Posted by I make stuff on Sunday, January 24, 2010 12:26 AM

Thank you, Wingnut, it's a slow process for me, but I like the input I get here.


Oh, nothing...I just totally fabricated replacement fenders, front ot back, out of sheet brass (well, one so far, I wanted to make sure it was OK before doing two), then I soldered the front.  That's right.

This AM, off to a large chain of retail electronics shacks, to get this:


Yep, not a soldering iron, a soldering STATION!.

Then I did this:

 Dimensional check:


Looks OK compared to the kit one, but the kit one didn't fit too well, so here it is in place:


Check that scale thickness!!


Honest question-I spent some time on this, and it's my first large scale brass scratch-solder-replacement of kit parts.  I want this to look good, and I believe I have lost objectivity.

WHat do you think?  I didn't have to destroy the kit fenders to fab this, so I could go back.  I realize the brass is still missing some detail, but that sould be easy to add with styrene or even more brass.

Comments, please.

Bill the solder guy.

  • Member since
    January 2009
  • From: Everett, WA
Posted by Schnobs on Sunday, January 24, 2010 1:38 AM

As my friend Bob would say this is FREAKIN SWEET!!!

Seriously Bill this definitely was worth doing I am very impressed.  You will never have to purchase AM PE fenders again you know how to replicate your own!  How cool is that? Yes

Fish is in the water you are committed now!  GET ER DONE!!


"There is a principle which is a bar against all information, which is proof against all arguments and which cannot fail to keep a man in everlasting ignorance. That principle is contempt prior to investigation." Herbert Spencer
  • Member since
    July 2004
  • From: Sonora Desert
Posted by stikpusher on Sunday, January 24, 2010 1:47 AM

OK, this build looks really familiar now. Did you happen to have this at the So Cal AMPS meeting a couple weeks ago for show and tell? If you did, all I can say is that it looks even more impressive in person!


F is for FIRE, That burns down the whole town!

U is for URANIUM... BOMBS!

N is for NO SURVIVORS...

       - Plankton

LSM


  • Member since
    January 2012
Posted by I make stuff on Sunday, January 24, 2010 10:37 AM

Hey, Carlos, yes, that was me!  I was hoping to meet up, now you know what I look like.  Are you going to the mini show? I hope ot have this across the line by then, but with my pace, you never know....

Thanks, Ed!  Just a little diversion that turned into another learning experience.  I guess I'm committed, I'll go start the other one.  I get some bench time today.

Bill 


  • Member since
    January 2009
  • From: Everett, WA
Posted by Schnobs on Sunday, January 24, 2010 11:10 AM

Bill,

A diversion is an hour in front of the Idiot box watching some mindless dribble.  This is well thought out scratch building using materials and methods that make most people cring.  Seriously color me red and spank me I am very impressed.  I was hoping to make a couple fenders to simulate damage on my next piece of armor with some aluminum from a pop can but you beat me to it with this and placed a very high bar in front of me.

Again Bill what a great job and well worth the effort!


"There is a principle which is a bar against all information, which is proof against all arguments and which cannot fail to keep a man in everlasting ignorance. That principle is contempt prior to investigation." Herbert Spencer
  • Member since
    July 2004
  • From: Texas
Posted by wbill76 on Sunday, January 24, 2010 11:15 AM

Definitely an improvement over the kit parts and, as you mentioned, you can add the remaining detail using strip styrene or even additional brass parts as you need. It's funny in that the soldering station you picked up is the exact same one I bought from RS when I first needed to solder! Big Smile I use a different one now with different size tips that I picked up from Micromark but still keep the RS one handy for large work as it's very very reliable. Yes

  • Member since
    October 2009
Posted by Scott MacPhee on Sunday, January 24, 2010 11:47 AM

Wow.  I've been following this build since the first post, and you're an inspiration!  Those fenders look fantastic.  A little plasticard raised detail will help them pop.

  • Member since
    April 2008
  • From: Ventura (at the beach) in California
Posted by *INDY on Sunday, January 24, 2010 12:46 PM

~Very nice Bill~ Im sure your glad you ventured it by now~ Like WildBill said  "Definitely an improvement over the kit parts and, as you mentioned, you can add the remaining detail using strip styrene or even additional brass parts as you need..... Of course there the matching of the wo sides 1st...good luck with that.   Again, the new fender is nice Buddy, great J.O.B.


"Well...you gunna pull them pistols, or just whistle Dixie?"

  • Member since
    January 2012
Posted by I make stuff on Sunday, January 24, 2010 1:29 PM

Wow, guys, THANKS, really, the critical eyes around here are my yardstick, I can't express how nice it is to get such positive feedback.  Ed, Bill, Scott, Wayne, this really REALLY made my day.

Adam, thanks for the push...again.

As for the sewcond fender, that one was EASY compared to the first one.  I should open up an assembly line.  One nice thing was that hte shape is so simple, I just flipped the template over and had the other fender at the same dimensions.

Here are some comparison shots.


There is (was) a molded ridge to give strength to the plastic joint, nore surface are, but it interfered with the metal to plastic joint, so it had to get shaved off, cot me a return roller and one of the thin styrene mounting supports, but it had to happen:

FInally, some walk around shots of them just sitting in place, for some reason, the right side one stays put, the left side won't stay in place without glue.  I didn't feel lke taping it, so it droops in the back:


Above is one last shot of the plastic ones side by side with the bionic fenders.

A question, not that I CAN bend them up like realistically damaged fenders, SHOULD I???

Thanks for all the support on this, it was scary for a minute, then my inner metalsmith seemed to come out.  I helped my dad make a 1:1 airplane in his garage, so this was sort of familiar.  I need a tiny English wheel.....

Again, thanks for all the kind words about this fender deal, I've been around here long enough, and seen what the group likes, so it really means a lot.

Bill

  • Member since
    April 2008
  • From: Ventura (at the beach) in California
Posted by *INDY on Sunday, January 24, 2010 1:46 PM

!They are beauties Bill, really--And I enjoy the look of a pristine Fender as much as the next guy

but I still say mutilate them ! But hey ---- that's me. Based on the wear inside the tractor, there should at least be a dent or ding somewhere.........

"Well...you gunna pull them pistols, or just whistle Dixie?"

  • Member since
    July 2004
  • From: Sonora Desert
Posted by stikpusher on Sunday, January 24, 2010 2:15 PM

Citadelgrad87

Hey, Carlos, yes, that was me!  I was hoping to meet up, now you know what I look like.  Are you going to the mini show? I hope ot have this across the line by then, but with my pace, you never know....

Thanks, Ed!  Just a little diversion that turned into another learning experience.  I guess I'm committed, I'll go start the other one.  I get some bench time today.

Bill 


No, unfortuantely my schedule at work is changing after Feb 6th, I will be working weekends until May, so that will be when my next meeting visit will be. At least taht will give me some time to get an armor kit finished! I do look forward to seeing this one done. Your work is really great to see firsthand.


F is for FIRE, That burns down the whole town!

U is for URANIUM... BOMBS!

N is for NO SURVIVORS...

       - Plankton

LSM


  • Member since
    January 2012
Posted by I make stuff on Sunday, January 24, 2010 3:48 PM

Well, guys, I can comfortably say I am no longer afraind of soldered PE and/or simple brass sheet fabrication. 

Thanks, Indy (Adam) for the information and the push in the right direction.  It wasn't the first time you have encouraged me to try something I thought was beyond my abilities, and I hope it's not the last.  It was nice finally talking to you today!  You can be sure I read and re-read the soldering links, and I'm still pretty shaky, but the jopints are strong, I bent them up (see below) and they held up.  This old tractor is now much much better than OOB, and I appreciate your help.

Edmund, you are far too kind, my friend.  I have seen you grow immensely over the past year, such praise from you is treasured.

Enough awards ceremony speeches, this thing isn't even primed yet.  WHen we last left off, the plain metal fabrication was done, but we lacked detail and I wasns't sure whether to damage them.  Adam hit me with the unassailable logic that if I didn't bend them up a bit, then when there was paint on, they might as well just be plastic, the main reason to do them of metal is that it can be damaged like metal. 

So without further delay, here are some shots:


A close up of the minor wear and tear

WIth the cab in place


THere are some gaps, the cab is just sitting on there for now


 Thte rear


Top showing damage


WE now return you to your regularly scheduled plastic modeling.

Bill

  • Member since
    February 2009
  • From: mass,USA
Posted by scratchmod on Sunday, January 24, 2010 5:09 PM

WOW Stick out tongue that little sucker looks too nice. Man is there a lot of nice detailing on such a TINY little model. The PE  (brass) fenders are fantastico. This just gets better and better, keep those pics coming Bill.


Rob

www.scratchmod.com

  • Member since
    July 2006
  • From: San Francisco Bay Area
Posted by bufflehead on Sunday, January 24, 2010 8:55 PM

citadel, I haven't been frequenting the forums that much so I missed this thread!  I love the subject of your WIP, the C7P being a very interesting early war vehicle!  I've got a couple of different versions in the stash and am eager to see how your's turns out!  GREAT work so far with the fender and grill improvements and also with the interior work! 

Ernest

Last Armor Build - 1/35 Dragon M-26A1, 1/35 Emhar Mk.IV Female


Last Aircraft Builds - Hobby Boss 1/72 F4F Wildcat & FW-190A8


  • Member since
    July 2004
  • From: Texas
Posted by wbill76 on Sunday, January 24, 2010 9:52 PM

You've definitely hit a home run with these now that you've banged them up...they looked great from a fabrication standpoint and I hoped you wouldn't get too enamored with them that you were going to leave them in pristine condition. Stick out tongue Sharp work all around and the damage looks just right IMHO to go with the tough towing duty this would've been subjected to by the Germans. Yes

  • Member since
    October 2007
  • From: N.H.
Posted by panzerguy on Sunday, January 24, 2010 11:22 PM

 Bill what a great build you've got going on just top notch! The time and effort is paying off big time. Well done on the fendersYes.

"Happiness is a belt fed weapon"

  • Member since
    January 2012
Posted by I make stuff on Monday, January 25, 2010 5:51 PM

Man-O-Man!  Nice comments from all sides on this one, that makes the effort worth it.  Adam, Ed, Bill, bufflehead, scratchmod, panzerguy, a rogue's gallery of talent!

Thanks for the posuitive feedback, this place is a great place to improve.  A reminder, Adam thoughtfully posted some great how-to solder links, like any new skill, it's a bit scary atr first, but with top notch resources like the step by steps Adam posted, it's do-able.  I encourage anyone who is thinking about trying this to pore over the links and dive in.

thanks again, guys!

Bill  

  • Member since
    April 2008
  • From: Ventura (at the beach) in California
Posted by *INDY on Monday, January 25, 2010 7:09 PM

Thanks for firing back with that Bill--I feel appreciated now!


"Well...you gunna pull them pistols, or just whistle Dixie?"

  • Member since
    January 2012
Posted by I make stuff on Monday, January 25, 2010 7:12 PM

Any time, Adam!

Uh, your cat seems peeved, though.

  • Member since
    December 2008
  • From: Las Vegas, Nevada
Posted by model maniac 96 on Monday, January 25, 2010 10:52 PM

LOL!!!!!! Nice build though! I really like the fenders and the engine!


      Thanks, Jim

"Veni, Vidi, Vici" Julius Caesar: I came, I saw, I conquered.
  • Member since
    April 2008
  • From: Ventura (at the beach) in California
Posted by *INDY on Monday, February 1, 2010 7:51 AM

Man ~ ! Is this a cool build! No update in an entire week, however.......not cool.   Come on Bill....you we're at the bench yesterday...anything happen? Anything good ? 

 Camera + Idea + Censored + Automobile = update    =   Stick out tongueBig SmileYesNoGeekedSurpriseBow Down...ect...ect


"Well...you gunna pull them pistols, or just whistle Dixie?"

  • Member since
    January 2012
Posted by I make stuff on Monday, February 1, 2010 1:25 PM

Hi Indy,


OK, you have shamed me into posting a progress report.  Nothing as glamorous as the fenders I hewed out of the very living rock....uh, wait, I mean that I folded out of sheet brass and bent a bit.

Against my nature, i bring you a words only update, no photos.  I took a few, mind you, but last night got away from me and I didn't get a chance, here we go  

This was a non "sexy" progress week. 

My former experience with black “magic” tracks has led me in a quest away from those freakishly difficult items which are really the only part of the hobby I do not like.  I read the tutorials, they made sense to me, and I followed them to the letter, twice.  Both times I had a disaster, separations, weird kinks in the track runs, too short, too long, cursing, sweating, it was not cool.  At all.  Then I did it again.  And it was nasty AGAIN. 


First I fled to model kastens, after seeing our own WBill use them with such success.  These were far better than the type whose name shall not be spoken, but were still super fragile.


Enter Fruils.  Pure, pot metal karmic perfection.  METAL!  Held together with METAL!!  I grabbed a set for my IS3, they are HUGE, heavy, appear to sag realistically, they are tough, it’s everything I ever dreamed of.  BTW, I only assembled the IS3s, I haven’t even started on that model yet, let alone weathered the tracks.


(To those kind souls who will chime in that I could get another whole kit for the price of Fruils, those who know me know I am a frugal shopper, I got  both a KV-1/and a KV-2 last week, delivered, for $40.00, I am a cheap boy.  But if I have to use magic tracks, I am out of this hobby, it is truly that bad for me.  It’s as simple as that.  I am not kidding)    


So naturally, when the rubber band tracks on this tractor appeared as featureless as, well, rubber bands, I did some homework and determined that this tractor has Vickers tank running gear.  Fruil makes Vickers/T26 tracks, so I grabbed some.


Let me start with the relative difference between an IS3 and this tractor thing.  Look at this thing in my hands in this thread.  It is TINY.  
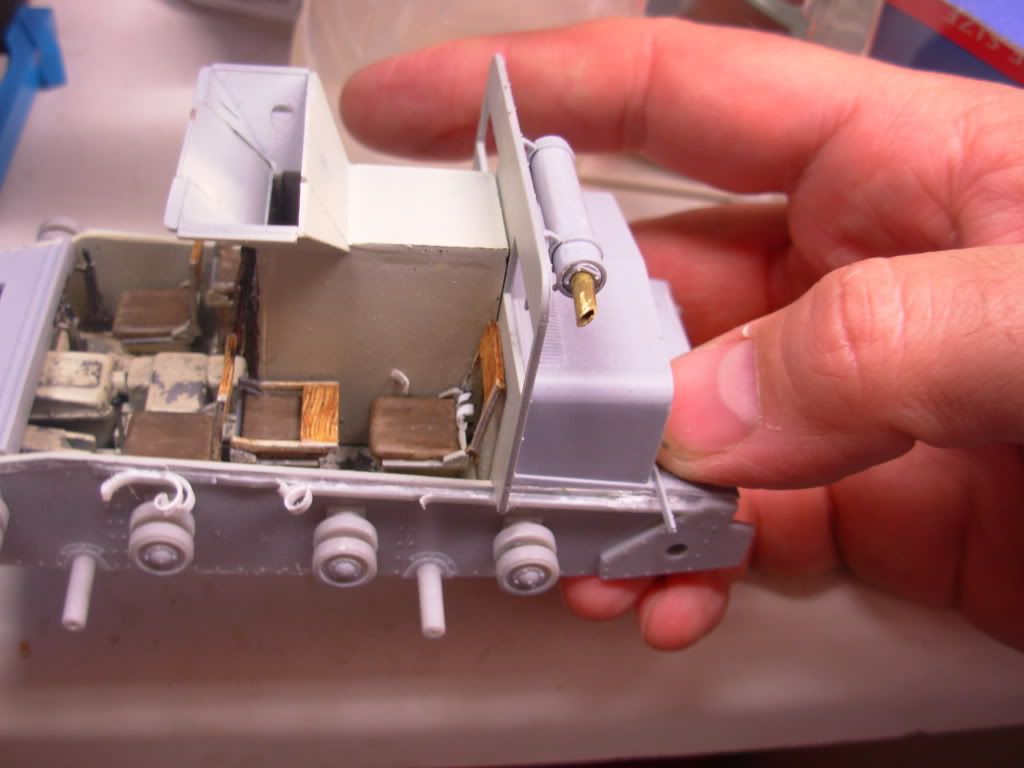
How did it not occur to me that the fruils would be TINY?  They replace the rubber band tracks, those would seem to indicate to any rational person that the tracks are small.


So I guess a direct effect of the tiny tracks is the fact that I had to DRILL OUT every single pin hole.  Not most, not a lot, but all.  For the IS3, I chased maybe 6 holes, and did so by simply punching through with a bit.  On these jeweler grade delicate tracks, I had to drill the holes because if they weren’t drilled, the bit would rip the channel open and it would go into the discard pile.


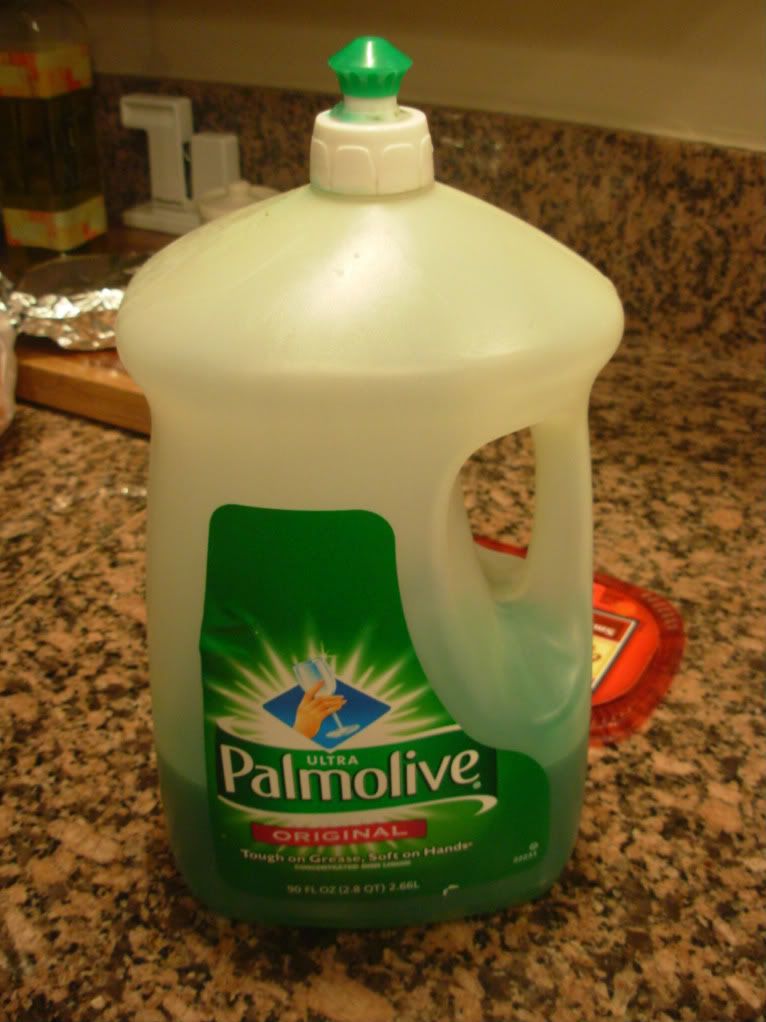
4 days of 1-3 hour sessions with my Optivisor and my thinnest drill bit, first one whole track run, then the next, I though it would never end, but it finally did Friday night.  Saturday morning, I started my patented “substitute .020 brass wire instead of the stainless wire because someone told me is worked better” routine.  It took forever, but, working between family obligations, I got two track runs done by Sunday evening.  Then I washed them down with some dish soap,

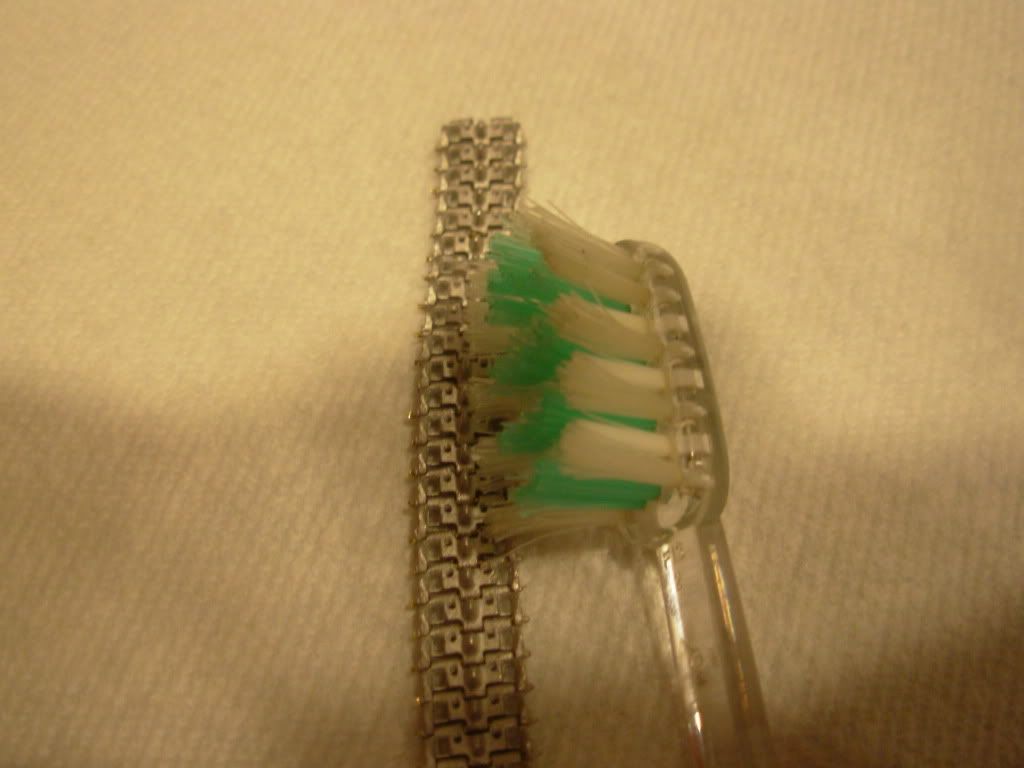
and scrubbed them with e toothbrush

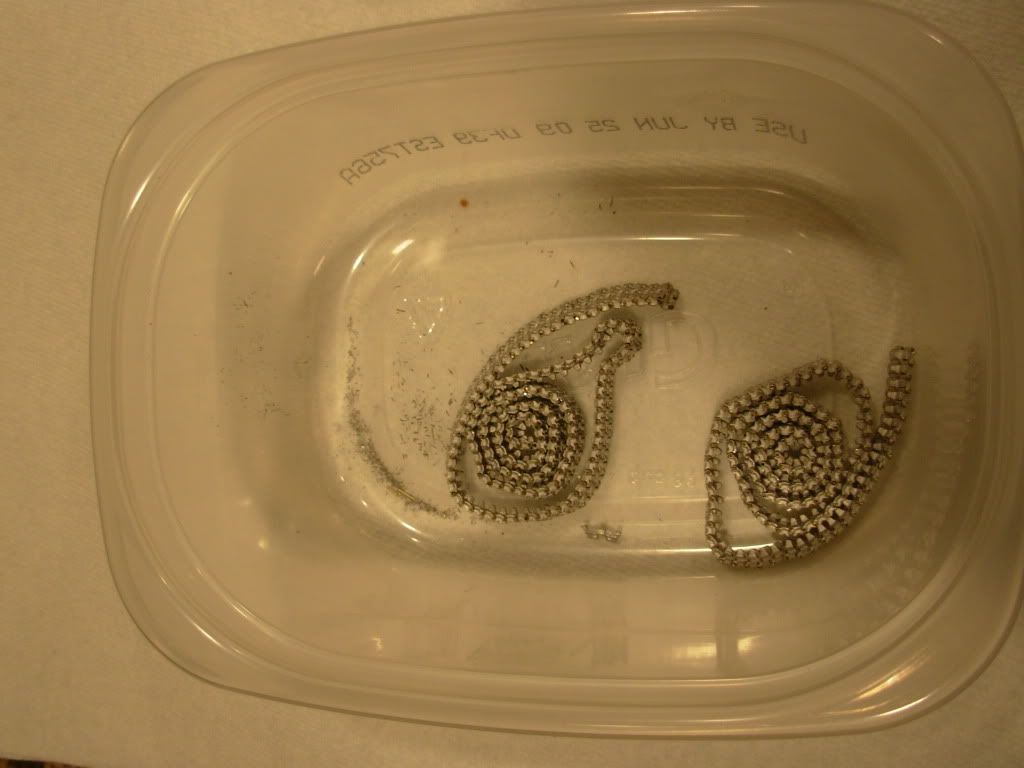
then I tossed them in a tub with some heated white vinegar, and let them sit for two hours. 

 I was going to Blacken it them, but by then it was 2300 on a school night, so I had to hit the bunk.


My plan is a single 10 minute or so application, followed by touch up with a brush to get the substance into any nooks and crannies that I miss with the first go around.  I understand that two applications approaches black, which I think will look too dark.


Thanks for checking on me, Indy.                    


  • Member since
    April 2008
  • From: Ventura (at the beach) in California
Posted by *INDY on Monday, February 1, 2010 11:47 PM

OK Buddy, as long as you're having fun  Sad

That's quite a story there Bill. Well writen.      I like Magic tracks.    There ,...I said it.       Truth is on those tiny tracked vehickys there's no easy way, besides the rubberband(heaven forbid!)

I think pictures might have been bettter than you think, but I'll take your word. Hope you get some good , solid benchtime...maybe even before the weekend!

"Well...you gunna pull them pistols, or just whistle Dixie?"

  • Member since
    January 2012
Posted by I make stuff on Tuesday, February 2, 2010 2:01 AM

Hi Adam!

Oh, Im having a blast, I love this hobby, just not the tracks part of it.  I tend to exaggerate difficulties, but I am most definately enjoying myself.  I love that Russian  figure, I sent one to Edmund about 6 mo ago.  Yours came out amazing!

I don't mind that you like magic tracks, some of my best friends like magic tracks.  I just can't get them to stay assembled long enough to get them on. 

I took some pictures, Indy, but I saw your post as a command performance, and I hadn't uploaded them yet.   I will go back and upload them and weave them into my story.  I will get some bench time this week, this one is getting close to paint.  I need to pick your brain about something, and a few hull details, and then I get to paint it!  Shooting for this weekend for paint, I hope.

Thanks, Adam.

Bill   

  • Member since
    January 2012
Posted by I make stuff on Saturday, February 6, 2010 4:46 PM

Hi guys,

Last night I spent about an hour or two re-doing the rear fender detail, I decided to solder on brass strip instead of that plastic detail. It was tough without the propoer equipment, but today I picked up some alligator clips, next time I will be ready.  Here are the new, improved, rear fenders


I also got the fruils assembled and blacken-it-ed, and here they are for a test fit:


More later!

Bill

  • Member since
    July 2004
  • From: Texas
Posted by wbill76 on Saturday, February 6, 2010 8:06 PM

Tracks look suitably blackened and the rework on the fenders is sharp as well Bill! Yes

  • Member since
    January 2012
Posted by I make stuff on Sunday, February 7, 2010 1:25 PM

Thanks, Bill, slow, but sure is the name of the game.

I decided that the styrene detail was insufficient, so I riped it off and re-did the fron fenders, and this had the added bonus of making funsional fender mounts.  My soldering is coming along, slowly.

On to the anti super bowl entertainment!


Now for some bolt/and/or rivet detail...more to come!

Bill

Van
  • Member since
    February 2010
  • From: London, UK
Posted by Van on Sunday, February 7, 2010 2:34 PM

Hi,

All those improvements make your model looks really good...Bow Down

I want to share some photos of the C7P tractor from the beginning of IIWW. Some are Polish and some German photos....


"So many models so little time"

  • Member since
    January 2009
  • From: Everett, WA
Posted by Schnobs on Sunday, February 7, 2010 2:39 PM

Hi Bill,

Your hard and dedication to push yourself to try new techniques is really showing here.  I am very proud of you!  Very cool indeed.This is going to look fantastic with Primer on it. Take lot's of pics before and after primer please!!

"There is a principle which is a bar against all information, which is proof against all arguments and which cannot fail to keep a man in everlasting ignorance. That principle is contempt prior to investigation." Herbert Spencer
  • Member since
    April 2008
  • From: Ventura (at the beach) in California
Posted by *INDY on Sunday, February 7, 2010 5:42 PM

~Van~ Beautiful collection of relevant photos---very nice to share those!

~Ed~ hi Ed ! I agree, he better, huh?

~Bill~ This little tractor of yours is becoming increadably impressive. As Schnobs says "Are you going to go watch other men exersize(I can't even spell it) or are you going to model!? Let's do this!

When I saw your fenders at this point I had to......It made me....

proud as the day my kitty got her 1st kill


"Well...you gunna pull them pistols, or just whistle Dixie?"

  • Member since
    January 2012
Posted by I make stuff on Tuesday, February 9, 2010 12:14 AM

Thanks for the wonderful pictures, VAN!  Those are more than I have found online in a couple months of searching, great detail shots there.

Edmund and Adam, my brothers in styrene, thanks so much for your support.  You guys are really inspirations and standouts, your consistent ability and results really inspire me.

Tonight, a Riddle:  What do you get when you cross this:

with an obscure early WW2 tractor lacking in detail and recently having recieved fenders, devoid of surface detail?

Oh, just THIS!!!

A bit of missing proportionaility, I chalk that up to being stupid and putting the critical framework on after bending and attaching the fenders, lesson learned!


A bit of under edge detail:


Then, since I can't simply call this construction done and prime this, I decided to use the new punch set to add some detail to the running gear, the top is "as is", the bottom is, maybe, improved?  Please let me know if you think this looks like it's worth the effort:


I punched some details, and I added a bit of brass rod as a spring clamp.

Well, not bad for a Monday update!

Thanks for looking, and comments always welcome!

Bill

  • Member since
    January 2009
  • From: Everett, WA
Posted by Schnobs on Tuesday, February 9, 2010 12:32 AM

Bill you are the cool guy on the block with a Punch and Die set! 

Most of it looks great but not to rain on your parade or anything I think I would go with a smaller rivet on the fender bracket at least in my opinion based on these photos. 

The running gear looks great and that size works well.

Keep it up we wanr to see primer!!!

"There is a principle which is a bar against all information, which is proof against all arguments and which cannot fail to keep a man in everlasting ignorance. That principle is contempt prior to investigation." Herbert Spencer
  • Member since
    May 2009
  • From: Poland
Posted by Pawel on Tuesday, February 9, 2010 2:57 AM

I'd opt for smaller rivets/bolts too. Do some calculations, how big would those be in 1:1? On the fenders I would expect bolts with heads no bigger than 17mm. That would make 0.5mm in scale.  By the way, for all those people who don't have that cool punch&die set, you can add rivet detail by stretching the sprue and then cutting slices off of it, and using those as rivet heads. You can even file the stretched sprue hexagonally and by slicing you get very realistic bolt heads. Keep up the good work & have a nice day

Pawel

All comments and critique welcomed. Thanks for your honest opinions!

www.vietnam.net.pl

  • Member since
    January 2012
Posted by I make stuff on Tuesday, February 9, 2010 1:10 PM

Thanks for the critical eye, Ed and Pawel, that's why I post the pictures here....well, OK, it's nicer when you get "Wow that's cool!", but honestly the eyes here help me be a better modeler.

This morning, I uncermoniously pried off the offending gigantor rivets, and will dig out a smaller punch tonight and try to do better.

Thanks, guys!

Bill   

  • Member since
    July 2004
  • From: Texas
Posted by wbill76 on Tuesday, February 9, 2010 2:16 PM

Bill,

Nothing to add to what's already been said except to offer the following suggestion. As a kind of size-reality check, compare the size of your bolts with the size of the rivets on the hull glacis plate. The bolts would likely be simillar size to that vs. what you've got now in terms of scale reference and should help bring things more in line. 

I think the work on the suspension is worth it. IMHO once you add it and paint it it will add some more depth to that area especially when you get to the wethering process. Yes 

  • Member since
    January 2012
Posted by I make stuff on Friday, February 12, 2010 12:42 AM

Thanks, Bill, I agree on the suspension, I did some more tweaking, sort of artsy for me, trying to put on realistic detail onto something I don't have a good picture of, but I think with paint on it it will catch washes and look fine.

On to the progress: The prior version of the fender rivest was done using the smallest of the large Waldron punch and die set.  I used Bill's suggested method of comparing the hull rivets to the punches to get an approximation.  I ended up using the secind smallest punch, it's roughly the size of a hat pin in diameter.

Before using the tiny die, I bought this, my now smallest hammer:

I used that teeny hamer to make new rivets for the fenders, and discovered something about halfway through.  It appears that if you let the punched out rivets accumulate, subsequent punches squash and distort the earlier punched out parts, which gives you varying sized rivets.

On with the new and hopefully improved front fender rivets:


And I also added some more detail to the running gear, this is what i came up with so far:


Comments welcome! THanks for the extra eyes on this,

Bill

  • Member since
    May 2005
  • From: Eugene, Oregon
Posted by hughes2682 on Friday, February 12, 2010 1:06 AM
Bill, That's the spirit! Don't settle for OK. I am seriously liking what you are doing with this beastie. Funny how the broken fender got you to where you are. What you've done has most certainly been exceptional! I've been following this one mostly from the sidelines. Now that I see you've been using a product produced a few miles south of me I felt the need to chime in. Keep up the fantastic work Cheers Dave

http://img.photobucket.com/albums/v317/Aaronw/Groupbuilds/ClassicAviationGB2010bomb.jpg

With enough thrust, pigs fly just fine.

  • Member since
    July 2004
  • From: Texas
Posted by wbill76 on Friday, February 12, 2010 9:50 AM

Rivets 2.0 look much better Bill. Have to agree with Dave, it's amazing how you've turned a problem into a great opportunity to scratch and enhance this little beastie. Wink Beer

  • Member since
    January 2009
  • From: Everett, WA
Posted by Schnobs on Friday, February 12, 2010 10:46 AM

Bill if your day job doesn't work out for you I believe you would have an excellent career as a hand Model.  If Bob Barker was still around I know he would hire you for Price Is Right!  It's all I can do to restrain myself form either guessing the Price of that little ball peen or rushing out and buying one!

I agree with my esteemed Colleauge Wbill 2.0 Rivits are an improvement.  I like the additional detail you applied to the bogeys!  Well done!


"There is a principle which is a bar against all information, which is proof against all arguments and which cannot fail to keep a man in everlasting ignorance. That principle is contempt prior to investigation." Herbert Spencer
  • Member since
    December 2008
  • From: Goffstown, NH
Posted by New Hampshire on Friday, February 12, 2010 7:29 PM

Citadelgrad87

  It appears that if you let the punched out rivets accumulate, subsequent punches squash and distort the earlier punched out parts, which gives you varying sized rivets

I won't tell ya how many of those deformed disks came out of mine (actually mine is from Micro Mark, but the same thing) before I realized what was going on.  I kept scratching my head thinking "why the H*LL are these things all messed up!?!?!?"  I actually thought I was doing something wrong.  Then it dawned on me...... Embarrassed

But anyways Bill, your build is looking wonderful so far!

Brian

  • Member since
    March 2003
  • From: El Dorado Hills, CA
Posted by IBuild148 on Friday, February 12, 2010 7:49 PM

Hi Bill,

Trying to catch up on all the aircraft/armor threads since January. Stumbled across yours and read all replies.

Very Interesting subject along with punch and die, fabricating, metal, soldering, Palmolive, fruils, ball peen hammers.......ROCK & ROLL and way FRIC_EN Cool!


IBuildOne48

Teach modeling to youth!

Scalefinishes.com

http://i712.photobucket.com/albums/ww122/randysmodels/NMF%20Group%20build%20II/Group%20Badge/NMFIIGBbadgesmall.jpg


  • Member since
    January 2012
Posted by I make stuff on Saturday, February 13, 2010 2:40 PM

Thanks, guys, Hughes, Edmund, Bill, Brian, and I build 48!

This one seems to be 2 steps forward, one back.  I have been trying to get this assembled and primed/painted.

But in putting what I thought were the final details, I found this:

These are some kind of clamp deal that holds the bogie assemblies in place:


Sorry for the blurry pics, anyway, there are 4 bogies, but TWO clamps:

Not broken off, just never formed....

Never fear, I had an idea:


Punch some appropriate sized holes in styrene, double it up and use the punch as an alignment mandrel, a little dremel, a little hand sanding, a little railroad bolt, and here's the planned replacement, on the left, compared to the finely detailed original:


Well, assuming this meets aproval after seeing it in magnified glory, that's what I'll be doing today...

Thanks for looking

Bill

  • Member since
    January 2012
Posted by I make stuff on Saturday, February 13, 2010 4:24 PM

Bumping my own thread, but I went ahead and increased the thickness by another .015, and made up 4.  Here they are


And here is one that is placed where they will end up


I guess the detail on this one is not what I hoped, and the scratch, while interesting and challenging, has sort of become a necessity to just get it assembled.  I hole to get this into paint this week, although this weekend is sort of busy.

Bill

  • Member since
    January 2012
Posted by I make stuff on Sunday, February 14, 2010 11:37 AM

A few small steps toward paint, yesterday I noticed that the rivet "detail" on the front plates was lost to the sanding stick, never fear, I added a couple rows to the mix, I like this new ability to repace or add what is missing or lost:


Nearly ready for paint, I showed my wife today and she said, "That's not a tank, is it a car, or what?"

I was so proud of her!

  • Member since
    August 2008
  • From: S.W. Missouri
Posted by Pvt Mutt on Sunday, February 14, 2010 1:09 PM

Big Smile Modern Women will surprise you these days. You're sure putting the slick on this build man.Yes

Tony LeeSmile

Shoot Low Boys They're Ridin Ponys

  • Member since
    July 2004
  • From: Texas
Posted by wbill76 on Sunday, February 14, 2010 2:41 PM

You're really going to town with that punch and die set Bill! Nice work on the replacement rivet work on the front. Yes The fix on the suspension for the missing parts looks like it will do the trick as well, you never know with some of these Eastern European kits when parts will just not be there at all and you've cleard that hurdle just fine IMHO.

  • Member since
    April 2008
  • From: Ventura (at the beach) in California
Posted by *INDY on Sunday, February 14, 2010 5:07 PM

I'da said, " Honey you're right, not a tank, a vintage S.U.V. ! "

Rivet Me this.................Whats got tracks like a duck, tows guns like a duck, but aint a duck?

Rubber Duck

"Well...you gunna pull them pistols, or just whistle Dixie?"

  • Member since
    January 2009
  • From: Everett, WA
Posted by Schnobs on Monday, February 15, 2010 1:34 PM

Danger! Danger! Will Robinson!!

Wow Bill this is really starting to take shape and all your hard work and prep is payng off.  Do not and I repeat do not put any rivets on your dog!

You have really stretched yourself on this one with your Brass Fenders and rivets.  Two great skill sets that will serve you well!

I apologize for not posting sooner it has been pretty busy on the Schnabel Homestead!

Well done!!!  YesYesYesYesYesYesYesYesYesYes


"There is a principle which is a bar against all information, which is proof against all arguments and which cannot fail to keep a man in everlasting ignorance. That principle is contempt prior to investigation." Herbert Spencer
  • Member since
    January 2012
Posted by I make stuff on Monday, February 15, 2010 1:40 PM

Thanks, Tony, Bill, Adam. and Ed!

You wouldn't recognize her right now.  I tried to snap a photo but needed to get in to get some work done, because later, I plan to do a final review and prime it.

Ed, I will call you later to discuss some paint issues.

Thanks, guys, next stop, monochrome city hall!  

Bill

  • Member since
    February 2009
  • From: mass,USA
Posted by scratchmod on Monday, February 15, 2010 3:26 PM

I love all the scratch stuff your adding, nothing beats adding new rivets to a model. Almost ready for paint Bill, she looks awesome. You know what color pops into my head when I see that SUV, yep RUST Big Smile

Looks fantastic Bill, keep up the great work, I'll be watching and waiting to see the paint going on.


Rob

www.scratchmod.com

  • Member since
    January 2012
Posted by I make stuff on Tuesday, February 16, 2010 10:40 PM

Well, the construction phase of this little guy is coming to an end.  As much fun and growing as I did, despite it being a pretty crappy kit, it was my first attempt at scratchbuilding using brass for fenders, my first soldering, pin punch, all that jazz.  Without Indy/Adam pushing me like Bull Meecham in he Great Santini, this thing would be on the shelf already with chunky style manwich fenders made of plastic.

Despite the time spent and the challenges, I am really glad I chose this one to do, and glad I took so much time to try to get it right, or at least better than it originally was.  I'm a bit sad that now I need to cover it all up, I love painting and weathering, but I hate to cover up all this brass and styrene rivets.

Anyhow, here's my last review before priming, I don't mind putting off priming a while (although it might kill Ed) if I can fix anything anyone is nice enough to point out.

On to the walk around, sorry dial up guys, you are going to hate this:


Finally, I almost forgot the fender mounted headlights, which turned out to be solid styrene "bullets," so I busted out the ELF replacement headlights, sized small on the large set, courtesy of Ed's recommendation, and voila, nicer lights.


Next time anyone sees her, she will be monotone primer grey, then I'll keep it under wraps until I get the paint done.

THanks for looking, please sound off if you see any problems that need to be dealt with before paint.

Bill 


  • Member since
    May 2005
  • From: Eugene, Oregon
Posted by hughes2682 on Wednesday, February 17, 2010 3:35 AM
Bill, Now this little beastie has got character. You've done some amazing scratch building you've done! Cheers Dave

http://img.photobucket.com/albums/v317/Aaronw/Groupbuilds/ClassicAviationGB2010bomb.jpg

With enough thrust, pigs fly just fine.

  • Member since
    July 2004
  • From: Texas
Posted by wbill76 on Wednesday, February 17, 2010 1:21 PM

Bill,

Only thing I can see is some possible small gaps (may be a trick of the lighting) at the rear both where the cab top meets the rear vertical plate and also around the engine air intake grating. If there are gaps there, this is your best chance to putty and sand them prior to throwing paint on this bad boy! I hear you about covering up all that brass and styrene scratch work but that's what WIP photos are for so you can go back and look at it after it's all done and see it in the pristine stage anytime you want! Wink Beer

  • Member since
    January 2012
Posted by I make stuff on Wednesday, February 17, 2010 9:23 PM

Thanks, Bill, and as much as I'd like to blame it on the angle, there is a gap there that no amount of clamping could address.

My plan is to mask off a narrow strip, remove the rivets, putty and sand, and replce the rivets.

Wish me luck...

Bill

  • Member since
    April 2008
  • From: Ventura (at the beach) in California
Posted by *INDY on Wednesday, February 17, 2010 9:36 PM

OK...Good Luck!

St. Patty's Clover Headalso ......VMail sent    Phone Shocker

"Well...you gunna pull them pistols, or just whistle Dixie?"

  • Member since
    July 2004
  • From: Texas
Posted by wbill76 on Wednesday, February 17, 2010 10:12 PM

Good luck Bill! I have faith in you! Now that you've proven you can do rivets standing on your head, you won't have to worry about trying to preserve what's there through the sanding and puttying exercise. Yes

  • Member since
    April 2005
  • From: Piscataway, NJ!
Posted by wing_nut on Thursday, February 18, 2010 7:40 AM

OK Bill,, Just plain WOW!

Marc  

  • Member since
    January 2012
Posted by I make stuff on Saturday, February 20, 2010 11:37 PM

What all of you..well, at least Ed, have been waiting for, the first application of any color to his beast:

I put a bit of a witness coat on tonight so I can be sure it's safe to replace the rivets:


As soon as I convince myself it's smooth, I will replace the rivets and shoot a primer coat.

Bill

  • Member since
    January 2009
  • From: Everett, WA
Posted by Schnobs on Saturday, February 20, 2010 11:56 PM

This is what I am talking about!  This will be a treat to watch you paint and weather!

Great job Bill!

"There is a principle which is a bar against all information, which is proof against all arguments and which cannot fail to keep a man in everlasting ignorance. That principle is contempt prior to investigation." Herbert Spencer
  • Member since
    January 2012
Posted by I make stuff on Sunday, February 21, 2010 1:25 AM

Thanks, Wingnut!  Ed, my first German Grey vehicle, a captured Polish whatzit?  WE shall see.

I did some riveting tonight, too:


I tried what we talked about, Ed, let's see if anyone spots it.

Bill

  • Member since
    April 2008
  • From: Ventura (at the beach) in California
Posted by *INDY on Sunday, February 21, 2010 1:55 AM

Missing Rivit YesCool

~~Your baby looks good to me--->shoot it

"Well...you gunna pull them pistols, or just whistle Dixie?"

  • Member since
    May 2005
  • From: Eugene, Oregon
Posted by hughes2682 on Sunday, February 21, 2010 1:59 AM

INDY beat me to the punch. But.....I'm not sure that is it since you stated having done something you talked about.  I can't tell what it is but this wee beastie is very cool.

Cheers

Dave

http://img.photobucket.com/albums/v317/Aaronw/Groupbuilds/ClassicAviationGB2010bomb.jpg

With enough thrust, pigs fly just fine.

  • Member since
    January 2012
Posted by I make stuff on Sunday, February 21, 2010 2:48 AM

Wow, Indy and Dave, you guys are sharp, especially at 0043 am.

So I shot some Tamiya fine primer all over it, and here is the monotone version of this little guy, hopefully I can shoot some paint tomorrow, I need to get some rack time and then look at these pics and make sure the surface is smooth as a tank should be...

Those rivets we worked on tonight:

Some shots of the revised running gear

THat is all she wrote this Satruday night...

THanks for looking, guys,

Bill

  • Member since
    July 2004
  • From: Texas
Posted by wbill76 on Sunday, February 21, 2010 11:08 AM

Looks like a very productive Saturday's worth of effort Bill! Gaps are gone and rivits are looking good, now it's Sunday so get it painted already! Big Smile

  • Member since
    January 2012
Posted by I make stuff on Sunday, February 28, 2010 2:48 PM

I FINALLY got to start painting,

I just have one shot:  gunmetal undercoat, cav brown misting, in preparation for a hairspray technique which I have picked up from our own Ed.  I know he did not pioneer this technique, but I have learned the mechanics from him, and his builds speak for themselves.


For those unfamiliar, this coat will be totally co0vered with a base coat, then chipped back using a water solouble harispray to reveal small patches of this color.


BACK TO THE GARAGE!!!!!!

  • Member since
    January 2012
Posted by I make stuff on Sunday, February 28, 2010 4:09 PM

I have started with a German Grey undercoat, then a single shade lighter for highlights, and a shade darker for shadows.

Started over 3 very light coats of this stuff, which I cannot even pronounce:


Then on to the paint, again, one lighter shade, one lighter, one darker, using these as mixers:


I also went light on top of the bogies, agasint the darker underside shadow, and darker under the bogie, as well:


BACK TO THE PAINTCAVE!!!!!!!

  • Member since
    January 2009
  • From: Everett, WA
Posted by Schnobs on Sunday, February 28, 2010 4:37 PM

LOL!  My wife says it is pronounced Tray Samay.  I call it smelly prissy stuff!

Sounds like you are having fun Bill which is what this all about. I am glad you had some time to enjoy the hobby today you deserve it!

Paint job is looking great.  The Shep Paine stop sign is alive and well!!


"There is a principle which is a bar against all information, which is proof against all arguments and which cannot fail to keep a man in everlasting ignorance. That principle is contempt prior to investigation." Herbert Spencer
  • Member since
    January 2012
Posted by I make stuff on Sunday, February 28, 2010 4:40 PM

I think I am ready to chip, this looks like a finished base coat, I hope.


TO get back into blog mode, here's what I did:  I sprayed 3 thin, non covering coats of the german grey, and got a nice monochrome uniform coverage.  THen I mixed quite a bit of tamiya flesh to the grey, thinned it, and envisioned a stop sign. THe majority of light falling on this vehicle, or a stop sign, hits the top, making it look brightest, even if its painted a single color.  So I took the top edges and highlighted them lightly.

THen I added some black to the straight grey, and started lowlighting, making it darker where shadows would be, I lightened the senters of some panels, and darkened the edges, others, I darkened the center of others and lightened the edges.

THen I went back and lightened it furhter, lightened, but less this time, and darkened again, then sprayed more shadows, but only areas that would really be dark.

I know it looks kind of cartoonish, but the weathering will tone this down.

SO that's were we are now, I am going to do some very light chipping.

Bill

  • Member since
    January 2008
  • From: Bournemouth UK
Posted by Bodge on Sunday, February 28, 2010 5:08 PM

Wow, ive missed this one. thats a real nice job your doing on a crazy lookin vehicle. Love it.Indifferent

  • Member since
    May 2005
  • From: Eugene, Oregon
Posted by hughes2682 on Sunday, February 28, 2010 8:15 PM

Bill,

This is some outstanding work sir!Bow Down

Cheers

Dave

http://img.photobucket.com/albums/v317/Aaronw/Groupbuilds/ClassicAviationGB2010bomb.jpg

With enough thrust, pigs fly just fine.

  • Member since
    January 2012
Posted by I make stuff on Sunday, February 28, 2010 9:18 PM

Thanks, Ed, Bodge, and MR Hughes!

Some more stuff today, first, I did some minor chipping, wear.  Really light.  THen I sprayed the insignia, I hate decals


It's suposed to be "Klara", but I don't know any Klara

AND I hate decals..so I did this:

FIrst, a sample font from the computer


Then I got out a brush, some Vallejo off white, and I tried to hand paint it:


Can I get a reality check?  How does the name look, please, honesty is the best policy.

Bill

  • Member since
    January 2009
  • From: Everett, WA
Posted by Schnobs on Sunday, February 28, 2010 9:29 PM

Hey Bill,

First of all you this is your best vehicle yet and you have accomplished quite a bit of firsts with this one.  Well done Sir. now about the name.  I know you already have a Pink Mystery machine Panther out there so in this case I think the name is a little over the top and will take away from the fantastic realistic details you have accomplished here.  I also think it would make a great sighting point for a crew served weapon which is also not a very good ideal.  You did a great job free handing the script but I think you would best be served using that area for some oil dot fading and tonal variations of the paint.

Again Bill that is just IMHO and this is your art do what makes you happy!  it was nice to har that in your voice today when we talked on the phone!

Let's Do This!!


"There is a principle which is a bar against all information, which is proof against all arguments and which cannot fail to keep a man in everlasting ignorance. That principle is contempt prior to investigation." Herbert Spencer
  • Member since
    July 2006
  • From: San Francisco Bay Area
Posted by bufflehead on Sunday, February 28, 2010 10:49 PM

Hey CG, this is coming along great!  Nice paint job and markings!  The "sophia" lettering looks good, but maybe a little large?  However, your weathering and chipping might do the trick and make it stand out less.  Keep up the great work!

Ernest

Last Armor Build - 1/35 Dragon M-26A1, 1/35 Emhar Mk.IV Female


Last Aircraft Builds - Hobby Boss 1/72 F4F Wildcat & FW-190A8


  • Member since
    January 2012
Posted by I make stuff on Monday, March 1, 2010 12:23 AM

I believe you guys are correct.  I went back and painted over the name, those Vallejo paints are so thin, it's gone.

I also put a dark umber oil wash on the tracks to give them some more brown color.

Tomorrow, drybrushing and oil dot fading.

Then, some earth type stuff for the running gear.

Thanks, guys.

Bill

  • Member since
    July 2004
  • From: Texas
Posted by wbill76 on Monday, March 1, 2010 1:52 PM

I personally liked the name, thought it gave the whole thing a "human" touch. These were artillery towing tractors after all so would generally have been used behind the lines vs. say a front-line tank or similar vehicle. Anyhow, it's gone now so I guess it's a moot point!

Looking forward to where you're taking this one Bill! Beer

  • Member since
    May 2005
  • From: Eugene, Oregon
Posted by hughes2682 on Tuesday, March 2, 2010 10:07 AM

Bill,

I am with Bill on this one. Nonetheless, Sophia or not, this is coming along wonderfully.  Thank you for posting this enjoyable build. Yes

Cheers

Dave

http://img.photobucket.com/albums/v317/Aaronw/Groupbuilds/ClassicAviationGB2010bomb.jpg

With enough thrust, pigs fly just fine.

  • Member since
    January 2012
Posted by I make stuff on Tuesday, March 2, 2010 5:26 PM

Thanks so much, Dave and Bill, I appreciate it.  I really liked the idea of “Sophia” more than my execution, I may go back with a watercolor pencil and try again, as suggested by Adam/Indy.  The script just got a little thick for scale.


Anyway, I went back and tried to do some additional chipping with the assistance of alcohol, which is much hotter than the tap water I sued to chip the interior MM Acryl paints, but I painted the hull with Tamiya. And we were NOT amused with the outcome.  The alcohol dramatically changed the character of the paint, making is a semi gloss and darkening the grey, then, when it did bite, it just wiped off everything all the way down to the light gray shiny plastic, so I am not yet a chipmaster.


I was able to go back and re spray the most heavily damaged areas, and I will then go back again and, using both a graphite pencil/mig’s gunmetal powder, and traditional painted chips, try to distress it somewhat.


I also put some hurt on the kit’s prominent muffler assembly.  I started off just wanting to put on an orange Vallejo undercoat, but while it was still wet, I dusted on some Vallejo pigment, my first try, it’s called red oxide, and was far too red.  So I added some Mig strandard rust wash, then some Mig old and new rust pigments, then, finally, some Mig track brown to take away some of the brightness.


My first real effort at a rusty muffler, how did I do?


BTW, these are pictures taken with a new phone, not too bad in depicting the correct colr as percieved by my eyes.

Thanks for looking,

Bill 

  • Member since
    April 2008
  • From: Ventura (at the beach) in California
Posted by *INDY on Tuesday, March 2, 2010 9:50 PM

Wayne....You may decide to "rethink" a great many things........

Bill~ That's look'in smoking cool !This is shaping right up.``That exhaust looks darn real. Now--Are you going to show them the magic bullet for the name? Or just bring it in time?

"Well...you gunna pull them pistols, or just whistle Dixie?"

  • Member since
    January 2012
Posted by I make stuff on Tuesday, March 2, 2010 11:18 PM

Wayne, I very much appreciate your kind words.

Adam, All good things to those who wait

Go to fullsize image


Tonight, I took some mixed by eye light Vallejo german grey to apply some scratches and chipping, and went back with some german camo brown to represent the bare oxidizing metal on the largest of those scratches.  I intentioanlly understated this, it's too easy to get a cartoon result.  I quite while I am ahead. 

Then I applied an overall filter wash of Mig for panzer grey, it's basically an electric blue wash, to tone down the shading I intentionally over emphasized so it would survive the steps to come.

Here's a baby walk around.


And a close up of that styrene and wire detail I added to the rather plain bogies


Finally, I have been playing with the tracks, to review they are Fruils treated with blacken it, they turned out a light tan, so I first hit them with a heavy raw umber wash, which gave me a better base color.  Then I added mig track brown and old rust, mostly the former, and some thinner to hold it in place, not totally happy with it yet but its better than it was.


And a shot of them next to the hull for contrast:


But i will be honest, this is my favorite shot of the model so far:


That's it for now, next stop, dot filtering, thanks for looking and weiging in, guys.

Bill


  • Member since
    January 2012
Posted by I make stuff on Wednesday, March 3, 2010 11:11 PM

Tonight, I ran some dot filtering, trying to use light colors, Mig buff, flesh, light mud, and faded grey, on the portions that are exposed, and using darker colors, dark rust, dark mud, shadow brown, wash brown, etc. in the areas where shadows need to be potrayed.

Pretty subtle so far, I also started a pinwash.

I also unveiled the transmission area


I was really starting to roll, when I launched an engine handle during the washes of the engine deck, and had to replace it with this, not a huge deal, but I am pretty angry that I conquered all the shrotcomings of the kit, only to now have an unmatching handle.


Should I pull them all off and make 4 that match out of wire?

Thanks for looking!

Bill

  • Member since
    April 2005
  • From: Piscataway, NJ!
Posted by wing_nut on Thursday, March 4, 2010 6:39 AM

i really like they way this has taken shape.  It looks very nice.

Marc  

  • Member since
    July 2004
  • From: Texas
Posted by wbill76 on Thursday, March 4, 2010 2:00 PM

Making good progress! IMHO you should replace the other handles only if you won't be able to sleep at night knowing that 1 doesn't match the rest...after you paint it I'm sure no one who doesn't know won't notice. Wink

  • Member since
    January 2012
Posted by I make stuff on Saturday, March 6, 2010 5:21 PM

Thanks for checking in, Bill.  I will work on the handles, I have not been sleeping this week...

I got the headlight lenses mounted and have started making some dusty washes with Vallejo green ochre, which I saw used to spectacular results on another board.  Right now it only has a light wash, I will increase the intensity on the lower areas and drive train.


THanks for looking, PM to Ed, call me please. MY phone died again and I lost my contacts until Monday....

\Bill

  • Member since
    June 2009
Posted by Guney on Saturday, March 6, 2010 6:14 PM

Really good work...:)

  • Member since
    January 2012
Posted by I make stuff on Saturday, March 6, 2010 9:27 PM

Well, it's been a frustrating day, but I listened to the advice of my great frind Edmund, stepped away, then methodically searched the bench for the left rear idler wheel, and then I gave up, then I looked in one last place, a bag of alligator clips for my soldering, and there is was.

I am entering this in a small local contest, and I have never used Fruils before.  Please check my tension:

Also, if anything jumps out at anybody, I have a couple hours to fix it, please sound off!

THanks for looking,

Billy boy.


  • Member since
    January 2009
  • From: Everett, WA
Posted by Schnobs on Saturday, March 6, 2010 9:32 PM

 Bravo! Bill!

This is beautiful!!

I am so glad you found the idler.  Nice work Bill by far your best and the Sherman was fanstastic but this is better! 


"There is a principle which is a bar against all information, which is proof against all arguments and which cannot fail to keep a man in everlasting ignorance. That principle is contempt prior to investigation." Herbert Spencer
  • Member since
    July 2003
  • From: On my kitchen counter top somewhere in North Carolina.
Posted by disastermaster on Saturday, March 6, 2010 11:38 PM

Citadelgrad87


I am entering this in a small local contest, and I have never used Fruils before.  Please check my tension:

Also, if anything jumps out at anybody, I have a couple hours to fix it, please sound off!

THanks for looking,

Billy boy.

Hmm Maybe an extra link or two on each side to enhance the track sag?

Sherman-Jumbo-1945

" I was so much older then I'm younger than that now "


  • Member since
    January 2012
Posted by I make stuff on Saturday, March 6, 2010 11:43 PM

Well, thank you Ed.  You are a powerful and positive influence in my pursuit of excellence, and not just in modeling.  This would not be half the build if I didn't know and rely on you.

ANd, of course, Adam, with his gentle shove off the "SUre, solder it, you can do it!" right off the cliff!  Man, I'm glad I didn't look down before I jumped, but I can tell you I have NO FEAR of pe or soldering at all now.

THis was a kit of many firsts...first non DML kit since my return to this hobby.  FIrst large scale scratchbuilding, first sodering, first German Grey, first use of Vallejo to weather, first use of Fruils...

IF I sound melancholy, gents, it's becasue build #6 is now in the history books.  Tomorrow bright and early, I'm taking it to Pasadena and entering it in a small local show.  Thanks to all, and I mean ALL, who joined me on this journey.  I would do a roll call, but then I'd leave someone out, and I want to include everyone who checked in and watched this wierd thing take shape.  I kind of like it...

Here's the walk around.  I have about 12 hours until the contest, so if you see anything fixable, sing out!


I added some soot to the end of the muffler, Mig's black pigment


And I was pretty happy with this:  two mirrors that I plan to break off before the show, but I punched out discs of aluminum tape and stuck them on for glass, looks OK to me:


And the top, the shading is still pretty apparent, maybe I overdid it?


And for scale, I figure you are all probably saying "I wonder what it looks like next to an obscure RUssian armored car?"  Well, here you go:


Thanks, guys, I'm taking the day off tomorrow--to go to the show, I will report back no matter what!

Bil

  • Member since
    January 2012
Posted by I make stuff on Sunday, March 7, 2010 12:37 AM

disastermaster

 Citadelgrad87:


I am entering this in a small local contest, and I have never used Fruils before.  Please check my tension:

Also, if anything jumps out at anybody, I have a couple hours to fix it, please sound off!

THanks for looking,

Billy boy.


http://smileys.smileycentral.com/cat/4/4_6_2v.gif Maybe an extra link or two on each side to enhance the track sag?

Hi DIsasterMaster.  THat was my first instinct, I actually tried more links, but these are so light, they kind of honked up and didn't sag, they sort of floated and bunched.  WHen I pick it up, they actually hang about 1/4 inch below the bogies, they are far from tight.  Maybe I will try one more link?

I have a set for my ISU152 that weight about an ounce a link those better sag.

Thanks for checking in, I admire yuo work a LOT.

Bill

  • Member since
    July 2003
  • From: On my kitchen counter top somewhere in North Carolina.
Posted by disastermaster on Sunday, March 7, 2010 1:37 AM

 That's true, those tracks ARE pretty dinky. It's a bit hard to realize the lack of weight involved there. I have a quick fix if these are to be static display only.

ROTFLThere's more than one way to scan a cat.http://img.photobucket.com/albums/v208/Psycho_Wolf/Funny%20Stuff/catscan.png

  On the very inside top of the rear idler - a small dollop of gel superglue to hold the track in place.                                    

  Now, roll the front sprocket backwards to compress the track until the sag is what you want...... 

  Next, a very small drop of (I use laquer thinner) fast drying liquid glue to the axle attachment point (hold it a few seconds) of the front sprocket; if the rear idler is movable you will have to do the same thing first with that also.

Using a small amount of liquid glue in a capillaried manner shouldn't hurt the paint at all. If it does, that's what dirt pigments are for.

 Hope this explanation was understandable.

I've been following/watching your progress and you are doing a wonderful job here. Looks like you're going to be another diehard modeler. The contest should go well for you; make sure to document your work.

Good luck.

Thanks for being a fan.... I'll have another project up in the near future.

http://i20.photobucket.com/albums/b232/gluetank/Decorated%20images/th_T1-4-copy.jpg


Sherman-Jumbo-1945

" I was so much older then I'm younger than that now "


  • Member since
    July 2004
  • From: Texas
Posted by wbill76 on Sunday, March 7, 2010 12:13 PM

Looks mighty nice from here Bill, best of luck at the local show! Beer

  • Member since
    May 2005
  • From: Eugene, Oregon
Posted by hughes2682 on Sunday, March 7, 2010 12:36 PM

Bill,

Outstanding work sir!YesYesYes  Best of luck at the show!

Cheers

Dave

http://img.photobucket.com/albums/v317/Aaronw/Groupbuilds/ClassicAviationGB2010bomb.jpg

With enough thrust, pigs fly just fine.

  • Member since
    April 2008
  • From: Ventura (at the beach) in California
Posted by *INDY on Sunday, March 7, 2010 2:44 PM

CaliBill~  I love your work on the little Polish tractor. Your efforts to reach farther and grow your skills should inspire darn near everyone to keep moving! Well done one this project-my fingers are crossed for you at theshow today Mate.  Best'a luck---but in any case--you're a success!

"Well...you gunna pull them pistols, or just whistle Dixie?"

  • Member since
    January 2012
Posted by I make stuff on Sunday, March 7, 2010 11:39 PM

OK, guys, thanks for the good wishes, but no joy today.  I took my Sherman, that BA20, The Klipboard Karl figure, and this recently, well, pretty completed build.

The results, a not unexpected non place finish. I had pretty high hopes for the tractor, and got some very nice compliments on it.  It was in a competitve category of soft skins, displaced by a pretty magnificent Willys, a Kubel, and I think a staghound.  I didn't feel bad, but I would have rather got a 3d place than nothing!

Now for the good news, I triumphed in the raffle AGAIN.

This time, I scored a 1/48 Hasegawa FW190 wiht a car in the same kit, and a Hobby Boss Landwasser Schlepper!  Love the floaty tracky thing, I wonder why I keep winning wingy things, last time I won a 1/32 Hase P47.  I also bought a nice Monroe Perdue base of a waterwheel and a water course, perfect for displaying a single tank.

Thanks for the company on this one.

Bill


  • Member since
    April 2008
  • From: Ventura (at the beach) in California
Posted by *INDY on Monday, March 8, 2010 1:20 AM

Awsome Bill! You won buddy!! BIG time. Personally I'd rather have the free models than the ribbons & plaques  Surprise I'd say you did well---can't wait for the blog of the Land Wasershleppershiptracckdealy--that will be EPIC---and the {planes}--I got a few waiting to be needed for Dio's---{no shame}

"Well...you gunna pull them pistols, or just whistle Dixie?"

  • Member since
    January 2009
  • From: Everett, WA
Posted by Schnobs on Monday, March 8, 2010 10:11 AM

  No DId I hear No Joy! 

Let's see let me list off your first's on this one......

  • First German Grey Monotine build that you did a great job with to make visually inteesting which is not an easy thing to do,
  • First scratch built soldered brass fenders that turned out beautiful!
  • First scratch built rivets which turned out very believable
  • First picture window on an AFV!  Roll
  • Time spent with fellow modelers and vendors!  I would of loved to meet Mike Bishop!
  •  Oh and a free LSW that cost me $89.00 last year!!

I am done now and  I hope you feel properly chastized!

Great job on the build Bill I would be proud to have that unique ugly duckling in my shelf!


"There is a principle which is a bar against all information, which is proof against all arguments and which cannot fail to keep a man in everlasting ignorance. That principle is contempt prior to investigation." Herbert Spencer
  • Member since
    July 2004
  • From: Texas
Posted by wbill76 on Monday, March 8, 2010 1:17 PM

Sorry to hear you didn't bring home any hardware but the raffle score more than makes up for it Bill! Hearing that a Staghound was entered in a softskin category is a bit strange but then you never know about those things. Don't let it get you down, you did an awesome job with this one and conquered a lot of new ground with it. Yes Beer

  • Member since
    April 2005
  • From: Piscataway, NJ!
Posted by wing_nut on Monday, March 8, 2010 6:57 PM

yes the hardware would have been the gravy but that is a bad..s piece of meat there.  That is very cool looking and very well done.

Marc  

  • Member since
    January 2012
Posted by I make stuff on Sunday, April 18, 2010 4:28 PM

Thanks, Edmund, WBill, and WIngnut!  I didn't get discouraged, but I did get busy with both work and a total overhaul of my workspace, I am transitioning from a stand up bench to a sit down corner unit with a lot more space to scread out and occupy. Still not complete, but yetsterday I decided to add some more Vallejo washes to try to push this one across the finish line.  I was really rushed to get it done for that show, and then I left it in a box, but nw I like what i have done:

THanks for joining me for that strange ride, and all the nice comments, I appreciate every word.

Bill


  • Member since
    December 2008
  • From: Goffstown, NH
Posted by New Hampshire on Sunday, April 18, 2010 6:44 PM

She came out wonerful Bill!  You put a lot of effort into this one and it sure does show!

Brian

JOIN OUR COMMUNITY!

Our community is FREE to join. To participate you must either login or register for an account.

SEARCH FORUMS
FREE NEWSLETTER
By signing up you may also receive reader surveys and occasional special offers. We do not sell, rent or trade our email lists. View our Privacy Policy.