SEARCH FINESCALE.COM

Enter keywords or a search phrase below:

#6 Polish Artillery Tractor C7P-WIP 4/18--More Weathering Pics Page 12

43331 views
170 replies
1 rating 2 rating 3 rating 4 rating 5 rating
  • Member since
    April 2008
  • From: Ventura (at the beach) in California
Posted by *INDY on Friday, December 18, 2009 1:32 AM

~OK<OK I'm here ^&^ I'm ROFLing! Stop that !

~Really Bill, could you please find somthing more unusual to model? Please. LOL Very facinating my friend. ^&^ Fantasic build-work going on here. sorry I missed the start..It's down to not being able to deal with the new Forum this last week*(I'm liking it better by now, especially since my thread started functioning again and I could add some new post!!) but enough aout me(Man! These self-absorbed, know-it-all-artist types!!)   Looking good Buddy...I'll be back to see more.....                    Indy Out

"Well...you gunna pull them pistols, or just whistle Dixie?"

  • Member since
    April 2005
  • From: Piscataway, NJ!
Posted by wing_nut on Friday, December 18, 2009 5:04 AM

OMG...someone is building one of these AGAINWhistling

Looks good (now that I found this threadWink

Marc  

  • Member since
    July 2004
  • From: Texas
Posted by wbill76 on Friday, December 18, 2009 9:36 AM

Looking good Bill! Have to agree with Edmund about the hand model question...way too "clean" to be a real modeler's hands! Big Smile

  • Member since
    January 2012
Posted by I make stuff on Sunday, January 3, 2010 7:31 PM

Thanks,  Bill, Wingnut, and Indy!  Sorry about the soft hands, the last couple months have been at my desk, not my workbench.

Today, I tried my HANDS at hairspray chipping.  I took some Mr Surfacer 1000 and primed the interior several weeks ago, then I took some MMgunmetal and sprayed the interior surfaces, and highlighted some transmission structures with aluminum, and some high wear areas drybrushed with steel.  Then I coated it with some hairspray, but it was late, so I let it sit.  Out of caution, I recoated it with hairspray today, and discovered that more is not always better, I got some cracking on the areas where there was too much hairspray.

Anyway, this is a captured vehicle, so I figured the Germans would have sprayed the interior as well as the exterior, I chose MM Panzer buff interior.  I let it sit for 1 hour, and went at it with various tools, a stiff brush, my favortie was a pointy file, I used it to make random scratches and to start teh chipping for the brush to attack the paint.

It "got away" from me in a couple places, but all in all I'm pretty happy and think I can refine the trechnique, not bad for a first attempt. 

On to the pictures, please let me know what you think!


And finally, an idea of how it will look with the roof on:


Sorry about the slow updates, it's tough to get to the bench, and even harder to get better with such little practice.

Thanks for looking and weighing in,

Bill 

  • Member since
    January 2012
Posted by I make stuff on Monday, January 4, 2010 11:25 PM

Well, two sessions in two days, that's a personal best for the years, so far.

Tonight, i did a Mig filter for white, followed by a filter for german gray, followed by a pinwash using Mig dark wash, followed by some detail painting, mainly the various control sticks and shifters, and the leather seat cushions.  I plan to drybrush the seats with some darker and lighter tones to depict wear.

Here are the shots, it really seemed to tone down the chipping, does it look too grungy?


And a shot of a seat, with a question.  I painted the seat backs a tan to simulate wood, then "chipped" it with the hair spray method.  MY problem is the tan is so close to the Panzer interior, there is no contrast.  I need to visibly beat up these seatbacks, does anyone have any ideas?  Maybe WBill's tool treatment?

Here's a seat:


Thanks for looking, guys, I appreciate the advice and support I get here.

More to come,

Bill

  • Member since
    July 2004
  • From: Texas
Posted by wbill76 on Tuesday, January 5, 2010 9:32 AM

I'd say the interior looks good with the filter Bill! As for the seat backs, giving them a wash to add some color depth and variation would probably be your best bet to generate some contrast. It's highly unlikely they would've been left as raw lumber and instead would've probably received some kind of lacquer or varnish treatment in order to keep them from cracking/splintering over time...especially given their semi-exposed condition. Two sessions in two days...you're on a roll! Beer

  • Member since
    January 2009
  • From: Everett, WA
Posted by Schnobs on Tuesday, January 5, 2010 9:55 AM

Looking great Bill.  I agree with Wayne about method to simulate wood and another method is to paint the wood areas a pale or light sand Vallejo and then paint the area with Burnt Umber oils and then wait 20 minutes and then use mineral spirits on a brush to remove the majority of the pain in the direction of the "Wood grain".  Th end product looks great.

Tank makes the rife set you were asking about last night for the empty rifle racks.


"There is a principle which is a bar against all information, which is proof against all arguments and which cannot fail to keep a man in everlasting ignorance. That principle is contempt prior to investigation." Herbert Spencer
  • Member since
    January 2007
Posted by the doog on Tuesday, January 5, 2010 12:42 PM

Nice work so far, Bill!

  • Member since
    January 2012
Posted by I make stuff on Wednesday, January 6, 2010 10:08 PM

Thanks, Bill, Wayne, Edmund, and our world traveller, Karl!  I appreciate the feedback.

After pondering how to do the seat backs (review, I tried to hairspray chip them, but the selected undercoat, a vallejo light tan, was too close to the interior gray overcoat--the result, far from the spectacular high contrast chipping, there WAS no result.)

Solution:  fix it somehow.  I settled on MM enamel wood brown, followed by some Windsor and Newton water soluble oil paint raw umber to darken it up. I had trouble getting grain, but I think I like it.

Results:


I still need to do some touch up, but I think it's what I was looking for.  AS ALWAYS, please weigh in either way.

Oh, I almost forgot, I tackeled the instument panel, man, not much detail, I think I wil put some (gasp) future on the dials or something.


Well, how do you like the seat solution???

Thanks,

Bill

  • Member since
    July 2004
  • From: Texas
Posted by wbill76 on Wednesday, January 6, 2010 10:10 PM

Looking good Bill! If you want to introduce a little more grain pattern, try dry brushing some of the tan or wood color very lightly over the current dark color and see where that gets you. If you get it on too heavy, you can counter dry brush the darker color until you get the look you want.

  • Member since
    January 2009
  • From: Everett, WA
Posted by Schnobs on Wednesday, January 6, 2010 10:41 PM

Hey Bill nice to see you consistently hitting the bench you have been working so hard lately it's important you get some hobby time.  yes I am your Forum wife I admit it. 

Okay I going to be honest I don't like the wood effect here and I think you can do better. Bear with me I think I have a simple solution for you. Waterboard the chairs in windex and get rid of that plastic toy like finish and then use your razor say to put in some wood grain or use a hot needle tip in your wood burner or just a heated hat pin held with teasers.  Lot's of different ways to skin that cat. Now I know you have some light colored Vallejo's like Light sand or something light tan.  Then paint with Burnt Umber oils and then remove most of it with with Mineral spirits brushed along the granin and I think you will be much happier.  You could also use Flat Each Vallejo and deck tan dry brushing on the wood grain to pop it.

Instrument Panel looks great just build up the future with light coats dropped in on a tip of a needle.

Call me if you want o run through the steps or yell at me! Wink


"There is a principle which is a bar against all information, which is proof against all arguments and which cannot fail to keep a man in everlasting ignorance. That principle is contempt prior to investigation." Herbert Spencer
  • Member since
    January 2012
Posted by I make stuff on Saturday, January 9, 2010 11:34 AM

Well, that's now 4 days this week I got a chance to work on this, uh, bad boy(?)

Thanks to Edmunds...encouragement (Just kiding, man, I appreciate the critical eye, I don't post here for attaboys, I always welcome comments, and the critical ones are how I learn) I stripped the seats down, added some grain detail with a razor saw, re painted with some Vallejo Iraqui sand, then hit is with some burnt umber oil paint, this time not the water soluble type, let it sit out for 20 minutes on some paper to absorb the oils, then lightly brushed it on the seat backs, grinding it into the newly made wood grain.

Again I waited 10 minutes, then I came back and LIGHTLY tried to take some paint off but leave it in the grain.  The first try I used mineral spirits, but that took it all off, so I went back and re applied it, taking it off by using a damp, soft brush (the same one I use for oil dot fading) and gently stroked it along the grain pattern.  Please take acriticval look, did I leave TOO much on?

Well, other than some rifles, the interior is ready to be called finished.  I still have several pages of directions to follow, so the build is going to last a while longer.

Take a look, please, and thanks for taking the time to follow and weigh in!


What do you think?

THanks, Bill

  • Member since
    January 2007
Posted by the doog on Saturday, January 9, 2010 11:38 AM

Bill, I think that the seats look fine--they're enough to give any modeler a "woody"! Whistling....Big Smile

  • Member since
    January 2009
  • From: Everett, WA
Posted by Schnobs on Saturday, January 9, 2010 11:42 AM

Hey Bill!

Much better look my friend and the fact that there are tonal differences between the seat backs makes it even better.  Well done Sir!

Yes

"There is a principle which is a bar against all information, which is proof against all arguments and which cannot fail to keep a man in everlasting ignorance. That principle is contempt prior to investigation." Herbert Spencer
  • Member since
    July 2004
  • From: Texas
Posted by wbill76 on Saturday, January 9, 2010 11:50 AM

Nice work on the redo Bill. Yes

  • Member since
    April 2008
  • From: Ventura (at the beach) in California
Posted by *INDY on Saturday, January 9, 2010 1:45 PM

Sorry Buddy, you're going to have to re-do the rest of NOW !    Stick out tongue   Ok,  so the seat-backs do look better don't they?       Guys what did we learn here?  Ed bravely witheld giving an 'ata-boy' when it was time to give a friend a little nudge to get him to live up to his potential. It's not often easy to do that. We often see room for improvement in projects that we didn't even think to start in the 1st place, but we all know it's different when immersed in the myriad of detail in any project.    Ok now I gotta go point out to Edmund all his flaws again....wish me luck, SurpriseBig SmileSmile

"Well...you gunna pull them pistols, or just whistle Dixie?"

  • Member since
    January 2012
Posted by I make stuff on Wednesday, January 13, 2010 12:46 AM

Thanks, Indy, Bill, and of course the conscience/palooka muse of all "artistic" endeavors, Edmund.  Adam, I totally agree that the nudge, while sometimes uncomfortable, is the best move when you see something that you KNOW can be better.

Last night, I put in the seats, and painted up, or started to paint, some wonderful rifles I got in a Gen 2 DML figure set, they really are something, and I will be hitting you guys up for some sling advice, I have PE slings from the kit, maybe good patterns, and some lead foil and dental foil to choose from, but I need some toot action.

On to the pics:


Inside:


Lid on


And I have the option of leaving this open, I think I will


Question for the well rounded, should I wash the seats and the interior now that they are joined, just to tie them in, and if so, with what?

THanks for following this strange build

Bill

EDIT!  These pictures are pretty rushed, with harsh lighting, and don't really show the interior. I will snap some more tomorrow from a higher angle with better light, sorry about that.

Bill

  • Member since
    July 2004
  • From: Texas
Posted by wbill76 on Wednesday, January 13, 2010 2:39 PM

I would definitely advise doing any weathering or washes for the interior that you want to accomplish now before you secure it in with the cab...if only because it's much more accessible now vs. later. A pin wash with Burnt Umber will help make some of the details pop, it's up to you if you want to put another overall wash in place but my vote would be no unless you want to show some heavy duty dirt accumulation or similar grime on the interior.

Rifles are looking good too Bill, keep up the good work. Yes

  • Member since
    January 2009
  • From: Everett, WA
Posted by Schnobs on Thursday, January 14, 2010 11:28 AM

Hey Bill,

The interior had turned out really nice and your extra work and re-work really shows here.  I like the rifles and as I said on the the phone don't be intimated by slings because I was too and they are really quite simple to make and work with.  have had the best luck with thin strips cut off Yogurt foil lids.  The ones my wife uses has a pebble like texture which when painted looks just like leather.  Do not forget to make a loop on the inside of the sling to simulate the sling loop and use a touch of CA and you are done.  I often glue them on the he rifle and then paint them it is easier.

Keep firing down range Sir!!

"There is a principle which is a bar against all information, which is proof against all arguments and which cannot fail to keep a man in everlasting ignorance. That principle is contempt prior to investigation." Herbert Spencer
  • Member since
    May 2005
  • From: Eugene, Oregon
Posted by hughes2682 on Thursday, January 14, 2010 11:38 AM

Bill,

A re-do can be a hard one to swallow.  They can often pay off in spades.  This is NO exception.  A very nicely done interior.  I agree with Bill (WildBill) about weathering the interior now before the interior gets buttoned up with the cab.  I am looking forward to following this build.  I somehow missed it before today but it is now marked to be followed.

Cheers

Dave

http://img.photobucket.com/albums/v317/Aaronw/Groupbuilds/ClassicAviationGB2010bomb.jpg

With enough thrust, pigs fly just fine.

  • Member since
    January 2012
Posted by I make stuff on Tuesday, January 19, 2010 11:46 PM

Thanks, Bill, Edmund, and Dave, so nice to have company for this ride.

A few nights ago, I cut some slings out of lead foil, glued them up, painted them to resemble leather, and then oil washed them to tone them down.

Tonight, I glued on the central stack that forms the center of the crew compartment, and fitted two rifles to the rack on the driver's side. I added a "leather" retainer strap out of lead foil painted vallejo leather.

Not much progress, but it's a step in the right direction!


And with the roof on, here's what we will see

  • Member since
    January 2009
  • From: Everett, WA
Posted by Schnobs on Wednesday, January 20, 2010 3:24 AM

Nice rifles and rack Bill. The interior is looking great!  If you have MIG Gunmetal pigment a little bit rubbed on the high points of the weapon like the sights is a nice touch.  Just a suggestion of course!

"There is a principle which is a bar against all information, which is proof against all arguments and which cannot fail to keep a man in everlasting ignorance. That principle is contempt prior to investigation." Herbert Spencer
  • Member since
    July 2004
  • From: Texas
Posted by wbill76 on Wednesday, January 20, 2010 9:31 AM

Looking good Bill, nice work on the interior details. Yes Yes

  • Member since
    February 2009
  • From: mass,USA
Posted by scratchmod on Wednesday, January 20, 2010 1:31 PM

Love the look of the interior, the chipping looks great as do the rifles.


Rob

www.scratchmod.com

  • Member since
    January 2012
Posted by I make stuff on Thursday, January 21, 2010 8:48 PM

Thanks Edmund, Bill, and Rob.  Rob, I appreciate that, this is my first try at chipping.

Update!

So you may recall that the entire front section of the tractor cab was formerly a clear piece with windows molded into it.  I decided that masking the "clear" parts and painting the rest would result in the masks being on the windows for so long that they would never be clear again.  Also, they were very thick, scratched to heck, and the windshiled wipers molded in place looked bigger than 1/35 prybars.  SO... I dremeled out the windows and left the frames, and got this:
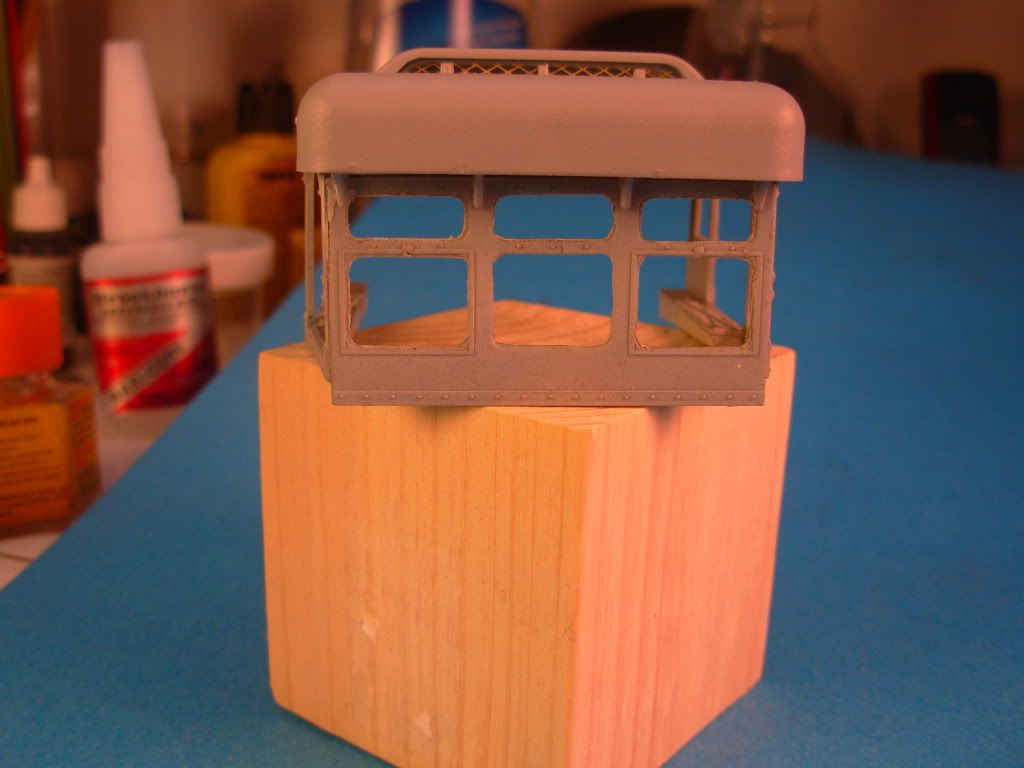
 

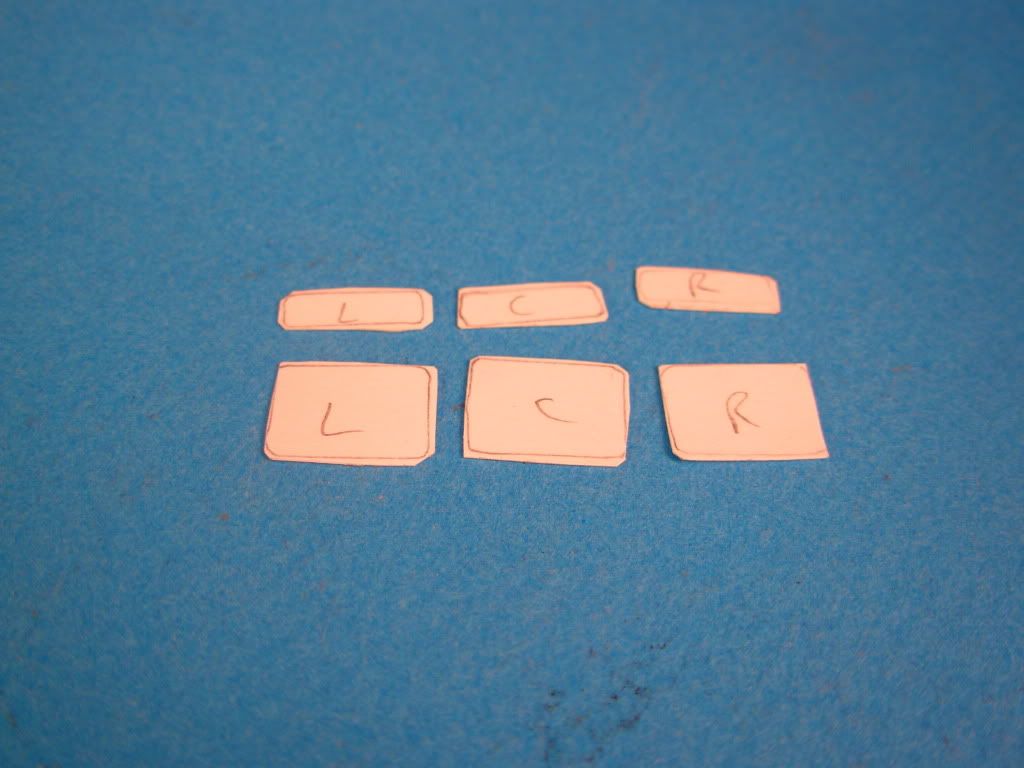
I planeed to simply make clear plastic windows and put them in after I paint it.  My problem was I should have made a rubbing of hte windows before I got rid of them so I would have templtes to make the clear windows.  I didn't, and had a mental block about the best way to go about getting properly sized windows.

Enter Schnobs, in the finest FInescale tradition, he suggested tracing the window openings onto some card stock, and trimming those to fit, then transferring that to some clear packaging for nice clear scale thickness glass.

SO I did:
 

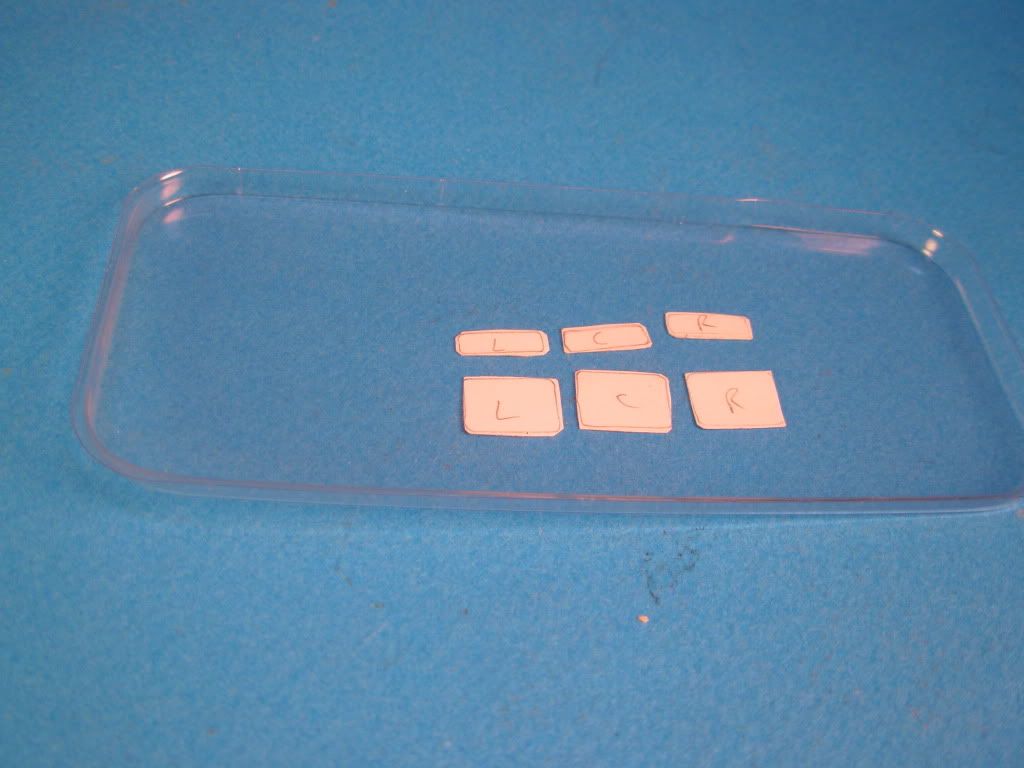
And a quick shot of the raw "glass" I intend to use.  Points to anyone but Schnobs who can guess what that package is for:


THen I started on the myriad of tiny outside details, starting with the exhaust.  Here's the first part, the tip, nice and solid:
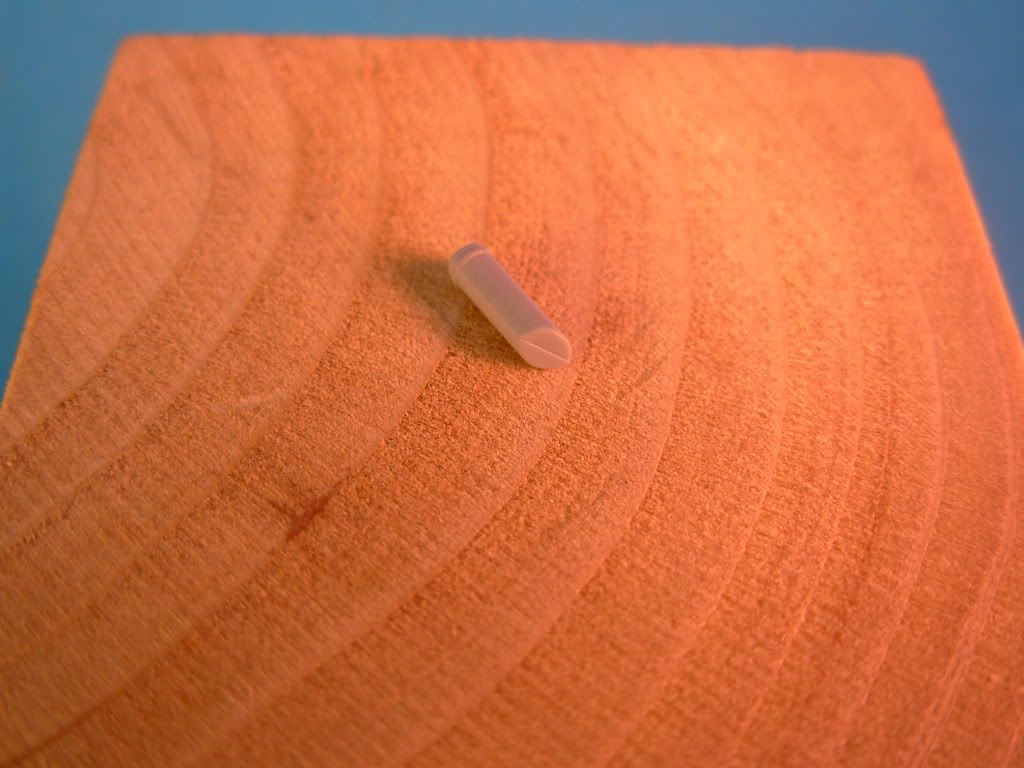
 

I started to root around for a bit to drill it out, then, brainstorm, I found some brass tubing that I bought for the BA 20 exhaust, and here we have a realistic ( I hope) tip.
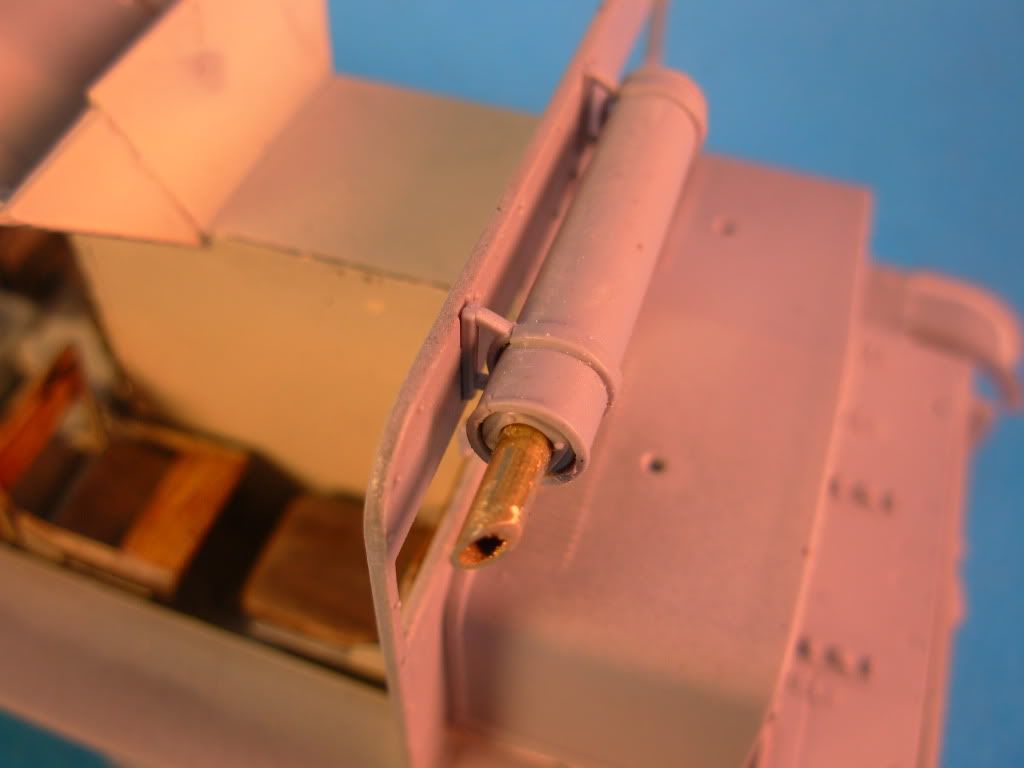
 

And here is the overlal shot, that thing didn't fit very well at all, I needed a couple extra hands
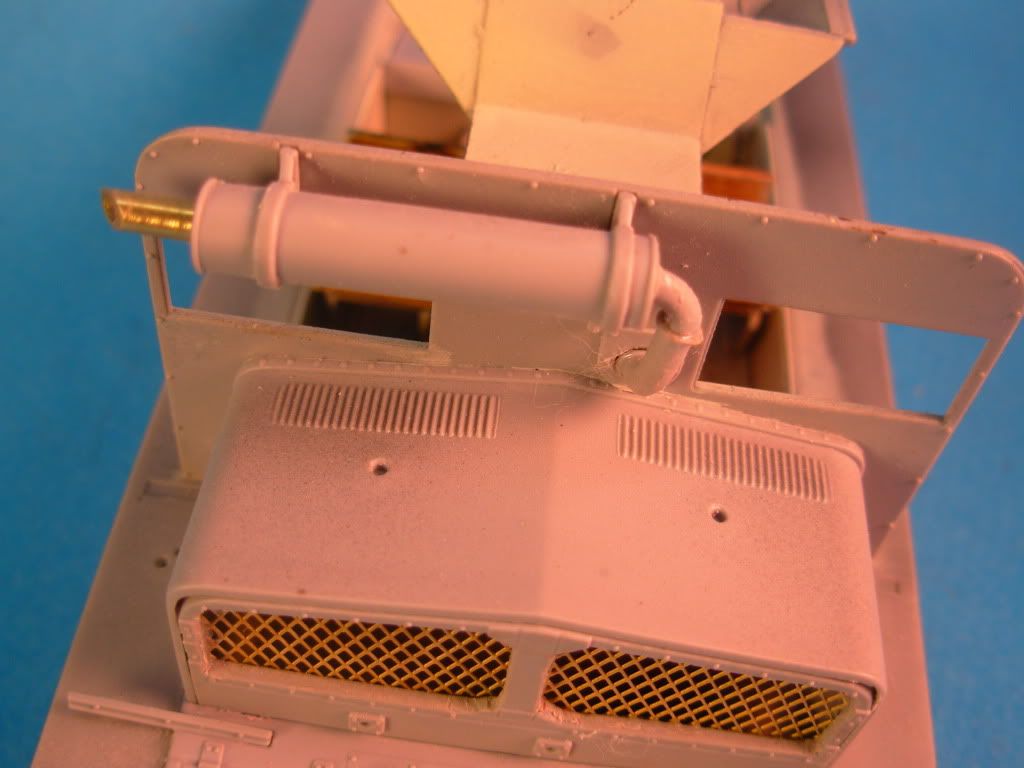
 

THen I started with some other smaller details, check these fender supports for WOW does that not fit well.  Combination the fenders took on a droop to get them flush with the hull, and the top plate is also warped.  Check these clearances, anyone have any suggestions?  I can CA them down and they will look bent, not out of the question, or they can remain straight and I can rip some holes in the fender and they can be "torn off."
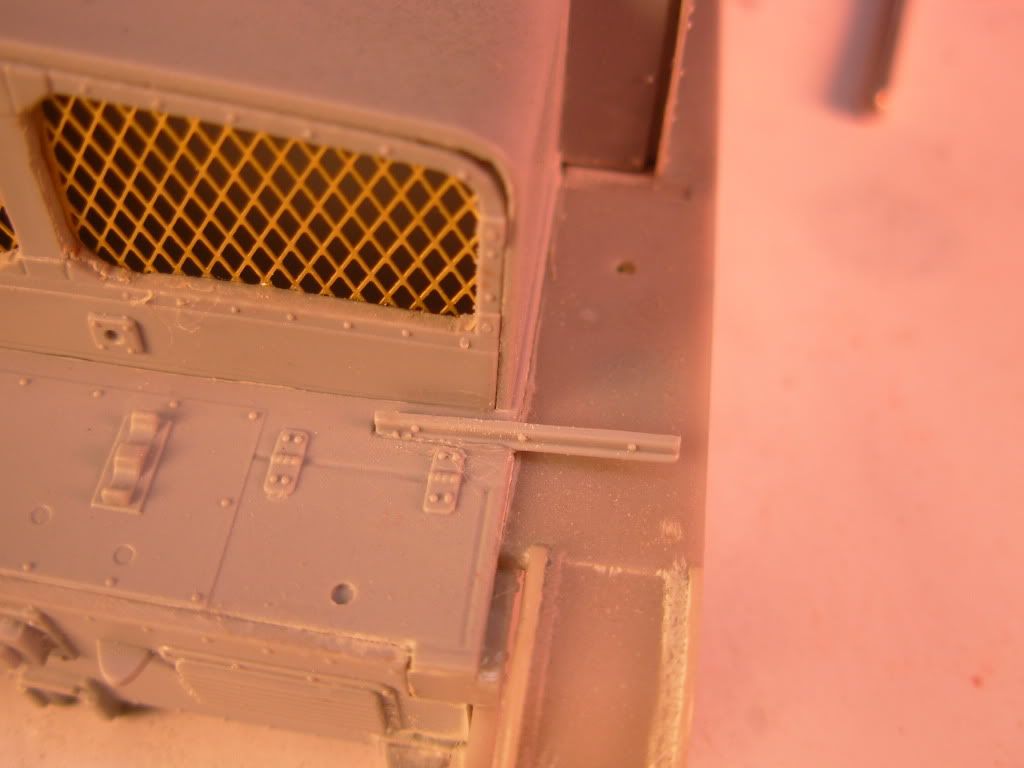
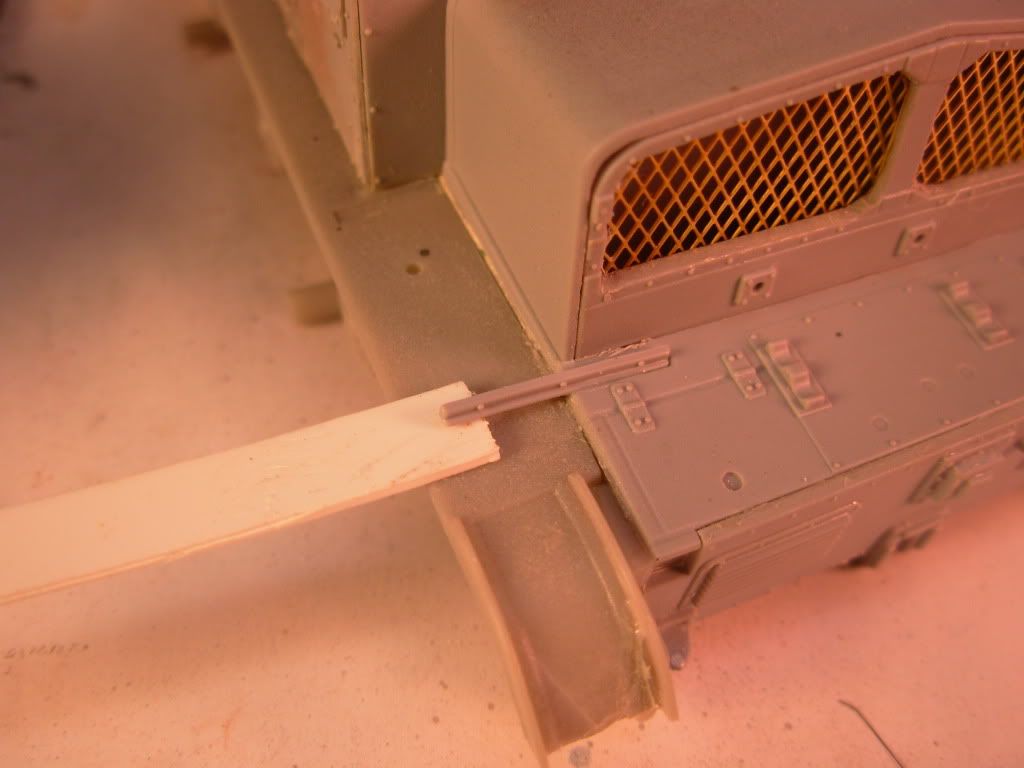


That's where we sit tonight, I will next drill another couple hundred thousand Fruil links, maybe get the first run finished.

Please weigh in with any comments, especially with teh fender supports.

Thanks, guys,

Bill  

  • Member since
    January 2009
  • From: Everett, WA
Posted by Schnobs on Thursday, January 21, 2010 9:07 PM

No worries Bill I am always willing to lend an ear Have two fairly large ones! 

First of all I love the brass tubing on the muffler.  Well done and that will really set it apart!  If you cannot remove the fenders and fix the height problem you could use a visual slight of hand and cut some evergreen stock down to pad out the space right below the strut until it is flush with the fender.  You could also drop a tarp or something over this because according to the non extreme modelers we only use extreme modeling and weathering to hide our mistakes!  That one made me laugh long and hard! 

I Will think about it for awhile and see if I can come with anything else.

Good to see you making progress on this Bill!!  Yes


"There is a principle which is a bar against all information, which is proof against all arguments and which cannot fail to keep a man in everlasting ignorance. That principle is contempt prior to investigation." Herbert Spencer
  • Member since
    April 2008
  • From: Ventura (at the beach) in California
Posted by *INDY on Thursday, January 21, 2010 9:47 PM

~Billy'O'Bill~~~ Hey that interior looks terrific. Looks just right from what I know of these(which is nothing, but it still looks right Stick out tongue) would'nt be much of a vacation tour fighting inone  of these!

Dig the substitution of the exhaust---any time you can add in or substitute more brass the better, right? After-all, what better to model scale metal than tiny bits'o'metal? IF FACT....if you have any brass sheet or large P.E. pieces even, you may consider sub-ing out those ill-fitting fenders for some scratch-made ones that fit however you want.... The brass could give you some oppertunity for convincing damage,as the fenders are always the first thing to go--------In any case I vote mutilate them(I would, huh?)

Oh and jest out to Ed----Edmund, is there another kind of slight-of-hand besides the visual kind?Geeked

"Well...you gunna pull them pistols, or just whistle Dixie?"

  • Member since
    January 2012
Posted by I make stuff on Thursday, January 21, 2010 10:39 PM

Indy!  Did you guys really have a tornado today?  Still raining and lightning here!

I thought I heard a challenge/push to new exploits, seriously, after the baby steps of the cobblestone base, you feel like walking me throught this?

What do you make of this?


Then, when gingely testing the glued joints, THIS happened:


The new status quo is one fender off, I am certainly not going to glue that back on


Indy, I'm going to need some serious backup.  FIrst things first, how is the best way to neatly cut this stuff, I have tin snips, but feel like it will curl and tear it up, maybe it's soft enough to beat back flat?

Second, the ONLY detail at all is the end pieces, they have some ribbing detail, how do I replicate that?

Let's get this party started!

Bill

  • Member since
    April 2008
  • From: Ventura (at the beach) in California
Posted by *INDY on Friday, January 22, 2010 12:28 AM

Oh OK ...Me & my big mouth, er a.... typeface. So you got the brass right there. ok dokie

1st measure up the size pieces you're gunna need. Looks like there's going to be a long fold down the side to get an edge on the side, so include this in the width(likely you can scribe the bend-line on the bottom to get the bend crisp just like a P.E. sheet.(scribe with a knife or awl & metal straight-edge) To minimize the sheet metal work, you may choose to cut off the rounded ends of your styrene fenders to save from having to bend the fenders and recreate the detail. Decide if you want to do this before sizing the brass & cutting. _OR_ you may want to go the whole route and re-create all of it, particularly if you want to bang-up the end alot--or have some of it go missing? Anyways, you'll have to decide all of that prior to cutting.

To cut you could use your snips, if proficiant with them. Needing a long straight cut, I'd use a knife & straight-edge. Not the regular hobby knife, but a heavy utility blade. You got the .005 thou brass so it's no thicker than a typical Photo-etch sheet, thinner than many.

These are really handy and worth the $10 . The thick blade will give you a more consistaint cut. You need to hold that ruler down really firmly. to avoid slipping and getting your fingers, or getting squirly cut... you may want to clamp it down, with C-clamps or whatever you got.

That should get you started, maybe as far as the side-fold done, let us know what you decide about the rest and we'll go from there*

YesCool

"Well...you gunna pull them pistols, or just whistle Dixie?"

  • Member since
    July 2004
  • From: Texas
Posted by wbill76 on Friday, January 22, 2010 9:43 AM

Looks like you've got some great advice here Bill on how to address the issues. Look forward to seeing the facelift on the fenders! The replacement of the exhaust is a nice touch as well. Yes

JOIN OUR COMMUNITY!

Our community is FREE to join. To participate you must either login or register for an account.

SEARCH FORUMS
FREE NEWSLETTER
By signing up you may also receive reader surveys and occasional special offers. We do not sell, rent or trade our email lists. View our Privacy Policy.