SEARCH FINESCALE.COM

Enter keywords or a search phrase below:

#6 Polish Artillery Tractor C7P-WIP 4/18--More Weathering Pics Page 12

43331 views
170 replies
1 rating 2 rating 3 rating 4 rating 5 rating
  • Member since
    April 2008
  • From: Ventura (at the beach) in California
Posted by *INDY on Wednesday, February 17, 2010 9:36 PM

OK...Good Luck!

St. Patty's Clover Headalso ......VMail sent    Phone Shocker

"Well...you gunna pull them pistols, or just whistle Dixie?"

  • Member since
    July 2004
  • From: Texas
Posted by wbill76 on Wednesday, February 17, 2010 10:12 PM

Good luck Bill! I have faith in you! Now that you've proven you can do rivets standing on your head, you won't have to worry about trying to preserve what's there through the sanding and puttying exercise. Yes

  • Member since
    April 2005
  • From: Piscataway, NJ!
Posted by wing_nut on Thursday, February 18, 2010 7:40 AM

OK Bill,, Just plain WOW!

Marc  

  • Member since
    January 2012
Posted by I make stuff on Saturday, February 20, 2010 11:37 PM

What all of you..well, at least Ed, have been waiting for, the first application of any color to his beast:

I put a bit of a witness coat on tonight so I can be sure it's safe to replace the rivets:


As soon as I convince myself it's smooth, I will replace the rivets and shoot a primer coat.

Bill

  • Member since
    January 2009
  • From: Everett, WA
Posted by Schnobs on Saturday, February 20, 2010 11:56 PM

This is what I am talking about!  This will be a treat to watch you paint and weather!

Great job Bill!

"There is a principle which is a bar against all information, which is proof against all arguments and which cannot fail to keep a man in everlasting ignorance. That principle is contempt prior to investigation." Herbert Spencer
  • Member since
    January 2012
Posted by I make stuff on Sunday, February 21, 2010 1:25 AM

Thanks, Wingnut!  Ed, my first German Grey vehicle, a captured Polish whatzit?  WE shall see.

I did some riveting tonight, too:


I tried what we talked about, Ed, let's see if anyone spots it.

Bill

  • Member since
    April 2008
  • From: Ventura (at the beach) in California
Posted by *INDY on Sunday, February 21, 2010 1:55 AM

Missing Rivit YesCool

~~Your baby looks good to me--->shoot it

"Well...you gunna pull them pistols, or just whistle Dixie?"

  • Member since
    May 2005
  • From: Eugene, Oregon
Posted by hughes2682 on Sunday, February 21, 2010 1:59 AM

INDY beat me to the punch. But.....I'm not sure that is it since you stated having done something you talked about.  I can't tell what it is but this wee beastie is very cool.

Cheers

Dave

http://img.photobucket.com/albums/v317/Aaronw/Groupbuilds/ClassicAviationGB2010bomb.jpg

With enough thrust, pigs fly just fine.

  • Member since
    January 2012
Posted by I make stuff on Sunday, February 21, 2010 2:48 AM

Wow, Indy and Dave, you guys are sharp, especially at 0043 am.

So I shot some Tamiya fine primer all over it, and here is the monotone version of this little guy, hopefully I can shoot some paint tomorrow, I need to get some rack time and then look at these pics and make sure the surface is smooth as a tank should be...

Those rivets we worked on tonight:

Some shots of the revised running gear

THat is all she wrote this Satruday night...

THanks for looking, guys,

Bill

  • Member since
    July 2004
  • From: Texas
Posted by wbill76 on Sunday, February 21, 2010 11:08 AM

Looks like a very productive Saturday's worth of effort Bill! Gaps are gone and rivits are looking good, now it's Sunday so get it painted already! Big Smile

  • Member since
    January 2012
Posted by I make stuff on Sunday, February 28, 2010 2:48 PM

I FINALLY got to start painting,

I just have one shot:  gunmetal undercoat, cav brown misting, in preparation for a hairspray technique which I have picked up from our own Ed.  I know he did not pioneer this technique, but I have learned the mechanics from him, and his builds speak for themselves.


For those unfamiliar, this coat will be totally co0vered with a base coat, then chipped back using a water solouble harispray to reveal small patches of this color.


BACK TO THE GARAGE!!!!!!

  • Member since
    January 2012
Posted by I make stuff on Sunday, February 28, 2010 4:09 PM

I have started with a German Grey undercoat, then a single shade lighter for highlights, and a shade darker for shadows.

Started over 3 very light coats of this stuff, which I cannot even pronounce:


Then on to the paint, again, one lighter shade, one lighter, one darker, using these as mixers:


I also went light on top of the bogies, agasint the darker underside shadow, and darker under the bogie, as well:


BACK TO THE PAINTCAVE!!!!!!!

  • Member since
    January 2009
  • From: Everett, WA
Posted by Schnobs on Sunday, February 28, 2010 4:37 PM

LOL!  My wife says it is pronounced Tray Samay.  I call it smelly prissy stuff!

Sounds like you are having fun Bill which is what this all about. I am glad you had some time to enjoy the hobby today you deserve it!

Paint job is looking great.  The Shep Paine stop sign is alive and well!!


"There is a principle which is a bar against all information, which is proof against all arguments and which cannot fail to keep a man in everlasting ignorance. That principle is contempt prior to investigation." Herbert Spencer
  • Member since
    January 2012
Posted by I make stuff on Sunday, February 28, 2010 4:40 PM

I think I am ready to chip, this looks like a finished base coat, I hope.


TO get back into blog mode, here's what I did:  I sprayed 3 thin, non covering coats of the german grey, and got a nice monochrome uniform coverage.  THen I mixed quite a bit of tamiya flesh to the grey, thinned it, and envisioned a stop sign. THe majority of light falling on this vehicle, or a stop sign, hits the top, making it look brightest, even if its painted a single color.  So I took the top edges and highlighted them lightly.

THen I added some black to the straight grey, and started lowlighting, making it darker where shadows would be, I lightened the senters of some panels, and darkened the edges, others, I darkened the center of others and lightened the edges.

THen I went back and lightened it furhter, lightened, but less this time, and darkened again, then sprayed more shadows, but only areas that would really be dark.

I know it looks kind of cartoonish, but the weathering will tone this down.

SO that's were we are now, I am going to do some very light chipping.

Bill

  • Member since
    January 2008
  • From: Bournemouth UK
Posted by Bodge on Sunday, February 28, 2010 5:08 PM

Wow, ive missed this one. thats a real nice job your doing on a crazy lookin vehicle. Love it.Indifferent

  • Member since
    May 2005
  • From: Eugene, Oregon
Posted by hughes2682 on Sunday, February 28, 2010 8:15 PM

Bill,

This is some outstanding work sir!Bow Down

Cheers

Dave

http://img.photobucket.com/albums/v317/Aaronw/Groupbuilds/ClassicAviationGB2010bomb.jpg

With enough thrust, pigs fly just fine.

  • Member since
    January 2012
Posted by I make stuff on Sunday, February 28, 2010 9:18 PM

Thanks, Ed, Bodge, and MR Hughes!

Some more stuff today, first, I did some minor chipping, wear.  Really light.  THen I sprayed the insignia, I hate decals


It's suposed to be "Klara", but I don't know any Klara

AND I hate decals..so I did this:

FIrst, a sample font from the computer


Then I got out a brush, some Vallejo off white, and I tried to hand paint it:


Can I get a reality check?  How does the name look, please, honesty is the best policy.

Bill

  • Member since
    January 2009
  • From: Everett, WA
Posted by Schnobs on Sunday, February 28, 2010 9:29 PM

Hey Bill,

First of all you this is your best vehicle yet and you have accomplished quite a bit of firsts with this one.  Well done Sir. now about the name.  I know you already have a Pink Mystery machine Panther out there so in this case I think the name is a little over the top and will take away from the fantastic realistic details you have accomplished here.  I also think it would make a great sighting point for a crew served weapon which is also not a very good ideal.  You did a great job free handing the script but I think you would best be served using that area for some oil dot fading and tonal variations of the paint.

Again Bill that is just IMHO and this is your art do what makes you happy!  it was nice to har that in your voice today when we talked on the phone!

Let's Do This!!


"There is a principle which is a bar against all information, which is proof against all arguments and which cannot fail to keep a man in everlasting ignorance. That principle is contempt prior to investigation." Herbert Spencer
  • Member since
    July 2006
  • From: San Francisco Bay Area
Posted by bufflehead on Sunday, February 28, 2010 10:49 PM

Hey CG, this is coming along great!  Nice paint job and markings!  The "sophia" lettering looks good, but maybe a little large?  However, your weathering and chipping might do the trick and make it stand out less.  Keep up the great work!

Ernest

Last Armor Build - 1/35 Dragon M-26A1, 1/35 Emhar Mk.IV Female


Last Aircraft Builds - Hobby Boss 1/72 F4F Wildcat & FW-190A8


  • Member since
    January 2012
Posted by I make stuff on Monday, March 1, 2010 12:23 AM

I believe you guys are correct.  I went back and painted over the name, those Vallejo paints are so thin, it's gone.

I also put a dark umber oil wash on the tracks to give them some more brown color.

Tomorrow, drybrushing and oil dot fading.

Then, some earth type stuff for the running gear.

Thanks, guys.

Bill

  • Member since
    July 2004
  • From: Texas
Posted by wbill76 on Monday, March 1, 2010 1:52 PM

I personally liked the name, thought it gave the whole thing a "human" touch. These were artillery towing tractors after all so would generally have been used behind the lines vs. say a front-line tank or similar vehicle. Anyhow, it's gone now so I guess it's a moot point!

Looking forward to where you're taking this one Bill! Beer

  • Member since
    May 2005
  • From: Eugene, Oregon
Posted by hughes2682 on Tuesday, March 2, 2010 10:07 AM

Bill,

I am with Bill on this one. Nonetheless, Sophia or not, this is coming along wonderfully.  Thank you for posting this enjoyable build. Yes

Cheers

Dave

http://img.photobucket.com/albums/v317/Aaronw/Groupbuilds/ClassicAviationGB2010bomb.jpg

With enough thrust, pigs fly just fine.

  • Member since
    January 2012
Posted by I make stuff on Tuesday, March 2, 2010 5:26 PM

Thanks so much, Dave and Bill, I appreciate it.  I really liked the idea of “Sophia” more than my execution, I may go back with a watercolor pencil and try again, as suggested by Adam/Indy.  The script just got a little thick for scale.


Anyway, I went back and tried to do some additional chipping with the assistance of alcohol, which is much hotter than the tap water I sued to chip the interior MM Acryl paints, but I painted the hull with Tamiya. And we were NOT amused with the outcome.  The alcohol dramatically changed the character of the paint, making is a semi gloss and darkening the grey, then, when it did bite, it just wiped off everything all the way down to the light gray shiny plastic, so I am not yet a chipmaster.


I was able to go back and re spray the most heavily damaged areas, and I will then go back again and, using both a graphite pencil/mig’s gunmetal powder, and traditional painted chips, try to distress it somewhat.
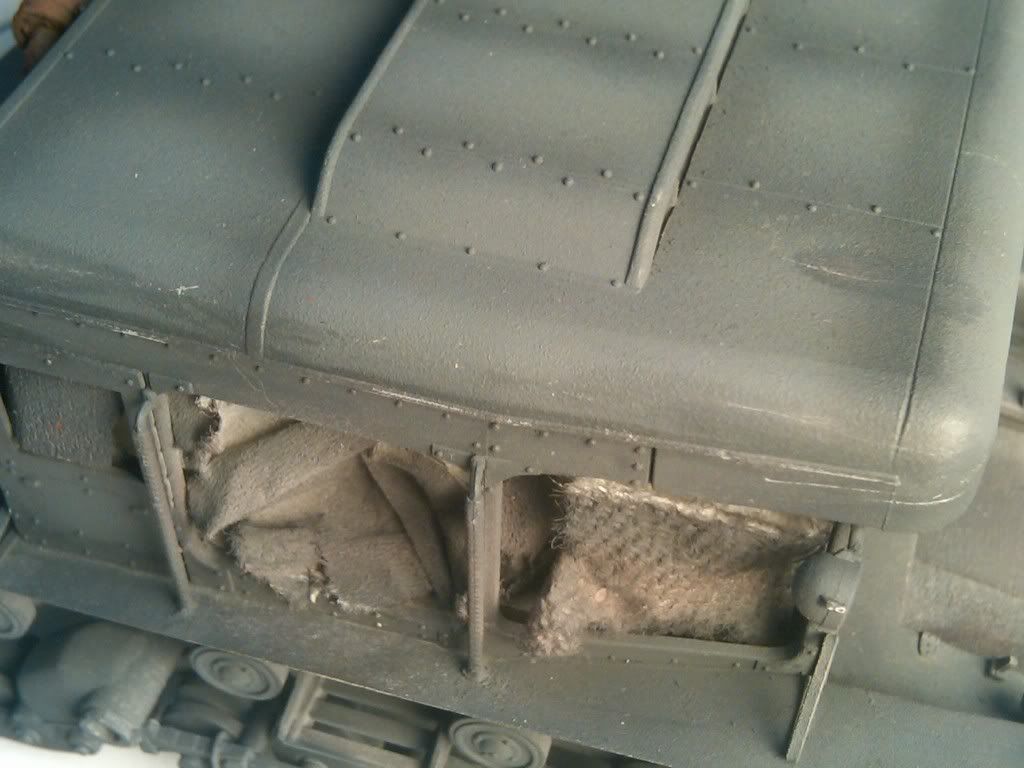
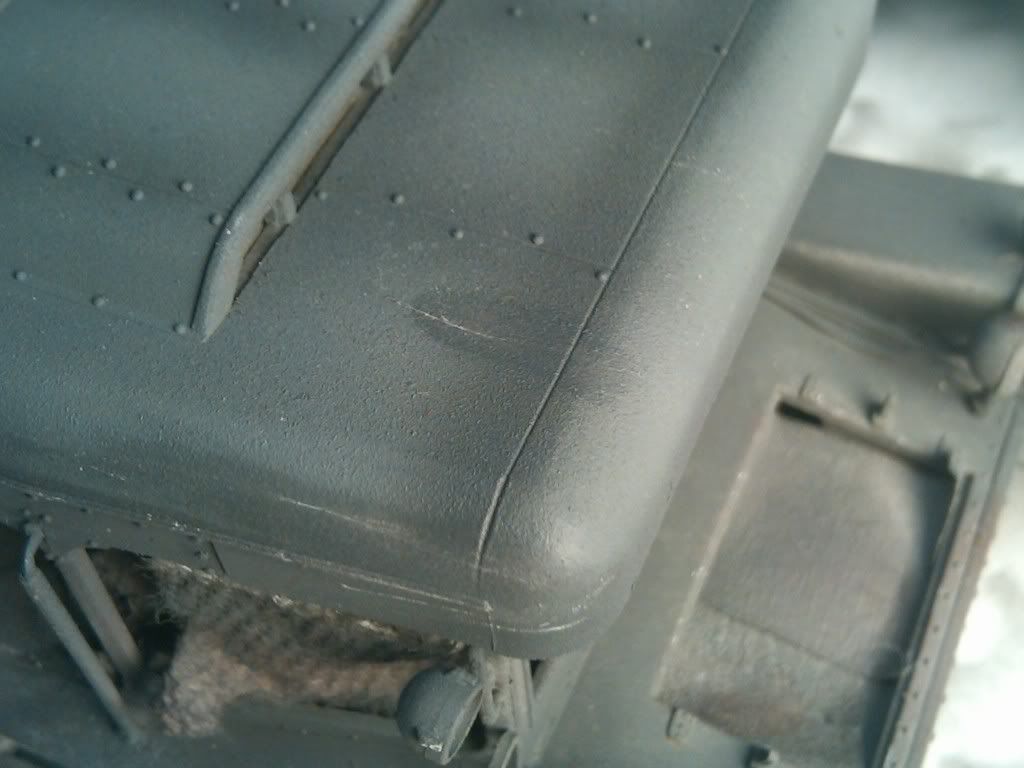
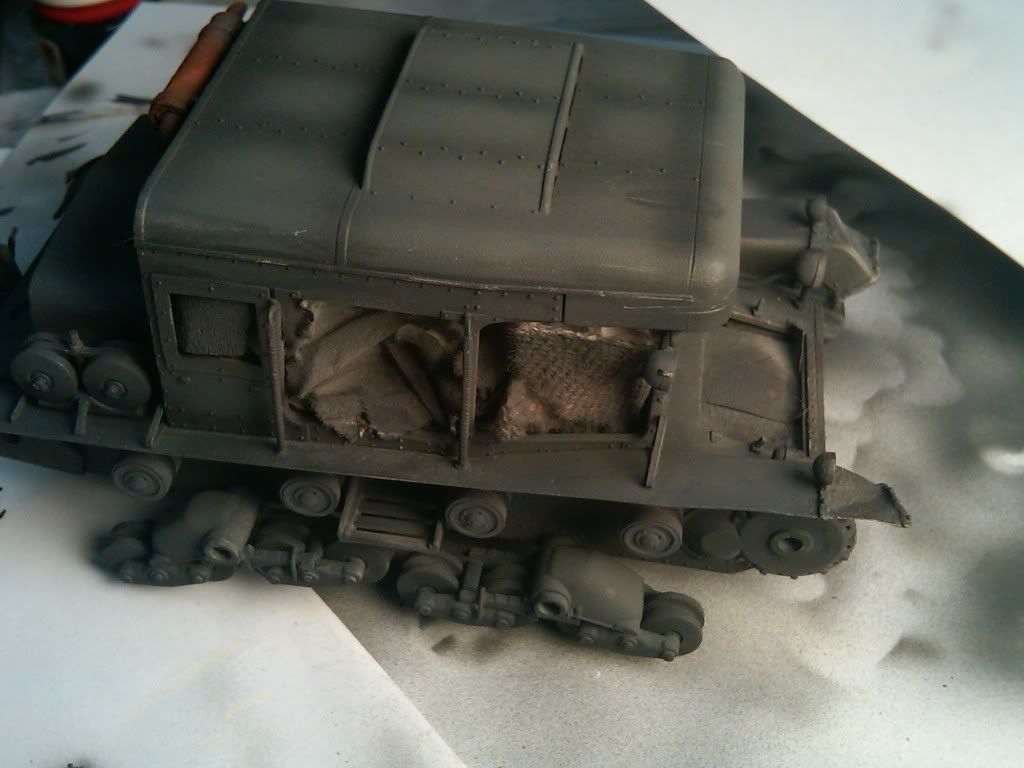


I also put some hurt on the kit’s prominent muffler assembly.  I started off just wanting to put on an orange Vallejo undercoat, but while it was still wet, I dusted on some Vallejo pigment, my first try, it’s called red oxide, and was far too red.  So I added some Mig strandard rust wash, then some Mig old and new rust pigments, then, finally, some Mig track brown to take away some of the brightness.


My first real effort at a rusty muffler, how did I do?
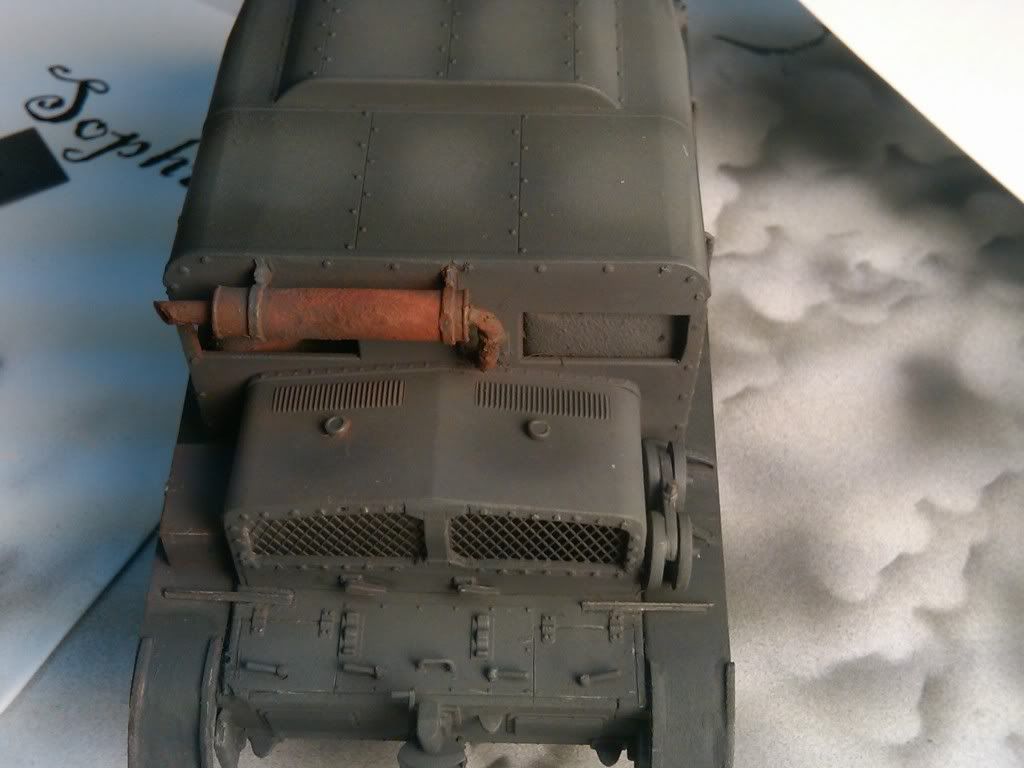
 

BTW, these are pictures taken with a new phone, not too bad in depicting the correct colr as percieved by my eyes.

Thanks for looking,

Bill 

  • Member since
    April 2008
  • From: Ventura (at the beach) in California
Posted by *INDY on Tuesday, March 2, 2010 9:50 PM

Wayne....You may decide to "rethink" a great many things........

Bill~ That's look'in smoking cool !This is shaping right up.``That exhaust looks darn real. Now--Are you going to show them the magic bullet for the name? Or just bring it in time?

"Well...you gunna pull them pistols, or just whistle Dixie?"

  • Member since
    January 2012
Posted by I make stuff on Tuesday, March 2, 2010 11:18 PM

Wayne, I very much appreciate your kind words.

Adam, All good things to those who wait

Go to fullsize image


Tonight, I took some mixed by eye light Vallejo german grey to apply some scratches and chipping, and went back with some german camo brown to represent the bare oxidizing metal on the largest of those scratches.  I intentioanlly understated this, it's too easy to get a cartoon result.  I quite while I am ahead. 

Then I applied an overall filter wash of Mig for panzer grey, it's basically an electric blue wash, to tone down the shading I intentionally over emphasized so it would survive the steps to come.

Here's a baby walk around.


And a close up of that styrene and wire detail I added to the rather plain bogies


Finally, I have been playing with the tracks, to review they are Fruils treated with blacken it, they turned out a light tan, so I first hit them with a heavy raw umber wash, which gave me a better base color.  Then I added mig track brown and old rust, mostly the former, and some thinner to hold it in place, not totally happy with it yet but its better than it was.


And a shot of them next to the hull for contrast:


But i will be honest, this is my favorite shot of the model so far:


That's it for now, next stop, dot filtering, thanks for looking and weiging in, guys.

Bill


  • Member since
    January 2012
Posted by I make stuff on Wednesday, March 3, 2010 11:11 PM

Tonight, I ran some dot filtering, trying to use light colors, Mig buff, flesh, light mud, and faded grey, on the portions that are exposed, and using darker colors, dark rust, dark mud, shadow brown, wash brown, etc. in the areas where shadows need to be potrayed.

Pretty subtle so far, I also started a pinwash.

I also unveiled the transmission area


I was really starting to roll, when I launched an engine handle during the washes of the engine deck, and had to replace it with this, not a huge deal, but I am pretty angry that I conquered all the shrotcomings of the kit, only to now have an unmatching handle.


Should I pull them all off and make 4 that match out of wire?

Thanks for looking!

Bill

  • Member since
    April 2005
  • From: Piscataway, NJ!
Posted by wing_nut on Thursday, March 4, 2010 6:39 AM

i really like they way this has taken shape.  It looks very nice.

Marc  

  • Member since
    July 2004
  • From: Texas
Posted by wbill76 on Thursday, March 4, 2010 2:00 PM

Making good progress! IMHO you should replace the other handles only if you won't be able to sleep at night knowing that 1 doesn't match the rest...after you paint it I'm sure no one who doesn't know won't notice. Wink

  • Member since
    January 2012
Posted by I make stuff on Saturday, March 6, 2010 5:21 PM

Thanks for checking in, Bill.  I will work on the handles, I have not been sleeping this week...

I got the headlight lenses mounted and have started making some dusty washes with Vallejo green ochre, which I saw used to spectacular results on another board.  Right now it only has a light wash, I will increase the intensity on the lower areas and drive train.


THanks for looking, PM to Ed, call me please. MY phone died again and I lost my contacts until Monday....

\Bill

  • Member since
    June 2009
Posted by Guney on Saturday, March 6, 2010 6:14 PM

Really good work...:)

JOIN OUR COMMUNITY!

Our community is FREE to join. To participate you must either login or register for an account.

SEARCH FORUMS
FREE NEWSLETTER
By signing up you may also receive reader surveys and occasional special offers. We do not sell, rent or trade our email lists. View our Privacy Policy.