SEARCH FINESCALE.COM

Enter keywords or a search phrase below:

100th Anniversary of WWI GB

75528 views
879 replies
1 rating 2 rating 3 rating 4 rating 5 rating
  • Member since
    June 2010
  • From: Rochester, New York USA
Posted by rocker286 on Thursday, September 4, 2014 12:38 PM

Rigidrider - excellent choice for a replacement build! The D VII was an excellent aeroplane - that stinks about your original build! Did you ever find out where it went to?

falconmod - your Albatross is coming along great! What type of material are you using for rigging?

65ss - I can't wait either! It'll be my first time painting a camo scheme like that - all the other camo schemes I've done have been the straight-angle Luftwaffe types.

Big Blue - I'll definitely throw up some more photos when I get home from work tonight! So far I've glued the struts on and primed the plane!

And as far as paint goes, would anyone out there happen to know what color to use for the underside of a Nieuport 28? Some sources point to a grayish color, others to a more beige type color. I wasn't sure if anyone had cold hard evidence as to what color was used on the bottom surfaces of those planes.

4badges

  • Member since
    September 2011
  • From: Milaca, Minnesota
Posted by falconmod on Thursday, September 4, 2014 12:48 PM

Rocker,

  I found a spool of nylon quilting thread at JoAnn fabrics.  it comes in different colors too.  I'll have to look at the spool to get the manufacturer when I get home.

John

On the Bench: 1/72 Ki-67, 1/48 T-38

1/144 AC-130, 1/72 AV-8A Harrier

  • Member since
    November 2008
  • From: Central Florida
Posted by plasticjunkie on Thursday, September 4, 2014 12:53 PM

A quick update. Here is the prop done in acrylics and oils. Prop hub painted Alclad steel.

 GIFMaker.org_jy_Ayj_O


Too many models to build, not enough time in a lifetime!!

  • Member since
    November 2008
  • From: Central Florida
Posted by plasticjunkie on Thursday, September 4, 2014 12:55 PM

Another update. Since the Fokker has a VERY poor excuse for a cockpit, I decided to add a few things just to make it a bit more realistic using some reference info I have. I scratched out a floor, rear bulkhead and a basic IP that will get a couple of instrument decals. Did the wood graining thing to them and now they have to dry out for a couple of days. Meanwhile I sliced up some thin strips for the fuselage framing.

Nothing fancy but close enough I think

The fabric would have been a doped linen color so I would think it would have looked like a khaki inside. The outside color would not have bled thru since the dope sealed out the cloth.

The framing adds more detail to the pit area.

The rest of the details have to wait for the oil wood tone paint to dry. Still need to scratch out the ammo box for the Spandaus.

And here is the  party responsible that sneaked into my man cave, stood up on my bench and took my Tom's Modelworks pe set! Too cute of a face to be mad at her.

 GIFMaker.org_jy_Ayj_O


Too many models to build, not enough time in a lifetime!!

  • Member since
    February 2005
  • From: Proctor. MN
Posted by 65ss on Thursday, September 4, 2014 6:16 PM

Man everyones work is looking great! I'm making progress but it's going pretty slow nothing really worth posting yet.

Dale

  • Member since
    October 2008
  • From: Georgia
Posted by Rigidrider on Thursday, September 4, 2014 7:33 PM

PJ... That is AWESOME wood look ! Shes a pretty dog too!

When Life Hands You A Bucket Of Lemons...

Make Lemonade!

Then Sell It Back At $2 Bucks A Glass...

  • Member since
    November 2008
  • From: Central Florida
Posted by plasticjunkie on Thursday, September 4, 2014 7:37 PM

Thanks Rrider. She's a 70 lb. ham that will lick you to death! LOL

 GIFMaker.org_jy_Ayj_O


Too many models to build, not enough time in a lifetime!!

  • Member since
    October 2013
Posted by Big Blue on Thursday, September 4, 2014 11:03 PM

PJ: It looks like you are off to a great start on that D.VII.  She seems so tiny compared to the 1/32 WWI build that I have been working on!  You've done some nice work with an older kit.

Ok, here is a picture heavy update (TLDR, I have closed up and painted the fuselage, and painted and applied decals to the wings).  Once the fuselage seams were filled and sanded, its painting process ran parallel to that of the wings, so I will describe them together.  I painted (and documented) the wings first, so left out some of the basic pictures for the fuse were there was nothing really new to show.

First step was a coat of primer, using Mr. Finishing Surfacer:

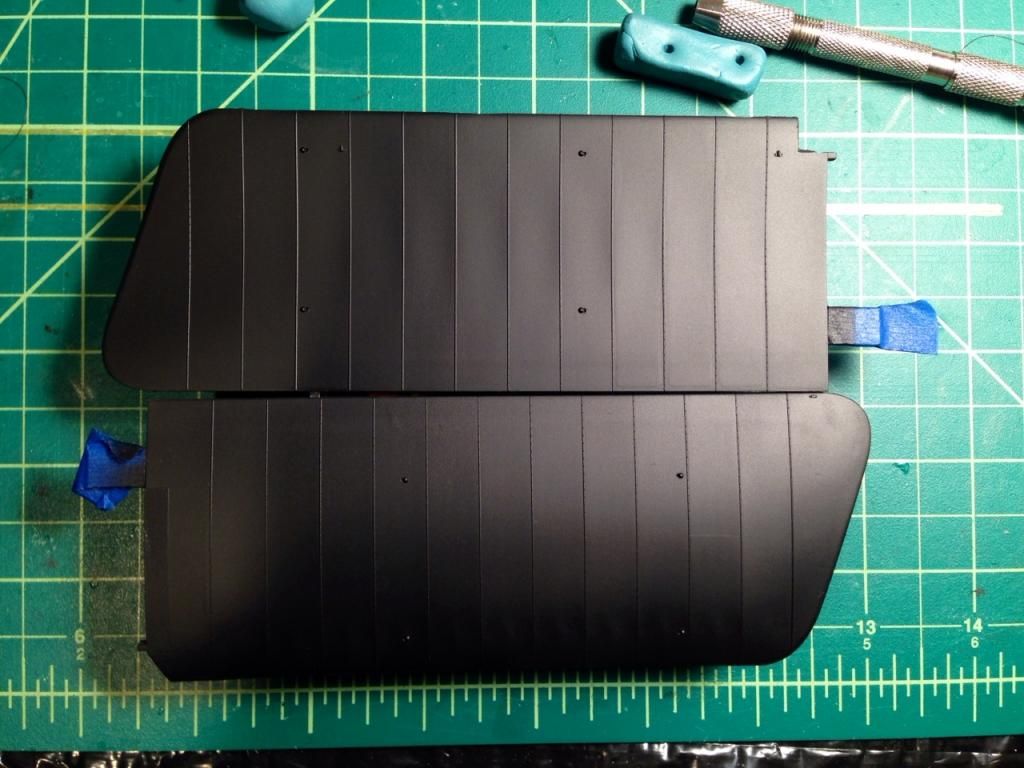
I followed this with a thin and uneven undercoat of color. I used XF-22, RLM Gray (the final color) and random patches of XF-55, Deck Tan (representing the underlying linen) for this step.  I masked some of the internal structure on both the wings and the fuselage, however since I wanted different effects, I did this is slightly different order for the two.  On the fuselage, I wanted the fabric over the ribs to be slightly darker, and on the fuselage, slightly lighter.  Therefore, I masked the wing's spars prior to the undercoat, and the fuselage after it.  I followed the fuselage masking with a second, darker, undercoat made from a mix of XF-22, XF-1 (Flat Black), and XF-64 (Red-Brown).  Here are the results in both cases after removing the tape:

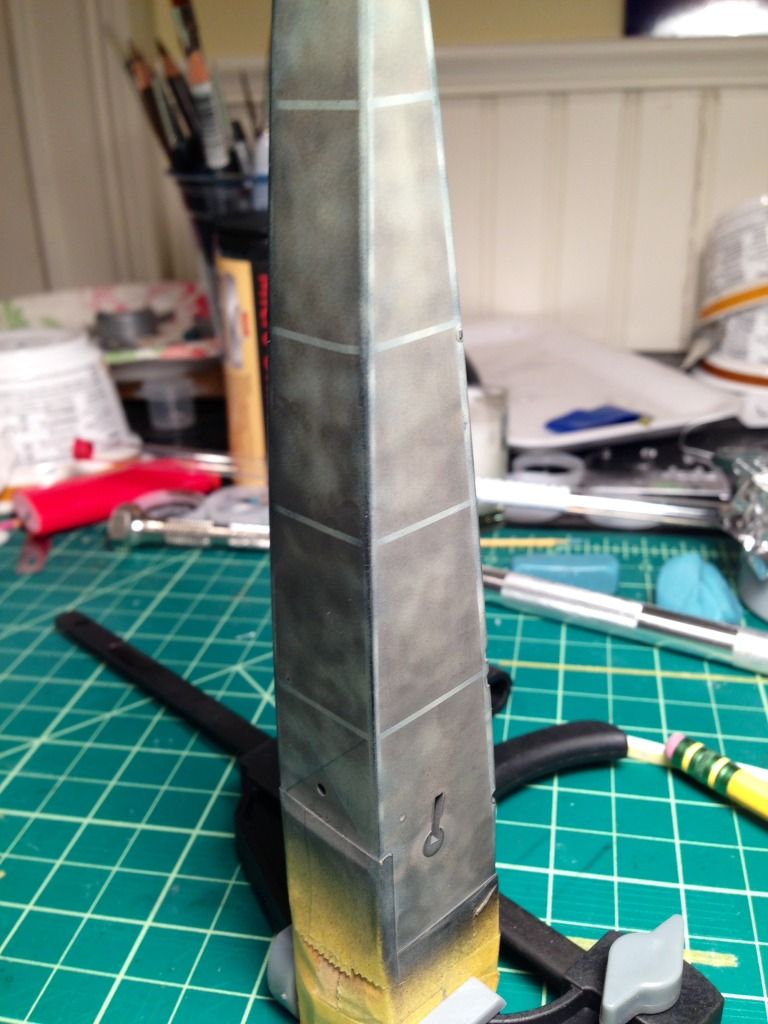
The second picture shows the crossed pencil lines I added behind the cockpit to represent the bracing wires which show through the fabric in one of the pictures included in the kits'  instructions.  Obviously the results after the undercoats here are very contrasty, but they get toned down significantly after the next step, when I applied a very thin (1:3) coat of the final color to tie it all together:

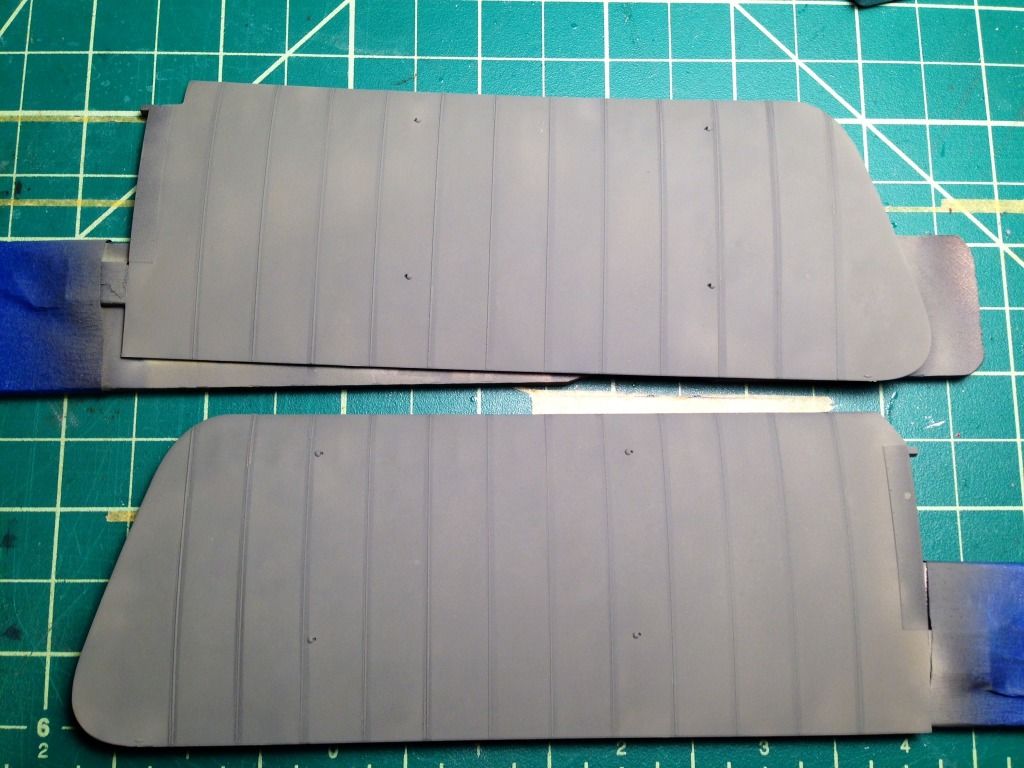
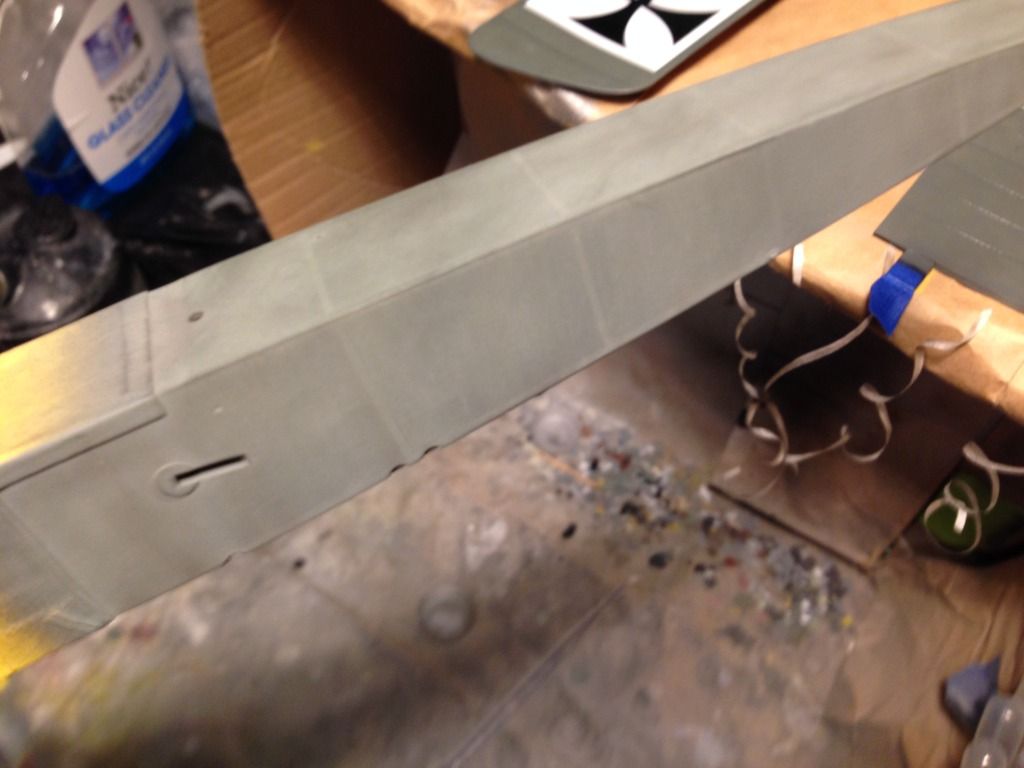
I sprayed a coat of Alclad Aqua Gloss in preparation of decals.  This is as far as I got with the fuselage at this point, but the wings continue on with their iron cross decals:

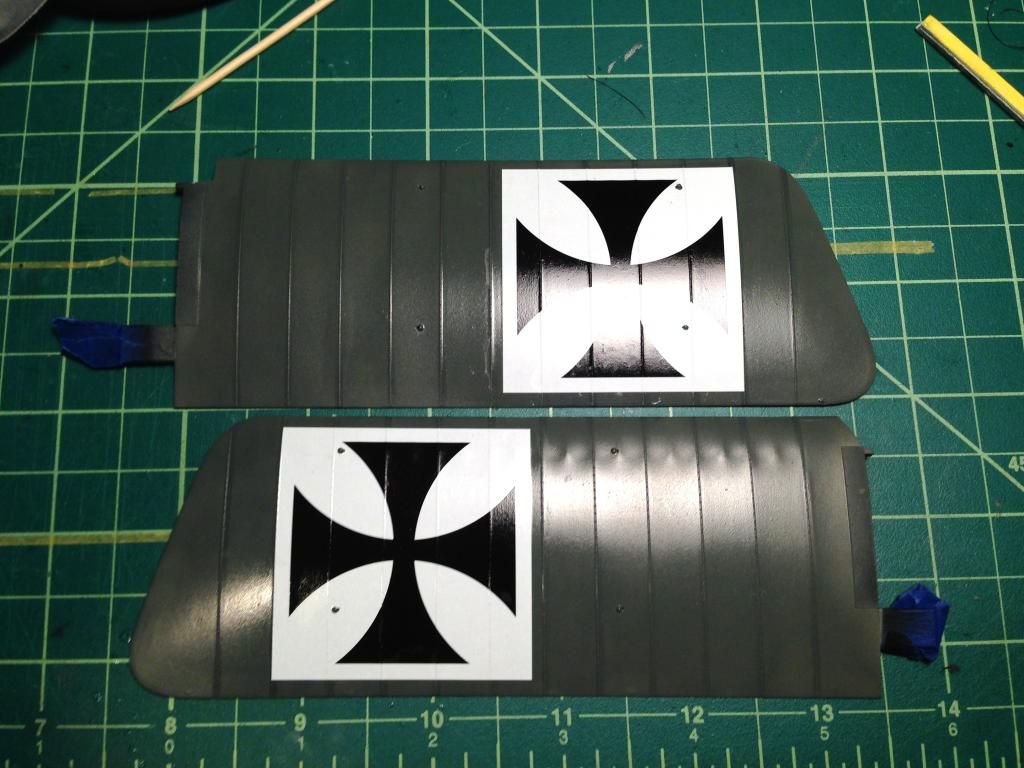
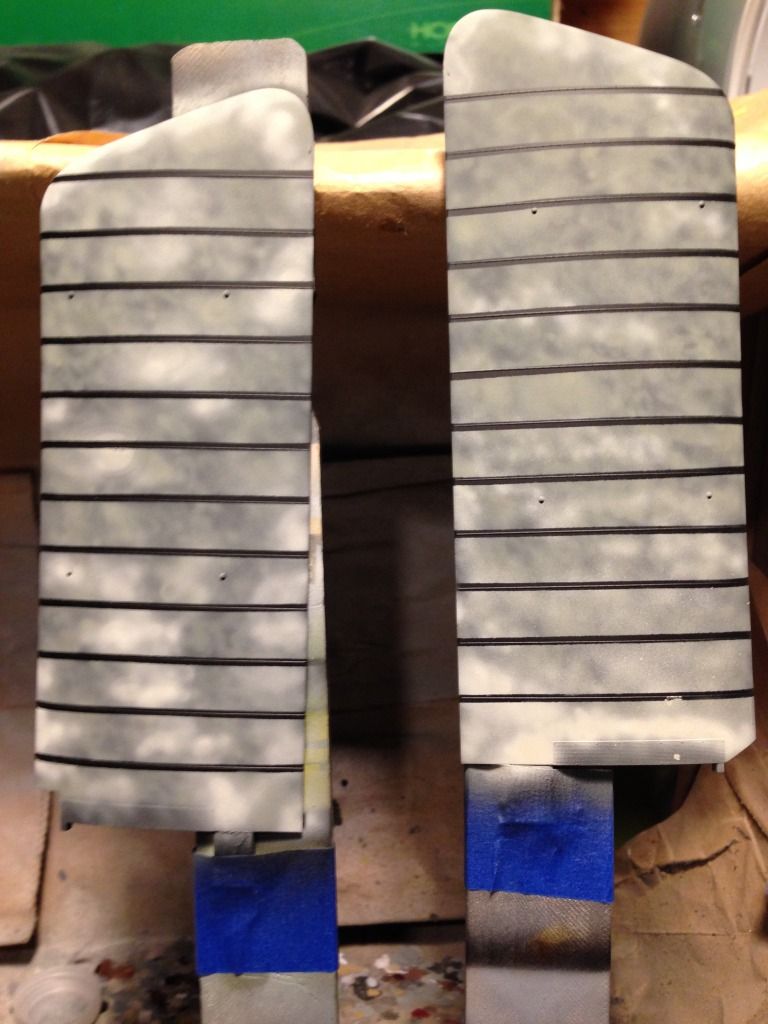
It looks like a big shift in color and luminance between this picture and the last, and while some of that is due to shooting with a camera phone under changing light, the gloss definitely accentuated the green tones, and darkened things up a bit.  Continuing the process, I reapplied the tape over the wing ribs, and sprayed a thin coat of X-19, Smoke, over them.  Additionally, I sprayed some very dilute XF-1, Flat Back, in a couple of spots where I wanted a stronger effect.

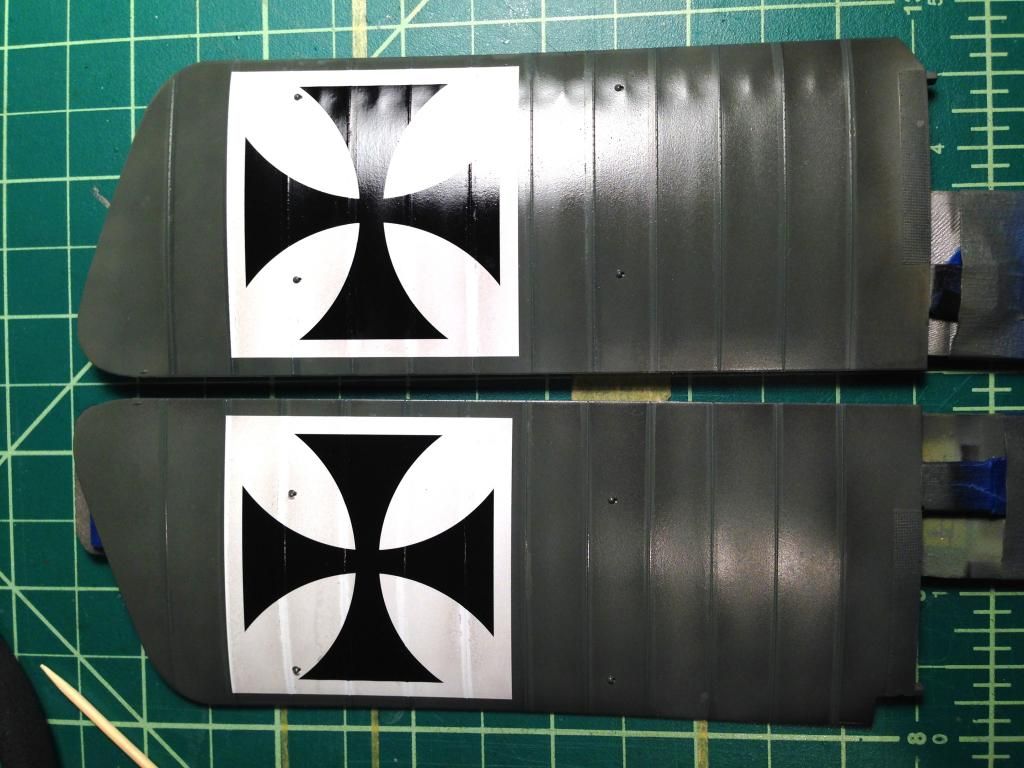
Because the Smoke is so thin (particularly when it has been that diluted), I have trouble judging the effect until I remove the tape and see the contrast versus the untreated areas.  The results, in this case, are probably a little heavier than I intended, but not terribly so.

I still need to add the smaller, stencil type, decals to the wings, and will paint the metal walkways after I have finished clear coating the wings. 

That catches me up.  I damaged a handful of the resin valve rocker arms, so the Oberursal is on hold while I wait for replacements from Taurus.  Lukasz, the owner, has been incredibly helpful to me; his customer service matches the incredibly high quality of his products.  I'm a big fan.

Comments, questions, etc. are always welcome.  I continue to enjoy seeing the updates people are posting in this group build... great stuff.

Blue

  • Member since
    April 2005
  • From: Piscataway, NJ!
Posted by wing_nut on Friday, September 5, 2014 7:29 AM

PJ, Nice work.  And how can anyone stay mad at a face like that.

Looking good Blue.

Marc  

  • Member since
    November 2008
  • From: Central Florida
Posted by plasticjunkie on Friday, September 5, 2014 9:03 AM

Blue...Yes even at 1/48 it's tiny. Can't imagine doing one in 1/72.Geeked Great progress on your model. Love the AB effect.

Wnut... Thanks. Holly is a sweetie, just a big playful puppy even though she just turned 2.

 GIFMaker.org_jy_Ayj_O


Too many models to build, not enough time in a lifetime!!

  • Member since
    February 2006
  • From: Smithers, BC, Canada
Posted by ruddratt on Friday, September 5, 2014 3:16 PM

Love that "who, me?" look on her face PJ.  Priceless!   Really nice progress on the D.VII too.  They are tiny planes.  My WnW D.VII in 1/32 is about as big as a 1/48 P-47.

Blue, you're knockin' my socks off here!  Great technique - really gives the impression of structure underneath the fabric and adds a lot of depth.  Awesome stuff! Yes

Marc, I knew you'd be showing up soon. Can't wait to see you get started!

Mike

 "We have our own ammunition. It's filled with paint. When we fire it, it makes pretty pictures....scares the hell outta people."


  • Member since
    February 2006
  • From: Smithers, BC, Canada
Posted by ruddratt on Friday, September 5, 2014 3:57 PM

Well, as promised, here's a few pics to show where the Tripe stands.  The fuselage is buttoned up and the lower wing attached. Everything fit like it should. Next step is to clean up the seams and add the tail sections, mask 'er up and get some paint on 'er.


Here's the engine all painted up and weathered.  A base coat of Alclad II Aluminum was lightly overcoated with Tamiya clear yellow and then Tamiya smoke to give it a sort of heated, oxidized look. The manifolds got an additional treatment of varying shades of rust with Tamiya weathering powders to carry it a bit further and set 'em apart from the heads.  Lastly came a wash of Citadel Devlan Mud (this stuff is awesome for simulating grime!) and Badab Black. The lifters were painted with a Burnt Umber/Testors silver mix and EZLine was used for the ignition wires.


Mike

 "We have our own ammunition. It's filled with paint. When we fire it, it makes pretty pictures....scares the hell outta people."


  • Member since
    December 2002
  • From: Bury St Edmunds, Suffolk, England
Posted by Bish on Friday, September 5, 2014 3:59 PM

Blue, that's is some sweet work there. I love those huge crosses.

I am a Norfolk man and i glory in being so


On the bench: Airfix 1/72nd Harrier GR.3/Fujimi 1/72nd Ju 87D-3

  • Member since
    December 2002
  • From: Bury St Edmunds, Suffolk, England
Posted by Bish on Friday, September 5, 2014 4:02 PM

PJ, really nice wood effects, I really must work on that, you guys are really pulling out all the stops here.

Mike, lovely work, that engine looks really nice. Going to be interested to se how you rig this one.

I am a Norfolk man and i glory in being so


On the bench: Airfix 1/72nd Harrier GR.3/Fujimi 1/72nd Ju 87D-3

  • Member since
    February 2006
  • From: Smithers, BC, Canada
Posted by ruddratt on Friday, September 5, 2014 4:15 PM

Thanks Bish! There's a bit of rigging on this guy, but it's fairly minimal - mostly control lines and a handful of bracing wires, but nothing close to an Eindecker or SE.5a. EZLIne will do the job here - love that stuff!

Mike

 "We have our own ammunition. It's filled with paint. When we fire it, it makes pretty pictures....scares the hell outta people."


  • Member since
    December 2002
  • From: Bury St Edmunds, Suffolk, England
Posted by Bish on Friday, September 5, 2014 5:01 PM

Now you mention it, I had noticed before that the tri planes don't have much rigging in the wings. I assume the centre wing being fixed to the fuselage as well as the bottom one give it enough strength not to need all the wires.

I am a Norfolk man and i glory in being so


On the bench: Airfix 1/72nd Harrier GR.3/Fujimi 1/72nd Ju 87D-3

  • Member since
    October 2008
  • From: Georgia
Posted by Rigidrider on Friday, September 5, 2014 5:51 PM

OK... a little more progress, Starting to get some of the components together...

Man this thing is small!

Getting some of the base colors in place...

Getting some of the top scheme in place...

and lastely for now a couple of coats of Future floor finish. Look around, check for hawks... This is about where I lost my SPAD... LOL!

When Life Hands You A Bucket Of Lemons...

Make Lemonade!

Then Sell It Back At $2 Bucks A Glass...

  • Member since
    February 2006
  • From: Smithers, BC, Canada
Posted by ruddratt on Friday, September 5, 2014 6:11 PM

That's pretty much it Bish.  They're sturdy little planes.  One big difference between this guy and Fokker's version was the lack of moveable control surfaces on the Fokker's middle and lower wings - just the upper wing had 'em.  The Sopwith had 'em on all three,  making it way more maneuverable.  Add an excellent rate of climb and a more than adequate top speed and you get a plane that was a darn good match for anything else in the air.


Rigid -  sweet looking Fokker!  I love that color scheme, and will be doing a similar one on my Roland D.VIa with the stripes running horizontally.  Interesting too how Roden tooled the front third of the fuselage as a separate assembly.  Never seen that before.

Mike

 "We have our own ammunition. It's filled with paint. When we fire it, it makes pretty pictures....scares the hell outta people."


  • Member since
    November 2008
  • From: Central Florida
Posted by plasticjunkie on Friday, September 5, 2014 7:10 PM

Rrider...I like that scheme on your Fokker. Mine is gonna have some really wild colors, like groovy man.

ratt...Great job on that engine! I like using Tamiya clear blue over the Alclad for that bluish discoloration tone on the metal. That is one sharp looking tripe. And yea I had to snap a picture of Holly when I asked her about her sabotaging my build and that was her reaction! LOL

Bish.. Thanks, the wood tone thing is really easy.

 GIFMaker.org_jy_Ayj_O


Too many models to build, not enough time in a lifetime!!

  • Member since
    April 2005
  • From: Piscataway, NJ!
Posted by wing_nut on Friday, September 5, 2014 7:32 PM

Rigid... very nice work on those stripes.  Always somewhat terrifying when that tape starts to come off.

Mike... Nice work there my boy.  Nice indeed.  I can almost smell the castor oil on the engine.

And wait no more for some real work Mike.  Started on the interior.  Nice and sturdy parts for the sides.  No where near as flimsy as they look. Whistling


Marc  

  • Member since
    October 2013
Posted by Big Blue on Friday, September 5, 2014 10:29 PM

Thanks for the kind comments everyone.

Mike: I love what you have done so far on the Tripe.  Its funny how strong the Sopwith family resemblance is... other than those massive cabane struts, that really reminds me of my Snipe build.  Like others have said, I like how you have treated the Clerget; I may borrow some of those techniques when I finally get around to painting my engine.

Doug: The D.VII looks great so far.  I am impressed with how quickly you seem to be able to move through your build while still maintaining quality; I am quite slow by comparison.  The WnW D.VIIf is next up for me, and I am planning on going with the "Red W" livery, which features a black and white striped fuselage.  I have been a bit nervous about puling it off, but you have made it look easy!  Nice work.  And, yes... KEEP IT INSIDE!

Marc:  Glad to see you up and running.  The framing and wood work look quite nice so far.  I will enjoy seeing this build come together.

Blue

  • Member since
    October 2008
  • From: Georgia
Posted by Rigidrider on Saturday, September 6, 2014 7:45 AM

Ruddratt  I kinda like the sectional design, Your not having to hold everything together to work on 1 thing, but again, Im not a big WWI builder and am trying to learn from you more experianced guys, all I have at the time to go by is pictures.

PJ,  yes the colors of the WWI combatants were really out there! I do love em !

WingNut... Yes... tape... scarry!!! LOL When I know tape will be used during the build, I try to buff surface with a 0000steel wool washed off in lacquer thinner then bathe area in soap and water to try to assure a good adhesion...I also thin the MM acrylics and the Tamiya acrylics with straight LT for a faster dry and adhesion, this usually works, AND WOW... That frame is amazing! Very nice!

Blue... LOL...Thanks, actually it wasnt that fast, what you see here took a couple of days, I'm kinda winding down my working career and will be retiring in a few (2 or 3 yrs) and have made a deal with my employer to work just over 3 wks a month, so I have a bit of build time during the month. And on top of that my wife travels a bit in her job so again I have a bit more build time!

Bish Rollands, Kool! Good looking craft, I like any of the Albatros looking planes!

When Life Hands You A Bucket Of Lemons...

Make Lemonade!

Then Sell It Back At $2 Bucks A Glass...

  • Member since
    December 2002
  • From: Bury St Edmunds, Suffolk, England
Posted by Bish on Saturday, September 6, 2014 8:13 AM

Doug, liking that scheme, great job on those strips. I hope you have a couple of Flak guns set up to protect it this time.

Mike, I do recall hearing that this Triplane was extremely manoeuvrable.

PJ, I have tried it on small items, like weapons and a 72nd table, and ye, its quite easy to get the hang of. But the time I get to a prop, I should have it nailed. Certainly some great example of it on here.

Marc, very nice. Some lovely work there, looking forward to seeing some skin on this.

I am a Norfolk man and i glory in being so


On the bench: Airfix 1/72nd Harrier GR.3/Fujimi 1/72nd Ju 87D-3

  • Member since
    April 2005
  • From: Piscataway, NJ!
Posted by wing_nut on Saturday, September 6, 2014 9:20 AM

Thanks guys.  Bish, the skin seems such a longs ways off...Indifferent Especially since I am going backwards in that respect. I've already had to remove some "skin" after a CA glue mishap Whistling

Marc  

  • Member since
    December 2002
  • From: Bury St Edmunds, Suffolk, England
Posted by Bish on Saturday, September 6, 2014 9:22 AM

Ouch, well I am sure we have all been there.

So is the covering of the frame plastic.

I am a Norfolk man and i glory in being so


On the bench: Airfix 1/72nd Harrier GR.3/Fujimi 1/72nd Ju 87D-3

  • Member since
    November 2008
  • From: Central Florida
Posted by plasticjunkie on Saturday, September 6, 2014 9:56 AM

wingnut

That is some beautiful work on the frame. You really can't go wrong with any of the WNW kits.

 GIFMaker.org_jy_Ayj_O


Too many models to build, not enough time in a lifetime!!

  • Member since
    April 2005
  • From: Piscataway, NJ!
Posted by wing_nut on Saturday, September 6, 2014 10:22 AM

Thanks PJ

Yes the fuselage is a typical 2 halves of plastic affair.  If I recall from the 1st glance at the parts there are ripples in the "fabric" to look like it was pulled taut and stressed.

Marc  

  • Member since
    November 2008
  • From: Central Florida
Posted by plasticjunkie on Saturday, September 6, 2014 10:55 AM

wing_nut

there are ripples in the "fabric" to look like it was pulled taut and stressed.


Yes I have the same rippled molded effect on the skin of my WNW SE5 model.

 GIFMaker.org_jy_Ayj_O


Too many models to build, not enough time in a lifetime!!

  • Member since
    February 2006
  • From: Smithers, BC, Canada
Posted by ruddratt on Saturday, September 6, 2014 8:38 PM

Marc - off to your typical great start I see.  That's looking real nice.  I'm glad you're building that kit - I've yet to see one here all built up. 

PJ - I wish I had used the rippled fuselage for my SE.5.  I had an 'accident' with it and was relegated to option 'B', the smooth fuselage.  Still looks good and I'm happy with it,  but the other one would have been awesome!

Mike

 "We have our own ammunition. It's filled with paint. When we fire it, it makes pretty pictures....scares the hell outta people."


JOIN OUR COMMUNITY!

Our community is FREE to join. To participate you must either login or register for an account.

SEARCH FORUMS
FREE NEWSLETTER
By signing up you may also receive reader surveys and occasional special offers. We do not sell, rent or trade our email lists. View our Privacy Policy.