SEARCH FINESCALE.COM

Enter keywords or a search phrase below:

2015 Messerschmitt Bf 109 Group Build

180533 views
2798 replies
1 rating 2 rating 3 rating 4 rating 5 rating
  • Member since
    September 2011
  • From: Milaca, Minnesota
Posted by falconmod on Wednesday, January 28, 2015 12:53 PM

do you mean the forward portion of the rudder above the elevators?  I drew a red line on this picture.

On the Bench: 1/72 Ki-67, 1/48 T-38

1/144 AC-130, 1/72 AV-8A Harrier

  • Member since
    December 2002
  • From: Bury St Edmunds, Suffolk, England
Posted by Bish on Wednesday, January 28, 2015 1:18 PM

Ye, that area. This is a good drawing of it, but this missus the overspray under the 9.

The hasegawa kit missed those out as well. But I had a couple of pics of the real thing and because I wasn't happy with the white 9 in the Hase kit I got a set of AM decals and the scheme on those matched the pics. Unfortunately the only online image I can find of the real thing is this.

But there are a couple of it in flight in the Squadron In Action book and that's where I realised the errors in the kit. 

I am a Norfolk man and i glory in being so


On the bench: Airfix 1/72nd Harrier GR.3/Fujimi 1/72nd Ju 87D-3

  • Member since
    December 2009
  • From: Laurel, MD
Posted by Tucohoward on Wednesday, January 28, 2015 5:35 PM

Joe(lawdog), the only decals I could find that fit your needs is Eagle Strike 48101 Augsburg's flyers Pt.IV. Pretty interesting scheme, although I like the Hackl one as well. You are welcome to them, just PM me.

Jay

The Mighty Mo says no.

  • Member since
    October 2008
  • From: Georgia
Posted by Rigidrider on Wednesday, January 28, 2015 6:20 PM

Man you cant even take a nap on this GB! LOLOL.... Wake up and find some phenomenal progress being made! LOVE IT!!!

Well, here is me progress over the last day or two.

The decals are all in place, and the bulk of the weathering is done now. The Dull coat is applied, and time to  begin wrapping up, Another awaits in the wings!

Canopy and aerial wire is installed.

Sorry, pictures are a tad washed out, I forgot to compensate exposure with the flash.

I like to make the springs using wire gauge drill bits chucked in a pin vise then wrapping a fine wire around it and voila! , a spring is born. I also make one for the canopy. 

And for the most part ... there she is! Now I need to make the base to set her on before calling it complete.

I've already begun work on the dio to mount her to and should be done early this weekend. More then! 

Take care all, Back soon...

Doug

When Life Hands You A Bucket Of Lemons...

Make Lemonade!

Then Sell It Back At $2 Bucks A Glass...

  • Member since
    December 2009
  • From: Laurel, MD
Posted by Tucohoward on Wednesday, January 28, 2015 6:49 PM

Looks great Doug! I like it a lot.

Jay

The Mighty Mo says no.

  • Member since
    July 2014
Posted by modelcrazy on Wednesday, January 28, 2015 10:33 PM

Looks fantastic Doug.  Yes

Steve

Building a kit from your stash is like cutting a head off a Hydra, two more take it's place.


http://www.spamodeler.com/forum/

  • Member since
    March 2010
  • From: MN
Posted by Nathan T on Wednesday, January 28, 2015 10:39 PM

Doug thats some great detail. I usually skip out on the spring tensioners and aerial insulators in 1/48 scale. I figure just getting the ez line in place is hard enough.


  • Member since
    April 2005
Posted by Thunderbolt379 on Wednesday, January 28, 2015 11:18 PM

Hear hear, on all counts! I do blobs of paint for the ceramic insulators, but that's about it...

M/TB379

http://worldinminiature.blogspot.com/

  • Member since
    April 2005
Posted by Thunderbolt379 on Thursday, January 29, 2015 2:06 AM

Well, the main decals are on, now it's the stencil data and "Luchs" to sort out.

The bad news is it could be a few days before I can get back to it. Stencils are a problem, the black ones would be invisible against the green, there's no point using them against RLM 70, so there's just the red and other bright coloured ones that are worth applying. There are only trim tabs moulded on the elevators, and they are now in paint.

M/TB379

http://worldinminiature.blogspot.com/

  • Member since
    January 2015
Posted by Radial9 on Thursday, January 29, 2015 6:55 AM

Bish

Radial9

OK Worthy Model Masters…. Grasshopper thinks he’s ready to begin running with the big dogs.

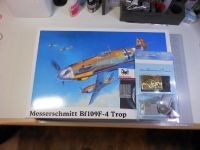
Got my BF109F-4 Trop and a few add ons sitting here ready to go. Still waiting for the decal sets to show up. I’m quite impressed with the talent here. Have been keeping up on the thread and the other BF109 builds. Unbelievable talent. Will the pace slow down over the next few months so us mere mortals will feel comfortable posting our rookie handywork?

I won’t start putting together the PE IP and cockpit set until next week. Need to clear the deck of a few items. Took the PE cockpit set out and looked it over. Intimidating as Hell. Have spent countless hours reading here and other FSM threads. Many more hours practicing with the new Paasch Model H.

Many of you have responded with genuine kindness and encouragement to questions sent by PM. Thank you!

Here we go.

Bob

I'll be keeping an eye on this one. that's the kit I will be building later in the year. The pic is a bit small, is that an RB productions PE set there.

Bish... The PE cockpit set is an Aires. Sorry for the poor photo, my first. I'll dicker around with the image sizes in the test forum section until I get a size that works, I ordered a SmallShop PE cutting tool this am. Will commence operations upon it's receipt. I know even after weeks of reading here and elsewhere I'm going to have rookie questions that I haven't found answers to yet. Will be taking advantage of some of the very kind PM offers made over the past few weeks .

Cheers,

Bob

  • Member since
    December 2009
  • From: Laurel, MD
Posted by Tucohoward on Thursday, January 29, 2015 7:18 AM

Bob, since you are just starting out, you may want to just go with the kit cockpit on this build. I am building a Hasegawa F currently and found the level of detail much improved from the G and K. I have always used AM cockpit sets on those, but didn't feel it was needed on the F. I did use a Quickboost stick, which is very easy to do, and I always use RB Productions belts, which are pretty fiddly, but IMHO are the most realistic looking belts out there and make a big difference. PE can be frustrating and much can be done just with careful painting.

Jay

The Mighty Mo says no.

  • Member since
    January 2015
Posted by Radial9 on Thursday, January 29, 2015 7:31 AM

Jay, Thanks for the advise. I would probably be well advised to take it. The detail of the kit cockpit is indeed much greater than what I expected. I have not seen any pilots modeled in the builds here. Is it common to not include them? I'm thinking they most likely cover the fine detail put into the cockpit??

Bob

  • Member since
    December 2009
  • From: Laurel, MD
Posted by Tucohoward on Thursday, January 29, 2015 8:57 AM

Bob, yes they do conceal some of the detail, but I think the reason is most of us are not very good at figure painting. If your pilot doesn't look as good as the plane it detracts from the overall build, at least to me anyway.

Jay

The Mighty Mo says no.

  • Member since
    September 2011
Posted by fightnjoe on Thursday, January 29, 2015 9:33 AM

Many thanks for all the kindness.

T-Bolt to be honest I really enjoy the construction aspect.  That all started years ago with my first modified pit.  Since then I find it very enjoyable.  Your -D looks clean and crisp.  Really looks good.

Stang you are right.  There does seem to be a lot of overengineering on this but then again what I am doing some say is overkill.

Tom many thanks.  It is the little things that always seem to stand out.

Lawdog another crisp and clean build.  And so quick.

John nice work on the canopy.  I seem to always have at least one issue with mine.  Operator error most of the time.

Jay I wish I had decent display cases.  Most of my work ends up on a shelf in a cabinet down in the bunker where it is hidden away.

Doug the wire springs as well as the overall is fantastic.  I have yet to do an aerial that I am truly happy with.

Again I am a bit overwhelmed by all the talent shown in this build.  All the work seems so polished, so refined.  

Joe

Veterans,

Thank You For Your Sacrifices,

Never To Be Forgotten

Where you can find me:

Workbench on FaceBook  Google Plus  YouTube

  • Member since
    December 2002
  • From: Bury St Edmunds, Suffolk, England
Posted by Bish on Thursday, January 29, 2015 3:46 PM

Really nice work there Doug. I really like how you have done those antenna's. I think I am going to have to learn that one. In 72nd, I can get away with not doing them like that, but in 32nd I reckon it will be a must.

Mike, I do like the look of that one. Do you know if there was any purpose to the white markings.

I am a Norfolk man and i glory in being so


On the bench: Airfix 1/72nd Harrier GR.3/Fujimi 1/72nd Ju 87D-3

  • Member since
    April 2005
Posted by Thunderbolt379 on Thursday, January 29, 2015 4:05 PM

Thanks Joe and Bish! Honestly, I have no idea about the white crosses, they seem fairly unique -- perhaps they mark out a veteran of the Spanish Civil War, but then why didn't loads of aircraft have them? Maybe it was a recognition thing, something applied for an exercise. These markings I believe are dated to March 1939.

No further progress -- it'll be a couple of days before I can get to the stencils, but then hopefully a fairly clear shoot to the finish. I found a set of True details wheels right for this bird so I don't have to hang around for the ones  bought to arrive or use the poorer kit wheels after all.

M/TB379

http://worldinminiature.blogspot.com/

  • Member since
    December 2009
  • From: Laurel, MD
Posted by Tucohoward on Thursday, January 29, 2015 4:47 PM

According to my book, which is from the Jagdwaffe series by Classic Colours, Vol. 1 Sec. 3 Blitzkreig and Sitzkreig, Poland and France 1939-1940,  they are special markings for the Staffel Schwamfuhren, if that tells you anything.

Awesome set of books btw. 20 books in the Jagdwaffe series plus more for other parts of the Luftwaffe besides the fighters.

Jay

The Mighty Mo says no.

  • Member since
    October 2008
  • From: Georgia
Posted by Rigidrider on Thursday, January 29, 2015 5:57 PM

Thanks all! Again, you guys are and continue to be the best!!!, The tensioning springs are really fairly easy Bish, I just use a micro drill bit( I try to guess at the scale) and as I said, leave a short pig tail at both ends to form the hooks, then just start winding a piece of fine wire around it until I have enough, then bend the hook on both ends. But kinda like Nathan said, Hard enough to just get the "EZ" line in place. The connectors and cones I usually carefully heat some clear acetate plastic and while still hot and soft push something pointed like a toothpick into it forming a cone shape. One tiny hole and your done with the cone. Take care all! Keep up the great work!

Doug

When Life Hands You A Bucket Of Lemons...

Make Lemonade!

Then Sell It Back At $2 Bucks A Glass...

  • Member since
    November 2003
  • From: Naples, FL
Posted by tempestjohnny on Thursday, January 29, 2015 7:27 PM

Great work everyone. Welcome aboard Bob.  We'll ordered my mug today should get it next week. Went with the 15 oz.  Thanks Clemens


  • Member since
    March 2012
  • From: Corpus Christi, Tx
Posted by mustang1989 on Thursday, January 29, 2015 7:47 PM

Bob: I'm assuming that's a 32nd scale kit?

Doug: You're telling me about not being able to take a nap around here and them BAM! 2-3 pages go by. You outta try running this mamma jamma!!!! Constant good action!!! Really great group build so far you guys. Thanks for all the hospitable interaction!!


 Forum | Modelers Social Club Forum (proboards.com) 

  • Member since
    April 2005
Posted by Thunderbolt379 on Thursday, January 29, 2015 7:50 PM

Bit of good news, guys -- I didn't have to head out today so I've snagged the chance to drop the selection of data onto the -D. A few to go and she'll be ready for inspection and final clear coat...

M/TB379

http://worldinminiature.blogspot.com/

  • Member since
    May 2013
  • From: Indiana, USA
Posted by Greg on Thursday, January 29, 2015 8:02 PM

Lawdog Joe, man, you don't mess around. Takes me longer to open a box. Great start.

John, that's some terrific work. Masking a canopy in 1/72. That thought might keep me awake tonight. You have it down pat, it seems.

Bob (radial 9), welcome to the group!

Doug, yours has my jaw dropping, buddy. Really outstanding. That spring and insulator in the coolest thing. Thanks for 'splaining how you did it.

Mike, those are surely some interesting markings. New to me. Looking great, looking forward to watching it progress.

Mustang Joe, this is a heckuva GB you have going here. You sure do a nice job keeping up with it.

  • Member since
    December 2002
  • From: Bury St Edmunds, Suffolk, England
Posted by Bish on Friday, January 30, 2015 12:47 AM

I was going to check those books tonight jay. Now I know where I just had a look and I see what you mean. Ye, that makes perfect sense. I am going to have to do one of those in 72nd.

Doug, thanks for the info. Will defiantly give that a go.

I am a Norfolk man and i glory in being so


On the bench: Airfix 1/72nd Harrier GR.3/Fujimi 1/72nd Ju 87D-3

  • Member since
    April 2005
Posted by Thunderbolt379 on Friday, January 30, 2015 2:13 AM

Jay -- thanks for the info! Okay, the crosses were a marking that told everybody else in the unit "this one's the boss!"

Right, I made use of unexpected time today. The stencils, such as will show up against 70, are all on, the model was then washed and air dried, and I've shot a final coat of clear. In the same session I got the paintwork underway on the TD wheels I found. Here she is:

The decals pulled in tightly enough for most panel lines to take an accent over the decals -- not all, a couple repelled the wash, but enough for the effect to look right.

It should be downhill from here -- landing gear, detail painting, radio mast and other small parts. There are no moulded formation lights, I'm thinking of trying the CA-dot method.

I might get a little more done tomorrow, then I'm away overnight, so still a few days to finish.

Cheers, M/TB379

http://worldinminiature.blogspot.com/

  • Member since
    December 2009
  • From: Laurel, MD
Posted by Tucohoward on Friday, January 30, 2015 6:50 AM

Mike, looks great! Very well done.

Jay

The Mighty Mo says no.

  • Member since
    April 2005
Posted by Thunderbolt379 on Friday, January 30, 2015 7:03 AM

Thanks, Jay! I've done the formation lights, I used micro drops of CA applied with a needle to create the lights physically, and have painted them with a very thin brush. I'll add some Future to them before I hit the hay, and I'm hoping to get some more details done in the morning before I head off. If I can get several items done then it's not beyond the bounds of possibility that I can finish her sometime late Sunday (Aus time).

M/TB379

http://worldinminiature.blogspot.com/

  • Member since
    March 2012
  • From: Corpus Christi, Tx
Posted by mustang1989 on Friday, January 30, 2015 7:53 AM

That's a great job on that "D" there Mike! I wasn't into the earlier 109's until recently meaning the A's through E models. They have come to grow on me a bit.

Greg: Thanks for the vote of confidence brother!


 Forum | Modelers Social Club Forum (proboards.com) 

  • Member since
    January 2015
Posted by Radial9 on Friday, January 30, 2015 8:35 AM

Mustang1989:   Yes, the scale is 1:32

All: Spending some serious time with the assembly sheet. Looking back over the cockpit builds in the thread it appears most choose to paint first; interior walls, floor, yoke, trim wheel, rudder petals and various other pieces either separated or still on the sprue, then remove paint from contact surfaces and assemble followed by detail painting with a brush or toothpick. Do I have that right?

Also, it seems I have a choice to either dry paint the instrument panel followed by detail painting the dials or use the included decal set. Should my first attempt at small detail decal work be the IP or should I hand paint? I know it’s ultimately my decision, but the experience here is well worth seeking out. I know Jay used the decal set and cut them down. I am experienced doing fine detail work as a long time fly tier, but new techniques are always an issue. I have done my reading homework about decal application.

Advise and suggestions welcomed. Thank you for the welcome posts too!!

Bob

  • Member since
    October 2008
  • From: Georgia
Posted by Rigidrider on Friday, January 30, 2015 8:55 AM

Bob... I personally will never again hand paint an ip gauge.  Check out , AirScale IP decals on Ebay or the LHS. Just type in AirScale or instrument panel decals and check them out, they are relatively inexpensive, look great and come in various scales and air craft types, also placards if desired. After application, put a small drop of micro sol on them, let it dry, then put a drop of clear floor wax or clear varnish on it and you have a beautiful panel. Now as to pit assy, I assy then paint, except the IP, that I usually do while the rest is drying, then paint the pit assy and install IP. Thats just my way.

Doug

When Life Hands You A Bucket Of Lemons...

Make Lemonade!

Then Sell It Back At $2 Bucks A Glass...

  • Member since
    December 2009
  • From: Laurel, MD
Posted by Tucohoward on Friday, January 30, 2015 9:07 AM

Bob, I would go with the decals. They always look better. I cut mine into three pieces. On a 109 with the raised center section it's easier to get the decals to lay down, so left, right, and center sections. Easier to get them aligned with the molded detail also. You will need to use setting solution. When that's done I use Future in each gauge to give it a glossy glass-like appearance. You may have have to do that a couple of times to fill up the depression. If you use the decals, gloss coat the IP over the RLM 66, apply the decals, flat coat, then Future in each gauge.

Jay

The Mighty Mo says no.

JOIN OUR COMMUNITY!

Our community is FREE to join. To participate you must either login or register for an account.

SEARCH FORUMS
FREE NEWSLETTER
By signing up you may also receive reader surveys and occasional special offers. We do not sell, rent or trade our email lists. View our Privacy Policy.