SEARCH FINESCALE.COM

Enter keywords or a search phrase below:

Mustang Build

80077 views
1582 replies
1 rating 2 rating 3 rating 4 rating 5 rating
  • Member since
    July 2014
Posted by modelcrazy on Wednesday, October 14, 2015 9:35 AM
Looking good BD! I love the design of the Blue Nosed Bastards. I always have trouble masking Alclad, you seem to pull it off easily.

Steve

Building a kit from your stash is like cutting a head off a Hydra, two more take it's place.


http://www.spamodeler.com/forum/

  • Member since
    April 2010
Posted by Theuns on Wednesday, October 14, 2015 11:01 AM
I have never had alclad come off with masking. I use only tamiya tape and before putting on the model I pull it over my finger to get the worst "tack" off. Then when i remove it I fold it back on itself and remove it that way, not pulling up but rather "back" Theuns
  • Member since
    July 2014
Posted by modelcrazy on Wednesday, October 14, 2015 2:55 PM

fightnjoe
I am in the Notheastern corner of Washington.

Spokane area? I spent a lot of time in that area while I was driving a Simi. Delivered to Spokane and ran I-90 quite a few times.

Steve

Building a kit from your stash is like cutting a head off a Hydra, two more take it's place.


http://www.spamodeler.com/forum/

  • Member since
    July 2013
Posted by lzdaily@comcast.net on Wednesday, October 14, 2015 5:02 PM

Theuns, look the look of the engine. Very nice work.

BD, the natural metal finish looks great. I haven't worked up the nerve to try a natural metal Mustang, but you make it look easy.

Larry

  • Member since
    September 2011
Posted by fightnjoe on Wednesday, October 14, 2015 10:55 PM

Progress is progress no matter how small.

Today I can show a little progress.

Paint has been thrown at the work so far.  This does not mean I am ready to close it all up but it is a significant step as I am getting close to the point where construction turns into finishing.  

All the interior parts have been painted including the interior of the fuselage and the flooring/bulkheads.  The copper wire is gone and an alternative is now fit.  Nothing is glued though.

...

I also jumped the gun just a little but I wanted to see what the fuselage would look like with the paint.  Alclad Airframe Aluminum over Gloss Gray.

...

Next up will be to finish up all the little construction, just a few things left.  Final touches and then I will look to the engine compartment.  Bad news I am afraid though.  The kit did not come with anything resembling engine mounts.  

Oh Boy.


All comments, critiques, and criticism are encouraged.


Joe

Veterans,

Thank You For Your Sacrifices,

Never To Be Forgotten

Where you can find me:

Workbench on FaceBook  Google Plus  YouTube

  • Member since
    September 2011
Posted by fightnjoe on Wednesday, October 14, 2015 10:56 PM

modelcrazy


fightnjoe
I am in the Notheastern corner of Washington.


Spokane area? I spent a lot of time in that area while I was driving a Simi. Delivered to Spokane and ran I-90 quite a few times.


Actually North of Spokane by an hour or so.


Joe

Veterans,

Thank You For Your Sacrifices,

Never To Be Forgotten

Where you can find me:

Workbench on FaceBook  Google Plus  YouTube

  • Member since
    January 2015
Posted by BrandonD on Friday, October 16, 2015 1:47 AM

Thanks for the comments, guys.

And Larry - it really is easy. THe biggest thing is the prep work. Make sure it's smooth (a well-engineered kit like the Tamiya one makes this a lot easier), then just take your time with the different layers. Make sure to allow plenty of time for paint curing, and it takes care of itself.

-BD-

  • Member since
    September 2011
Posted by fightnjoe on Saturday, October 17, 2015 11:15 PM

Brandon sorry bit delayed in responding.  You and the others are always very kind in commenting on my work.  Appreciated.


Joe

Veterans,

Thank You For Your Sacrifices,

Never To Be Forgotten

Where you can find me:

Workbench on FaceBook  Google Plus  YouTube

  • Member since
    July 2014
Posted by modelcrazy on Sunday, October 18, 2015 6:26 PM

Joe,

That's going to be soo cool.

PA24-250flyer,

I have you down on the roster. I didn't get a chance to go to Reno last year, so I missed him. I will enjoy watching your build of the Old Crow.

Steve

Steve

Building a kit from your stash is like cutting a head off a Hydra, two more take it's place.


http://www.spamodeler.com/forum/

  • Member since
    January 2015
Posted by BrandonD on Wednesday, October 21, 2015 1:22 AM

A quick update on me 1/48 Tamiya P-51D:

I got the legs on, and I got decals on the prop. As it sits right now, it just needs a few things - mounting the canopy, painting the guns, mounting the landing light, mounting the antenna and pitot tube, painting the exhaust pipes, painting streaks for the exhaust, painting the streak for the oil overflow, streaking around the fuel caps, chiping on the prop and probably some gunsmoke stains. Still seems like a lot, actually.

So that's it as it sits now. And Col. Meyer needs to get into the paint shop next.

-BD-

  • Member since
    July 2014
Posted by modelcrazy on Wednesday, October 21, 2015 9:38 AM
BD, there is nothing quite as cool looking as a Mustang in full dress. I'm sure you will nail the weathering as you do all your builds. The blue nose design on the Stangs were such a complement to the design. Great job so far Yes

Steve

Building a kit from your stash is like cutting a head off a Hydra, two more take it's place.


http://www.spamodeler.com/forum/

  • Member since
    April 2010
Posted by Theuns on Thursday, October 22, 2015 5:31 AM
The seat is done, these "real look" straps are finiky to work with but in my view the most realistic I have seen, I am very pleased with the way they look - Thanx Garry :smt023 
As for the instrument decal, it does not exactly fit the clear insert in the pannel, I must be doing something wrong...I will cut the decal and fit it induvidually.

Image

Theuns


  • Member since
    July 2014
Posted by modelcrazy on Thursday, October 22, 2015 9:20 AM

Wow, that looks great T, where did you get the belts again? How were the kits belts?

Steve

Building a kit from your stash is like cutting a head off a Hydra, two more take it's place.


http://www.spamodeler.com/forum/

  • Member since
    April 2010
Posted by Theuns on Thursday, October 22, 2015 9:37 AM
A friend sent me the set of belts in the kit, they are made from a fabric cutout and PE buckles. I used the kit supplied PE belts on my 1/32 P-40 and although OK no where near as nice as these ones. Theuns
  • Member since
    January 2015
Posted by BrandonD on Friday, October 23, 2015 11:58 AM

Well, I am calling this one completed. This is the third P-51 I've built, and all have been for this group build, so thanks for having me! I can't wait till Eduard releases their P-51 family, because I want need more of them.

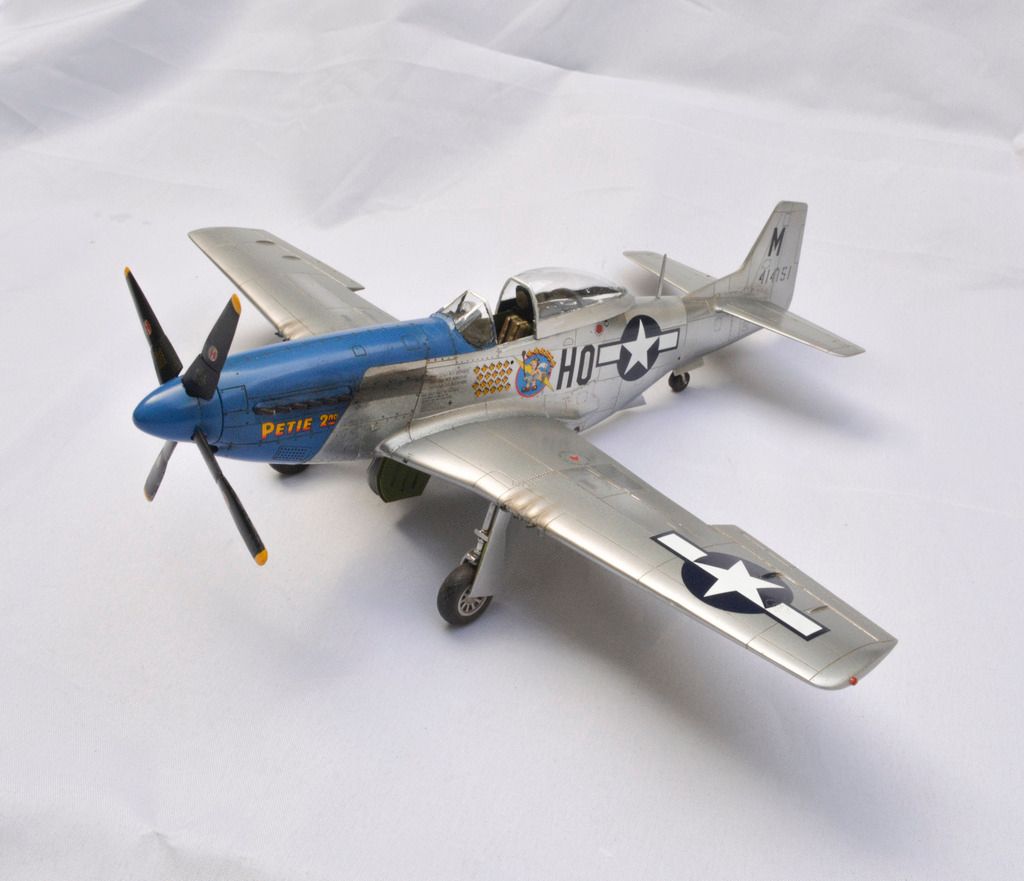
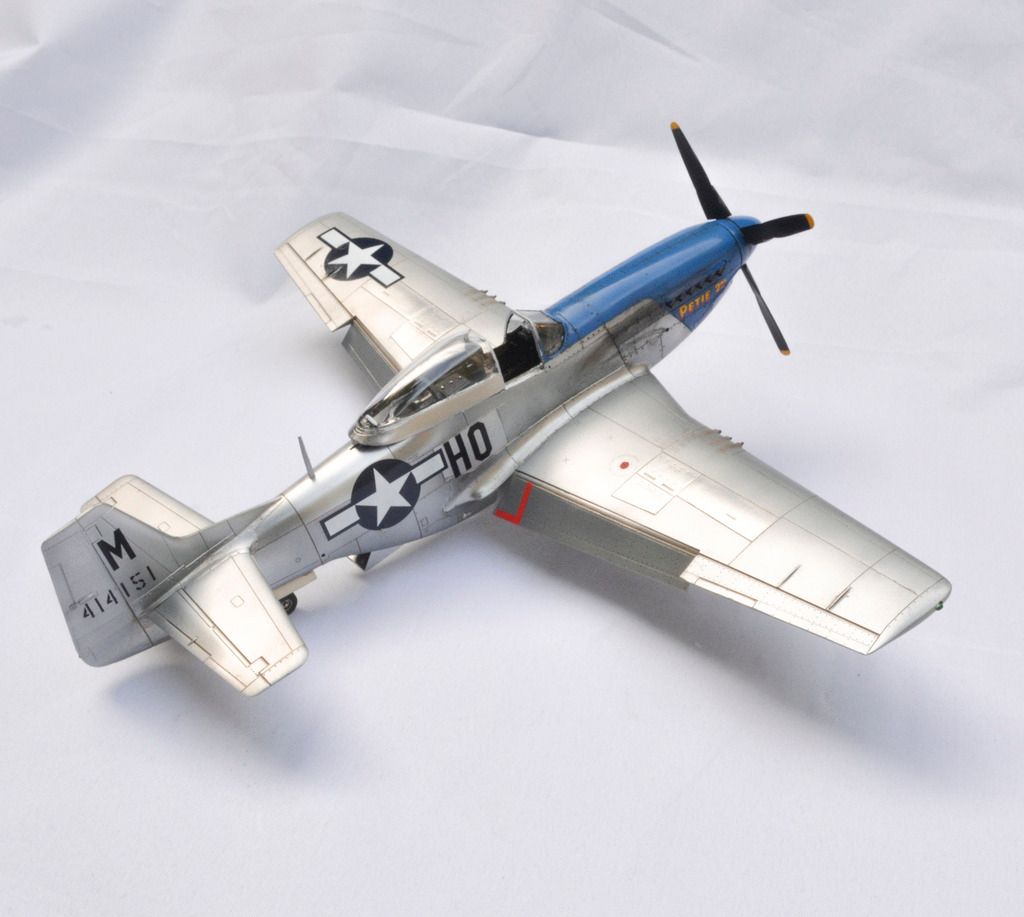
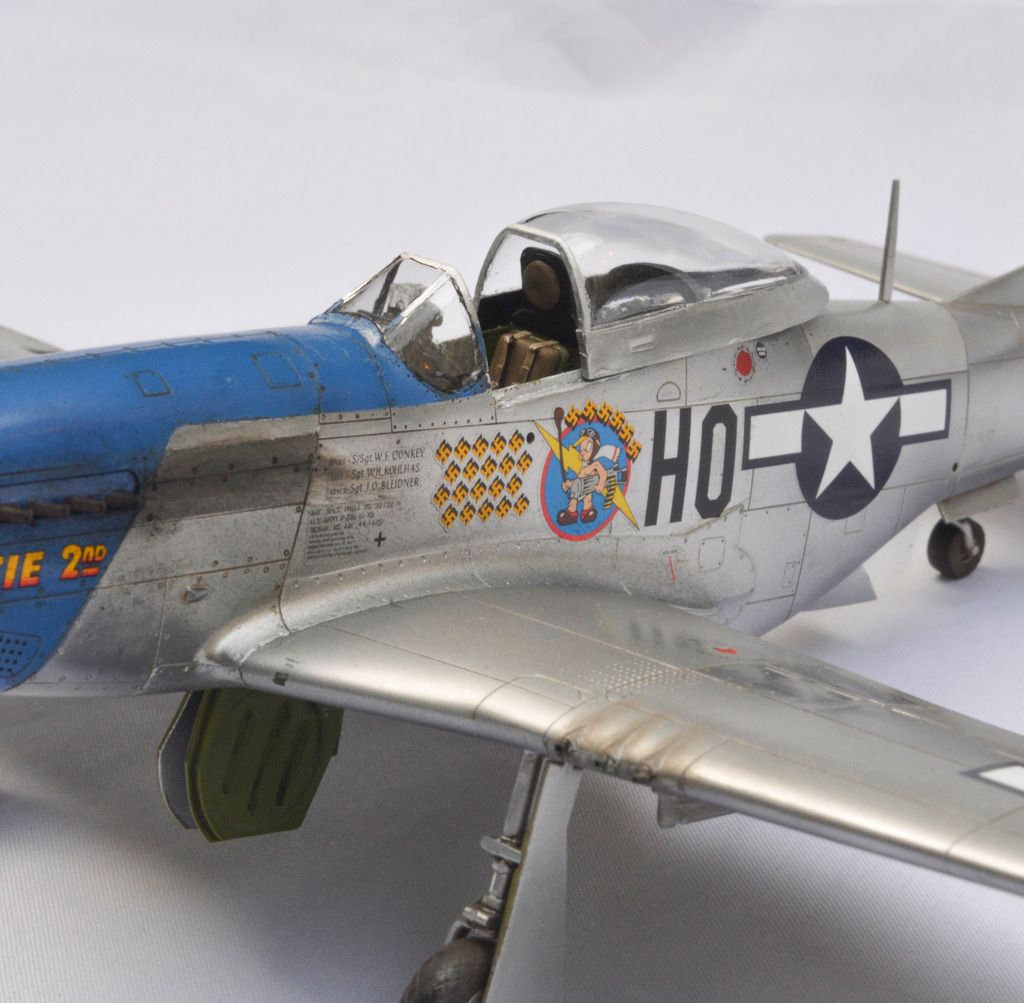
Anyway, this is the Tamiya 1/48 kit with the Eduard color PE cockpit set. I removed the kit guns and replaced them with brass tubing from Albion Alloys, drilled out the holes in the canopy slide brace, drilled out the exhaust and did everything else pretty much OOB. The decals for Petie 2nd, flown by Col. John Meyer, are by Eagle Strike (printed by Cartograf and WAY nicer than the kit markings for the same plane). This is his mount from 1944. I believe he was on Petie 3rd by the time of Operation Bodenplatte, when he got airborne during the German attack on the field and managed to blast a 190 to pieces before he even had time to raise his landing gear.

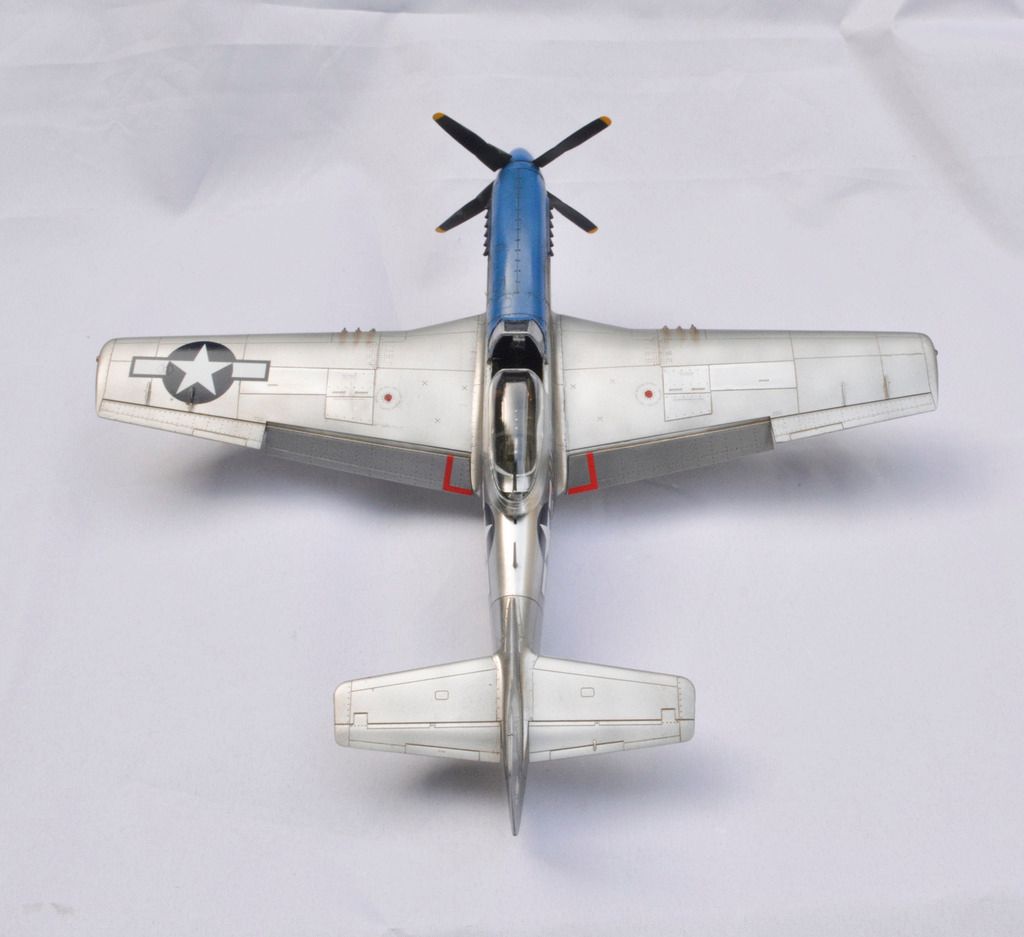
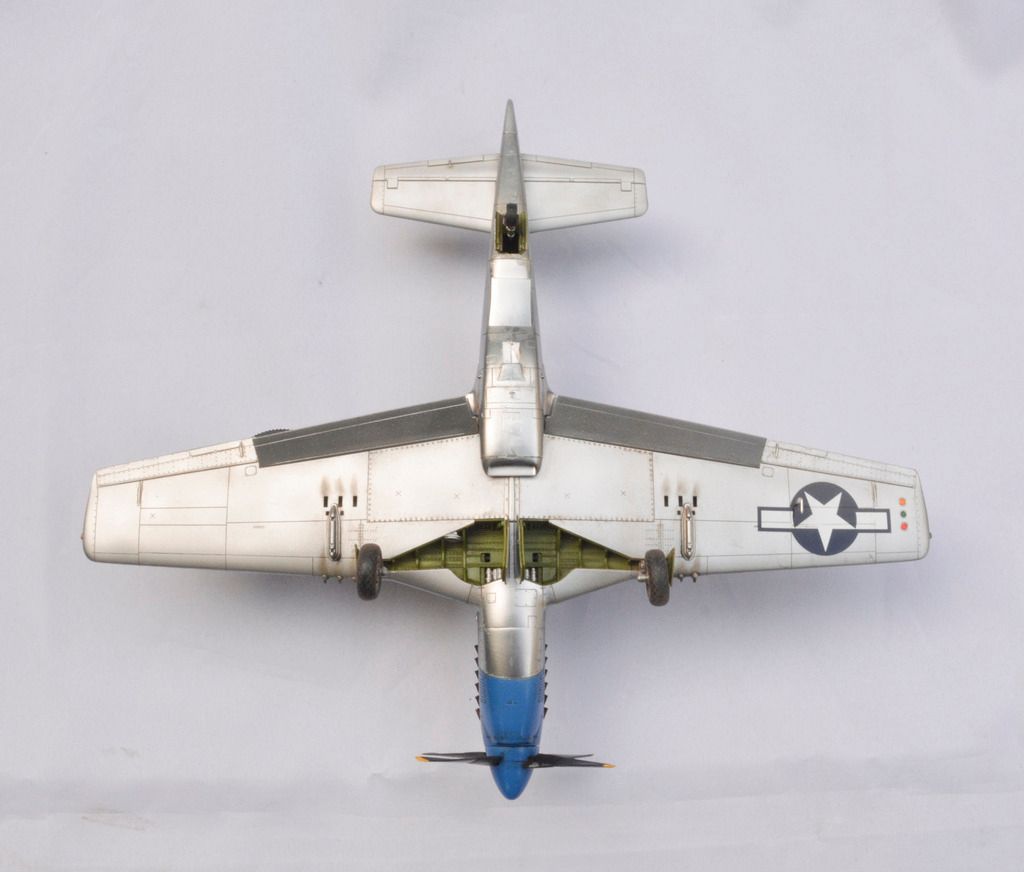
This one is finished in Alclad, mostly. I primed it with Aqua Gloss, then shot Duraluminum on the wings, gear legs, and rudder. Next came another coat of aqua gloss followed by airframe aluminum on the fuselage, shock absorbers and gun bay covers. I sealed that with Aqua Gloss and then shot Magnesium on the panels behind the exhaust ports and Polished Aluminum on the panel behind the canopy and a couple others to break up the monochromatic feel. The blue nose is Humbrol French Blue gloss enamel, and it was actually sprayed on and masked before I started playing with the Alclad. The rest is covered in Tamiya acrylics. Gun and exhaust streaking was done with a Tamiya weathering kit (the one that looks like a makeup pack). I wanted a very subtle panel line wsh, so I opted for Flory Grime, which is brownish. It sank into the wheel treads nicely, and some ground up pastel chalk did the rest.

I kept this one mostly clean since it was a late-war squadron leader's plane. I left the drop tanks off because I wanted it to have that "just returned from a mission" look.

But I am rambling, and you all just want to see the pics anyway:

Thanks for having me in this group build. It's been a blast, and I have really enjoyed seeing your work and learning from you all.

Oh, and a quick tip on this kit: If you are like me, you break off things like radio masts and pitot tubes, Well, you can actually install this kit's radio mast at the end without any mess by applying glue to the bottom of it from inside - just reach up through the rear wheel doors with a needle applicator.

All comments, critiques and questions welcomed!

-BD-

  • Member since
    July 2014
Posted by modelcrazy on Friday, October 23, 2015 12:31 PM

Brandon,

beutiful work as usual. It was a true pleasure watching your builds here. Thank you for joining our GB and contrubiting to a growing wall of fame. You are always welcome to join any GB I may host.

Cody will get your new build up as soon as he can.

Steve

Steve

Building a kit from your stash is like cutting a head off a Hydra, two more take it's place.


http://www.spamodeler.com/forum/

  • Member since
    September 2014
Posted by rooster513 on Friday, October 23, 2015 3:14 PM

Fantastic build Brandon! Really sharp looking paint job. Thanks for sharing!

-Andy

  • Member since
    June 2013
Posted by bvallot on Friday, October 23, 2015 3:36 PM

I've been a little absent in here as work has been pretty busy, but I did want to say how there have been so many great Mustangs coming out of this GB.  I haven't quite gotten to start mine yet, but I have been following along through my email and I will admit that's it's been nice to see something pretty while swimming in a sea of frustration during most of the day. 

There are too many names for me to mention at this moment, but everyone has been turning out some really pleasant builds!  Kudos to all. =]

On the bench:  

Tamiya F4U-1  Kenneth Walsh


  • Member since
    July 2013
Posted by lzdaily@comcast.net on Sunday, October 25, 2015 2:47 PM

Great job, Brandon! Gives me something to aspire to.

Larry

  • Member since
    December 2013
Posted by CodyJ on Monday, October 26, 2015 3:58 AM

Excellent work Brandon!  You did a great streaking job around the guns and on the underside!!!

I'll get the pic up right away!

  • Member since
    February 2015
  • From: California
Posted by PA24-250Flyer on Friday, October 30, 2015 4:48 PM

Hi Folks,

I know that I am jumping in a little late for this build, but was a little hesitant as this is my first group build and am a little overwhelmed by all of the great work I see from you all! I found this kit and was originally going to build Chuck Yeager's plane, but changed my mind after having recently met Bud Anderson at the Reno Air Races. Both gentlemen are true heroes, and I will eventually get around to building Yeager's, but for now "Old Crow" is in the loop. In the photos I am jumping in with you will see Bud and Me, and the beginning of the cockpit so far. I did get the Eduard photo etch interior set and am using some of that stuff. I would love to get some feedback for improvement from you experts out there. I look forward to the interactionBig Smile!

Best,

George Clover

  • Member since
    July 2014
Posted by modelcrazy on Friday, October 30, 2015 5:54 PM

That's a nice looking pit George. Nice job on the wood floor and belts. Are those belts after market?

Steve

Steve

Building a kit from your stash is like cutting a head off a Hydra, two more take it's place.


http://www.spamodeler.com/forum/

  • Member since
    February 2015
  • From: California
Posted by PA24-250Flyer on Friday, October 30, 2015 6:30 PM

modelcrazy

That's a nice looking pit George. Nice job on the wood floor and belts. Are those belts after market?

Steve


Hi Steve,
 
Thanks! Yes, I bought the Eduard FE268 photo etch set that includes the seat belts, panel face, and other side panels. I wanted to display it with an open canopy and thought it would be a nice touch to add the photo etch.
 
Best Regards,


George
  • Member since
    July 2014
Posted by modelcrazy on Friday, October 30, 2015 6:50 PM

While the photographic evidence is is difficult to find (in other words, I'm no expert ) the fuel tank under the radio may have been black or black gray. I'm not sure green is wrong though. 

Steve

Building a kit from your stash is like cutting a head off a Hydra, two more take it's place.


http://www.spamodeler.com/forum/

  • Member since
    February 2015
  • From: California
Posted by PA24-250Flyer on Friday, October 30, 2015 7:08 PM

modelcrazy

While the photographic evidence is is difficult to find (in other words, I'm no expert ) the fuel tank under the radio may have been black or black gray. I'm not sure green is wrong though. 


Thanks! It is still not too late for me to fix it. I wonder if anybody else wants to help with this dilemma? I have not been able to find any evidence online and was just defaulting to what the kit instructions were showing...

  • Member since
    July 2014
Posted by modelcrazy on Friday, October 30, 2015 7:19 PM

I Googled P-51 fuselage fuel tank and P-51 cockpit fuel tank and It came up with different photos. 

Steve

Building a kit from your stash is like cutting a head off a Hydra, two more take it's place.


http://www.spamodeler.com/forum/

  • Member since
    July 2013
Posted by lzdaily@comcast.net on Friday, October 30, 2015 7:20 PM

George,

Great start. I look forward to seeing the rest of the build.

After a couple of crazy weeks at work, I got a little work done on my P-51B this evening. I think I have everything done that I need to close up the fuselage. Here are a couple of shots of the various cockpit parts. Obviously I need belts on the seat; I haven't worked with photoetched belts before so I'm taking my time with those.

Larry

  • Member since
    February 2015
  • From: California
Posted by PA24-250Flyer on Friday, October 30, 2015 8:22 PM

lzdaily@comcast.net

George,

Great start. I look forward to seeing the rest of the build.

After a couple of crazy weeks at work, I got a little work done on my P-51B this evening. I think I have everything done that I need to close up the fuselage. Here are a couple of shots of the various cockpit parts. Obviously I need belts on the seat; I haven't worked with photoetched belts before so I'm taking my time with those.

Larry


Hi Larry,

I like it! I love the B model! Is that seat part of the kit? It looks fantastic! I have found that the photo etch is usually quite time consuming because of the nature and size of the pieces. You therefore will be forced to take your time...or get VERY frustrated trying to find the little bits that fly off onto the carpet!Big Smile

George

  • Member since
    September 2011
Posted by fightnjoe on Friday, October 30, 2015 8:31 PM


Re the fuel tank

http://www.air-relics.co.uk/communities/2/004/010/876/292//images/4573788899.jpg


I hope this helps.


Joe

Veterans,

Thank You For Your Sacrifices,

Never To Be Forgotten

Where you can find me:

Workbench on FaceBook  Google Plus  YouTube

  • Member since
    July 2013
Posted by lzdaily@comcast.net on Friday, October 30, 2015 8:38 PM

George,

Thanks! The kit is an Accurate Miniatures kit. I'm using the Aires cockpit set intended for the Tamiya P-51B. I've been impressed by the level of detail and the Aires parts fit together really well. Fitting them into the AM kit, now that's a different matter...

I also did a bit of reference checking. Squadron's Walk Around Number 7 has two photos that show portions of the fuselage fuel tank on a P-51D. In both cases, it looks like a fairly light gray, maybe light Gull Gray.

Larry

JOIN OUR COMMUNITY!

Our community is FREE to join. To participate you must either login or register for an account.

SEARCH FORUMS
FREE NEWSLETTER
By signing up you may also receive reader surveys and occasional special offers. We do not sell, rent or trade our email lists. View our Privacy Policy.