SEARCH FINESCALE.COM

Enter keywords or a search phrase below:

Mustang Build

80080 views
1582 replies
1 rating 2 rating 3 rating 4 rating 5 rating
  • Member since
    December 2015
Posted by Kyuzo on Wednesday, January 27, 2016 9:30 PM

Here goes. I thought it'd be something a Lil different for the forum. This is most of the key angles that I have taken pictures from so far.  This was done with an app called Monzo model builder


  • Member since
    June 2010
Posted by 5-high on Wednesday, January 27, 2016 9:43 PM

Izdaily 

Your mustang is comeing along great ..and I'm glad you cought the fin strip in time ..keep up the great work. .I'm watching .Propeller

Modelcrazy..wow what a beautiful job on moonbeam !!.I hope myn turns out as good as yours did ..excellent job two thumbs up YesYes

Pete

  • Member since
    June 2010
Posted by 5-high on Wednesday, January 27, 2016 9:51 PM

Kyuzo..that on a phone ??wow !! ..is it like a cad designing app ?..that's pretty awesome. .I'll have to check it out ..is it free??

Pete 

  • Member since
    June 2010
Posted by 5-high on Thursday, January 28, 2016 11:11 AM

Hay guys 

Right in the middle of painting the fiddley bibs an bobs . Landing gear. Bomb racks ..had to scratch up some stabilizer bolts to those. Bazooka tubes .bombs. .etc,etc.Wink

5-high 

On the bench Trumpeter 1 / 32 scale p -51 mk.lll 


  • Member since
    June 2013
Posted by bvallot on Thursday, January 28, 2016 12:57 PM

Interesting app Kyuzo.  I'll have to check that out.

Steve. Great job putting that scene together.  It's always in the little things. =]

On the bench:  

Tamiya F4U-1  Kenneth Walsh


  • Member since
    December 2015
Posted by Kyuzo on Thursday, January 28, 2016 7:09 PM

If I recall the app is free but u have to pay for a lot of the models & paint sets. It's an enjoyable app though. There are some free models. ANNND... Most of them have a few interactive functions. One you finish building it. Don't know if it's CAD based or not.

  • Member since
    July 2013
Posted by lzdaily@comcast.net on Friday, January 29, 2016 7:59 PM

I got the decals are on Ding Hao, sealed them with a coat of Future, and then overcoated the whole plane with Model Masters flat clear. Once that’s had a day or so to dry, I’ll start the weathering process.

Larry

  • Member since
    June 2010
Posted by 5-high on Friday, January 29, 2016 8:09 PM

Izdaily 

she's looking amazing bud...never used any of the clears from testers . Are thay safe for spraying on future, ,being a acrylic. ??

5-high 

  • Member since
    June 2010
Posted by 5-high on Friday, January 29, 2016 9:33 PM

well thats just nice ,,, photobuckets down for maintenanceSuper Angry

can,t up load my wips . wanted to show how i do those in the field applyed invasion strips to the mustangs. ( hastedly painted on with whatever thay had on hand ).

5-high 

  • Member since
    July 2014
Posted by modelcrazy on Saturday, January 30, 2016 12:36 AM

Everybody is doing great,

Larry, Ding Ho is looking sweet.

5, Photobucket has been having problem lately, there probably try to repair the problems.

Steve

Steve

Building a kit from your stash is like cutting a head off a Hydra, two more take it's place.


http://www.spamodeler.com/forum/

  • Member since
    June 2010
Posted by 5-high on Saturday, January 30, 2016 2:13 AM

well,,someone must of been lisening cuzz i was able to log on to photobucket

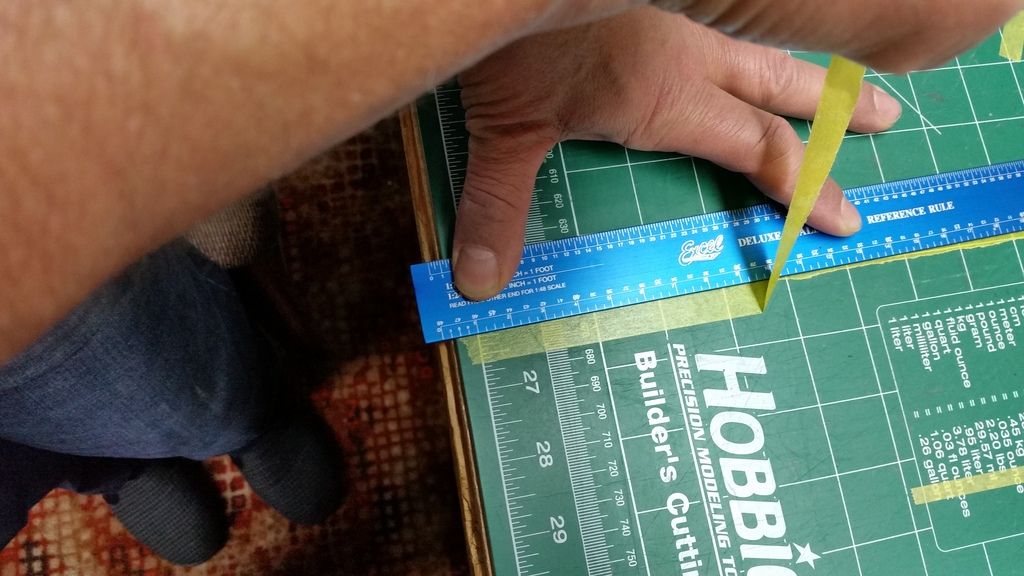
well guys heres some more wip pic,s . last time i showed the yellow and white paint on her ,, now i,ll share and show how i paint the invasion strips on my mustang . i was at first stumped at how to go about painting these strips .we know that the field maintenance personnel had to paint there pilot,s ships with what ever tools thay had on hand ,,ie large matts layed across wings and fuselage. but in most casess by hand / large brushes or even brooms . we the modeler have the luxury of masking tap,,,just measure and lay down five nice straight and crisp white and black lines .but in there war time world ,,time thay rarely had . if you google invasion strips you,ll see how thay did it ,, no perfect lines ,,just uneven lines...brush marks over lapping each other .so i thought how can i do it ???? .a day goes buy and it came to me as i was tearing up some old paper bill,s .i noticed that by tearing the paper you create uneven ragged erreguler edges .voila ...the look of brushed paint and erreguler lines. so out can the tamiya 40 mm tape . I laid down a few strips of tap, then measured how wide the stripes where  in 1/32 scale. lined up my marks with the ruler and start ripping . use a ruler with a rounded edge ,,it works better .as you tear you move back an forth in a sideways motion to create uneveness as you can see in the photo,s .after take and lay the strips down I then rub my tumb up and down the edges of the tap ,,what this do,es is roll the loose fibers and adhesive off  the tape,s edges. it should look like this .

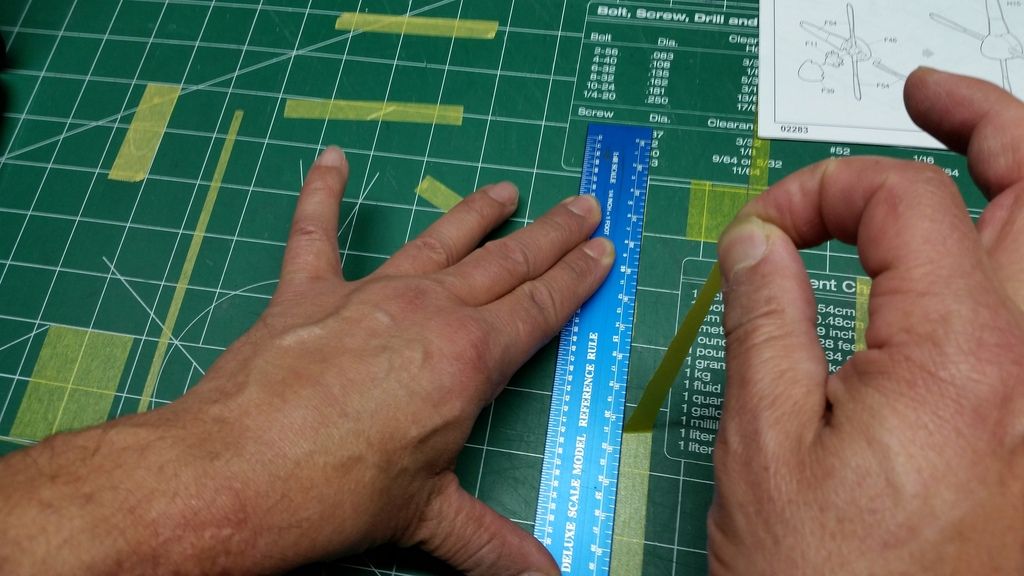
this is what you get
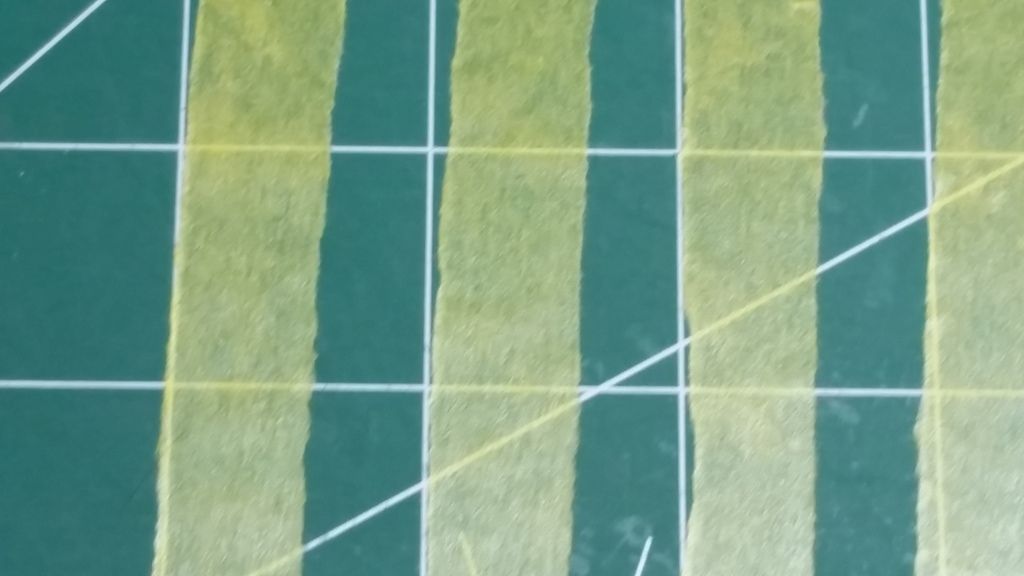
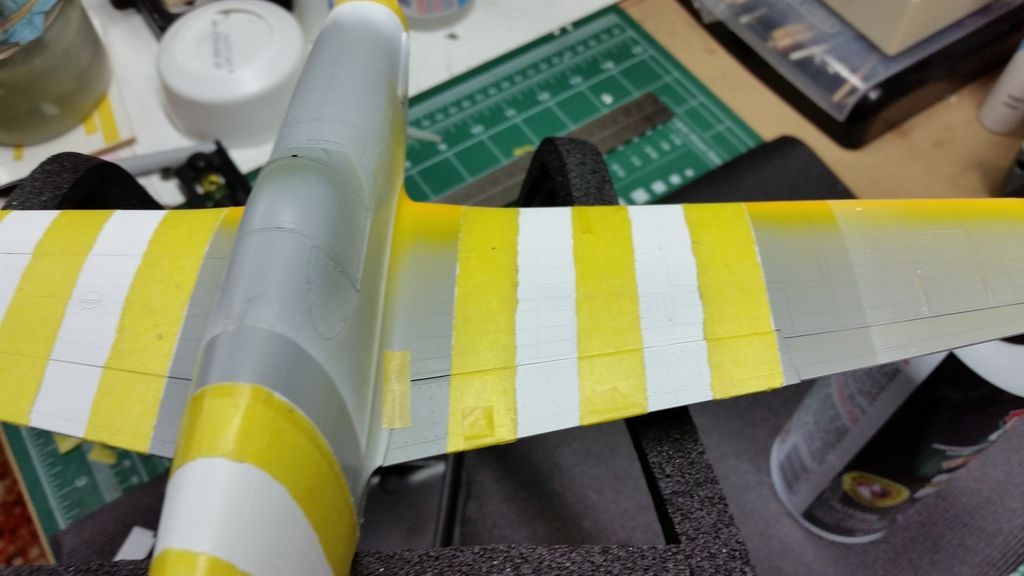
more pic,s 

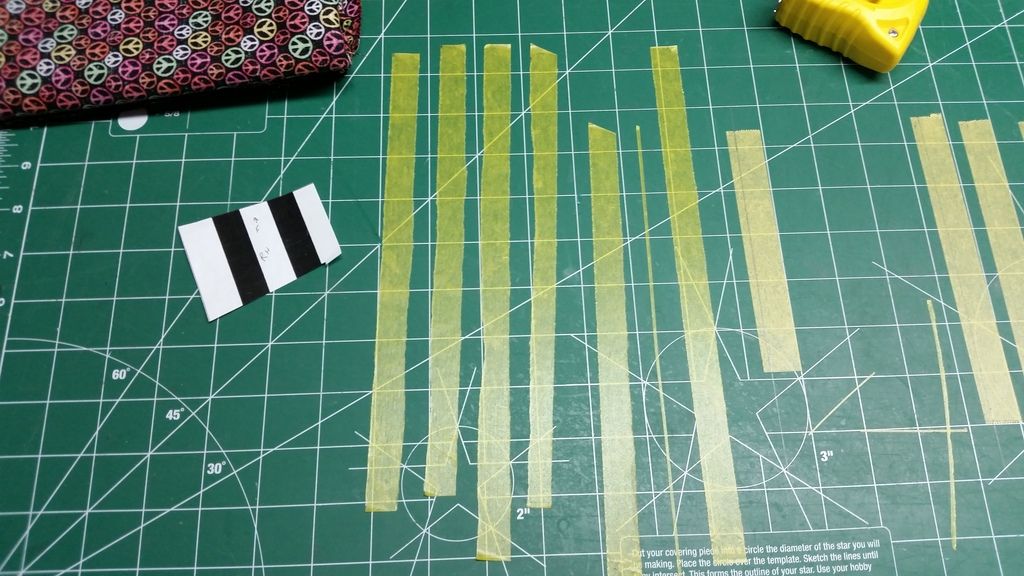
now your ready to mask for the black

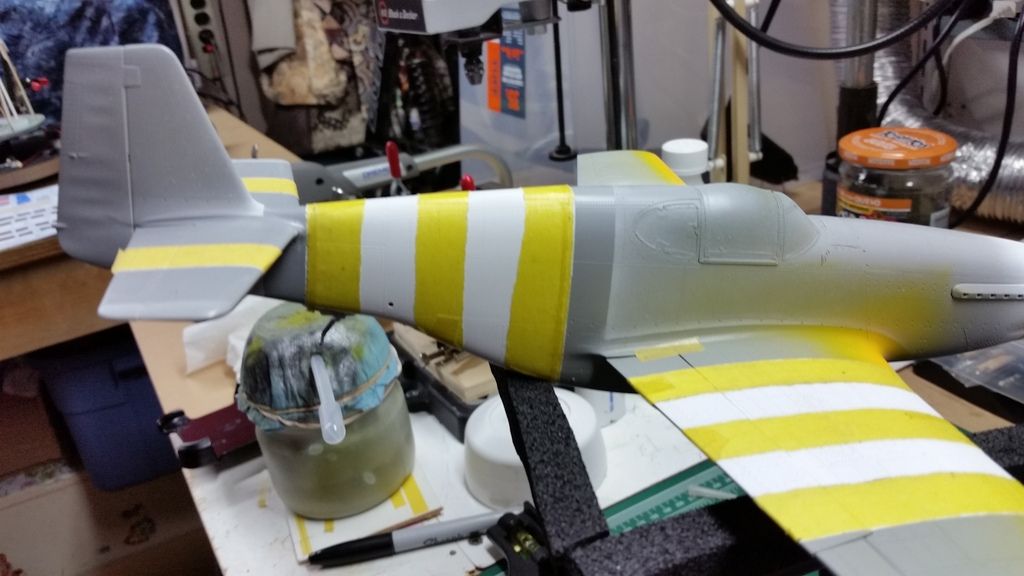
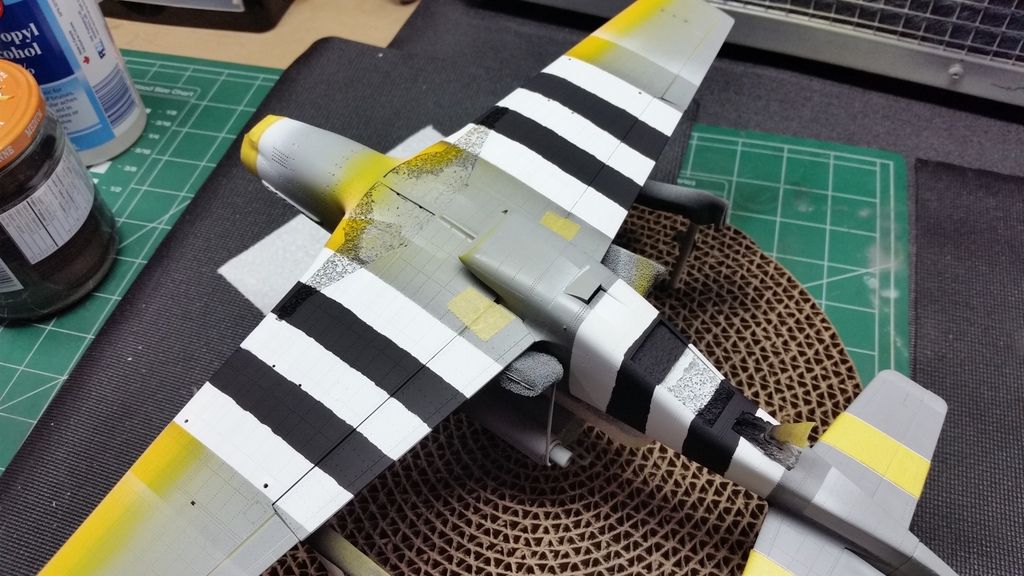
after airbrushing the black

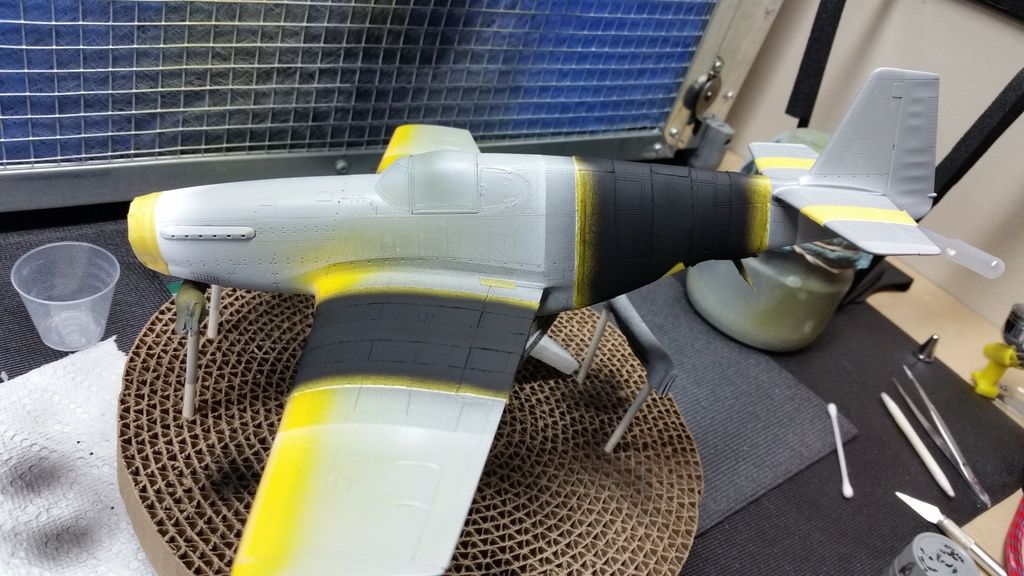
a close up of the left wing
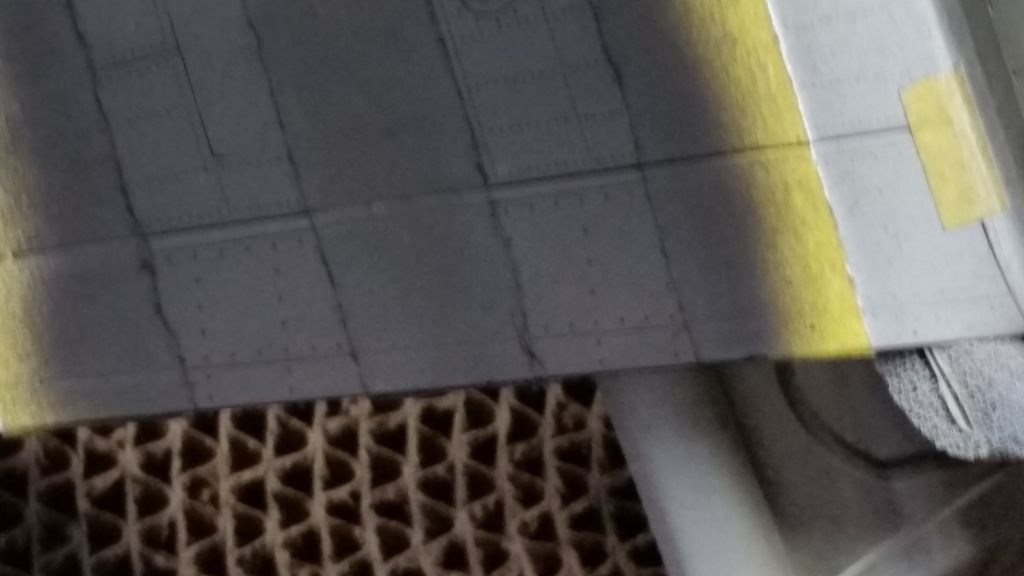
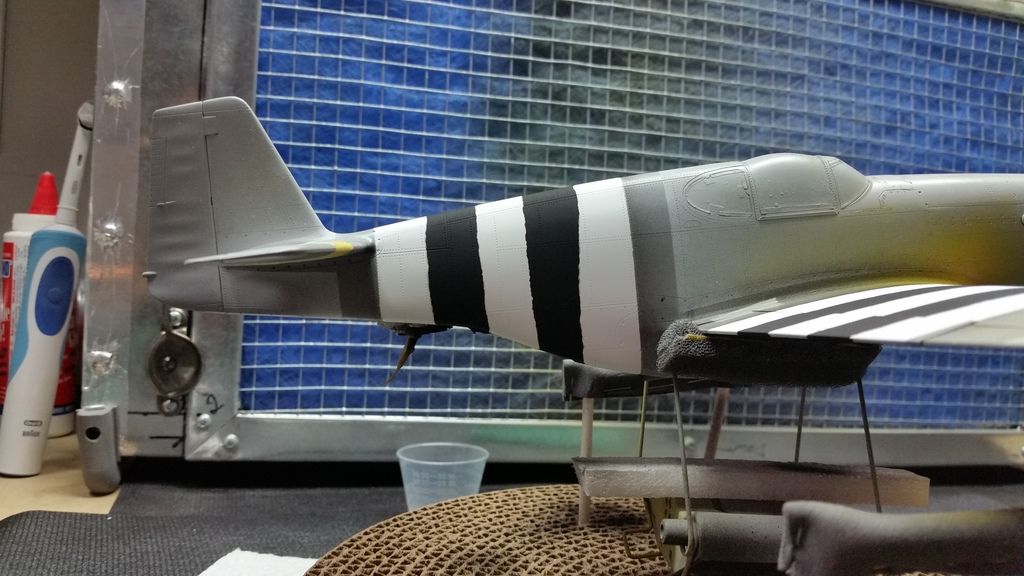
side

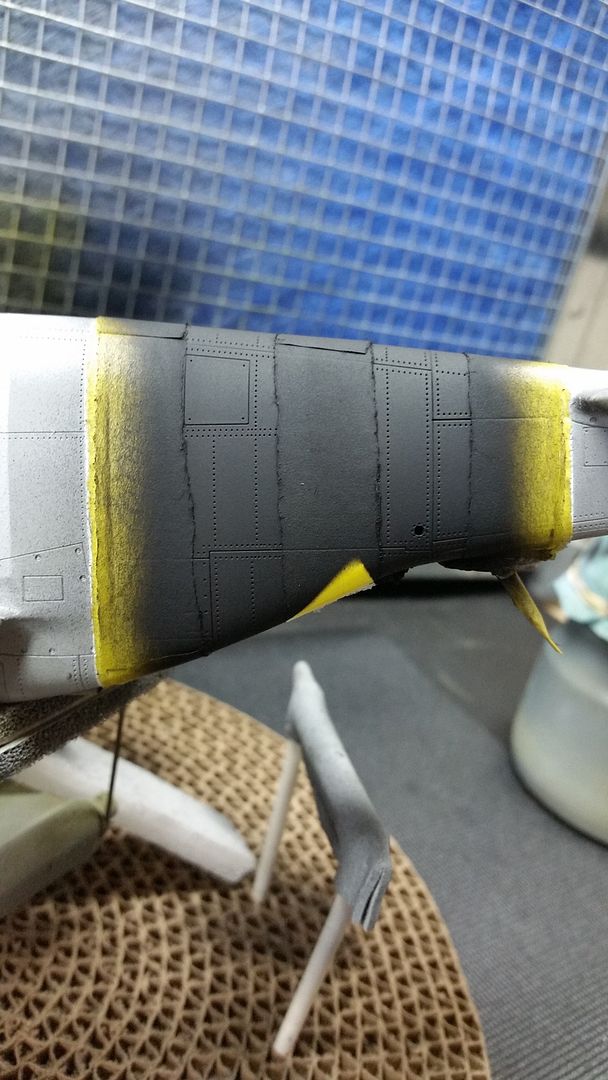
and after taking off the masking

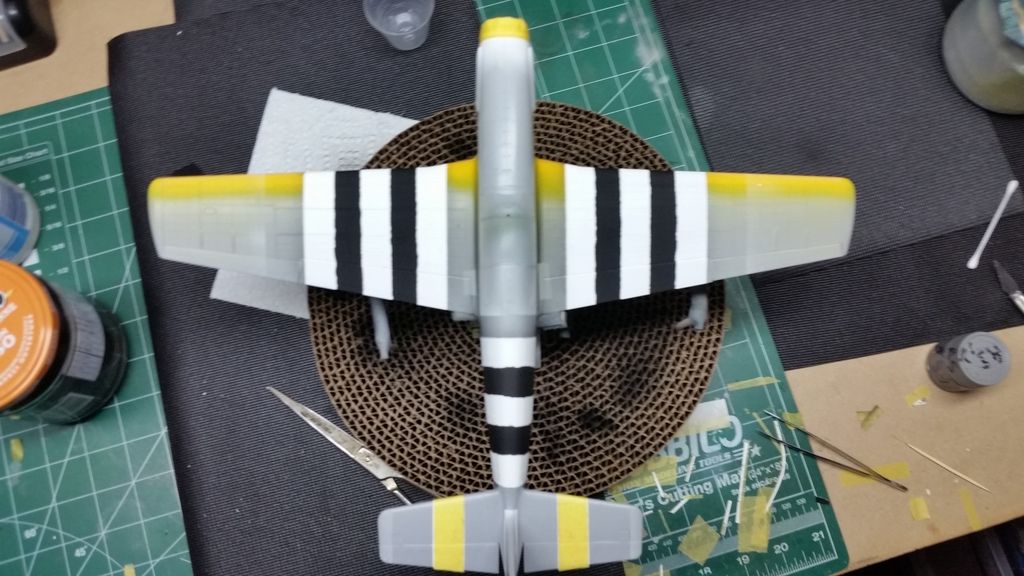
and thats how i do the uneven invasion stripes on a mustang mk.III

hope you all like this ,,, and try it out .

any questions and criticisms are welcom.

5- high .. cheersToast

  • Member since
    December 2013
Posted by CodyJ on Saturday, January 30, 2016 3:19 AM

Lewbub & Steve-   Nice Job!! Got your guys 'stangs in the Gallery.  Great work!!!

  • Member since
    November 2003
  • From: Naples, FL
Posted by tempestjohnny on Saturday, January 30, 2016 5:46 AM
Pete that is great. Thanks for the tutorial. Ill have to file that in the old brain cabinet. John


  • Member since
    February 2015
  • From: California
Posted by PA24-250Flyer on Saturday, January 30, 2016 10:11 AM
Pete, Thanks for sharing! Great idea for the stripes. Larry, Ding Hao is looking great. Keep up the good work! George
  • Member since
    June 2010
Posted by 5-high on Saturday, January 30, 2016 11:03 AM

thanks guys for your replys

more wip pic,s 

the day after i applyed the strip,s ,I decanted as-12 bare metal silver on the surface area,s where the usual chipping ,,scuffing happens im trying out the salt mask technique for the first time .

a close up

while thats drying .I worked on the prop,s . later i,ll feather in the white over spray on the bottom of the prop cuff,s

salt masks have dryed nicely ,,now i painted tamiya RAF ocean grey-2 (FX-82).

  • Member since
    July 2014
Posted by modelcrazy on Saturday, January 30, 2016 2:48 PM

Pete,

I like the stripe idea. I've tried the salt treatment and I need a little more practice to do it right. It looks like you’re on the right track. I think my problem was the salt crystals were too big.


Steve

Steve

Building a kit from your stash is like cutting a head off a Hydra, two more take it's place.


http://www.spamodeler.com/forum/

  • Member since
    June 2010
Posted by 5-high on Saturday, January 30, 2016 5:28 PM

yes that may be so modelcrazy

its better sometimes to keep the salt crystals big for ease of removal..i have found that fine crystals make it much much harder to remove too. i also found that if you add just a tiney bit of dish soap ,,,just a tiney amount will act as a water wettiner soas to keep the water from beeding up.

5-high

  • Member since
    July 2014
Posted by modelcrazy on Saturday, January 30, 2016 5:31 PM

That has never occurred to me. See, this is why I love these forums, I'm always learning something new, or being reminded of something I forgot. 

Steve 

Steve

Building a kit from your stash is like cutting a head off a Hydra, two more take it's place.


http://www.spamodeler.com/forum/

  • Member since
    June 2010
Posted by 5-high on Saturday, January 30, 2016 6:22 PM

  some more wip pic,s from week,s pass,d .soon the pic,s im showing will catch up to my present state of build .

Im breacking out a new airbrush that i bought 8 years ago .A BADGER 155 ANTHUM. I,ll be performing the camo free hand , so i thought it was time use it .

so here is what im shooting for (parden the pun)Whistling.

 polish ace ,S/Ldr Eugeniusz Horbaczewski, FB387 mustang MK.lll.

off i goooo

as you can see the big crystals of salt ...some of witch blew off as i airbrushed the tamiya RAF dark green 2 ( FX-81) OH YEA ..almost forgot the under side is tamiya RAF meadium sea grey 2 (FX-83)

all done !!....and i must say that the badger 155 anthum performed amazingly well ..im verey impressed Yes. takeing off the masks

a john wayne peel off ha ha 

the under side

nose came out good too

5-highs work bench ,,,where the magic happens Propeller.


hope you all liked the show..tommaro I,ll show all the bib,s and fiddely stuff.

any questions and criticisms are welcome 

5-high

  • Member since
    December 2015
Posted by Kyuzo on Sunday, January 31, 2016 4:57 PM

The base coat on the '06 GT-H. Was going for an brushed metal kind of finish for the blue nose paint job 

It looks a little better in person without the camera flash shining on it

  • Member since
    November 2003
  • From: Naples, FL
Posted by tempestjohnny on Sunday, January 31, 2016 6:26 PM

Preshading is complete


  • Member since
    June 2010
Posted by 5-high on Sunday, January 31, 2016 8:37 PM

hay that's great shading john .when.s the next step bud.

Pete

  • Member since
    June 2010
Posted by 5-high on Sunday, January 31, 2016 9:00 PM

Tonight I'm painting the fiddley bits. Bomb racks, main wheel doors, tail doors, feather the white on the prop cuffs .then I'll clear the hole thing with tamiya x-22 .get it ready for post shading the panel lines and some fading there.s .

Pete 

  • Member since
    June 2010
Posted by 5-high on Sunday, January 31, 2016 9:03 PM

Kyuzo  that's going to be a cool way of doing the all metal Finnish Yes

Pete

  • Member since
    December 2015
Posted by Kyuzo on Sunday, January 31, 2016 11:12 PM

Sweet workstation 5.in seriously jealous lol.

  • Member since
    June 2010
Posted by 5-high on Sunday, January 31, 2016 11:42 PM

Kyuzo thanks for the comment, I built two in 2005 .the sound one was for rc plane's. Back then I would repaint and modify parkzone warbirds for peaple. Now my wife uses it for sewing. Last plane I repainted was my bf-109-G6 in hungarian colors. 

  • Member since
    June 2010
Posted by 5-high on Sunday, January 31, 2016 11:46 PM

Take a break from airbrushing the last fiddly parts .Propeller

  • Member since
    December 2015
Posted by Kyuzo on Monday, February 1, 2016 7:29 AM

Just FYI,  to anyone interested I highly recommend you to check out AK Interactive's website & check out their product line. So far I've only their Extreme Metals Chrome paint and I love it. It's even self leveling. But all the super easy to use weathering kits (many of which are geared toward specific applications like aircraft landing gear & abandonment weathering) I want almost everything they have! We also have a smartphone app to keep you posted on their products as well as link you to videos on how to get the most out of their products. I just figured that I would throw that out there after seeing the kind of work you guys do and the level of detail and realism that you strive for in hopes that it may help you attain the same level of quality or better with a little more ease. 

  • Member since
    July 2014
Posted by modelcrazy on Monday, February 1, 2016 10:07 AM

I love their "Weathering Effects"

Steve

Building a kit from your stash is like cutting a head off a Hydra, two more take it's place.


http://www.spamodeler.com/forum/

  • Member since
    December 2015
Posted by Kyuzo on Monday, February 1, 2016 10:20 AM

Ok guys, an update on the situation with the 97 SVT Cobra. I have been sitting on this car for almost 2 weeks  because of a problem when painting the rims. It only just dawned on me today that why not ask you guys for advice. So what happened was I've got black on part of the smokes that is not supposed to have black on it and as it stands I have yet to come up with a sure fire idea of how to correct this without running the risk of messing up the rest of the rim. So here is a picture of the room as it is now and I would greatly appreciate any input on how to fix this problem.

Also as for the '06 Mustang GT-H I have decided I want to try to create my own  axles so that I can fit it with these wheels which are from a 57 Corvette gasser kit that I have over here. I can tell you now that the rear wheels will have to sit wide  with a little offset but personally I kind of like that look on certain cars.  I will probably paint the tires with Tamiya's tire rubber black to give them more of a well run look as opposed to a shined up  show car look.

JOIN OUR COMMUNITY!

Our community is FREE to join. To participate you must either login or register for an account.

SEARCH FORUMS
FREE NEWSLETTER
By signing up you may also receive reader surveys and occasional special offers. We do not sell, rent or trade our email lists. View our Privacy Policy.