SEARCH FINESCALE.COM

Enter keywords or a search phrase below:

2016 OTS (1/72) SMALL IS BIG

24610 views
566 replies
1 rating 2 rating 3 rating 4 rating 5 rating
  • Member since
    September 2003
  • From: AandF in the Badger State
Posted by checkmateking02 on Sunday, October 16, 2016 3:31 PM

Great looking detail, MC.  Very effective.


  • Member since
    September 2003
  • From: AandF in the Badger State
Posted by checkmateking02 on Sunday, October 16, 2016 5:01 PM

Wing attached to fuselage and interior green over the canopy.


  • Member since
    December 2002
Posted by Bossman on Sunday, October 16, 2016 9:00 PM

Yup - that's a Spitfire !!!   Lookin good so far Check.

Added stripes to the Havoc.  They need some edge rework/cleanup - but they're close to the correct spacing.  A few years ago I painted a P-51 with white and very dark grey invasion stripes - and the contrast just looked way too extreme - especially in 1/72 scale.  This time I used Light Aircraft Gray for the "white", and I lightened the Black a bit more.  These shades look better to me.  In fact - I think I could have gone with an even grayer "white" and a lighter "black".  I will work more in that direction when I do the weathering.

I decided to go with the one decal option that had full invasion stripes all around.


This in't a great shot, but it gives you some idea of the shades compared to a white paper

So the major hurdle has been jumped . . . I trust the rest of this build will proceed at a quicker pace.

Chris

  • Member since
    September 2003
  • From: AandF in the Badger State
Posted by checkmateking02 on Sunday, October 16, 2016 11:10 PM
Thanks, Bossman. Excellent work on the invasion stripes.


  • Member since
    December 2002
  • From: Bury St Edmunds, Suffolk, England
Posted by Bish on Monday, October 17, 2016 1:21 AM

The Spit is coming together nicley there Check.

Nice work on the strips Bossman. I like your choice for the colours, i think it works well.

I am a Norfolk man and i glory in being so


On the bench: Airfix 1/72nd Harrier GR.3/Fujimi 1/72nd Ju 87D-3

  • Member since
    September 2003
  • From: AandF in the Badger State
Posted by checkmateking02 on Monday, October 17, 2016 4:19 PM

Thanks, Bish.  I ran into some issues during painting, which I'll post photos of sometime soon.


  • Member since
    September 2003
  • From: AandF in the Badger State
Posted by checkmateking02 on Thursday, October 20, 2016 5:57 PM

Under- and upper-surfaces painted.

Then I ran into a problem.  I let the paint set up for three days, then used Testors clear gloss lacquer over the paint.

When I was getting ready to put decals on it, I noticed a piece of fuzz stuck in the wing root, so I used a piece of masking tape to pull it off.  And it pulled the gloss coat off in little sheets, although it didn't harm the paint.

I posted these photos over in the painting forum along with a description of the problem, and got some helpful responses back.  It seems a number of people have had the same experience with this product behaving this way.  It might not even be a true lacquer, or Testors may have altered their formula.  I've never had this happen before with any other clear-coat product, including Floquil (which I've been using for years until Testors decided to drop the line).  I used lacquer thinner to thin both the paint and the clear coat for spraying through the airbrush.

Everything turned out OK; I pulled off more of the clear coat with tape until I got it kind of cleared up, then resprayed and everything blended in fine.

I wasn't too happy with the way Testors stuff sprayed anyway; it went on kind of rough and pebbly, but I think the final flat coat will eliminate most of that.

Right now, the Spitfire is finished--paint, decals, flat coat; and I've only got to attach an antenna wire made from sprue.


  • Member since
    July 2014
Posted by modelcrazy on Thursday, October 20, 2016 10:00 PM

Yeah Check, that doesn't sound like lacquer to me.

Steve

Building a kit from your stash is like cutting a head off a Hydra, two more take it's place.


http://www.spamodeler.com/forum/

  • Member since
    June 2003
  • From: Rowland Heights, California
Posted by Duke Maddog on Friday, October 21, 2016 11:00 AM

That is an interesting development. I usually use the spraycan if I use Testor's; otherwise I use Aqua Clear or Future. This is good information. It's also good that you can peel off the clearcoat, then re-spray to get a smooth coat again. Thanks for posting this information.

  • Member since
    September 2003
  • From: AandF in the Badger State
Posted by checkmateking02 on Friday, October 21, 2016 12:11 PM
I haven't had really good results in the past using acrylics through the airbrush--although I've never tried Future. Years ago MicroScale changed their clear overcoats to acrylics, and I didn't have such a great time with them. Probably me and my ignorance. I have tins of Colourcoats three clear overcoats: gloss, semi-gloss and matte. I used their matte on the finish coat, and it went on well--but I didn't risk trying to pull off any of it! I think I'll also give Humbrol's offerings a try.


  • Member since
    September 2003
  • From: AandF in the Badger State
Posted by checkmateking02 on Friday, October 21, 2016 12:31 PM

Here's the finished product.

First, the original aircraft in a photo probably taken before Dunkirk.  She survived through the Battle of Britain with 92 Squadron, and was shot down near Biggin Hill on 9 September, 1940.  Pilot Officer William Charles "Bill" Watling bailed out and survived (but was killed in 1941).  The wreckage has been recovered and will apparently be restored by The Spitfire Company for the Biggin Hill Heritage Hanger.

Interesting that the P9372 carried no stripes on the fin at this point.  This made me think that there probably shouldn't be roundels on the wing undersides either, but the decal instructions showed them so I used them.

I used Caspar's decals, which included markings for this plane.

++

And that's it!  Thanks to the hosts for putting together the GB.  It's always a good thing to emphasize the importance of the one true scale.


  • Member since
    July 2014
Posted by modelcrazy on Friday, October 21, 2016 12:48 PM

That turned out great Check. If I were to guess, it looks more like a 1/48 scale to me. Glad you were able to overcome the paint issue.

Wayne will get you up on the wall as soon as he can.

Thanks for joining up it was enjoyable to watch your build.

Steve

Building a kit from your stash is like cutting a head off a Hydra, two more take it's place.


http://www.spamodeler.com/forum/

  • Member since
    December 2002
Posted by Bossman on Friday, October 21, 2016 5:50 PM

Really nice job Check.

How did you like the Airfix kit ?  Any issues ? (aside from the clear coat)

Chris

  • Member since
    September 2003
  • From: AandF in the Badger State
Posted by checkmateking02 on Saturday, October 22, 2016 11:38 AM

Thanks very much, mc--but 1/48!  That would be turning to the dark side!

Chris, thanks!  I like the Airfix kit very much.  There are no big problems with it, but a lot of little tweaking.

1.  It helps to drill out all the locating holes in the fuselage and wings, so they accept the locating pins better.  Doing it eliminates some potential gaps.

2.  The instrument panel is a little too wide and needs to be filed/sanded down some (around the edges), or it will not allow the fuselage to come together at that point.  

3.  The tab on the "floor" of the cockpit needs to be reduced to fit the slot on the seat/ back/headrest part, in order to make a tight join.

4.  The pin on the propeller back plate needs to be shortened some.  It's too long as is, and will cause prop droop if the retaining boss isn't snug against the front of the fuselage.

5.  The canopy won't fit unless the rear of the canopy is sanded down and/or the fuselage behind it is sanded/filed.  I took a little off of both, so as not to destroy the framing at the rear of the canopy.

6.  Canopy also has a tab at the front, to fit into the fuselage.  Sometimes that needs to be trimmed or even removed to get a good fit.

7.  Tailwheel strut needs to be thinned where it fits into the fuselage.  It's too wide to slide into the locating slot after the fuselage is closed up.

8.  On some of the Airfix Spitfire kits I've had, there's been a problem with the wing to fuselage joint.  I've had to remove material from either fuselage or wing or both to get them together.  It seems mostly to happen on the starboard side.  

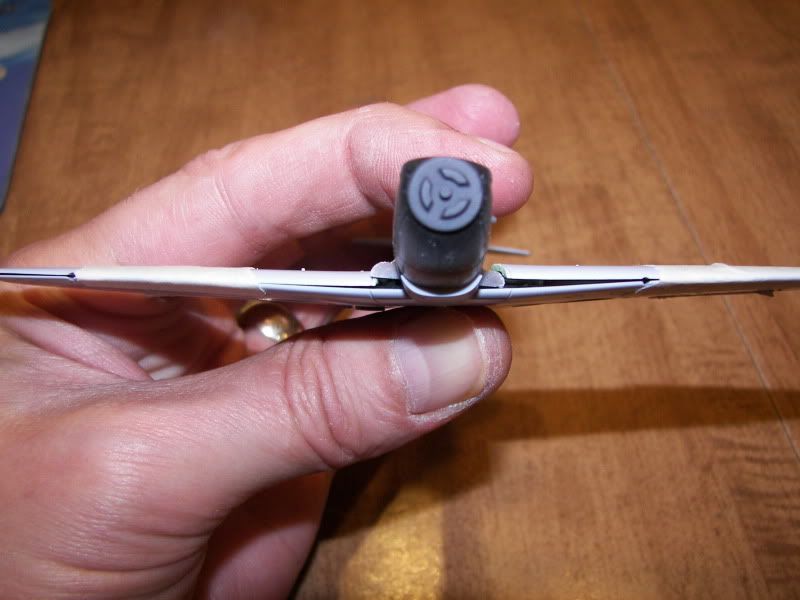
Photo is from an earlier GB I did a few years ago--not the current OTS GB.  I didn't have the same problem with this particular kit, so maybe Airfix corrected it or maybe the problem only comes up with a particular molding.

Those are about all the issues I can recall at the moment.  Nothing that can't be corrected.

If you build the kit, I think you'll like the results. 


  • Member since
    January 2015
Posted by TheMongoose on Sunday, October 23, 2016 5:12 PM

Airfix 1/76 WWI Female Tank. Doing this for a show at the American Legion.

In the pattern: Scale Shipyard's 1/48 Balao Class Sub! leaning out the list...NOT! Ha, added to it again - Viper MkVii, 1/32 THUD & F-15J plus a weekend madness build!

  • Member since
    July 2014
Posted by modelcrazy on Sunday, October 23, 2016 11:11 PM

Look like fun Mongoose. I didn't know Airfix produced armor, but then armor isn't my strong suit. 

Steve

Building a kit from your stash is like cutting a head off a Hydra, two more take it's place.


http://www.spamodeler.com/forum/

  • Member since
    December 2002
Posted by Bossman on Tuesday, October 25, 2016 6:28 PM

modelcrazy

. . .  armor isn't my strong suit. 


Ahhhh . . .    but if you had an armor suit -you would most certainly be strong !
  • Member since
    January 2015
Posted by TheMongoose on Thursday, October 27, 2016 9:50 PM

This little thing assembled quick. Pretty good fit. Just a few small gaps i think i will fill before painting. Going to try Vallejo acrylics on this. I'm getting complaints about the paint smell now that I can't do it outside Sad


In the pattern: Scale Shipyard's 1/48 Balao Class Sub! leaning out the list...NOT! Ha, added to it again - Viper MkVii, 1/32 THUD & F-15J plus a weekend madness build!

  • Member since
    July 2014
Posted by modelcrazy on Thursday, October 27, 2016 10:10 PM

I don't care for the smell of Vallejo either . 

Steve

Building a kit from your stash is like cutting a head off a Hydra, two more take it's place.


http://www.spamodeler.com/forum/

  • Member since
    December 2002
  • From: Bury St Edmunds, Suffolk, England
Posted by Bish on Friday, October 28, 2016 9:11 AM

Thats looking nice there check. But i have just noticed the underside appears to be NMF, is that the final finish, i haven't seen that before.

When you said fluff, is that something thats stuck to the glosscoat or somthing thats been produced by the gloss.


Edit: Forget the NMF question, i can see your finished. Really nice job, i do like the NMF, it does look differant. A great advert for the scale.

I am a Norfolk man and i glory in being so


On the bench: Airfix 1/72nd Harrier GR.3/Fujimi 1/72nd Ju 87D-3

  • Member since
    December 2002
  • From: Bury St Edmunds, Suffolk, England
Posted by Bish on Friday, October 28, 2016 9:15 AM

modelcrazy

Look like fun Mongoose. I didn't know Airfix produced armor, but then armor isn't my strong suit. 


Airtfix do have a small selection of vehicle kits, in 76th, 48th and 32nd. But as far as vehicles go, they are best known for the ground equipment sets. But as you can see, theiur scales, especially 76th and 32nd are not in the mainstream.

Its a bit odd that they do 76th ground equipment but 72nd aircraft.

I am a Norfolk man and i glory in being so


On the bench: Airfix 1/72nd Harrier GR.3/Fujimi 1/72nd Ju 87D-3

  • Member since
    September 2003
  • From: AandF in the Badger State
Posted by checkmateking02 on Friday, October 28, 2016 9:56 AM

Thanks, Bish.

By fluff, I meant lint or some other fibrous annoyance that often floats around the house and inconveniently lands on a newly-painted model.

Paul Lukas' book on RAF camouflage shows the same plane in profile with 1/2 white & 1/2 black undersides.  The actual photo makes it look like the aluminum paint was retained, and only the wings painted black/white.  But with things as fluid as they were in May and June, 1940, who knows what the plane really looked like at Dunkirk? 


  • Member since
    July 2014
Posted by modelcrazy on Friday, October 28, 2016 9:51 PM
I received the AA guns from Hanants today. They look very nice with brass barrels and PE. These should be fun.

Steve

Building a kit from your stash is like cutting a head off a Hydra, two more take it's place.


http://www.spamodeler.com/forum/

  • Member since
    July 2014
Posted by modelcrazy on Sunday, October 30, 2016 8:20 PM
I started the 20’s and the kit seems very nice. It’s going together very well.

Steve

Building a kit from your stash is like cutting a head off a Hydra, two more take it's place.


http://www.spamodeler.com/forum/

  • Member since
    July 2014
Posted by modelcrazy on Wednesday, November 2, 2016 3:24 PM

Here are the completed 20’s. I would recommend this AM set as a replacement of the guns on the kit. All I need to complete is the painting and wait for the anchor to arrive from Revell, although they have not responded to my request yet.

Does anybody know, are those counterweights hanging off the front of the frame under the barrels?

Steve

Building a kit from your stash is like cutting a head off a Hydra, two more take it's place.


http://www.spamodeler.com/forum/

  • Member since
    September 2003
  • From: AandF in the Badger State
Posted by checkmateking02 on Thursday, November 3, 2016 8:00 PM

Little gems, mc.  Very nice, detailed work there.


  • Member since
    December 2002
Posted by Bossman on Friday, November 4, 2016 9:14 PM

Sweet ,Sharp, detail MC.

Very nice.

Chris

  • Member since
    January 2015
Posted by TheMongoose on Tuesday, November 8, 2016 5:22 AM

Well, I've still got something to learn with an air brush. I like the way it's covering though, just have to be able to get full coverage but thats a topic for a different forum lol


In the pattern: Scale Shipyard's 1/48 Balao Class Sub! leaning out the list...NOT! Ha, added to it again - Viper MkVii, 1/32 THUD & F-15J plus a weekend madness build!

  • Member since
    December 2002
  • From: Bury St Edmunds, Suffolk, England
Posted by Bish on Tuesday, November 8, 2016 5:38 AM

checkmateking02

Thanks, Bish.

By fluff, I meant lint or some other fibrous annoyance that often floats around the house and inconveniently lands on a newly-painted model.

Paul Lukas' book on RAF camouflage shows the same plane in profile with 1/2 white & 1/2 black undersides.  The actual photo makes it look like the aluminum paint was retained, and only the wings painted black/white.  But with things as fluid as they were in May and June, 1940, who knows what the plane really looked like at Dunkirk? 


Ok check,with you now. Thats why i have now taken to putting everything in a drying box after painting.

I am a Norfolk man and i glory in being so


On the bench: Airfix 1/72nd Harrier GR.3/Fujimi 1/72nd Ju 87D-3

  • Member since
    December 2002
  • From: Bury St Edmunds, Suffolk, England
Posted by Bish on Tuesday, November 8, 2016 5:39 AM

Nicework on those guns Steve, i like the lookof those. I had notspotted themon hannants,goingto have to look those up.

I am a Norfolk man and i glory in being so


On the bench: Airfix 1/72nd Harrier GR.3/Fujimi 1/72nd Ju 87D-3

JOIN OUR COMMUNITY!

Our community is FREE to join. To participate you must either login or register for an account.

SEARCH FORUMS
FREE NEWSLETTER
By signing up you may also receive reader surveys and occasional special offers. We do not sell, rent or trade our email lists. View our Privacy Policy.