SEARCH FINESCALE.COM

Enter keywords or a search phrase below:

2016 OTS (1/72) SMALL IS BIG

24610 views
566 replies
1 rating 2 rating 3 rating 4 rating 5 rating
  • Member since
    July 2014
Posted by modelcrazy on Tuesday, November 8, 2016 1:36 PM

Thanks Bish. They are very nice. Another product I'm going to put up on YouTube since there is nothing to be found for the builder looking at them and wondering what they are like.

Steve

Building a kit from your stash is like cutting a head off a Hydra, two more take it's place.


http://www.spamodeler.com/forum/

  • Member since
    September 2003
  • From: AandF in the Badger State
Posted by checkmateking02 on Tuesday, November 8, 2016 4:34 PM

Bish

 checkmateking02

Thanks, Bish.

By fluff, I meant lint or some other fibrous annoyance that often floats around the house and inconveniently lands on a newly-painted model.

Paul Lukas' book on RAF camouflage shows the same plane in profile with 1/2 white & 1/2 black undersides.  The actual photo makes it look like the aluminum paint was retained, and only the wings painted black/white.  But with things as fluid as they were in May and June, 1940, who knows what the plane really looked like at Dunkirk? 

 Ok check,with you now. Thats why i have now taken to putting everything in a drying box after painting.


Might also help if I dusted the painting room from time to time.  Embarrassed


  • Member since
    January 2015
Posted by TheMongoose on Wednesday, November 9, 2016 10:39 PM

I airbrushed the basecoat on and now I'm doing the 2 color camo. Basecoat is 988 khaki. 1st camo color on is the 882 middlestone, and next is the 889 olive drab. All Valejo. I really like this Airfix kit. Lots of detail - tons of rivets and the hinges on hatches are there to.

In the pattern: Scale Shipyard's 1/48 Balao Class Sub! leaning out the list...NOT! Ha, added to it again - Viper MkVii, 1/32 THUD & F-15J plus a weekend madness build!

  • Member since
    January 2015
Posted by BrandonD on Thursday, November 10, 2016 11:54 AM

I'd like to change my build from the Fokker to this one, if that works.

I got talked into a 1/72 MiG-15 by Eduard (their limited edition dual combo with Czech markings).

I've heard great things about this kit, and so far all I can say is, wow - they're warranted.

The cockpit built up nicely, and I used Lawdog's method described in the aircraft forum post he made. It was my first time using PE in 1/72. Fiddly, but Eduard designed it well.

I painted it Neutral Gray, and the PE wasn't a great match, but I figured weathering would take care of that.

And it did.

But man is this thing little!

I should close up the fuselage at lunch today and get on with it.

Not sure how I like 1/72 compared to 1/48, but so far this one is fun.

-BD-

  • Member since
    July 2014
Posted by modelcrazy on Thursday, November 10, 2016 12:21 PM

That little tank looks great Mongoose Yes

Sounds good BD, man you are a master at cockpits. I can't even get my 000 brush in such tight places. Bow Down

Steve

Building a kit from your stash is like cutting a head off a Hydra, two more take it's place.


http://www.spamodeler.com/forum/

  • Member since
    January 2015
Posted by TheMongoose on Friday, November 11, 2016 10:02 PM

Here it is just in time for Veterans Day. I finished it off with a couple passes of dull coat.  I'm showing it off at an event our local model club is holding at the American Legion tomorrow. Thanks to all of you who have served or are serving. 

In the pattern: Scale Shipyard's 1/48 Balao Class Sub! leaning out the list...NOT! Ha, added to it again - Viper MkVii, 1/32 THUD & F-15J plus a weekend madness build!

  • Member since
    July 2014
Posted by modelcrazy on Saturday, November 12, 2016 12:34 AM

Hey..that turned out really nice! I'll bet the American Legion folks will really go nuts over it.

Wayne will get you on the wall when he gits a chance.

Steve

Building a kit from your stash is like cutting a head off a Hydra, two more take it's place.


http://www.spamodeler.com/forum/

  • Member since
    January 2015
Posted by BrandonD on Monday, November 14, 2016 3:35 PM

Mongoos - great job on that tank!

ModelCrazy - Yeah me neither. I can barely do it when it's disassembled. And the prepainted PE helped a ton in this case.

-BD-

  • Member since
    July 2014
Posted by modelcrazy on Tuesday, November 15, 2016 11:09 PM
The guns are done, and The U-boat is almost done. I just need to complete the flag and take some pics. I’m still waiting for the anchor from ROG but I’m starting to get impatient after a month so I’ll take some pics without it in a couple of days. Anyway, here are the MpM 20’s.

Steve

Building a kit from your stash is like cutting a head off a Hydra, two more take it's place.


http://www.spamodeler.com/forum/

  • Member since
    January 2015
Posted by BrandonD on Thursday, November 17, 2016 12:17 PM

modelcrazy
The guns are done, and The U-boat is almost done. I just need to complete the flag and take some pics. I’m still waiting for the anchor from ROG but I’m starting to get impatient after a month so I’ll take some pics without it in a couple of days. Anyway, here are the MpM 20’s.
 

That looks fantastic. It's been so cool seeing this one come together.

-BD-

  • Member since
    December 2002
Posted by Bossman on Thursday, November 17, 2016 7:44 PM

Hello All,

Mongoose - Nice job on that little tank.  I've seen several of these built up over the years in larger scale, but never in 1/72.  Looks like a great kit and you did a bang up job.

Brandon - That is super impressive cockpit detail for the tiny MiG.  Seriously - you've gotta have some kindof vision assistance - right ?   Like a microscopic optivisor ?  I've got really good close vision and I would have a hard time with something that small.  Wow.

Steve - The weathering on the U-boat is great and the guns add alot.  Really nice work.  You mentioned you were gonna upload something about the guns to Youtube - do you have your own Youtube channel ?  or name that I can search by to find stuff you've put up there ?  If you do - would you mind sharing it ?

Work progresses with the Havoc - on the home stretch now.   She's partially weathered with paint, future coated, and decaled.  Not a whole lot of decals for this one - but what she lacks in flashy nose art - she makes up for with the full invasion stripes.  

And as long as I was mixing up weathering shades of Olive Drab, clear coating, and decaling, I thought I would let this little friend tag along.  This is one of the incomplete shelf sitters that was posted earlier.  It will be done wheels up - because the wheel wells were not detailed at all, and because I just wanted to get this one done quickly.  This is the Hasegawa 1/72 P-47 Razorback from a "Nose Art" dual boxing.  The cockpit was kindof crude in this one too.   The decals were right on the edge of use-ability.  It'll be a trick to remove the silvering under many of them.

It isn't really obvious over an olive drab - but the white in the decals is pretty badly yellowed as well.   Looks like a t-Bolt though ! 

Chris

  • Member since
    July 2014
Posted by modelcrazy on Friday, November 18, 2016 7:24 AM

Chris,

The Havoc is coming along nicely. "Big Stud" is parked in the Seattle Air Museum


As far as the YouTube channel, yes, I'm working on getting one up. My first one will be the F-8 I just completed but I need to figure out how to upload a slideshow and add text and music. I'm not doing videos just yet. The guns will also be featured as soon as I finish the 37mm that came in the box. I may put that on some apocalyptic what if build someday.

Steve

Building a kit from your stash is like cutting a head off a Hydra, two more take it's place.


http://www.spamodeler.com/forum/

  • Member since
    January 2015
Posted by BrandonD on Friday, November 18, 2016 11:47 AM

Bossman - those planes look great. The decals actually look spot on as something that's been in theater for more than a couple of days, so that works out.

As for magnification, no, I don't use any. But it was pre-painted photoetch from Eduard that covered most o those details. I just glued the pieces in place with Micro Kristal Klear after painting the tub (in a color that wasn't really a close match at all, to be honest) and then glossed it and used The Detailer wash.

The only part I painted aside from the tub itself was the control stick handle and red button.

-BD-

  • Member since
    July 2014
Posted by modelcrazy on Saturday, November 19, 2016 3:30 PM
I’m done with the U-boat although I’m still waiting for the anchor from ROG. Don’t know if or when I’ll be getting a replacement for it.
Anyway, here it is.
   
Steve

Steve

Building a kit from your stash is like cutting a head off a Hydra, two more take it's place.


http://www.spamodeler.com/forum/

  • Member since
    December 2002
Posted by Bossman on Saturday, November 19, 2016 3:44 PM

Great job Steve,

Admiring the detail in every square inch of that one.  

It's surprising that the oil canning doesn't seem nearly as obvious in the photos after being painted and weathered.  I imagine that it might be more visible if I could see it "in person".

Very impressive.

Chris

  • Member since
    January 2015
Posted by BrandonD on Tuesday, November 22, 2016 3:06 PM

Steve, that's an awesome job! I don't know how you ship guys don't go entirely nuts.

-BD-

  • Member since
    January 2015
Posted by BrandonD on Tuesday, November 22, 2016 3:07 PM

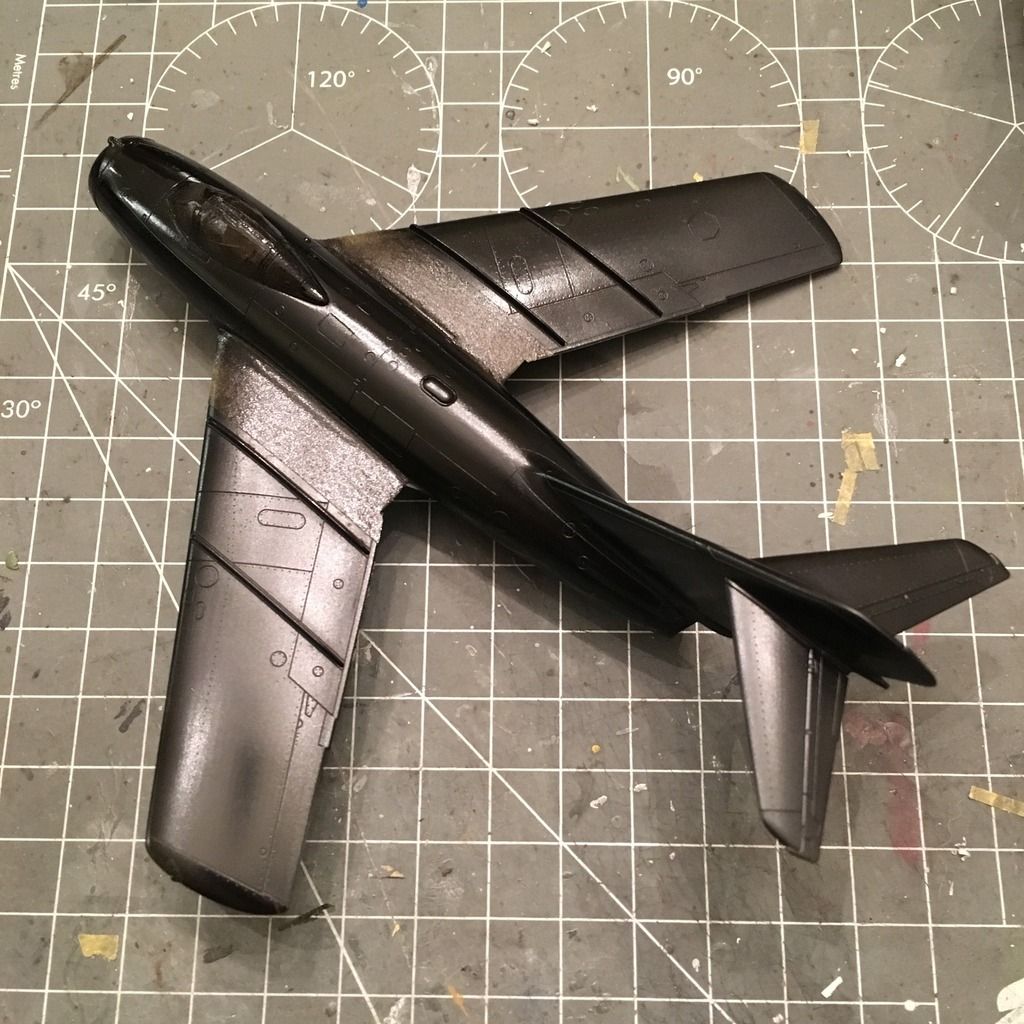
Ok, I got a lot of work done on the 1/72 Eduard MiG-15 over the weekend and finished it up last night. After filling the wing root seams with Gunze Mr. Dissolved Putty and just wiping them with a paper towel with Mr. Leveling Thinner on it, I sprayed Mr. Surfacer 1500 Black and then masked the wing walk areas before coating it with Tamiya Gloss Black.

Next up was the Alclad, and I used Polished Aluminum as a base coat, with Airframe Aluminum on the speed brakes.

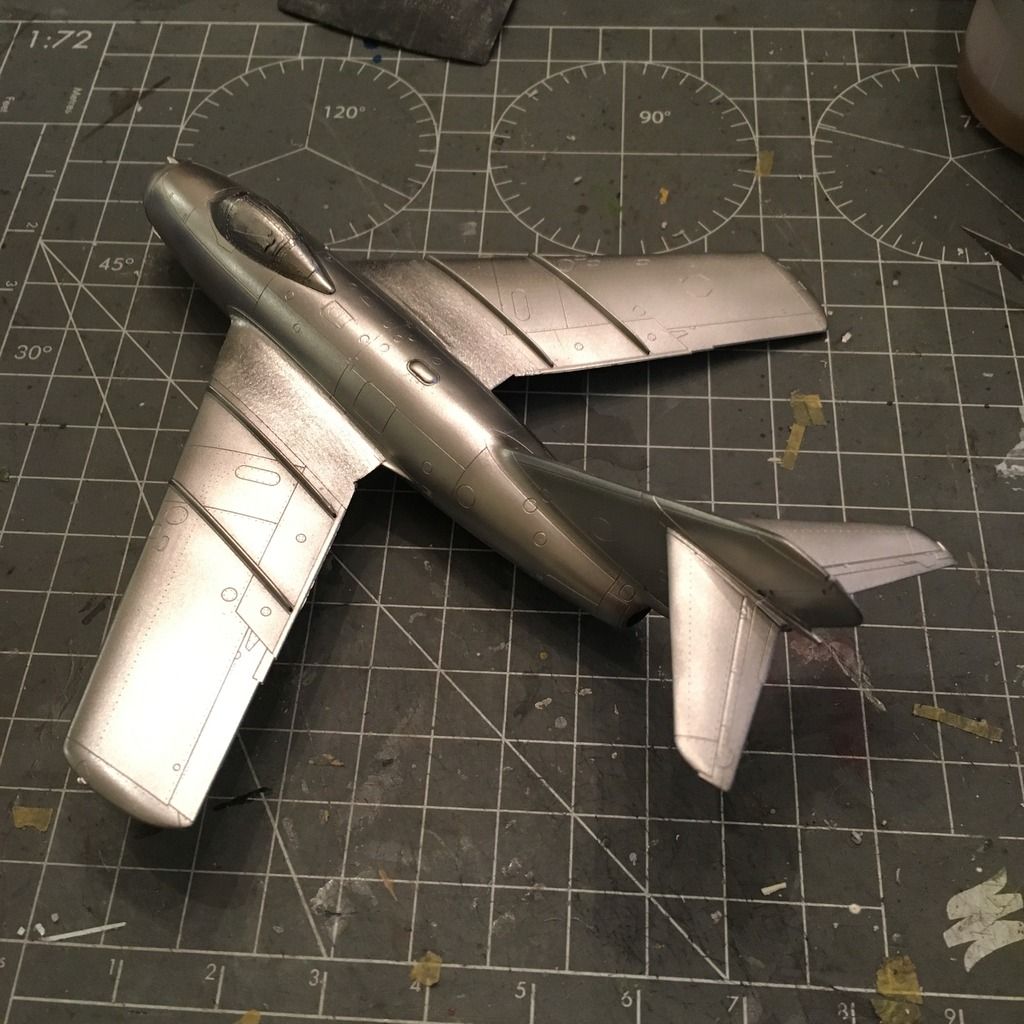
I did some random shadows and highlights with Magnesium and White Aluminum, but kept it all pretty subtle, as my references show these Czech MiGs were kept pretty clean.

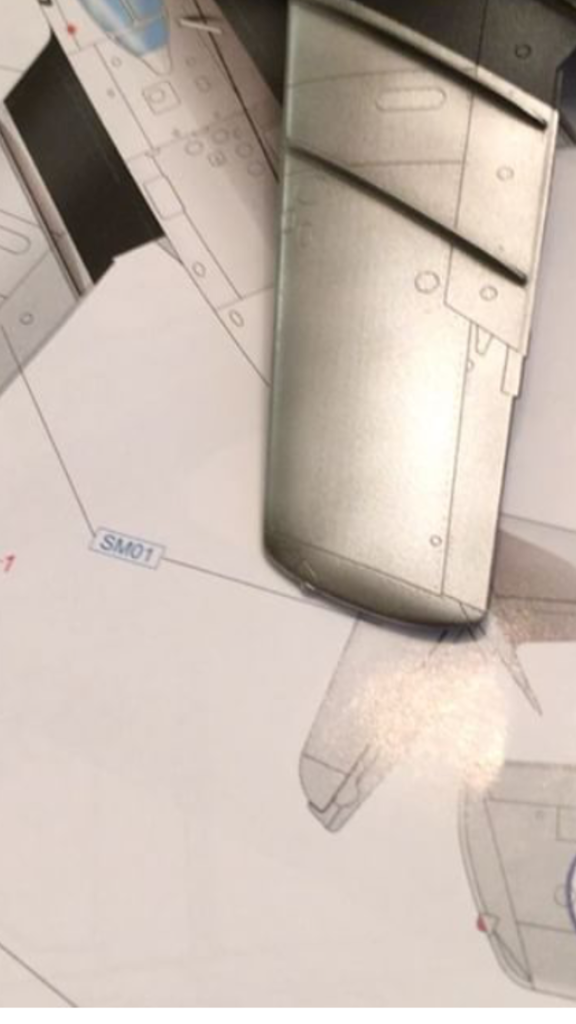
Then I went to shoot Tamiya Clear on it and accidentally dropped it. Instead of letting it fall 2 inches, I caught it and this happened.

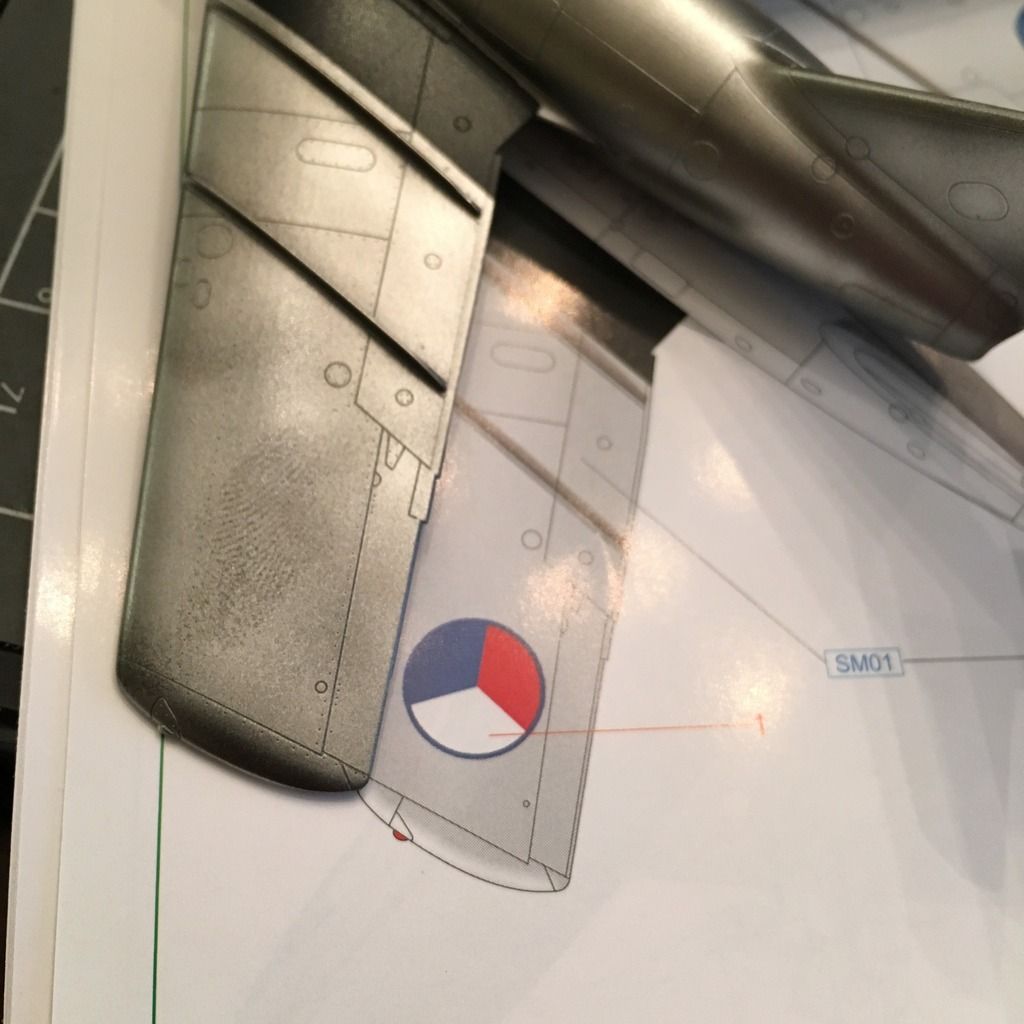
I was just going to leave it since a roundel went there, but I decided to be an adult about it and really quickly re-shot it with Polished Aluminum.

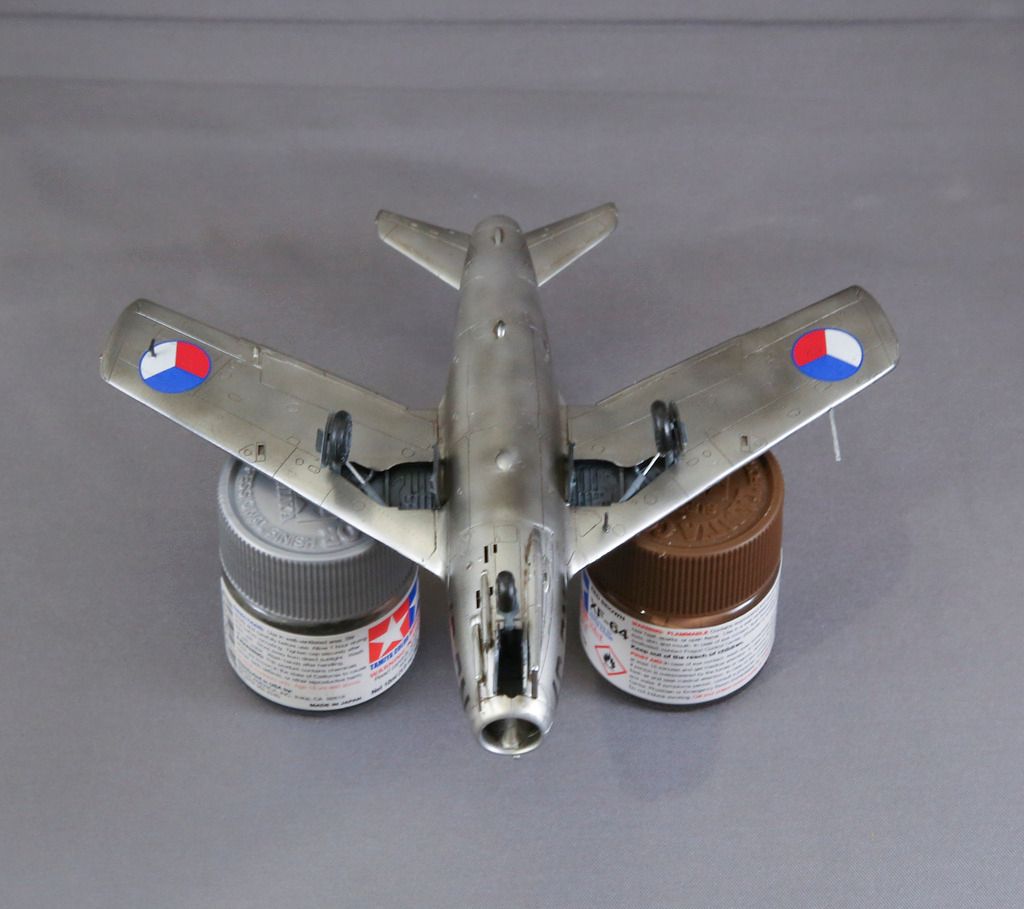
Once I put the legs on it, I ran into another issue - not enough nose weight. I tried several things, mostly around crushing lead pellets and dropping them in behind the cockpit, but too many went farther back past the landing gear and didn't help. I got it close by super gluing them in place behind the cockpit, but it was still a tail-sitter.

Finally, I decided to try something else. So I cut up a bunch of pellets after I flattened them with pliers.

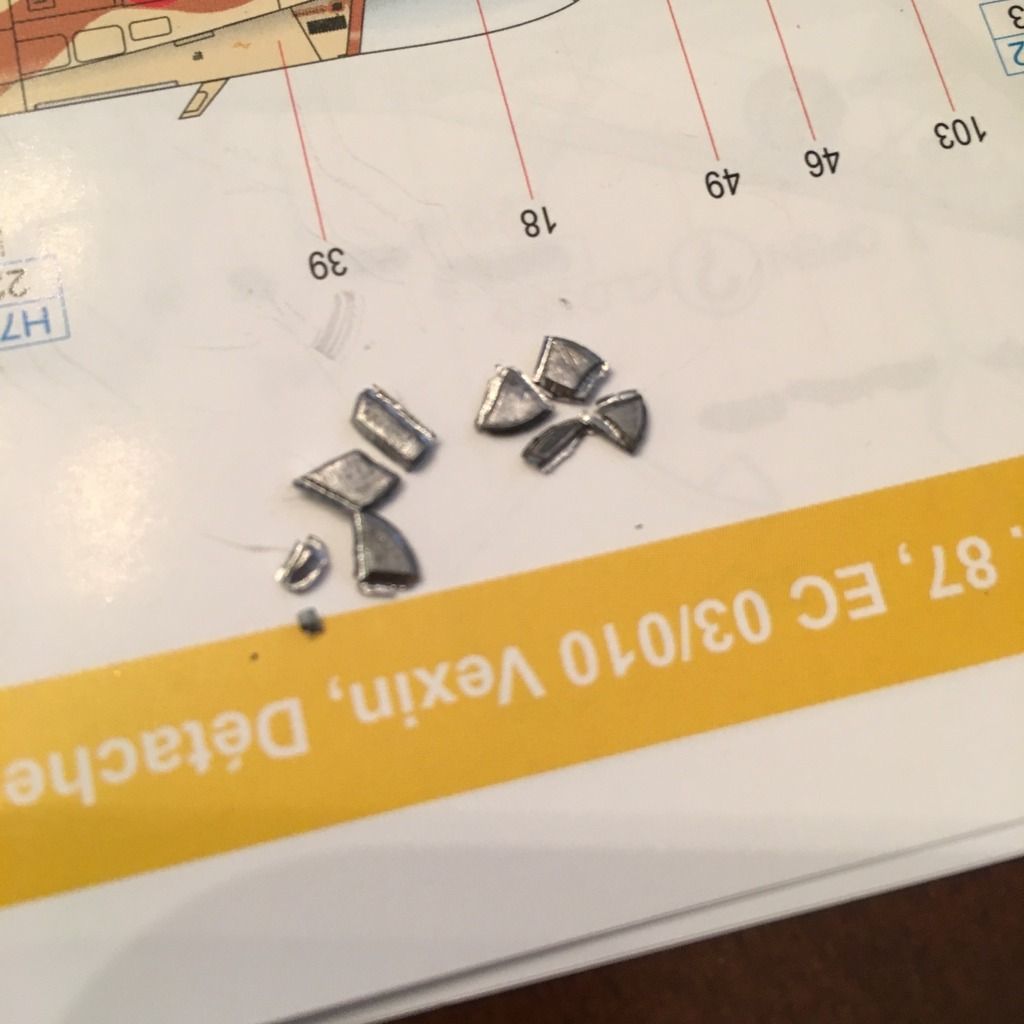
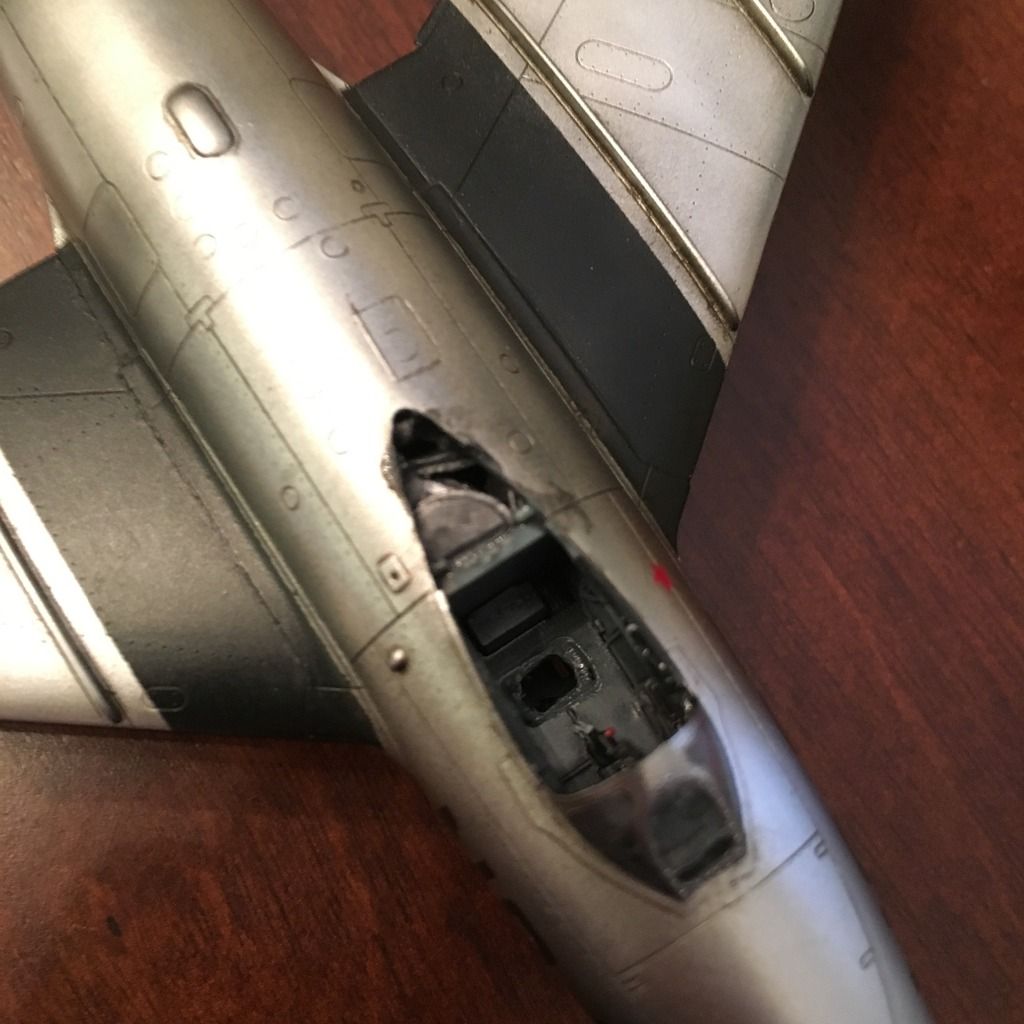
Then I pulled the ejection seat and took a drill to the cockpit so I could access the space in the weapons bay. You can see in the photo below I had some more cleanup to do around the cockpit area due to some super glue (this was just not my build in a few ways).

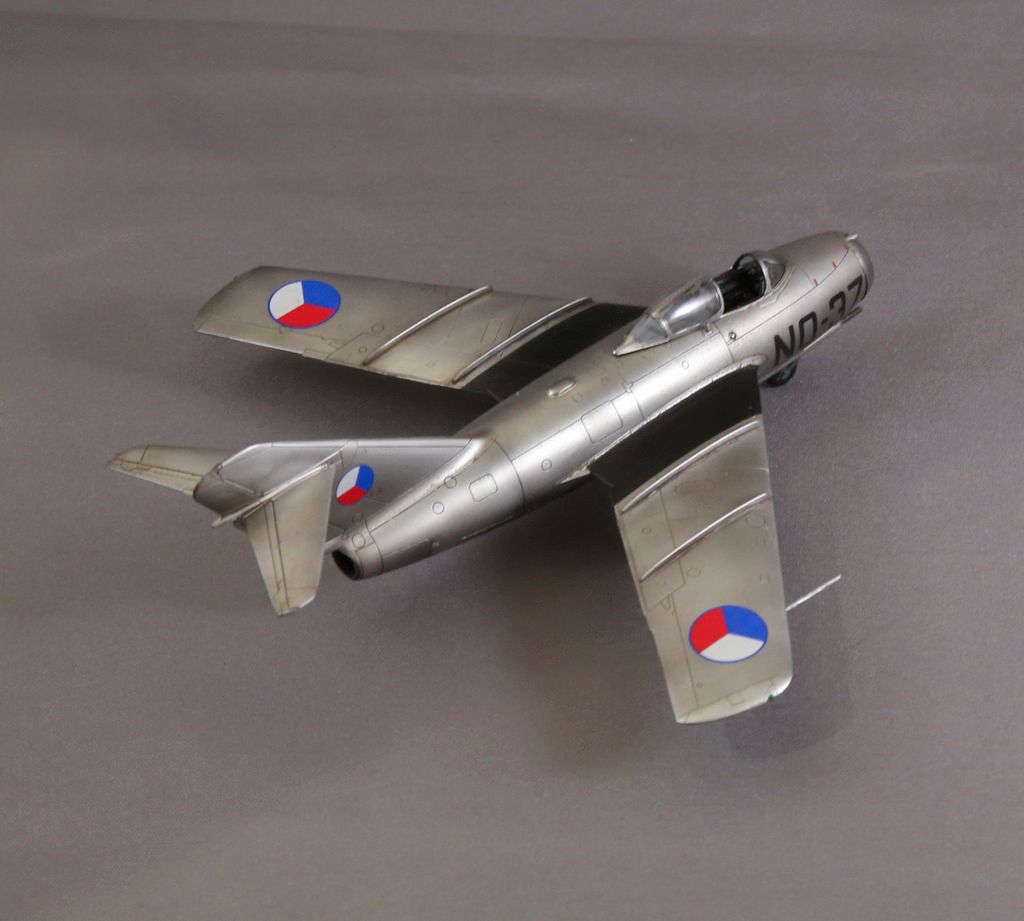
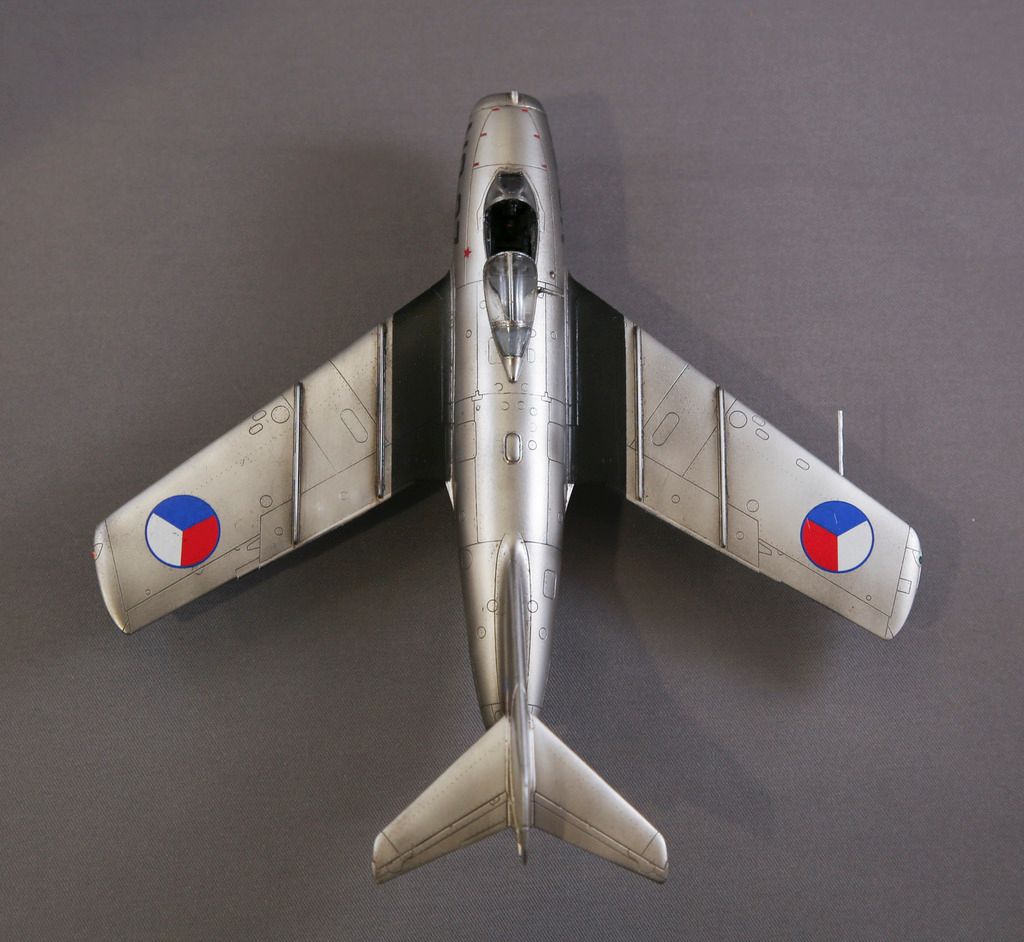
But that worked, and at the end, it sat firmly on the nose wheel, so I did the finishing touches and took it into the photo booth today at lunch.

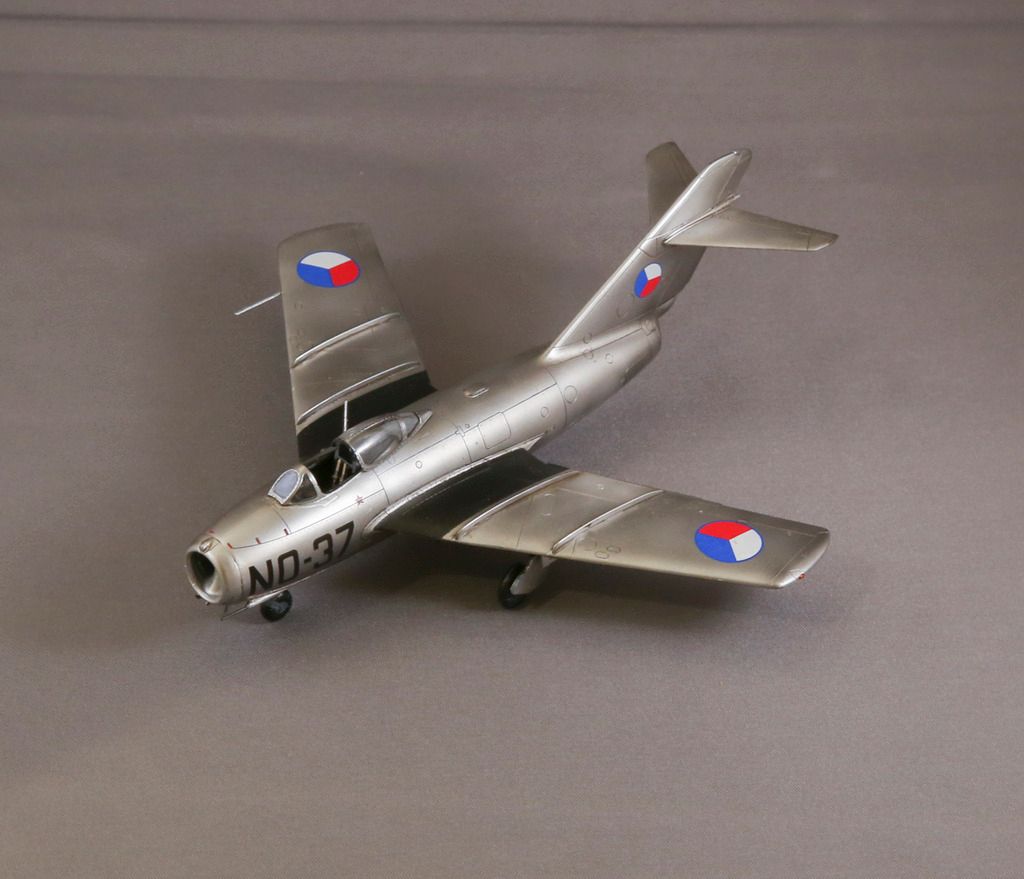
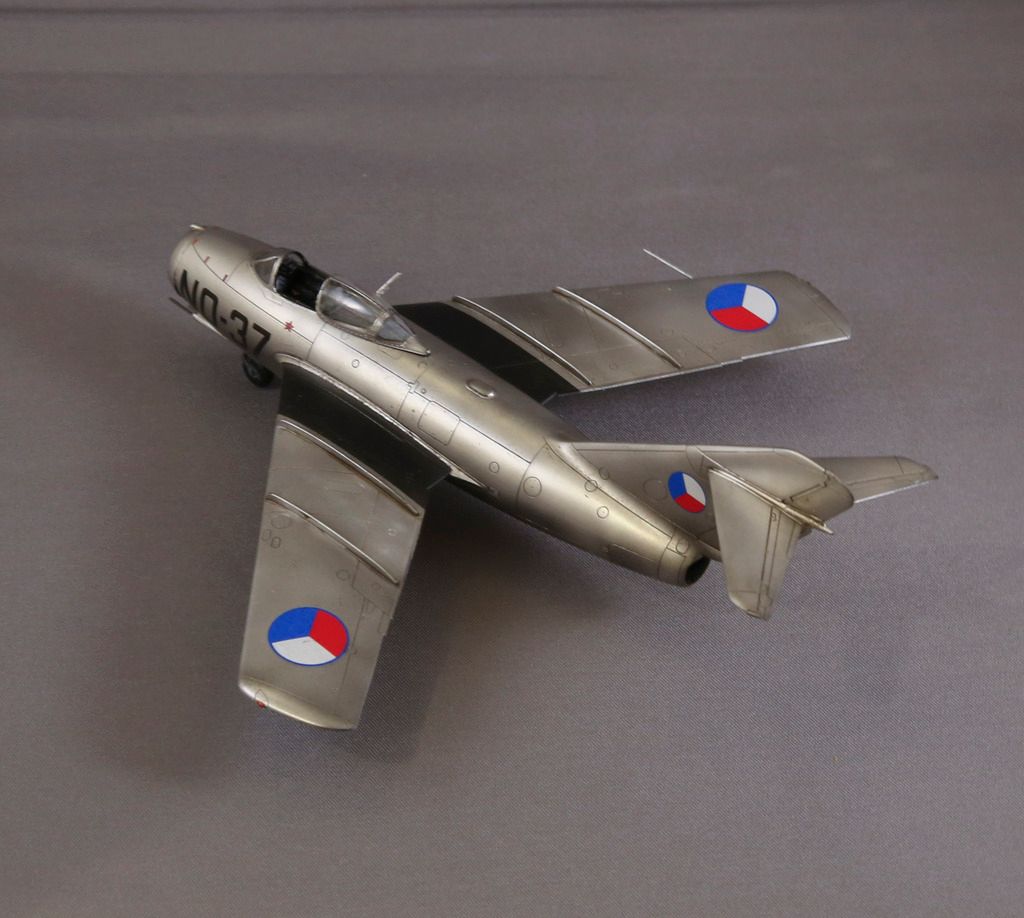
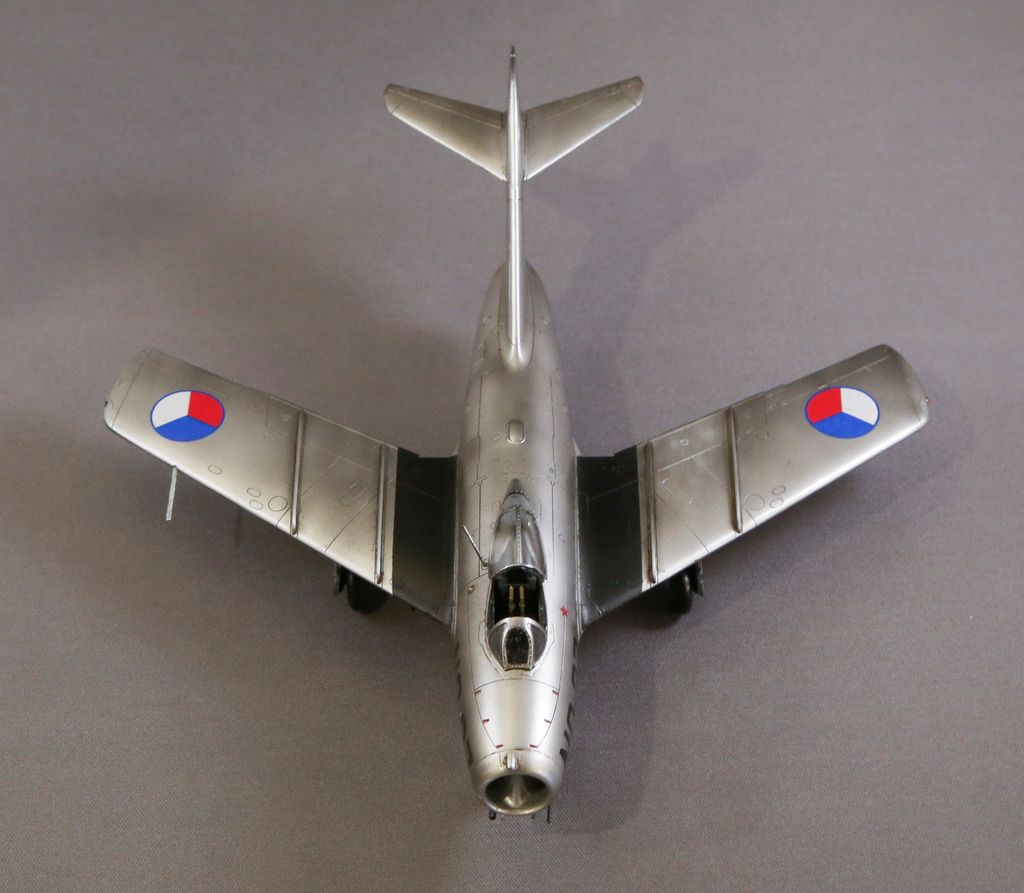
This one was flown in 1953 by the Czechoslovakian Air Force, and actually downed a US F-84 that the directions say "probably" flew into their airspace. The American pilot bailed out.

Thanks for looking, and for hosting this group build. It's been a lot of fun, even though it's in that little scale I rarely dabble in :)

The first pic of the finished plane is fine for the gallery.

-BD-

  • Member since
    July 2014
Posted by modelcrazy on Tuesday, November 22, 2016 3:23 PM

BrandonD

Steve, that's an awesome job! I don't know how you ship guys don't go entirely nuts.

-BD-


That's an easy one, we are already nuts Propeller

Steve

Building a kit from your stash is like cutting a head off a Hydra, two more take it's place.


http://www.spamodeler.com/forum/

  • Member since
    April 2006
  • From: Denver, Colorado
Posted by waynec on Sunday, November 27, 2016 10:45 PM

nice builds everyone. FINALLY got everything up to date life-wise and got some bench time today. have a 1/48 armored car ready to weather and got this Trumpeter ARIETE ready to weather. picked up a MODELCOLLECT HEMMT PERSHING, HEMMT PATRIOT and Russian MLRS in the stash. look like good kits.

tracks on the ARIETE are wired together underneath the skirts, Vallejo armor green. may add a camo pattern. got into modern Italian armro so have 3 CENTAURO 8x8s and an up armored ARIETE in 1/35

Никто не Забыт    (No one is Forgotten)
Ничто не Забыто  (Nothing is Forgotten)


  • Member since
    June 2003
  • From: Rowland Heights, California
Posted by Duke Maddog on Monday, November 28, 2016 11:58 AM

Looking fantstic Wayne! Your Ariete tank looks fantastic! Reminds me of when I built mine. Nice scores with the new stuff too. I started the Modelcollect Pershing; it's a great kit but lots of fiddly detail parts. Also the Pershing missile comes in 6 parts so watch alignment and seams closely. I also started the Modelcellect SMERCH MLRS, it's another one with very fiddly parts. First advice: finish the chassis assembly first before adding the axles to this; it'll make things far easier than doing it the way the instructions say.


Good luck! I'm looking forward to seeing more of these built.

  • Member since
    April 2006
  • From: Denver, Colorado
Posted by waynec on Monday, November 28, 2016 12:11 PM

hey Duke

thanks for the heads up on MODELCOLLECT.  have the AOSHIMA PATRIOT. might be fun to build simultaneously. saw some videos of LEOPARD 2A56s in winter camo. they only did the sides, not the top. i may do that on the ARIETE just to add some color. have to clean up a 1/35 CENTAUO and build a quick base and case for a present. good to be building again.

you going to NATS? i am and probably Albequeque too.

Никто не Забыт    (No one is Forgotten)
Ничто не Забыто  (Nothing is Forgotten)


  • Member since
    June 2003
  • From: Rowland Heights, California
Posted by Duke Maddog on Monday, November 28, 2016 12:16 PM

You're welcome. I'm glad to help.  I'm two-thirds of the way finished with my Aoshima Patriot too. I also got started on the JGSDF wheeled armored car prototype you did before; I just shot the first coat of paint on it.


It's still to early to know whether I'm going to the Nats in Omaha; right now it ain't looking good. Phoenix in 2018 however is a definite!

  • Member since
    April 2006
  • From: Denver, Colorado
Posted by waynec on Monday, November 28, 2016 12:25 PM

i don't know why your pics don't show up? was wondering where 2018 wAS. PHOENIX is a possible. we bid on 2018 and 2019 and didn't get either one. pity. 

Никто не Забыт    (No one is Forgotten)
Ничто не Забыто  (Nothing is Forgotten)


  • Member since
    July 2014
Posted by modelcrazy on Monday, November 28, 2016 1:32 PM

Hey Wayne, good to see you back!

BTW I have new pics of the U-Boat and will be replacing the yellow ones that are presently on the site. The yellow backdrop I used really washed out the colors so I bought a cheap white sheet and took new pics.

Steve

Steve

Building a kit from your stash is like cutting a head off a Hydra, two more take it's place.


http://www.spamodeler.com/forum/

  • Member since
    June 2003
  • From: Rowland Heights, California
Posted by Duke Maddog on Monday, November 28, 2016 4:00 PM

waynec

i don't know why your pics don't show up? was wondering where 2018 wAS. PHOENIX is a possible. we bid on 2018 and 2019 and didn't get either one. pity. 


I'm sorry, I didn't post any pics, but here they are if you want to see them. These are all the current small scale armor vehicles I'm currently working on:

My Aoshima Patriot:

JGSDF prototype:

My Pershing II so far:

Two Boxers and a Fuchs:

Two pics showing the start of my SMERCH. First the start of the axles:

The start of the rocket tubes. The ones on the right are shown with both halves of everything together:


Now if these don't show up, it's because of FSM's messed up photo inserting protocols. EDIT: They didn't work so I'm posting Old School. They do show up for me now. If they still don't show for you, send your E-mail address to me and I'll send them to you.


I also finished a couple Roden buses some time back. I can post pics of those later.


Modelcrazy, I'm looking forward to seeing those pics of that U-boat too. You've been doing a magnificent job on that.

  • Member since
    July 2014
Posted by modelcrazy on Monday, November 28, 2016 9:13 PM

Wayne,

I replaced the original pics with ones that aren't yellow.
If you want I think this picture may be nice on the wall.

Steve

Building a kit from your stash is like cutting a head off a Hydra, two more take it's place.


http://www.spamodeler.com/forum/

  • Member since
    January 2015
Posted by BrandonD on Tuesday, November 29, 2016 11:53 AM

Lol, Steve.

Wayne - nice work. It's looking great.

-BD-

  • Member since
    April 2006
  • From: Denver, Colorado
Posted by waynec on Saturday, December 3, 2016 5:31 PM

a couple of months ago i got a BROMRY anime 8x8 from the cheap bin. today i got the APC set and they had 2 semis in the basement so i got them too. i don't even know what universe these are in but apparently they are worth more on ebay than i paid for them. any help in more information is appreciated.

Никто не Забыт    (No one is Forgotten)
Ничто не Забыто  (Nothing is Forgotten)


  • Member since
    July 2014
Posted by modelcrazy on Thursday, December 8, 2016 9:27 PM
I finally received the anchor, so now she totally complete and ready for a contest.

Steve

Building a kit from your stash is like cutting a head off a Hydra, two more take it's place.


http://www.spamodeler.com/forum/

  • Member since
    December 2002
Posted by Bossman on Friday, December 9, 2016 8:34 PM

Very Nice Steve !

A ton of work into a very impressive U-Boat.  

Chris

JOIN OUR COMMUNITY!

Our community is FREE to join. To participate you must either login or register for an account.

SEARCH FORUMS
FREE NEWSLETTER
By signing up you may also receive reader surveys and occasional special offers. We do not sell, rent or trade our email lists. View our Privacy Policy.