SEARCH FINESCALE.COM

Enter keywords or a search phrase below:

Winter Warriors II - The Wintering!

92033 views
598 replies
1 rating 2 rating 3 rating 4 rating 5 rating
  • Member since
    December 2007
  • From: Bridgeview, Illinois
Posted by mg.mikael on Sunday, January 10, 2010 5:02 PM

oddmanrush- Thanks for the comments about the paint scheme!  Sorry to hear about the loss of a devoted modeling area aka the basement.....best of luck with your new home.Yes

Pvt Mutt- Can't wait to see the beast all finihsed up and in a white-wash!

dupes- Lookin' forward to seeing your Type 90 all winterized!(also looking forward to that wicked paint scheme)

JMart- I'll be watching to see how your T-34 comes out. Looks like you have some great reference pics.

________________

As for myself, I've been weathering slowly. The grime wash has been put on(that was my ace up the sleeve for giving the build an overall white appearance, like an overspray.) After that wash I put on the Future to protect it........now I'm still testing out different washes for the next coat.(don't want it too dirty.) But alas, spring semester starts tommorrow, that means my modeling time will be cut in half. Though I should be able to get some work done soon.

"A good plan executed now is better than a perfect plan next week." - George S. Patton

  Photobucket 

  • Member since
    August 2008
  • From: S.W. Missouri
Posted by Pvt Mutt on Sunday, January 10, 2010 6:05 PM

An in between play-off games up-date.Smile

I found some goodies in the spare parts box and just had to use them.Idea

This is a old kit but i'm having fun with it.                                                                                                     Tony Lee

Shoot Low Boys They're Ridin Ponys

  • Member since
    November 2006
  • From: Coastal Maine
Posted by dupes on Monday, January 11, 2010 8:44 AM

Tony - looking great! Is the spare roadwheels on the front a standard fitting? Neat.

Jmart - can certainly switch you to the T-34. That pic in your refs - is that an Egyptian mod of the T-34?

MGMikael - I'm pretty interested to see how that scheme turns out myself. Stick out tongue

  • Member since
    August 2008
  • From: S.W. Missouri
Posted by Pvt Mutt on Monday, January 11, 2010 11:52 AM

"Is the spare roadwheels on the front a standard fitting?" No, just the ones on the rear of of the back fenders,same goes for the spare tracks. These units were rushed into production and sent to the field. The crews had a field day modifying them to fit their needs.

Tank "G7" of the Pz. Rgt. 201 (23. Pz.Div.) had the mods you see on my model.

Thanks for asking Dupes                                                                                                                                   Tony Lee


Shoot Low Boys They're Ridin Ponys

  • Member since
    February 2003
  • From: Rothesay, NB Canada
Posted by VanceCrozier on Tuesday, January 12, 2010 7:33 AM

Looking forward to the Storch too, there's probably a "waiting for the stork joke in there somewhere, but I haven't had that second cup of coffee yet!

Now that I have the box open I've realized two things: Wow, there are a lot of parts in here; but they are so well done, some of them could literally hold together without glue. So long as I take my time applying those canopy masks (never used these before!) and take my time on the assembly this will be a very enjoyable build.

Big thumbs up to all the armour I've seen so far. I have to admit that I've never assembled anything with tracks on it. I did pick up a Jagdpanzer years ago... mauybe if I keep watching you guys in action I'll get the itch to build the thing!

On the bench: Airfix 1/72 Wildcat; Airfix 1/72 Vampire T11; Airfix 1/72 Fouga Magister

  • Member since
    November 2006
  • From: Coastal Maine
Posted by dupes on Tuesday, January 12, 2010 8:22 AM

Vance - did the Tamiya Storch come with it's own canopy masks? If so, cool. After you apply them just make sure that you rub the edges down really well with a toothpick (or something similar) to prevent any paint from seeping under. And talk to me about your Jagdpanzer! Manufacturer/model/scale?

Tony - great reference shot you've got there. That Katiusha appears to be going the wrong way...Whistling

  • Member since
    April 2005
  • From: Piscataway, NJ!
Posted by wing_nut on Tuesday, January 12, 2010 8:27 AM

Tony that is looking very nice.

Jmart, Thank you for the compliments.  Looking froward to seeing it come along.

Marc  

  • Member since
    February 2003
  • From: Rothesay, NB Canada
Posted by VanceCrozier on Tuesday, January 12, 2010 8:46 AM

Hey Dupes - yes, the OOB kit comes complete with masks for all that glass, thankfully! (As well as some PE for the wing spar, some support structure for the landing gear, etc.)Am I better off hitting the glass with a coat of Future first, or do the masks prefer raw plastic?

The armour, just did a quick search for comparision, it's actually a Jagdpanther.  I'll have to dig it out to get specifics on it, it's a 1/35 kit from Italeri if memory serves. ( http://www.italeri.com/VisualizzaProdotto.aspx?PROD=01084 seems to be the right kit, I expect it is something that gets re-boxed ) And rubber-band tracks, I don't know right off if there are link options included... I figured it would be a good starting point for someone who hasn't tried it before now!

On the bench: Airfix 1/72 Wildcat; Airfix 1/72 Vampire T11; Airfix 1/72 Fouga Magister

  • Member since
    March 2008
  • From: Cheney, WA
Posted by FastasEF on Tuesday, January 12, 2010 2:29 PM

Hmm hmm hmm, I don't want to commit to anything yet but if I can get my C-47 done in the next week or so then I might sign up with my 1/35 Dragon T-34/76 Mod. 1941 (Cast Turret). I would love to build my Dragon Sd.Kfz.184 Elefant Premium Edition but the T-34/76 looks quite a bit easier and with the late start it would be wiser for a fairly new armor builder to pick the kit with fewer fiddly bits. That and me+zimmerit= not going to happen, lol

I'll let you know soon though.

Josh

  • Member since
    March 2007
  • From: NJ
Posted by JMart on Tuesday, January 12, 2010 5:08 PM

The reference pics I posted are from Osprey's "Modelling the T-34/76". The pics are from the last chapter, a German T-34/76 747 (r)-3, western front, 1944. The modeller (Mig J.) used parts from 3 kits and a resin turret. I am just following his sequence of "winter weathering", including the use of Mig filters. If anyone was more pics or scans from that book, let me know. I recomend the book; has a lot of techniques explained in detail with many pics, which can be used for armor other than the T-34.


  • Member since
    November 2006
  • From: Coastal Maine
Posted by dupes on Wednesday, January 13, 2010 3:06 PM

Vance - nothing wrong with that kit...hoping you get to crank it out someday (sooner rather than later!).

Josh - can't have too many T-34's when it comes to winter schemes.

JMart - how's that book treating you? Lots of good info in there?

Hoping to get several hours in on the Type 90 tonight...hopeful update tomorrow morning.

  • Member since
    December 2007
  • From: Bridgeview, Illinois
Posted by mg.mikael on Wednesday, January 13, 2010 4:14 PM

Nothing to report on my end. The JS-II is sorta in a holding stage untill I can find some time to build, which will hopefully be this weekend.

Ohter then that I did just buy an interesting program.....Rhino 4.0(sort of a 3D rendering program), I had to get it for architecture, but it allows you to essentially create any sort of object from a chair to a flashlight to a King Tiger. Might prove useful in testing objects and stuff related to how it looks on the model, before I do it in person. (Now I just have to learn how to use the program.Dunce)

"A good plan executed now is better than a perfect plan next week." - George S. Patton

  Photobucket 

  • Member since
    March 2008
  • From: Cheney, WA
Posted by FastasEF on Wednesday, January 13, 2010 4:40 PM

Mark me down dupes. Dragon 1/35 T-34/76 Mod.1941. Probably no weathering on this one. Just something to get my armor building skills up. Should be starting in about a week or two I'm hoping.

Josh

  • Member since
    August 2008
  • From: S.W. Missouri
Posted by Pvt Mutt on Wednesday, January 13, 2010 6:18 PM

I guess a set of these Get-a-Grip snow tracks will help it get around better.Heart

See Ya Later                                                                                                                                                   Tony Lee

Shoot Low Boys They're Ridin Ponys

  • Member since
    February 2004
  • From: Second City
Posted by arki30 on Wednesday, January 13, 2010 8:44 PM

VanceCrozier

...Am I better off hitting the glass with a coat of Future first, or do the masks prefer raw plastic?


Future, then mask.

Building Now:

1/48 Academy Bf-109G6 - 100%

1/48 Tamiya F4U-1A - 5%

Upcoming:

1/48 Revell F-14D

  • Member since
    April 2007
  • From: Schroon Lake, NY
Posted by SMJmodeler on Thursday, January 14, 2010 1:07 PM

This GB is 17 pages deep already!?!?! WOW!

Hey guys...I've been away awhile...had tp go to California over the holidays...long story.  Anyway, back on-line and glad to see this GB is rolling.

dupes: I hate to do this but I, after much deliberation, decided to change my entry for this GB.  I wanted to do the HST and Long Tom but found NO evidence or support for it/their whitewashing...SOOOO, I'll save that for AMPS East Korean War Theme and build it later.  Change me to a Trumpeter 1/35 KV-1 1942 Heavy Cast Turret.  I ljust received the model from luckymodel yesterday...I love the box art camo...and the instructions really show how to get it right...so that's what I'll do!

  • Member since
    April 2003
  • From: 41 Degrees 52.4 minutes North; 72 Degrees 7.3 minutes West
Posted by bbrowniii on Thursday, January 14, 2010 2:01 PM

Hey guys,

I'm getting started on my build for this - the Tamiya Marder 1A2 Schutzenpanzer.  Since it is a modern vehicle and the tracks don't have too much sag, I intend to use the rubber band tracks that come with the kit.

One question: back in the olden days when you could do a search on the forum Devil I know there were a number of threads describing some tricks to painting rubber band tracks.  Anyone have any of those linked or have any tips or tricks?

Thanks!

'All that is necessary for the triumph of evil is for good men to do nothing' - Edmund Burke (1770 ??)


  • Member since
    November 2006
  • From: Coastal Maine
Posted by dupes on Thursday, January 14, 2010 3:02 PM

Tony - Fruil Winterketten! Sweeet!

JMart, FastasEF - got you guys down.

SMJ - glad to see you finally back on the forum! You have some serious catching up to do, my friend. Tell you what - I'm going to wait until you actually start building something before I update the front page. Sound o.k.? Blind Fold

Boyd - I used the Tamiya rubber bands on my Pz.IV - I find that if you just give them a basecoat (primer) of flat black spraypaint - 99 cents at Walmart - they behave much more like plastic tracks...can be painted/weathered pretty much normally.

Hope to have a decent update on the Type 90 tomorrow for you guys. Yes

  • Member since
    November 2006
  • From: Coastal Maine
Posted by dupes on Thursday, January 14, 2010 3:04 PM

Vance - forgot to hit your question. DEFINITELY do the future-ing first. Rather than spraying it, try this - leave a bit of the excess clear sprue on your canopy as a handle, then pour yourself a small container of future (small tupperware or something similar - you can reuse it!). Grab your canopy in some tweezers, and dip it right in! Let it drip-dry, then put it somewhere away from dust (in another tupperware?) for at least 24 hours, preferably 48. Rock hard canopy gloss coat. Yes

  • Member since
    August 2008
  • From: S.W. Missouri
Posted by Pvt Mutt on Friday, January 15, 2010 3:54 PM

Tony Lee

Shoot Low Boys They're Ridin Ponys

  • Member since
    December 2006
  • From: t.r.f. mn.
Posted by detailfreak on Friday, January 15, 2010 5:46 PM

must be a tough neighborhood over your way tony,I see the ruffians have made off with not only your roadwheels but all of your running gear!

[View:http://s172.photobucket.com/albums/w1/g-earl828/]  http://i158.photobucket.com/albums/t104/cycledupes/1000Roadwheels4BuildBadge.jpg

  • Member since
    August 2008
  • From: S.W. Missouri
Posted by Pvt Mutt on Friday, January 15, 2010 7:28 PM

Yeah and if it ain't nailed down it's gone. Thing of it is I just got em painted too.Bang Head

Thanks for coming by but you're too slow for the neighborhood watch.Wink                                                               Tony Lee


Shoot Low Boys They're Ridin Ponys

  • Member since
    November 2007
  • From: Toronto Ontario
Posted by Hellcat man on Saturday, January 16, 2010 9:38 AM

Time for my first post. 

Photobucket

Photobucket

Photobucket

Photobucket

 ALEX ZELYK

  • Member since
    August 2008
  • From: S.W. Missouri
Posted by Pvt Mutt on Saturday, January 16, 2010 6:29 PM

Tony Lee

Shoot Low Boys They're Ridin Ponys

  • Member since
    November 2012
Posted by dioramator on Saturday, January 16, 2010 8:24 PM


Time for another update.

Firstly I must say… all the builds are looking good.

Tony Lee and hellcat man, can’t wait to see that winter white wash splashed around.


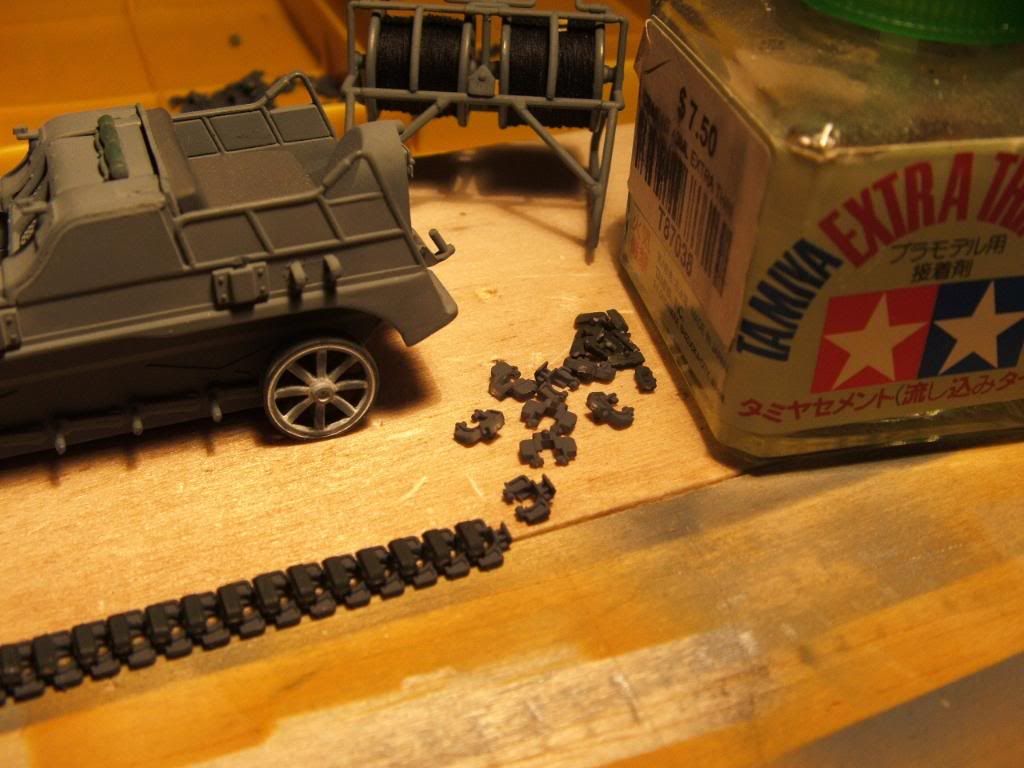
The tracks go together the same as the Tamiya Famo, but due to their size, are a little harder to work with. I tried to make them as working, but this turned out to be an exercise in futility, I ended up with one set working, but the set I fixed to the vehicle, I made up as usual indy link tracks (make the run and fit to the vehicle before they set).

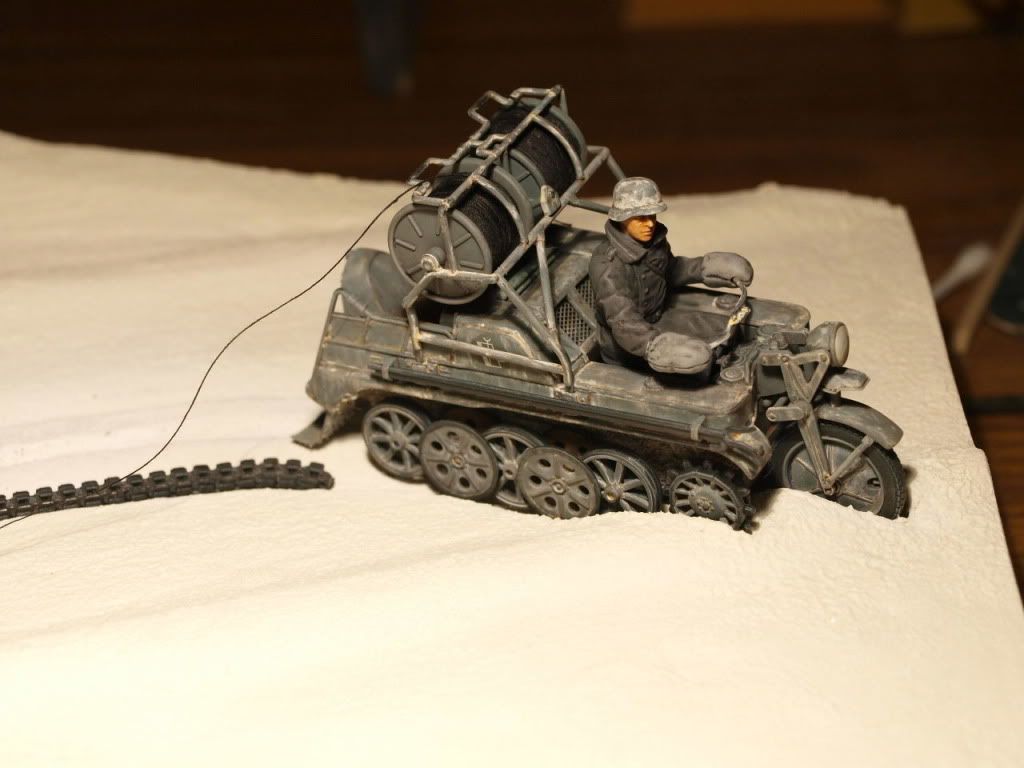
 I laid the winter wash with gouache, the result turned out as I had envisaged (depicting the wash applied a long time ago, and most of it has been washed off).

I then gave it an (oil paint) all over filter wash with raw sienna, then burnt umber, and finally a mix of lamp black and paynes grey. (note the cable frame and the driver have just been popped into position for the photo, so they are not seated properly yet).

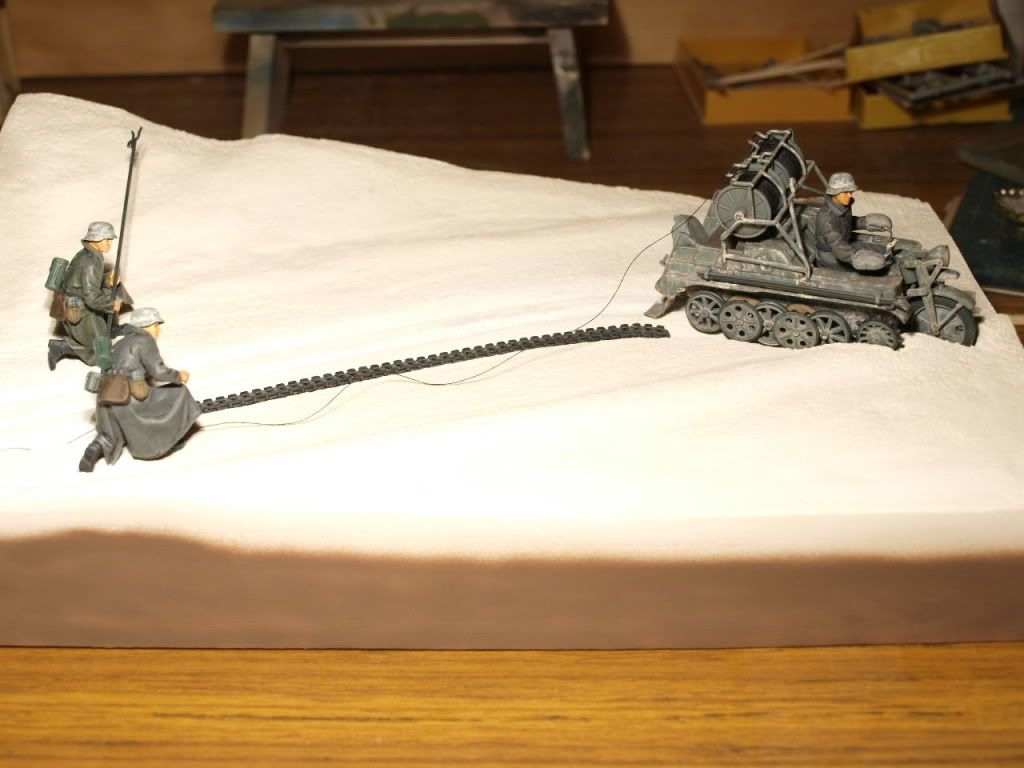
I placed the whole thing on the base (to see its overall effect), and have decided the figure at the back should not really be squatting down, (as he has no reason to be), so I have decided to use one of the extra figures that came with the kit.


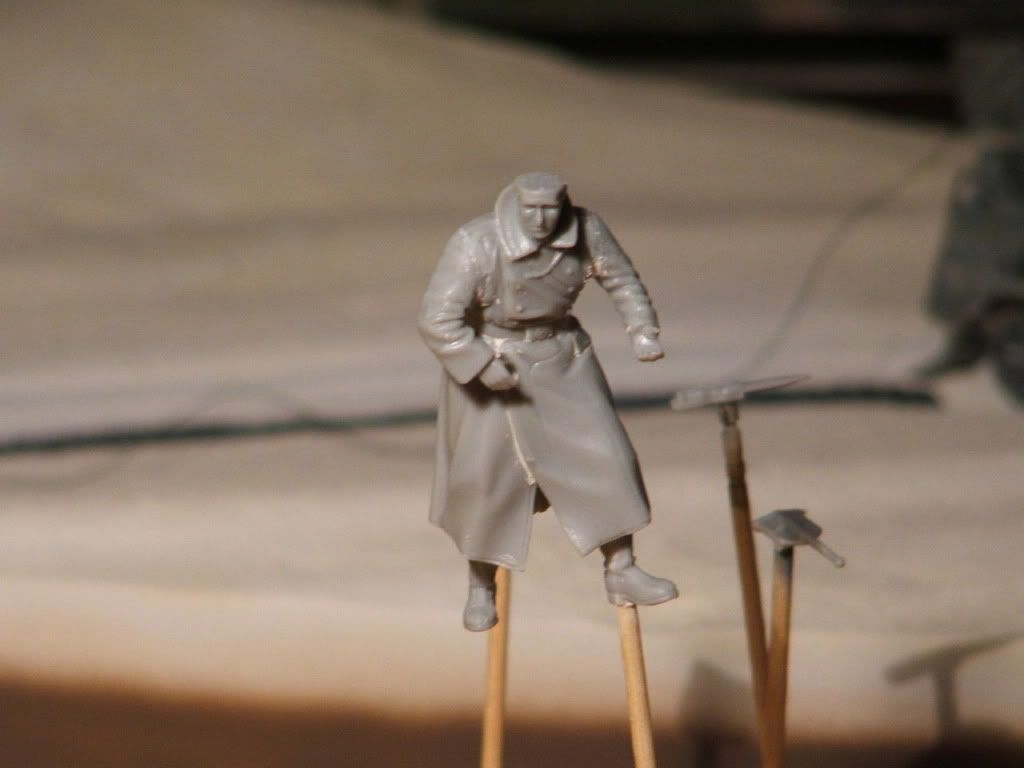
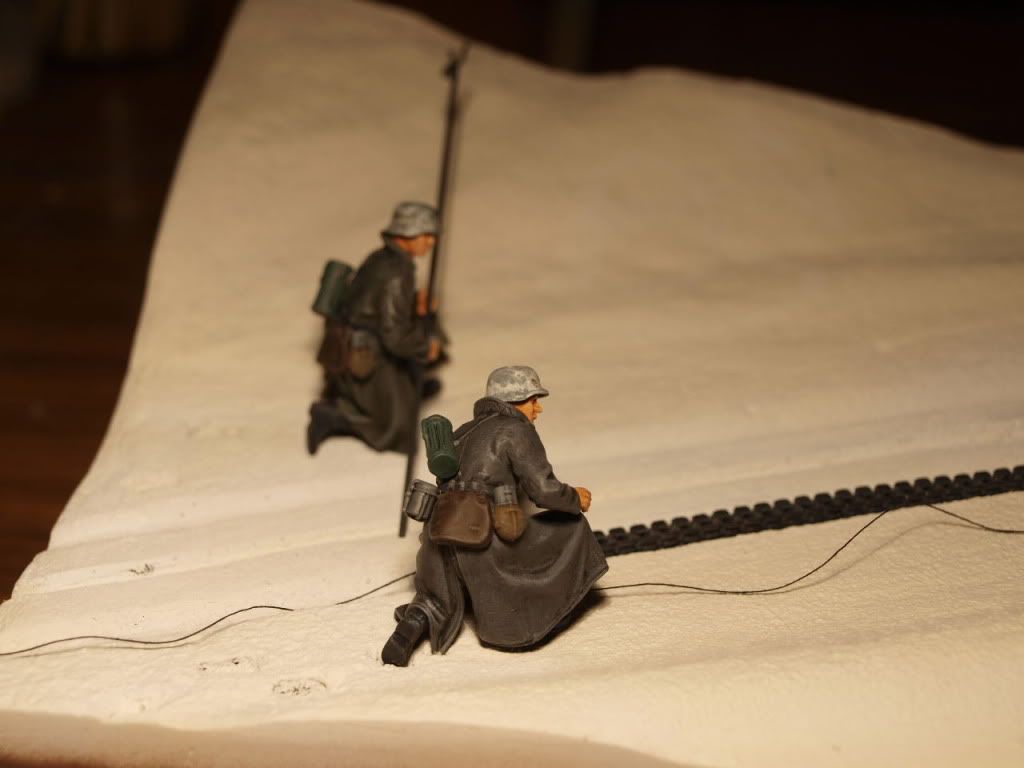
The figures were (once assembled) primed with a coat of Tamiya flat flesh, the uniforms painted with Vallejo colour. Skin tones were done in oil paint (mix of burnt sienna, yellow ochre, and raw umber) and wiped with a Q-tip.
A wash of burnt sienna mixed with ultramarine blue was used on the uniforms (which gives a nice velvety black look), followed by drybrushing with titanium white (oil paint).

Currently I’ll finish the new figure, and make the snow prints to suit.(the base currently has a thin layer of dry-wall filler, reduced and dappled on with a sponge), then I can put down the layer of soft flake snow, and make the Kettenkrad actually look like it is embedded in the snow bank.


I’m still tossing up on whether to use any other ground effects (grasses, signage, telegraph pole, fence, etc.), or just leave the whole thing covered in snow.


Brett


  • Member since
    May 2009
  • From: Hobart, Tasmania
Posted by Konigwolf13 on Saturday, January 16, 2010 8:59 PM

Well, must be the day for aussie updates. I finally found the spare change to get what I needed for my baby diorama. A hedge behind and a stack of logs in front, with a new snow recipee. Read, bicarb makes better snow than chalk.

Snow is half done. After the snow's finished, its the mud and then finish the weathering,mud and wash on the tiger.


Andrew


  • Member since
    February 2004
  • From: Second City
Posted by arki30 on Sunday, January 17, 2010 11:31 AM

Sheesh, with all of the detail being thrown into the armor builds I'm feeling inadequate with my OOB build!  Big Smile

Quick progress update.  Cowl is finally installed.  It's a 5 piece affair, once again over-engineering by Hasegawa to get multiple variants from the molds.  Left a large gap at the top, filled with styrene.  All other seams including the wing joints are now filled and sanded.

Canopy has been masked, installed and RLM 66 interior color applied to the outside.  Once that dries, I'm ready to put primer down to see how much more seam work I have to do.

Building Now:

1/48 Academy Bf-109G6 - 100%

1/48 Tamiya F4U-1A - 5%

Upcoming:

1/48 Revell F-14D

  • Member since
    December 2007
  • From: Bridgeview, Illinois
Posted by mg.mikael on Sunday, January 17, 2010 7:27 PM

Wow, the work benches have really been busy lately. Lots of of fantastic work done so far guys!Yes

Over on my end, I have the final washes drying currently and alot of the other little things(tow cable, exhausts, muzzle brake, tools) have been all been specially weathered. So with that said, I'm in the final stretch now just have to seal the model and do the finishing touches, thus I'll have finished pictures up sometime tommorrow.Big Smile

"A good plan executed now is better than a perfect plan next week." - George S. Patton

  Photobucket 

  • Member since
    May 2009
  • From: Hobart, Tasmania
Posted by Konigwolf13 on Sunday, January 17, 2010 11:17 PM

That is one awesome camo job, cant wait to see the finished job  mg.mikael


Andrew

  • Member since
    February 2003
  • From: Rothesay, NB Canada
Posted by VanceCrozier on Monday, January 18, 2010 9:59 AM

I know what you mean Arki, all the armour is looking great, and ridiculously detailed already too! Busy weekend with family around meant only a little painting done to the Storch, and some dry-fitting for sub-assemblies. Everything is looking good fit-wise though. I should be assembling the cockpit/passenger area tonight. I'll post up some pics as soon as I get that much done.

On the bench: Airfix 1/72 Wildcat; Airfix 1/72 Vampire T11; Airfix 1/72 Fouga Magister

JOIN OUR COMMUNITY!

Our community is FREE to join. To participate you must either login or register for an account.

SEARCH FORUMS
FREE NEWSLETTER
By signing up you may also receive reader surveys and occasional special offers. We do not sell, rent or trade our email lists. View our Privacy Policy.