SEARCH FINESCALE.COM

Enter keywords or a search phrase below:

Way Too Many Props GB April 18, 2011 - Extended to July 28, 2012

85563 views
862 replies
1 rating 2 rating 3 rating 4 rating 5 rating
  • Member since
    July 2007
  • From: Southern New Jersey
Posted by troublemaker66 on Friday, May 18, 2012 2:32 PM

Looks great Doogs ! What did you mess up on the port side?  Big Smile

Len

Len Pytlewski

  • Member since
    June 2010
  • From: Austin, TX
Posted by DoogsATX on Friday, May 18, 2012 3:57 PM

troublemaker66

Looks great Doogs ! What did you mess up on the port side?  Big Smile

Len

Nothing too awful - but the Zotz decals behaved badly on that side. Can you believe the US insignia was lifting off even after multiple coats of Future and at least two coats of Alclad clears? Finally got it back down with some Future cut with Tamiya Flat Base, but still.

Second time using Zotz decals. Second time less than thrilled.

On the Bench: 1/32 Trumpeter P-47 | 1/32 Hasegawa Bf 109G | 1/144 Eduard MiG-21MF x2

On Deck:  1/350 HMS Dreadnought

Blog/Completed Builds: doogsmodels.com


  • Member since
    December 2002
  • From: Bury St Edmunds, Suffolk, England
Posted by Bish on Friday, May 18, 2012 4:27 PM

Doogs, thats some stunning work on that build, your usualk high standard. I must admit when you first posted pics after useing the salt, i did wounder what it was meant to achieve. But i can see the difference it has made now. Its very subtle, but the effect is very nice.

I am a Norfolk man and i glory in being so


On the bench: Airfix 1/72nd Harrier GR.3/Fujimi 1/72nd Ju 87D-3

  • Member since
    July 2007
  • From: Southern New Jersey
Posted by troublemaker66 on Friday, May 18, 2012 4:41 PM

LOL! Doogs....I had a hunch something happened....I do the same thing when photographing some of my disastrous models...Wink

Don`t think I`ve used Zotz decals and doesn`t sound like I want to. There`s nothin` like doing a great job on a build and have the decals, which IMO are the most important part of the finish, go bonkers on ya. I was progressing nicely on an MPM Pe-2, no real problems with assembly but the decals malfunctioned and now it sits, incomplete, waiting for me to order new decals for it. I know if I paid for A/M decals and they didn`t work, I`d be pi$$`d.

You did a great job with your PV-1...salt weathering looks great. I`m doing that kit for the twin engine bombers GB and will be using yours as one of my references as I will be doing the same scheme/ aircraft....gotta cean up a few builds from other GB`s first.....Yes

Len

Len Pytlewski

  • Member since
    August 2009
  • From: Toledo Area OH
Posted by Sparrowhyperion on Tuesday, May 22, 2012 4:35 PM

Well, I have some good progress on my two Mosquitos.  The Mark VI Fighter Bomber is almost ready for paint, and the Mk IV is getting to that point too, just basic assembly to do.

Here's some images

The Mark VI first.

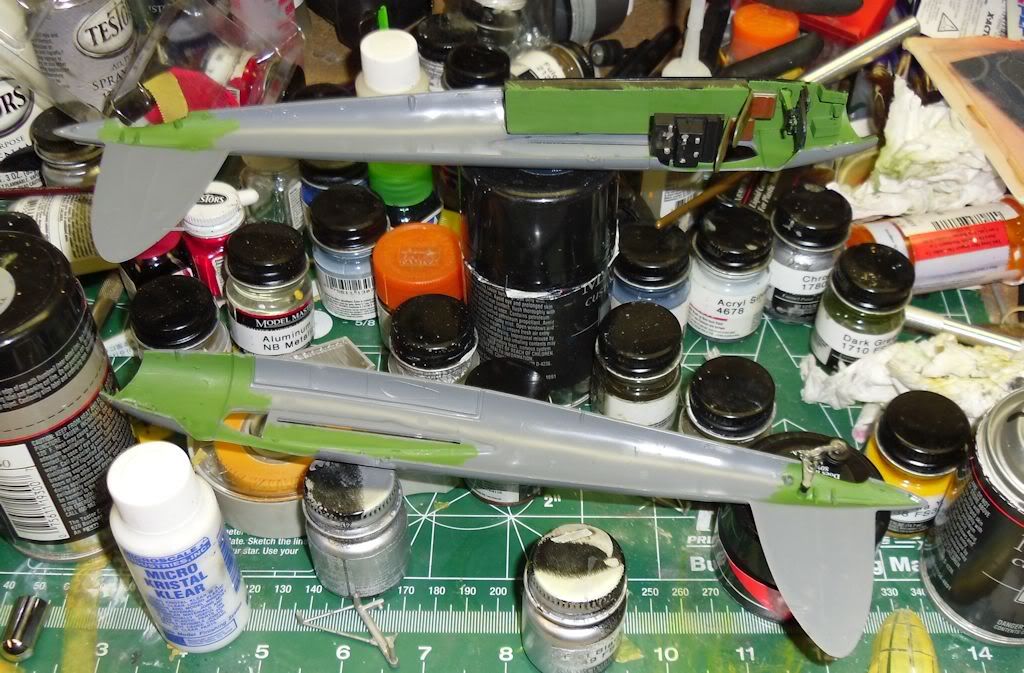
Main fuselage and wings glued and drying.
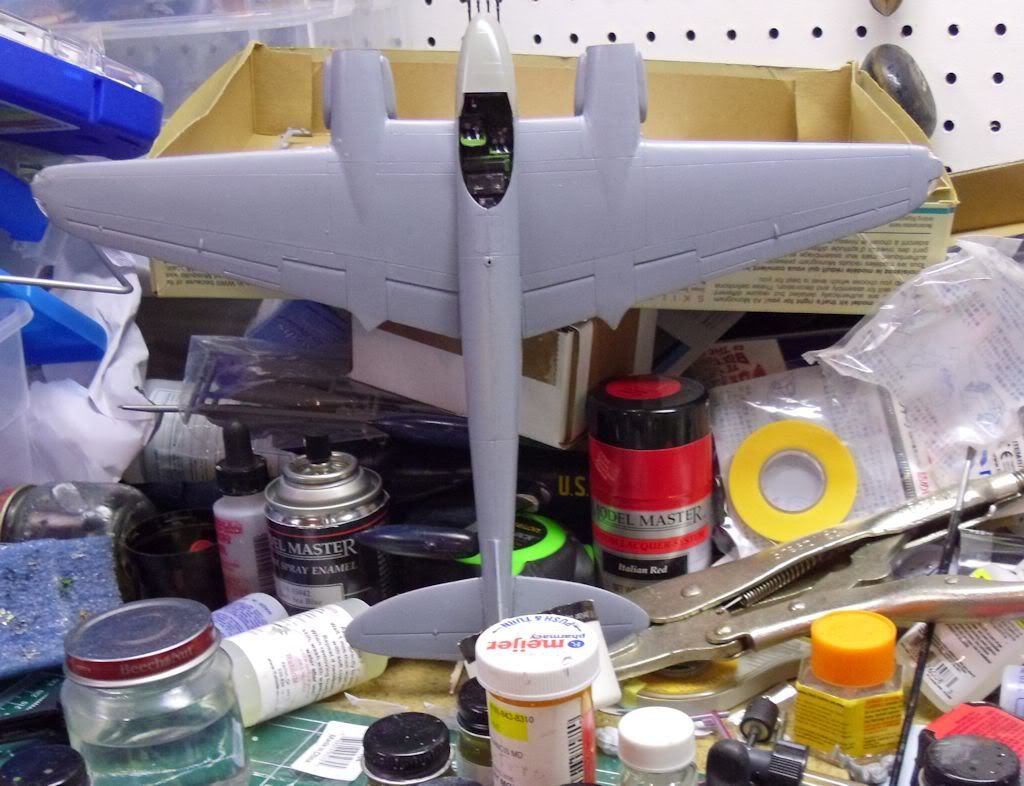
Top View

The Mk VI cockpit glass masked for painting.  This was the hardest part of the whole kit for me.  My hands are pretty shakey and it took me an hour to get it as good as this.  I just got through masking the Mk IV glass and it was just as bad.  I will never understand why the heck they made that glass two pieces.  It would be great if they made a separate piece for the glass and a another for the frame.  This would make life sooooo much easier.

Here's a couple of the Mk IV.

I didn't like the paint scheme for the Mk. VI so I decided on my own for the Mk. IV. cockpit.
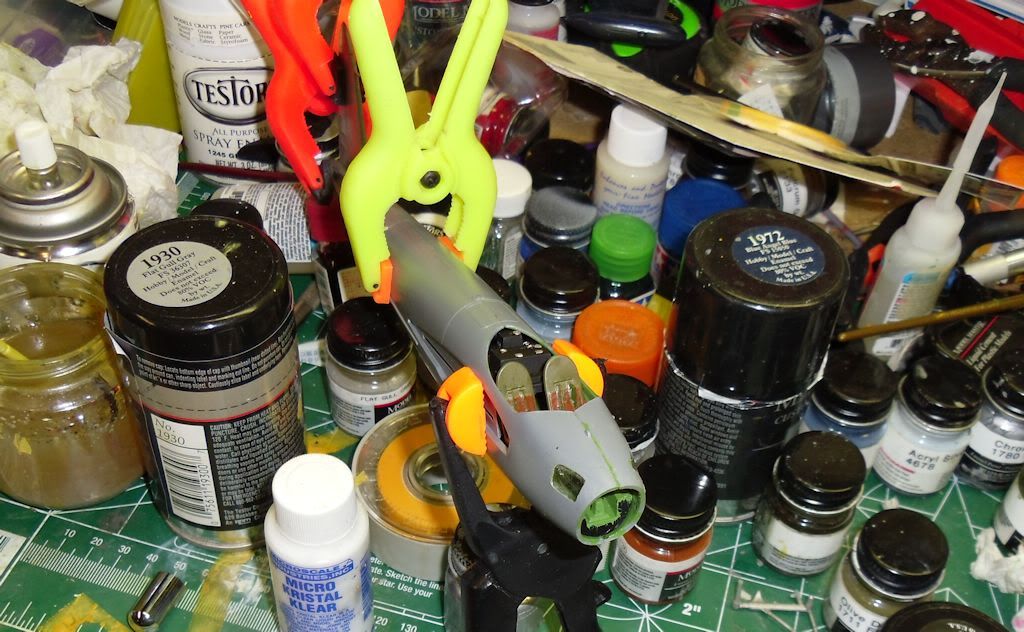
Here's the fuselage assembled.  I also have the wing segments primed gray, but my camera ran out of juice before I could take a couple of snaps.  I'll try and post some of the wings when the camera is recharged.

Rich


In the Hangar: 1/48 Hobby Boss F/A-18D RAAF Hornet,

On the Tarmac:  F4U-1D RNZAF Corsair 1/48 Scale.

  • Member since
    September 2009
  • From: Frisco, TX
Posted by B17Pilot on Tuesday, May 22, 2012 10:43 PM

Looking Good, Rich!


  • Member since
    December 2002
  • From: Bury St Edmunds, Suffolk, England
Posted by Bish on Wednesday, May 23, 2012 6:45 AM

Lovely work on those Mossies Sparrow. Great work.

I am a Norfolk man and i glory in being so


On the bench: Airfix 1/72nd Harrier GR.3/Fujimi 1/72nd Ju 87D-3

  • Member since
    September 2009
  • From: Frisco, TX
Posted by B17Pilot on Thursday, May 31, 2012 5:42 PM

Ready for paint!


  • Member since
    August 2009
  • From: Borlando Fla home of the rat
Posted by TREYZX10R on Thursday, May 31, 2012 9:51 PM

Rich ,B17Pilot looking great!

  • Member since
    June 2010
  • From: Austin, TX
Posted by DoogsATX on Thursday, May 31, 2012 10:03 PM

B17Pilot

Ready for paint!

http://i993.photobucket.com/albums/af53/raiderpilot/Models/Ventura/IMG_7506.jpg

Sweet...another peevee!

On the Bench: 1/32 Trumpeter P-47 | 1/32 Hasegawa Bf 109G | 1/144 Eduard MiG-21MF x2

On Deck:  1/350 HMS Dreadnought

Blog/Completed Builds: doogsmodels.com


  • Member since
    February 2011
  • From: Bent River, IA
Posted by Reasoned on Friday, June 1, 2012 7:36 AM

Sparrowhyperion

Well, I have some good progress on my two Mosquitos.  The Mark VI Fighter Bomber is almost ready for paint, and the Mk IV is getting to that point too, just basic assembly to do.

Here's some images

The Mark VI first.

Main fuselage and wings glued and drying.

http://i1161.photobucket.com/albums/q515/sparrowlord01/MosquitoWIPImages8.jpg

.

Here's a 

http://i1161.photobucket.com/albums/q515/sparrowlord01/MosquitoWIPImages6.jpg

I didn't like the paint scheme for the Mk. VI so I decided on my own for the Mk. IV. cockpit.

http://i1161.photobucket.com/albums/q515/sparrowlord01/MosquitoWIPImages5.jpg

Here's the fuselage assembled.  I also have the wing segments primed gray, but my camera ran out of juice before I could take a couple of snaps.  I'll try and post some of the wings when the camera is recharged.

Rich


Looks great Rich, so tell me, how in the world do you find anything on that bench? Stick out tongue

Science is the pursiut of knowledge, faith is the pursuit of wisdom.  Peace be with you.

On the Tarmac: 1/48 Revell P-38

In the Hanger: A bunch of kits

  • Member since
    August 2009
  • From: Toledo Area OH
Posted by Sparrowhyperion on Friday, June 1, 2012 10:35 AM

Well.  I actually neaten it up when I start a kit.  Then I take the paints I need for that particular kit out and leave the rest in my paint drawers.  Since I am working on a couple of kits at the same time right now, it's a bit messier than usual..  Right now I have a small issue with one of the Mossies.  One of the propellers went twang zip when I trued to remove it from the alligator clips that were holding it by the shaft so the black paint could dry, and I am having trouble finding it.  I don't have any spares, so I need to find it.


Reasoned


Looks great Rich, so tell me, how in the world do you find anything on that bench? Stick out tongue

In the Hangar: 1/48 Hobby Boss F/A-18D RAAF Hornet,

On the Tarmac:  F4U-1D RNZAF Corsair 1/48 Scale.

  • Member since
    June 2010
  • From: Austin, TX
Posted by DoogsATX on Friday, June 1, 2012 10:49 AM

I've found that if you pad clips with tape they tend to not turn into mass accelerators. If you can find some of that foam tape stuff, it works best for holding round bits since it conforms around them a bit.

On the Bench: 1/32 Trumpeter P-47 | 1/32 Hasegawa Bf 109G | 1/144 Eduard MiG-21MF x2

On Deck:  1/350 HMS Dreadnought

Blog/Completed Builds: doogsmodels.com


  • Member since
    August 2009
  • From: Toledo Area OH
Posted by Sparrowhyperion on Friday, June 1, 2012 11:33 AM

Now he tells me!   LMAO!

I know.  I just didn't have any of the foam at hand.  I had used some folded up paper towel, but it obviously didn't work.

Rich


DoogsATX

I've found that if you pad clips with tape they tend to not turn into mass accelerators. If you can find some of that foam tape stuff, it works best for holding round bits since it conforms around them a bit.

In the Hangar: 1/48 Hobby Boss F/A-18D RAAF Hornet,

On the Tarmac:  F4U-1D RNZAF Corsair 1/48 Scale.

  • Member since
    July 2007
  • From: Southern New Jersey
Posted by troublemaker66 on Friday, June 1, 2012 3:51 PM

Reasoned


Looks great Rich, so tell me, how in the world do you find anything on that bench? Stick out tongue

Ha!  My bench looks exactly like that..and...sometimes it ain`t easy....Big Smile

Len Pytlewski

  • Member since
    April 2006
  • From: Denver, Colorado
Posted by waynec on Wednesday, June 6, 2012 9:37 AM
will be starting on this this week, i hope. this will be my 3rd plane counting a WIP MD-500TOW helo. got caught up working on an M1126 STRYKER ICV (now primed and ready to paint) and VOSPER. looks straight forward; resin cockpit which will be a first and vacuform nose glass which looks annoying. have am decals as the swastika is missing. basic camo pattern. this thing is huge

Никто не Забыт    (No one is Forgotten)
Ничто не Забыто  (Nothing is Forgotten)


  • Member since
    July 2004
  • From: Austin, Texas
Posted by Lt. Zogg on Wednesday, June 6, 2012 10:22 AM

Wayne,

That's a pretty cool looking A/C.  Did they actually build any of these?  Almost looks like a copy of the B-29,except for the tail. 

I'm making slow progress on my Lanc, I'm in filling and sanding hell on the fuse sides (trying to cover many of the windows that were faired over on most of the real a/c), so I've been procrastinating on that task, and I've also had next to zero bench time in the last month - its starting to make me cranky.   I have been assembling some of the Eduard bits for the interior - got the pilot's chair and control wheel and the radio/nav table done.  They look really nice, but man there are some tiny delicate parts in there. 

Jeff

  • Member since
    April 2006
  • From: Denver, Colorado
Posted by waynec on Wednesday, June 6, 2012 11:11 AM
i procrastinate when it comes to airbrushing. i really have to break through that. my a/b isn't that bad. i have done some straight edge camo on me-163 and mas and my armor looks ok, given how much you can hide on armor. have an a/b area with a drawer with all my cleaning supplies. i use an aztek though i have a badger as well and my clean up is under 5 minutes so it's just me. probably expalins all the shelf queens. this one is the first (v1) and it actually flew staring in dec42. numerous test flights were made and it was damaged beyond repair in jul44. this version is unarmed.

Никто не Забыт    (No one is Forgotten)
Ничто не Забыто  (Nothing is Forgotten)


  • Member since
    July 2004
  • From: Austin, Texas
Posted by Lt. Zogg on Wednesday, June 6, 2012 1:55 PM

Thanks for the info Wayne.  So apparently the Me-264 was under development concurrent with the B-29.   They probably scrapped development when they shifted over to a general defensive posture. 

Jeff

  • Member since
    April 2006
  • From: Denver, Colorado
Posted by waynec on Wednesday, June 6, 2012 2:16 PM
looks like lots of development problems and engine availability. bish and i are dicussing the plane at the prototype gb.

Никто не Забыт    (No one is Forgotten)
Ничто не Забыто  (Nothing is Forgotten)


  • Member since
    July 2004
  • From: Austin, Texas
Posted by Lt. Zogg on Wednesday, June 6, 2012 2:36 PM

Thanks Wayne, I'll check it out.  Sounds like a cool gb. 

Jeff

  • Member since
    April 2006
  • From: Denver, Colorado
Posted by waynec on Wednesday, June 6, 2012 3:43 PM
off topic but just finished a/b my afv club stryker. tamiya acrylic nato green after priming with NOW ace hardware rattlecan primer. looks pretty good and mud and dust can hide some boggers. interesting that it does look like the b-29. i doubt the german engineers had spies in the boeing plant; just 2 parallel developments.

Никто не Забыт    (No one is Forgotten)
Ничто не Забыто  (Nothing is Forgotten)


  • Member since
    September 2009
  • From: Frisco, TX
Posted by B17Pilot on Monday, June 18, 2012 8:02 PM

Finally no more seams!  Had a couple that have been putting up a good fight!  After the third time of "fixing" the seam, I finally got it to submit.  Anyway, once this primer dries in the fixed area, a little smoothing of the primer and off I am to the white, I am not going to like painting the white


  • Member since
    April 2006
  • From: Denver, Colorado
Posted by waynec on Saturday, June 23, 2012 9:39 PM
started my ME-264. special hobby model. doesn't have a lot of alignment pins which got me into trouble. got the tail assemblies together, filled sanded and primed. some touch up but they look nice. run over with super fine sand paper and wash and they are ready to install and paint. put 2 nacelles together, 2 halves and a resin engine front. my first time with resin so i cut each one out with a jeweler's saw. they fit fine and put all 3 pieces together. nice tight secure bond of course SINCE i didn't realize the engine front isn't symetrical. plan A was take them apart. that lasted about 10 seconds. Plan B is fill in and redo 2 little holes near the top so i could have the front correct but this would mean eyeballing where all the other nacelle stuff goes. going with plan C which is a big prop hub plus not much detail of the engine front showing plus dark colors plus how many folks even know there was an ME-264. lesson learned. pay attention, especially when working with a smaller company kit.

Никто не Забыт    (No one is Forgotten)
Ничто не Забыто  (Nothing is Forgotten)


  • Member since
    July 2007
  • From: Southern New Jersey
Posted by troublemaker66 on Sunday, June 24, 2012 11:42 AM

Hey All!

I finally got one of my builds to the finish line....Tamiya`s Mosquito Mk.VI FB...here`s a few pics...


I took the pics outside in my backyard...much better lighting!

I used Tamiya paints and artist oil washes. I used some weathering powders that I`ve had for so long that I don`t know their origins anymore...lol. All clear parts were dipped in future then masked with Tamiya tape. I think that`s about it! Any questions/ comments / crituqes are welcome as usual.

Thanks for looking!

Len


Len Pytlewski

  • Member since
    June 2008
  • From: Iowa
Posted by Hans von Hammer on Monday, June 25, 2012 6:00 AM

I over-committed, 17.. Can't make the dead-line, haven't even pulled off shrink-wrap..

  • Member since
    April 2006
  • From: Denver, Colorado
Posted by waynec on Tuesday, June 26, 2012 7:21 PM

up to plan F. looks like exhausts are at 3 and 9 and bottom part is at 6 so, except for 2 little round "panel lines"at 11 and 1, i can rotate the nacelle so the engine front is correct and fill in the 2 round spots and redo them. won't get to this for a few days as i am keeping tabs on the front range fires in colorado

Никто не Забыт    (No one is Forgotten)
Ничто не Забыто  (Nothing is Forgotten)


  • Member since
    September 2009
  • From: Frisco, TX
Posted by B17Pilot on Wednesday, June 27, 2012 12:55 PM

Len: good job on that Mossie! Got the front page updated, after figuring out the new format.

Hans- Sorry to hear that.  Was looking forward to seeing that dirorama!

Waynec- good save on the cowlings


  • Member since
    July 2007
  • From: Southern New Jersey
Posted by troublemaker66 on Thursday, June 28, 2012 5:56 PM

Cool brother!  This new format is gonna be a PITA until we get used to it...When we finally do,it`ll prolly change again..lol.

Len Pytlewski

  • Member since
    September 2009
  • From: Frisco, TX
Posted by B17Pilot on Saturday, June 30, 2012 10:43 PM

Yeah I'm still like, "Where'd this go?" on this new format, oh, well.

OK, small progress as been made.  Life as been getting in the way, but I've managed to get the blues on.  Need to touch up the white and small areas in the blues along the joints but, she's painted.


JOIN OUR COMMUNITY!

Our community is FREE to join. To participate you must either login or register for an account.

SEARCH FORUMS
FREE NEWSLETTER
By signing up you may also receive reader surveys and occasional special offers. We do not sell, rent or trade our email lists. View our Privacy Policy.