SEARCH FINESCALE.COM

Enter keywords or a search phrase below:

Fw 190 Butcher Bird 2013 (extended to June 2014) Group Build

564938 views
5865 replies
1 rating 2 rating 3 rating 4 rating 5 rating
  • Member since
    September 2013
Posted by blackdog62 on Wednesday, November 27, 2013 9:00 PM

nathan.   That's looking real spot on. It looks like we doing the same colors. My directions call for modern master paints my rlm 84 acording to my color directions look exactly like your color. But mine layed down looks totaly diferent. Pale yellow with green tint. I'm going with it see how it turns out.

  • Member since
    August 2009
  • From: MOAB, UTAH
Posted by JOE RIX on Wednesday, November 27, 2013 8:52 PM

Rigidrider
Hey Joe R. I am trying to remember where I saw the description of the bomb colors and will post it as soon as I can remember what book it was in, But acording to what I read all Luftwaffe bombs were either Black Green, or a very dark (almost black) grey, I ch

Thanks Doug. I concur in that that is the information I had found in my research. Yet, in addition I had also found reference to the SC 500 being painted in Khaki Green. Then there is also the case of 500's being field painted in RLM 76. I cannot remember if I shared this at an earlier time so I'll share it now. This is a rather nice reference on Luftwaffe bombs. In some cases it even references colors. 

http://www.warbirdsresourcegroup.org/LRG/bombs.html

"Not only do I not know what's going on, I wouldn't know what to do about it if I did". George Carlin

  • Member since
    September 2013
Posted by blackdog62 on Wednesday, November 27, 2013 8:49 PM

NATHAN. Man lag a day or so on this gb and you'll. Fall behind.

no I'm not doing dlue 12 its black 12 from ll/jg 6. 190d (500570) the date is 8th may 1945.

  • Member since
    February 2012
  • From: Olmsted Township, Ohio
Posted by lawdog114 on Wednesday, November 27, 2013 8:47 PM

Hello all.  I've been down with the flu for a week or so and out of commission.  I have been starting to get caught up in here.  Taxi, I love the French scheme.  Thats something we don't see everyday.  Thanks for sharing it.  Doug, Beautiful job on a challenging kit.....and that weathering is fantastic.  Nathan, that wash is perfect and the underside is quite impressive.  I can't wait to see the finished product.  Clemens, what a great idea.  I don' know if I'm more impressed with the assemby line or that you have that many Wurgers in the stash.  Can't wait to these. 

I'm in the same boat as Doug and I'm gonna call this turkey done (good riddance).  It's the I/JG 54 Mount of 258 kill uber ace Walter Novotny on the Eastern Front in the Fall of 1943.  He was eventually killed in combat with 8th AF fighters while flying an ME 262 in late 1944.  Regarding the kit, well....I've just about had my fill of the Eduard 190.  I shall no longer torture myself with a kit that pretty much laughed at me from start to finish.  In a nutshell, It's beautifully detailed but poorly engineered and nothing really fits right.  Apparently its better to open everything up but thats not my thing.  You may recall that this was originally going to be Egon Mayer's JG2 mount but I decided not to waste those decals on this pig.  I did drill out the guns and added brass tube for the wing root cannons.  I intentionally deleted the inner gear doors because my research showed that this plane did not have them.  Apparently these were cumbersome due to the muddy conditions of Russia at the time.  I also added fine wire to the gear legs to simulate brake lines.    I do have an Eduard A-6 left in the stash.  Perhaps someday I'll just build that one with everything opened up and I may cuss a bit less. 

This said, I've really come to like the JG 54 scheme.  It certainly won't be my last.  To add insult injury, My Testor's Dull Coat had a hiccup and decided to spray white flecks on parts of my finish.  Apparently I need a new bottle.  I wiped most of it off with a light sanding of 2000 grit paper but some would not come off.....I was way past caring at that point.  This turkey isn't close to being a contest winner, so I'm not too worried about it.   At photo time, I somehow knocked the foot peg and pitot tube off into the abyss.  I suppose this was like a final obscene gesture to me.  I may or may not replace these.  I did however just get a Hasegawa A-5 off E-bay.  Perhaps I should go for a tri-fecta in here yeah?   Thanks for having me once again and comments are always welcome.

Joe

 "Can you fly this plane and land it?...Surely you can't be serious....I am serious, and don't call me Shirley"


  • Member since
    September 2013
Posted by blackdog62 on Wednesday, November 27, 2013 8:42 PM

Rigid rider that's a truly great looking #9

  • Member since
    October 2008
  • From: Georgia
Posted by Rigidrider on Wednesday, November 27, 2013 7:42 PM

Greg, I agree with Nathan, I start with a burnt umber oil then some dark grey to black acrylic to fill in. And yes dry brush with either aluminum or steel. Thats my preferance.

Clemens... Holy crap Mate!!! Cant wait to see all those complete and lined up side by side!

When Life Hands You A Bucket Of Lemons...

Make Lemonade!

Then Sell It Back At $2 Bucks A Glass...

  • Member since
    October 2008
  • From: Georgia
Posted by Rigidrider on Wednesday, November 27, 2013 7:32 PM

Hey Joe R. I am trying to remember where I saw the description of the bomb colors and will post it as soon as I can remember what book it was in, But acording to what I read all Luftwaffe bombs were either Black Green, or a very dark (almost black) grey, I chose to use the dark grey.

And guys, Your comments are too kind! Thanks much for the encourging words... One and all.

When Life Hands You A Bucket Of Lemons...

Make Lemonade!

Then Sell It Back At $2 Bucks A Glass...

  • Member since
    August 2009
  • From: MOAB, UTAH
Posted by JOE RIX on Wednesday, November 27, 2013 7:01 PM

Nathan: Wonderful work on the weathering. You have an excellent touch with the washes and filters. I particularly like your level of weathering. Not over done yet has that been seeing the business look.

Clemens: All I can do is shake my head in amazement. I mean not only is the scale of your work eye popping but, you have done a superb job on each and every one of those cockpits. Really impressive.

"Not only do I not know what's going on, I wouldn't know what to do about it if I did". George Carlin

  • Member since
    March 2012
  • From: Corpus Christi, Tx
Posted by mustang1989 on Wednesday, November 27, 2013 6:56 PM

WinkWay to go Clemens!!!!!!! So the assembly line is under way!!! Glad to see you posting pictures buddy. I was beginning to wonder............


 Forum | Modelers Social Club Forum (proboards.com) 

  • Member since
    November 2008
  • From: Central Florida
Posted by plasticjunkie on Wednesday, November 27, 2013 5:44 PM

SSpartan

Holy moly man! That is quite an assembly line!  Surprise True that about certain details not showing up in pictures, even with excellent camera equipment. Sad everything looks awesome.


 GIFMaker.org_jy_Ayj_O


Too many models to build, not enough time in a lifetime!!

  • Member since
    March 2010
  • From: MN
Posted by Nathan T on Wednesday, November 27, 2013 4:59 PM

Glad you guys like the Dora. She's all post-shaded up and weathered and it really came to life after that.

Greg- I'll use burnt umber for a wash in my rlm 66 pits, sort of a red/brown color. Then I'll use a paynes gray wash for some lighter contrasts, followed by dust colored pigments. I do my dry-brushing first, then gloss, then washes, then flat coat, then pigments.


  • Member since
    May 2013
  • From: Indiana, USA
Posted by Greg on Wednesday, November 27, 2013 3:55 PM

Nathan, that is truly some masterful work! Like everything I see!

Clemens, I know you are building a lot of them but something about seeing them all laid out made me gasp just a little. Looking good!

Since we're talking about weathering cockpits anyway, just what color would one wash a black or very dark cockpit anyway? Been wondering.........

  • Member since
    April 2013
Posted by SchattenSpartan on Wednesday, November 27, 2013 3:04 PM

I just found a nice deal at Hannants:

http://www.hannants.co.uk/product/EDK1155

Looks like I have to order 190 number 12 and 13 sooner or later... 

  • Member since
    April 2013
Posted by SchattenSpartan on Wednesday, November 27, 2013 2:53 PM

Ok, time to catch up again:

Doug: Your 190 is truly a piece of art, my friend! I love all those nice weathering effects!

Nathan: She's looking great!

  • Member since
    April 2013
Posted by SchattenSpartan on Wednesday, November 27, 2013 2:49 PM

Thanks for the tips Nathan!

I didn't use a gloss coat because the base color was already semi-gloss paint and turned out kinda glossy.

The right choice of color is always a problem for me when drybrushing. I guess I'm jsut afraid to overdo it and end up with it being too subtle. I'll try to add another layer of drybrushing before trapping it all inside the fuselages though...

I'll add some seatbelts, but I still have to assemble all of them. HGW belts take a huge amount of time... Wink

  • Member since
    March 2010
  • From: MN
Posted by Nathan T on Wednesday, November 27, 2013 2:43 PM

Holy my Clemens! Nice assembly line. Great detail painting and pe work. No seat belts? As far as cockpit weathering, did you apply a glosscoat to the whole pit before you added the wash? That really helps the was flow better and makes it more visible in the end. As far as the dry-brushing maybe try a color that is lighter and has more contrast to the 66. You could also add some pigments now if you want to weather things further.

I like all your instrument panels by the way. Even the decal ones. I agree, Eduard's weekend kits suck for instrument detail in the cockpit. Hasegawa's 190 pits out of box are way better than Eduard's weekenders...


  • Member since
    April 2013
Posted by SchattenSpartan on Wednesday, November 27, 2013 2:31 PM

Hi guys!

I'm really sorry for not posting the pics I promised untill now. I've been under the weather yesterday and spent almost the whole day in bed. I hope you're not too mad at me... Embarrassed

So no more excuses, here they finally are! Propeller

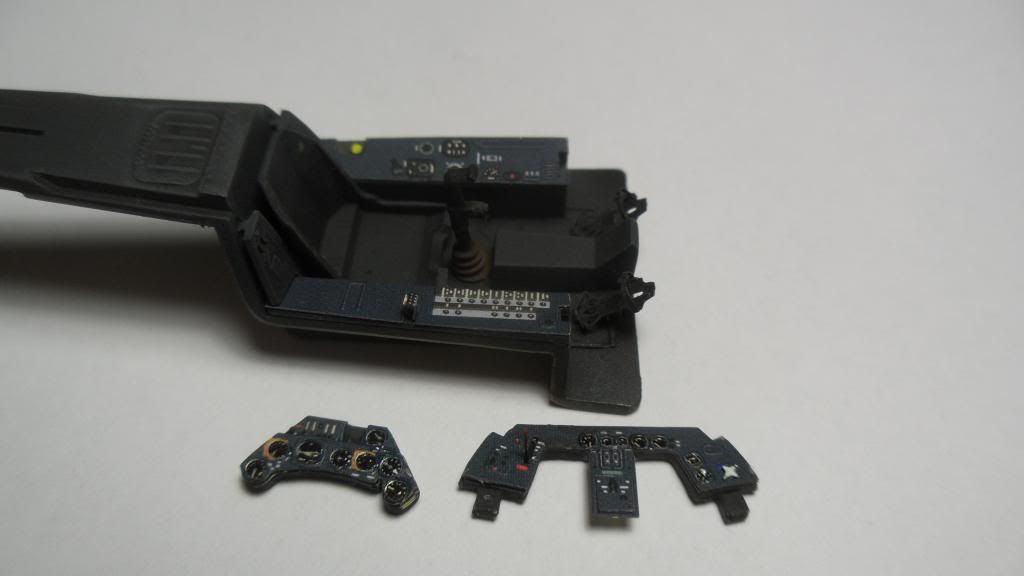
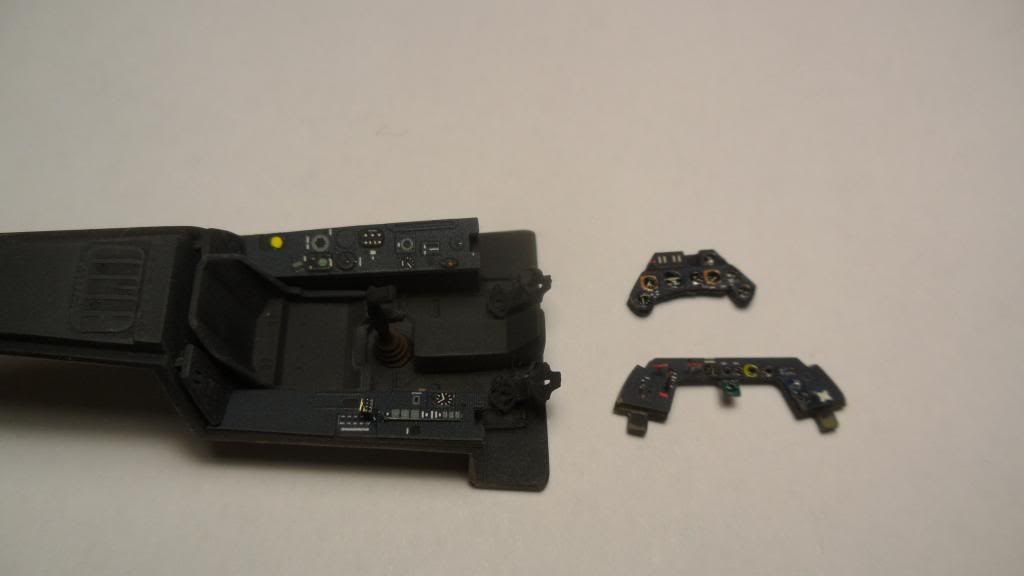
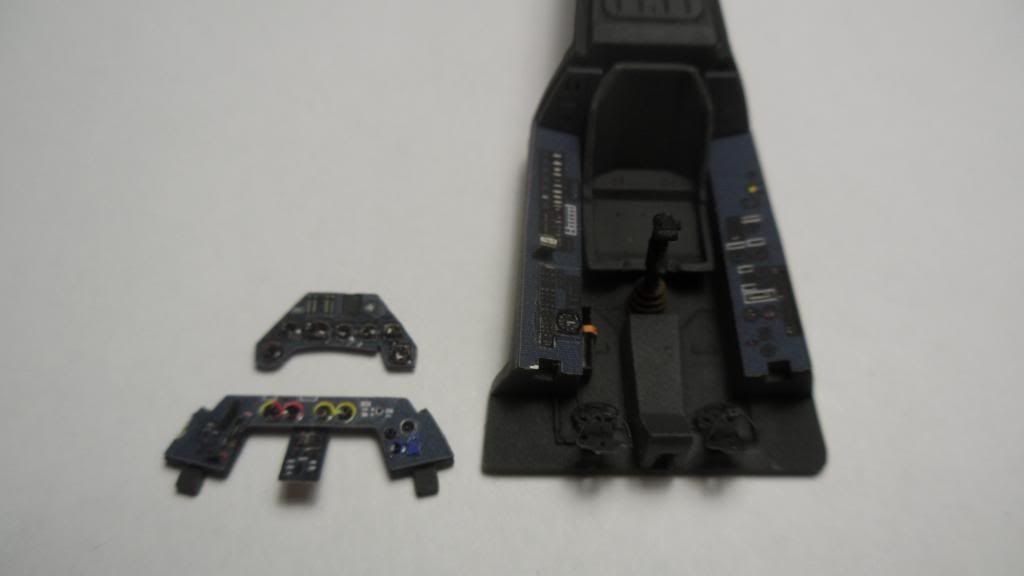
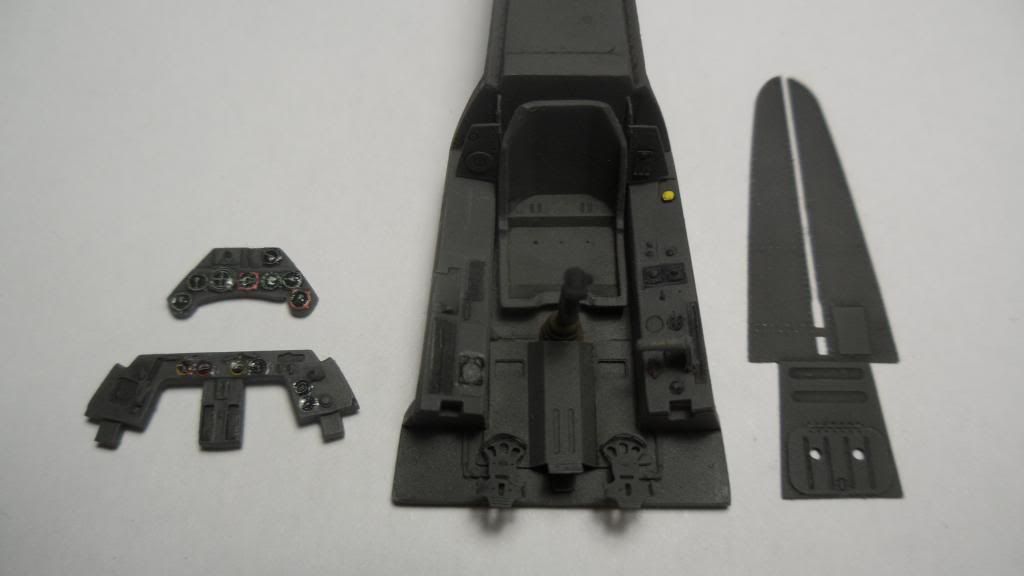
I used Gunze's RLM 66 for all the pits without PE and a home made mix of Tamiya German-Gray, Gunze Navy Blue, Tamiya Semi Gloss Black to match the color PE on the Eduard profipacks.

I didn't really weather the offices a lot except apllying a black-brown oil wash and some drybrushing with gray oil paint (first time using oils instead of acrylics and it worked great). The final dull coat sadly toned the drybrushing effect down a LOT, so you can't see it in the pics (it's slightly visible when you look at it in person though).

'Nuff said, here's something to look at for ya:

Eduard D-11:
Eduard D-9:
Eduard A-8:
Eduard D-13 weeekend + PE parts:
Eduard D-9 weekend:
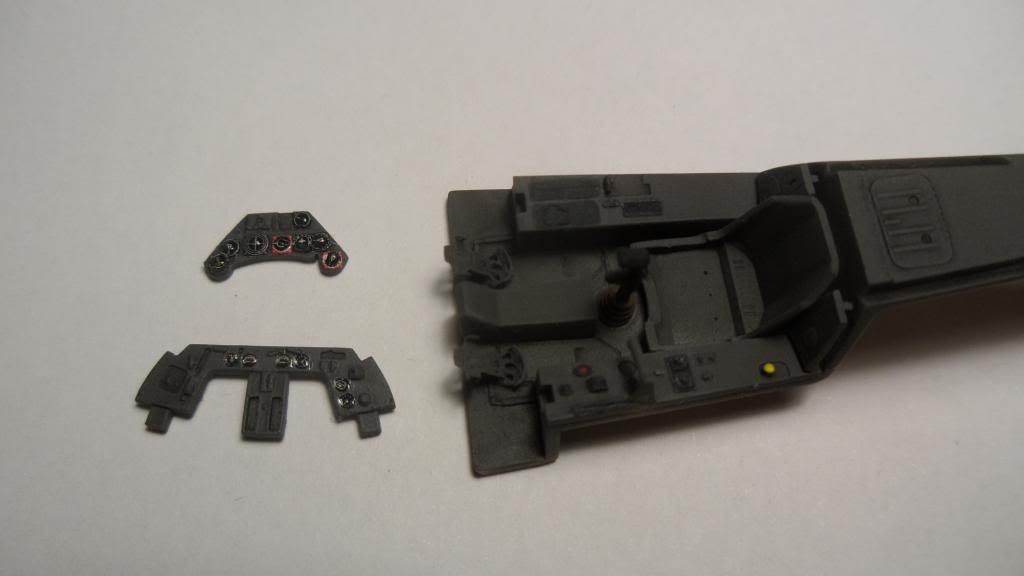
Hasegawa A-5:
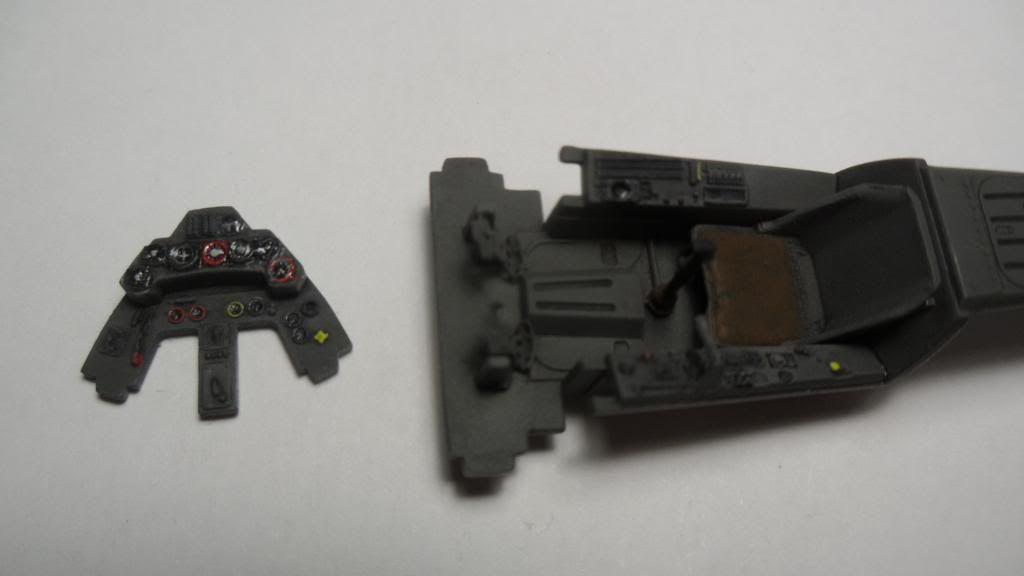
Hasegawa F-8:
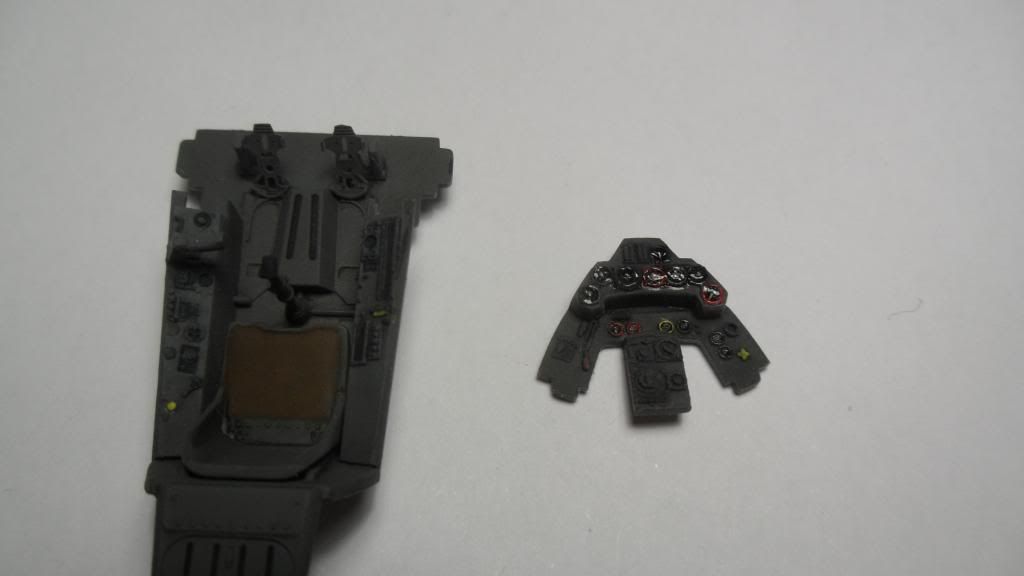
Tamiya F-8:
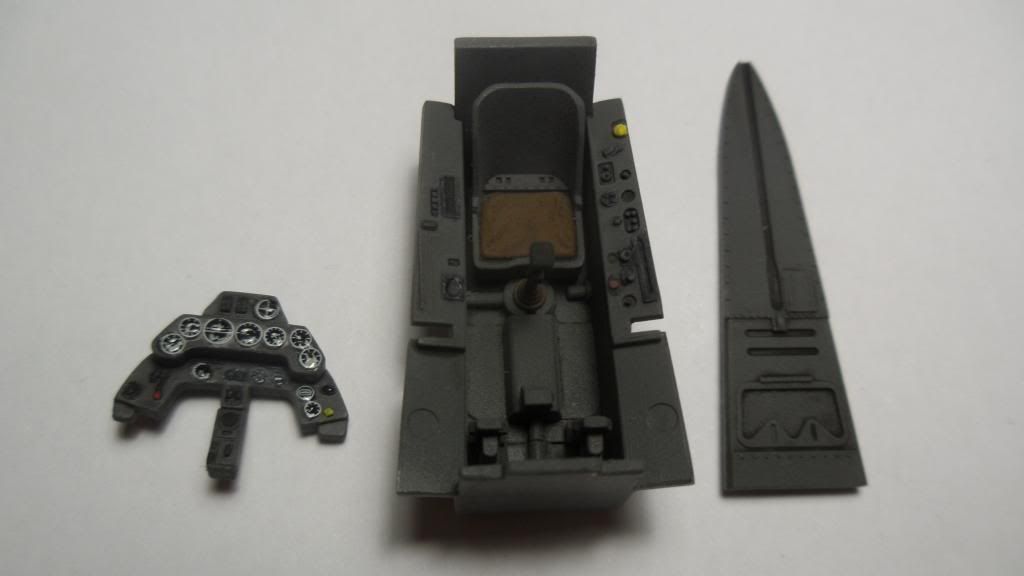
All of them together with the 9th one (Eduard A-8/R2):
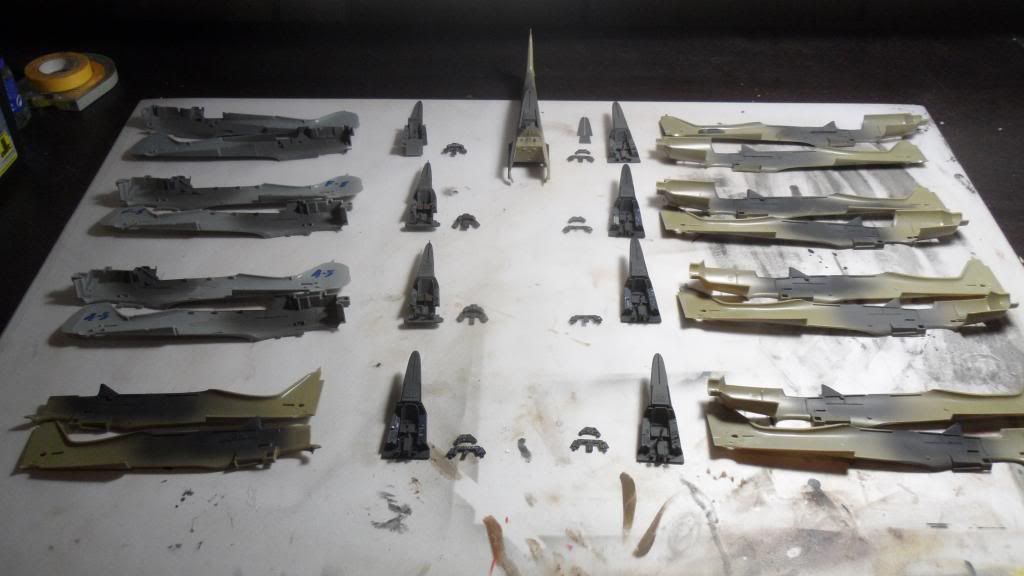
I used Hasegawa decals for the Eduard weekend IPs because the kit-supplied decals were kinda bad IMO.

It's really a shame you can't see the drybrushing and only half of the wash, but the cockpits all have some subtile weathering that looks good in person but just isn't strong enough to show up in the photos... Bang Head I'll play around with my camera settings and post a pic where the weathering is more visible...

I hope ya still like 'em.

Cheers, Clemens 


  • Member since
    March 2012
  • From: Corpus Christi, Tx
Posted by mustang1989 on Wednesday, November 27, 2013 10:13 AM

Nathan T:Man that came out great!!! I've got all kinds of inspiration when I start back on mine for sure!

fantacmet:I've got it dropped off in the mail pal. Sorry about that!


 Forum | Modelers Social Club Forum (proboards.com) 

  • Member since
    November 2008
  • From: Central Florida
Posted by plasticjunkie on Wednesday, November 27, 2013 9:40 AM

Nathan

Excellent weathering! Not overdone but just right! Yes

 GIFMaker.org_jy_Ayj_O


Too many models to build, not enough time in a lifetime!!

  • Member since
    October 2008
  • From: Georgia
Posted by Rigidrider on Wednesday, November 27, 2013 9:24 AM

Nathan... excellent work! Love the nmf underside and the way the wash turned out. Shes gonna shine fo sho!!!

Doug

When Life Hands You A Bucket Of Lemons...

Make Lemonade!

Then Sell It Back At $2 Bucks A Glass...

  • Member since
    March 2010
  • From: MN
Posted by Nathan T on Wednesday, November 27, 2013 8:29 AM

I finished weathering with oil paints the other day. Did some filters and added some streaking in strategic locations:

Gear bays got some drybrushing and oils as well:

I added some post shading and some exhaust stains afterwards, so I'm real close to the finish. Should be done by the weekend. 


  • Member since
    March 2010
  • From: MN
Posted by Nathan T on Wednesday, November 27, 2013 8:23 AM

Both quickboost and CMK make resin control sticks for 190s. They come 3 to a pack. Sounds like Joe's got you covered now though.


  • Member since
    March 2012
  • From: Corpus Christi, Tx
Posted by mustang1989 on Wednesday, November 27, 2013 5:28 AM

It'll be off to you today Mike!


 Forum | Modelers Social Club Forum (proboards.com) 

  • Member since
    March 2012
  • From: Corpus Christi, Tx
Posted by mustang1989 on Wednesday, November 27, 2013 5:20 AM

HOLY COW! I am again sorry for that fantacmet. I'll have that sucker off this week! Jeez!


 Forum | Modelers Social Club Forum (proboards.com) 

  • Member since
    January 2005
  • From: Portland, Oregon
Posted by fantacmet on Wednesday, November 27, 2013 12:12 AM

The builds all look spectacular.  I apologize I haven't posted progress pics but I have no progress to speak of.  I have not been able to procure the control stick for the Eduard D9 kit.  Interestingly enough I have my entire collection of FSM mags sitting on top of the box.  It's a bit caved in but everything inside is still in one piece and not crushed.


  • Member since
    April 2005
  • From: Australia
Posted by taxtp on Tuesday, November 26, 2013 11:30 PM

Agonising Greg. I have gone to great lengths myself at times.

One day had several hours to kill waiting for someone in my car.

Found a shop, bought a kit and a knife, got started in the car. Have you ever tried to remove parts from the sprue with no solid base in a car, with just a knife ????

Anyways, the SD KFZ 232 that I started in the car made it into the 1943 GB.

I look back now and realise all the attributes of addiction :)

Doug - your 190 is absolutely stunning.

Cheers

Tony

I'm just taking it one GB at a time.

  • Member since
    May 2013
  • From: Indiana, USA
Posted by Greg on Tuesday, November 26, 2013 10:24 PM

Tony, thanks for the info on the post-war French 190's mate! I had no idea, most interesting.

BD, the Hasegawa kit fit together very well, just what I need at my skill level. Judging by the work I am seeing you do (not to mention your scratch-building skills), I would guess the kit would put itself together for you while you watched! :) I do think you might enjoy the kit, I certainly did!

Doug, zowie, she's beautiful! Since I (we) got to watch this progress, I'm aware of all the great detail not evidenced by the finished photos. That said, I am completely taken by the mastery of your exterior finishing.

You gotta build another. You gotta.

Everybody, feel compelled to share my non-modeling evening.

We have 2 houseguests. At the moment, I have three sleeping females here. Both bedrooms and one downstairs. Two still jet-lagged and one looped on painkillers (wisdom teeth extraction yesterday). I am therefore unable to go down to my bench, and am confined to my chair until I get tired enough to go to bed. this has been going on since about 8PM and I'm a night owl. It's been a loooong night. :) Funny, when one can't build, one really wants to. :)

  • Member since
    August 2009
  • From: MOAB, UTAH
Posted by JOE RIX on Tuesday, November 26, 2013 8:06 PM

Doug Ole Boy she is absolutely beautiful. Great great work! The weathering is superbly done and very convincing. By all means, crank out another one. I have a question for you Doug, exactly what color did you paint your SC 500 bomb? It's kind of hard to discern from the pictures. Thank you so much yet again for sharing your remarkable skills with us.

"Not only do I not know what's going on, I wouldn't know what to do about it if I did". George Carlin

  • Member since
    March 2010
  • From: MN
Posted by Nathan T on Tuesday, November 26, 2013 3:46 PM

This RLM 84 is not minty green. Never trust profiles or instructoins. It looks almost exactly like RAF sky. I have a pic posted in this Thread showing a color photo of Blue 12, a dora with this sky green fuselage color. Not sure if you'll find it as its buried somewhere in this thread. If you want a look I'll post a pic up again. You are modeling Blue 12 right bdog? Furth, Germany, '45?


  • Member since
    September 2013
Posted by blackdog62 on Tuesday, November 26, 2013 3:25 PM
Well I have the main body of my a/c painted.
I thought this rlm 84 was more green. the directions look minty green.

Mine looks more like a pale yellow with a hint of green. Maybe when the rest of the colors go on it will hsve somthing to contatst to. And look more green. Ill be painting the next few days...:D I post pics when I'm further along

JOIN OUR COMMUNITY!

Our community is FREE to join. To participate you must either login or register for an account.

SEARCH FORUMS
FREE NEWSLETTER
By signing up you may also receive reader surveys and occasional special offers. We do not sell, rent or trade our email lists. View our Privacy Policy.