SEARCH FINESCALE.COM

Enter keywords or a search phrase below:

The 2015 /16 Red Hot and Rollin Automotive Group Build--Ended

121084 views
2225 replies
1 rating 2 rating 3 rating 4 rating 5 rating
  • Member since
    January 2014
  • From: Toronto
Posted by Rob S. on Wednesday, February 11, 2015 2:26 PM

Wicked cool rims Mike! Very cool.

______________________________________________________________________________


On the Bench: Nothing on the go ATM

  • Member since
    April 2005
  • From: Australia
Posted by taxtp on Wednesday, February 11, 2015 6:04 AM

Mike, I'm with you. Those new rims will look much better. You can always use the jig again.

Cheers

Tony

I'm just taking it one GB at a time.

  • Member since
    February 2006
  • From: Smithers, BC, Canada
Posted by ruddratt on Tuesday, February 10, 2015 11:36 PM

Great progress fellas! 

Eric - love those rims you picked out. They're gonna look sweet on the finished model! Yes

mailwalker - yep, no need to hurry.  We got a whole year!. Definitely looking forward to your build! Yes

Joe - glad you got some rest buddy!  ....and even though it was only 45 minutes bench time, ya made good use of it.  Nice work!

Tony - seriously looking forward to that Ferrari!


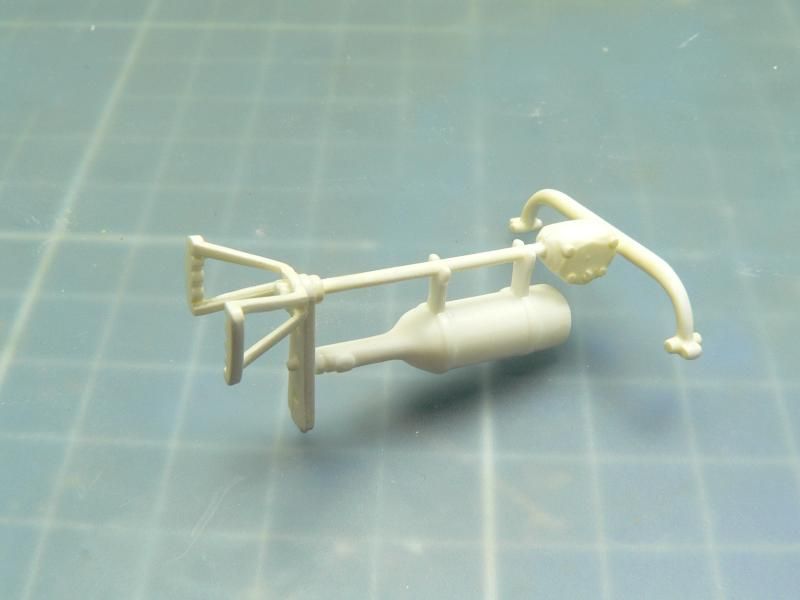
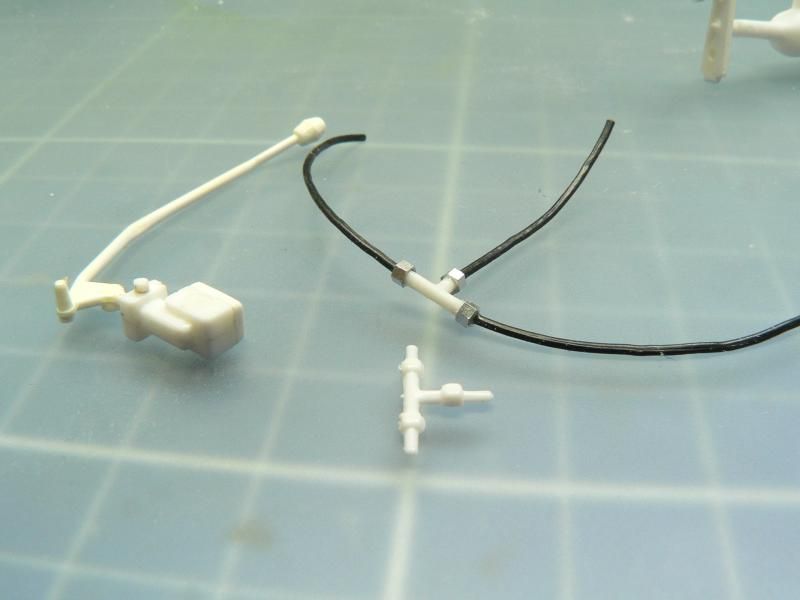
Not much to report on the dragster.  All the sink holes on the main body parts have been filled & sanded, ready for some paint, as is the steering assembly.  The brake lever/master cylinder is ready as well.  Didn't like the kit tee for the brake lines, so I scratchbuilt a new one.
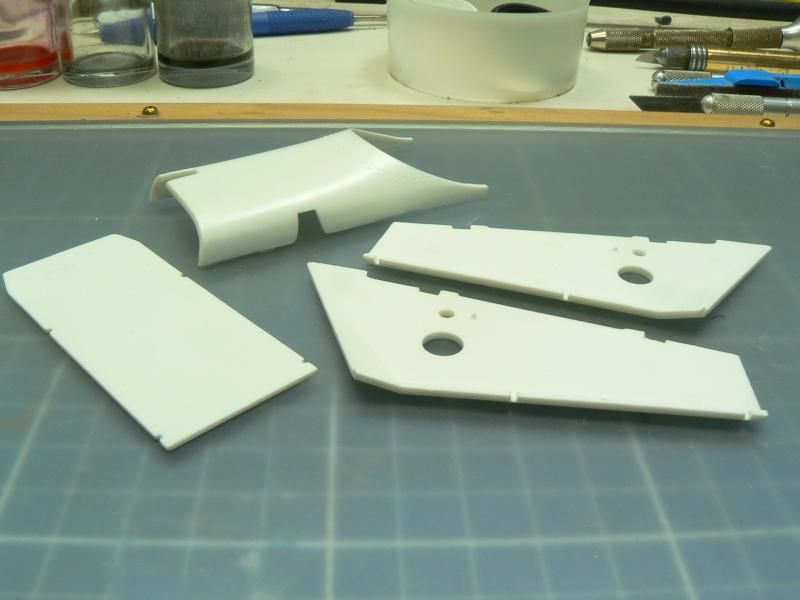
 

I gave up on the kits front rims. The molds were way too out of register to fix and have look convincing, so I went hunting last night and found these beauties.....(upper left corner)

http://www.micronitro.net/Dragster%20wheels.html

Yeah, I know they're pricey at $45 a pop, plus another $45 for the jig, but since those front wheels are such a prominent feature, I didn't want to skimp on 'em.


Mike

 "We have our own ammunition. It's filled with paint. When we fire it, it makes pretty pictures....scares the hell outta people."


  • Member since
    January 2015
Posted by MOPAR - D on Tuesday, February 10, 2015 8:26 PM

Taaron76 nice update to the detail on your engine.

  • Member since
    January 2015
Posted by taaron76 on Tuesday, February 10, 2015 8:17 PM

So I've been taking a closer look at the Cobra 289 engine over the last few days and wanted to give it a little more detail so it doesn't feel like its on an island all alone, or stick out like a sore thumb.  Here's what I added today, in case the picture aren't good enough.

Added vacuum line from valve cover to carburetor

Added vacuum/line breather line from valve cover to the rear of the intake manifold

Added the fuel line from the fuel pump area (there is no fuel pump in this kit) to the carb

Added the send and receive heater core water lines from the water pump and manifold that will be plugged into the heater core on the firewall

I'm working on the solenoid wiring now, but won't finish it until tomorrow of the weekend.  I'm trying to make something that resembles a solenoid so I can hook up the battery, alternator and starter wires.  It shouldn't be too hard, but we will see.  Not much more detail to add to the engine, at least I think.  lol

Here's some update pics:

DSC_1147-vi.jpg

DSC_1143-vi.jpg

DSC_1145-vi.jpg

  • Member since
    April 2005
  • From: Australia
Posted by taxtp on Tuesday, February 10, 2015 5:59 PM

Mike - your drag racer is starting to look really good. The bolts look great and the engine looks good in the frame.

Tim - I know what you mean about the hood colour difference. It tends to play on you, but I didn't notice it until you told us.

Eric - nice progress, seems to be a lot of honey-dos going on right now !

Mustang - Get some rest, then bounce back hard ! It looks great.

mailwalker - good to see you've made a start.

I decided that I didn't want to live with the previously painted chassis for my Sierra, so I've stripped it as well, and re-primed it this morning. At least it will be my work and won't have a quality compromise.

Other than that, it's the parts clean up phase, don't think you really want photos of that !!!

You can chalk me up for a Studio 27 resin 1/20 Ferrari 643 as well, It's from the 1991 F1 season. I'll definitely build it sometime later this year.

Cheers

Tony

I'm just taking it one GB at a time.

  • Member since
    March 2012
  • From: Corpus Christi, Tx
Posted by mustang1989 on Tuesday, February 10, 2015 10:17 AM

Mike: Wow man! The bolt and nut detail is just friggin' awesome and you're doing an amazing job on this build despite the kit flaws of the day.

ewheeler454: I can't see the pics here at work but will be checkin' 'em out tonight when I get home.

Tim: Dust? Where? This build is da bomb dude! This looks show ready right now!!

Dan: Beeeautiful work on that trailer!!!!

Everybody:Well I haven't got a whole lot of progress as I had to get some rest after the weekend. Had company down, the wife was out of town and it was go-go-go all the way with few breaks in between the weekend events. Yesterday I just  "turned off" while driving and went right through a freekin' stop light! I snapped out of it in the middle of the intersection while still driving! That was a close enough call for me! So last night I didn't get on the forum and this morning I slept in a little longer than I usually do.

Anyhow I have had only about 45 minutes or so of bench time in the last two days but managed to get started on the BMF on the deck lid area and the window channel posts.


 Forum | Modelers Social Club Forum (proboards.com) 

  • Member since
    January 2015
Posted by MOPAR - D on Monday, February 9, 2015 8:58 PM

Tim unless you point the hood out that you reworked it you would not see any difference.

  • Member since
    January 2015
Posted by taaron76 on Monday, February 9, 2015 8:21 PM

That '57 kit was fun to build.  Nice wheels, disc brakes, no suspension modifications to make, etc.  Those California Wheels 2 'n 1 kits are well worth it.  Thanks!

I tend to over analyze anything with paint, so I figured I'd ask and get some opinions.  There is enough clear on that hood to polish for days.  Lol. I'll give it a ltiile more attention to color blend it a little better.  Hopefully it doesn't stick out like a sore thumb.

Tim

  • Member since
    March 2011
Posted by ewheeler454 on Monday, February 9, 2015 8:14 PM

Tim,

Tim, you might be right, those are the same wheels. I better check my 57 kit as I may have started cutting stuff to soon HAHAHAHAHAHA! That is a sharp 57. I really like that color.

The paint on the Mustang is phenomenal! The shade is not really that noticeable unless you point it out hehehe. I think it's fine as I'm sure everyone else will agree.

  • Member since
    January 2015
Posted by taaron76 on Monday, February 9, 2015 8:06 PM

Another dilemma I am having is that I put another coat of clear orange on the hood in order to fix a small piece of dust.  Unfortunately, its a tad darker than the rest of the car and my paint OCD is kicking in.  Am I being too picky?  Is it that noticeable?  I've been color sanding and buffing to try and lighten it up, so hopefully this will help.  The hood literally is FLAWLESS and I hate to strip it and start all over, but if its a show stopper, I will.  I know, I'm probably being too picky... 

Can you tell a big difference from the hood and body?  I just slapped the body on the chassis to see the stance, shadows and light spots.

FullSizeRender14-vi.jpg

FullSizeRender13-vi.jpg

FullSizeRender15-vi.jpg

  • Member since
    January 2015
Posted by taaron76 on Monday, February 9, 2015 8:03 PM

Ewheeler 454 - Those look like the wheels and suspension off of the '57 Bel Air I just completed.  I love those wheels!

Tim

  • Member since
    January 2015
Posted by MOPAR - D on Monday, February 9, 2015 6:48 PM

Thanks for the comments on my truck the trailer is pretty much done now working on installing the glass in the cab.

Eric those rims look great on your Chevy

Mike your Dragster is coming along nice I like how you added the bolt detail to the front axel. I just orerded some of those bolts for a future project I have coming maybe later this year.

Misty. Those brakes are great looking may be you can display it with one of the wheels off to show at least one of them.

  • Member since
    August 2014
  • From: USA
Posted by mailwalker on Monday, February 9, 2015 6:41 PM

Some great vehicles coming to life in this GB! I thought I would post the obligatory sprue trees pic. All I've done so far is glue the engine and tranny halves together. No need to rush,right?

It doesn't matter that you ARE the best, but that you DID your best!


  • Member since
    March 2011
Posted by ewheeler454 on Monday, February 9, 2015 5:57 PM

Tony,

Amazing! What else can say.

Misty,

Those brakes are swift looking. :)

Mopar, 38 inches, whew you could almost ride it hehehehe.

Tim, Nice detail on that engine.

ruddrat, that engine sitting on those rails looks awesome!

We had such nice weather over the weekend that I got hit with a list of honey-do's I did however figure out my wheel dilemma. Going through my spare parts I found these wheels and the suspension parts that go with them. I cut the rotors off the original parts (forgot what kit they are from) and fit them to the 66 axles. I think they'll look nifty. :) Once I have everything lined up I'll solvent weld them in place (the rotors).

L8tr,

Eric


  • Member since
    February 2006
  • From: Smithers, BC, Canada
Posted by ruddratt on Monday, February 9, 2015 5:08 PM

Misty

There's the rub, unless yo squint through the wheels or leave them off then you won't even know they are there. The same goes for 90% of the upgrades. Cest la vie!

Man, that's a bummer MIsty. Those bits look phenomenal!

Mike

 "We have our own ammunition. It's filled with paint. When we fire it, it makes pretty pictures....scares the hell outta people."


  • Member since
    February 2006
  • From: Smithers, BC, Canada
Posted by ruddratt on Monday, February 9, 2015 5:06 PM

.....and now for some updates on the dragster.  I'm happy to say that things have been moving along smoothly.  The front end is complete with the exception of the tires & spoiler.  The attachments for all the connecting rods came with very long pins that need to be capped on the other end, so I cut the pins just long enough to fit into their holes and capped the ends with some Verlinden resin nuts & bolts I had kicking around from my armor days.......

The finish on the axle & connecting/bracing is Alclad chrome (love that stuff!) with a Citadel devlin mud pin wash.  The fuel & water tanks were painted Alclad aluminum under Tamiya clear yellow, and lightly weathered with the Citadel wash and Tamiya powders.  The nose weight got the same weathering treatment over a base coat of matte black enamel.

A test fit of the steering box has everything lining up as it should.......

...and a test fit of the engine fit like a dream.


This has been a fun kit to build so far. In spite of the poor mold quality (due to its age), I've been most impressed with the overall fit so far. Thanks for looking guys!


Mike

 "We have our own ammunition. It's filled with paint. When we fire it, it makes pretty pictures....scares the hell outta people."


  • Member since
    January 2012
  • From: Hatfield
Posted by Misty on Monday, February 9, 2015 4:58 PM

There's the rub, unless yo squint through the wheels or leave them off then you won't even know they are there. The same goes for 90% of the upgrades. Cest la vie!

  • Member since
    February 2006
  • From: Smithers, BC, Canada
Posted by ruddratt on Monday, February 9, 2015 4:44 PM

Man, this GB just rocks!  I'm lovin' the pace here, the way these updates keep flyin' in!  Keep it up guys! Yes

Tim - that engine is just insane. Great detail and subtle weathering really make it pop. Those rims look amazing as well, and the bumbers and lights?!.....great stuff!

Mopar - nice fix on the fuel tanks, and the trailer connections are top-notch!

Pawel - nice to see some pics of your build.  Looks like you're off to an excellent start!

Tony - don't know what to say that hasn't been said already.  That Porsche is to die for!  Flawless finish, excellent detail paint work - you guys just keep raising that bar higher!

Joe - really nice work on those exhausts.  The weathering looks perfect on 'em - gives 'em a nice used look. Just fantastic!

Misty - those brakes are nuts!  Love the detail work. I'm really hoping all that detail will be visible on the finished model.

Mike

 "We have our own ammunition. It's filled with paint. When we fire it, it makes pretty pictures....scares the hell outta people."


  • Member since
    January 2012
  • From: Hatfield
Posted by Misty on Monday, February 9, 2015 7:19 AM

Christ on a bike! I don't even have a desk that big

  • Member since
    January 2015
Posted by MOPAR - D on Monday, February 9, 2015 6:05 AM

Misty it comes in at 38" long.

  • Member since
    January 2012
  • From: Hatfield
Posted by Misty on Monday, February 9, 2015 5:26 AM

Mopar - i didnt realise just how HUGE that model is Surprise

taxtp - thats a superb looking car, just gorgeous Bow Down

  • Member since
    April 2005
  • From: Australia
Posted by taxtp on Sunday, February 8, 2015 11:43 PM

Nice work on the truck and the engine. Both look realistic to me.

The F1 brakes look terrific too Misty. I can learn something from them.

I think the 2nd photo of my  Porsche is the one to use please.

Cheers

Tony

I'm just taking it one GB at a time.

  • Member since
    January 2015
Posted by taaron76 on Sunday, February 8, 2015 6:58 PM

You guys are making some great progress and I enjoy looking at and reading all of your updates.

So I had a busy Sunday... Not really, but I did add a vacuum line from the valve cover to carburetor.  Almost ready for BMF and finish it up.  The homestretch now.

Tim

  • Member since
    January 2012
  • From: Hatfield
Posted by Misty on Sunday, February 8, 2015 5:51 PM

slapped some paint on the brakes, not 100% happy with the axles, i may strip and redo them

 r

  • Member since
    January 2015
Posted by MOPAR - D on Sunday, February 8, 2015 2:06 PM

In double checking the trailer spare tire I found that it needed to be moved out some to get the clearence I need to get the cars pass it. I cut the tire support off and moved it flush with the out side trailer frame. I also re-engineered the trailer support legs by moving them to where the front of the trailer is now and how I've seen them in pictures. I'm still up in the air about adding hydraulic hoses to the cylinders.


  • Member since
    September 2013
Posted by Raven728 on Sunday, February 8, 2015 10:33 AM

Great work overall guys.

Tony, beautifully done; that engine could be a kit in itself. Let me know which pic you want on the front page.

- Steve

  • Member since
    January 2014
  • From: Toronto
Posted by Rob S. on Sunday, February 8, 2015 10:17 AM

What a bloody excellent Porsche!! VERY well done Tony...Love it YesCoolYes

______________________________________________________________________________


On the Bench: Nothing on the go ATM

  • Member since
    January 2015
Posted by MOPAR - D on Sunday, February 8, 2015 8:11 AM

Tony, man what a great looking Porsche I could not of glued the cover on over all that great detail. That is one nice looking car.

Thanks Joe I've learned a lot about these car haulers building this and from that I'm surprised at how low to the ground these trailers are but that's what lets them get more cars on them.

  • Member since
    March 2012
  • From: Corpus Christi, Tx
Posted by mustang1989 on Sunday, February 8, 2015 7:35 AM

Tim: That wire looks better and more true to scale and again, that finish looks awesome iPhone pics or not you can tell the work you've put into it!

Dan: The fuel tanks look alot cleaner (I would have not noticed had you not pointed it all out) and the trailer connections look fine to me. That was smart to make a QD point to where you can separate the truck from the trailer.

Tony: What tha heck can I say here? This build looks phenomenal!! The "guts" of the car are well detailed and looks like a lot of work went into it!!!  I would have been all year on this one!!! What pic would you like to see in the completed builds section?

Pawel: Looking forward to the progress on that van.Big Smile

Everybody: I'd like to say thanks for you all's kind words. This one's gonna be one for the books 'round here!

 Secondly I have an update of my own. I stripped all the BMF off of my exhaust yesterday and had to apply it two more times to make a grand total of three BMF applications here before I was satisfied with the result. It was either too wrinkly or bubbled or didn't lay right but I got it to a point where I can live with it. Today I finished touching it up (which I do not have pics of that yet but will post yesterdays progress) and I painted the headlining of the car body this morning.

Anyway here's yesterday's progress:

and a closer look at one of those tips:


 Forum | Modelers Social Club Forum (proboards.com) 

JOIN OUR COMMUNITY!

Our community is FREE to join. To participate you must either login or register for an account.

SEARCH FORUMS
FREE NEWSLETTER
By signing up you may also receive reader surveys and occasional special offers. We do not sell, rent or trade our email lists. View our Privacy Policy.