SEARCH FINESCALE.COM

Enter keywords or a search phrase below:

Star Trek Group build

21479 views
317 replies
1 rating 2 rating 3 rating 4 rating 5 rating
  • Member since
    January 2010
Posted by Klik on Sunday, May 10, 2015 6:31 PM

Good thing I've got an update; it'll get this GB to page 1!

Ok, on the update on my Curry-type! So, after gluing the neck to the saucer section, I repainted the neck completely:

And I also did a little detail painting on the new "sensor array"

and, just for fun, added a golden 'sensor node' to the prow of the secondary hull:

With those two things done, I added more color to the saucer, and added the internal pair of impulse engines (four impulse engines seems a bit of overkill for this ship, doesn't it?)

I set it aside to dry for a few days, then finally i attached the secondary hull.

With two rubber bands to hold it, I left it overnight to dry:

I let it sit like that for another day or so, then, this morning, I attached the outer set of impulse engines. Here is how she sits right now:

And that's all I've got for now. There's still a lot of paint touch-ups to be done, and then the nacelles to attach before decals go on.

With the way the ship is set up, there is only room for the name and registry on the dorsal surface of the saucer section (whereas usually there is also a registry on the underside as well), so I won't have to chop up more decals than I really need to (can't use the names and number that came in the box). I'll be naming this ship the U.S.S. Lake  with a registry number of NCC-42717 (to limit the amount of decal splicing I'll need to do, since the included decals are for the Enterprise-B and the Lakota).

Thanks for looking!

Klik

oneyearwar1

The hardest part of flying isn't flying...it's landing.

  • Member since
    November 2009
  • From: SW Virginia
Posted by Gamera on Tuesday, May 5, 2015 8:21 PM

Very cool Terry!

BTW: What does it mean special edition though- does it come with extra parts or something?

"I dream in fire but work in clay." -Arthur Machen


  • Member since
    March 2010
  • From: Boston
Posted by mach71 on Tuesday, May 5, 2015 7:51 PM

Ohhh! Galileo goodness!

  • Member since
    January 2013
Posted by jibber on Tuesday, May 5, 2015 11:34 AM

Starting my Star Trek Galileo shuttle by AMT. Not many parts but should be a fun build. 

Terry

  • Member since
    March 2010
  • From: Boston
Posted by mach71 on Monday, May 4, 2015 9:37 PM

Klik your curry is looking nice. Thats a lot of work, but worth it!

Thanks everybody for the kind words. He's not perfect, but he's done!

I'm thinking of starting this prop next.

  • Member since
    July 2014
Posted by modelcrazy on Monday, May 4, 2015 8:42 PM

Great looking Spock Mach.

I got your pic on page 2. Let me know if you wanted a different pic.

Steve

Building a kit from your stash is like cutting a head off a Hydra, two more take it's place.


http://www.spamodeler.com/forum/

  • Member since
    November 2009
  • From: SW Virginia
Posted by Gamera on Monday, May 4, 2015 7:55 PM

Very cool Mach71! They both came out great, though the TMP does look a little odd with him pointing at something but the snake gone! Maybe I'm a little deranged but I'd be tempted to alter his hand to have him flipping someone 'The Bird' ......(though I guess it could be the Vulcan salute instead!)

And that's neat Klik, looks good and you're making serious progress.

On the other hand I got 'Bones' shirt airbrushed blue, haven't shaded it yet. Sorry, I'm kinda busy with a few other GBs right now and I'm hoping to get back to the good doctor soon...

"I dream in fire but work in clay." -Arthur Machen


  • Member since
    January 2014
  • From: Toronto
Posted by Rob S. on Monday, May 4, 2015 7:50 PM

Great work Mach...Spock looks great. Fine tribute to Mr. Nimoy...Well done and congrats on a great build! YesCoolYes

______________________________________________________________________________


On the Bench: Nothing on the go ATM

  • Member since
    January 2010
Posted by Klik on Monday, May 4, 2015 6:07 PM

Great work on Spock, Mach!

I, too, have an update to share with y'all.

This weekend, I finally had some free time (most of Sunday, actually....lucky me!), so I got most of the major work (and surgery) done my Curry-type:

Started with gluing together the secondary hull (which now looks like a boat):

And the neck:

Then came the most drastic surgery of all, I cut off the ends of the nacelle pylons to make two shortened ones:

With a quick test fit of the secondary hull to the primary hull (plus a LOT of sanding to try to level it...It turns out that the saucer section is warped on the rear, and it is too late to fix...oh, well.), I had to adjust my ideas for the placement of the nacelles:

Then came underside details (to replace the lost Sensor Array now covered by the neck), and pylons (note their positions):

Sorry about the blurriness Ick!.

And that was where I left it. 

Today, however, I began to paint some more details:

And that is where it sits right now.

I am looking forward to finishing this one up right, and for a teaser, here is a picture of the actual model;

 -

photo from this webpage:

<http://flare.solareclipse.net/ultimatebb.php/topic/6/2787.html>

Thanks for looking!

Klik

oneyearwar1

The hardest part of flying isn't flying...it's landing.

  • Member since
    March 2010
  • From: Boston
Posted by mach71 on Monday, May 4, 2015 5:14 PM

I'm going to call Spock done!

I could fuss over a few small details but This kit is really not worth it.

And the classic kit with the TMP one.

It was a nostalgia trip building this, and I think a good tribute to Mr. Nimoy.

Over all I think it came out not too bad. I thought about fixing some of the glaring

errors, Like removing the communicator and scratching a TMP tricorder into his pointing hand,

but In the end I felt it was not worth it.

I did leave off his satchel, It does not really fit with either the classic kit or the TMP one. On the Classic kit

I turned it into a tricorder.

I'm going to do another build for this GB. It's something little different....

  • Member since
    March 2010
  • From: Boston
Posted by mach71 on Monday, April 27, 2015 9:20 PM

yup Rob, it's really a poorly engineered kit. But I guess on par with early '70s kits. The re tooling they did didn't help at all!

It's starting to come together and should make a nice addition to the classic kit.

  • Member since
    January 2014
  • From: Toronto
Posted by Rob S. on Monday, April 27, 2015 5:50 PM

Still likin' it mach...I can't believe his head was in 3 pieces as you can see in the instructions in the background!!

______________________________________________________________________________


On the Bench: Nothing on the go ATM

  • Member since
    March 2010
  • From: Boston
Posted by mach71 on Monday, April 27, 2015 5:34 PM

Thanks guys. I've been plugging away at Spock when I can. I got some detail work done today.

I put a flat black wash on the tree, ferns and the ground, glued the tree and ferns on the base and did some work on Spock. His shirt insignia is all wrong, It's the original TOS insignia from the old kit and he is holding a TOS comunicator (without the top). the sleeve rank is all wrong also. I was going to correct

these bits but It's a crappy and I'm kind of feeling I want to be done with it. I have an interesting subject for a 2nd build in this groupbuild.

One mistake I made was the color choice of the rocks he is standing on. They are too close to the color of his uniform.

I still have a lot of clean up on him, and I won't get to do anything on him for the next few days but I think I can see the light at the end of the tunnel.

  • Member since
    January 2014
  • From: Toronto
Posted by Rob S. on Sunday, April 26, 2015 8:01 PM

Wow, mach, you really nailed that 'Motion Picture' blue for his uniform...well done!!

______________________________________________________________________________


On the Bench: Nothing on the go ATM

  • Member since
    November 2009
  • From: SW Virginia
Posted by Gamera on Sunday, April 26, 2015 7:03 PM

Klik: That is interesting, I like your idea better than what they did with the massively oversized Conny II nacelles. Just don't let her near any of your Dominion models!

Cool link, that Trieste with the hot pink bussard collectors and the - what the heck- Star Wars ion cannon mounted where the bridge should be?????

Mach71: Spock is coming along really nicely!

"I dream in fire but work in clay." -Arthur Machen


  • Member since
    January 2010
Posted by Klik on Saturday, April 25, 2015 11:01 PM

Haha, no battle damage on this one (other than your average wear and tear).

I finished the nacelles up, and puttied the seams on the saucer, but don't have pictures yet...

Klik

Note: I won't be using the same nacelles that were on the original version ( the 1/537 Reliant ones), because they don't match the scale. Instead, I'll be using the Ent-B nacelles that came in the box, since it is, after all, a refit.

oneyearwar1

The hardest part of flying isn't flying...it's landing.

  • Member since
    January 2014
  • From: Toronto
Posted by Rob S. on Thursday, April 23, 2015 7:49 PM

Bloody cool idea Klik...I hope you version will not be having as bad a day as the Curry featured in your link Stick out tongue

______________________________________________________________________________


On the Bench: Nothing on the go ATM

  • Member since
    March 2010
  • From: Boston
Posted by mach71 on Thursday, April 23, 2015 7:47 PM

Nice subject Klik!

Looking good so far.

Just a bit of progress on Spock.

Pre shading the tree.

Some detail work

  • Member since
    January 2010
Posted by Klik on Thursday, April 23, 2015 6:41 PM

Ok, since you're interested... my second entry in this GB:

I've not done any major surgery yet, but I have raided my spares bin for add-ons, and have started painting up the major sub-assemblies:
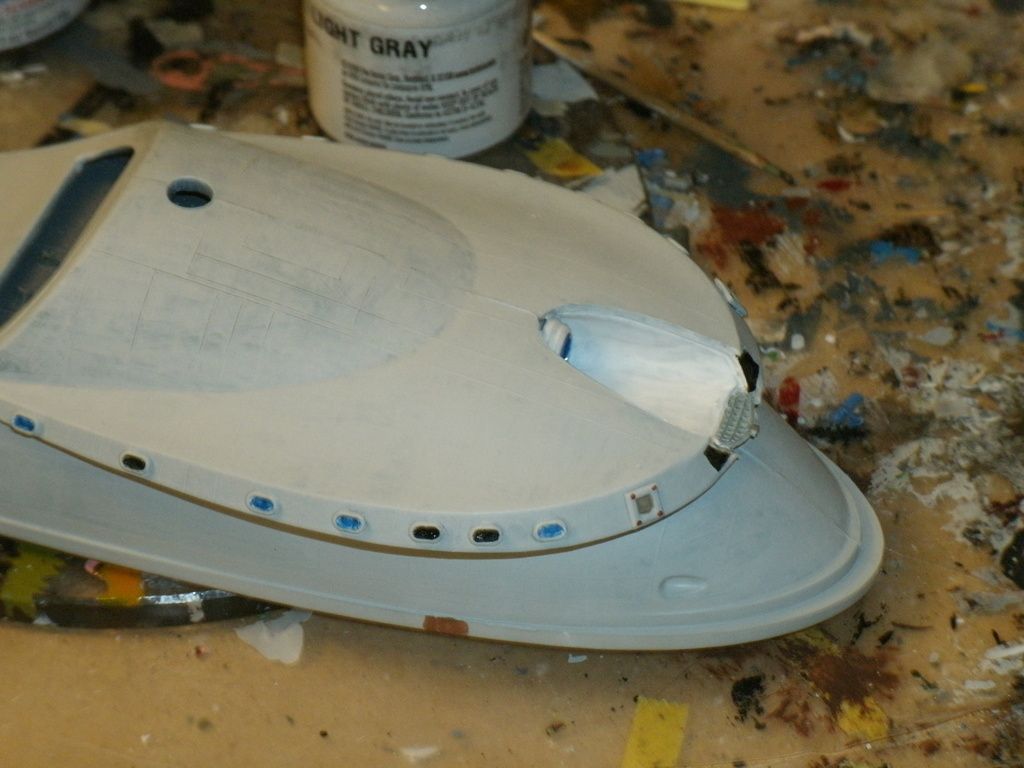
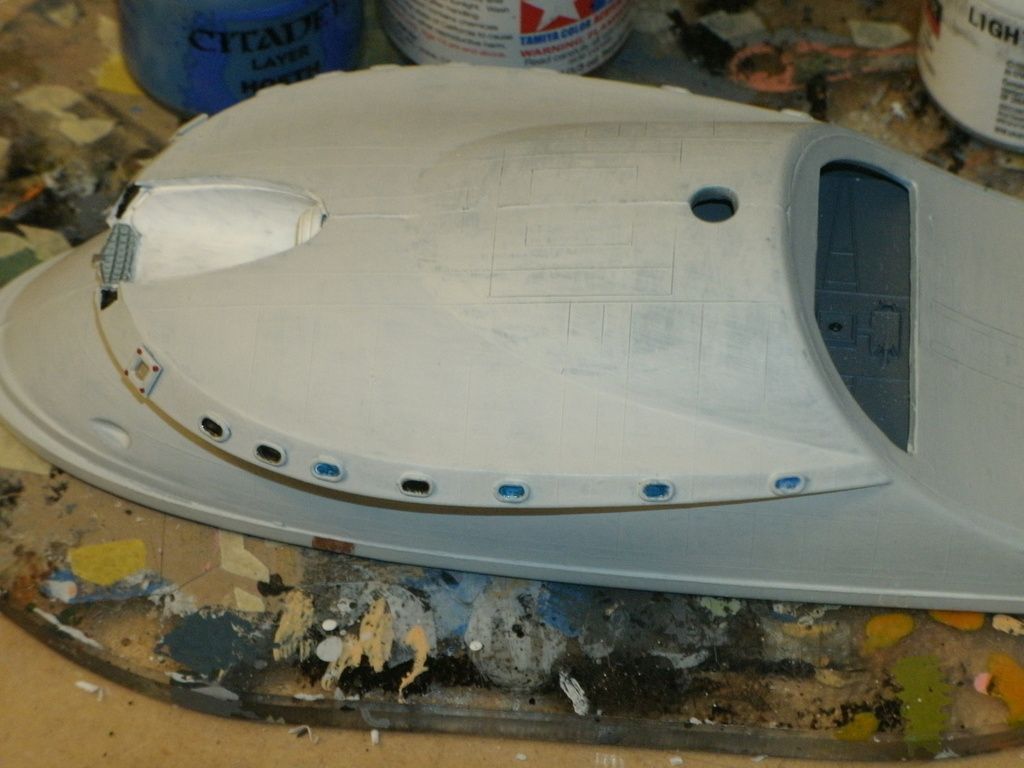
the secondary hull had received the most greebles:

"Picture windows" along the hull flares (which are three decks thick--so very large windows, which I am saying are for MASSIVE laboratory decks.):
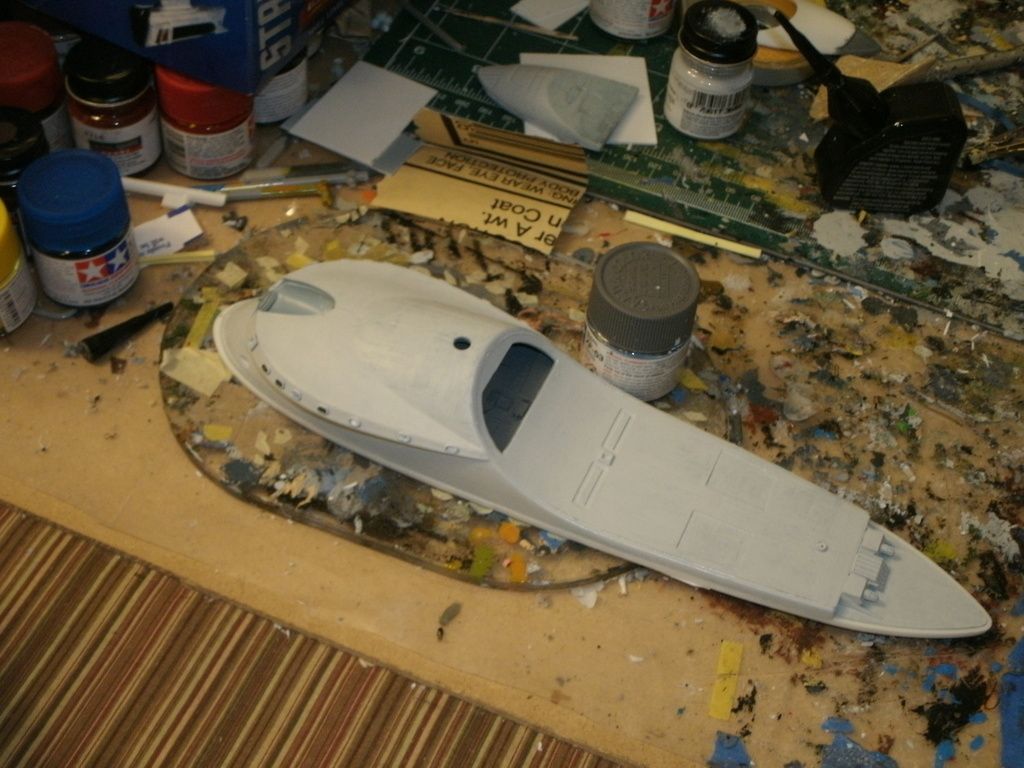
the windows, deflector, and underside of the secondary hull are finished, fully painted up to look like this:
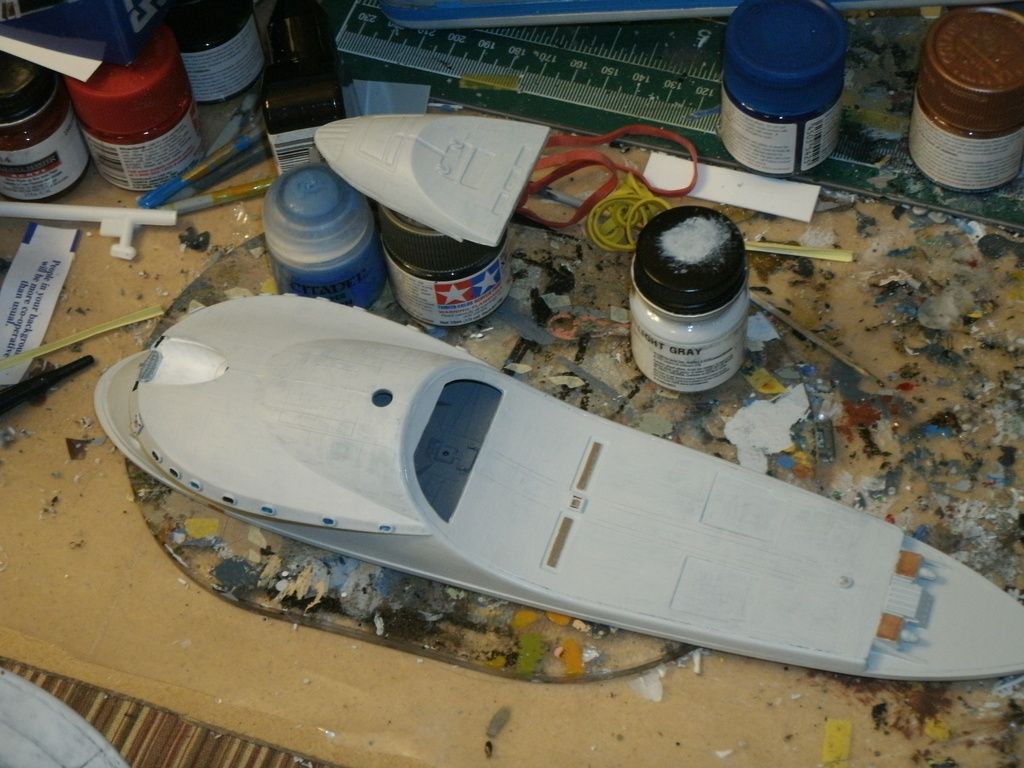
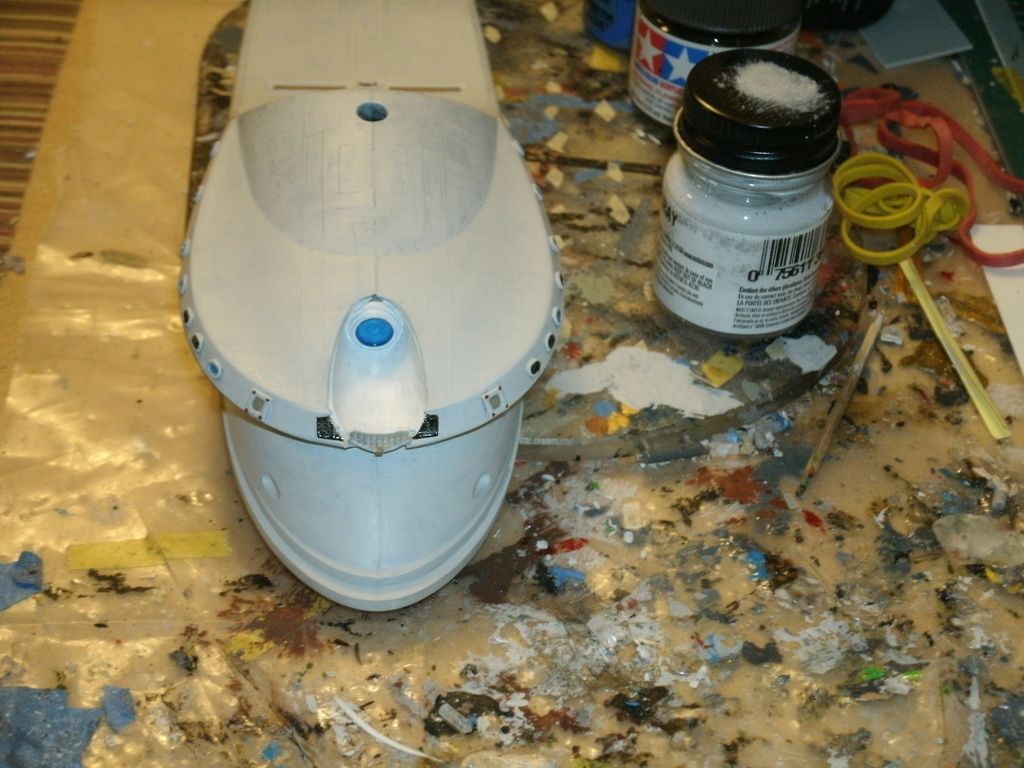
In case you can't immediately tell what parts they are, the windows are some (of many) 1/700th scale WWII lifeboats from some waterline kits I built years ago. the square 'hatches' are 1/350th German lifeboats that I didn't use on a Dragon Z-class destroyer, and the 'add-on' to the hull at the front of the deflector indent is a radar array from a 1/700th Dragon USS Cole kit leftover sprue. 

I am also adding on a leftover 1/1400th shuttlebay (which has the same sized door as the kit-supplied aft shuttlebay), which is visible alongside the secondary hull in the first 'fully-painted' picture above.

The nacelles right now are only partially assembled:

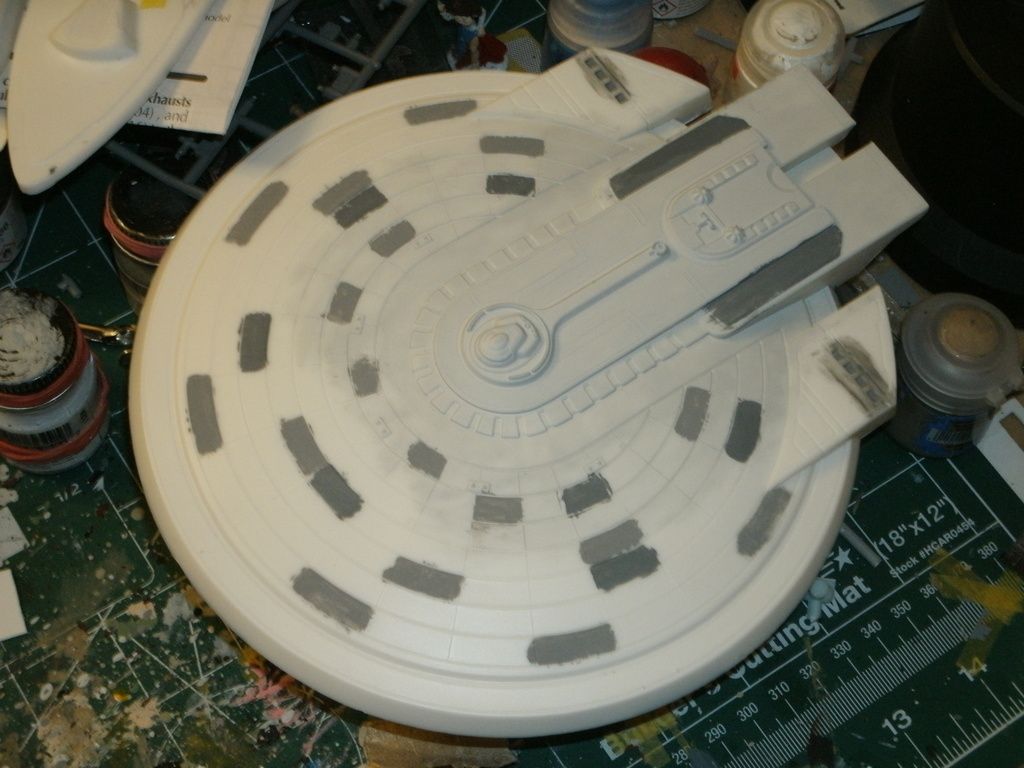
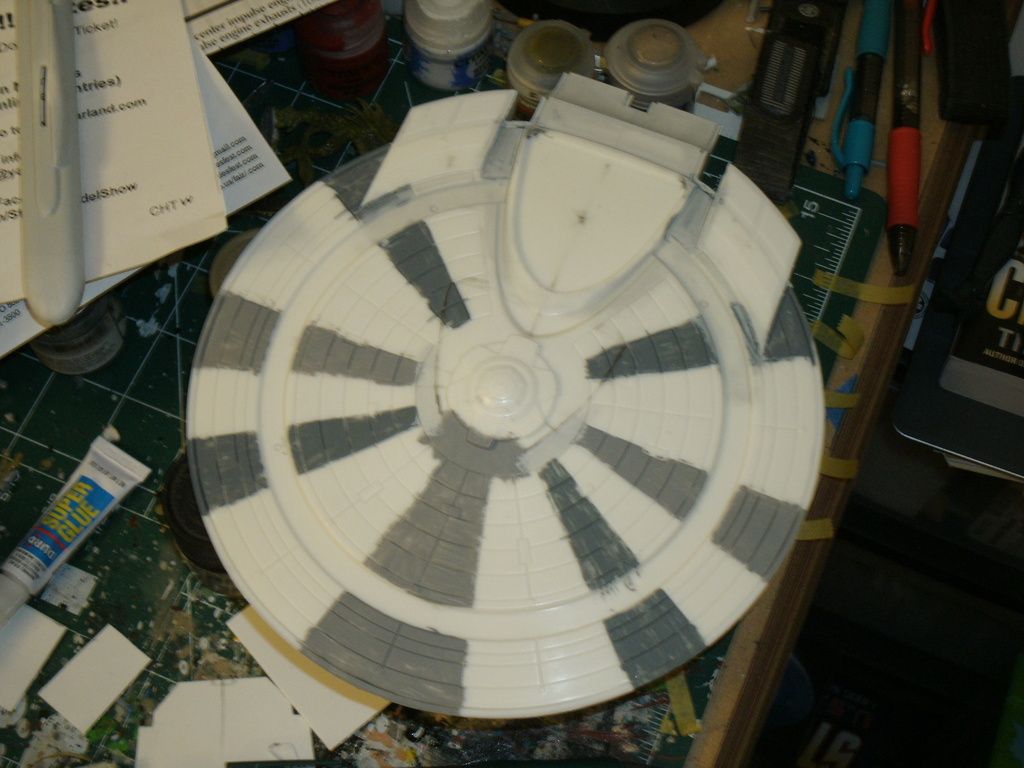
and the primary hull has received a first coat of paint, with some small details painted up, and is awaiting puttying to fill the seams on the underside:
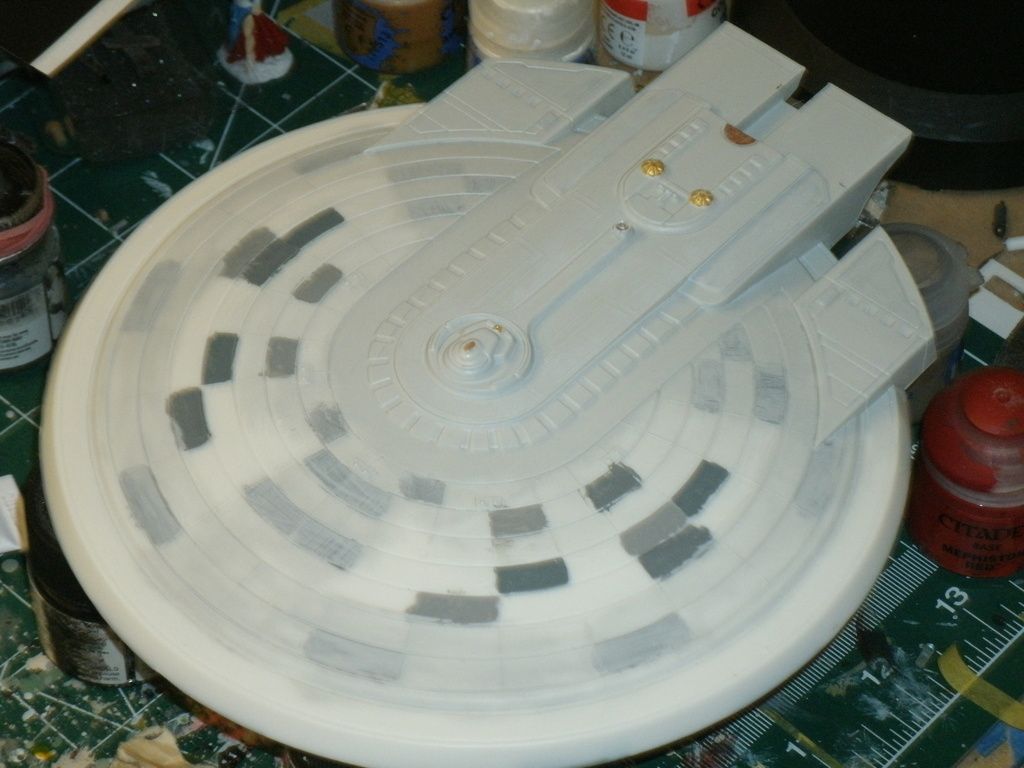
Well, any guesses as to what it'll be?

I can give you a hint: it will not be in the same configuration as the Enterprise-B.

Klik

Answer is in these links:

http://www.trekbbs.com/showthread.php?t=208027

http://msfm.seryan.com/stephen_l/ussearhart.htm

oneyearwar1

The hardest part of flying isn't flying...it's landing.

  • Member since
    November 2009
  • From: SW Virginia
Posted by Gamera on Thursday, April 23, 2015 7:33 AM

Ahhhhhhh, don't keep us in suspense Klik!

Whatcha doing with her please, please, please?!?!

"I dream in fire but work in clay." -Arthur Machen


  • Member since
    January 2014
  • From: Toronto
Posted by Rob S. on Thursday, April 23, 2015 5:03 AM

Of course Klik, whatcha got in mind?

______________________________________________________________________________


On the Bench: Nothing on the go ATM

  • Member since
    January 2010
Posted by Klik on Wednesday, April 22, 2015 8:13 PM

Wow Rob!!!!

Outstanding work. I don't have your patience to work with so many decals. Amazingly well done.

Klik

P.S. Been tinkering on my Ent-B, got something special in mind for it. Anyone interested?

oneyearwar1

The hardest part of flying isn't flying...it's landing.

  • Member since
    January 2014
  • From: Toronto
Posted by Rob S. on Wednesday, April 22, 2015 5:23 AM

modelcrazy

Rob,

Looks killer manYes

Which pic do you want on page 2?

Um, I suck at pictures (cell phone and bad lighting), but, I'd say the 3rd pic shows it best?

______________________________________________________________________________


On the Bench: Nothing on the go ATM

  • Member since
    March 2010
  • From: Boston
Posted by mach71 on Tuesday, April 21, 2015 9:52 PM

looks great Rob!

  • Member since
    November 2009
  • From: SW Virginia
Posted by Gamera on Tuesday, April 21, 2015 9:40 PM

I think she turned out pretty darn awesome! It would have been a royal pain to try to mask and paint all that.

"I dream in fire but work in clay." -Arthur Machen


  • Member since
    July 2014
Posted by modelcrazy on Tuesday, April 21, 2015 9:24 PM

Rob,

Looks killer manYes

Which pic do you want on page 2?

Steve

Building a kit from your stash is like cutting a head off a Hydra, two more take it's place.


http://www.spamodeler.com/forum/

  • Member since
    January 2014
  • From: Toronto
Posted by Rob S. on Tuesday, April 21, 2015 7:43 PM

Best looking badge in my whole set, IMO!!

______________________________________________________________________________


On the Bench: Nothing on the go ATM

  • Member since
    January 2014
  • From: Toronto
Posted by Rob S. on Tuesday, April 21, 2015 7:32 PM

I'm done with the NX-01. Can't do anymore. Gotta say, those decals take a special amount of courage because they were bloody flimsy and thin and ripped at every turn. You really need to trim 'em down to the edges AND cut them into small manageable pieces. Big challenge, but, I'm somewhat happy with the results. I'll do another one with the lessons I learned from this one. Anyway, here she is, RIP Mr. Spock. 

So, that's it for that. I'll grab a badge if nobody minds. I'll be starting my French Artillery piece tonight as well. As usual, thanks for lookin'!

______________________________________________________________________________


On the Bench: Nothing on the go ATM

  • Member since
    January 2014
  • From: Toronto
Posted by Rob S. on Friday, April 17, 2015 3:48 PM

The decals are thick, for sure. I need to clean out all the panel lines at the end as it totally dries. My only regret was spending that time doing the pre painting two tone...totally lost under all that aztek'ing.

______________________________________________________________________________


On the Bench: Nothing on the go ATM

  • Member since
    July 2014
Posted by modelcrazy on Friday, April 17, 2015 10:23 AM

This is going to be another one of your killer builds Rob.

Steve

Building a kit from your stash is like cutting a head off a Hydra, two more take it's place.


http://www.spamodeler.com/forum/

JOIN OUR COMMUNITY!

Our community is FREE to join. To participate you must either login or register for an account.

SEARCH FORUMS
FREE NEWSLETTER
By signing up you may also receive reader surveys and occasional special offers. We do not sell, rent or trade our email lists. View our Privacy Policy.